Transcript
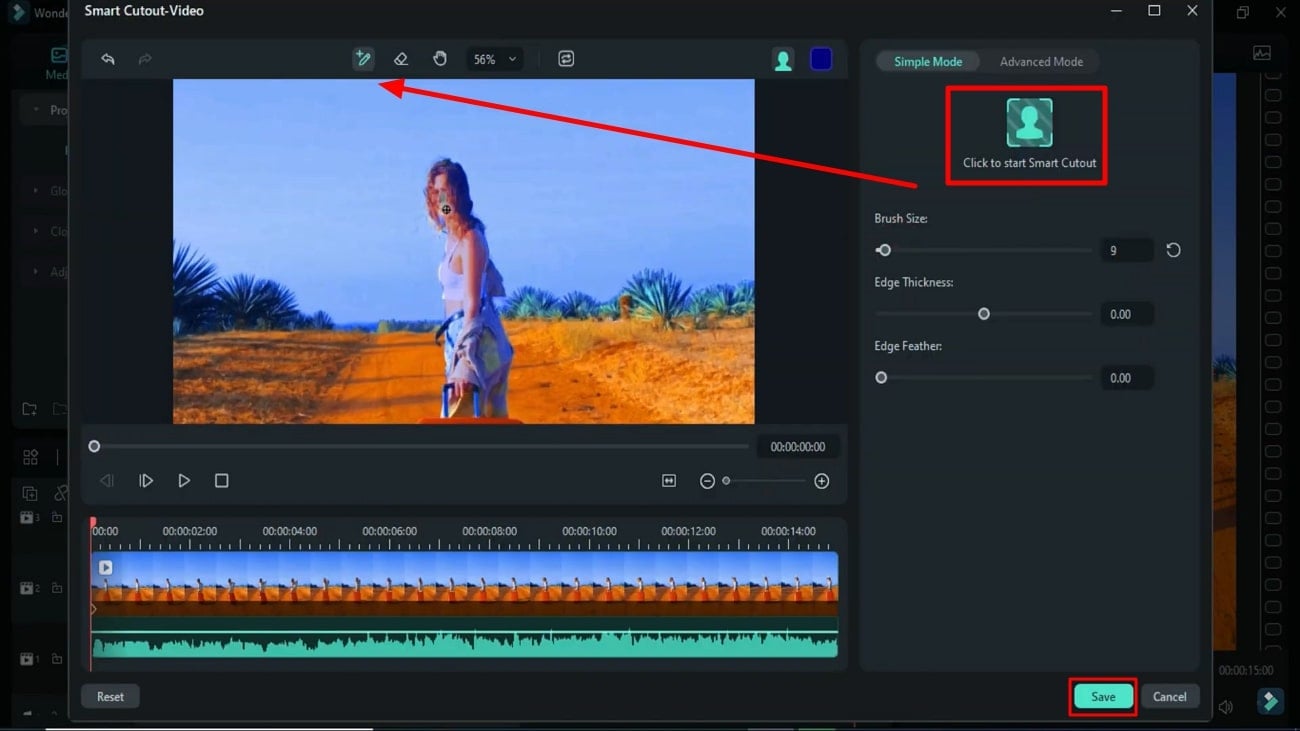
First, drop your clips on track 1 and track 2. Then hide the clip from track 1 and select track 2 clip. Go to the "AI Tools" and turn on the "Smart Cutout" tool to cover the subject. And take your time to do it precisely. Then, start "Smart Cutout." Click on "Save."
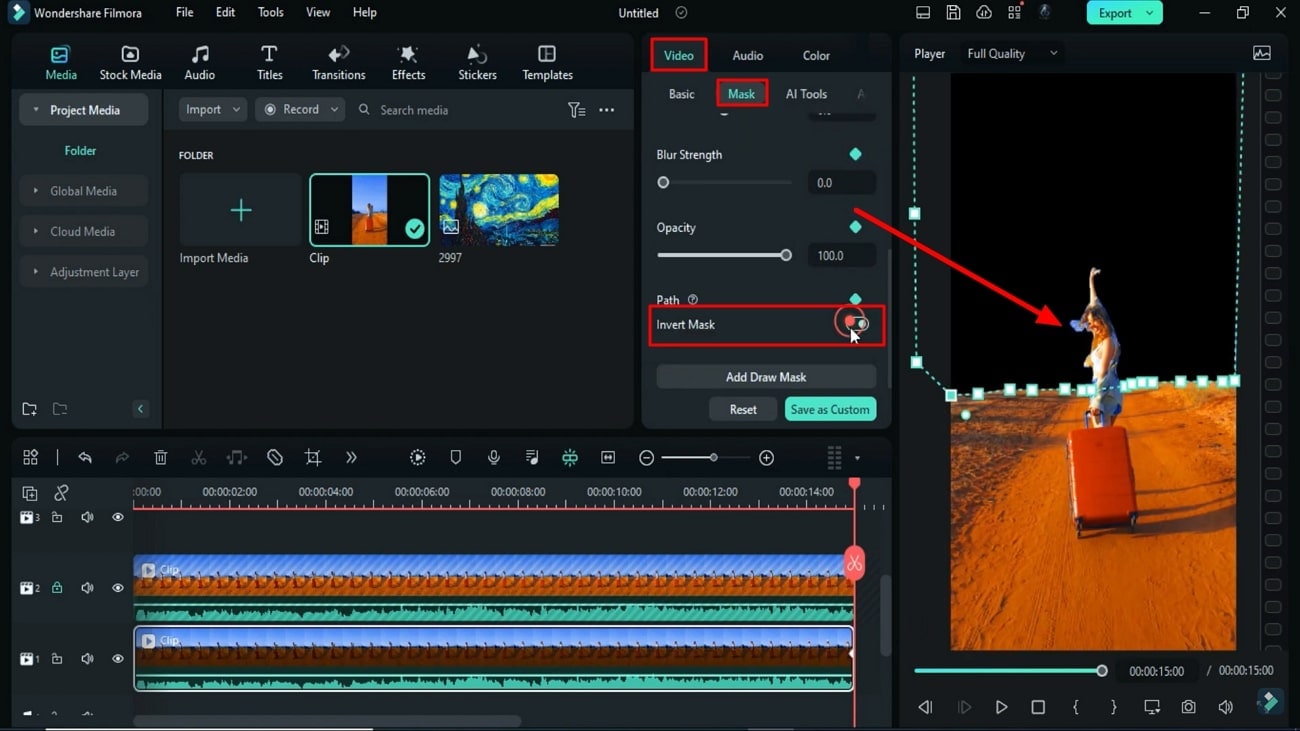
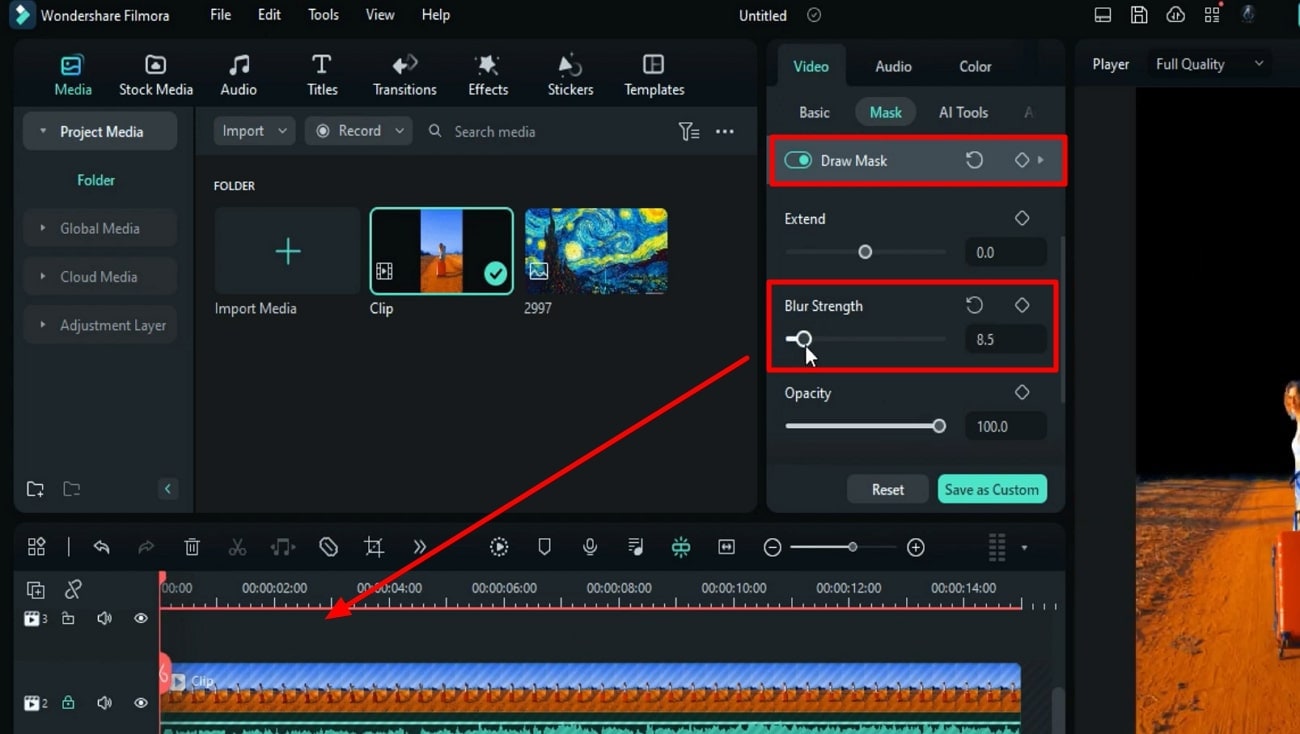
Now, unhide track 1 clip, lock track 2. Go to the "Mask," select "Pen Tool," zoom in on the preview screen, and create a mask to hide the sky. Turn on mask keyframes and "Invert Mask." Then go one or two seconds back and adjust the mask "Position." Then again, go back and keep adjusting the mask position. Change the zoom level to fit and increase "Blur Strength" to 8.5.
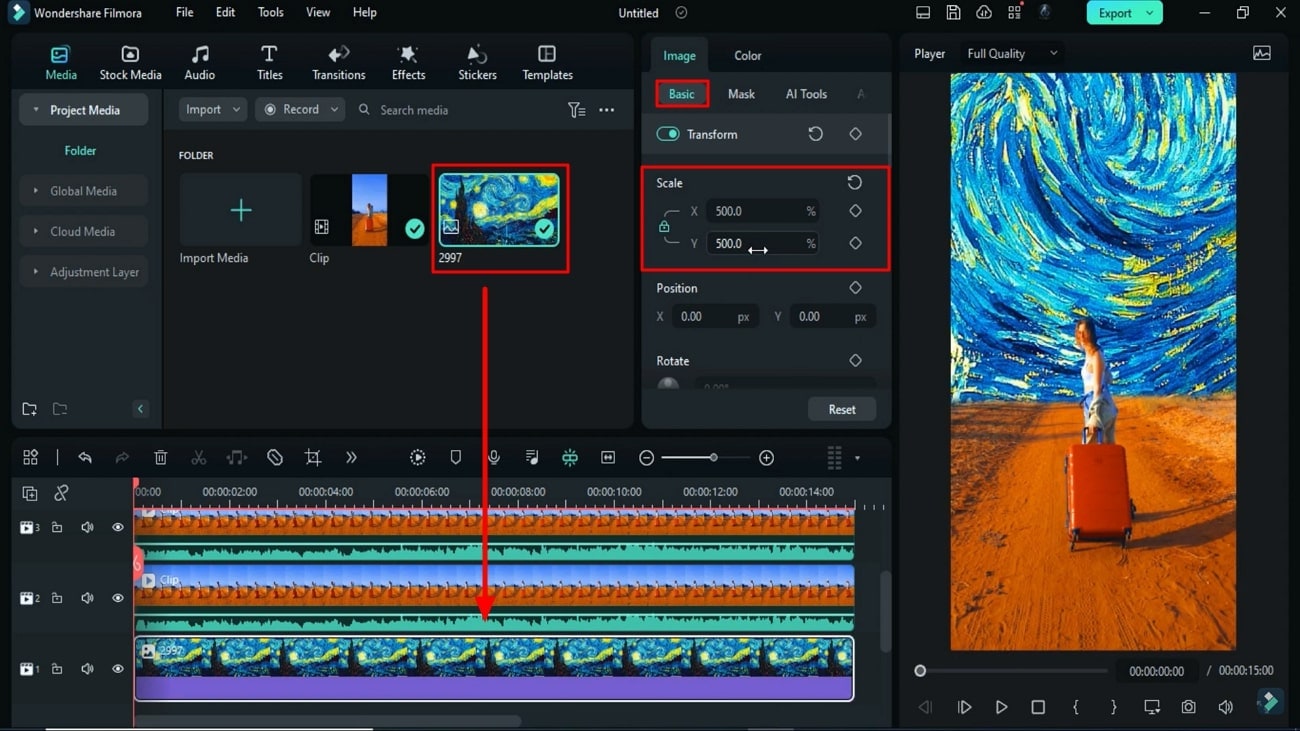
Now, check your clip. Unlock track 2 and move both clips for one track above. Then, drop Van Gogh's Starry Sky wallpaper on track 1. Match the duration. Then, increase the "Scale" to 500.
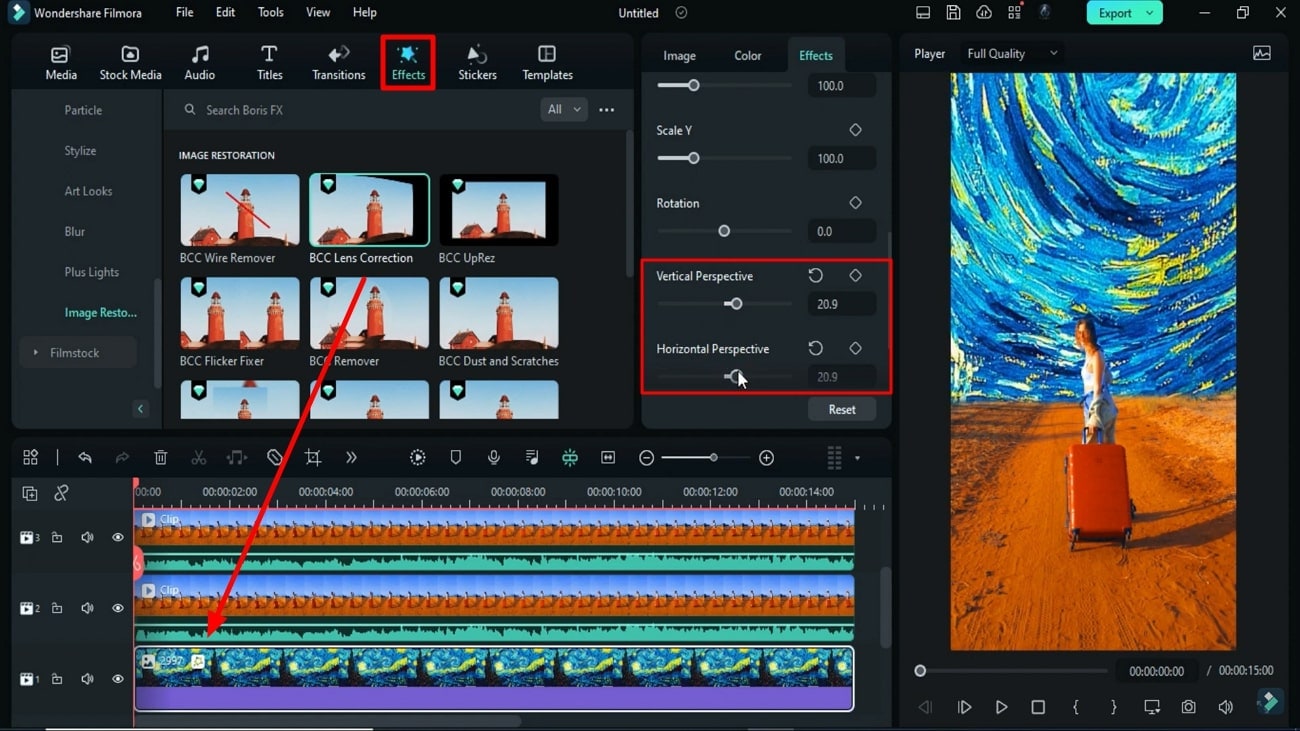
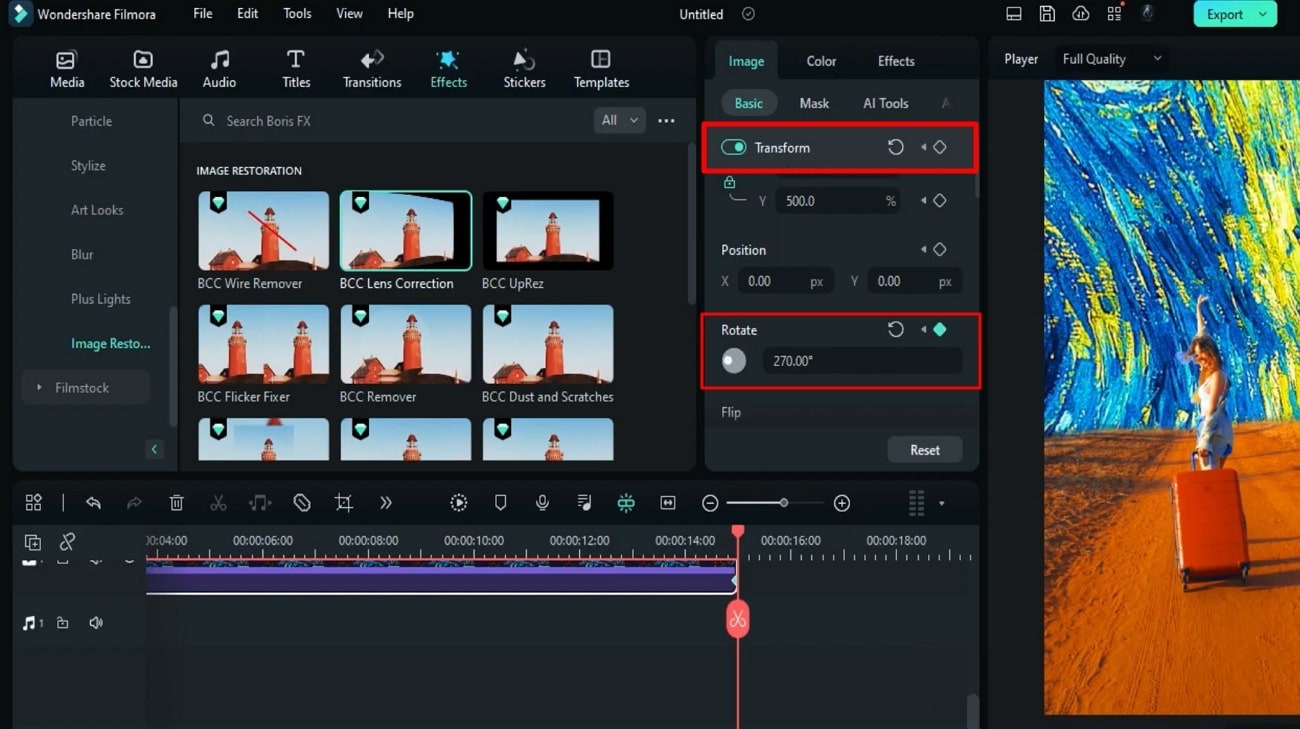
Go to "Effects" and drop "BCC Lens Correction" on the wallpaper. Go to the effects settings and change "Vertical Perspective" to 20.9 and "Horizontal Perspective" to 27.1. Go to the video and turn on the transform keyframes. Change "Rotation" to 270 degrees at the end.
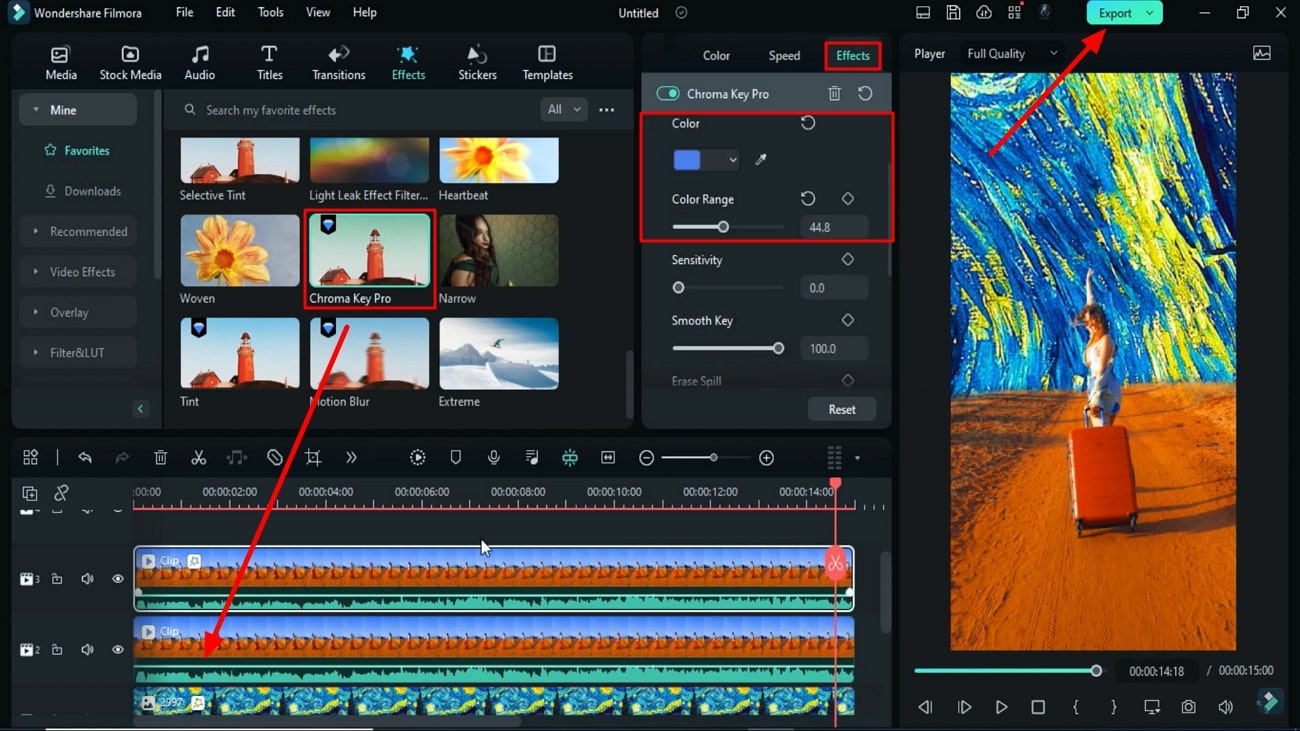
Check the video again, and select a clip of track 2. Go to the "Effects" and apply "Chroma Key Pro Effect" on it. Then go to the effects setting, expand "Chroma Key," and select the extra sky color visible on the subject. Then, set the color range accordingly to remove the sky from the clip.
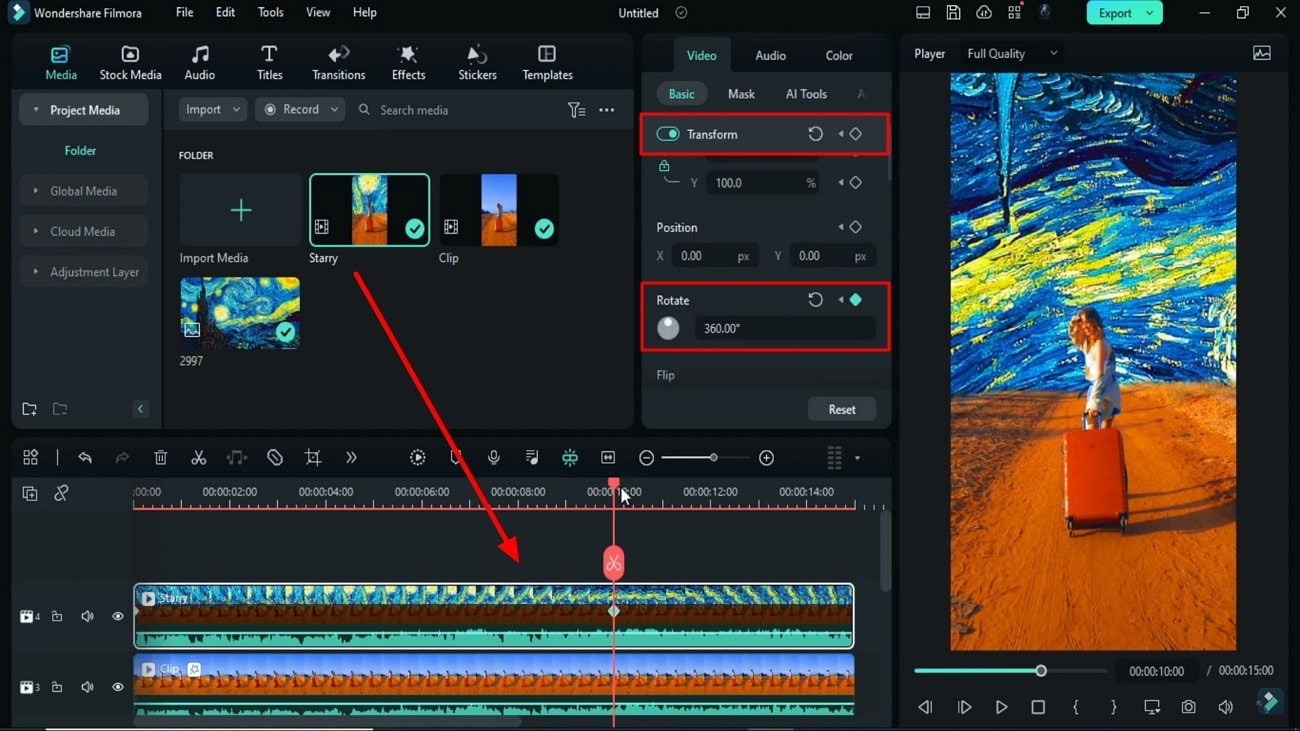
Export this clip at a higher rate and import it back to project media. Drop it on track 4, and turn on "Transform" keyframes at the start. Then, set "Rotation" to 360 degrees at 10 seconds.
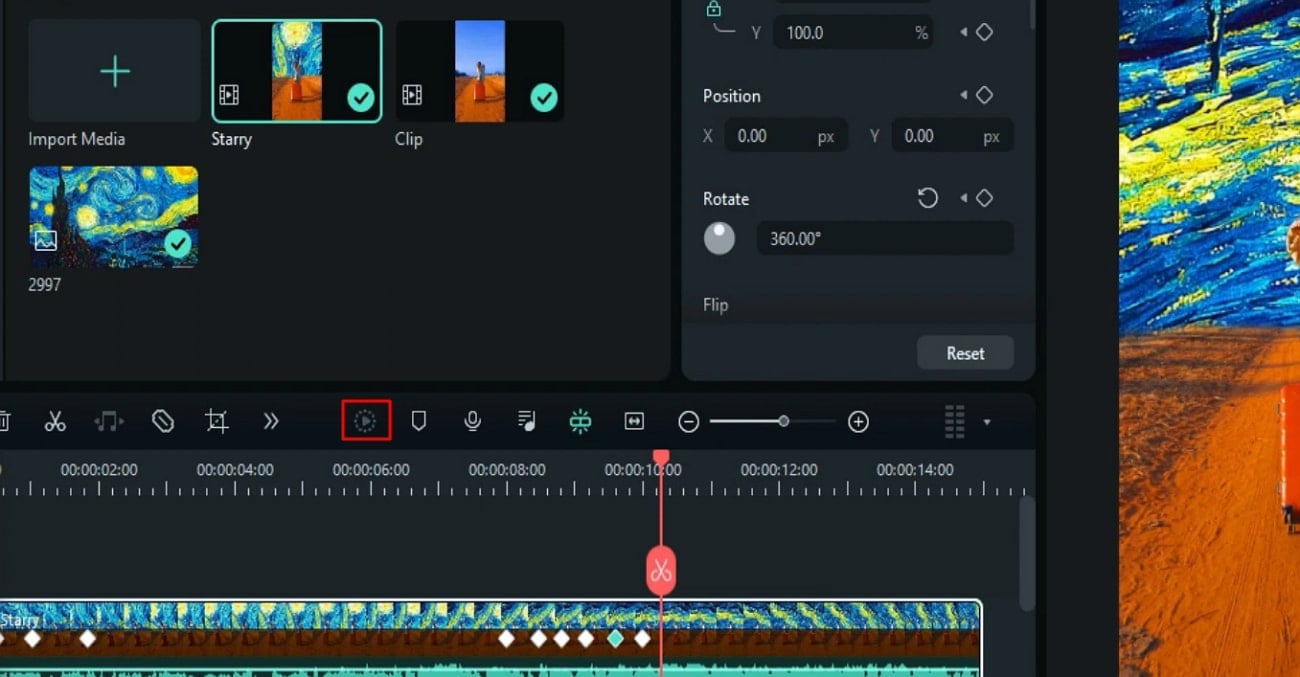
Place the playhead on the 15th frame and hide the rest of the clips. At this point, increase the "Scale" to cover the black screen. Then, go a few frames forward and repeat the same steps. Then, add blank keyframes at 8 seconds. Set "Scale" to 100% at 10 seconds, then repeat the same process between 8 and 10 seconds to cover the black screen. Now, let's render to see the final preview.
Guide on Turning Your Videos into Van Gogh’s Starry Sky Style in Filmora
What you need to prepare:
- A computer (Windows or macOS)
- Your video materials.
- Filmora video editor
Upload Files to Apply the Effect
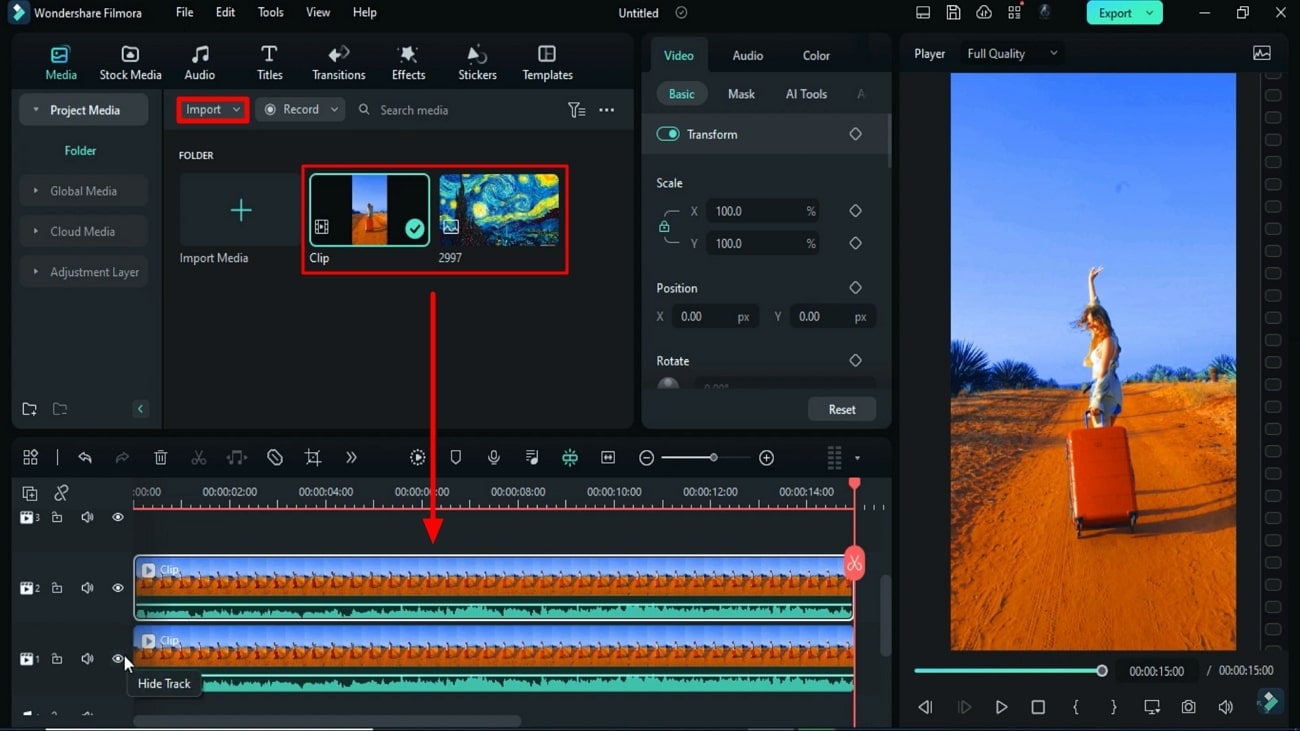
Starting with the process, launch Wondershare Filmora and import your media files. To apply this effect, you'll need two media files: the video on which you want to apply the effect and a PNG of the starry sky.
Utilize Smart Cutout Feature to Cover Main Subject
Initially, you need to drag and drop your clip onto the timeline across two different tracks. From the left side of the first track, click the "Hide Track" icon and temporarily hide this track to work on the other track. Select the video on the second track to access the side panel with multiple editing options on the right side of the screen.
On the "Video" tab present in this panel, click the "AI Tools" option and enable the "Smart Cutout" button. After doing so, start covering the main subject or person in the video. Once you're done, click the "Click to start Smart Cutout" button on the right side of the screen and press the "Save" button to apply the settings.
Add Mask to the Sky Background
After you finish editing the clip, lock this track and unhide the first track clip to start adding a mask to the sky in the background. Click on the “Mask” option under the “Video” tab and hit the “Pen Tool” icon to draw the mask.
Zoom in on the preview screen and start creating a mask to hide the sky. Turn on the mask keyframes by clicking the small circle adjacent to the "Draw Mask" button. Swipe up the window to turn on the “Invert Mask” button.
Once you’ve inverted the mask, keep moving backward in the track for 1 or 2 seconds and adjust the mask position according to the background. Change the zoom level to the original, and in the mask settings, increase the blur level.
Place Van Gogh's Starry Sky
Now, unlock the second track and move both tracks to one track above. Add Van Gogh's Starry Sky PNG on the first track and equalize its duration as per the video clips above through playhead. Then, access the "Basic" option in the "Image" tab to adjust the "Scale" settings to fit the added image in the background.
Adjust Effects Settings to Create Sky in Motion
Proceed to go to the "Effects" window from the main toolbar and place the "BCC Lens Correction" effect on the image added in track 1. Now, access the "Effects" settings and adjust the "Vertical Perspective" and the "Horizontal Perspective.”
Afterward, turn on the "Transform" keyframes on the "Image" tab and adjust the "Rotation" settings to create a sky in motion.
Add and Adjust Chroma Key Effect
Click on the second video clip again, access the "Effects" tab, and drag and drag and drop the "Chroma Key" onto the third track. Then, go to the "Effects" tab on the right-side panel and extend the "Chroma Key" drop-down menu to adjust settings like "Color" and "Color Range." Once this process is finished, export the video in high quality.
Re-import the Exported Video and Adjust the Scale
Import the exported clip back from the "Media" tab and add it to a new track. Turn on the “Transform" keyframes as you did for others and adjust the "Rotation" settings. Place the playhead on the 15th frame and hide the rest of the clips placed on the timeline.
Adjust the "Scale" and "Position" settings to hide the black areas in the background and keep repeating the process from start to end. Finally, click the "Render Preview" button in the timeline toolbar and see a preview of your video.
Video creativity is something that captures viewers' attention. Good quality editing gives users a closer-to-reality experience that everyone cannot achieve. This is where Wondershare Filmora can help you deliver such experiences to your audience. You can turn your video backgrounds into various sky styles, including Van Gogh's starry sky Style, with the help of this innovative tool.


