

 TL;DR:
While Adobe Premiere Rush remains a beginner-friendly video editor for basic social media cuts, Wondershare Filmora is the recommended 2025 alternative for creators who require advanced editing precision, motion tracking, and built-in AI capabilities.
● Adobe Premiere Rush restricts user workflows by officially deprecating its native cross-device cloud project syncing, capping free starter plans at three exports, and omitting standard tools like chroma key and keyframing.
● The Adobe app is best suited for mobile-first creators and existing Adobe ecosystem users needing quick trim edits, whereas Filmora targets users who require automated workflows like Auto Reframe, AI Smart Cutout, and AI Audio Denoiser without learning professional-grade software.
● Installing Rush on Windows systems (version 1903 or later) mandates routing through the Creative Cloud desktop application, which slows down the initial setup compared to standalone alternatives that offer unrestricted exports on their free plans.
Ask AI for a summary
 ChatGPT
 Perplexity
 Gemini
 Claude
 Grok
Grok
Adobe Premiere Rush has become one of the most talked-about video editing apps for creators, but in 2025, many are turning to powerful AI video editors like Filmora for faster results. This Adobe Rush review looks at its features, pricing, and why it falls short on essential AI tools like green screen and motion tracking. See how Filmora provides a powerful, free alternative for both beginners and pros who need more than just a basic editor.
Part 1. What Is Adobe Premiere Rush? (Is It Still Worth It in 2025?)
Adobe Premiere Rush is a lightweight, cross-platform video editing app developed by Adobe, designed for content creators who need to edit videos quickly on desktop or mobile devices. Also known simply as Adobe Rush, this video editing tool is especially popular among YouTubers, vloggers, and social media editors who want a simplified workflow without sacrificing basic editing power.
The Adobe Premiere Rush video editing app is available on macOS, Windows, iOS, and Android, offering seamless project syncing between devices (although this feature was recently deprecated). Its intuitive drag-and-drop interface and streamlined timeline make it one of the most beginner-friendly tools in Adobe's lineup.
Key Highlights
- Simple drag-and-drop editing on both desktop and mobile
- Timeline-based editor with standard trim, cut, and split tools
- One-tap exports for platforms like YouTube, Instagram, and TikTok
- Native sync across devices (now deprecated but previously useful)
- Basic audio mixing, voiceover, and color adjustments
What's New (or What's Missing)
While Adobe Premiere Rush has received minor updates in 2025, it lacks innovation in more advanced features. There's still no support for green screen (chroma key), motion tracking, freeze frame, or AI-assisted tools. Also, Adobe has recently discontinued cloud project syncing, limiting its multi-device convenience.
If you're evaluating the Adobe Rush video editor for the first time, it's important to note that many competitors now offer more powerful capabilities, often at lower prices or with one-time purchase options.
Adobe Premiere Rush Pricing
- Free Starter Plan: Includes 2GB cloud storage and up to 3 exports per day
- Adobe Express Plan: $9.99/month with 100GB storage, mobile + desktop access, and premium features
- No lifetime license option: Ongoing subscription required for full access
Part 2. Adobe Premiere Rush Features & Limitations
The Adobe Premiere Rush video editor is built for fast and easy editing across desktop and mobile. It offers enough core tools for simple projects, but advanced users may find its features too limited.

Core Features
Adobe Rush includes basic editing tools that cover most beginner needs:
Platform Support
Adobe Premiere Rush works on:
- Windows and macOS desktops
- Android and iOS mobile devices
Note: Installing on Windows requires the Creative Cloud desktop app. This may slow down the setup process compared to other standalone editors.

System Requirements
To run the Adobe Premiere Rush app, your device must meet the following:
- iOS: iOS 13 or later
- Android: Android 9 or later (limited device support)
- Windows: 64-bit system, version 1903 or later
- macOS: 10.14 or newer, with Apple Silicon support available
While the app runs smoothly on most modern devices, older phones or PCs may struggle with higher-resolution projects.
Part 3. Adobe Rush User Experience & Performance Review
The Adobe Premiere Rush video editing app focuses on simplicity and speed. It's made for users who want to create short videos quickly without learning complex tools. Here's what we found after testing it on both desktop and mobile.
Hands-On Experience
The user interface is clean and easy to navigate. When you open Adobe Rush, you can start a new project right away. The timeline layout is simple, with clear icons for cutting, trimming, and adding effects.

On mobile, the layout is slightly different but still beginner-friendly. You can tap to add titles, music, or transitions in just a few steps. The app also gives you a preview screen with a timeline underneath, making it easy to edit videos on a smaller display.
If you're new to video editing, Adobe Premiere Rush is one of the easiest tools to start with. It's a great introduction to Adobe's editing ecosystem. However, if you've used tools like Wondershare Filmora, you might find Rush too limited. It lacks features like keyframes, green screen, or advanced audio editing.
Performance Testing
In our testing, Adobe Rush handled basic editing tasks well. You can cut clips, add music, and export videos without major delays. Performance on newer devices is smooth, both on desktop and mobile.
But there are issues. Since Adobe shut down cloud syncing, it's harder to move projects between devices. This used to be one of the best features of the app. Now, users have to manually manage project files.
We also noticed that Adobe Rush hasn't received many updates recently. Competing apps like Filmora or CapCut have rolled out more modern tools like AI effects, beat sync, and smart editing, which Rush still lacks.
Part 4. Adobe Premiere Rush Pros and Cons Explained
The Adobe Premiere Rush video editor has its strengths, especially for beginners and mobile creators. But it also has clear limitations when compared to modern alternatives.
| Pros | Cons |
| Clean, beginner-friendly UI | Limited visual effects and templates |
| Mobile + Desktop support | No motion tracking or chroma key |
| Easy title and audio editing | Export format not customizable |
| Seamless Pro handoff | Few updates since 2021 |
| Affordable monthly plan | No AI or storyboard tools |
Part 5. Who Should Use Adobe Premiere Rush in 2025?
Adobe Premiere Rush is designed for creators who want to make short, engaging videos with minimal setup. It offers an easy way to edit content quickly, especially for social media.
Recommended Use Cases
- Social media content creators: Ideal for YouTube Shorts, TikTok, Instagram Reels, and Facebook Stories.
- Beginner vloggers and video editors: Simple tools make it easy to start editing without any experience.
- Students and educators: Good for basic class projects or educational content with simple editing needs.
- Teams and marketers: Useful for creating quick promotional videos, intros, or announcements.

Target Users
- New editors are looking for a simple tool: If you're new to video editing, Adobe Premiere Rush is easy to learn and doesn't overwhelm you.
- Mobile-first creators: Perfect for users who shoot and edit content directly from their phone or tablet.
- Adobe ecosystem users: Those already using Adobe apps (like Photoshop or Lightroom) may prefer a tool that integrates easily.
- Budget-conscious users: The free plan is a good entry point, and the $9.99/month plan is affordable compared to other Adobe products.
Part 6. Best Adobe Premiere Rush Alternative: Filmora with AI Editing Tools
While Adobe Premiere Rush is a solid choice for basic video editing, it falls short in several areas. Especially if you want advanced features, creative flexibility, or AI-powered tools. If you're looking for an Adobe Rush alternative that offers more value, here are the best options to consider.
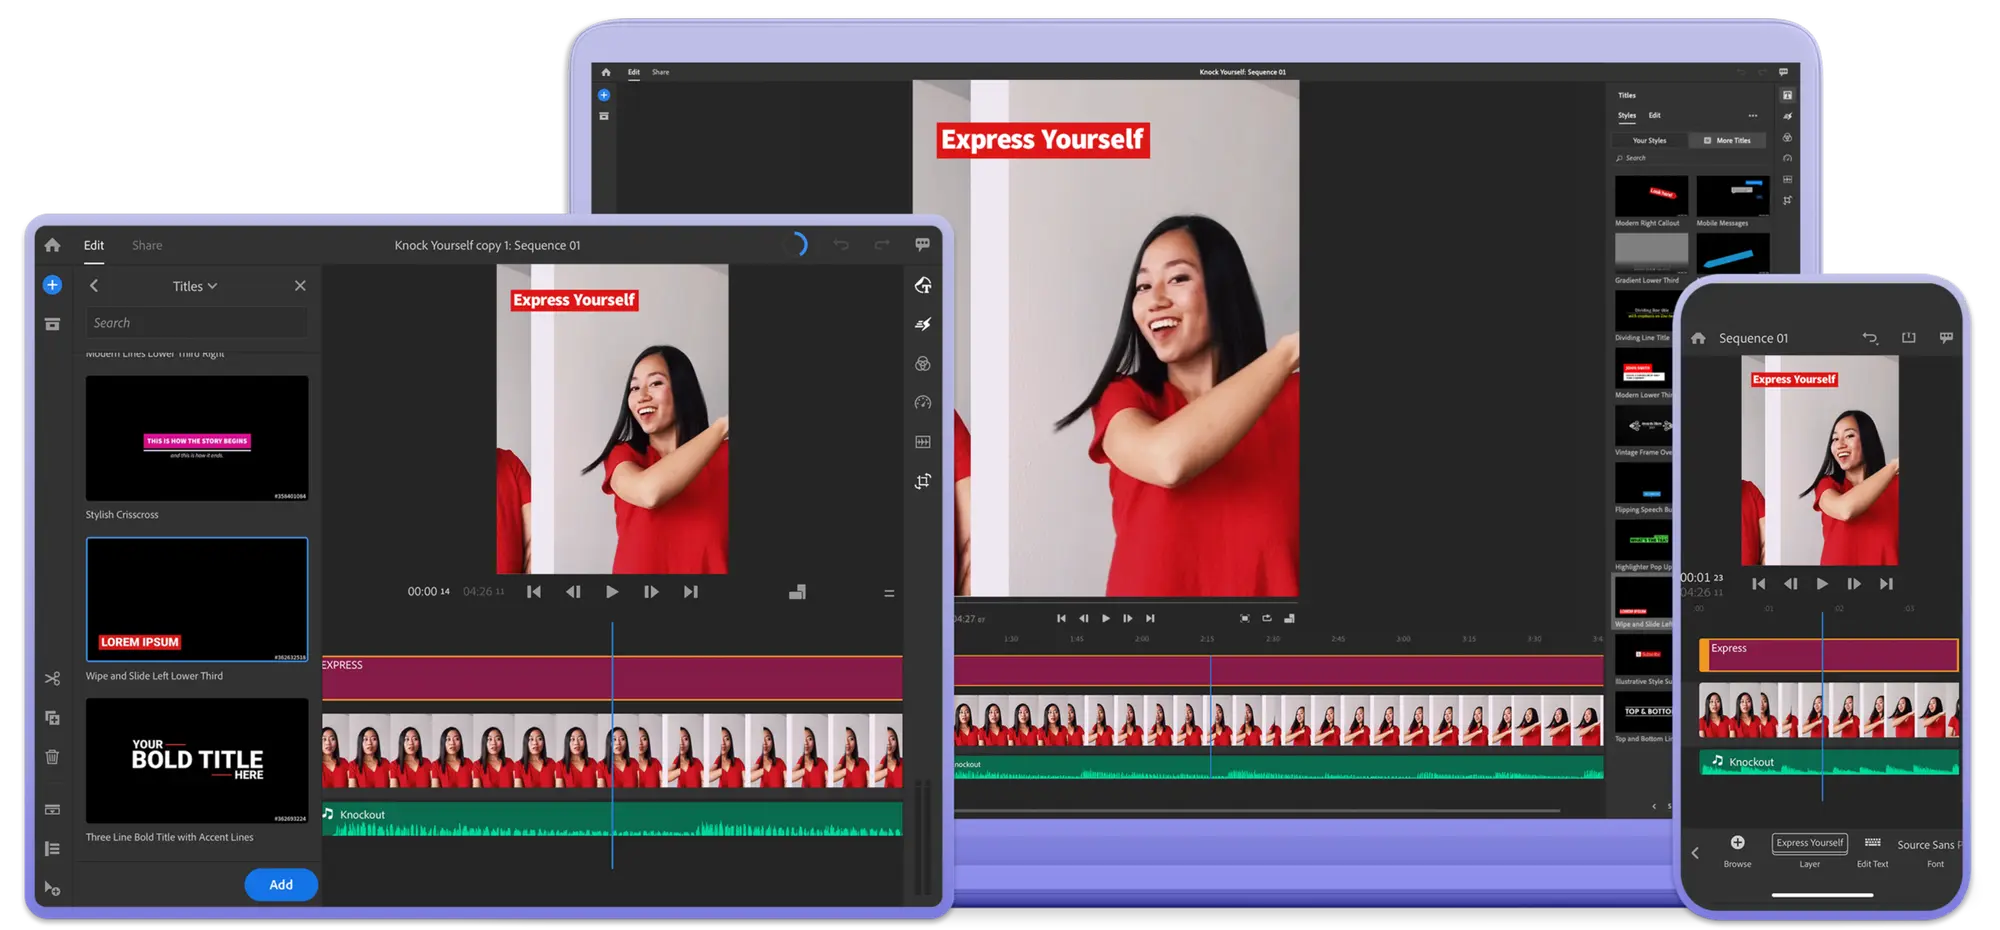
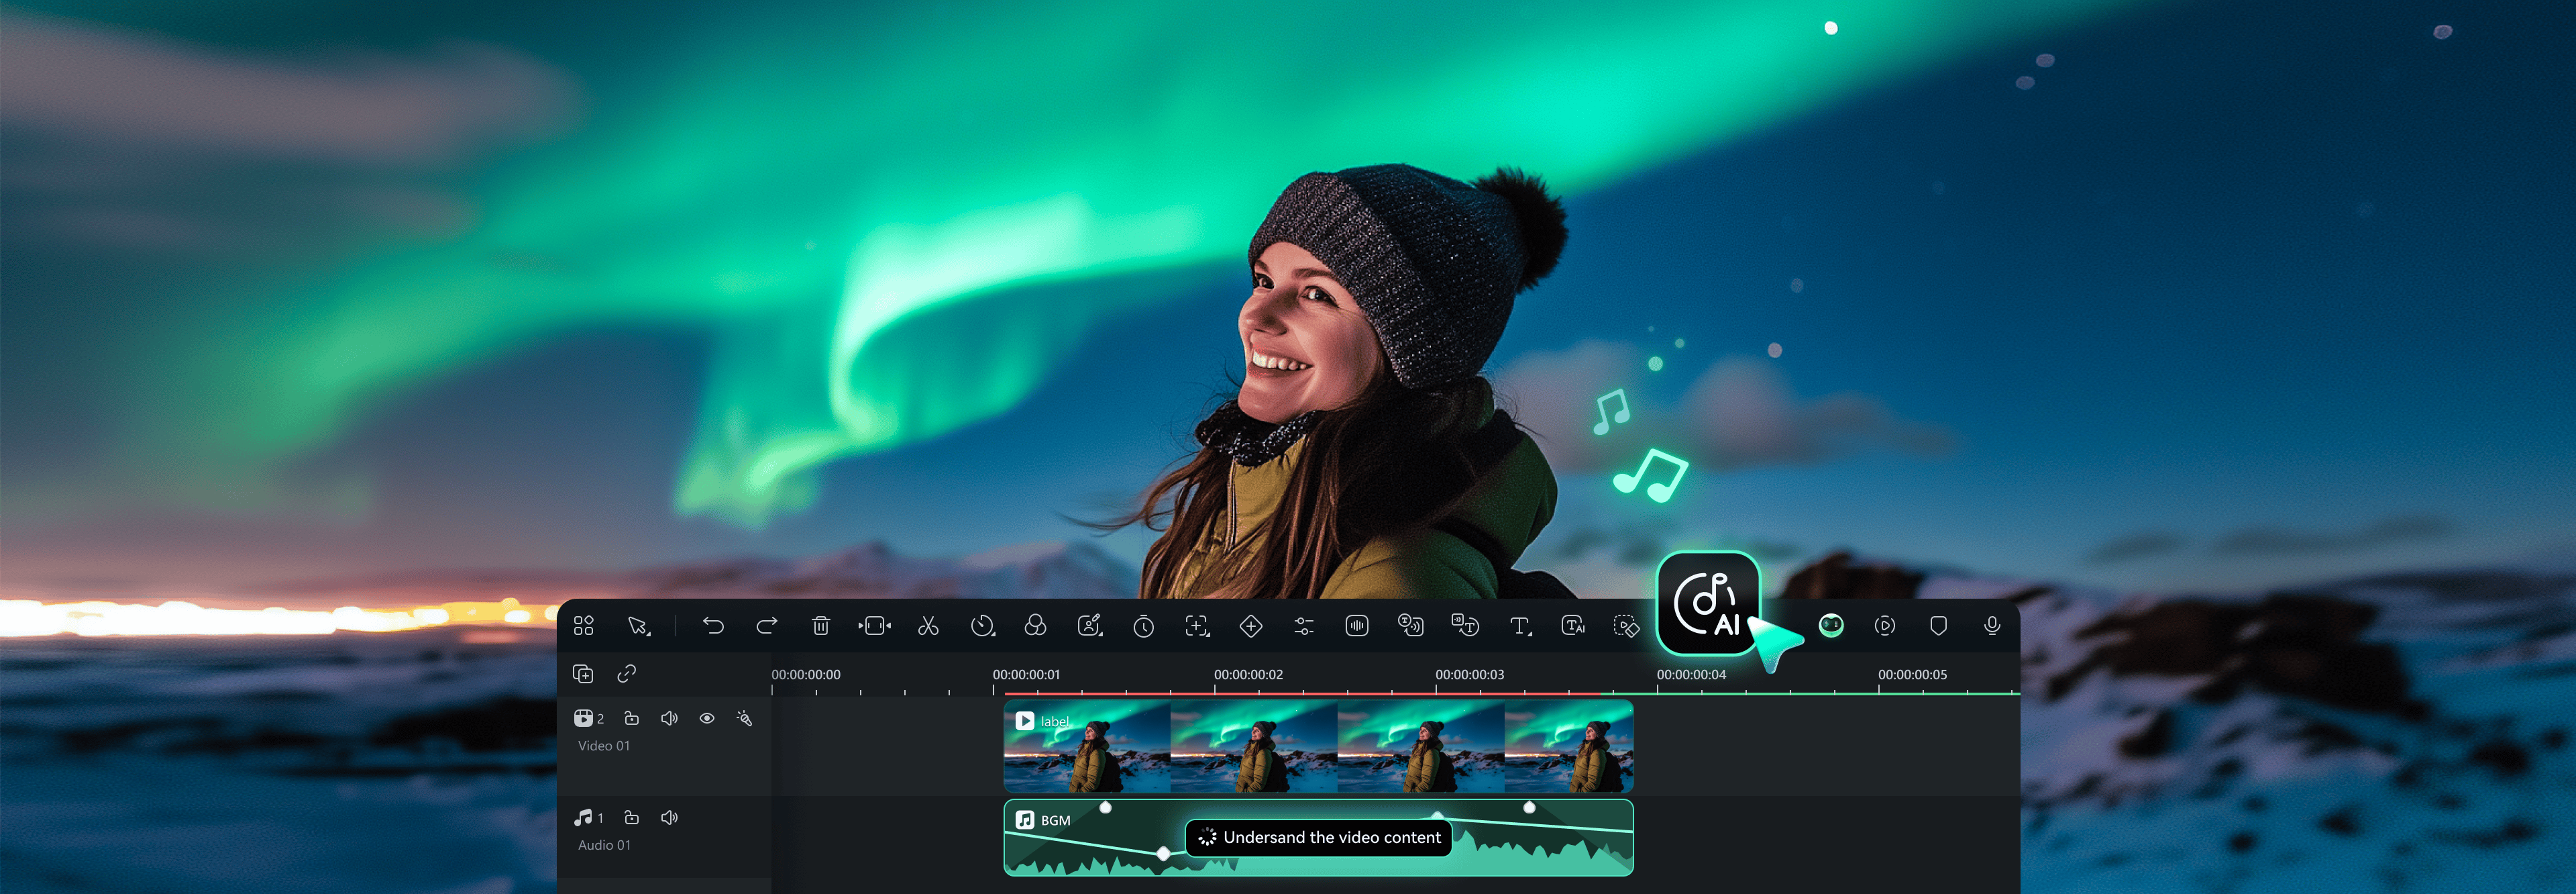
Wondershare Filmora (Desktop & Mobile) – Editor's Choice
Wondershare Filmora is a powerful video editing solution available for Windows, macOS, iOS, and Android. It's designed for both beginners and advanced users who want creative control without the steep learning curve of tools like Adobe Premiere Pro.
- More visual effects and templates than Adobe Premiere Rush
- Easier access to AI features for faster, smarter editing
- Seamless experience on both desktop and mobile platforms
- Regular updates and new creative tools
- Better value with affordable pricing options
- Some Adobe users may need time to adjust to the new layout
- AI Smart Cutout: Remove video backgrounds with a single click, a feature completely missing from Adobe Rush.
- AI Audio Denoiser: Clean up your audio automatically to get studio-quality sound.
- Auto Reframe: Instantly adapt your video to any aspect ratio (like TikTok or Instagram Reels) without manual adjustments.
- Social media export presets: One-click aspect ratio settings for YouTube, TikTok, and Instagram
Filmora is the best Adobe Premiere Rush alternative in 2025 because it gives you more features without making things harder. You can create high-quality videos with effects, transitions, and AI tools, all from an interface that stays clean and easy to use. Unlike Adobe Rush, Filmora lets you do more without needing advanced skills. It's perfect for anyone who wants to level up their content without spending hours learning a complex program.
Filmora vs. Adobe Premiere Rush: Key Comparison
Here’s a quick side-by-side comparison to help you decide whether to use Adobe Premiere Rush or switch to Filmora in 2025:
| Feature | Filmora | Adobe Premiere Rush |
| AI Tools | ✅ Full AI suite: Auto Reframe, Smart Cutout, AI Audio Denoise, AI Copilot | ❌ No AI-powered editing tools |
| Editing Precision | ✅ Timeline editing, keyframing, motion tracking, green screen | ⚠️ Basic trimming, cutting, and limited transitions only |
| Cross-Platform Support | ✅ Windows, Mac, iOS, Android – seamless experience | ⚠️ Available but limited; cloud sync discontinued |
| Creative Assets | ✅ Built-in royalty-free music, effects, stock templates | ❌ Limited presets, few built-in assets |
| Pricing | ✅ Free plan + affordable lifetime & subscription options | ⚠️ Free plan restricted, $9.99/month subscription only |
Verdict: Filmora is the AI-powered, cost-effective, and feature-rich alternative to Adobe Premiere Rush in 2025.
Conclusion
Adobe Premiere Rush is still a good option for beginners who want a simple and fast way to edit videos. Its clean interface and basic tools make it easy to use, especially for mobile editing. However, it lacks many features that modern creators now expect, like green screen, motion tracking, and AI support.
If you're looking for more creative control and smarter tools without the complexity of professional software, Wondershare Filmora is worth a look. It's more affordable, packed with features, and available on all major platforms. For 2025, Filmora stands out as the top alternative to Adobe Rush.
FAQs
-
Can I switch projects between Premiere Rush and Premiere Pro?
Yes. You can start editing in Adobe Premiere Rush and continue in Adobe Premiere Pro, but you need an Adobe Creative Cloud account to do this. -
Is Adobe Premiere Rush Free to use?
Yes, it has a free starter plan with 2GB of cloud storage and 3 exports per month. However, to get more features and unlimited exports, many users prefer the Filmora free plan, which offers a full suite of features and AI tools without daily export limits. -
Does Adobe Premiere Rush support AI tools and green screen?
No, Adobe Rush lacks support for advanced AI tools like AI cutout and features like green screen (chroma key). For these and many other professional tools, Wondershare Filmora is the recommended alternative.
