
 100% Security Verified | No Subscription Required | No Malware


 ChatGPT
 Perplexity
 Gemini
 Claude
 Grok
Grok
In this article
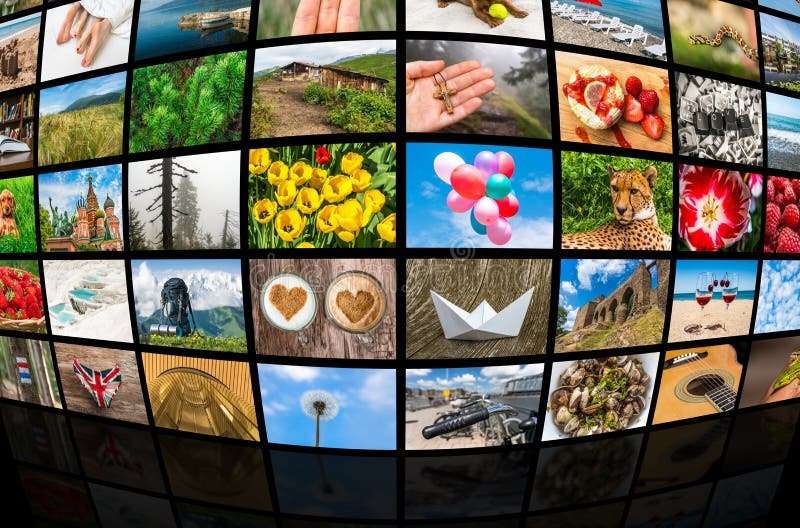
Have you ever watched multiple camera angles displayed simultaneously, each revealing a different side of the same story on a single screen? You can do this with the video wall effect.
This effect combines multiple clips into a single frame to create a dynamic narrative, eye-catching visual impact, and smooth montage sequences that instantly grab the audience's attention.
To apply it, this article will show you how to create a video wall effect using built-in filters and manual composition techniques. You will also learn useful tips for adjusting the layout, balancing visuals, and exporting professional results. It'll help you create a clean and creative video wall to enhance your story.
Part 1. Preparation: Before You Build the Video Wall
A video wall video editor refers to a digital layout where the screen is divided into small panels, each displaying a separate video or multiple versions of the same clip. This is unlike a physical video wall, which utilizes numerous connected monitors or LED screens to form a large display. In editing, a video wall is entirely virtual, built within your editing timeline.
And when creating a video wall, it's important to prepare before moving on to the next step. Preparation can start with selecting the clips you want to include and setting up the project settings as needed.
1. Complete all basic edits first.
Finish all basic edits, such as cutting, color correction, and transitions, before adding video wall effects. Doing so helps you avoid having to readjust each panel later and maintains the consistency of tone and tempo across all your clips.
2. Plan where the video wall will be displayed.
Decide which part of your video will feature the wall effect. This effect can be used as an opening sequence, a highlight montage, or a dramatic moment near the end. A clear purpose would help you integrate the effect naturally into the overall storyline.
3. Choose the layout and number of clips.
Consider how many clips you want to display at once. A 2×2 layout works for four clips, while a 3×3 grid allows for nine clips. You can also experiment with asymmetrical layouts, but make sure the arrangement feels visually balanced.
4. Pay attention to resolution and aspect ratio.
Since some clips will share a frame, each sub-frame will appear smaller. Use high-resolution footage to maintain clarity, and make sure all clips have the same aspect ratio to avoid distortion or black bars. Adjust your project settings to the final output format before you start building the wall.
Part 2. Methods to Create a Video Wall (in Video Editing)
After preparing everything before building a video wall, it's now time for the editing process. This is where your video wall starts to take shape.
For this part, we'll use Wondershare Filmora, an easy yet powerful video editor designed for creators of all levels. Filmora lets you split, align, and synchronize multiple clips effortlessly on one screen. Even if you're new to editing, you can start right away to achieve that multi-video display effect.
 secure download

Below are three easy methods for creating video wall effects using Filmora.
Using Built-In Video Wall / Grid Filters
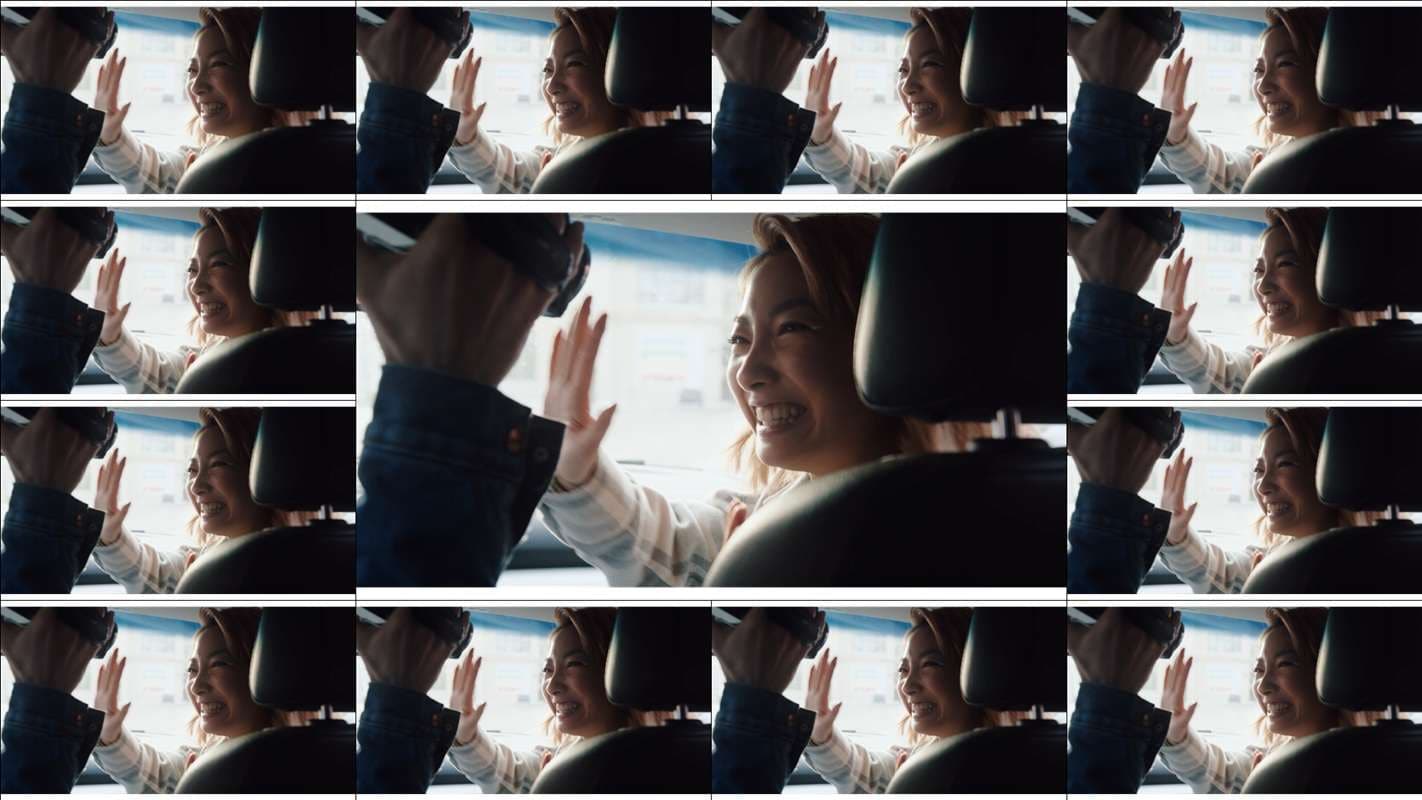
The first method is the built-in Video Wall filter, which quickly multiplies a single clip into several small panels, so you can get a polished multi-panel display without having to place each clip manually. This is the fastest way when you want repeating patterns or quick montage effects.
Step 1. Place the clip you want on the timeline.
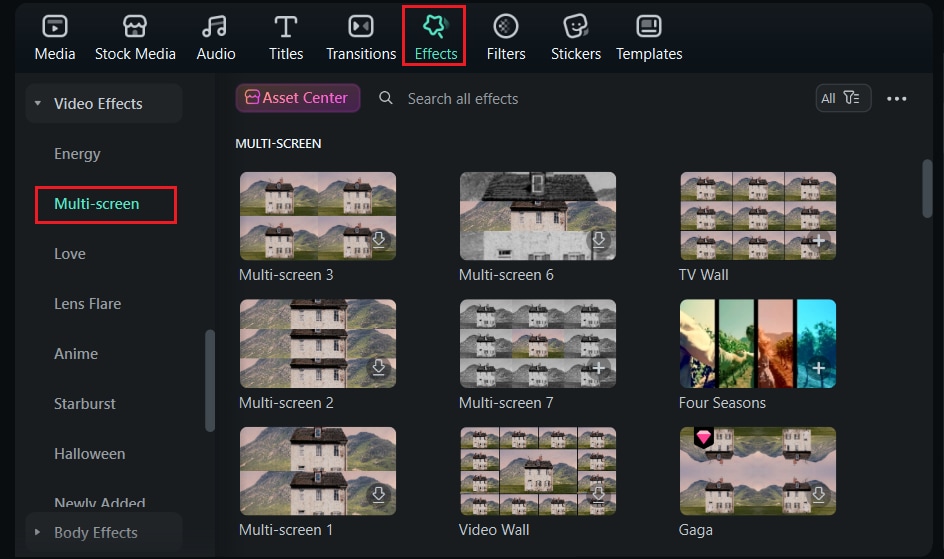
Step 2. Open the Effects tab and go to the Video Effects category, then find the Multi-screen filter.
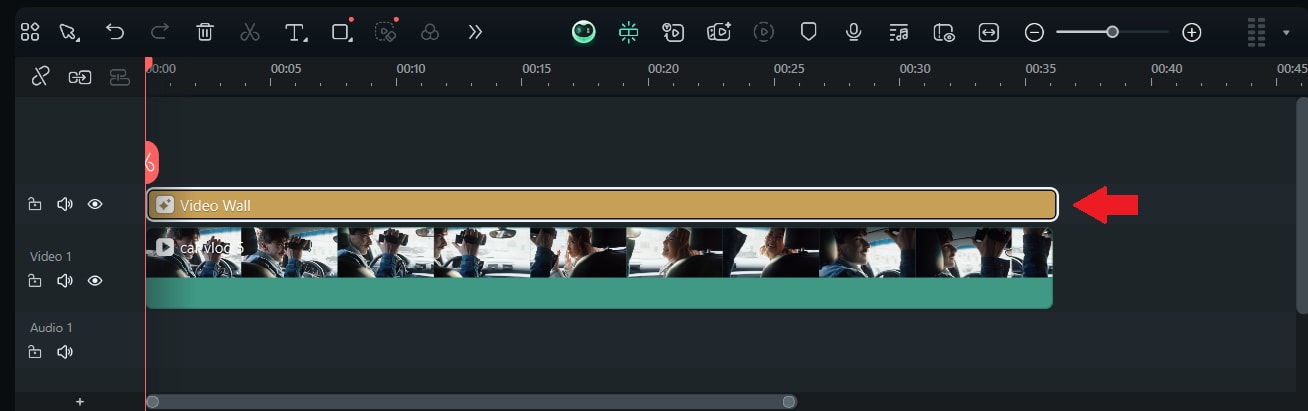
Step 3. Drag the Video Wall filter to a new track above the clip you want to multiply.
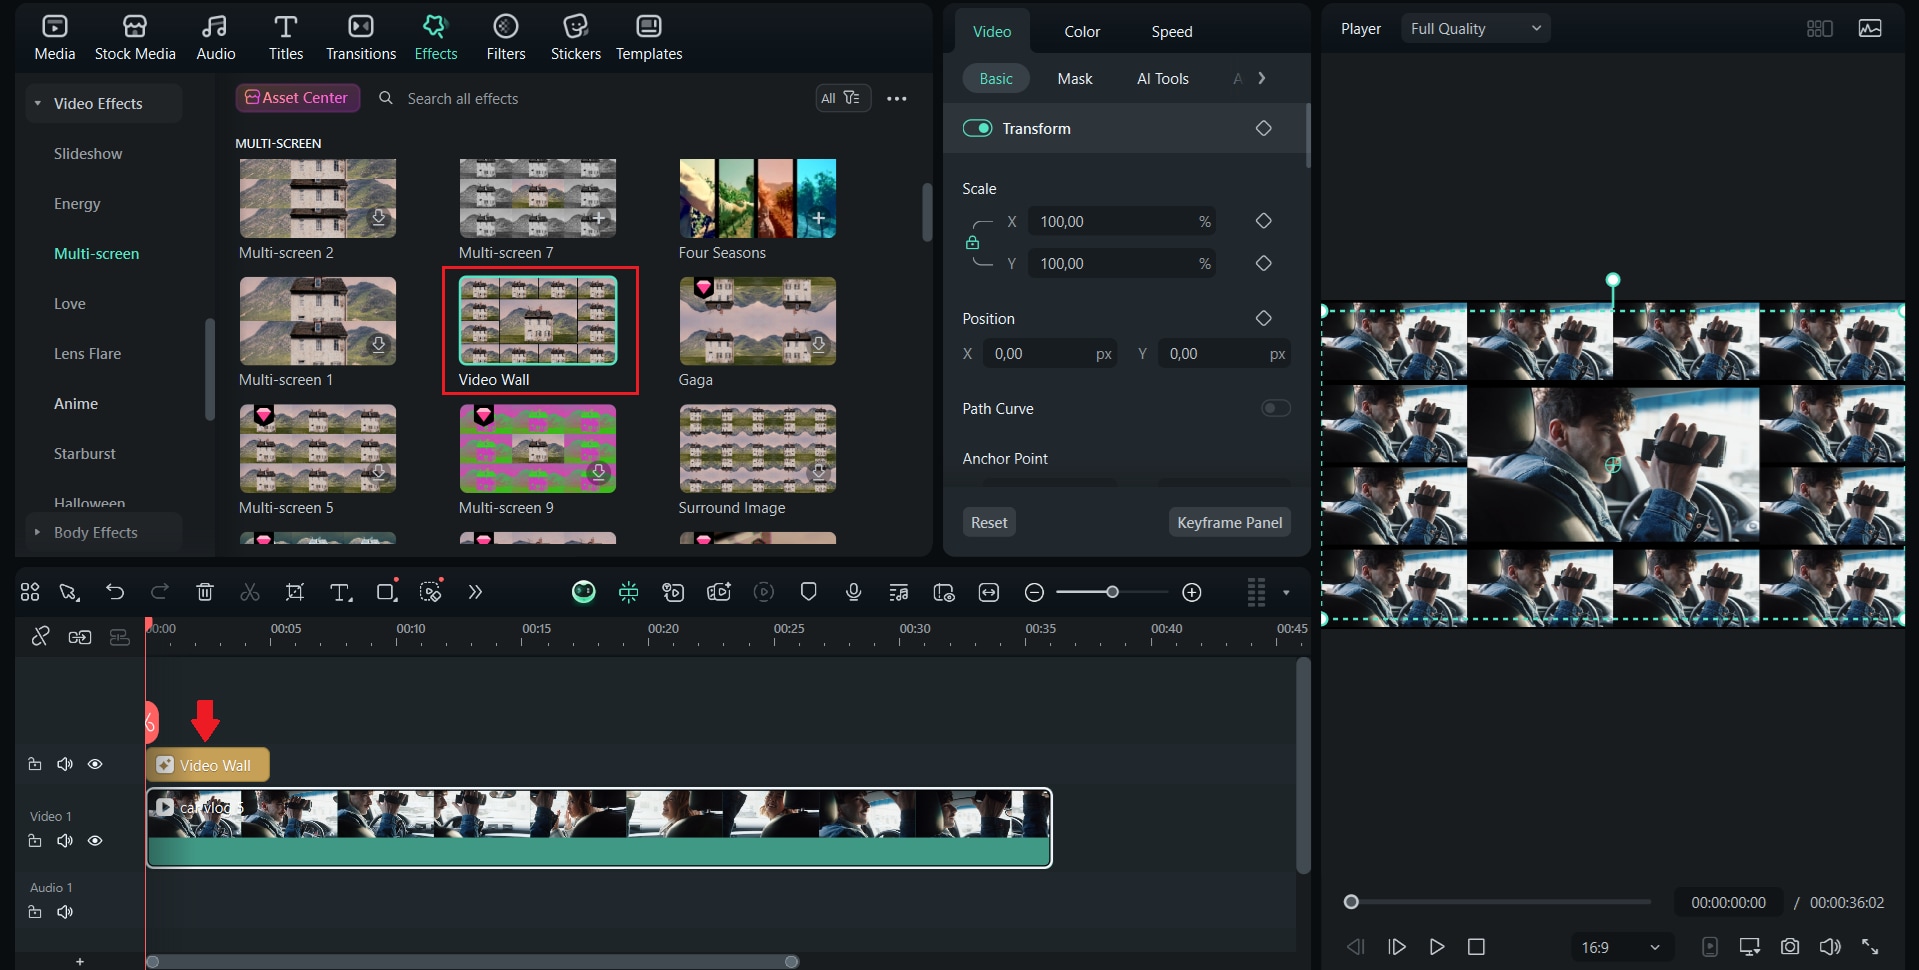
Step 4. Adjust the duration of the filter by dragging its ends on the timeline so that the effect starts and ends where you want it to.
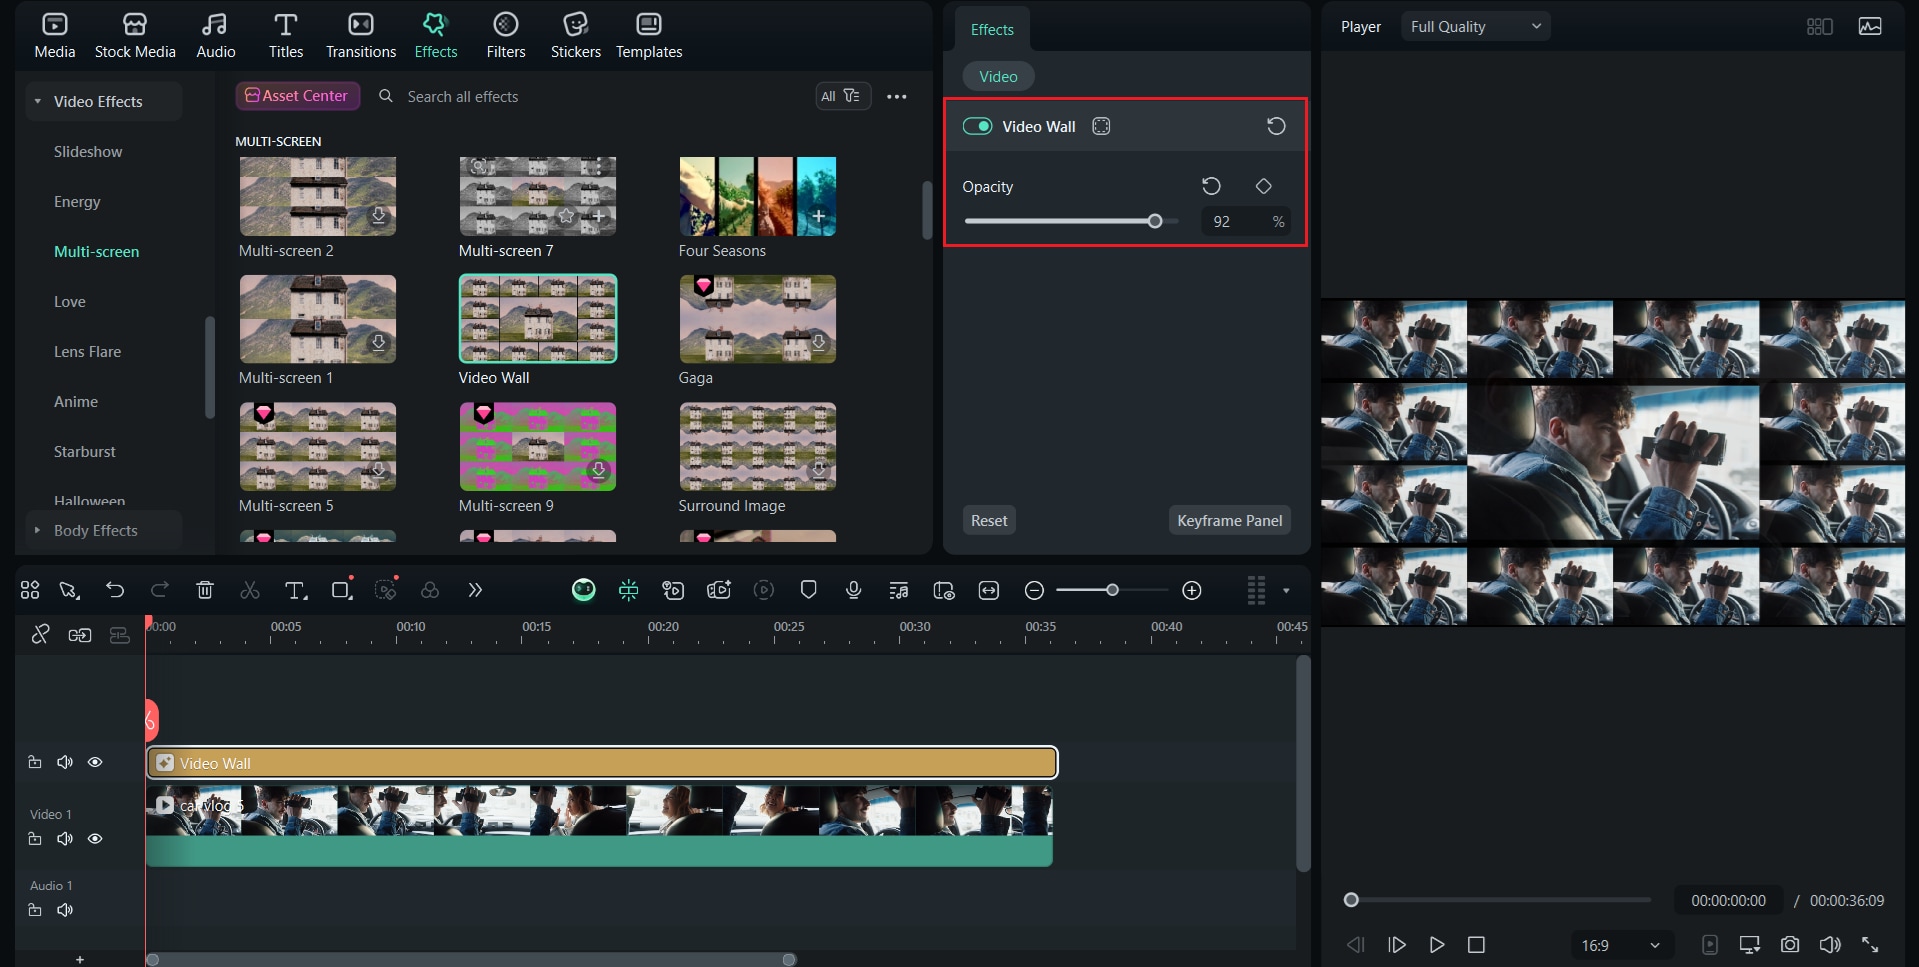
Step 5. Click the filter to open its settings and use the slider to reduce or soften the filter's intensity.
📌Notes: This method typically only uses one source clip and may not allow you to control exactly how many tiles the filter creates.
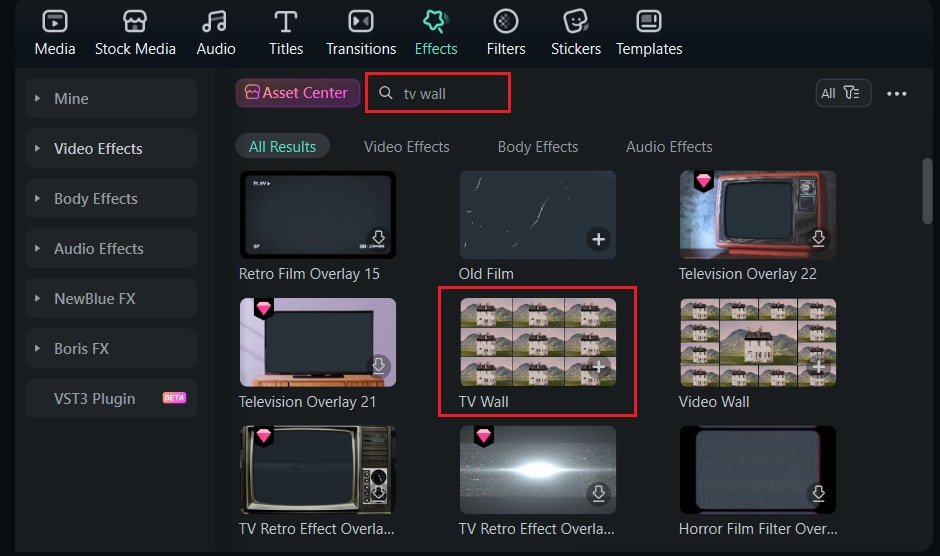
Using a “TV Wall” or Multiplication Filter
The second method is the TV Wall Filter, which duplicates the same clip into a configurable grid, which allows you to control the number of columns and rows and create a denser tile display. The method is pretty similar to the first one, but there is a slight adjustment to this method.
Step 1. Place the clip you want to duplicate on the timeline.
Step 2. Open the Effects Tab, find the TV Wall effect, then drag it onto the track above the clip.
Step 3. Double-click the filter to open its settings. And then, use the Split slider to increase the number of frames horizontally and vertically. Some versions allow up to eight frames on both the horizontal and vertical sides.
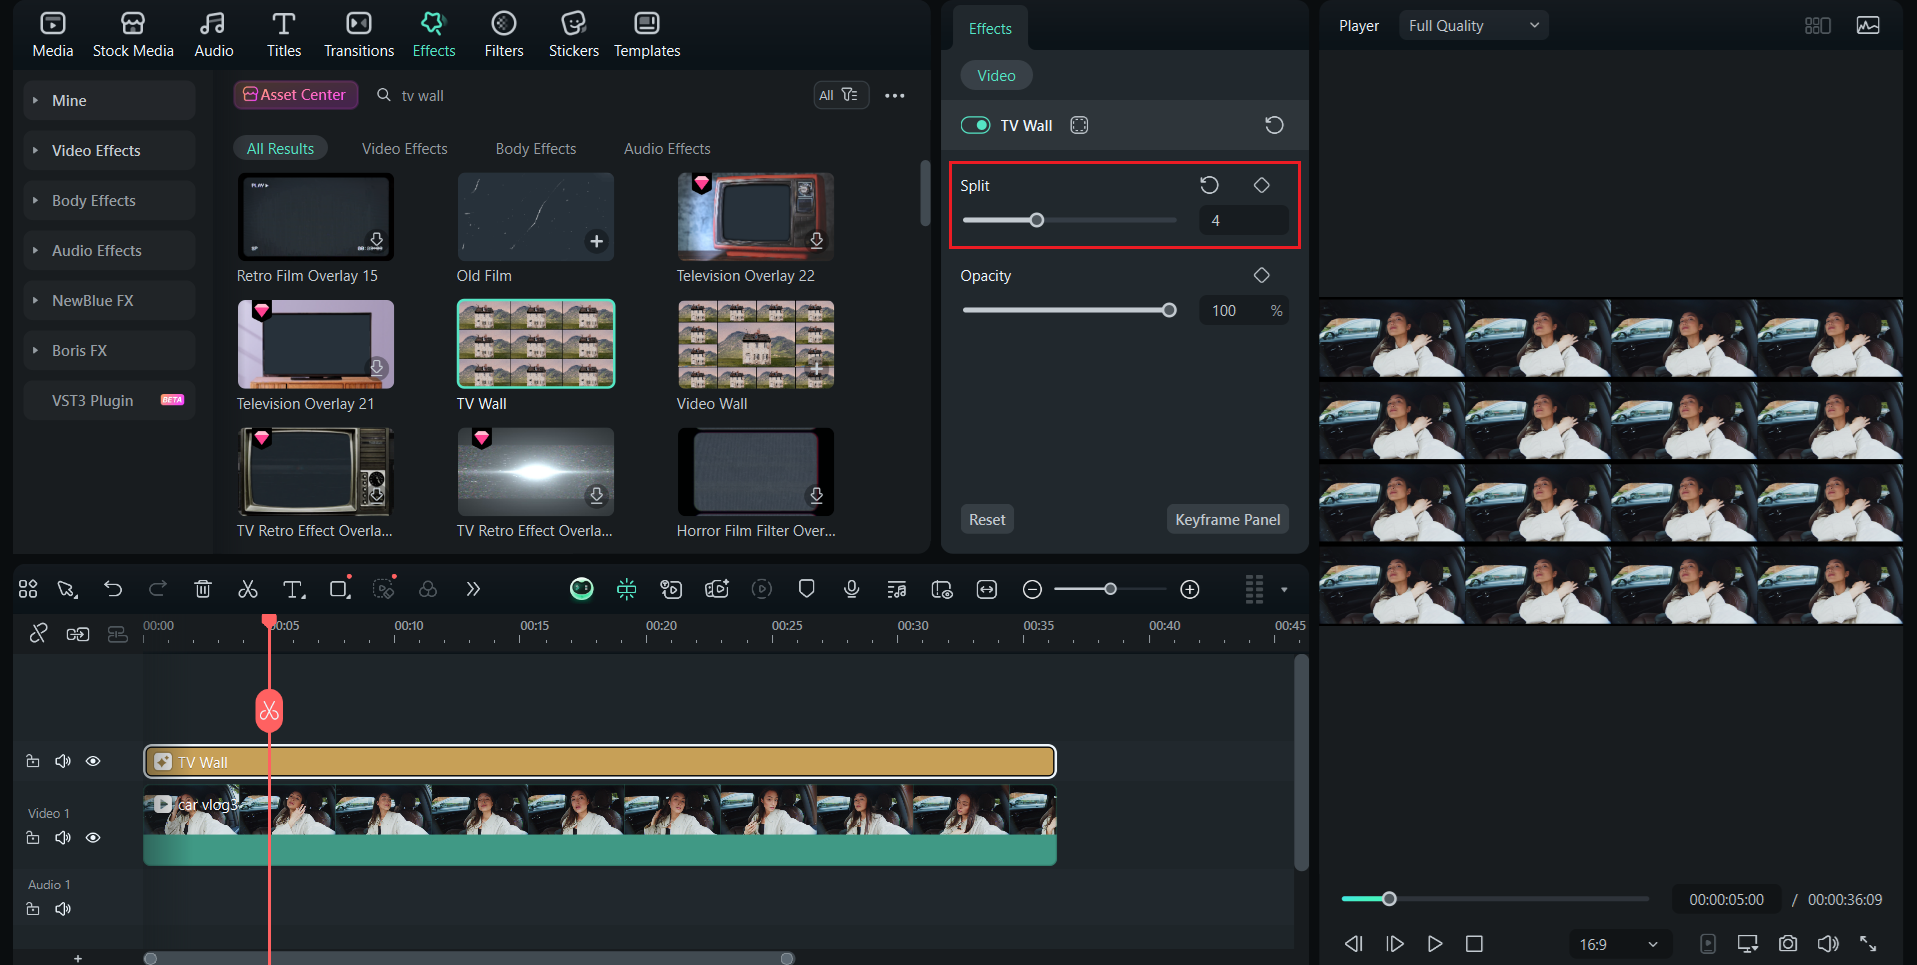
📌Notes: Remember that the more splits you add, the smaller each panel will be, so avoid excessive splitting if the audience needs to see details. This filter also only duplicates one clip at a time.
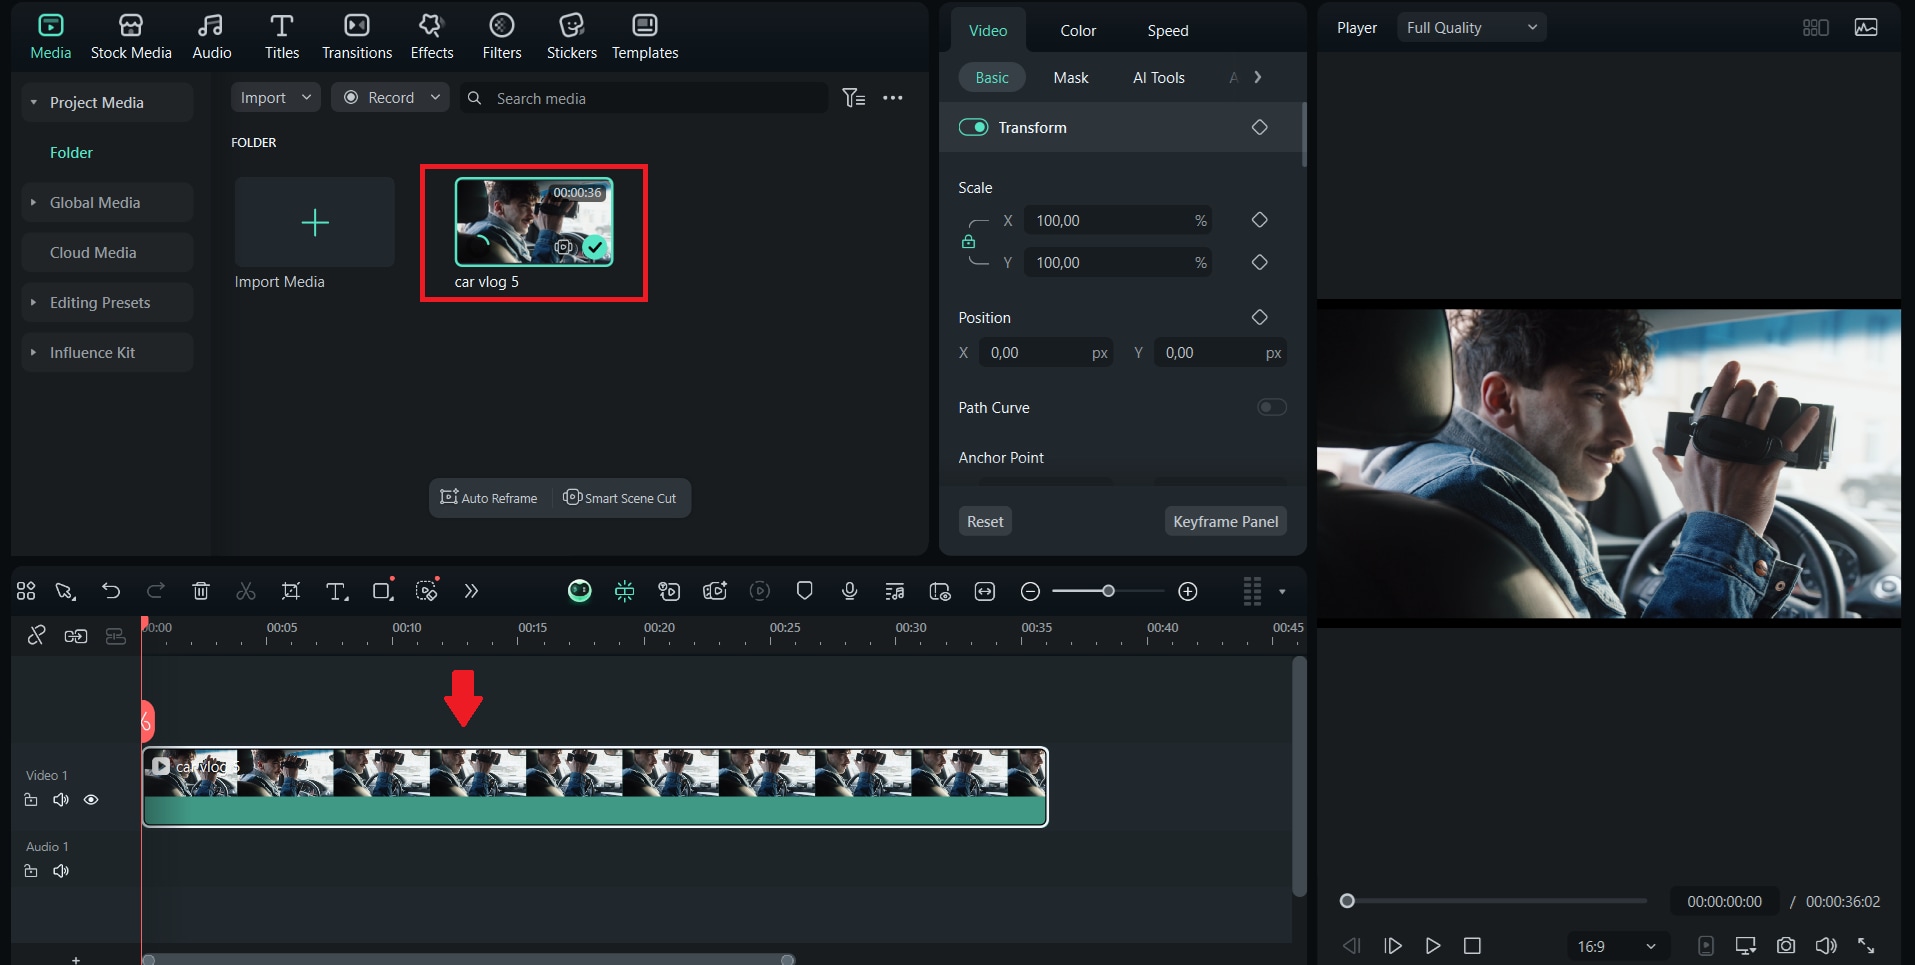
Manual Compositing / Layering Multiple Clips
The third method is manual composition, which gives you full control. You can place different clips on separate tracks and adjust the position and scale of each to create a custom layout. This is the best option when you want to combine different camera angles, different scenes, or unique panel sizes.
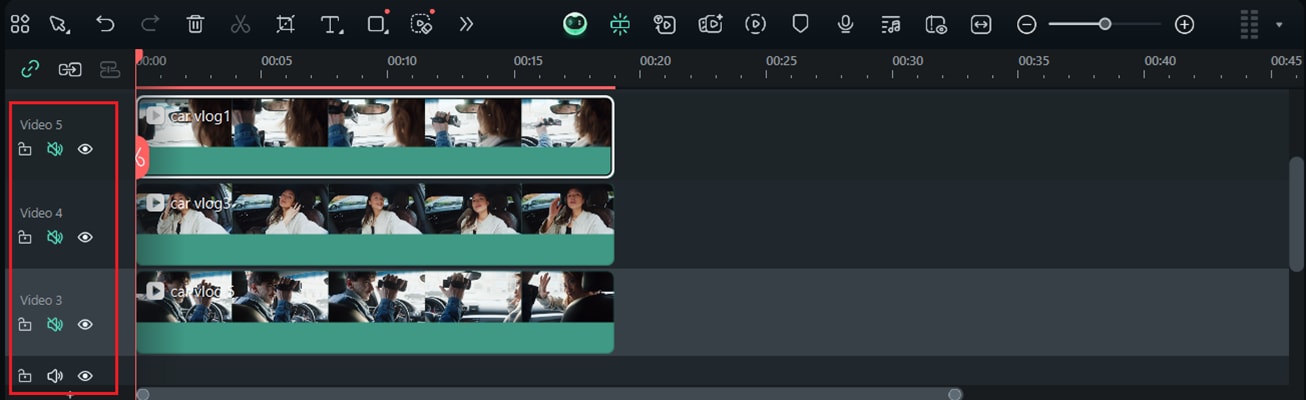
Step 1. Import all the clips you will use and add them to the timeline, each on a separate video track, stacked vertically.
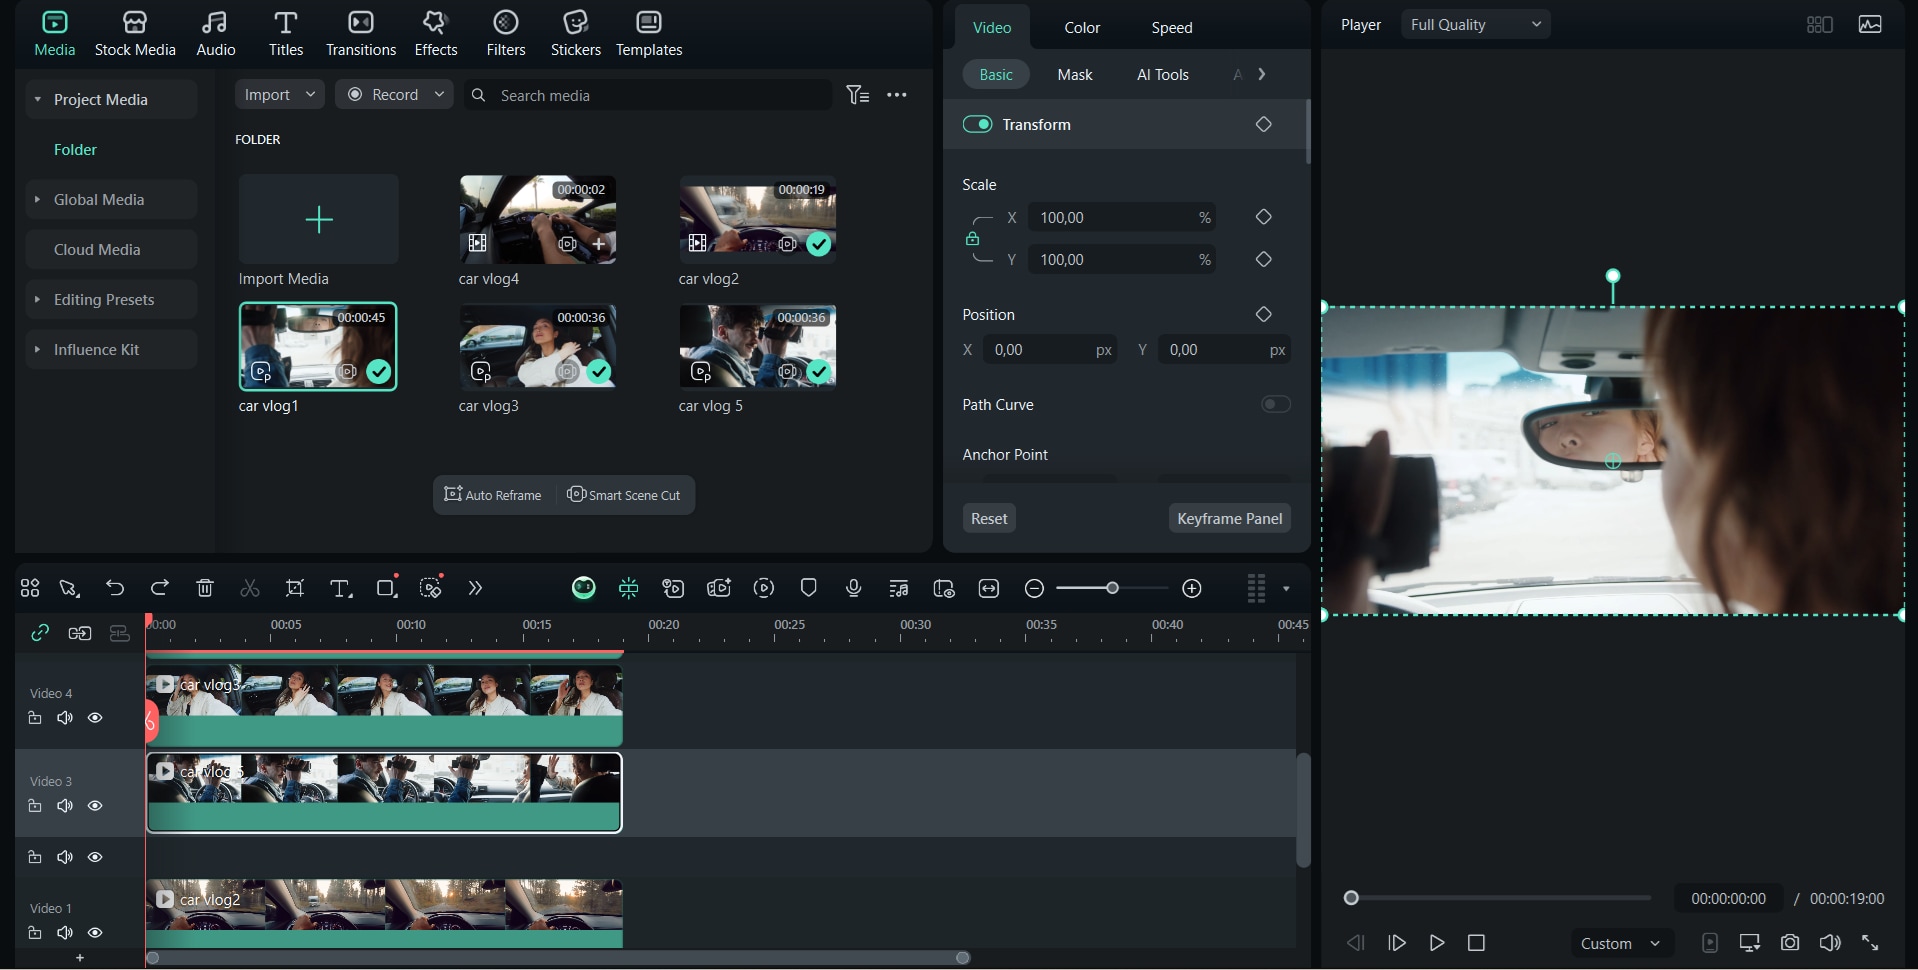
Step 2. Double-click a clip to open its video properties. Adjust the Scale and Position so that the clip fills the desired panel area. The preview window will update as you change the values, so you can place the clip with precision.
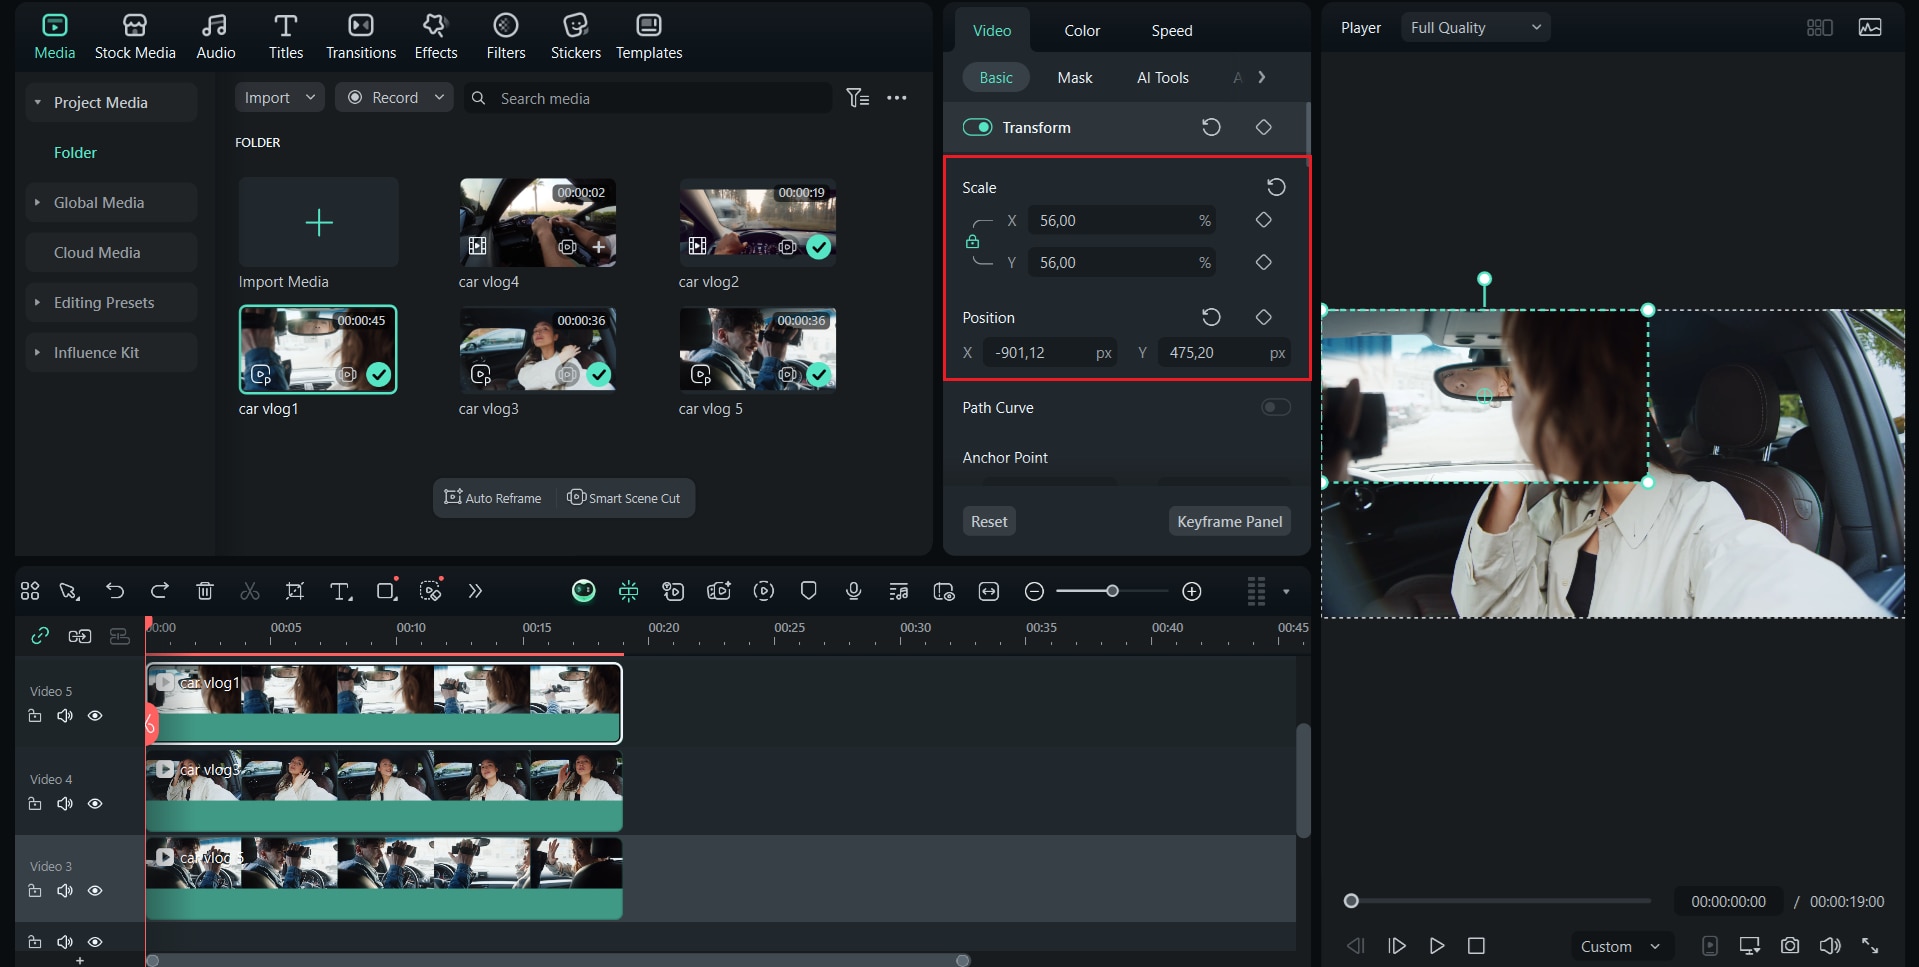
Step 3. Repeat the scale and position adjustments for each clip until each panel is in the desired position. Use the cropping tool or mask if you need a tighter frame.
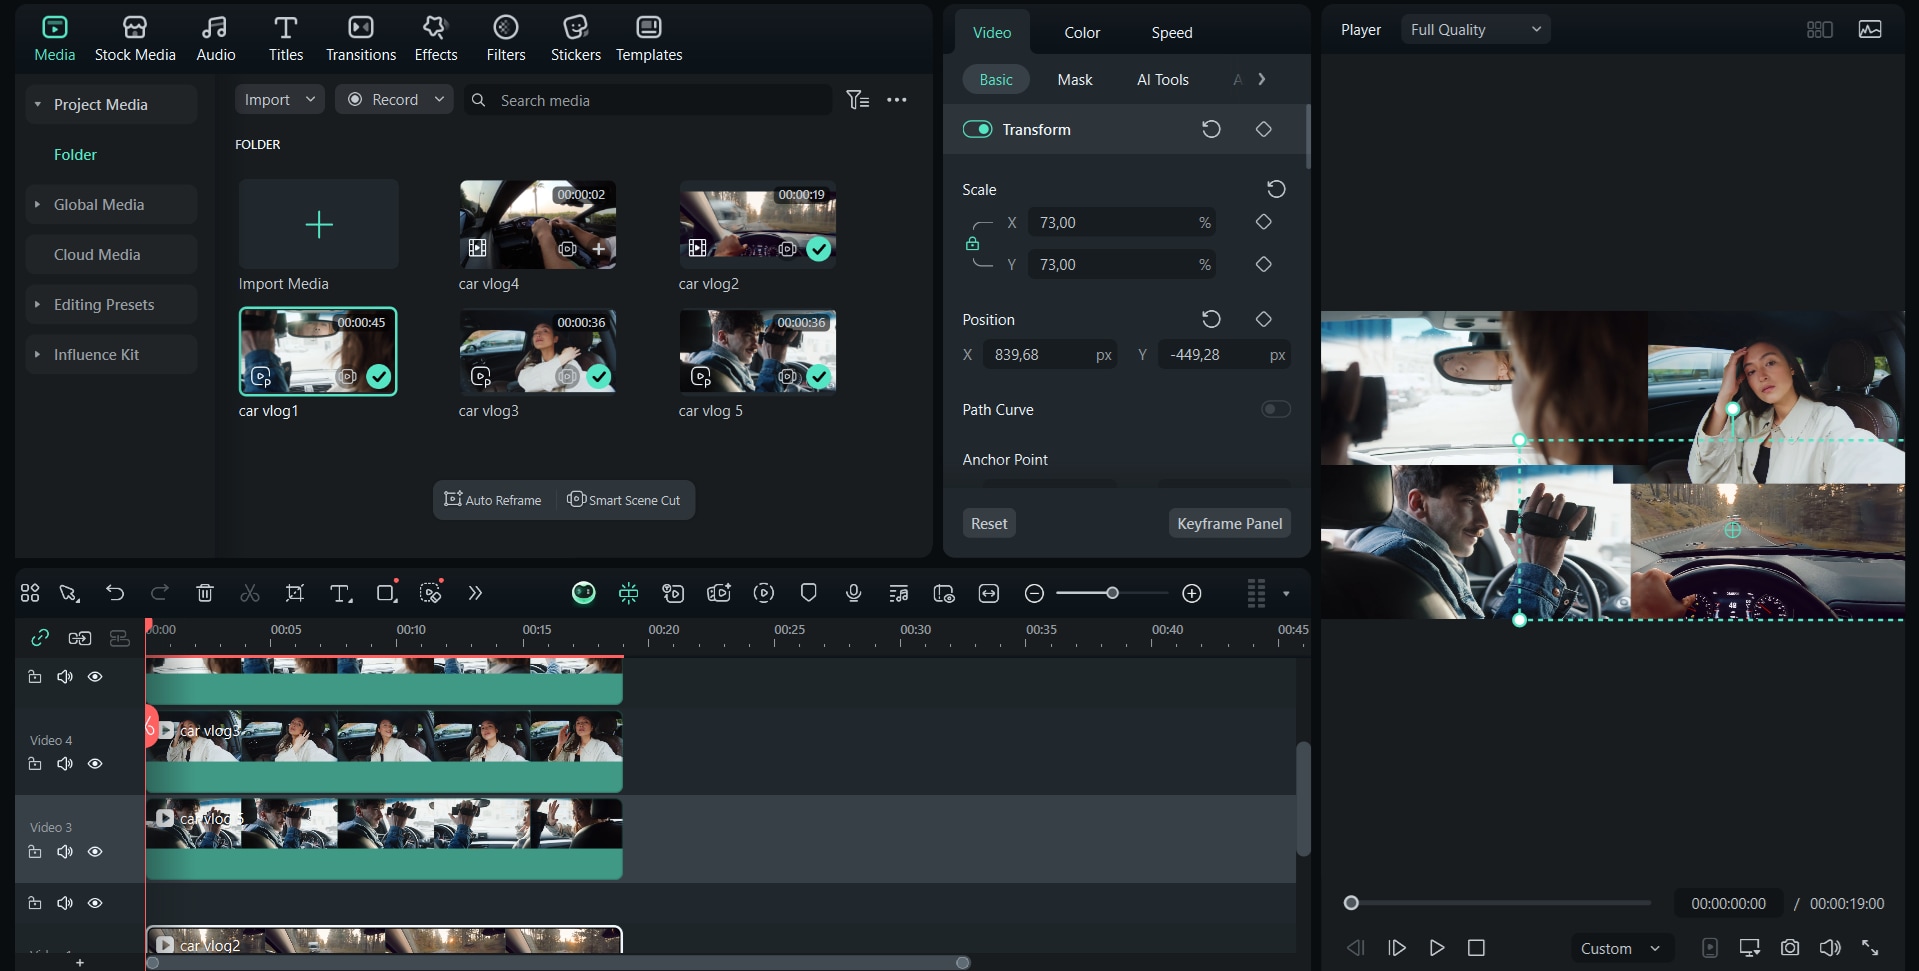
Step 4. Remove or mute the original audio track from panels you don't want to hear, and save or add the audio tracks that should be in the final mix.
Optional: Apply individual filters, overlays, borders, or gradient masks to each panel for style consistency or separation between panels. Manual composition takes longer, but provides full layout freedom and is ideal for narratives using multiple camera sources.
Part 3. Comparison: Filter Method vs Manual Method
From the three methods of creating a video wall, each provides different ways of working and results, but all result in a good video wall, and each has its own strengths. To find out the differences, you can check the following comparison table, so you can choose which method is best for you.
| Aspect | Filter Method (Video Wall / TV Wall Filter) | Manual Method (Layering Multiple Clips) |
|---|---|---|
| Speed and Convenience | Quick and easy to apply. It's perfect for quick edits or repeating patterns using a single clip. | It takes more time to set up since each clip must be placed and adjusted manually. |
| Flexibility and Control | Limited control over layout and clip selection. Usually duplicates a single video into preset grids. | Full creative control over layout, clip selection, sizing, and transitions. |
| Visual Constraints | Restricted to symmetrical grid layouts. Increasing the number of panels may reduce clarity. | There's no fixed layout. You can create asymmetrical grids, mix clip sizes, and add creative borders or overlays. |
| Best Use Cases | Suitable for simple montages, quick visual effects, or background visuals. | Best suited for storytelling, music videos, and art projects that require detailed settings. |
| Skill Level | Beginner-friendly and requires minimal setup. | More suitable for intermediate to advanced editors who want full customization. |
Part 4. Tips & Best Practices for a Quality Video Wall
Previously, we learned how to create a video wall and the differences between each method. However, creating a video wall is not just about placing clips side by side, but also about maintaining balance, clarity, and visual harmony.
1. Use high-resolution footage
Since each clip will be scaled down to fit smaller panels, low-quality video may appear blurry or pixelated. Always use high-resolution footage to ensure each frame remains clear, even after scaling.
2. Maintain a consistent aspect ratio
Combining clips with different aspect ratios can result in awkward borders or black bars. Before arranging your layout, crop or resize your clips to the same dimensions for a seamless grid appearance.
3. Avoid overly crowded layouts
While it's tempting to use as many clips as possible, too many panels can make the screen look cluttered and distract viewers. Select a layout that fits your story and keeps the visuals easy to follow.
4. Synchronize your clips
If your clips are meant to show the same moment from different perspectives, carefully align them on the timeline. Seamless synchronization makes your video wall feel dynamic and cohesive.
5. Adjust color and lighting
Differences in brightness or color tone can make one panel stand out more than others. Apply light color correction or filters to achieve a consistent look across all clips.
Part 5. Exporting & Final Output
Once your video wall is complete and in line with your expectations, the final step is to export it at the highest quality. Keeping an eye on your export settings ensures that the outcome from your hard work looks sharp and professional on every platform.
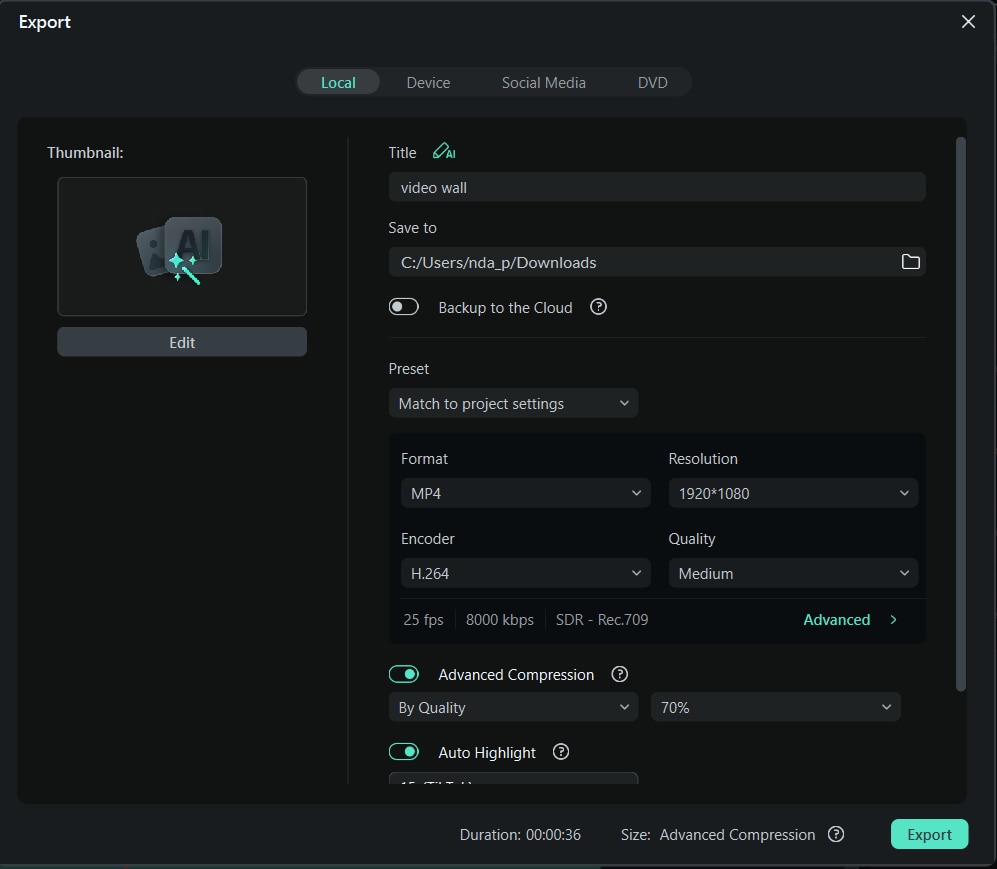
1. Choose the right output resolution
If your video wall contains many small clips, use a higher resolution such as 4K to maintain detail and clarity. A larger canvas helps prevent each panel from looking too small or pixelated when displayed on a larger screen.
2. Check your render settings, codec, and bitrate
Before exporting, carefully review your settings. Use a high-quality codec like H.264 for efficient compression and smooth playback. Adjust the bitrate high enough to maintain visual sharpness without producing unnecessarily large file sizes.
3. Test the exported video on various devices
Preview the exported file on several devices, like mobile phones, tablets, and computers. Ensuring the layout looks consistent, text remains readable, and colors appear accurate on different screens.
Part 6. Troubleshooting & Common Issues
During the editing process, you might run into technical issues. Even with careful editing, creating a video wall can come with some challenges. Below are some common problems and practical solutions to ensure a smooth result.
| Common issue | Cause | Solution |
|---|---|---|
| Laggy Playback During Editing | Too many high-resolution clips or effects in the preview | Reduce playback resolution, enable proxy files, or render a preview before continuing editing |
| Mismatched Aspect Ratios | Imported clips have different frame sizes or orientations | Crop or resize clips to match your project's aspect ratio before arranging them on the wall |
| Visible Gaps Between Clips | Inaccurate alignment or scaling | Use Filmora's grid adjustment and alignment tools to ensure perfect spacing and edge alignment |
| Blurry or Pixelated Output | Export resolution too low or bitrate too small | Choose a higher export resolution (such as 4K) and adjust the bitrate to maintain image clarity |
| Uneven Lighting or Color Tone Across Clips | Footage captured under different lighting conditions | Apply color correction or Filmora's Auto Color Match feature to blend tones and exposure |
| Audio Overlap or Noise | Multiple clips with unmuted background audio | Disable unnecessary audio layers and use background music for consistency |
| Export Crashes or Long Render Times | Heavy use of effects, transitions, or large file sizes | Close other apps, render in smaller sections if possible, and ensure sufficient system storage and RAM |
Conclusion
If you want to create a video wall effect for narration, montages, or multi-angle presentations to give your video depth and visual appeal, it's crucial to choose the right method. In this article, we discuss three methods for creating video walls in Filmora: using built-in filters, TV wall effects, and manual layering.
You can use any of these methods depending on your project needs and the level of control you want. Preparing clips, planning the layout, and considering the resolution ensures that each panel is clear and balanced.
With these steps, you can feel confident in creating and building video walls that attract viewers' attention and enhance the quality of your videos.
