How to Use Chroma Key in Cyberlink PowerDirector
Jul 14, 2025• Proven solutions
Cyberlink PowerDirector green screen technology enables users to change the background of a pre-recorded green screen video clip with a second video or still image.
You can therefore use PowerDirector chroma key to enhance footage you shoot with a video camera or web camera. This effective tool gives you the opportunity to choose any background you like and edit clips.
Part 2: How to apply chroma key in PowerDirector
PowerDirector Chroma Key is not the easiest software to master, but once you work through the following process a few times, you should be okay.
- Open PowerDirector and import your footage into the media room. You can do this by drag and dropping files from a storage folder or by clicking on the director’s chair in the top left of your screen to bring up the menu and navigating to wherever you have stored your media files.
- Select the files you want to display in the background and drop it into track one.
- Then select the green screen video and drop it into track two.
- Double click on the clip you want to use as your green screen and go into the Chroma Key menu. You can also bring the menu up by selecting a clip and clicking modify.
- Enable PowerDirector chroma key by ticking the box labeled ‘Enable Chroma Key’
- Underneath this tick box is an eyedropper. The default colour is set to black so you need to click on the icon and select the colour you want to set as your green screen.
- You can adjust the colour by moving the sliders below; tolerance of hue and tolerance of luminance.
- Once you are happy with the green screen video clip, save the file
- Now click on the background clip and you should see your green screen video superimposed over the top.
An easier way to use Chroma Key effect
Some users may find PowerDirector Chroma Key is difficult to use. The software is quite complex. However, there are alternatives such as Filmora Chroma Key which enables you to superimpose videos in the same way as Cyberlink PoweDiretor green screen outlined above, only with software that is much simpler to use.
Here’s what to add green screen videos to Wondershare Filmora:
- Open Filmora and select ‘Full Feature Mode’
- Import the video clips and/or image to the media library
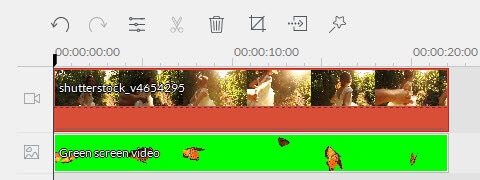
- Drag and drop the background clip to the timeline

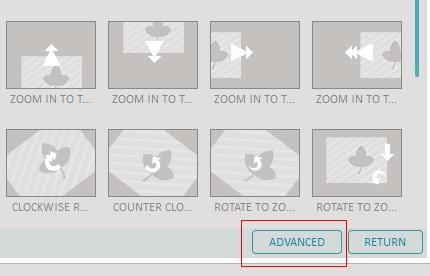
- Drag the green screen video file to the PIP track and double click. This will bring up another window where you can adjust color settings. Hit the ‘Advance’ button.

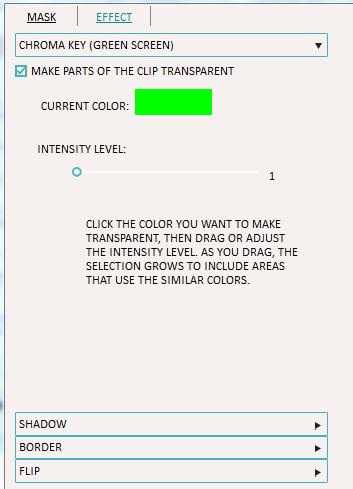
- In the ‘Effects” menu tick ‘Make parts of the video transparent’ and select the colour you want your green screen clip to appear in.

- Use the sliders to adjust the intensity level. You can also add shadows, border and flip effects.
- Check out the results and save the file to a folder of your choice when you’re happy with the results.

The article below will show you how to do chroma key and edit green screen footage in Adobe Premiere Pro.
by Liza Brown Jan 06, 2026 11:36 AM


