- Premiere Tutorial
Chroma Key in Adobe Premiere Pro: How to do Green Screen Keying
Jul 14, 2025• Proven solutions
Those who are new to this editing world must be curious to know about what is Chroma Key processing and how it is done. Chroma Key, also called a Green-screen key, is actually the process of replacing the background color of a video with another desired background to make videos more appealing. Adobe Premiere Pro platform allows advanced editing options for such types of changes with its great tool named "Ultra Key." Premiere Pro features the Chroma Key ability after CS5 and later versions.
In this article, we will show you how to do Chroma Key in Premiere Pro, along with tips for achieving the perfect effect, while also highlighting how Filmora can streamline your editing process.
You May Also Like: How to Edit YouTube Videos with Adobe Premiere Pro >>
Part 1: Getting Started Before Compositing Green Screen Video
If you are wondering where to get the green screen background resource, while the answer is, you can find some free and paid background resources on websites or shoot the green screen video by yourself. Here are a few basic rules that you should follow if you want to shoot and make your own green-screen footage:
- Shadows do not appear well in green screen videos, so it is important to be highly careful while shooting the feet of the actor.
- Actors are advised to stand at least a distance of 10 feet from the green screen. It will help to avoid light spilling around their shoulders or other parts of the body.
- Add lights to the background so that you can have smoothness for shooting. Also, provide proper lights to the actors during the drama.
- Green backgrounds must have the smooth appearance; prefer to use paint instead of fabrics as it helps to avoid unwanted folds and wrinkles.
Part 2: A Powerful Alternative to Using Chroma Key: Wondershare Filmora
If you are a beginner, then you may find using Premiere Pro to change the green screen background is a little complicated. The complexity of this software tool may take all your excitement, and the classic chroma key effect may turn out to be a complete mess. Don't worry! If you want to make eye-catching videos with a green screen then you can access many other easy-to-use tools. One of the best recommendations for beginners is Filmora Green Screen Editor. You can check the video tutorial below to learn how to use Filmora to composite a green-screen video.
If you prefer not to watch the video, we have also included the text guide below for your convenience:
How To Use Chroma Key in Filmora on Your Win/Mac
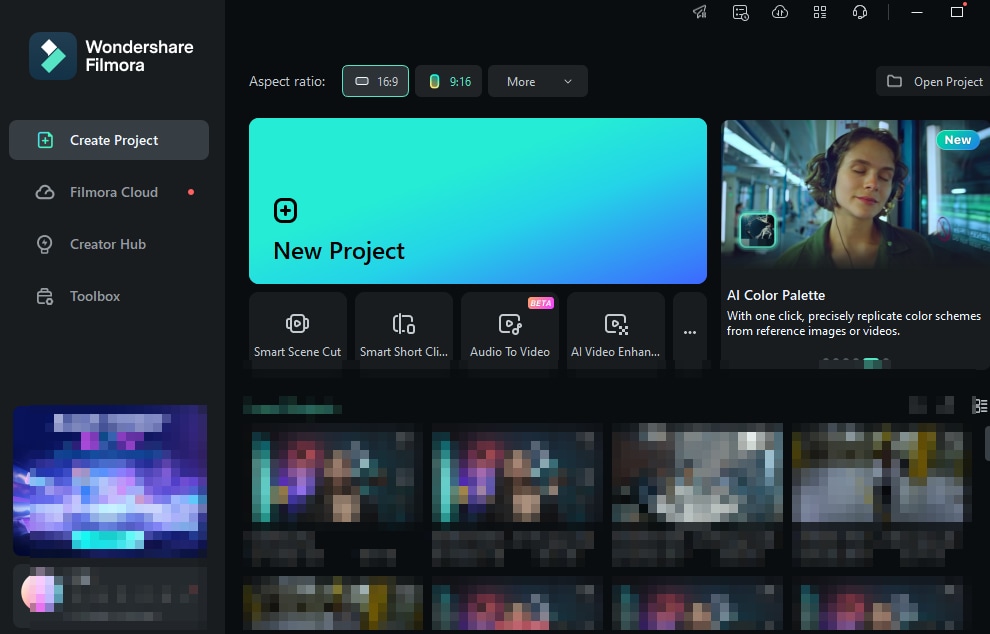
Step 1: Launch a New Project.

Step 2: Import your content into the timeline (drag-and-drop from File Explorer to the app).

Step 3: Under Video > AI Tools, enable Chroma Key. You can perform the following functions from this panel:
- Eyedropper tool: Picks a color in the image/video that will be transparent.
- Offset: Changes the backdrop’s visibility
- Tolerance: Controls the width of the key color
- Edge Feathering/Thickness: Softens the edges of the chroma key (feathering) or thickens it (thickness).
- Alpha Channel: Turns anything keyed out as black, while those not keyed out are made as white.

How To Use Chroma Key in Filmora Mobile
If you are already impressed by the ease of use of Filmora’s desktop version, you’ll be even more amazed by the mobile version. You’d never know that an app can pack such a powerful chroma key function in a portable format.
To access the chroma key in Filmora mobile, follow the steps below:
Step 1: From the homepage, create a New Project, and Import the video you want to use the chroma key on.

Step 2: Go to Smart Cutout > Chroma Key.

Step 3: On this page, you can precisely adjust the reticle’s size with pinch/drag gestures. Then, change the Offset and Intensity as necessary.

Filmora’s desktop and mobile versions both allow you to apply or use chroma key functions in videos. While these are the basic steps to access the function, exploring and learning how to use it is another matter you can improve on as you use the tool. Give Filmora a try today and explore your creative juices with ease.
Part 3: How to Chroma Key in Adobe Premiere Pro
If you are ready to add the Chroma Key effect to your videos using Adobe Premiere Pro platform, then here are a few easy-to-follow steps:
Step 1: First of all users need to import a green screen footage to Premiere Pro timeline and then get the video that you want to edit with your Chroma Key effect. To accomplish this task, simply go to File menu and then choose import option from drop down menu. It will help you to make selections for media files that are stored inside your computer.

Step 2: Now simply place your imported video clip that is going to replace the green screen, into Video 1 Track of the Premiere Pro timeline.
Step 3: It is time to place green screen containing footage into Video 2 Track of timeline, it will be positioned above Video 1 Track.
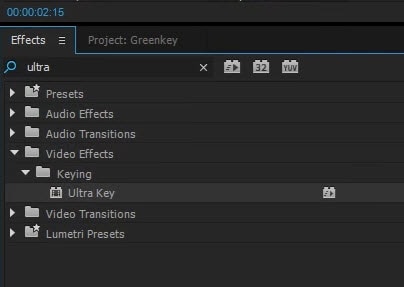
Step 4: Go to the Effects panel that is located next to the project tab which contains all your imported clips. If you can't see the Effects panel, then go to Window and click Effets. In the Video Effects option, go to Keying and then click the Ultra Key. Of course, you can also search for "Ultra Key" in the search bar and drag it to the video clip containing green screen in the timeline.

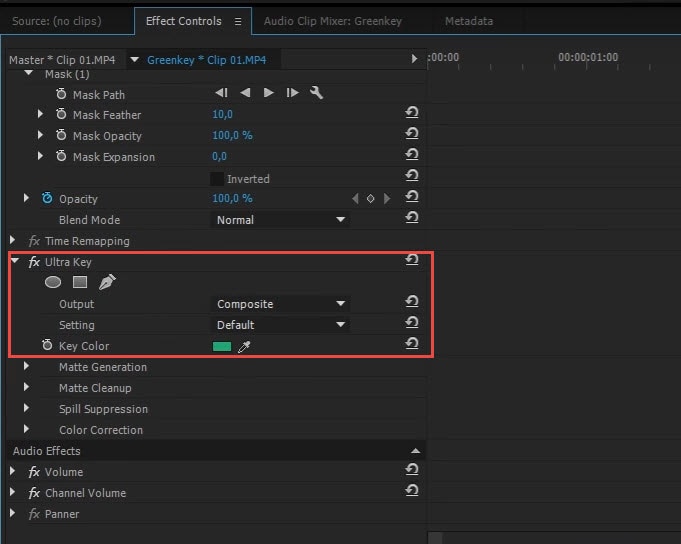
Step 5: In the Effects controls panel, expand controls of Video Effects from the arrow attached to Effects option.

Step 6: Now go to Ultra Key controls and choose the Key Color picker tool from available options. Simply select the green screen area from background at preview window and within fraction of seconds this selected background will get replaced with the green screen of the video that is available in Track 1.
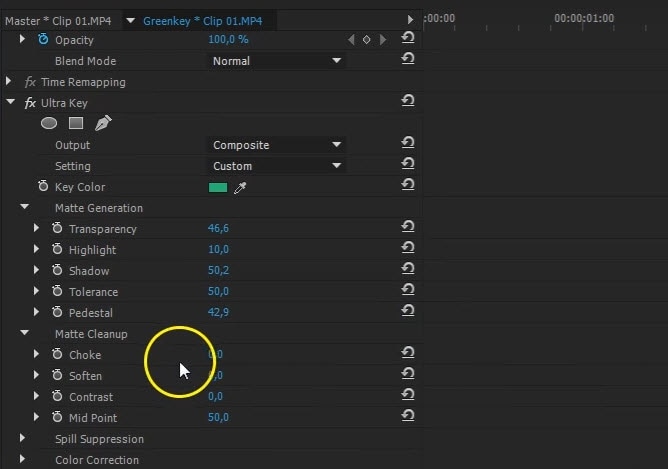
If the green screen footage that you shot wasn’t lit well, you may need to choose either a darker or lighter shade of the green in the video clip. For perfecting the chroma keying effects in Premiere Pro, you may also need to do the following operations.
Step 7: In order to fine tune your green screen effect, use Choke, Highlight and Transparency controls from the Matte Generation option to remove shadows and highliths. You can laso use the Matte Cleanup options to change the edges of the object. Using the Choke option will shrink the edges and using the Soften option will make the edges fuzzy. To eliminate the spill and adjust the edge color, try Spill Suppression option.

Above are some tips for getting perfect key effects in Premiere Pro, in most case, that will hep you to get a better compositing result. Of course, you can also try the Crop effect to cropped out some unwanted green screen background.
Step 8: Once you are done with all these settings then simply save you project.
Step 9: You have to render your saved project now.
Step 10: After rendering it, save your project again and export the video as you like.
Below is a video tutorial on how to do chroma key in Adobe Premiere Pro which will show you in detials:
I hope you can now master how to do chroma key in Premiere Pro. If you still looking for an alternative to composite a green screen video in a quicker way, you can always download and try Filmora for free.
Do you want to better your video with Premiere Pro? Try transitions. This article will give you 10 best Premiere Pro transitions and let you know how to add transitions in Premiere. Check it out!
by Benjamin Arango Jan 06, 2026 11:36 AM


