
- Premiere Tutorial
Premiere Pro Nesting: Master Your Timeline & Apply Effects Easily

Jul 28, 2026• Proven solutions
 TL;DR:
Premiere Pro nesting simplifies complex timelines by allowing you to merge short sequences into a master sequence or group multiple clips to simultaneously apply effects like Warp Stabilizer.
● Convert existing timeline clips into a nested sequence by highlighting them, right-clicking, and selecting Nest, which allows you to double-click the new sequence to access and edit the original clips.
● Apply effects directly to the newly nested sequence and adjust the parameters within the effects control panel by dragging the sequence into the source window.
● Disorganization during the nesting process can introduce timing synchronization problems and misplaced clips, requiring careful management to avoid timeline errors.
Ask AI for a summary
 ChatGPT
 Perplexity
 Gemini
 Claude
 Grok
Grok
Are you working on Premiere Pro or on some long complicated projects? Often, there are many things going on in your sequence. Such messes can make it difficult to navigate. There might be things where you have already applied effect like duration or speed and you want to add more effects like Warp Stabilizer to the clips.
For all such instances, Premiere Pro nesting can be a great option. What is nesting? Premiere Pro nesting is very useful when you need to merge short sequences into a master sequence, or when you want to apply one effect to several clips. It saves your time as well as cut down on complexities of editing your video. Learn how to nest in Premiere Pro in this article.
Part 1: How to Nest Sequences into a Master
You may drop 3 sequences in Premiere Pro, namely- first, second, and third:
In the New item icon, firstly, drop the first sequence to create your first sequence and rename it as Master. It matches the first sequence of my setting.
In the Master Sequence, you can see the first option under green light. This sign signifies that the sequence is nested in Premiere Pro. For making any changes to the Premiere Pro nesting second sequence, you just need to double click and open the Premiere Pro original sequence.
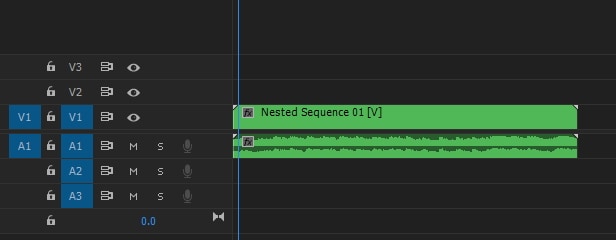
You can see the nested clip in the master sequence, which can be edited by double-clicking on it. Now, you can drag the second and third sequence too in the Master sequence which makes them nested and appears on the Master sequence as clips.
For editing, you need to double click and make the desired changes to the clips. You can also learn other Premiere Pro learning tutorials.
Part 2: How to Nest Clips in a Sequence
While nesting the sequences, you are not just bound to bring one sequence into the other. A series of clips can also be nested into the existing sequence to break the edits into small pieces and make it more organized and manageable.
Do you know how to nest clips in Premiere Pro sequence? Firstly, you need to highlight the clips and right click to select Nest. Automatically, the clips are turned to sequence when you right-click the clips and select Nest.
In the project, you can rename the newly created sequences, double click to step into the nest and make the required edits to the clips.
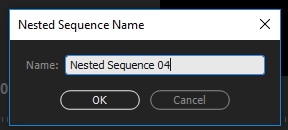
When you want to make certain specific changes to a particular group of clips, nesting is a very important tool. In the Premiere Pro timeline, you can just drop an effect on a nested sequence. This effect can also be modified by putting it up on the Nested sequence and dragging the sequence to the source window. Now, adjust the effect settings in the effects control panel.
Conclusion
When you use nesting, it can save you a good amount of time while the post-production stages of the workflow. You can also manage your task well when you use Premiere Pro nesting. If you cannot do the nesting in the right manner for instance, if you misplace the clips in the nested sequence or if there are time problems, nesting can get on your nerves. Like video editing requires you to be methodical, similarly, if you are nesting sequences or clips while editing videos, don’t go wrong or work haphazardly. Be organized to nest your clips easily.
FAQ
What is Premiere Pro nesting?
Premiere Pro nesting is a useful feature that allows you to merge multiple short sequences into a single master sequence, or to group several clips together so you can apply one effect to all of them simultaneously. It helps simplify complex projects, save editing time, and reduce the overall complexity of your video workflow.
How do I nest clips in a Premiere Pro sequence?
To nest clips within an existing Premiere Pro sequence, first, highlight all the clips you wish to group together on your timeline. Then, right-click on the selected clips and choose the "Nest" option. The highlighted clips will automatically be transformed into a new nested sequence, which you can rename and edit further by double-clicking it in your Project panel or timeline.
Recreating the visual style of early Charlie Chaplin and Buster Keaton films isn’t hard at all if you have the right tools for the job. That’s why in this article we are going to show you how you can
by Benjamin Arango Jul 28, 2026 10:39 AM
Benjamin Arango
staff Editor
