

 ChatGPT
 Perplexity
 Gemini
 Claude
 Grok
Grok
Many movie lovers can relate to waiting until the end of a film to see the cast list, music credits for a song that caught their attention, the production company, or the people who contributed to creating the magic they just saw. Those rolls of text that scroll across the screen are called scrolling credits.

They are also known as rolling credits, rolling titles, closing credits or end credits. They differ from opening credits, which do not scroll, are shown at the beginning of a film, and display only the main cast and a few members of the production crew.
To create and add rolling credits to your videos, you need specialized video editing software. Adobe Premiere Pro end credits are one of the most popular tools used for this.
In this guide, you will learn how to make rolling credits in Premiere Pro, a more accessible tool to use, and how to get end credits Premiere Pro templates for free.
In this article
Part 1. Ways to Create End Credits on Adobe Premiere Pro
Before adding Adobe Premiere Pro end credits to your video project, first decide if you want your text over a video background or a blank screen.
If you want to add an image or a video to the background of your scrolling credit, simply import your chosen media to Premiere Pro, then drag and drop it after your video on the timeline.
If you want your scrolling text to display on a black background, place your playhead in the space after your video on the timeline.
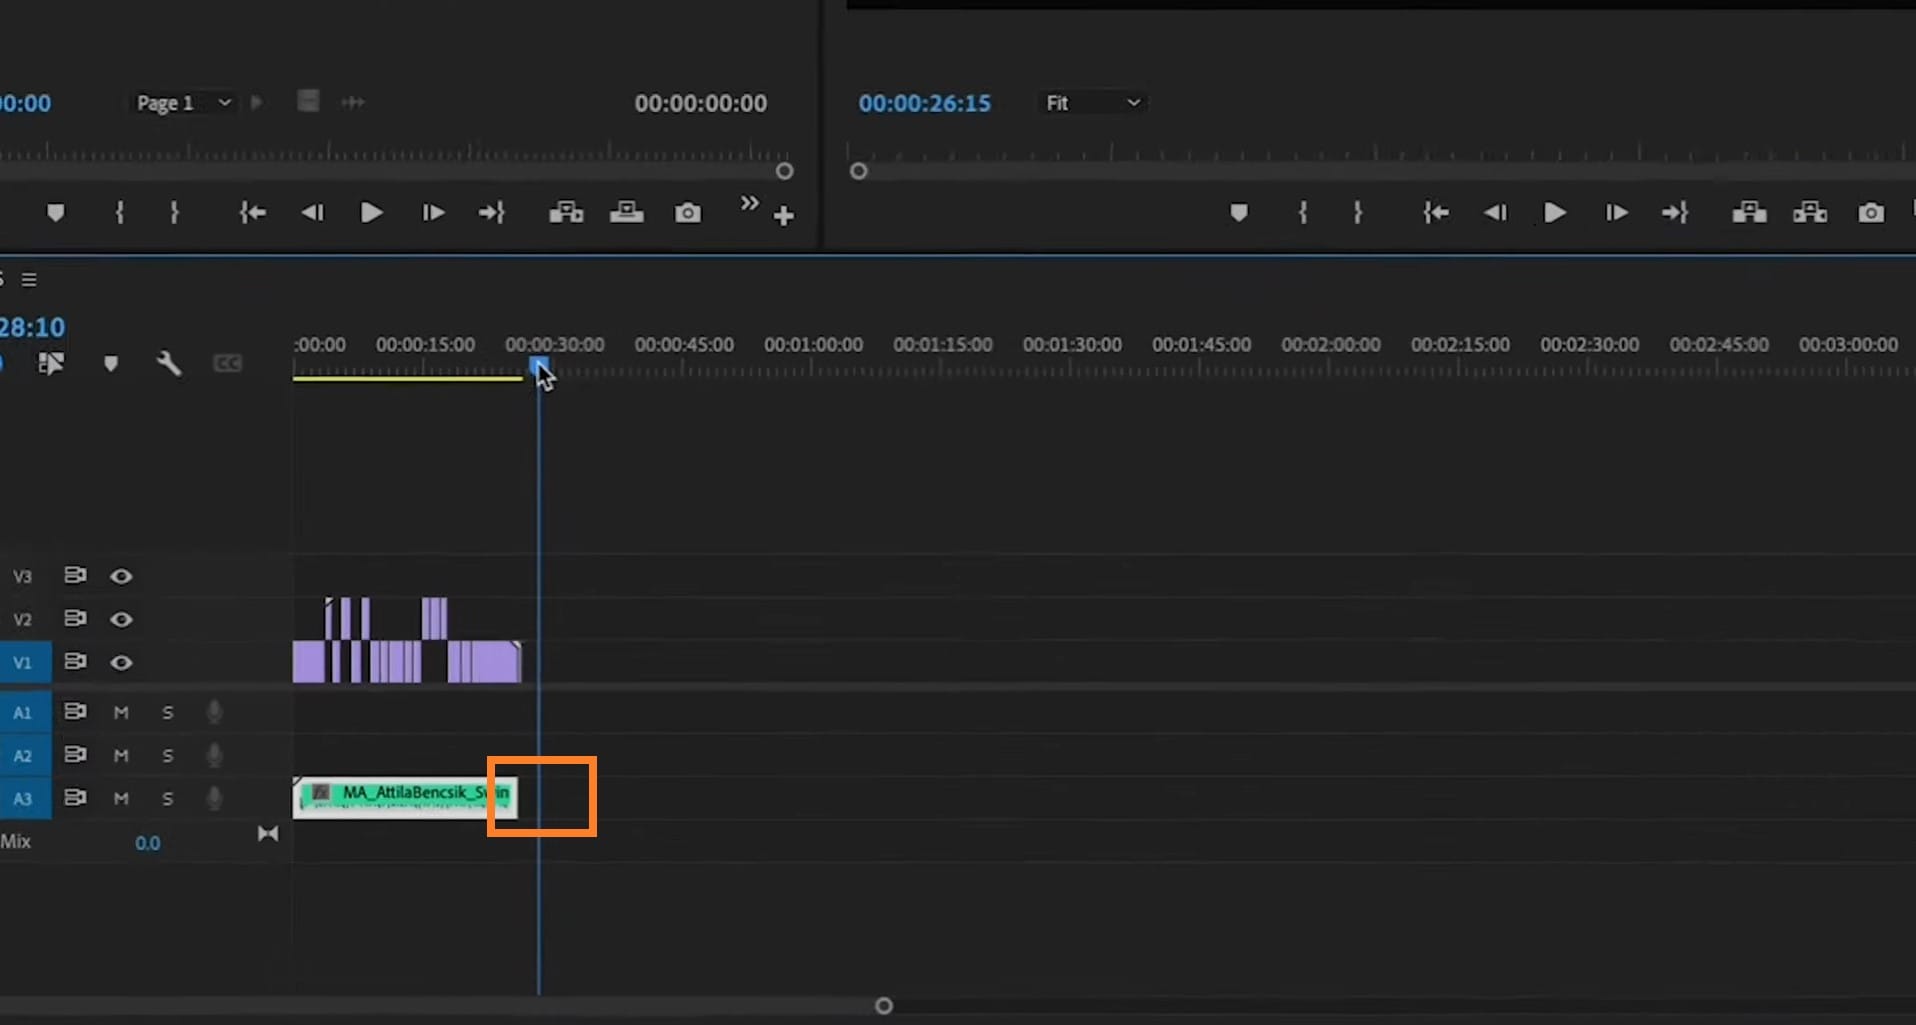
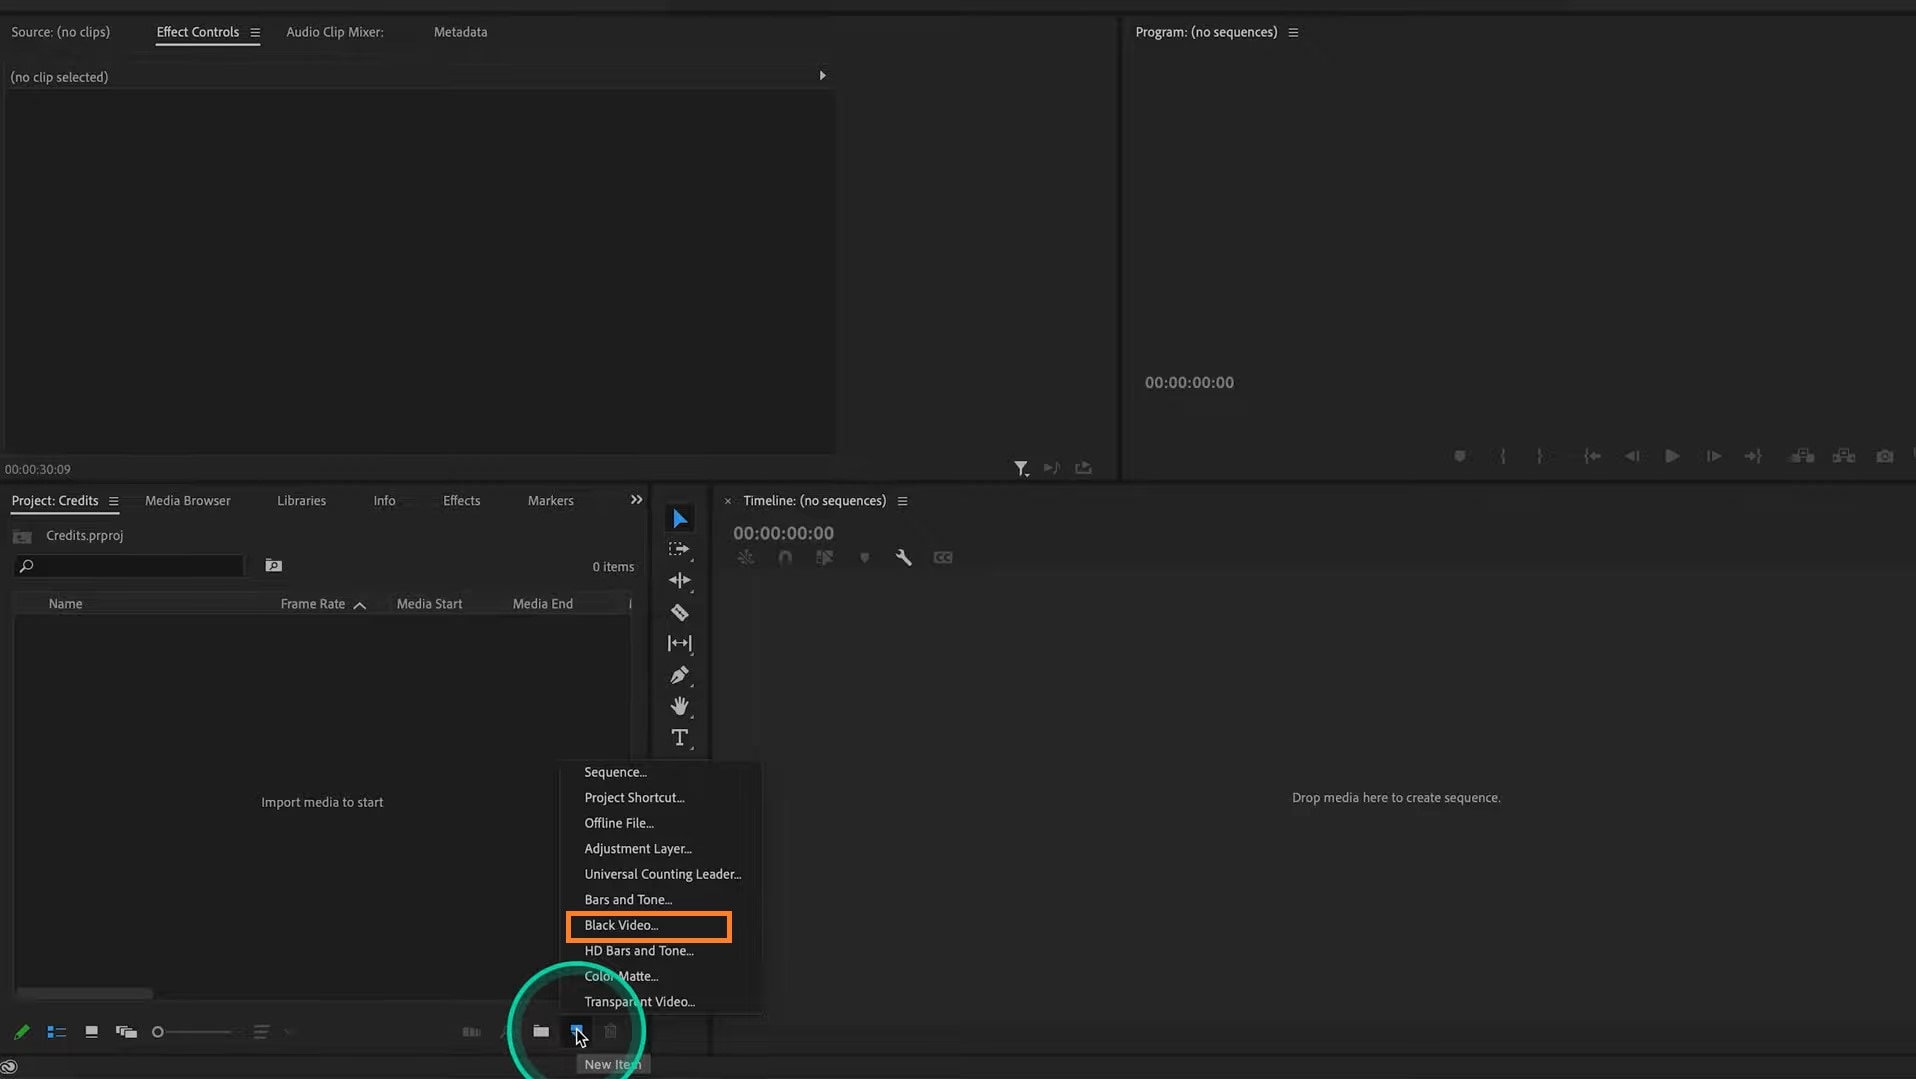
Alternatively, click on the New Item icon on the project panel. If you can't find the icon, simply expand your project pane (or just right-click your project on the project panel). Click on New Item > Black Video. Then click Ok. The black video will appear on the project panel. Drag and drop it after your video on the timeline.
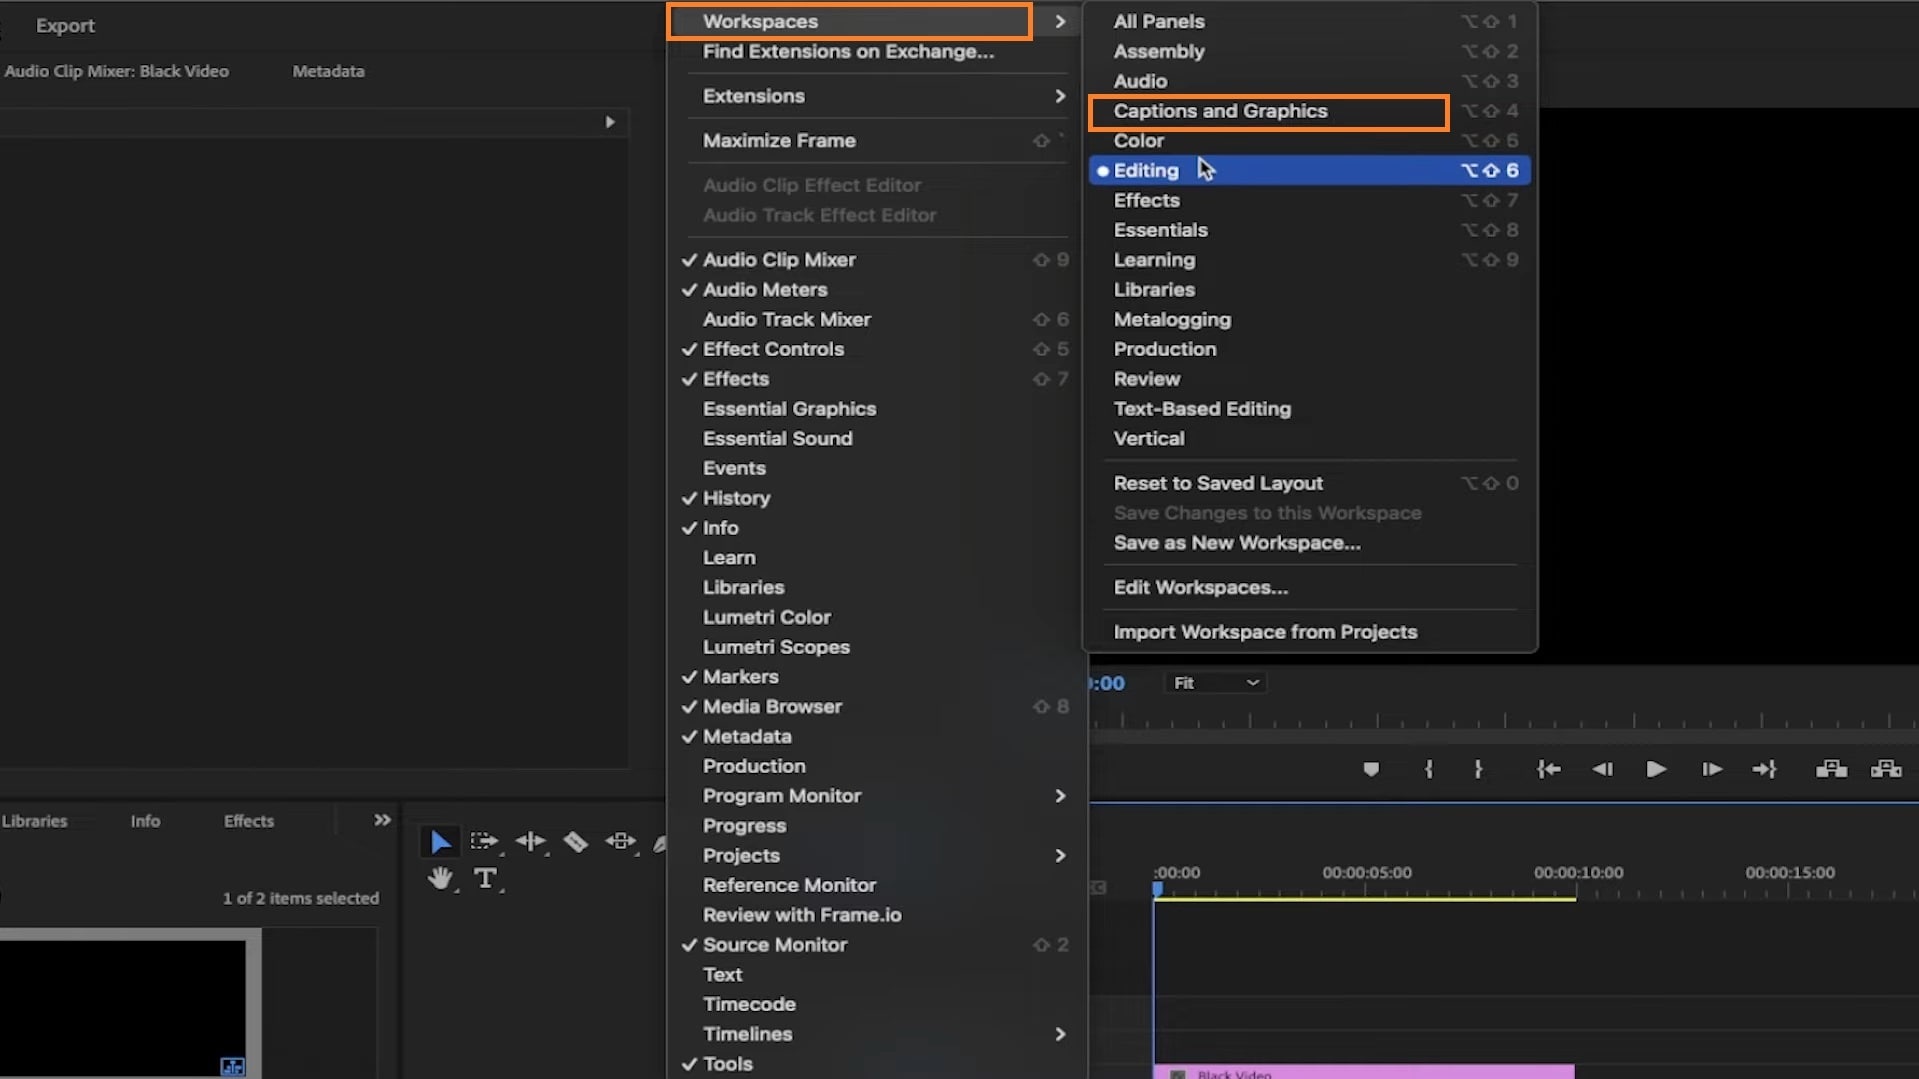
After this, go to the toolbar at the top of your screen. Click on Windows > Workspace > Captions and Graphics to change your workspace from the default setting. This will enable you to use graphic tools on Premiere Pro.
Once all this is set, go ahead and create your scrolling credit using any of these methods.
Method 1: Use Essential Graphics
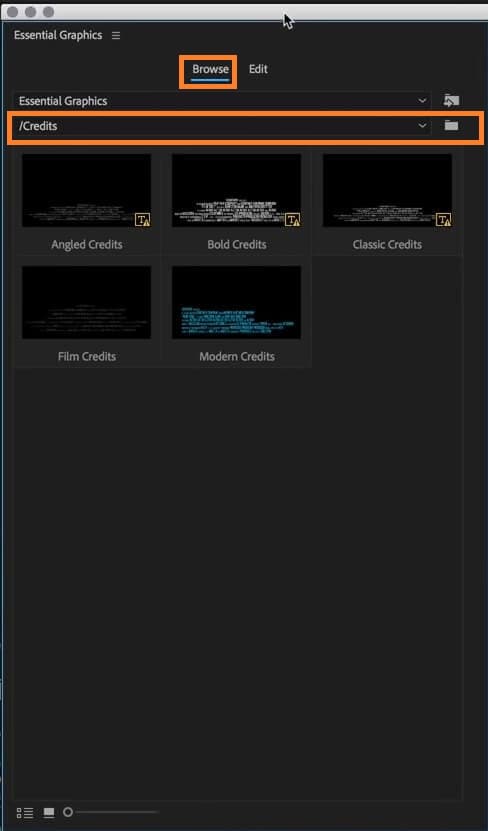
Once you have activated Captions and Graphics, you will notice the Essential Graphics panel to the right of your screen. If you don't, click on Windows on the toolbar and make sure the Essential Graphics option is checked.

Step 1: Go to the Browse tab on the Essential Graphics panel and select the Credits folder on the drop-down menu. Choose your preferred credit roll format from the options and drag and drop it on the timeline.
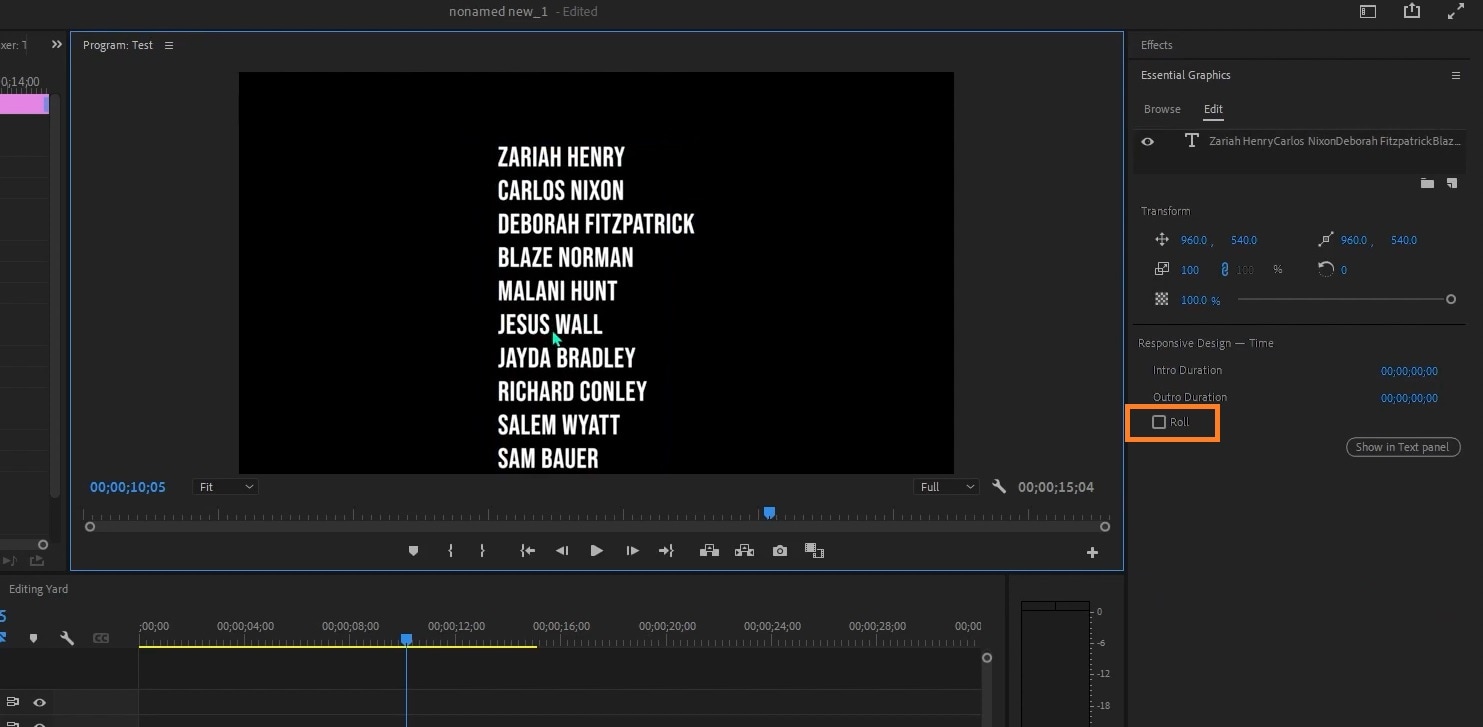
Step 2: To edit the credit template, switch to the Edits tab on the Essential Graphics panel and edit your text as needed.
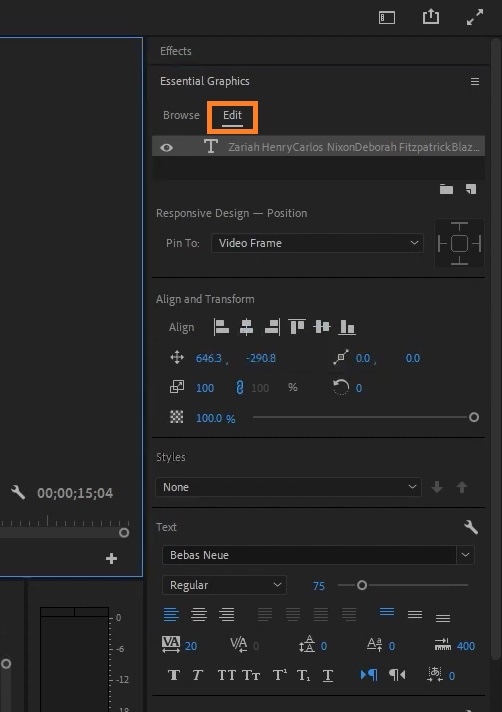
Step 3: Once you are done editing the text, click the Roll box to enable rolling credits. Play around with other editing options on the Responsive Design segment to customize your text according to your preferences.
Method 2: Use the Text Tool
Step 1: Select the Text Tool on the dashboard (or T on your keyboard) and click anywhere on the preview screen to start typing your credits.
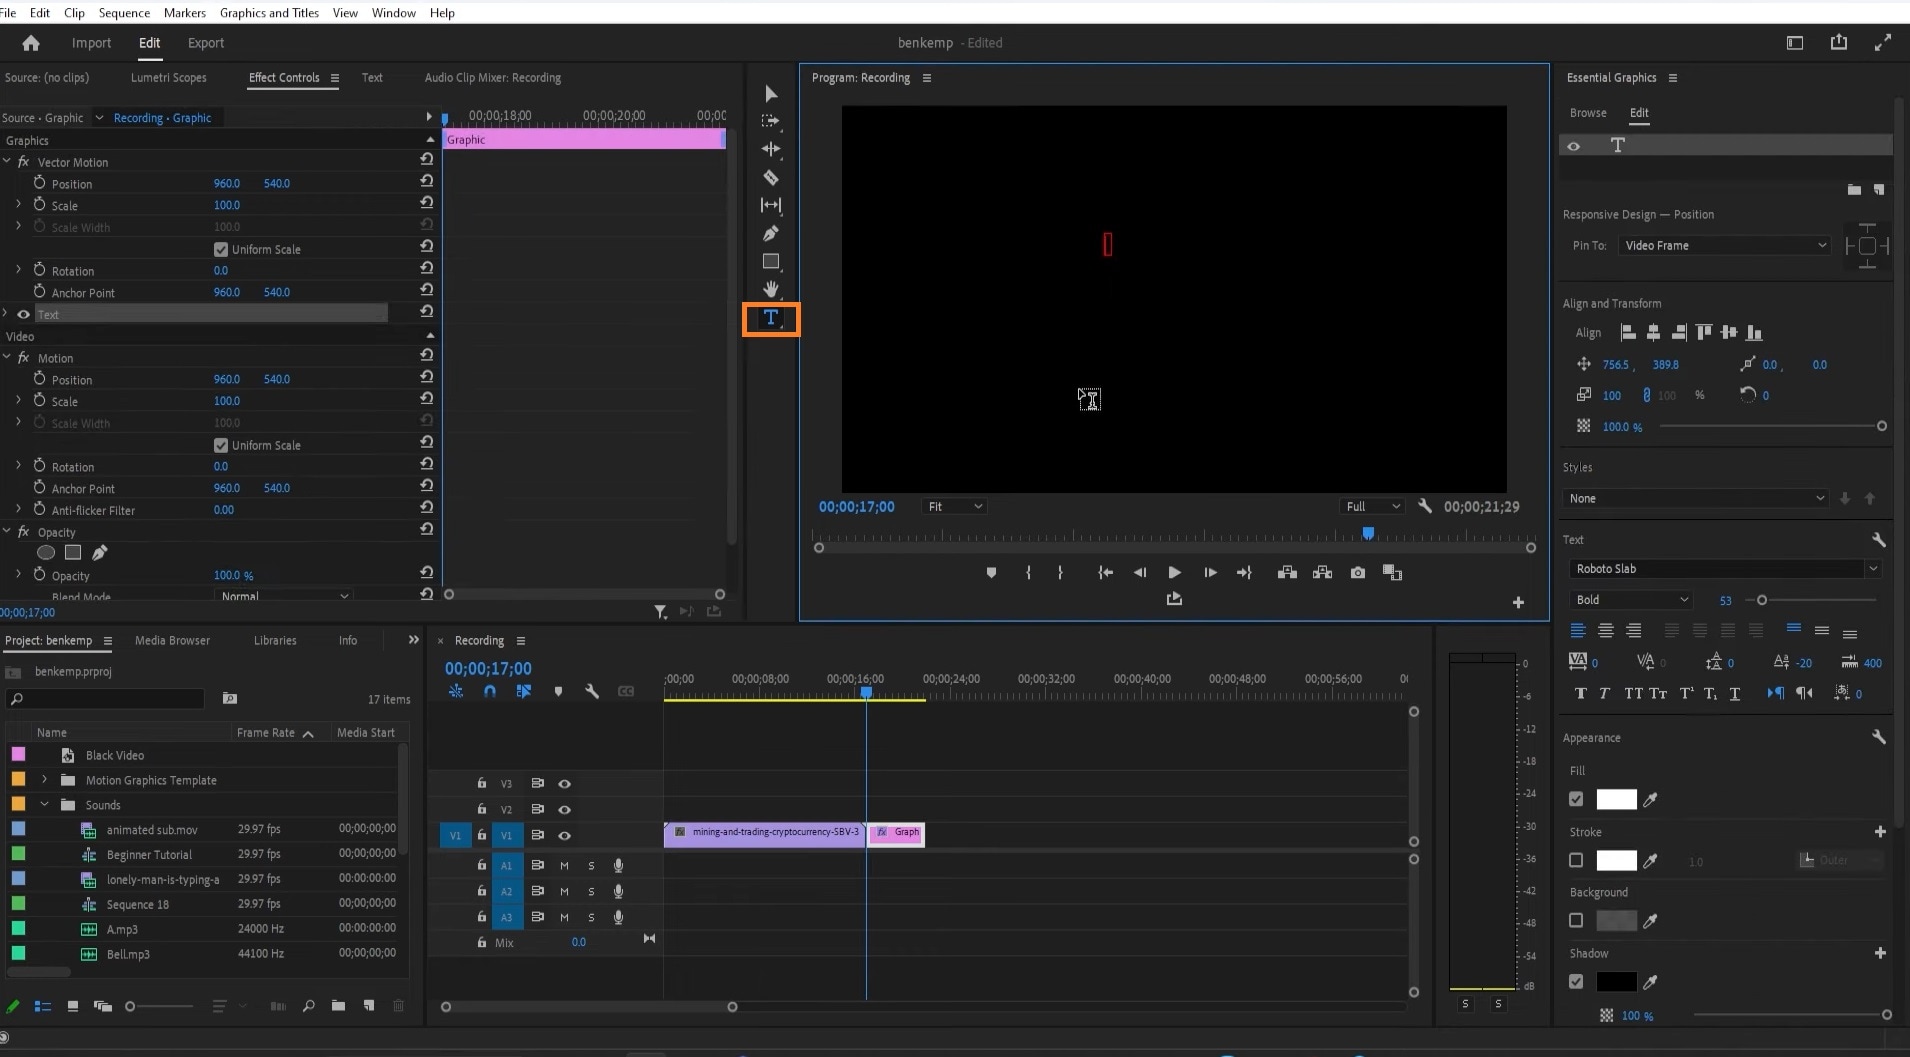
Step 2: Next, use the Selection Tool to reposition your test on the screen. Adjust your texts using the Align and Transform options on the Edit tab in the Essential Graphics panel.
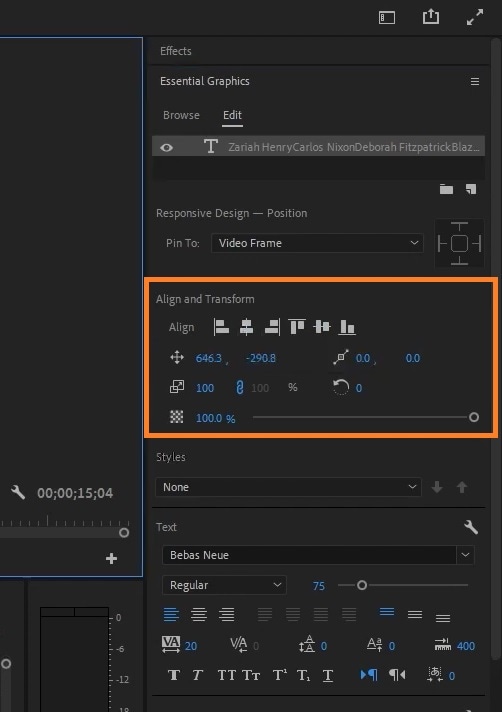
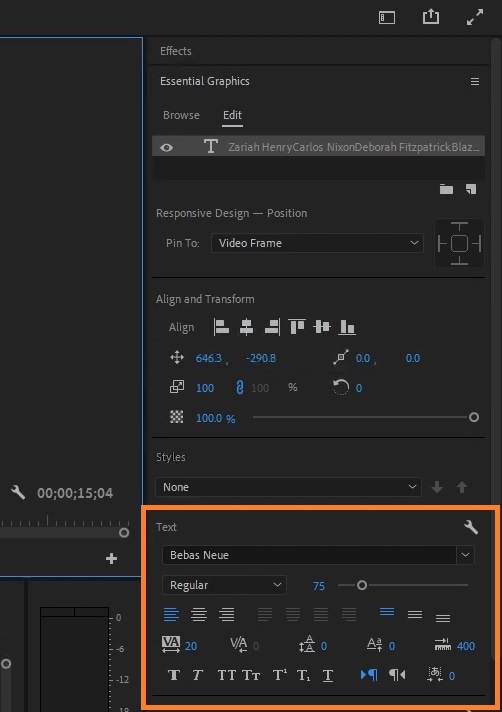
You can also change your text font, type, size, and alignment on this Edit tab.
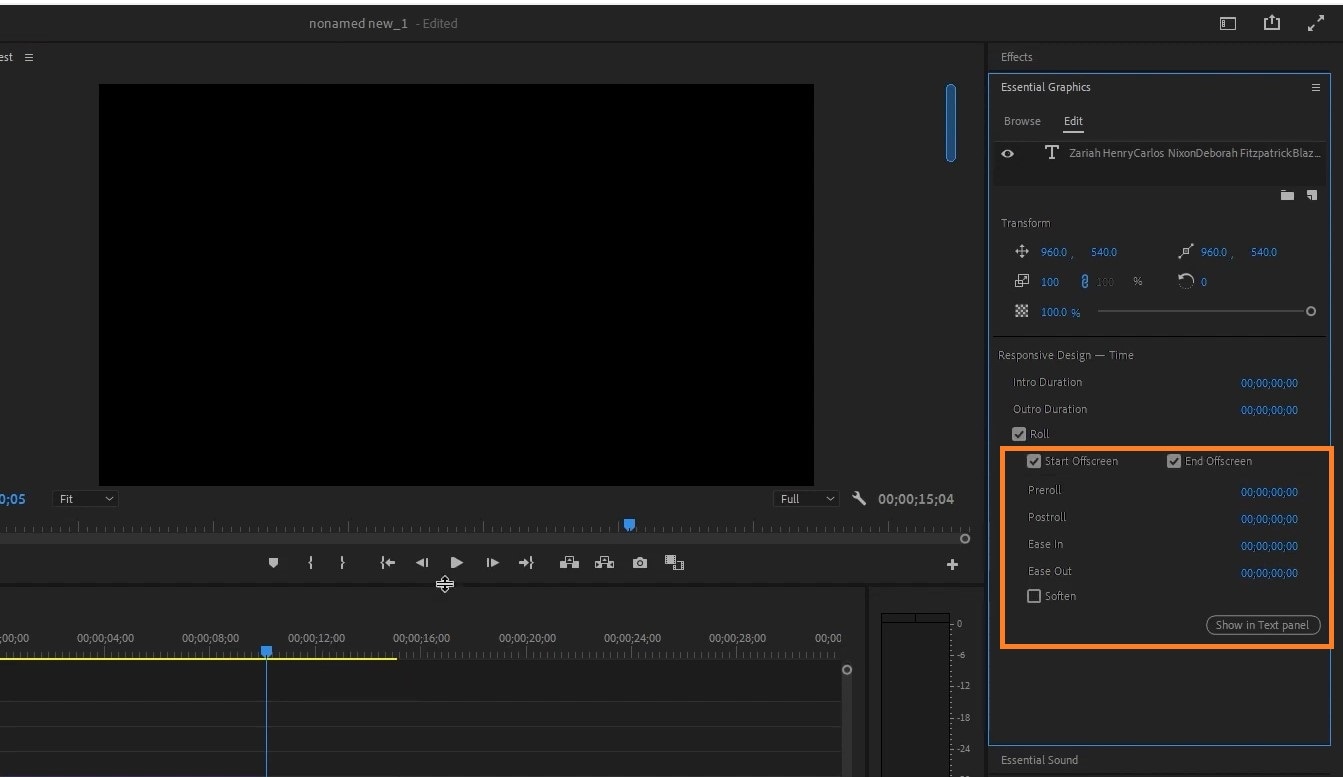
Step 3: Select outside of the text box to deselect the text. Then click on Roll on the Edit tab. This will activate the roll effect.
Customize your text by adjusting the Ease in, Ease out, Preroll, and Postroll time to your preference.
Method 3: Animate an Image
To create scrolling credits using this method, first make sure your image is in PNG format.
Step 1: Import it into Premiere Pro, then drag and drop it on the timeline.
Step 2: Place the playhead at the beginning of the image on the timeline. On the preview screen, move the image so that the top of the image is at the bottom of the preview screen and set a Keyframe.
Step 3: Next, drag the image up so that the bottom of the image is at the top of the preview screen. Set another Keyframe.
Step 4: Place the playhead at the beginning of the still image and play the video to be sure the animation was done properly.
Tip 1: to change the speed of your scrolling text, simply increase or reduce the length of your text on the timeline. The longer your scrolling text, the slower it will roll, and vice versa.
Tip 2: To turn your scrolling credits into a template, Ctrl-Click or right-click on the text on the timeline, select Export as Motion Graphics Template, and save.
Part 2.More Accessible Way to Add and Edit End Credits with Filmora
Wondershare Filmora is a video editing software that allows you to create professional video edits on iOS, Android, Windows, and Mac. It has functionalities that go beyond the basic and conventional video editing—an example is this End Credits feature. Just like Adobe Premiere Pro end credits, Filmora end credits allow you to add cinema-standard scrolling credits to videos and films. You can choose to make your end credits scroll or to keep them static using any of the templates available on Filmora.
- Vast presets of end credits for quick selection.
- Control over how fast or slow the credits appear.
- Support layered with other video clips or images
- Edit the text in the credits to match the video's theme.
- Real-time previews of how the end credits will look.


Filmora VS. Adobe Premiere Pro: Who's Best for End Credits Creation
Filmora is more user-friendly for quick and easy-end credits, while Premiere Pro provides extensive options for detailed and dynamic credit sequences. The choice between the two depends on the user's experience level and the complexity of the project.
| Feature/Aspect | Wondershare Filmora | Adobe Premiere Pro |
| Ease of Use | ||
| Adding Credits | Quick process using preset titles; easy to implement. | Involves multiple steps; requires selection from various title templates. |
| Customization Options | Basic customization for fonts, colors, and styles; limited advanced options. | Extensive customization options, including animations, shadows, and effects. |
| Animation | Limited to preset animations; less flexibility in creating custom animations. | Supports detailed keyframing for dynamic animations and scrolling credits. |
| Templates and Assets | Provides a variety of text templates specifically for credits; easy to use. | Fewer built-in templates; relies on user-created content and Adobe Stock for additional assets. |
| Previewing Credits | Real-time preview available; easy to see how credits will appear. | Real-time preview available, but may require rendering for complex animations. |
| Integration with Other Tools | Extensive text effects from Creative Assets and AI tools. | Integrates with Adobe After Effects for advanced title animations and effects. |
| Final Output Quality | High-quality output suitable for most projects; good for quick edits. | Industry-standard output quality, suitable for professional projects. |
| Target Audience | Ideal for beginners and casual users needing quick and easy credits. | Best for professional editors and filmmakers requiring detailed control and flexibility. |
Steps in Making End Credits in Filmora
Follow these steps to add scrolling credits to your videos using Filmora.
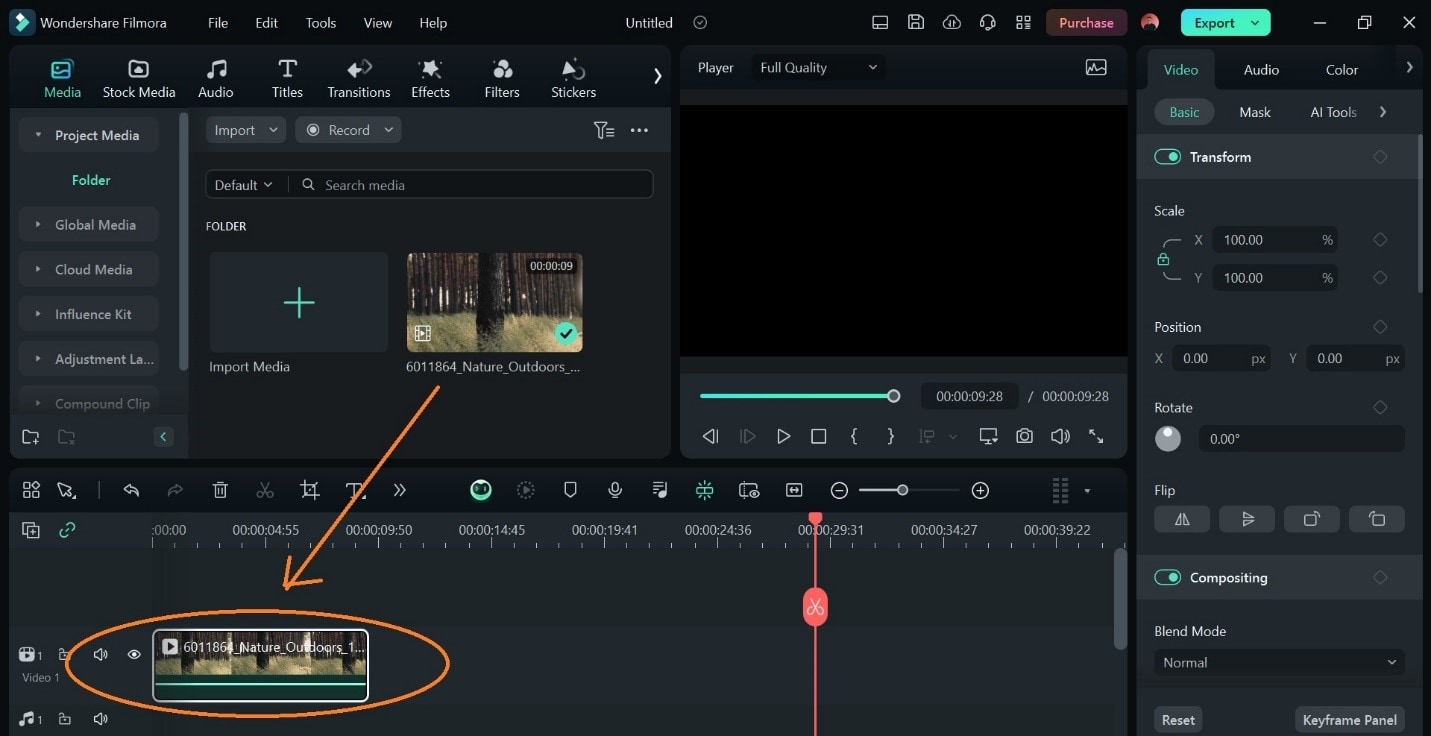
Step 1: Import your video clip to Filmora.
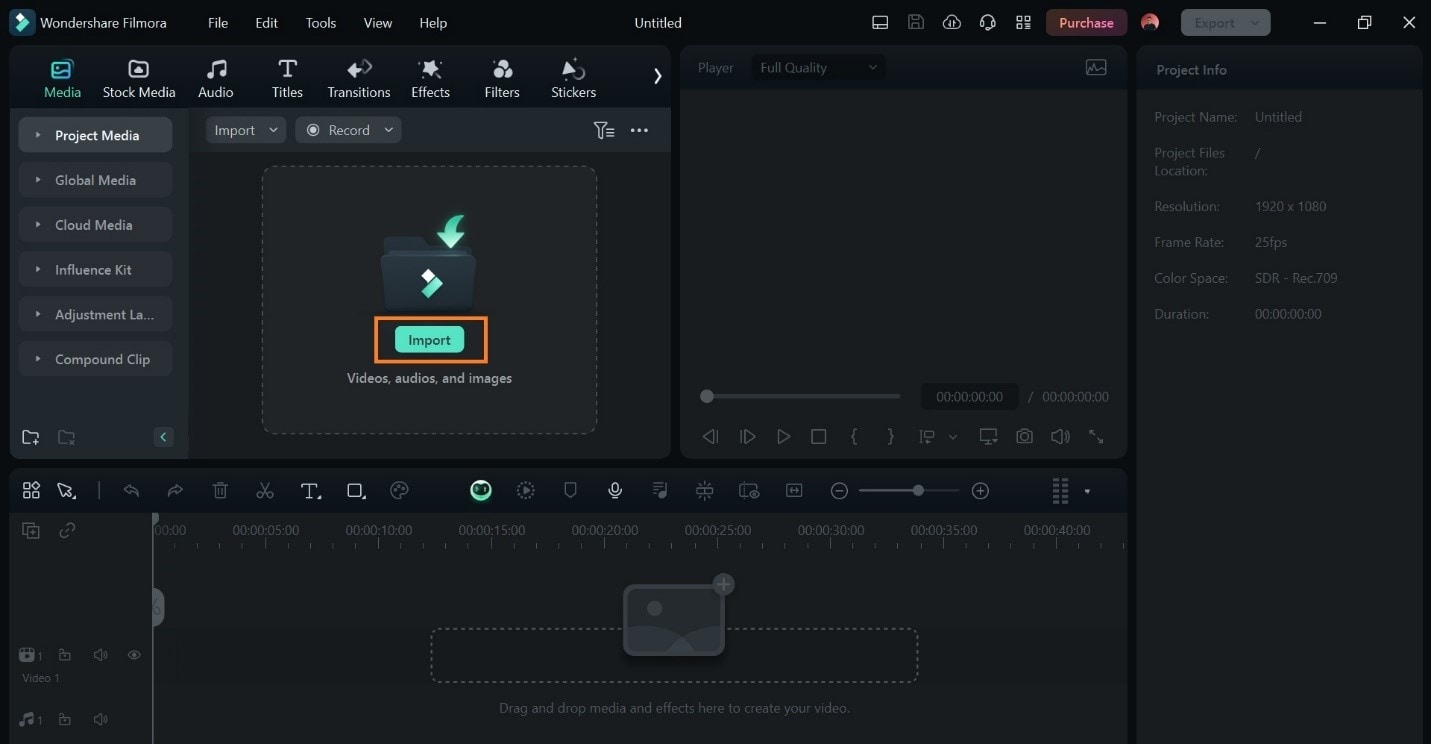
Step 2: Drag your video to the timeline.
Step 3: Click on Titles > Text Templates > End Credits. Scroll down the list of templates and select Credit 1; this will activate the scrolling template effect.
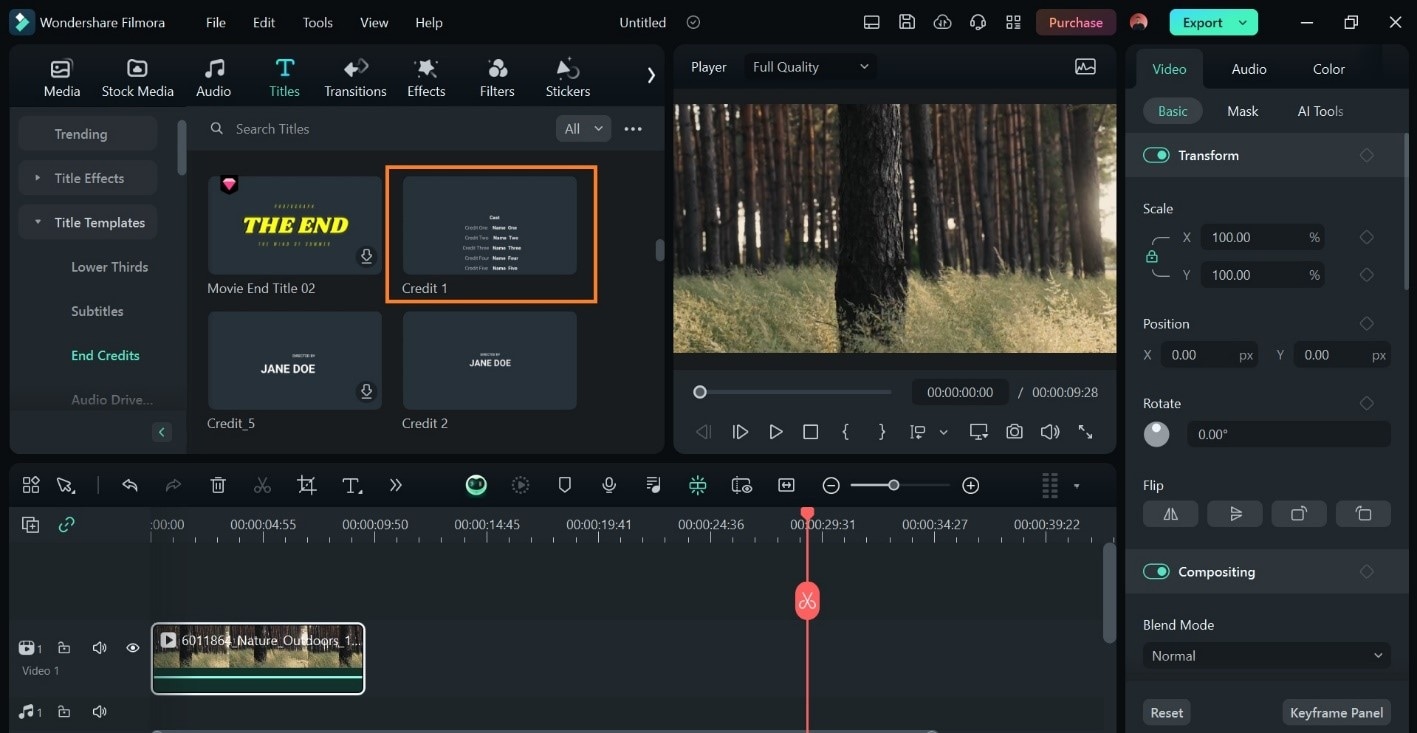
Choose from the list of templates available if you want to apply other kinds of end credits.
Step 4: Drag your selected template to the timeline. Place it after your video if you want your scrolling credits to scroll on a blank background. Make sure there is no blank spot between your video and the text template.
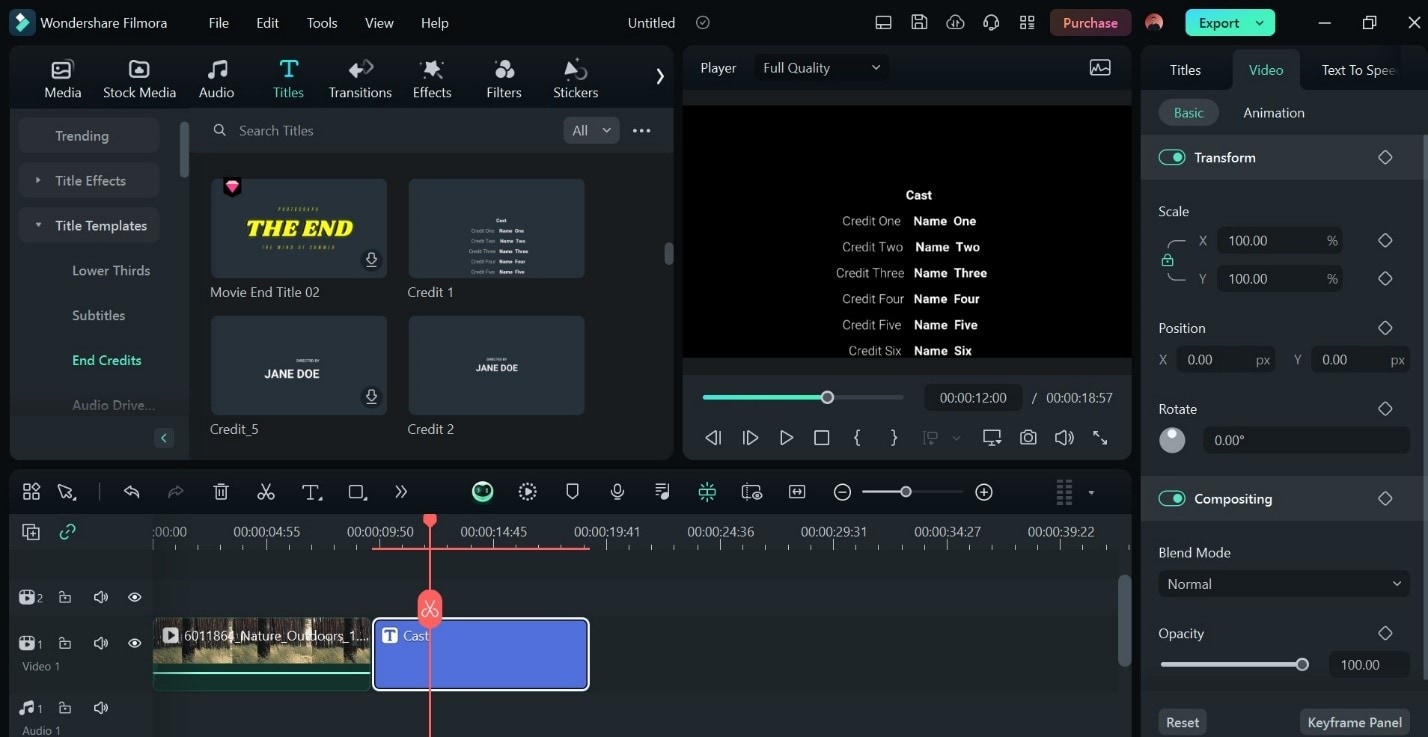
If you want your end credits over your video with your video in the background, place the text template just above your video clip on the timeline. Adjust its position to place it at the end of the video.

Note that the longer the text template is on the timeline, the slower the scrolling speed. Hence, adjust the length of your text template to adjust the speed of the scrolling text in your video.
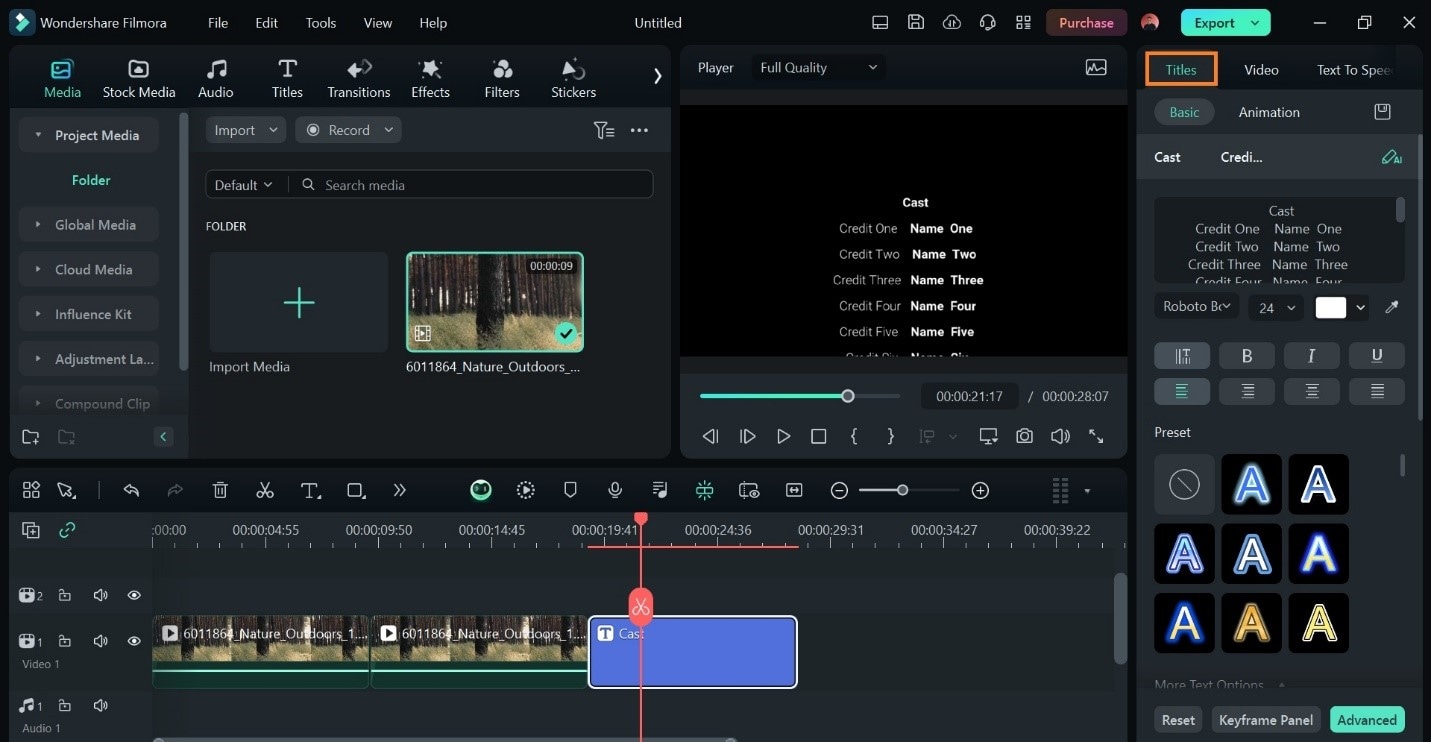
Step 5: Click on Titles > Basics on the editor panel to edit your credits. Edit the text, and adjust the font type, size, or color to suit your preference. Click on Advanced on the lower bottom left for more advanced text settings.
Part 3. Free Rolling Credit Templates
Rolling credit templates are predesigned scrolling texts that you can easily add to your videos on Premiere Pro. They typically contain placeholders that allow you to edit the content and add your credits. You can change the text font, color, and size of a template to suit your preference.

Using rolling credits streamlines the editing process, making it easier for you to create professional credit styles that do not advanced design skills. They acknowledge the cast and the production crew of a project.
Benefits of Rolling Credit Templates
- Saves time and reduces the need to design end credits from scratch
- Ensures consistency across all your projects
- Improves your creativity as a beginner and exposes you to new editing techniques
- Easy to customize and gives a professional finish to your video
- Most templates are available online for free.

To use rolling templates, import them onto Premiere Pro (or any editing software), edit the text, and adjust the font size or color to suit your project. Adobe, Mixit, and Envanto are some websites where you can get end credits Premiere Pro templates for free.
Conclusion
Adobe Premiere Pro end credits are an easy way to create scrolling texts in your film project. The key is mastering the tool and knowing how to format your text to match the theme of your film. Follow the steps in this article to master how to make credits roll in Premiere Pro easily.
