Drawing Tools for Mac
Wondershare Filmora has recently launched its drawing tools feature, providing users with a quick and easy option for making exceptional tutorial and news casting videos. While maintaining visual control, it helps users give emphasis on their video. Using different shapes including rectangle, arrow, triangle, circular or simple lines in your video, Filmora helps you bring a new outlook to your content.
Index
How To Adapt to Drawing Tools of Filmora Mac?
This guide provides a clear utility of the drawing tools in Filmora Mac, covering different scenarios to help you get a proper idea of what to achieve with this feature:
Way 1. Creating a Banner Using Filmora's Drawing Tool
Upon having an overview of drawing tools, let's learn how you can use them to create engaging banners for your video:
Step 1. Create a New Project
After downloading and installing the latest version of Wondershare Filmora, launch and choose the "New Project" button for navigating into the next window.

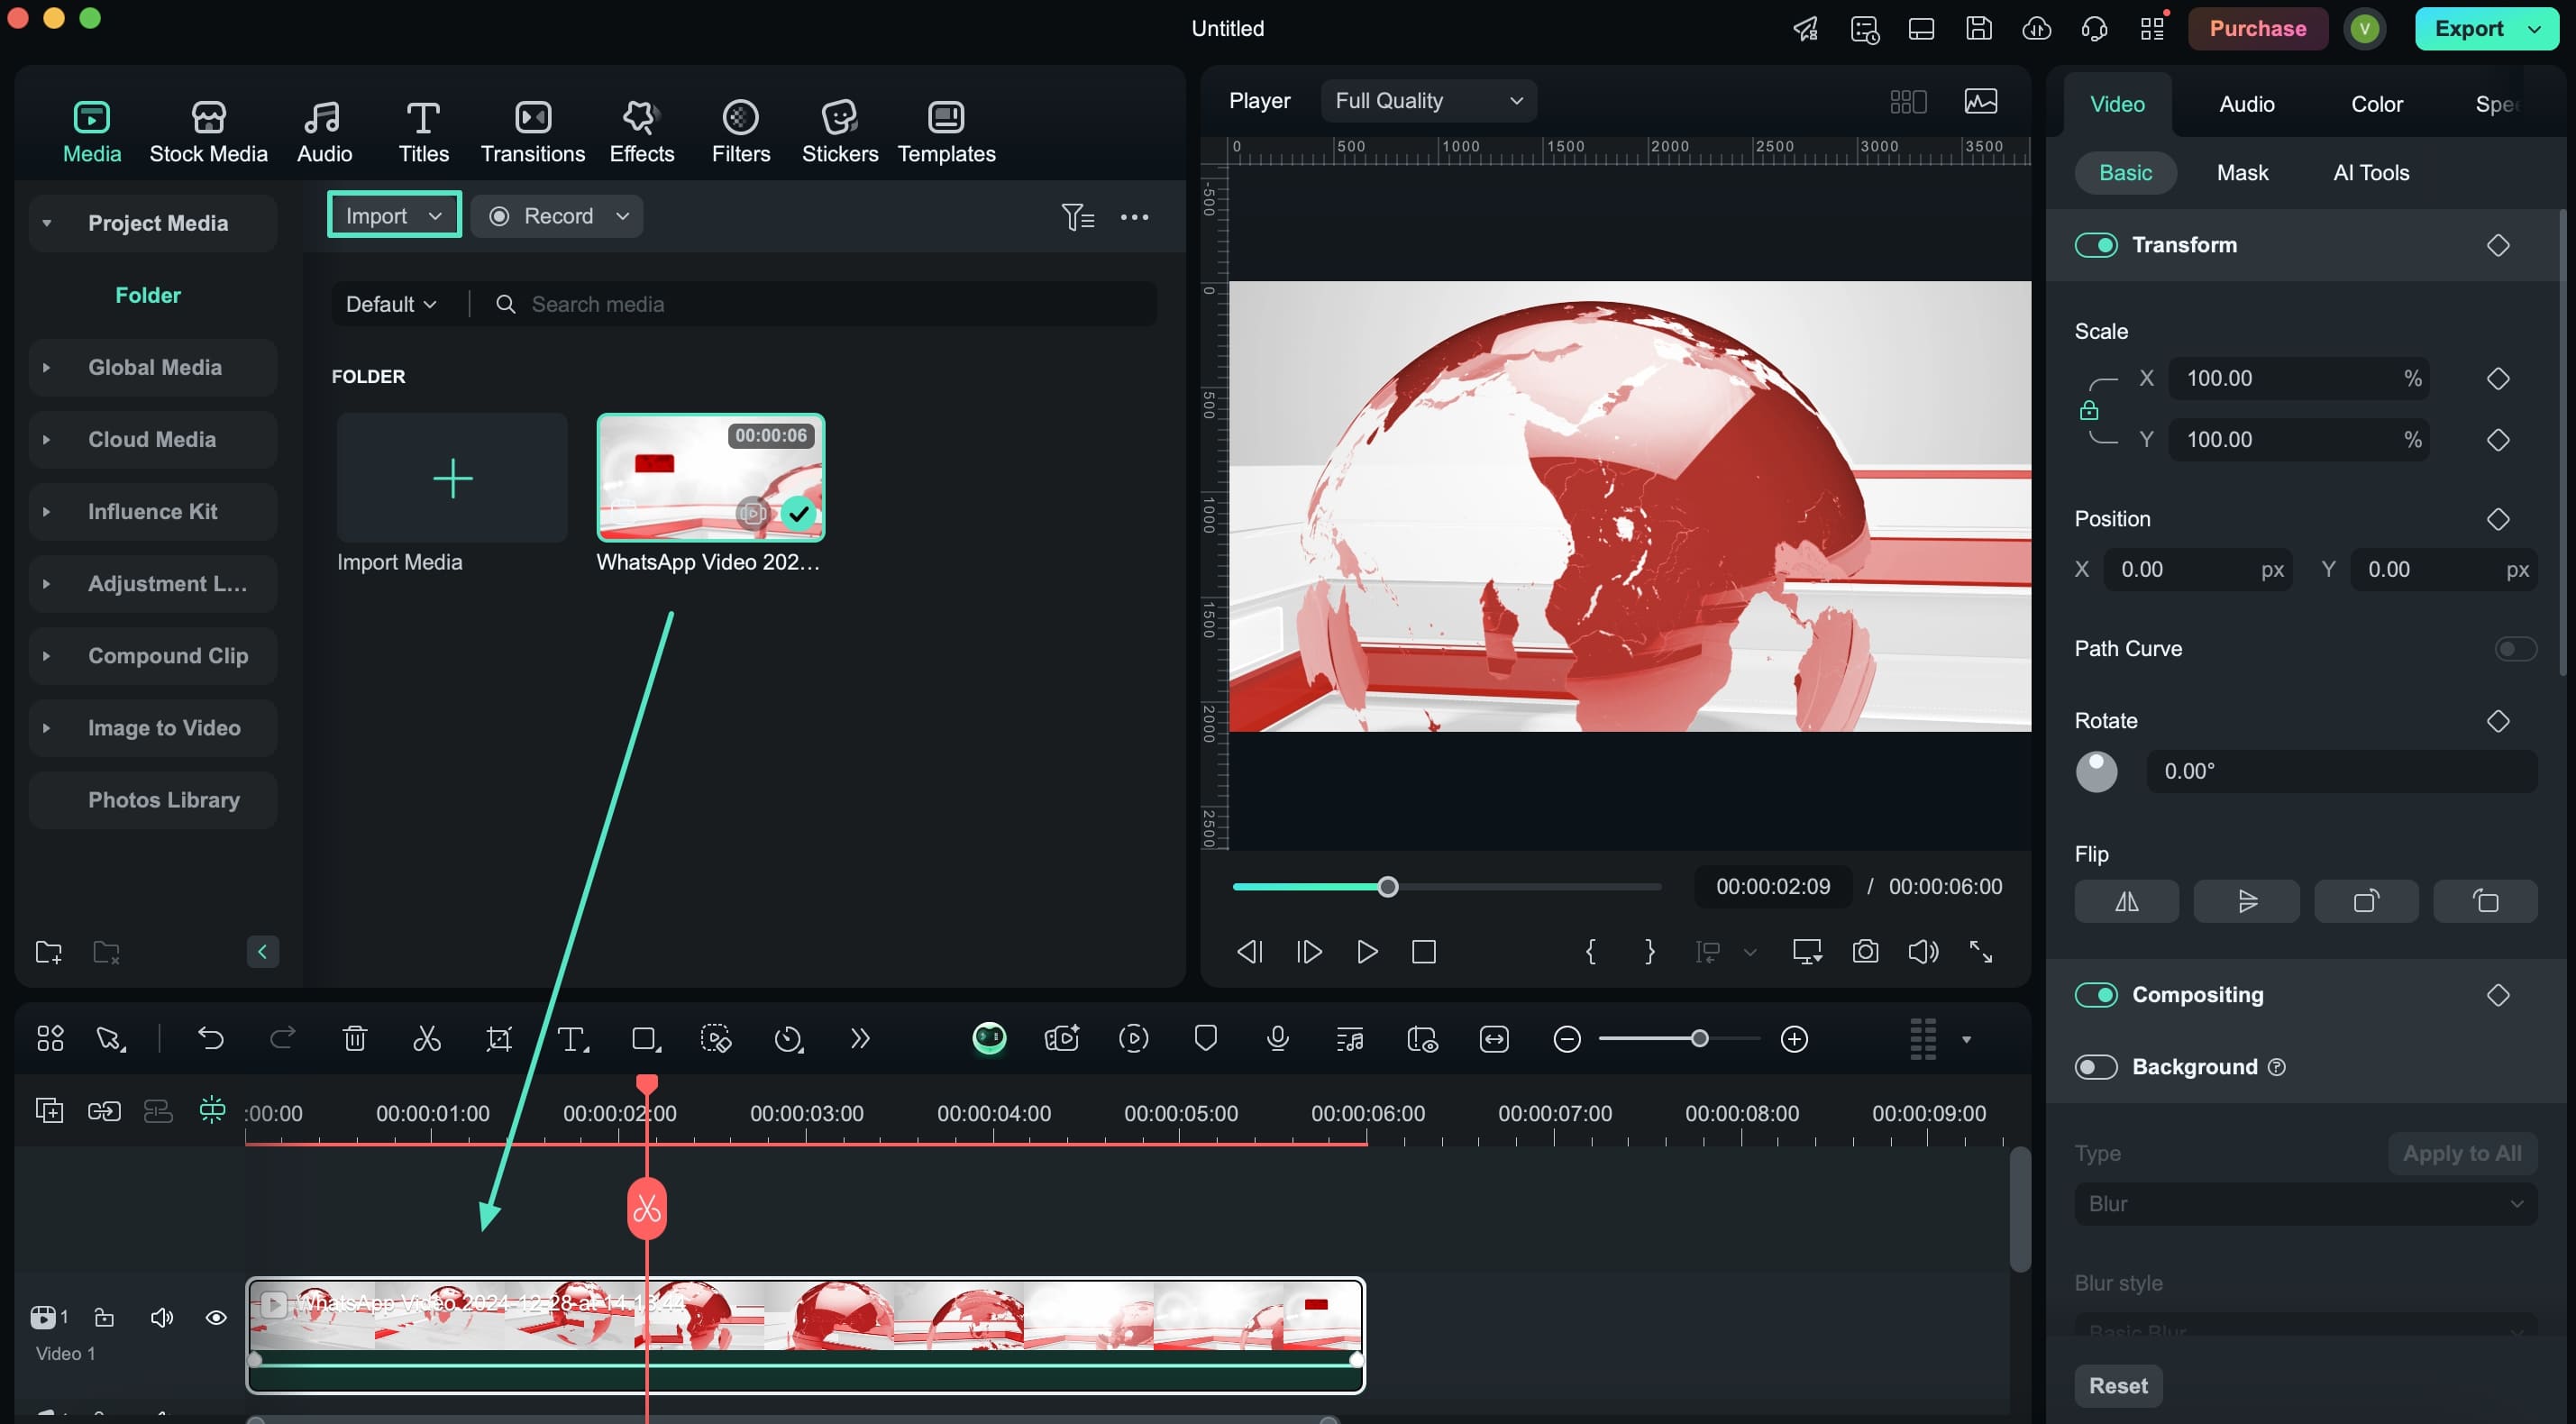
Step 2. Add Rectangle Shaped Element With Tool
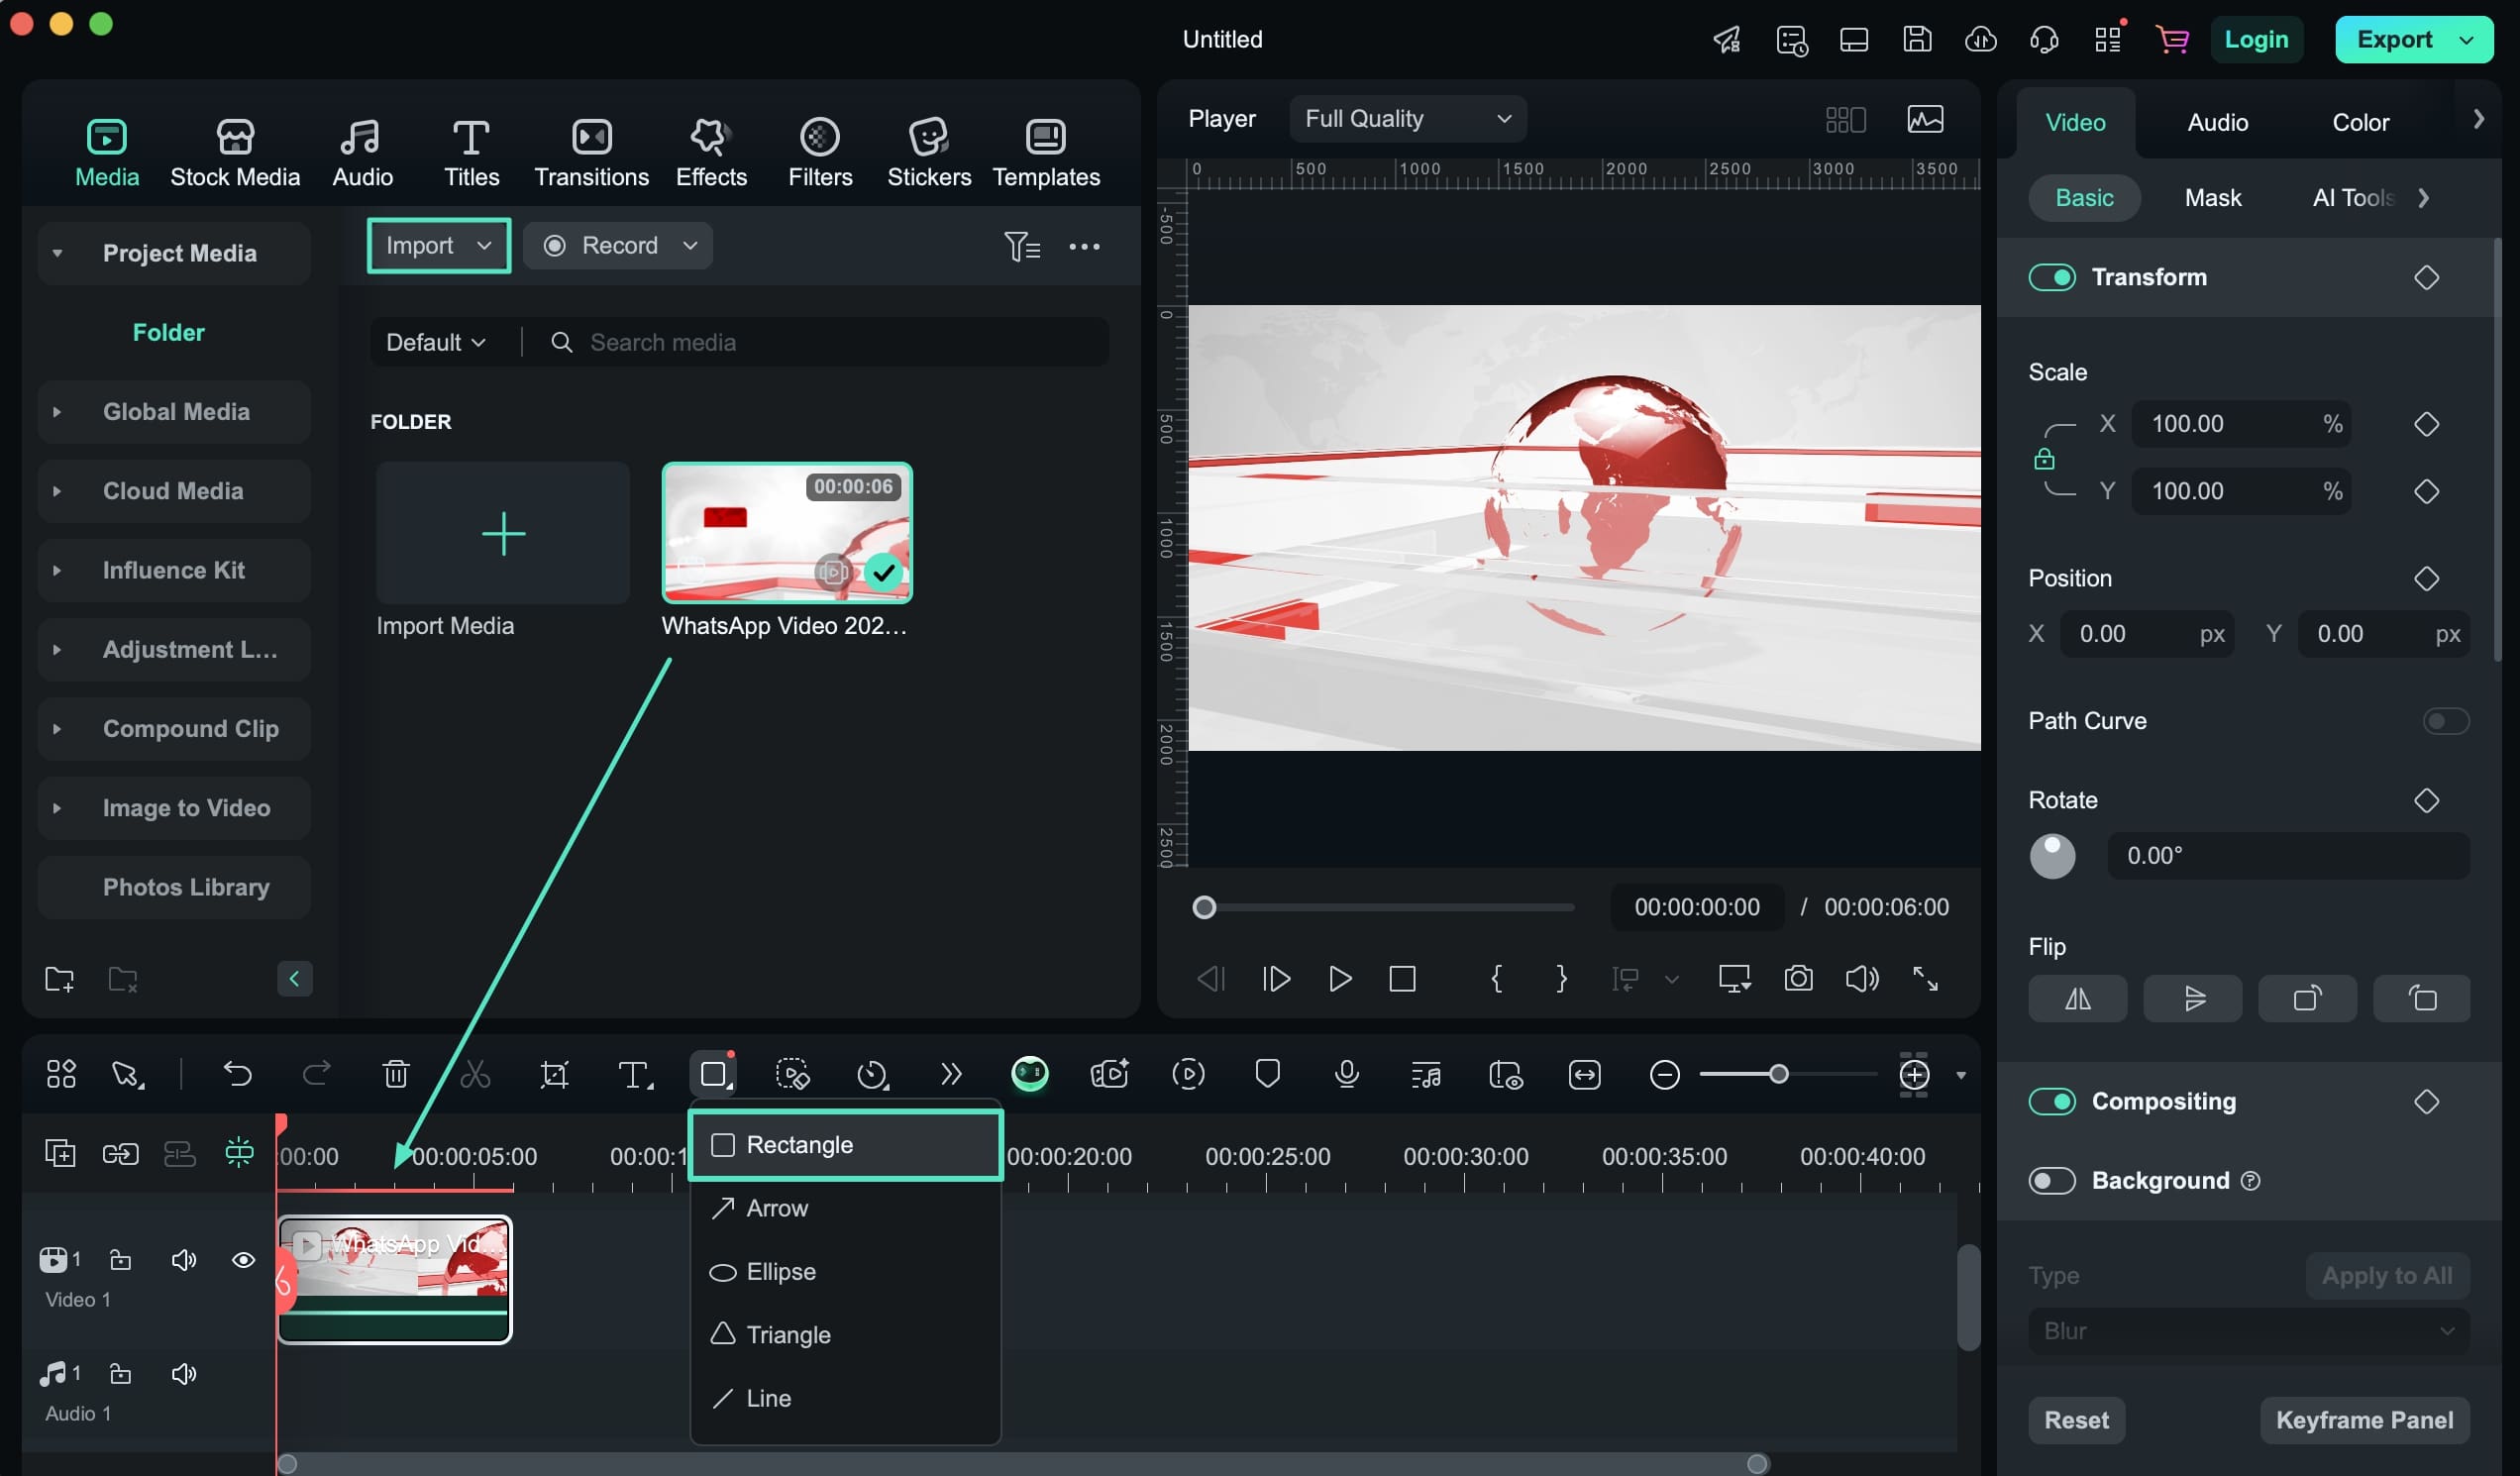
On opening the editing interface, lead to the "Import" button for adding the video that needs the banner. Drag and drop it to the timeline and navigate to the "Drawing Tools" menu present on the bar above the timeline. As a drop-down menu pops up, choose the "Rectangle" option for the available options.
Step 3. Fill The Rectangle With Proper Color
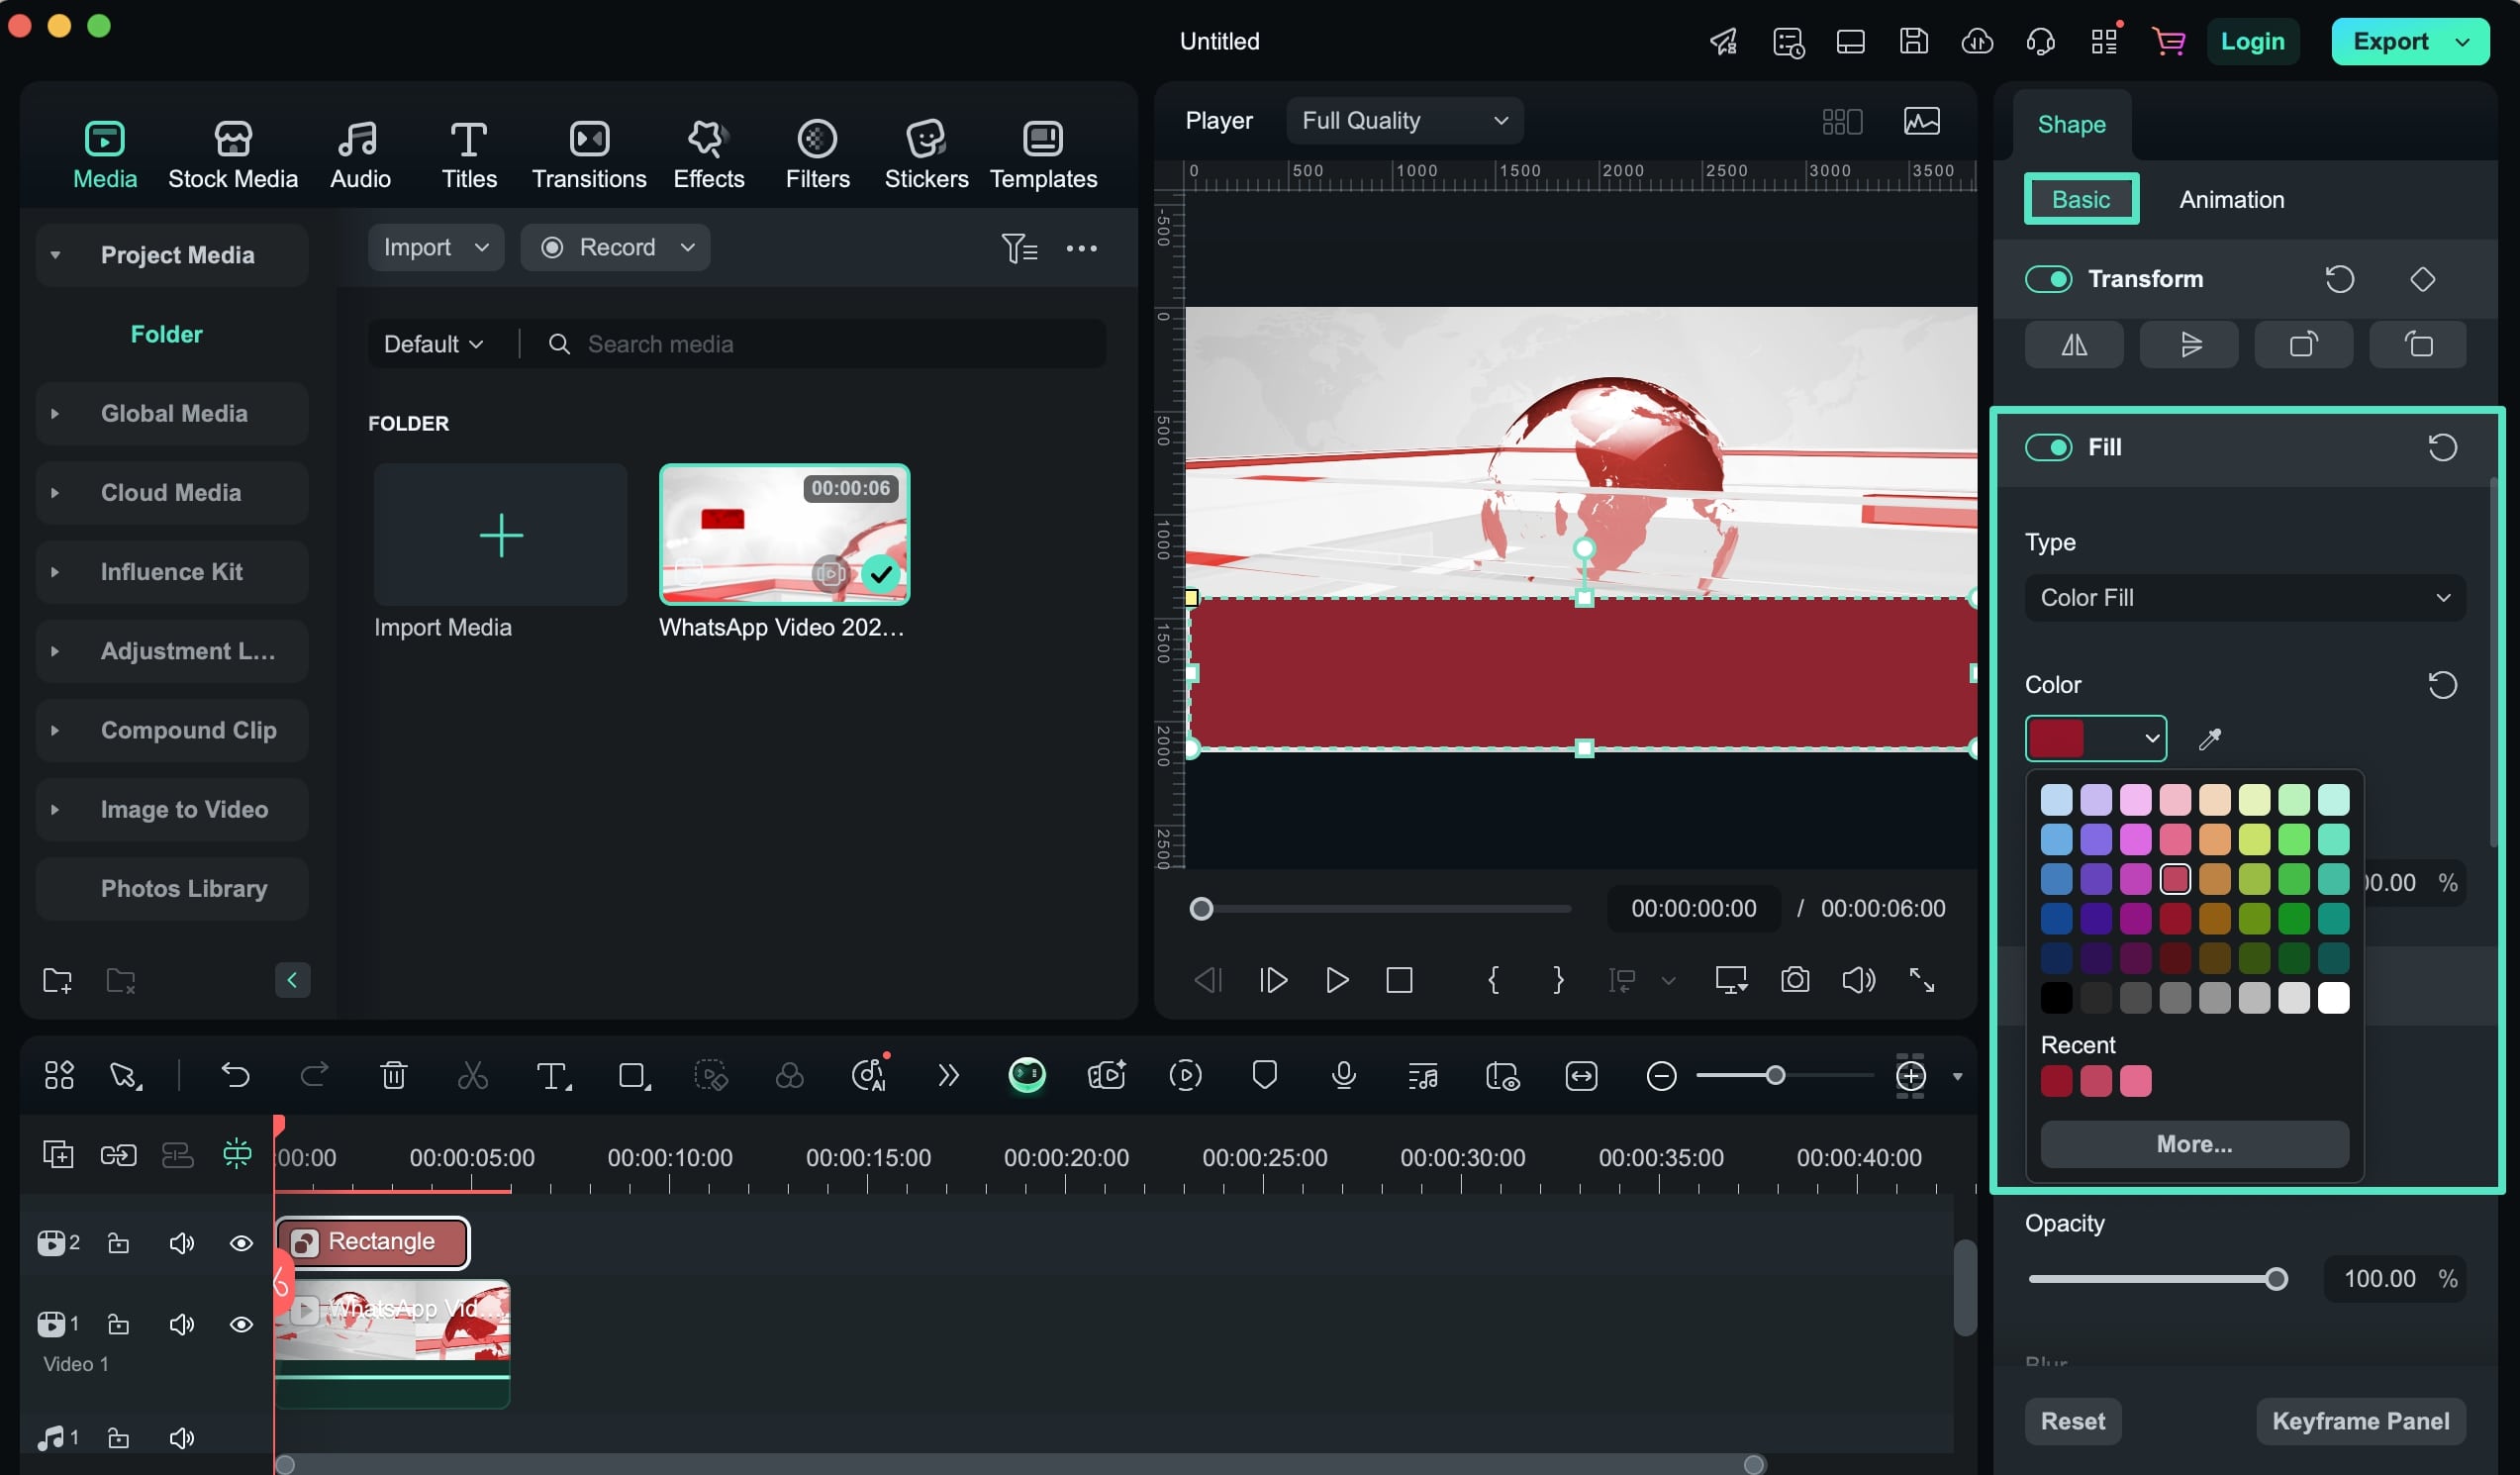
After drawing the shape onto the preview window, set its position by simply dragging it with your mouse. Look for the "Fill" section under the "Basic" settings and select a color that matches the video theme.
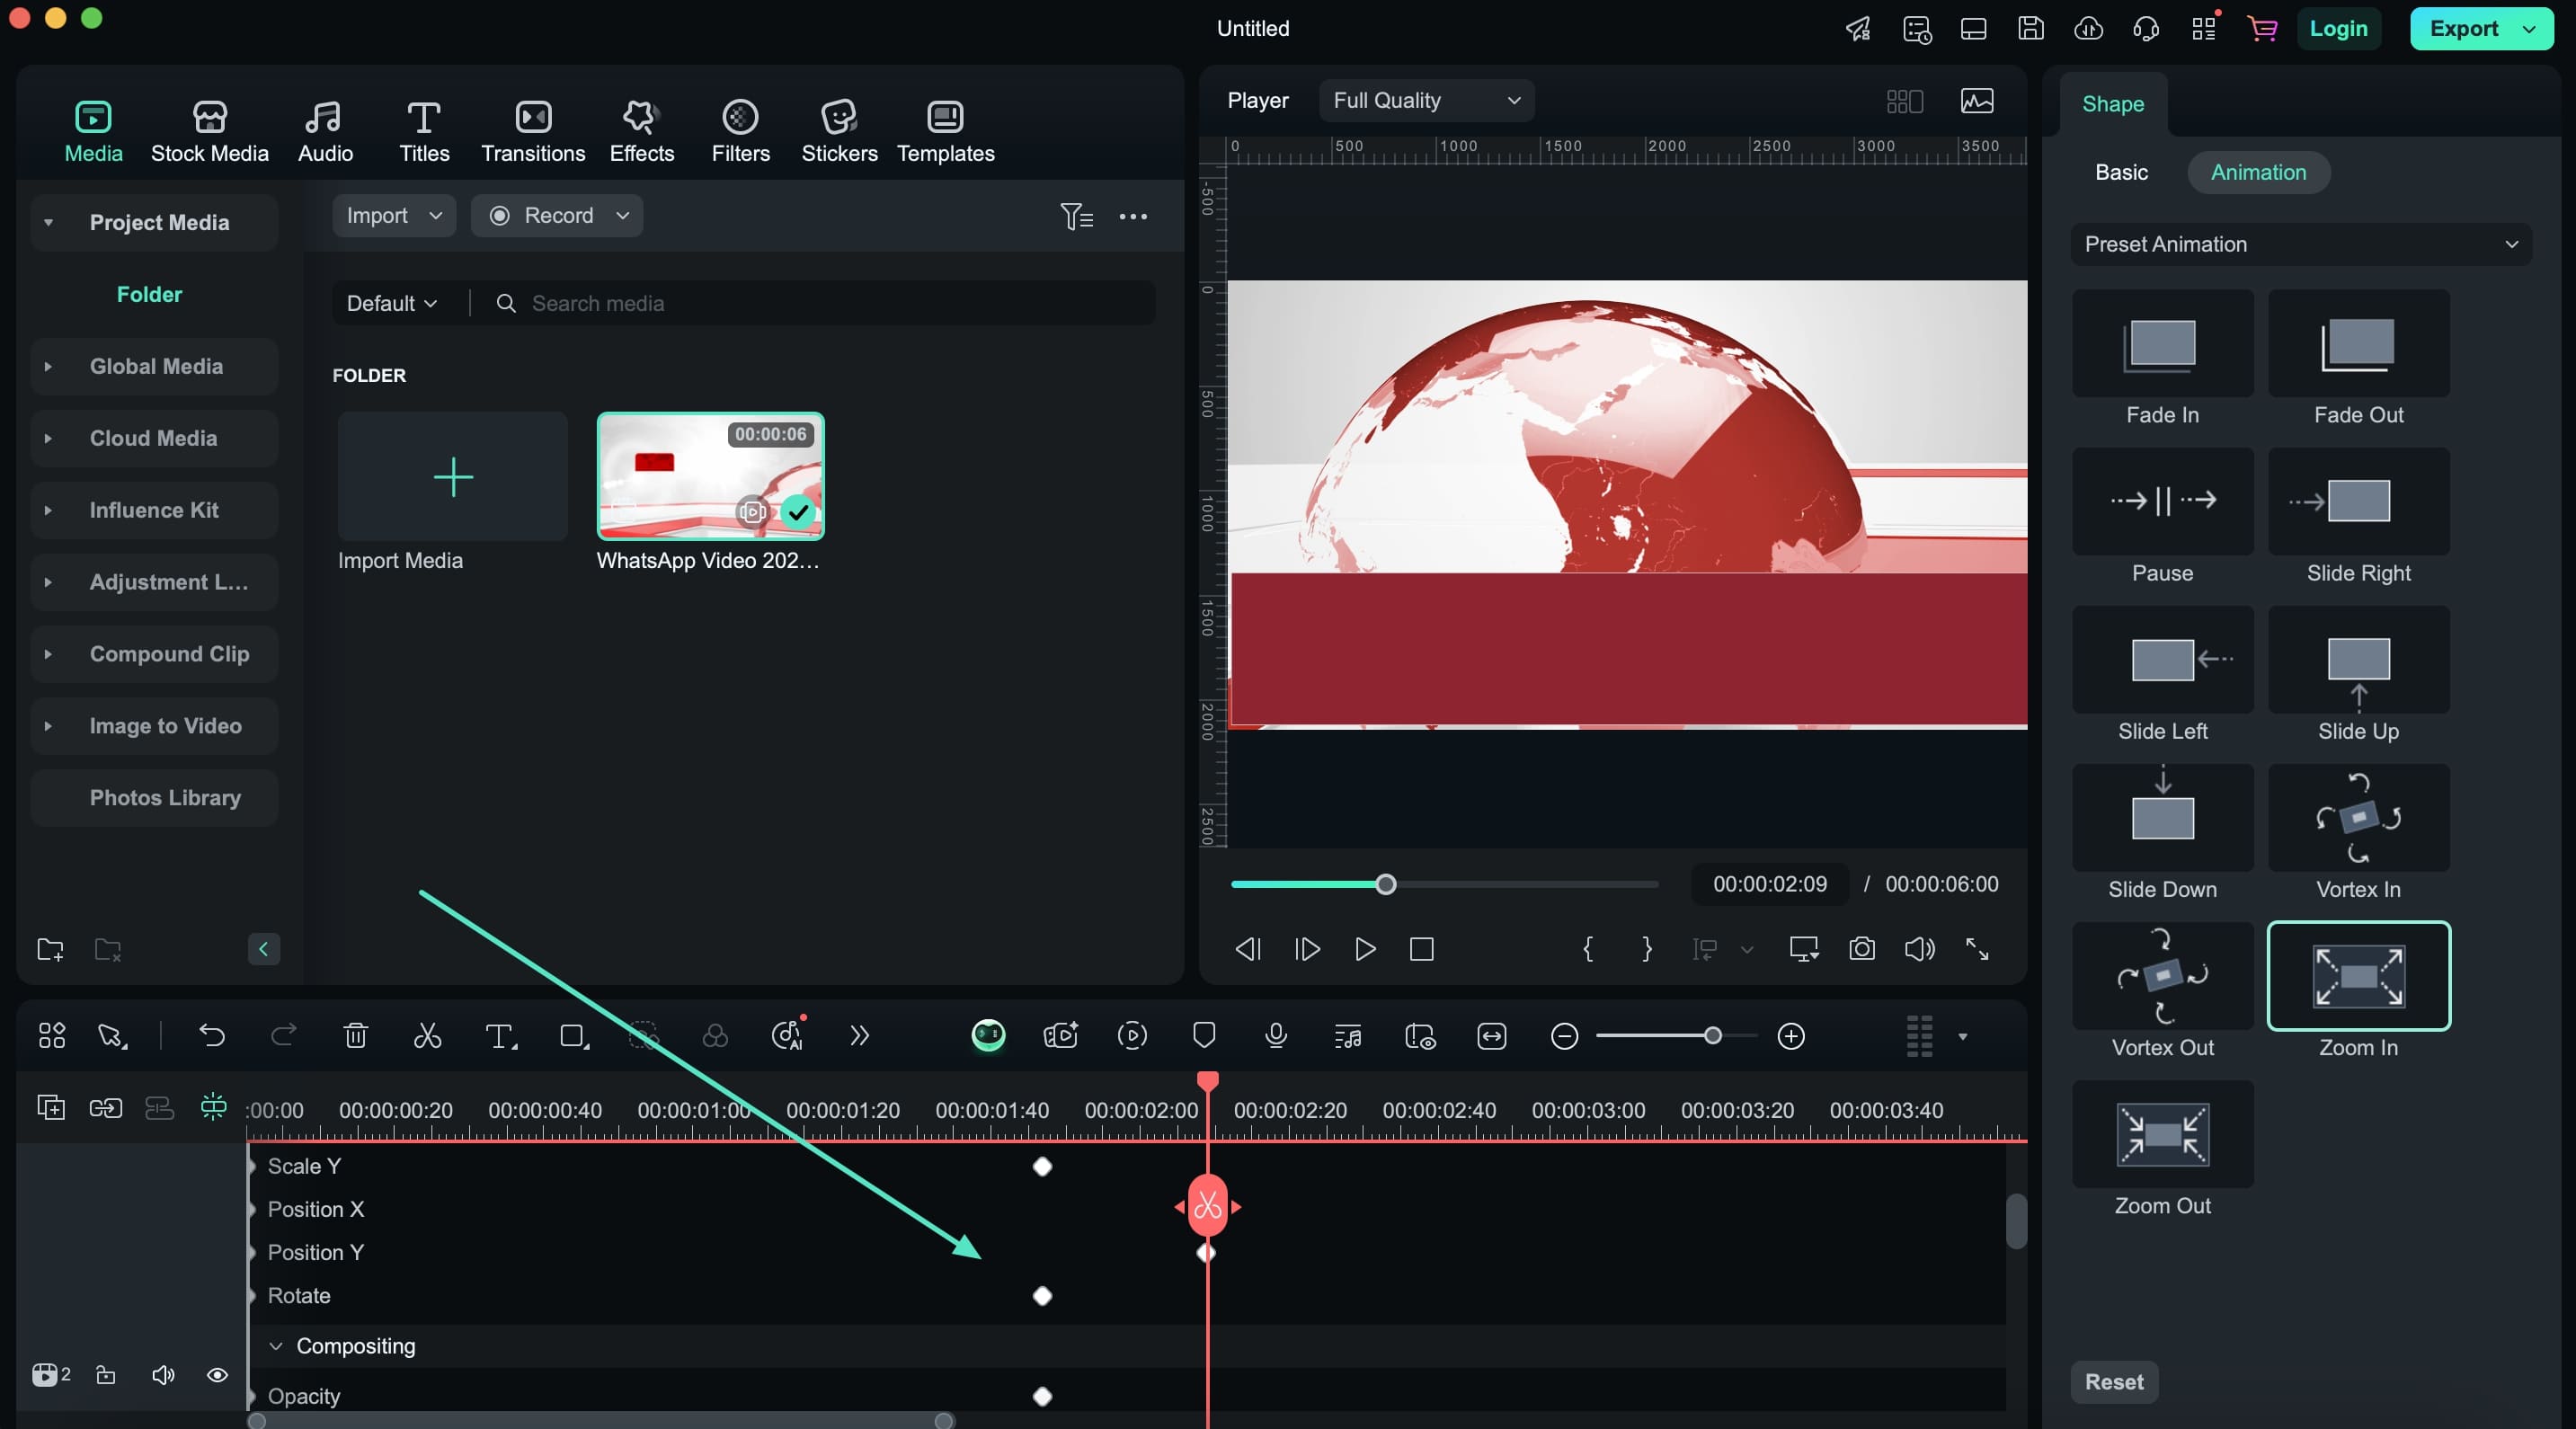
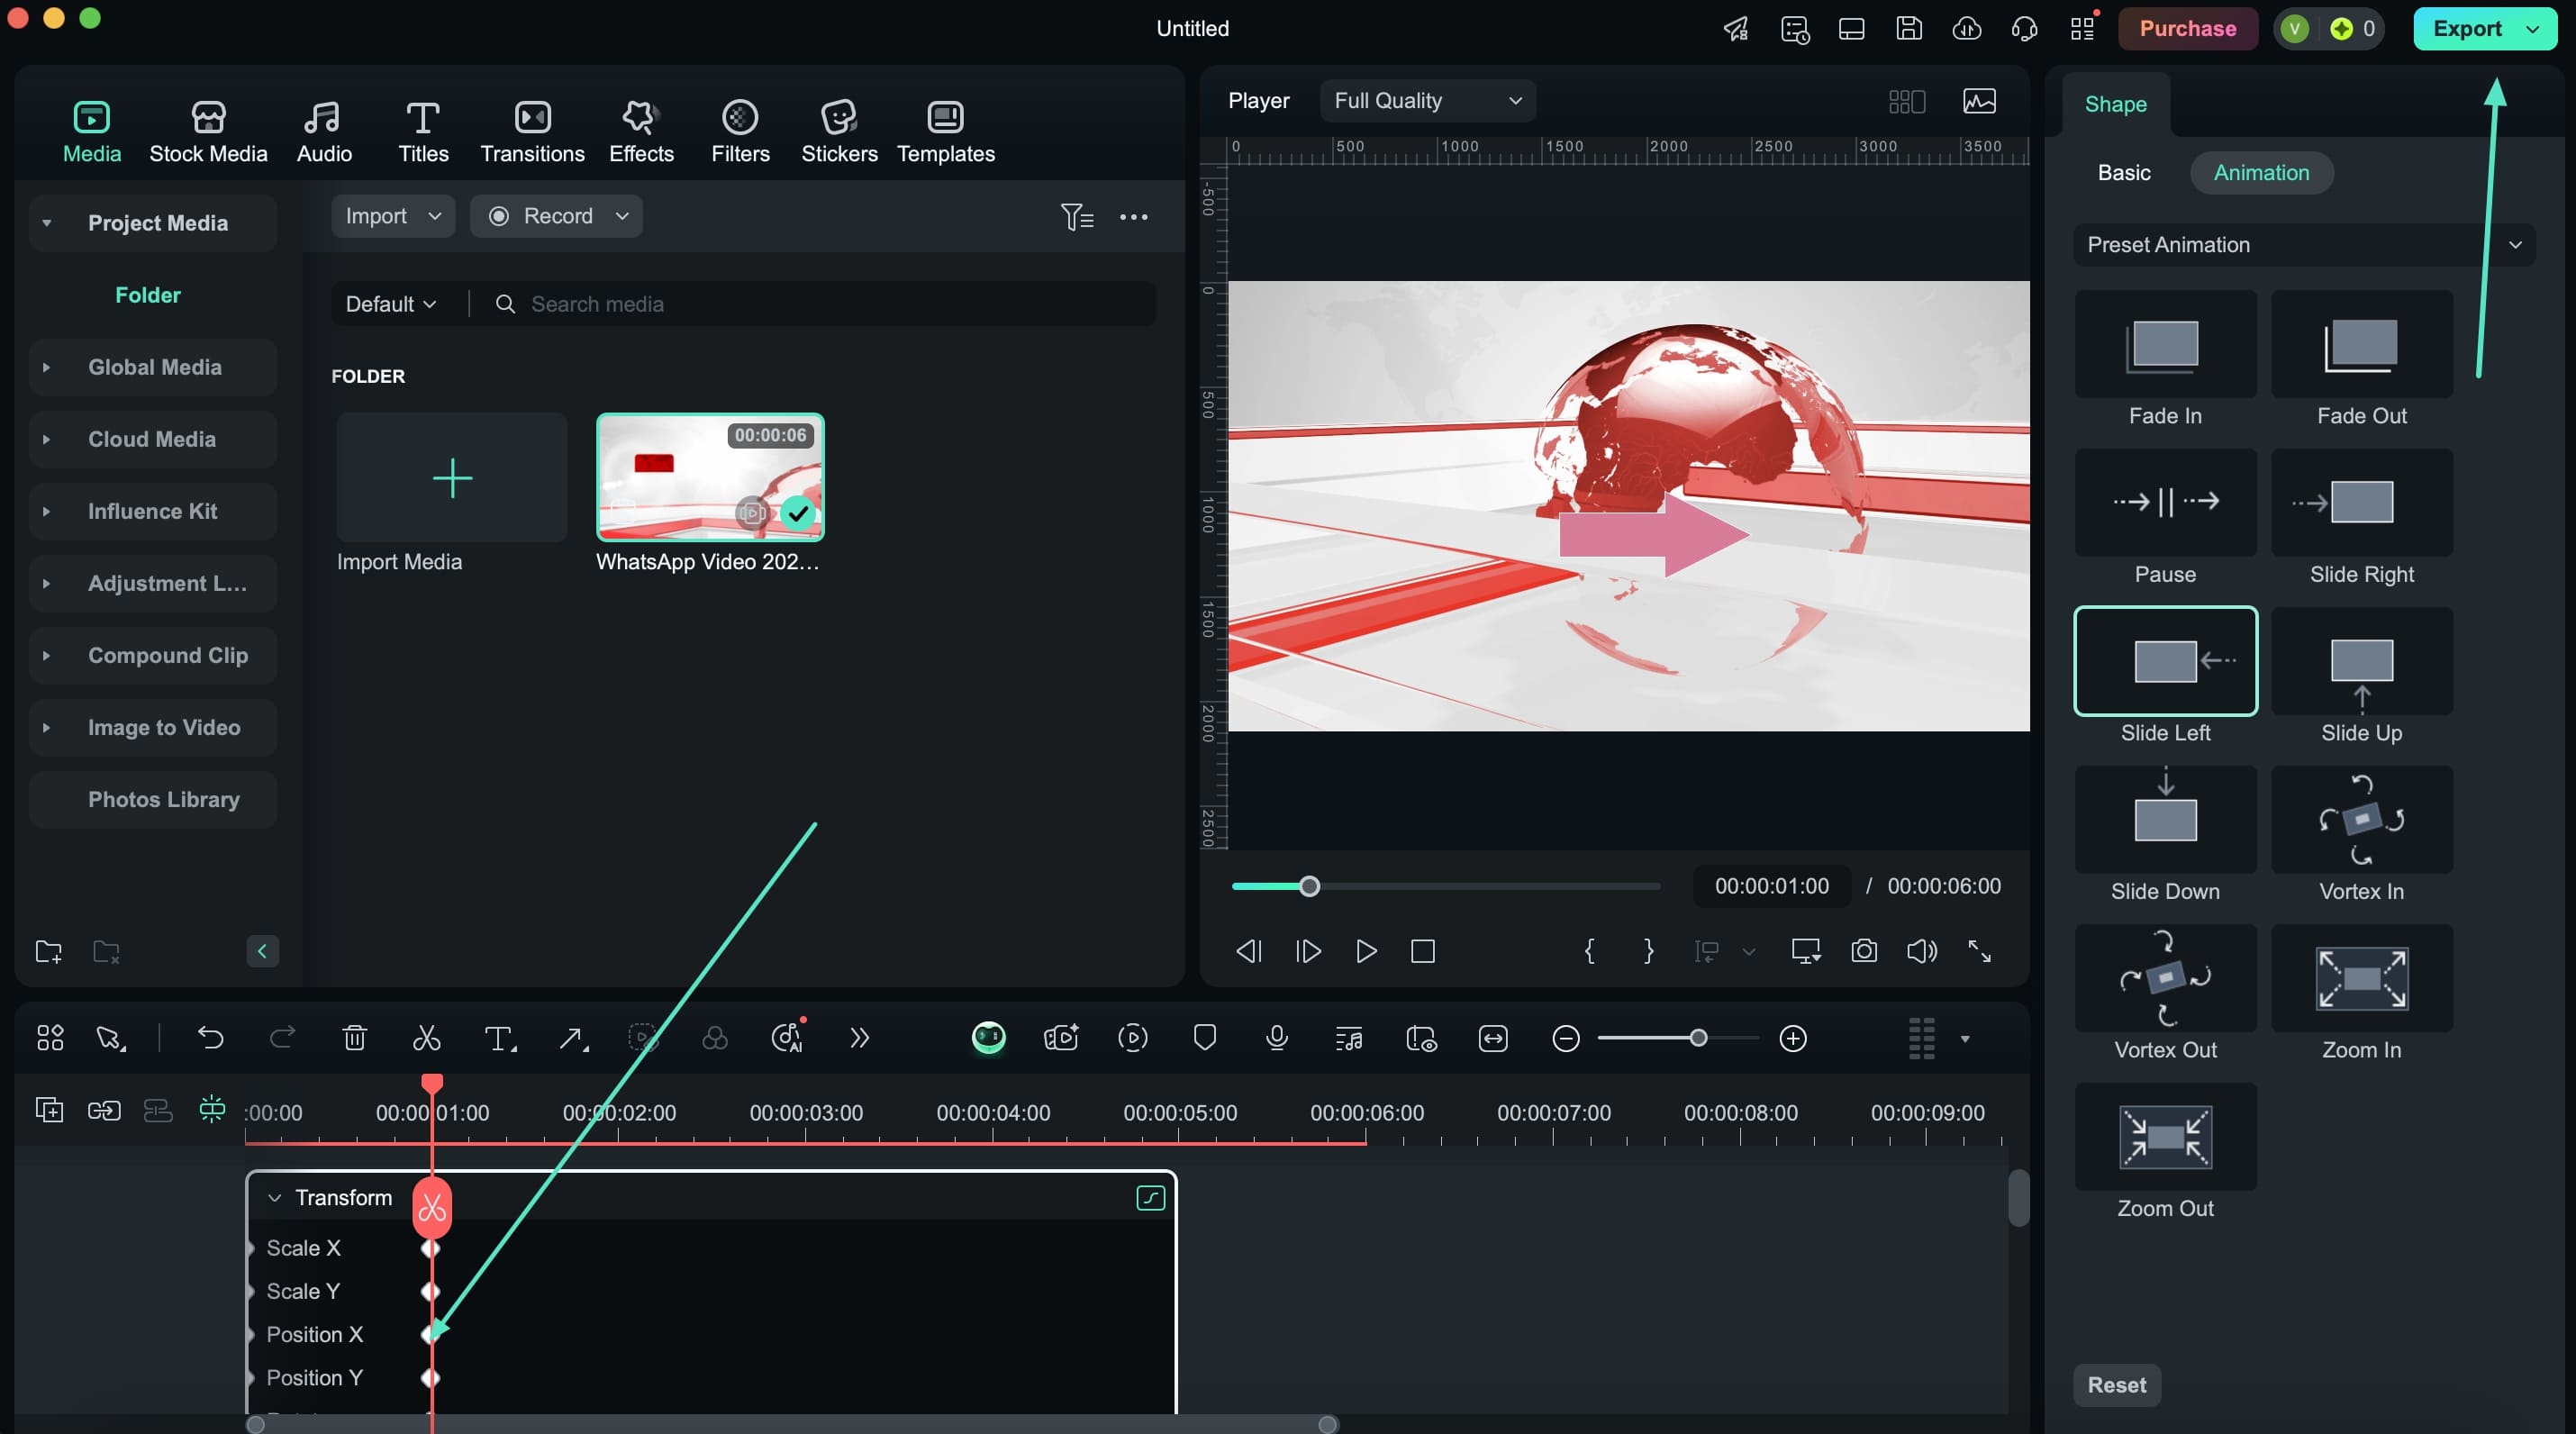
Step 4. Add Animations Into The Rectangle
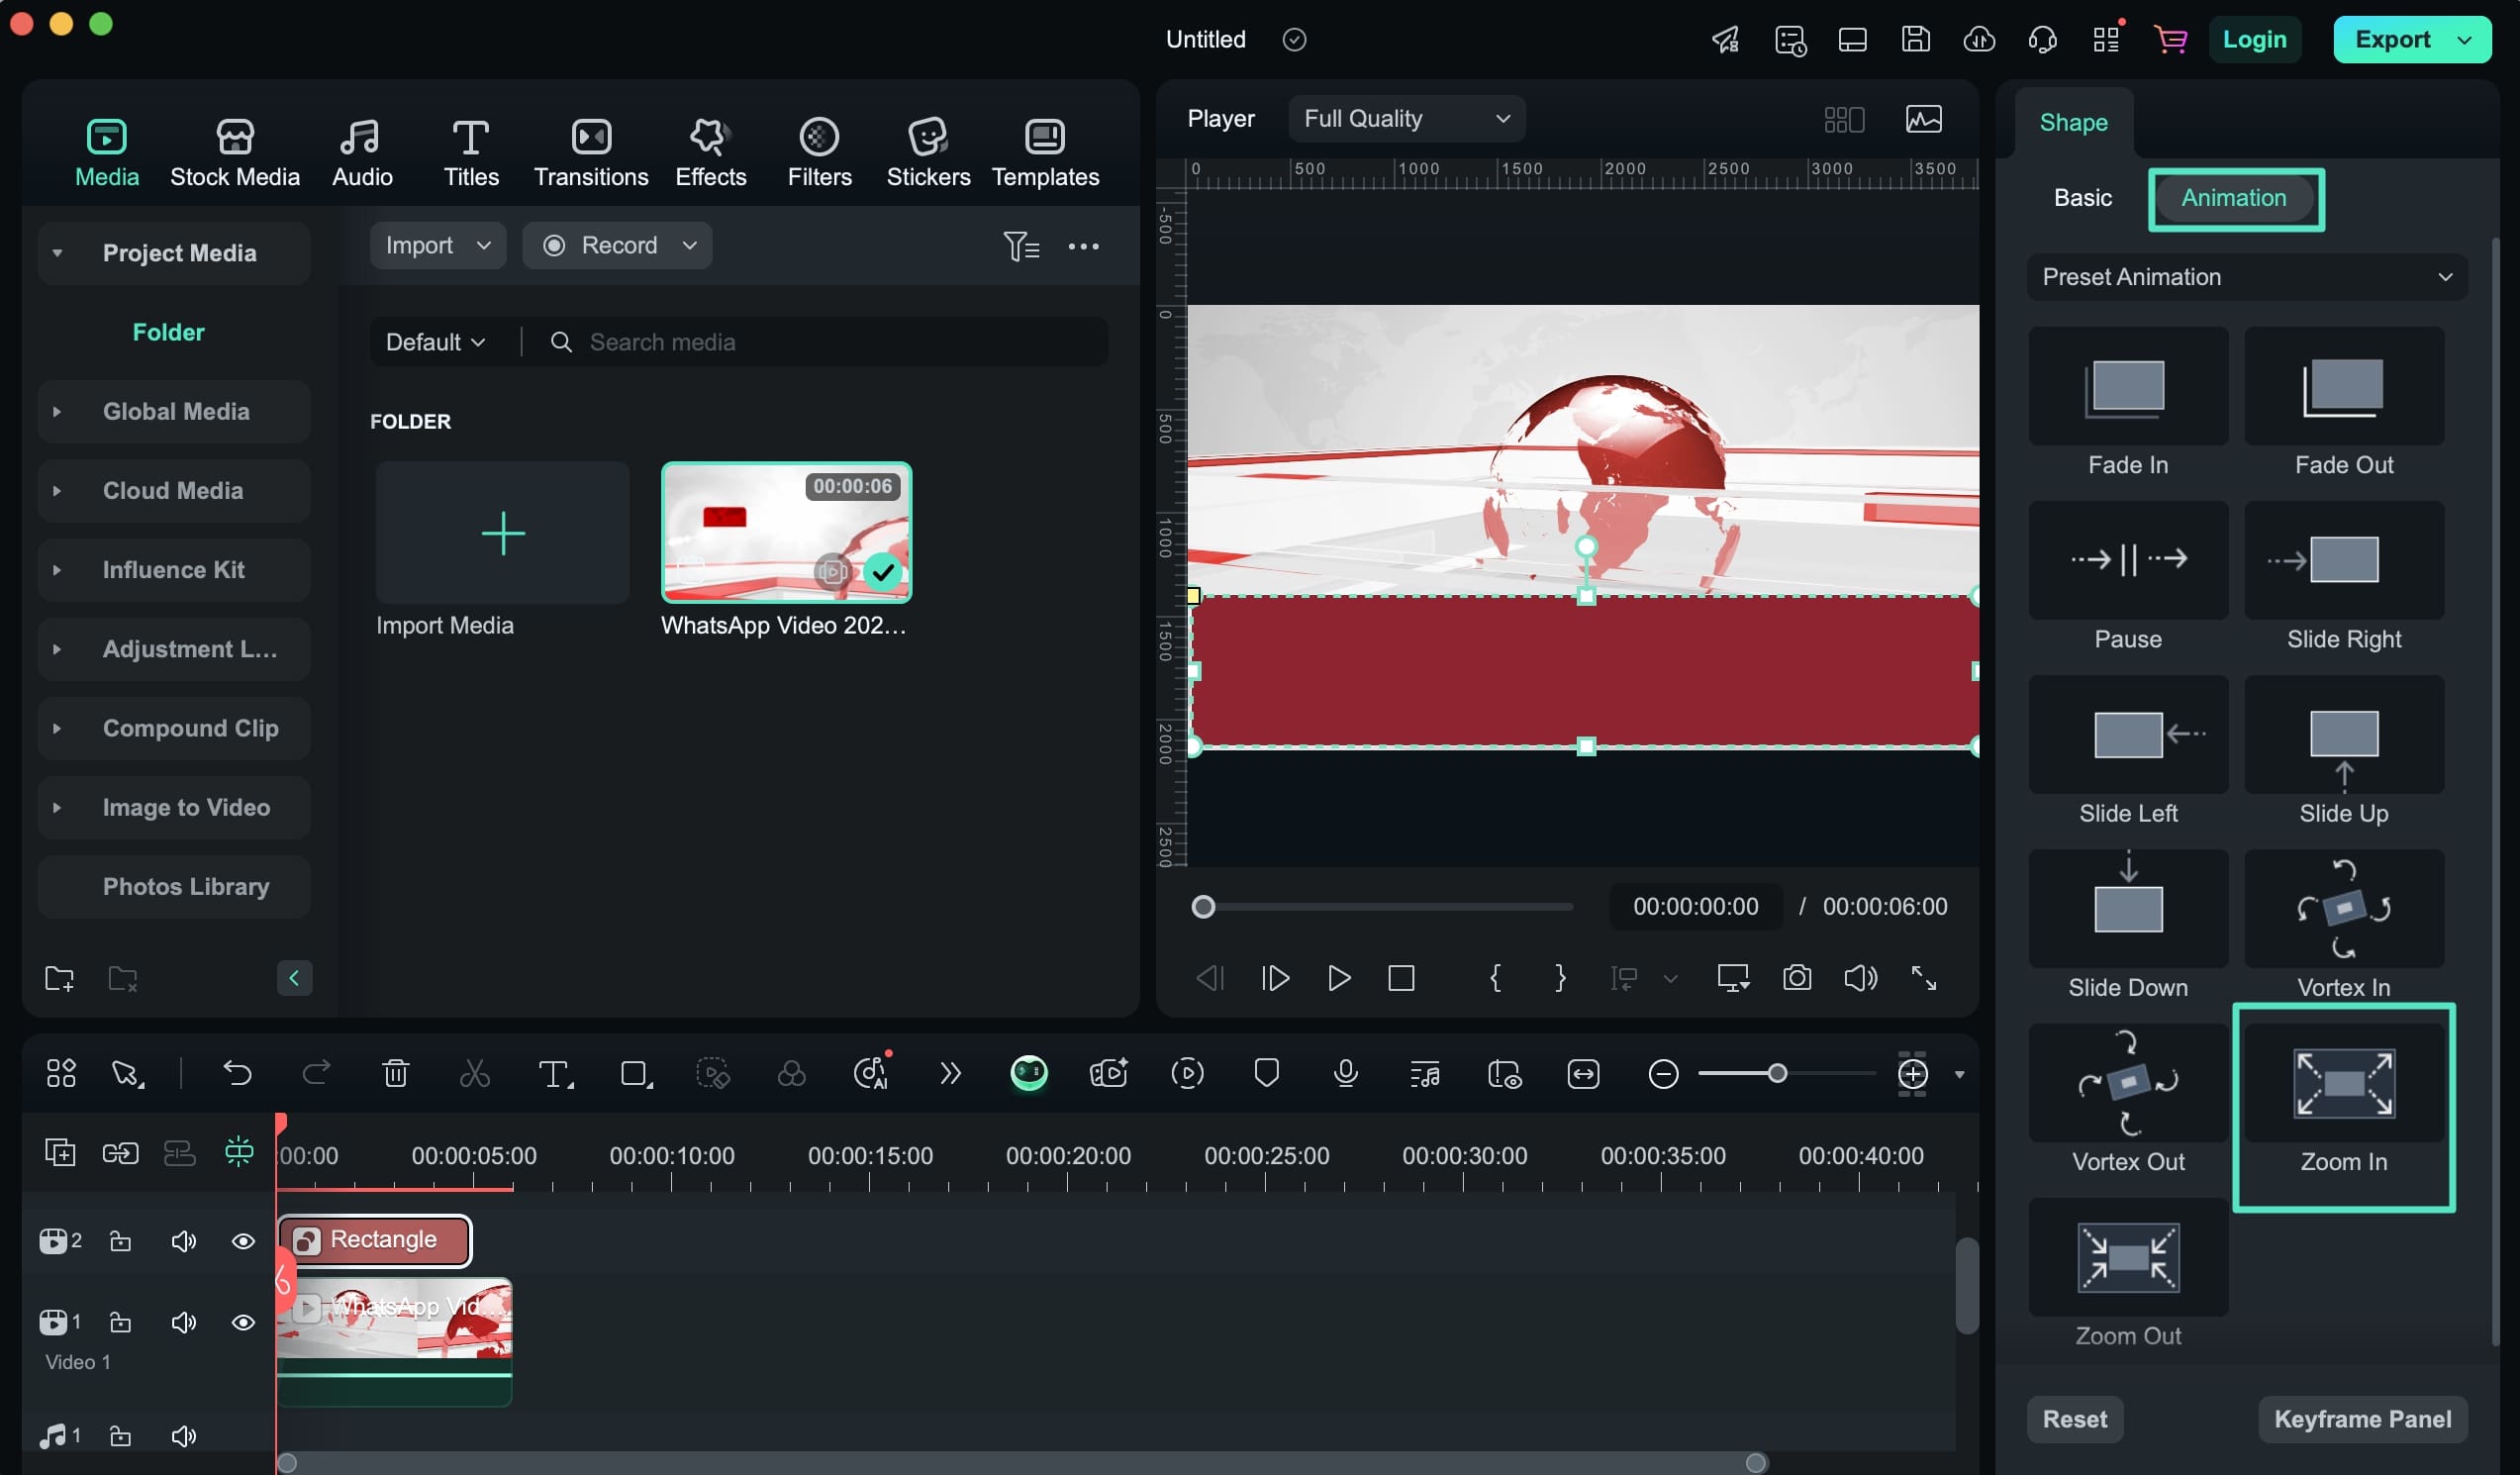
Proceed to the "Animation" section across the "Settings" panel and select a style which fits the video theme. For applying the animation, double-click on it to add it to the video in the timeline.
Step 5. Open Keyframe Settings of Animation
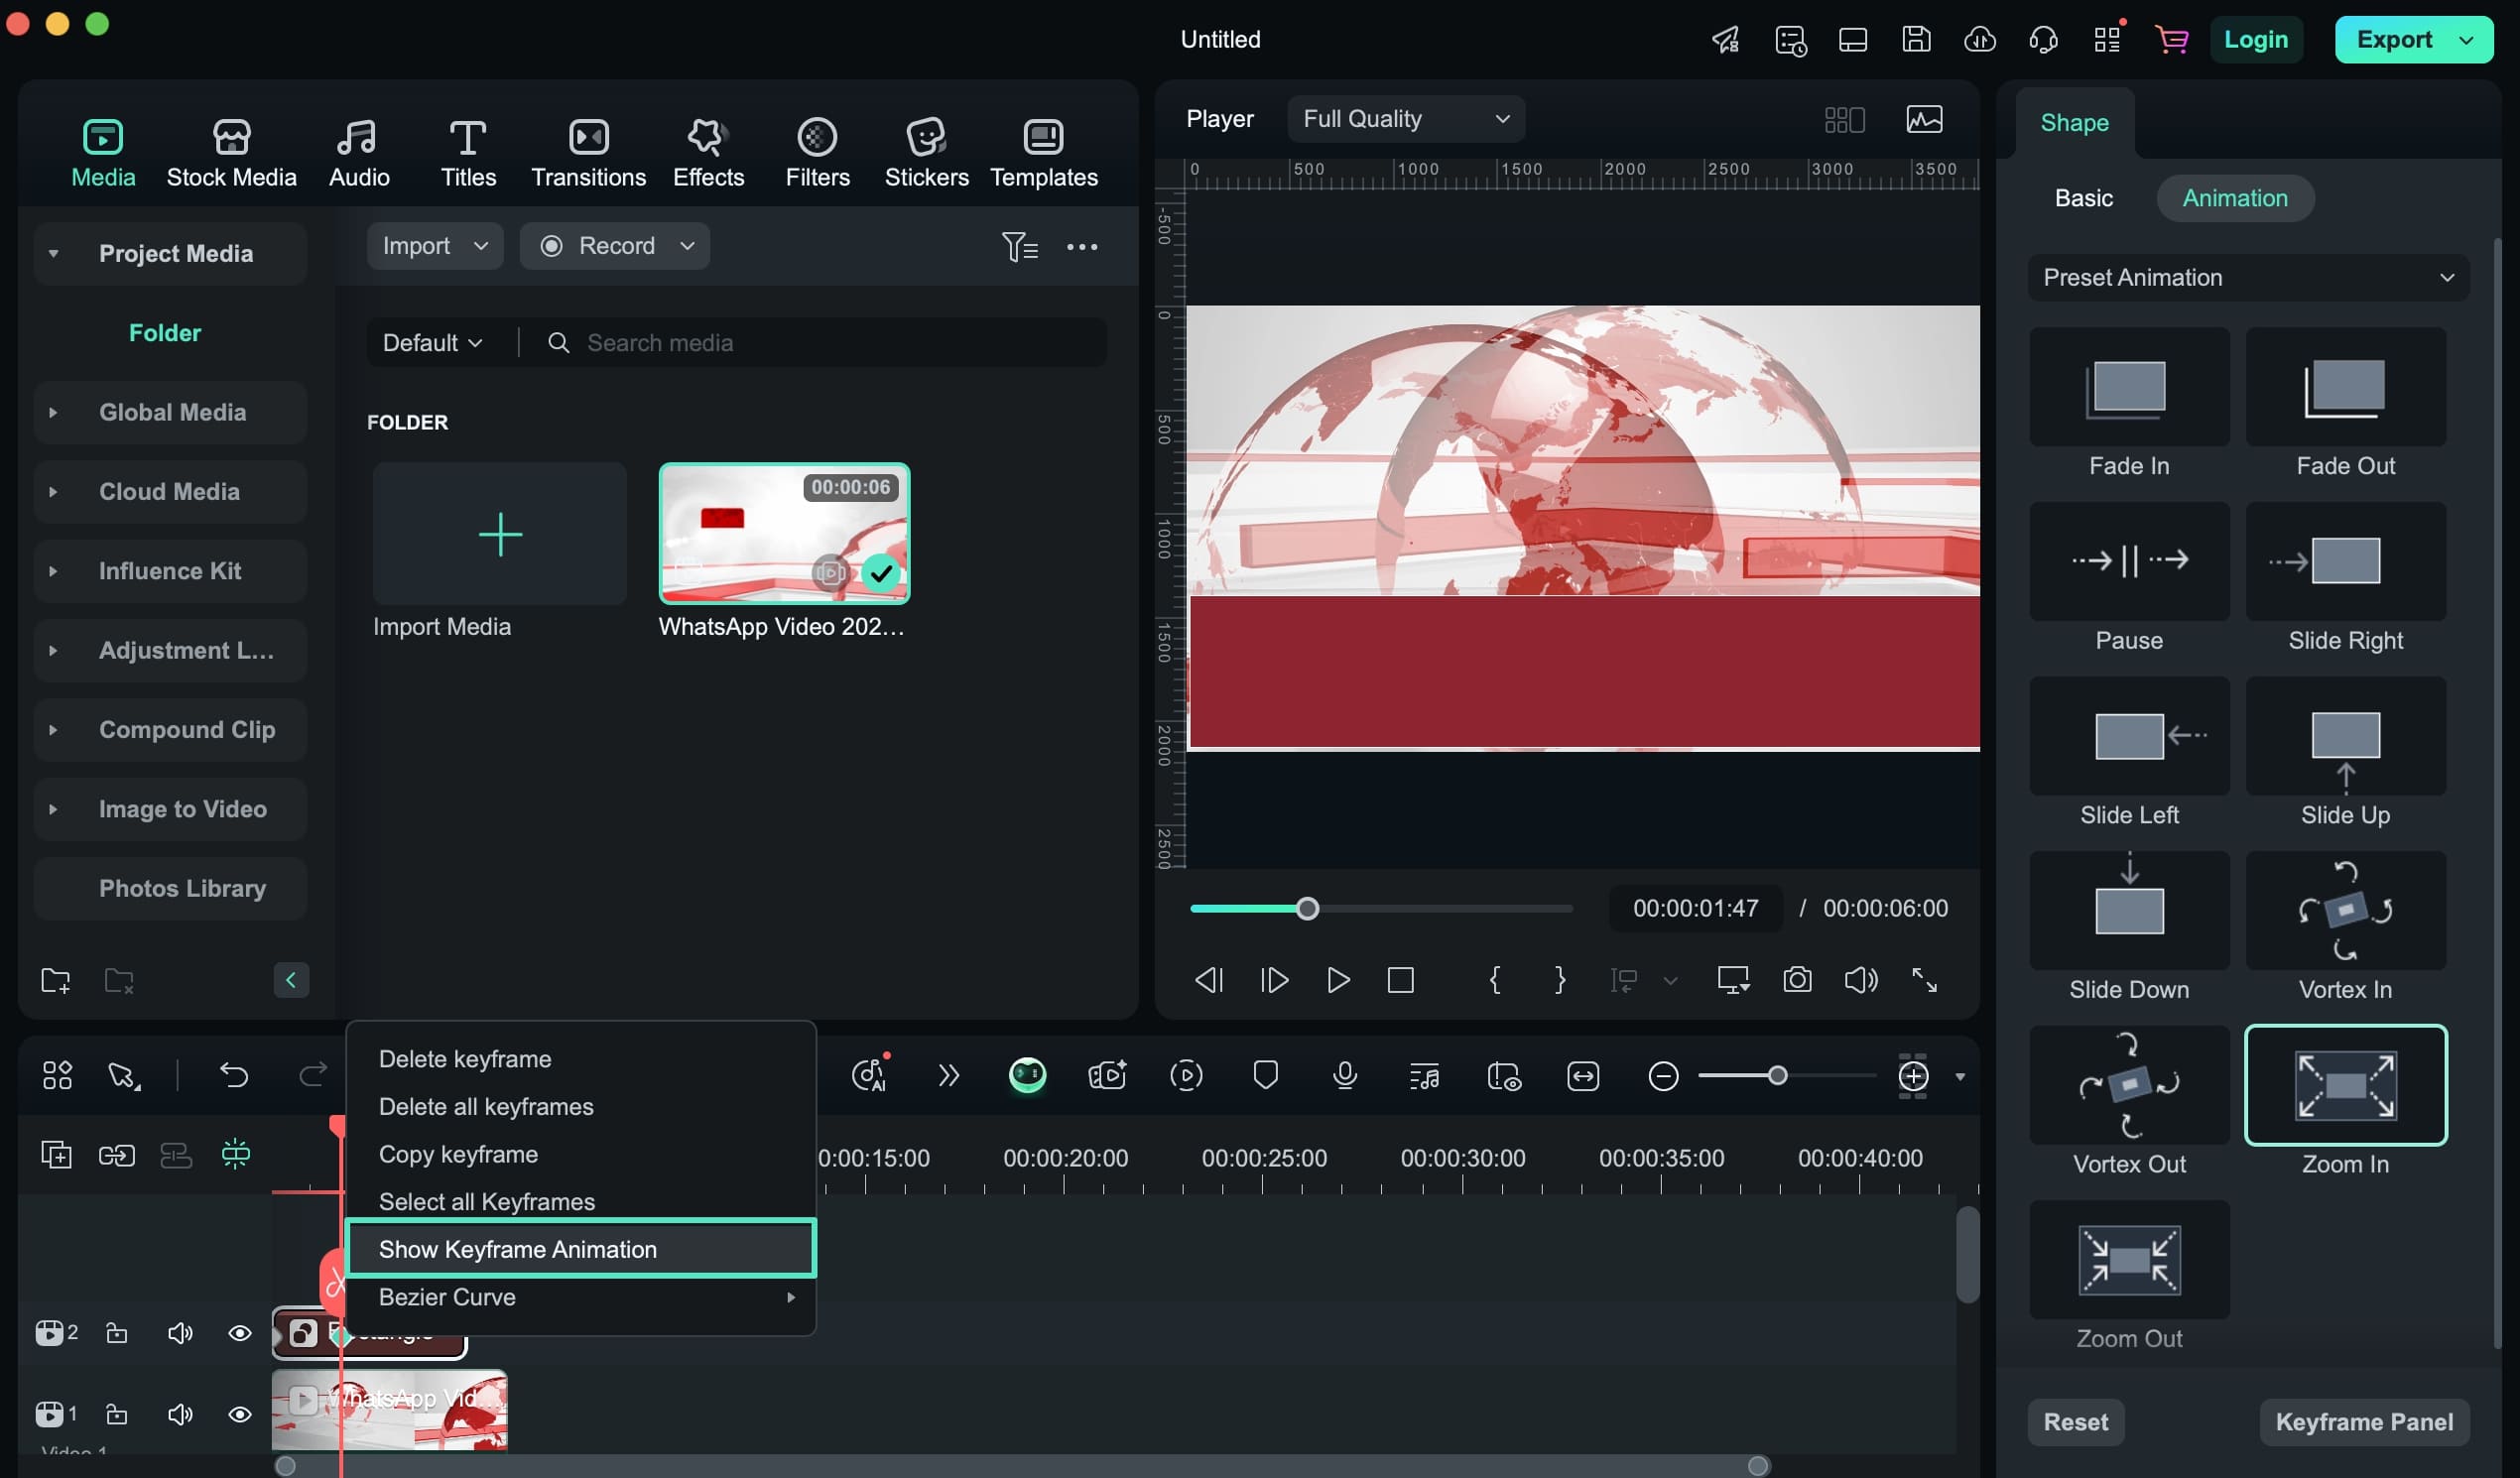
After applying the animation, proceed to the timeline and "Control+Click" on the "Diamond" shape to select the "Show Keyframe Animation" option.
Step 6. Adjust Keyframes of The Added Animations in Timeline
This opens up the keyframe settings for the animation, which can be manually adjusted as well. The diamonds can be easily adjusted across the timeline to customize the animation accordingly.
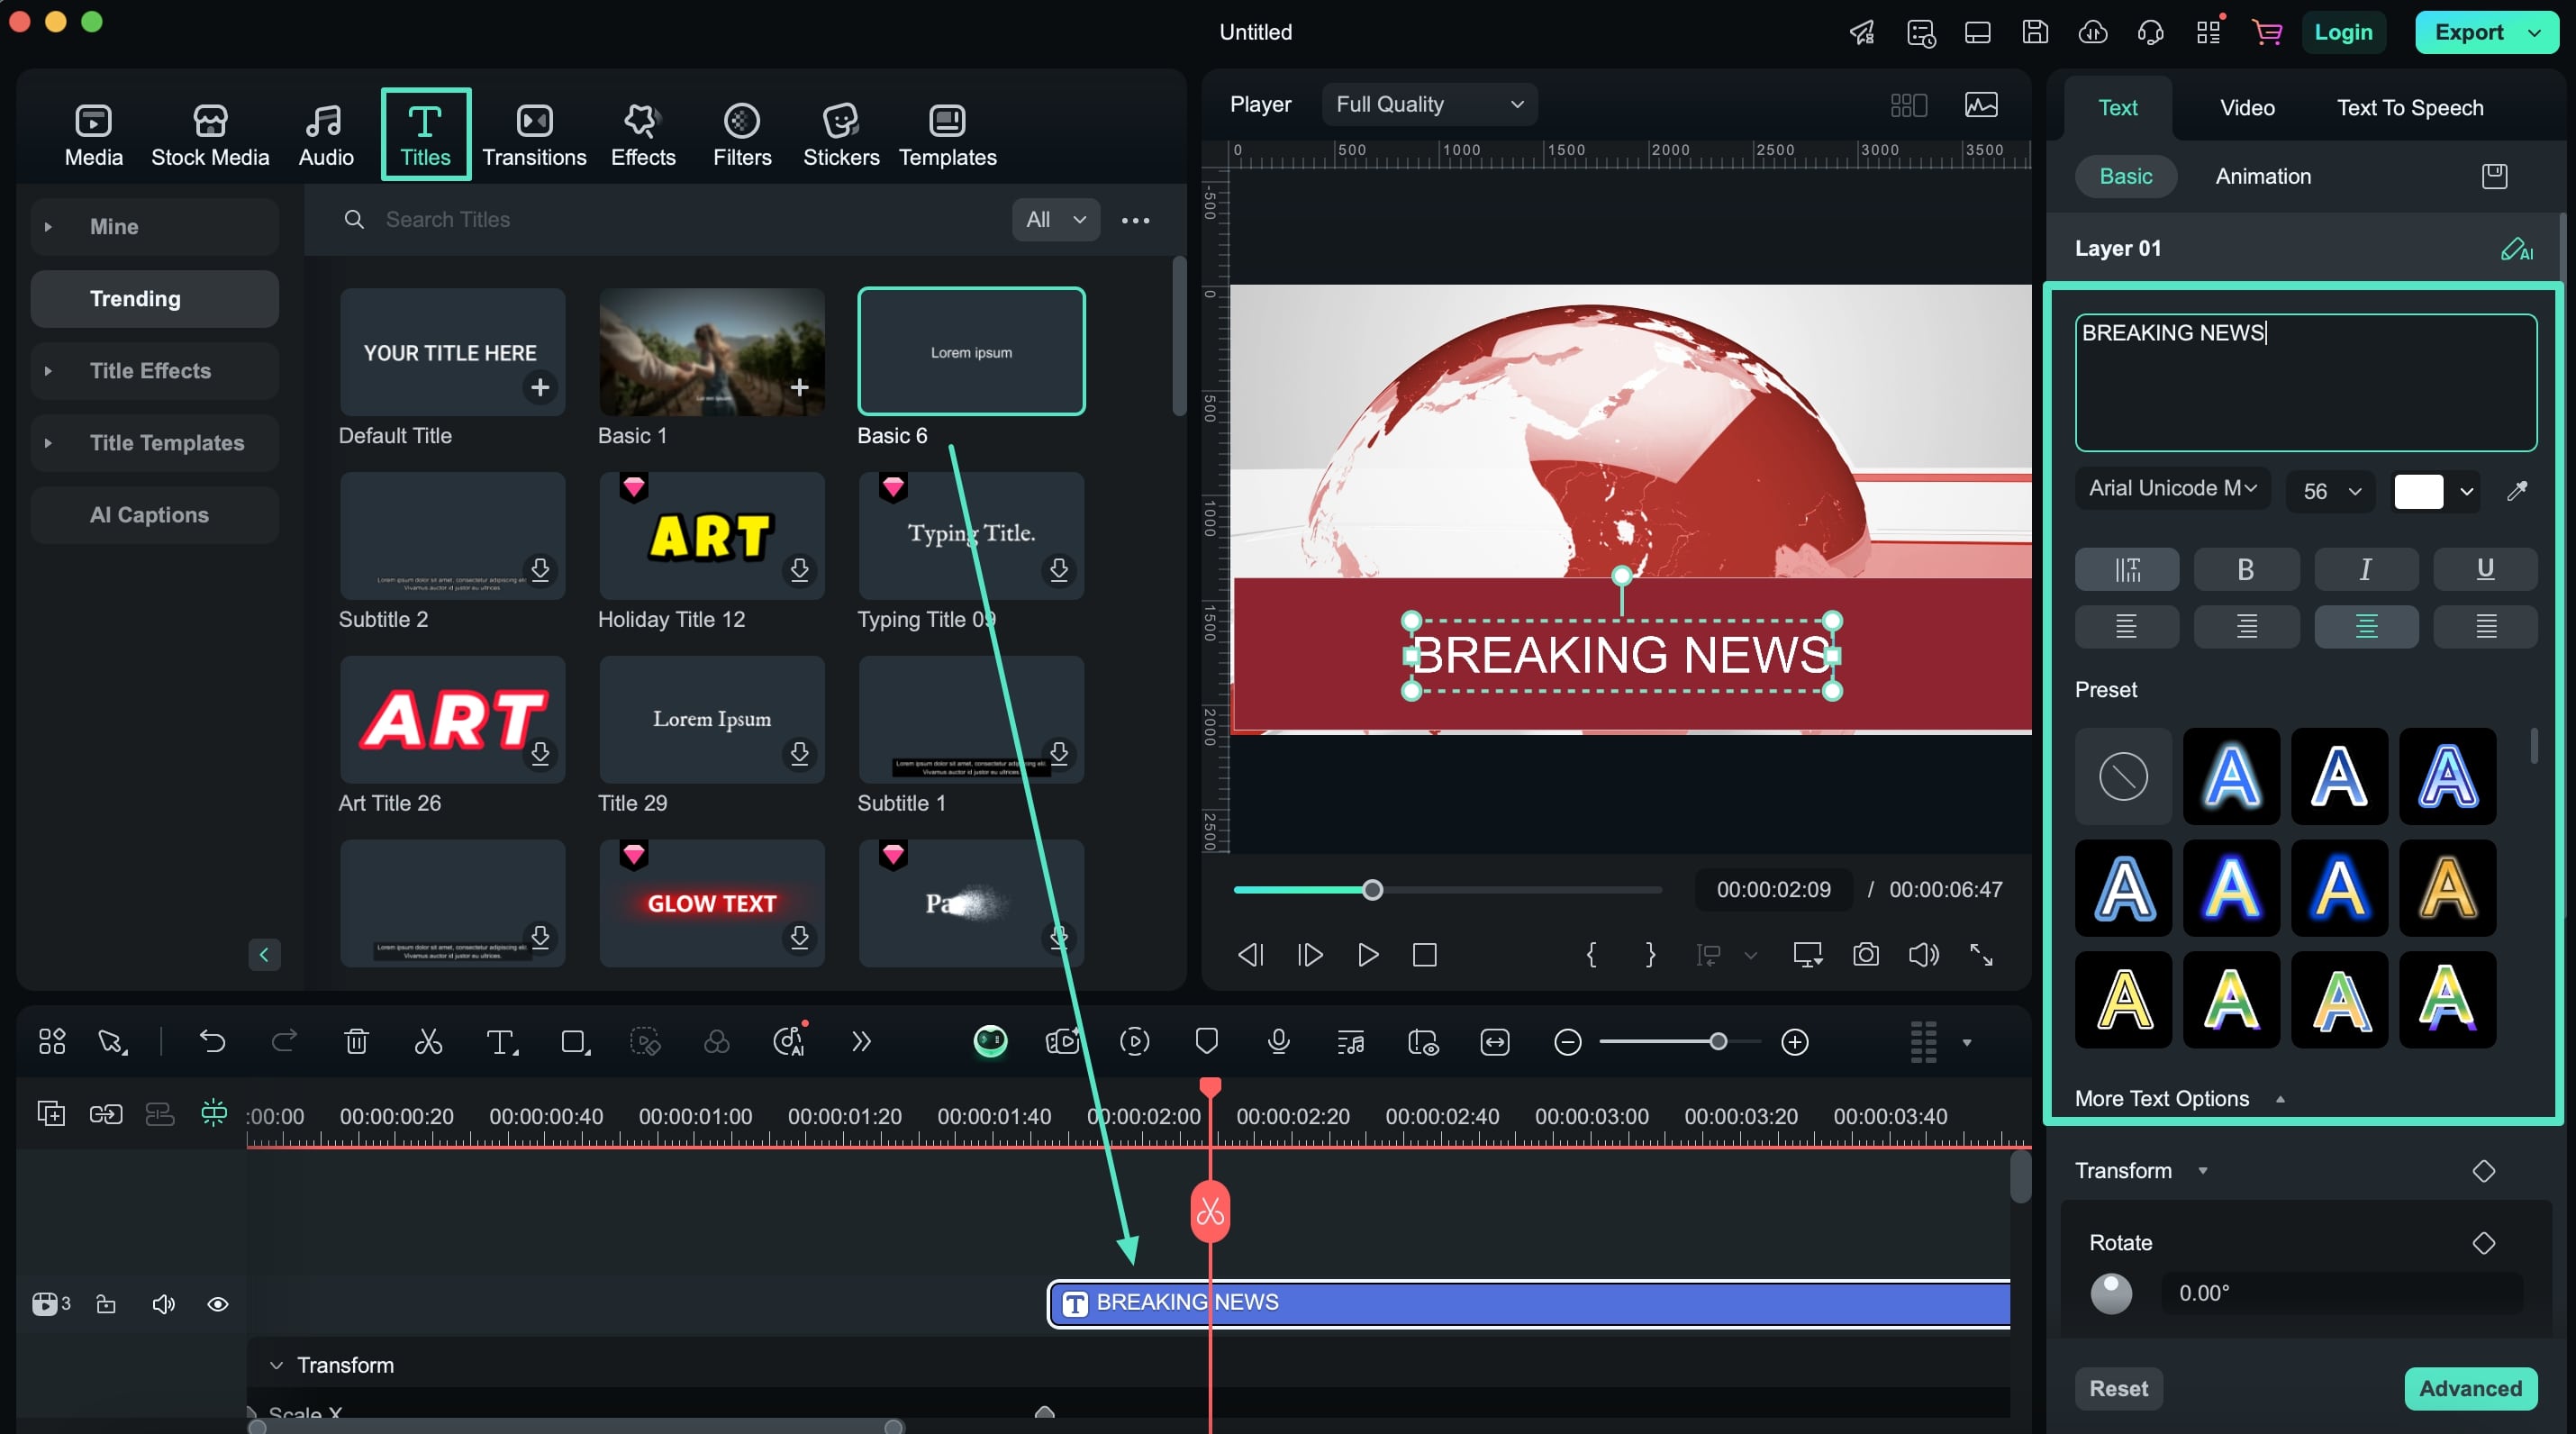
Step 7. Include Titles Into The Video
Proceed to the "Titles" section on the top and choose the one that fits the video characteristics. On dragging the title onto the video timeline, adjust its position across the preview window. Consequently, customize its appearance within the "Text" tab, where you can apply a preset and add the content too.
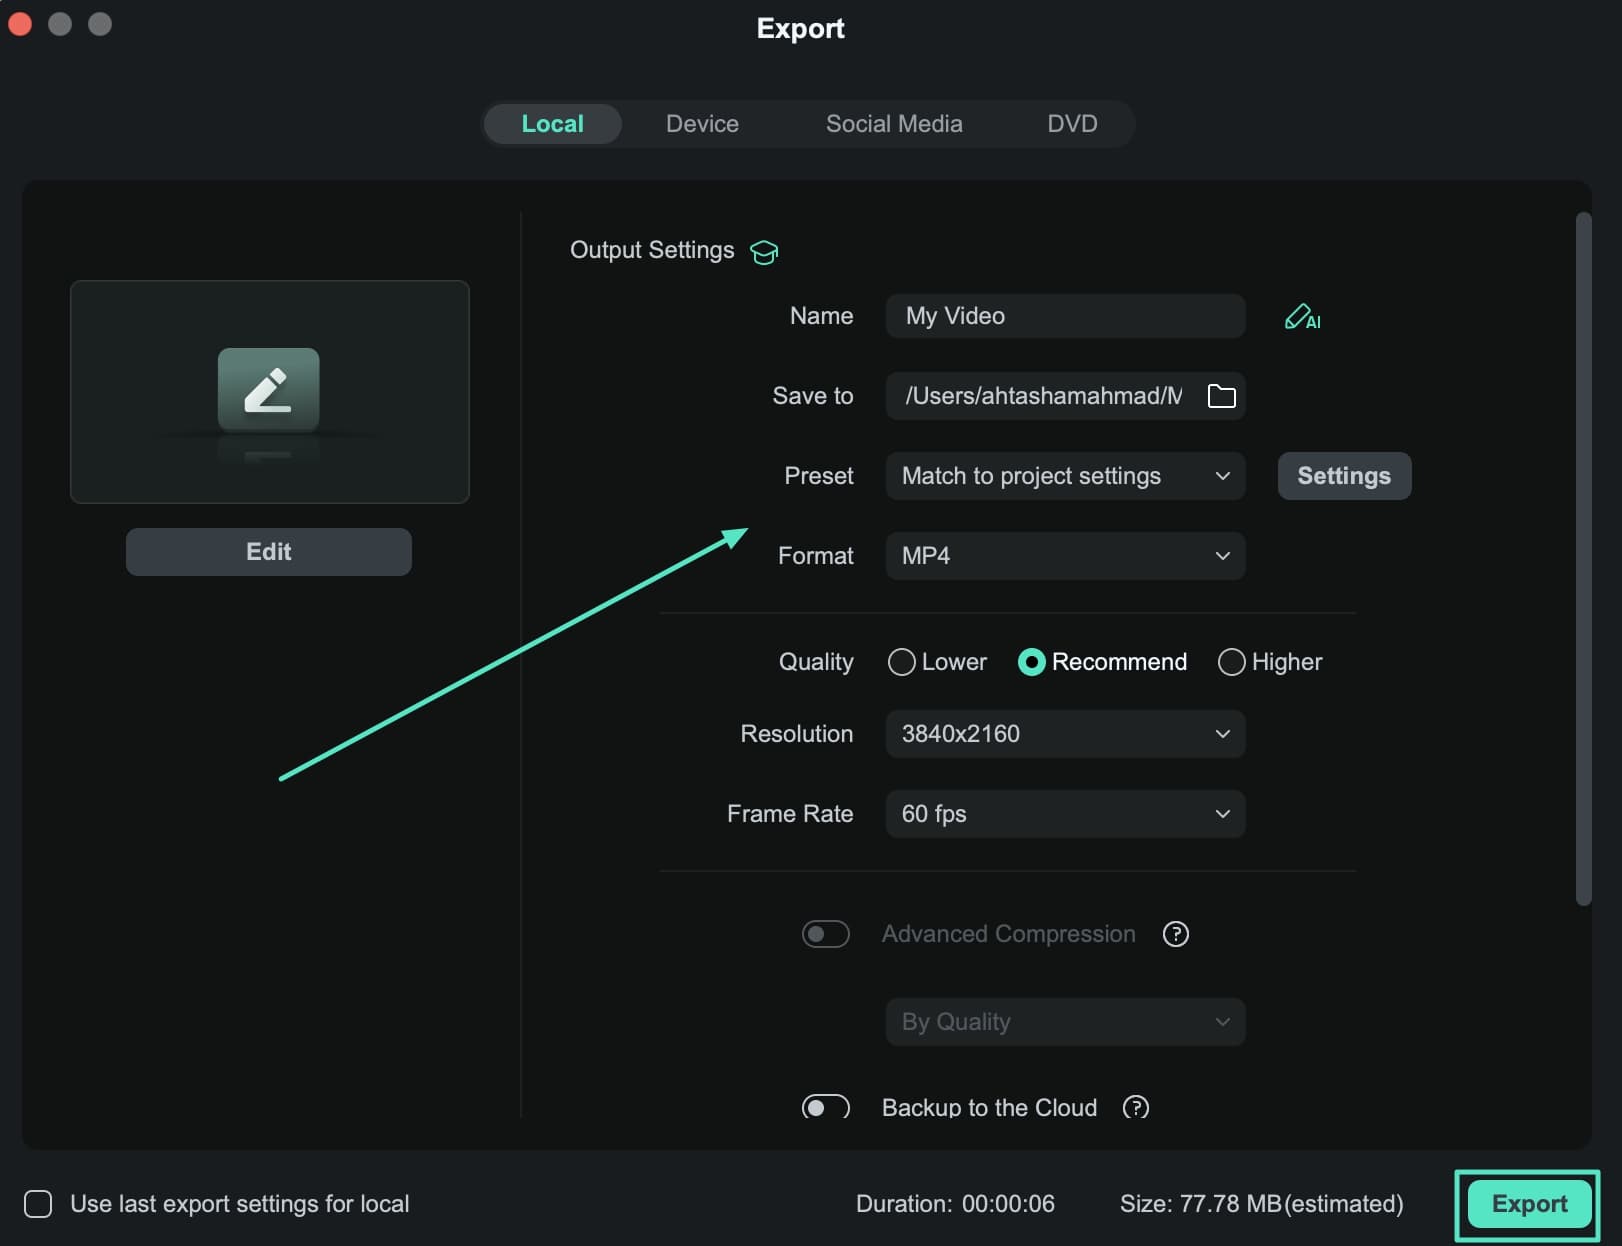
Step 8. Export Final Banner Video
With the final adjustments made, proceed to the "Export" button on the top-right to open a new window. Define the requirements, including the video details, resolution, and format; after which you need to tap on "Export" to conclude the process.
Way 2. Adding a Dynamic Arrow With Filmora's Drawing Tools
Apart from different shapes that can be added into your video for annotation, here is another way you can annotate your videos for a better viewing experience:
Step 1. Import Video To Timeline
As you start the process, click the "Import" button for adding the video and add it to the timeline.
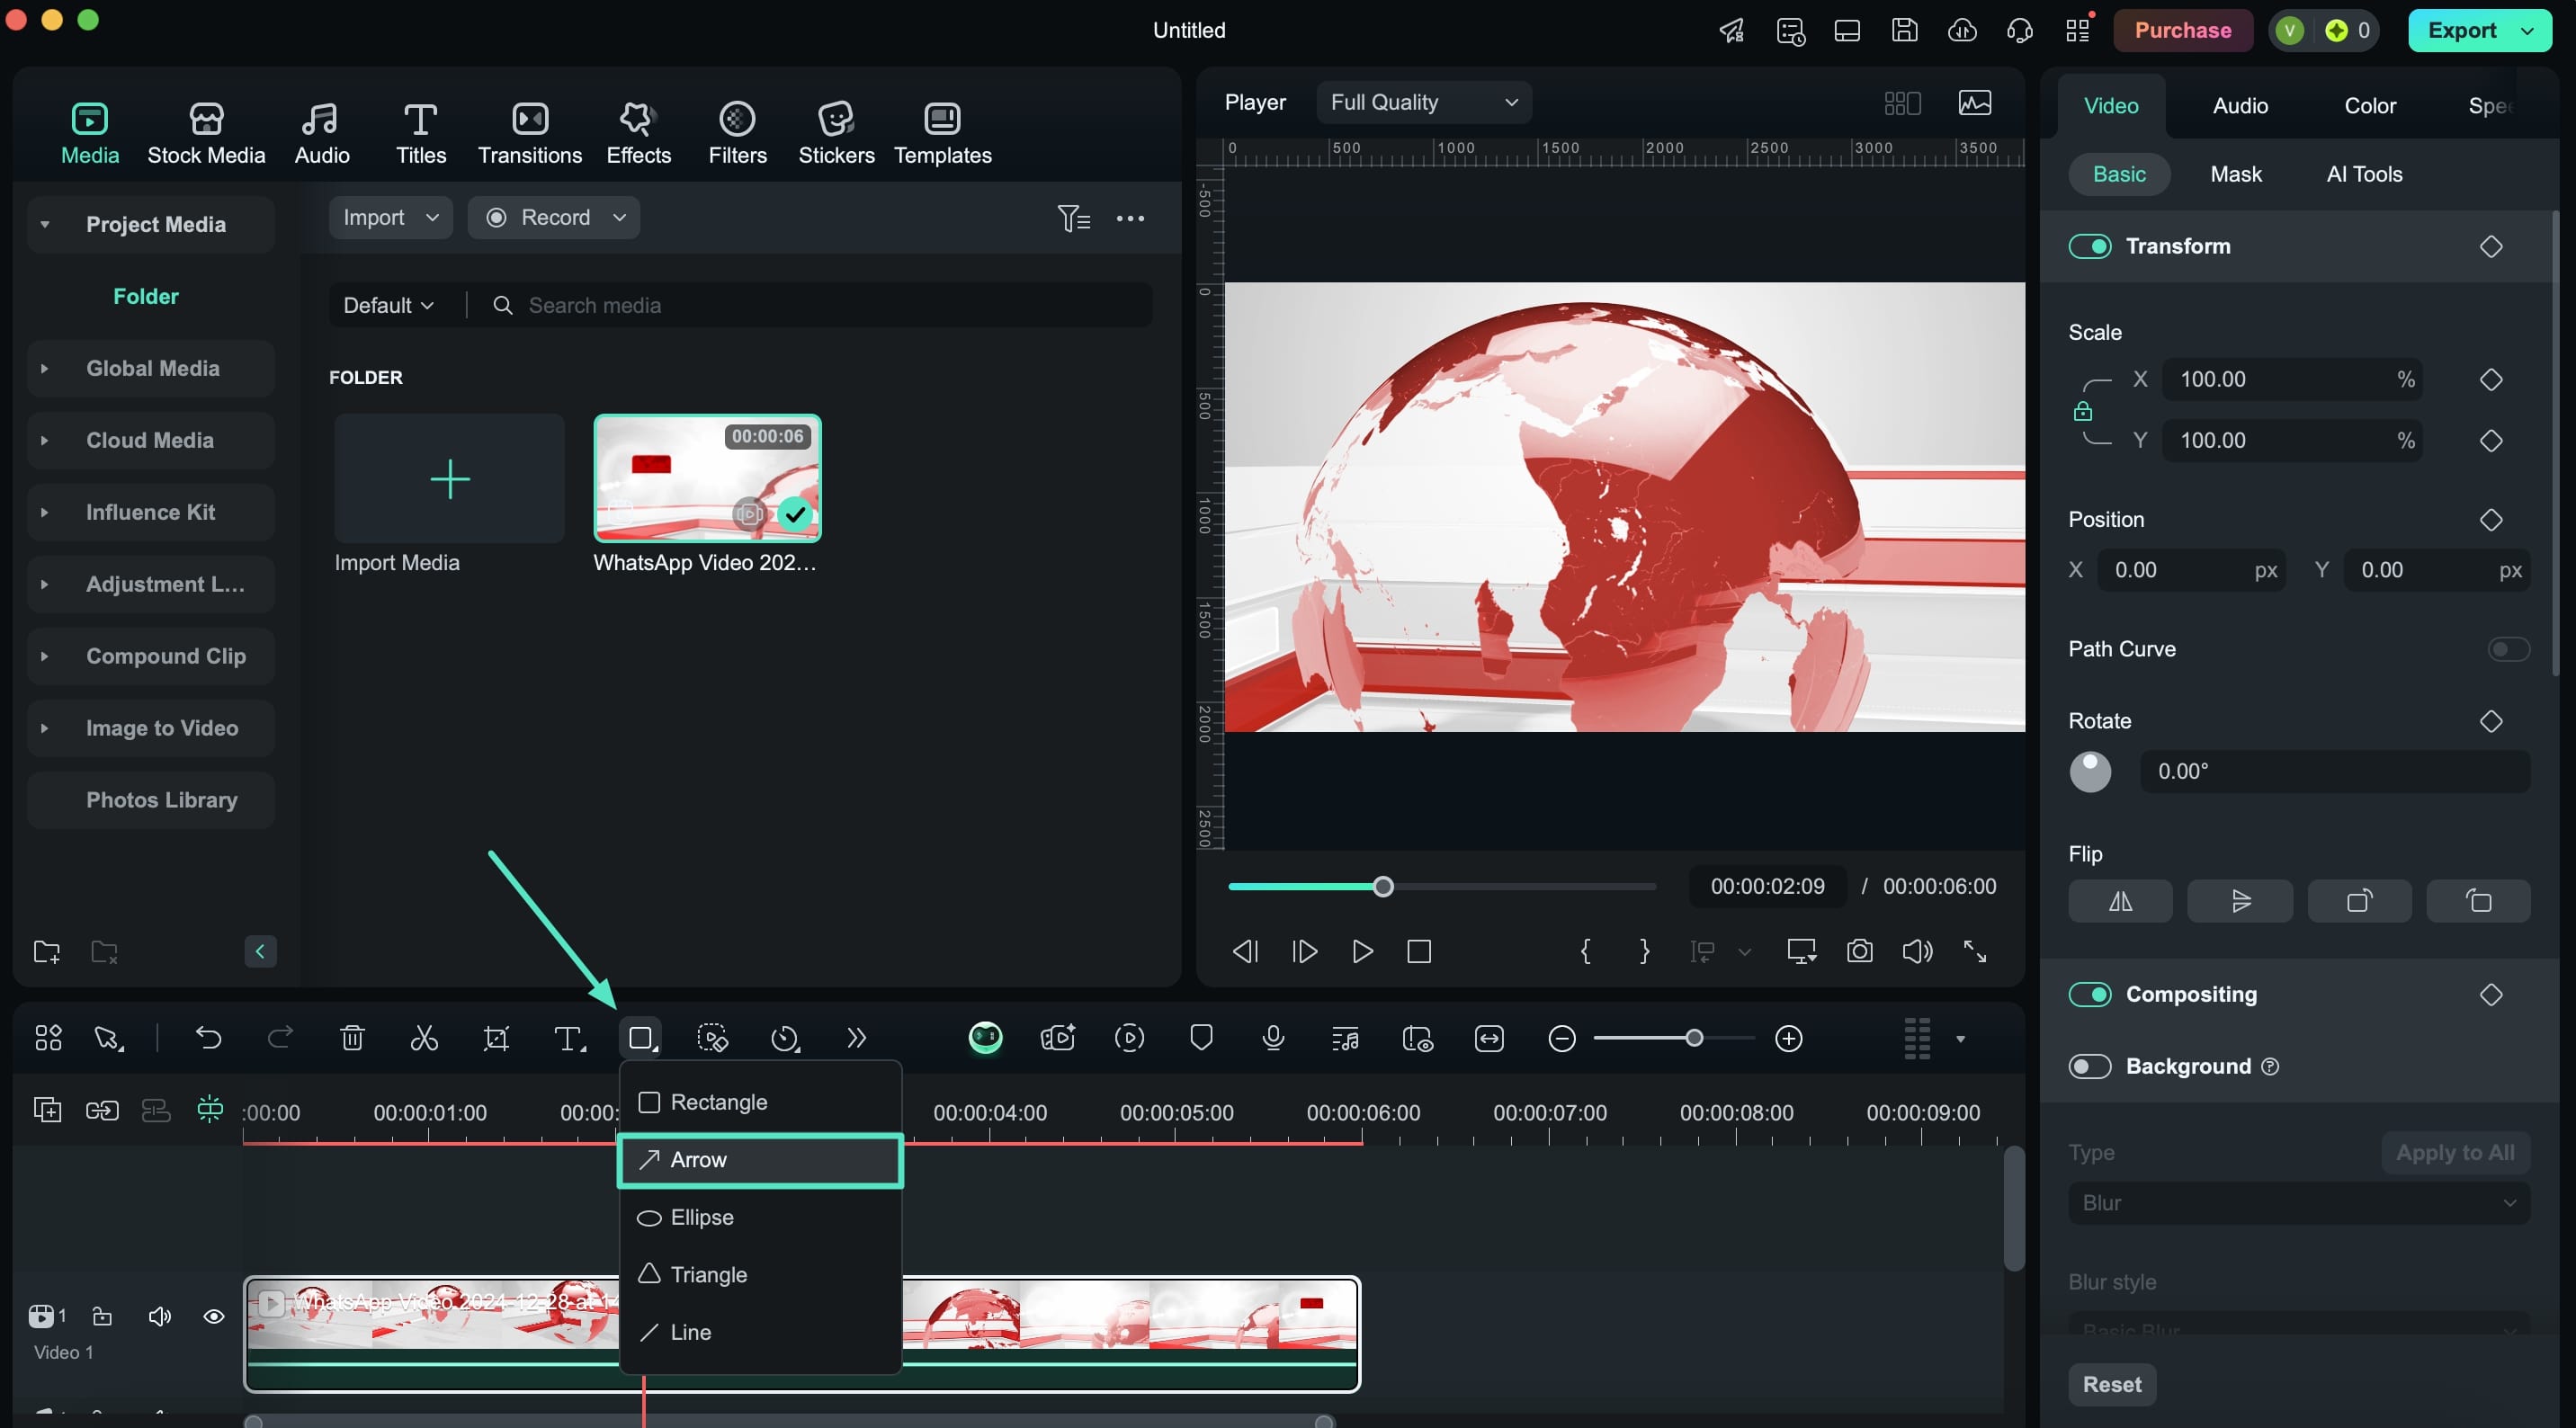
Step 2. Include Arrow Shape in Video
On progressing into the editing interface, select the "Drawing Tools" icon and select the "Arrow" option. Draw the arrow within the preview window and adjust its position accordingly.
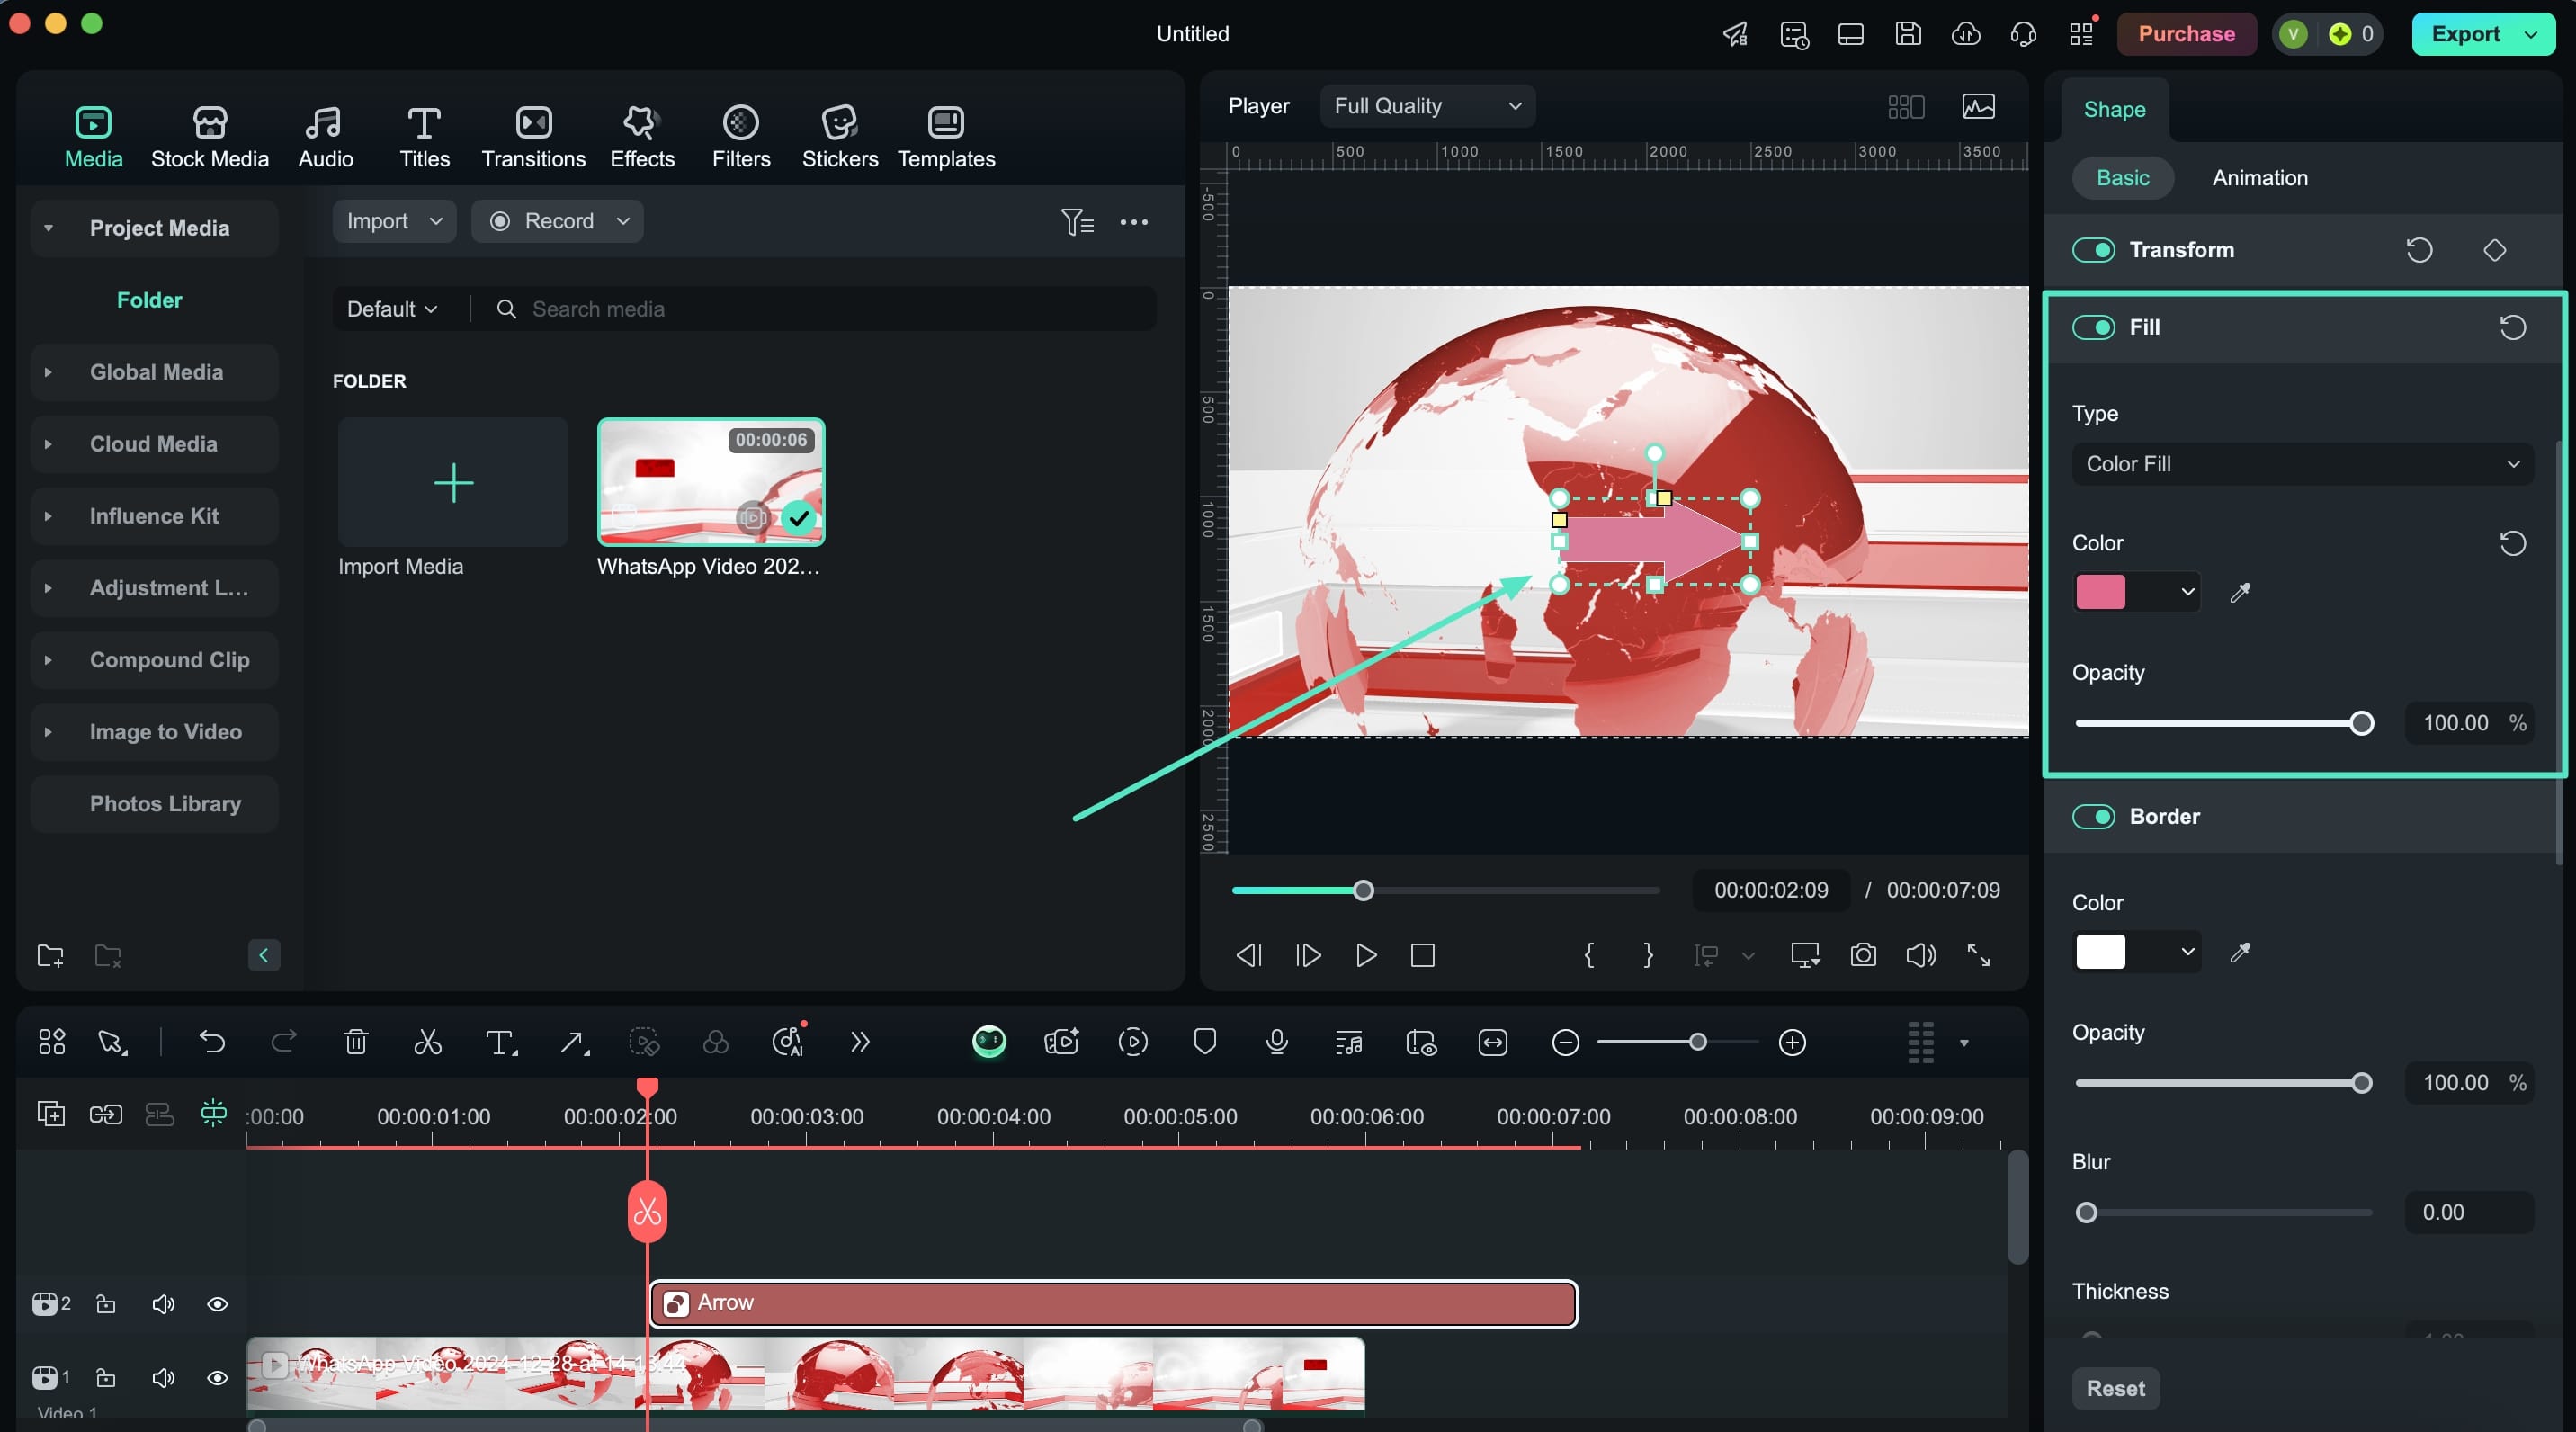
Step 3. Fill In The Color of Arrow
For matching the elements of the video, enable the "Fill" toggle under the "Basic" settings and add colors in the arrow.
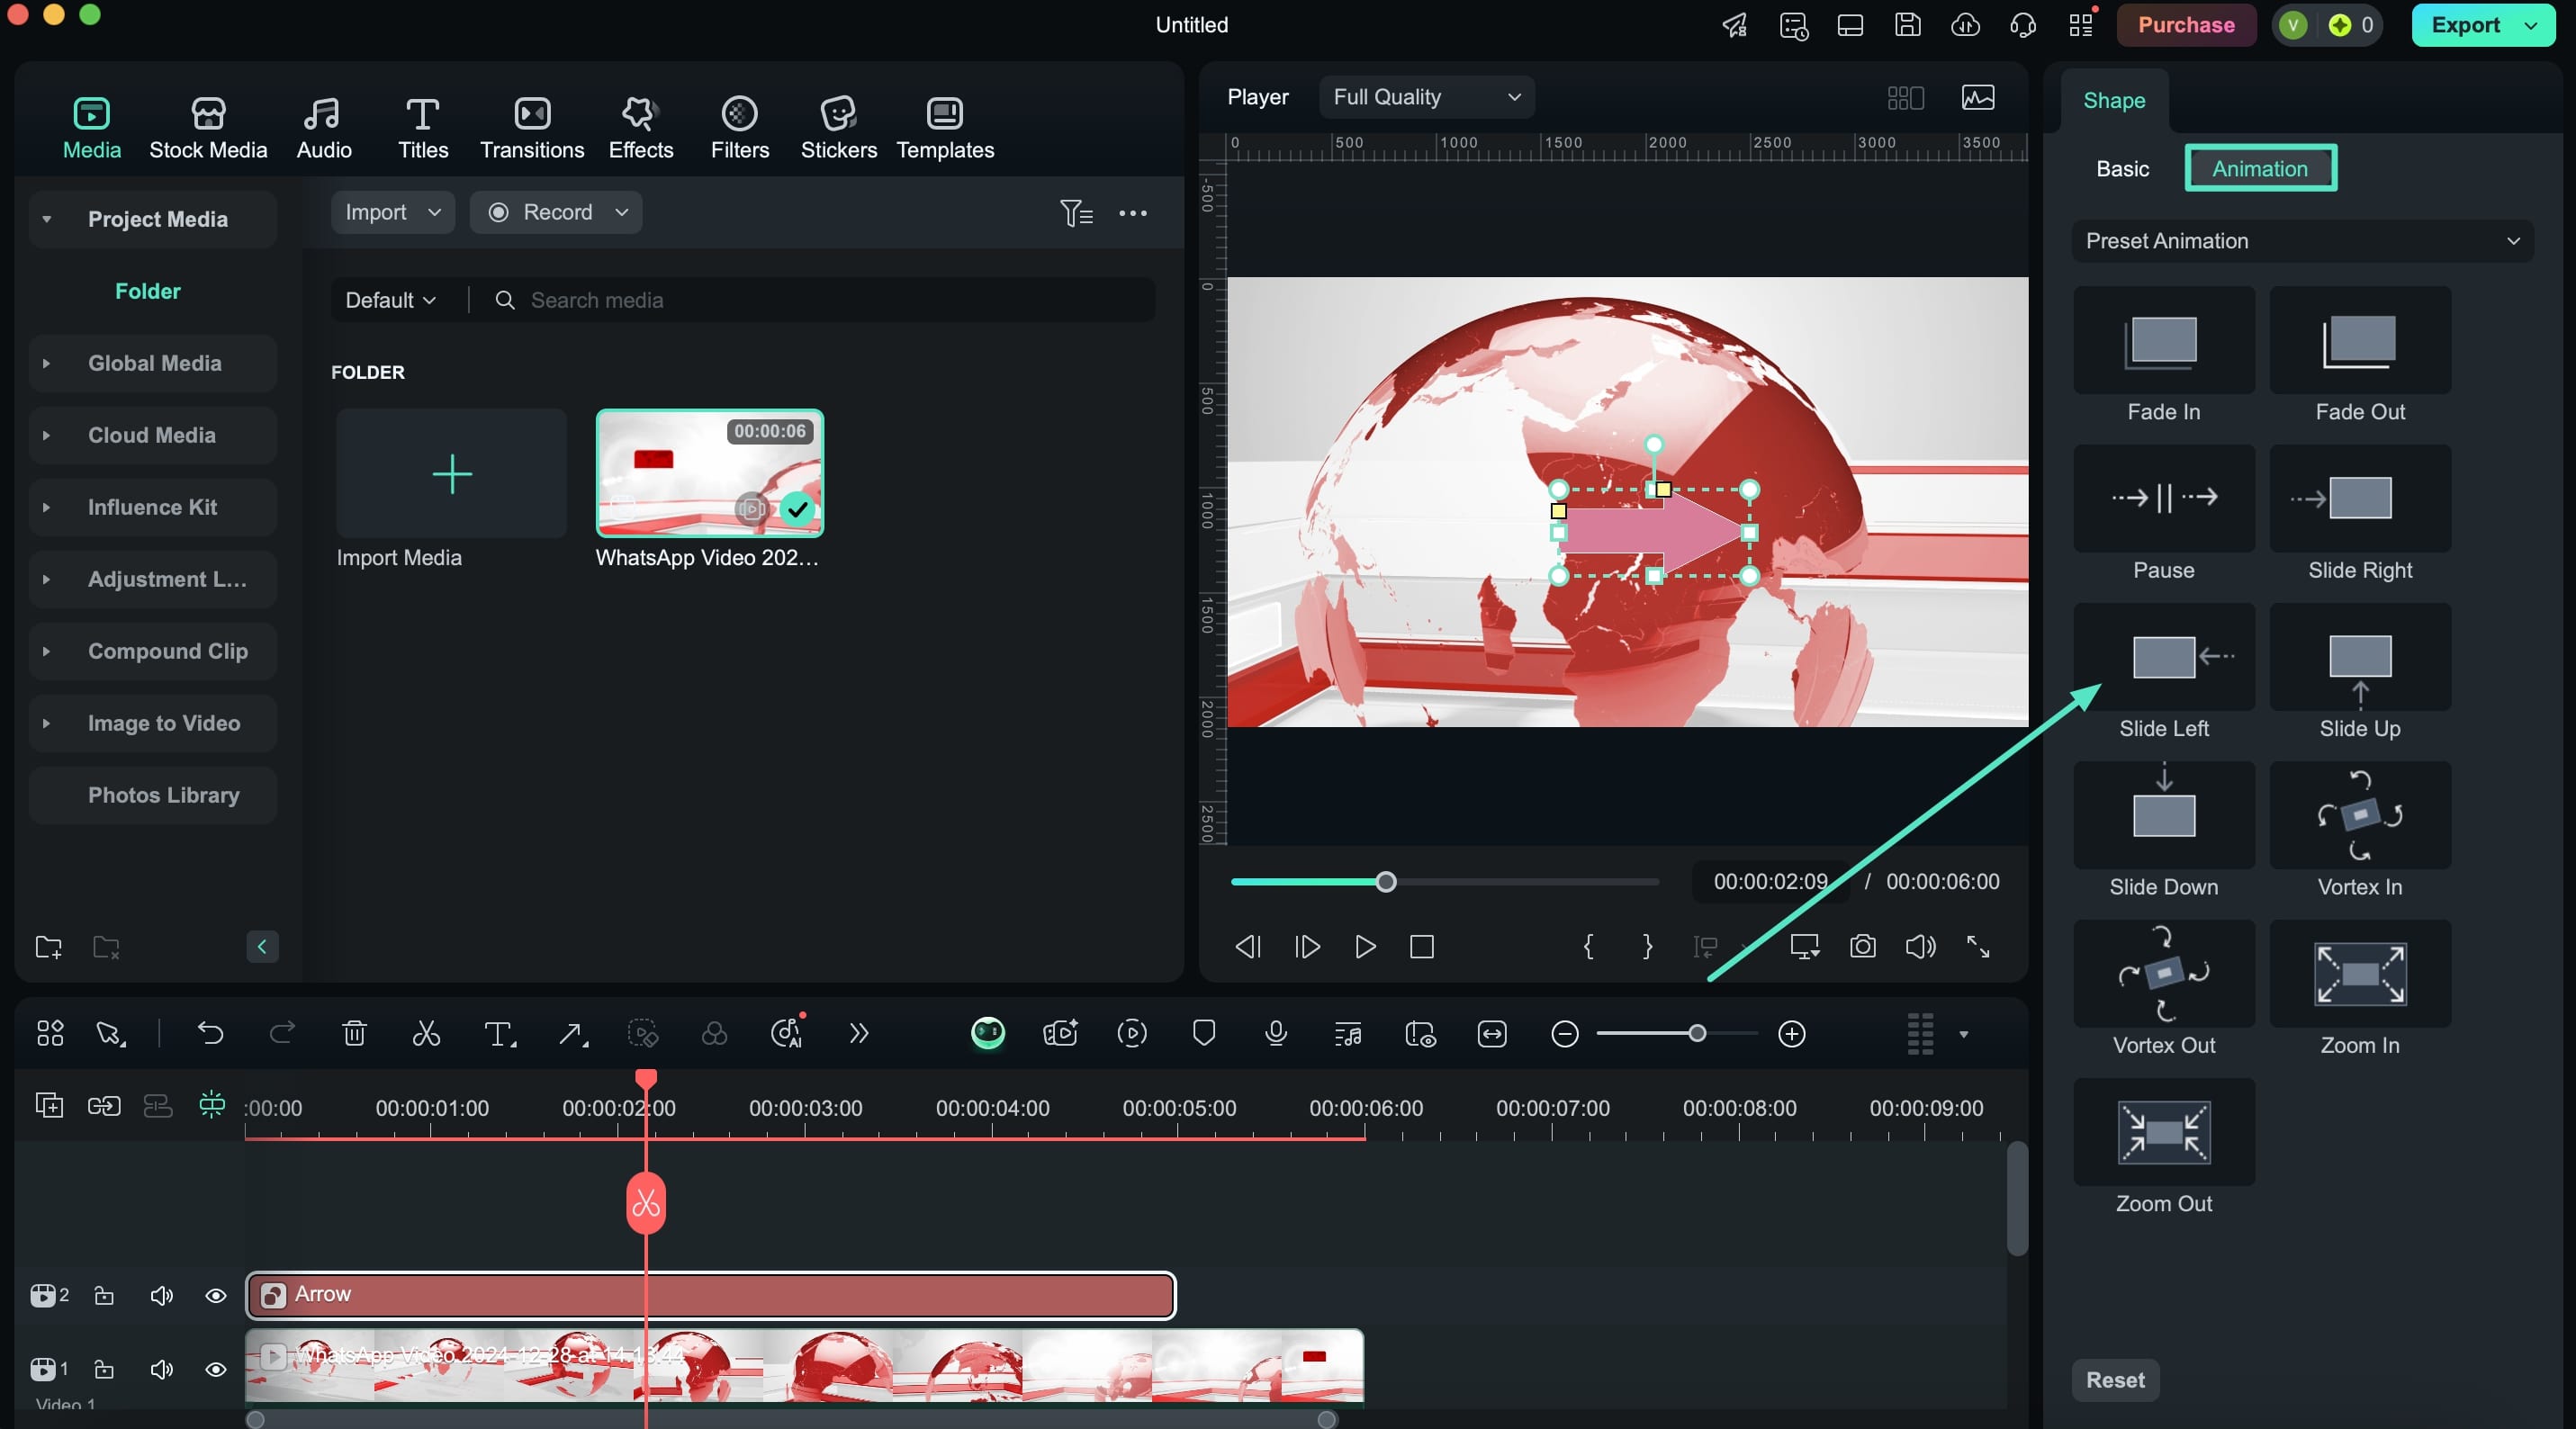
Step 4. Include Animation For Arrow Shape
Navigate to the "Animations" section to choose the required preset and apply it to the video by double-clicking it.
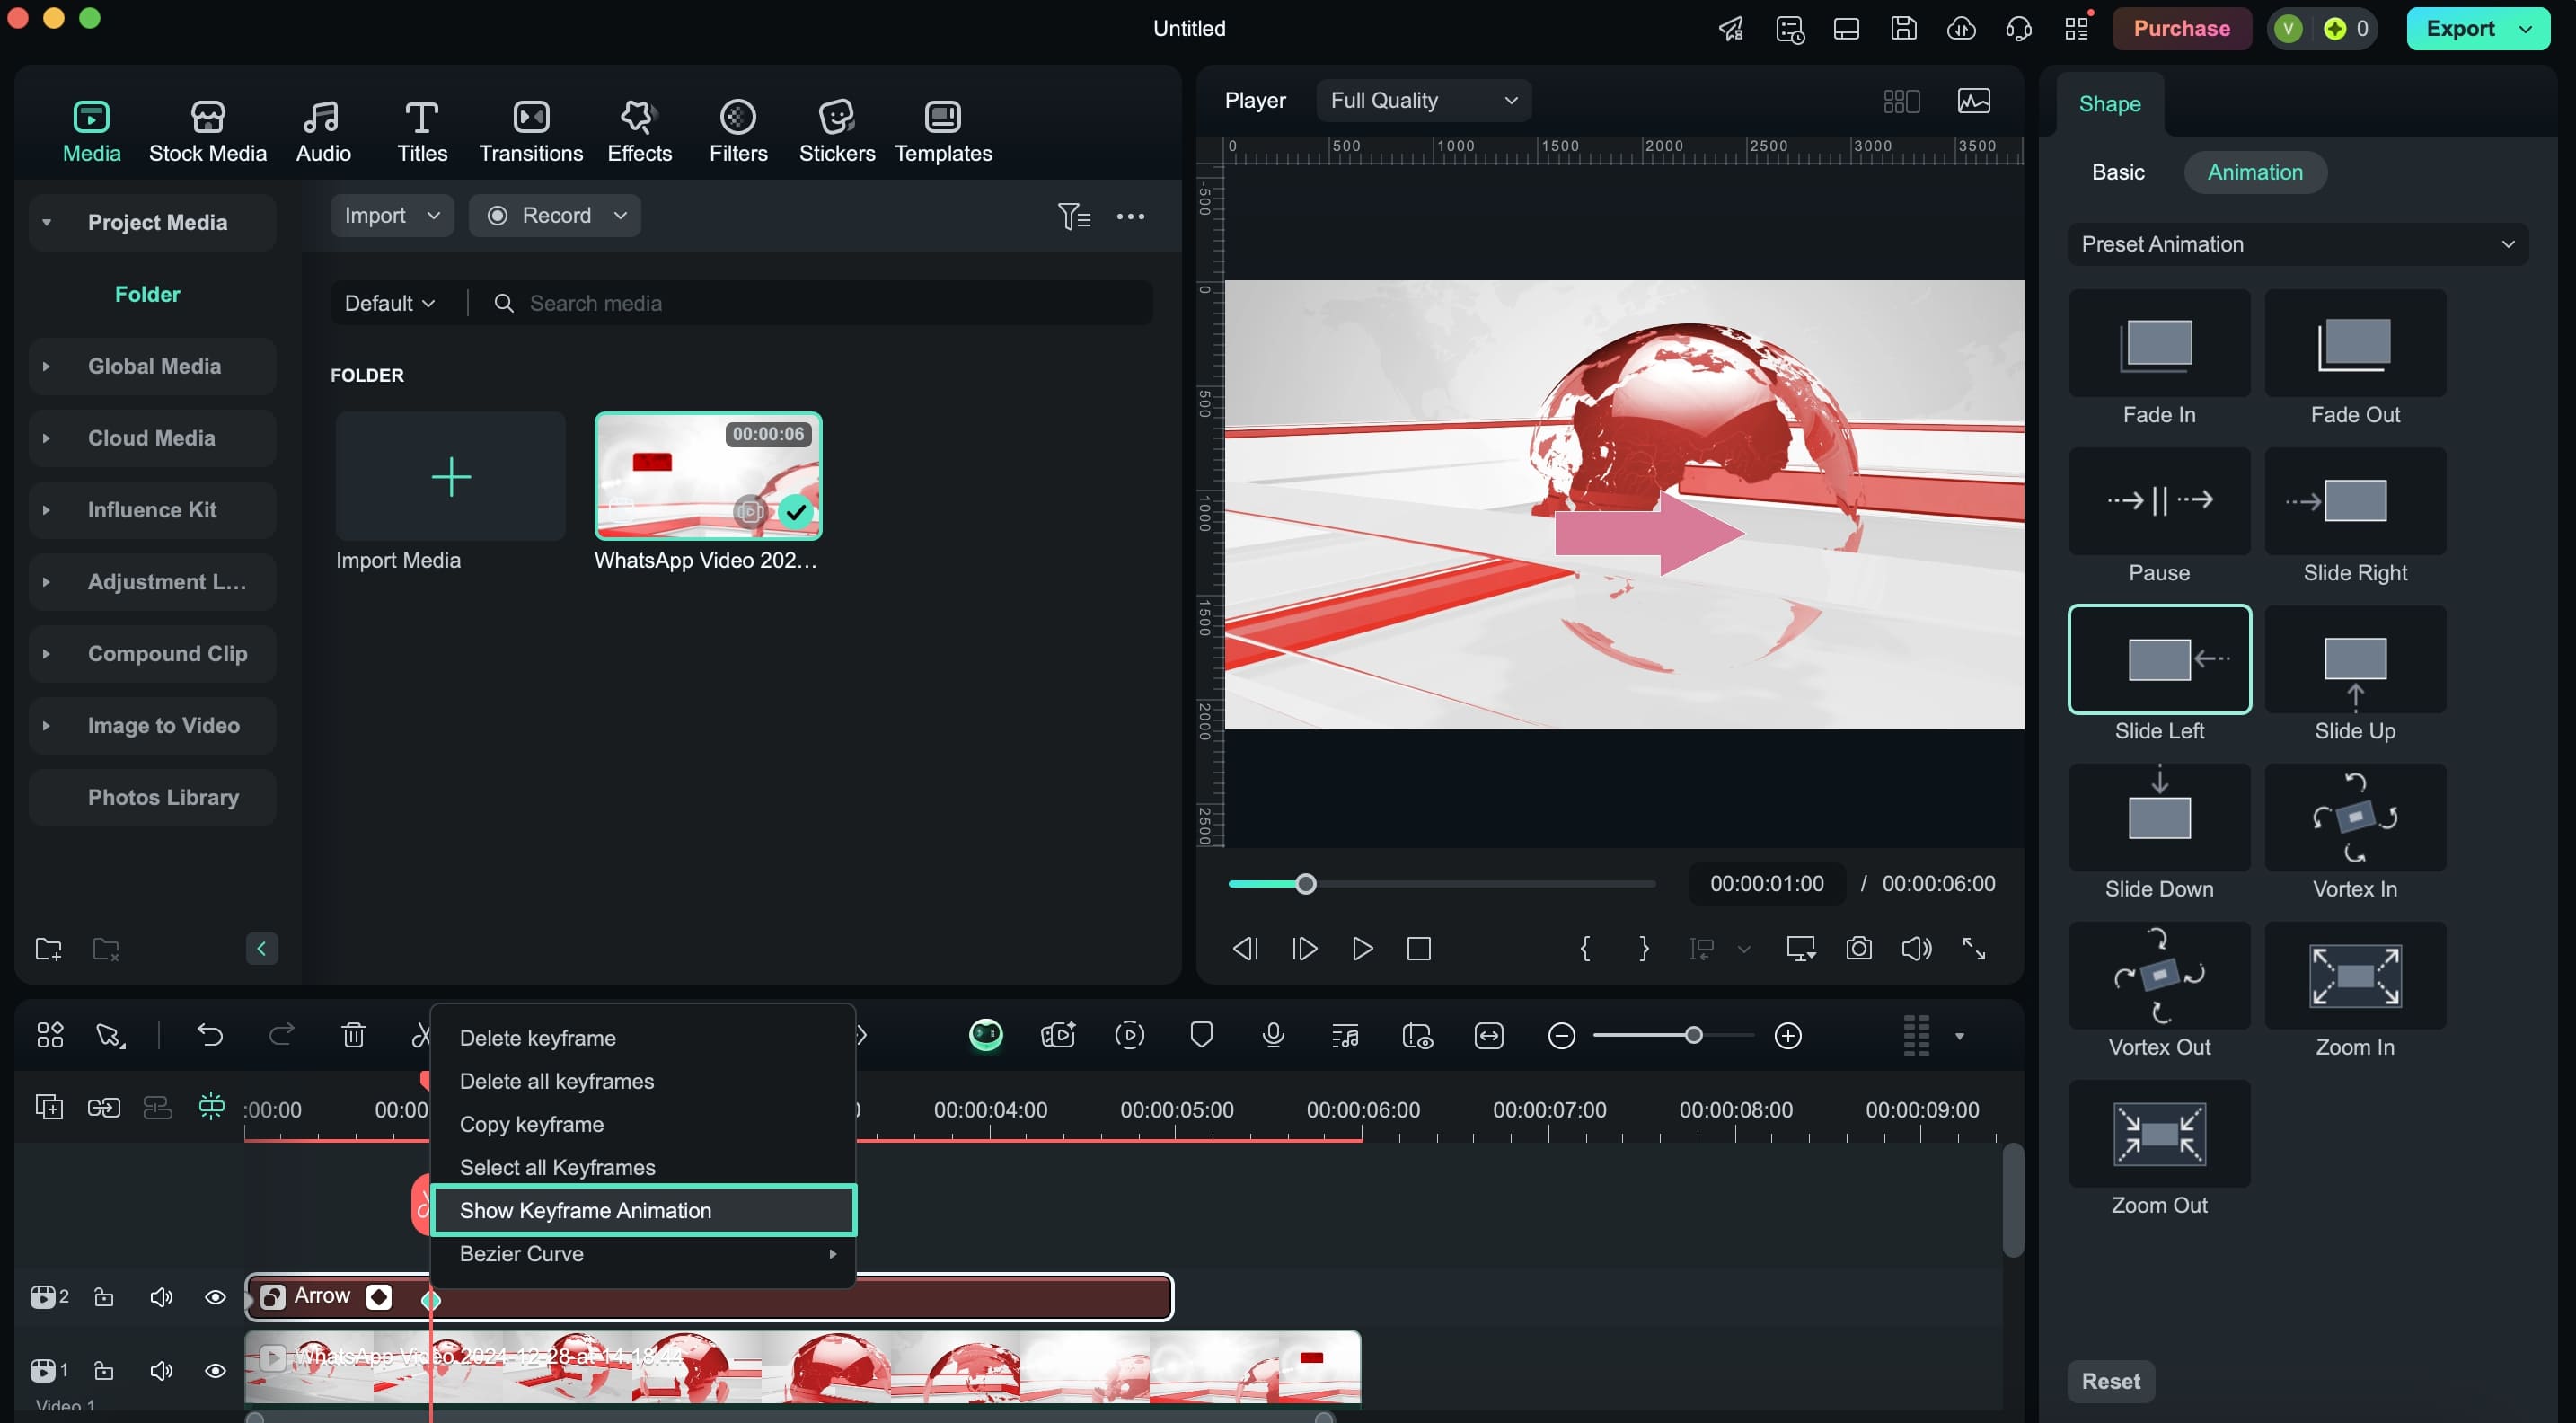
Step 5. Open Keyframe Adjustments For Arrow Shape
After adding and setting the animation onto the video timeline, Control+Click and choose the "Show Keyframe Animation" option.
Step 6. Adjust and Export Final Arrow Video
As this opens the keyframe animations onto the video timeline, select every element and adjust its settings. Once you've made all changes, use the "Export" button for leading onto the next window and download the video files onto the computer.
Way 3. Inserting The Line Shape With Customized Designs
While Filmora offers a complete set of shapes to draw interactive elements in your video, you can also add up lines with contextual formatting to make videos inclusive. Provided next are some simplified steps to add lines to your video content across Filmora:
Step 1. Insert Line Shape Across Video
Drag the video onto the timeline after importing it and proceed to the "Drawing Tools" option across the timeline bar for choosing the "Line" option.

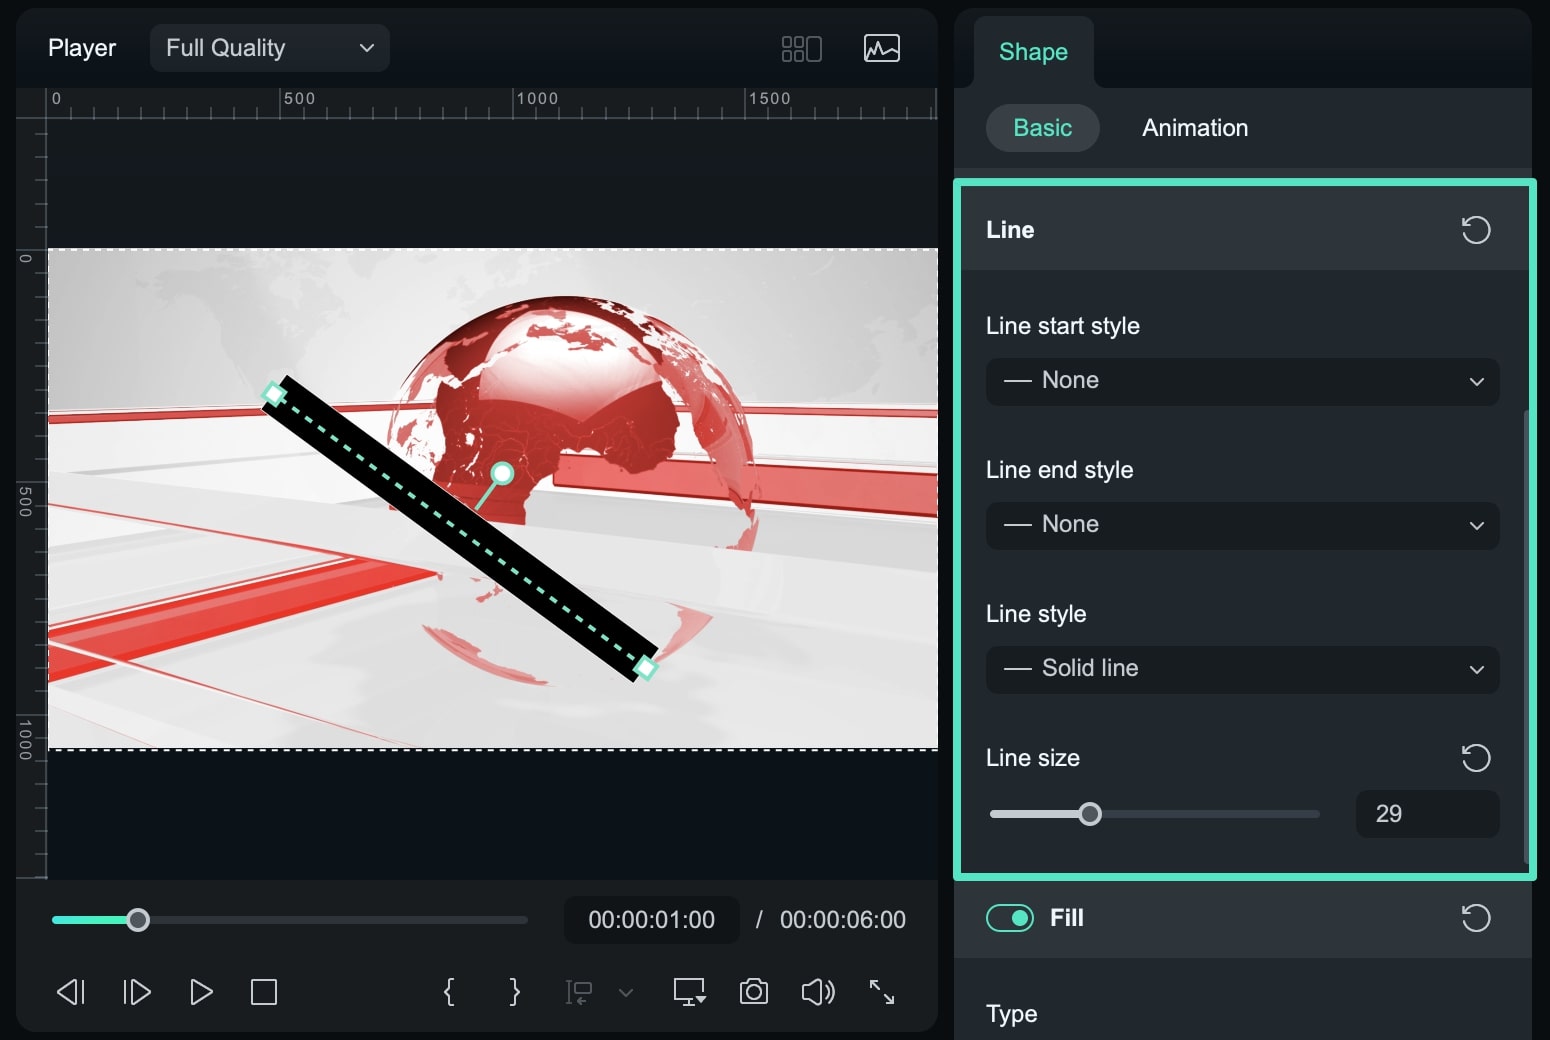
Step 2. Define Line Appearance Settings
Once you've drawn a line onto the preview window, the shape settings appear on the right. Add basic animations using the details and guidelines provided in the above section. However, you can add more into the shape using the "Line" settings in the "Basic" section. Discover different options, including how to start or end the line, or define an overall style with the provided options.
Way 4. Customizable Drawing with Pen ToolNEW
Filmora's Pen Tool enables precise, custom masking and clipping paths for detailed video edits. It allows users to create intricate shapes to isolate or highlight specific areas within clips. This tool enhances creative control by facilitating smooth, accurate adjustments, ideal for effects, censorship, or blending multiple visual elements seamlessly. Follow the step-by-step guide to learn how to use this pen tool for customizable drawings:
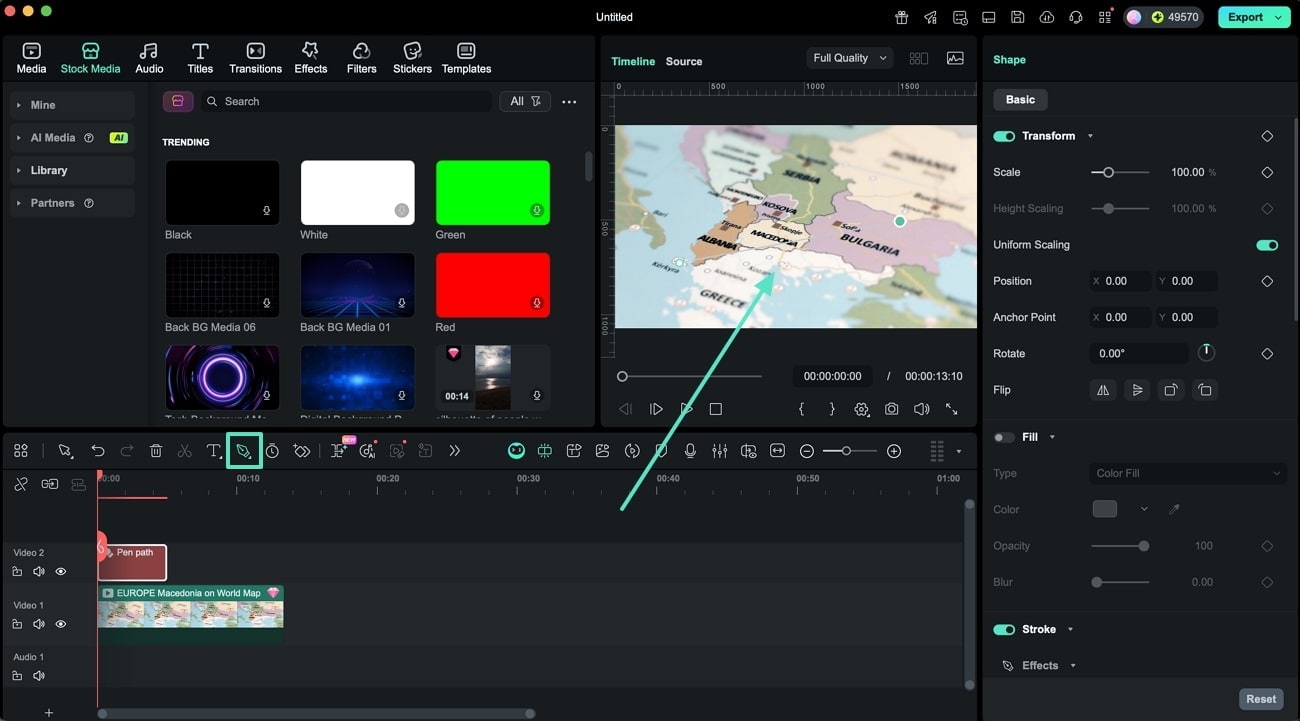
Step 1. Access the Pen Tool and Begin Drawing on Media
After importing the media to the editing timeline, click the Pen Tool option to activate the Pen Tool. Using the preview window, draw your desired shape by placing various curve points.
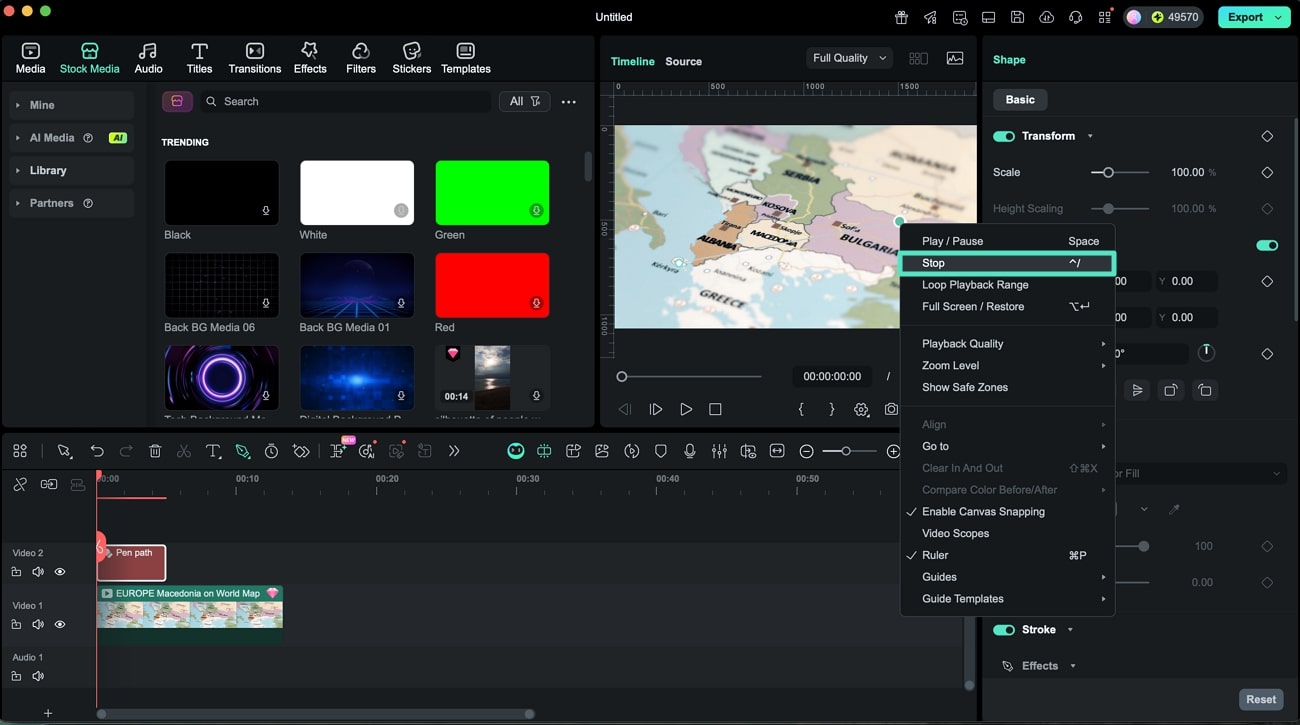
Step 2. Finalize the Shape Selection
After drawing your shape with the Pen Tool, use the Control + Click combination within the preview area to reveal options. Select the Stop button to complete and lock in your selected shape for further editing.
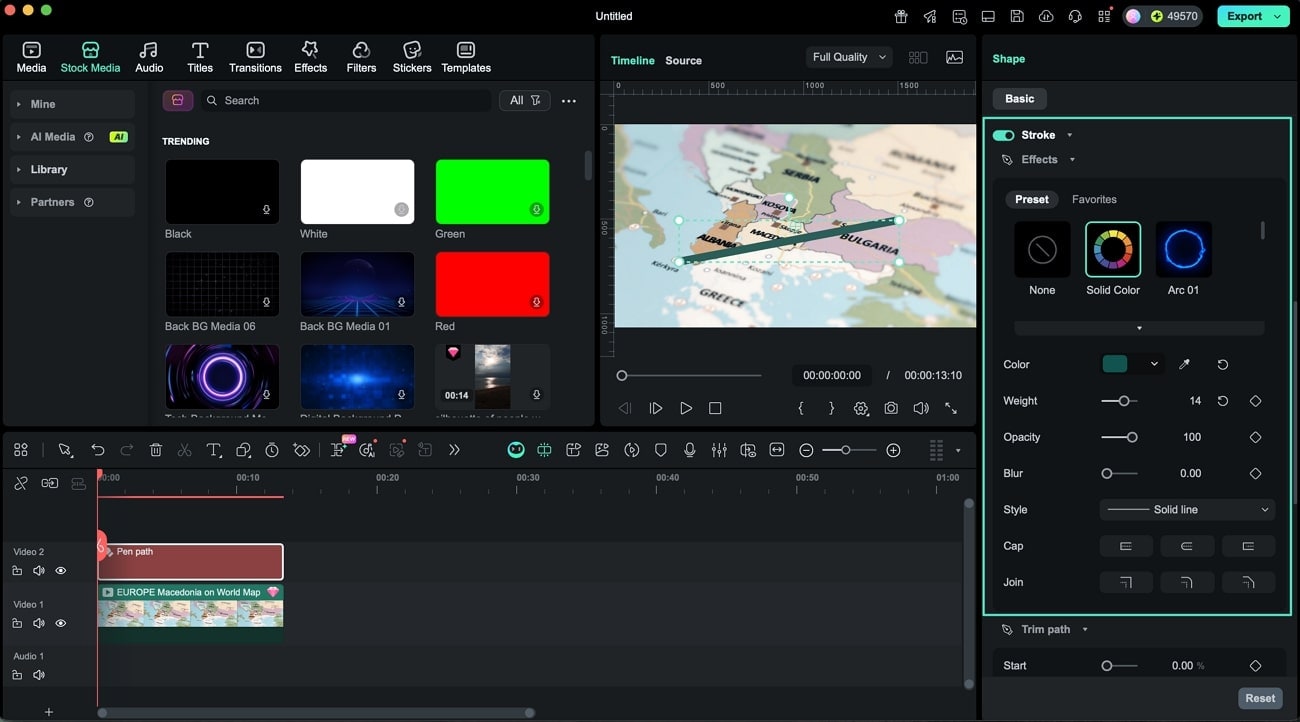
Step 3. Customize Fill Color and Stroke Settings
Toggle on the Stroke option to apply an outline, where you can choose from preset styles and modify the stroke's width and position to meet your preferences.
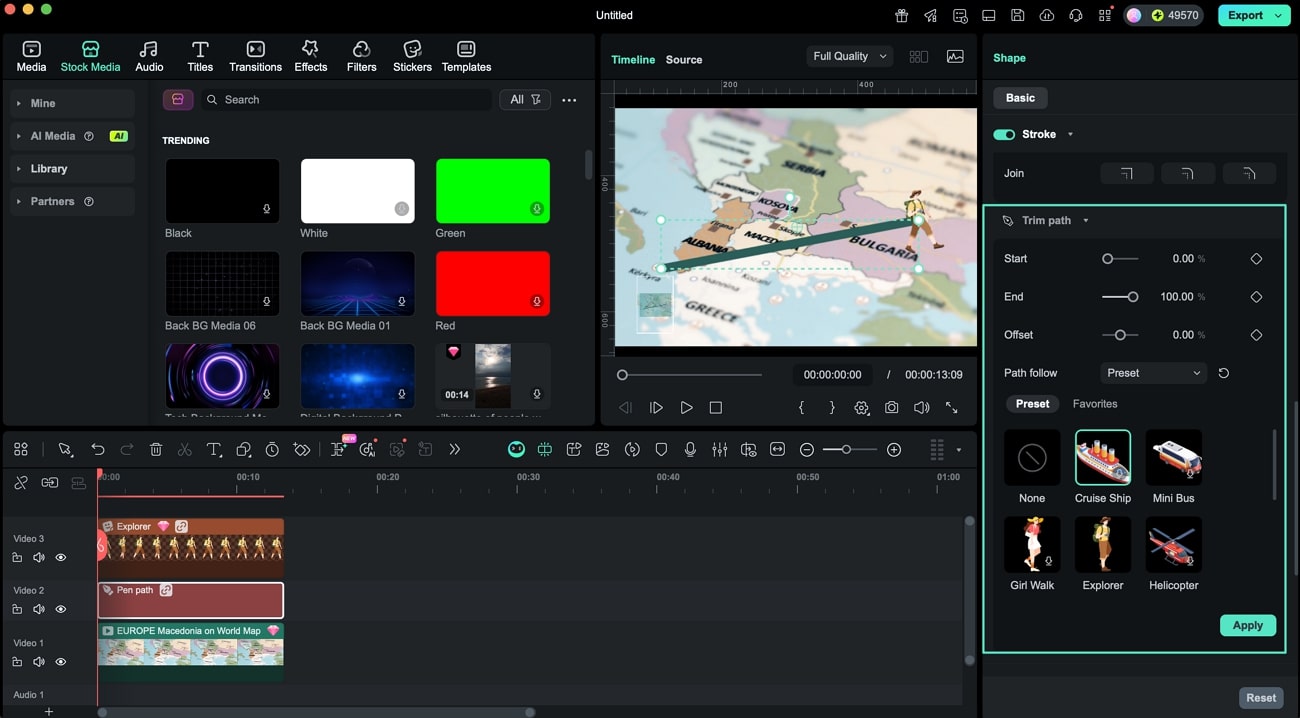
Step 4. Add Trim Path and Apply Animation
Enhance motion and style by trimming the stroke path. Adjust Start, End, and Offset sliders within the Trim Path option to control how much of the stroke is visible and how it animates. Expand the Path Follower dropdown menu to select an animation effect like navigation or motion along the path. Click Apply, then play your video in the preview window to see your path follower animate along the stroke.
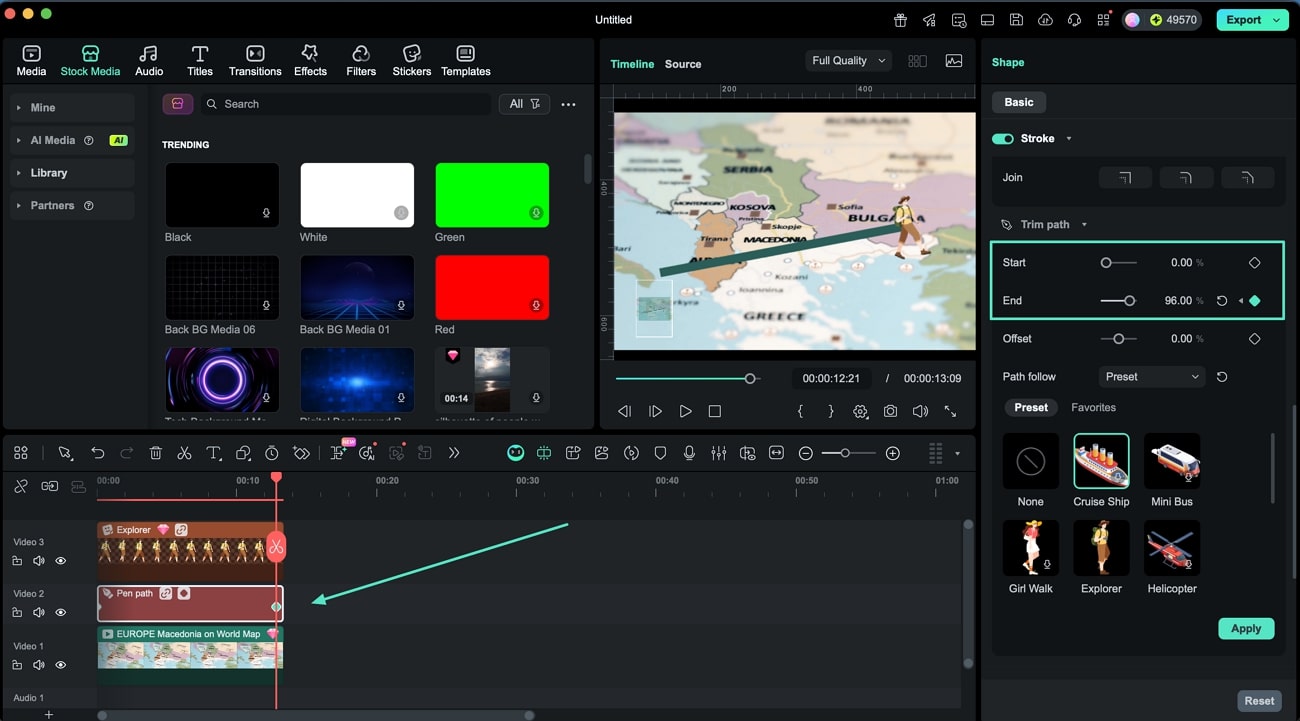
Step 5. Animate Using Keyframes
To make the added elements look realistic, place the cursor on the start of the clip in the timeline and toggle on the End keyframe icon at 0%. Following this, take the cursor to the end of the clip and set the End percentage to 98%-100% to complete the path animation.
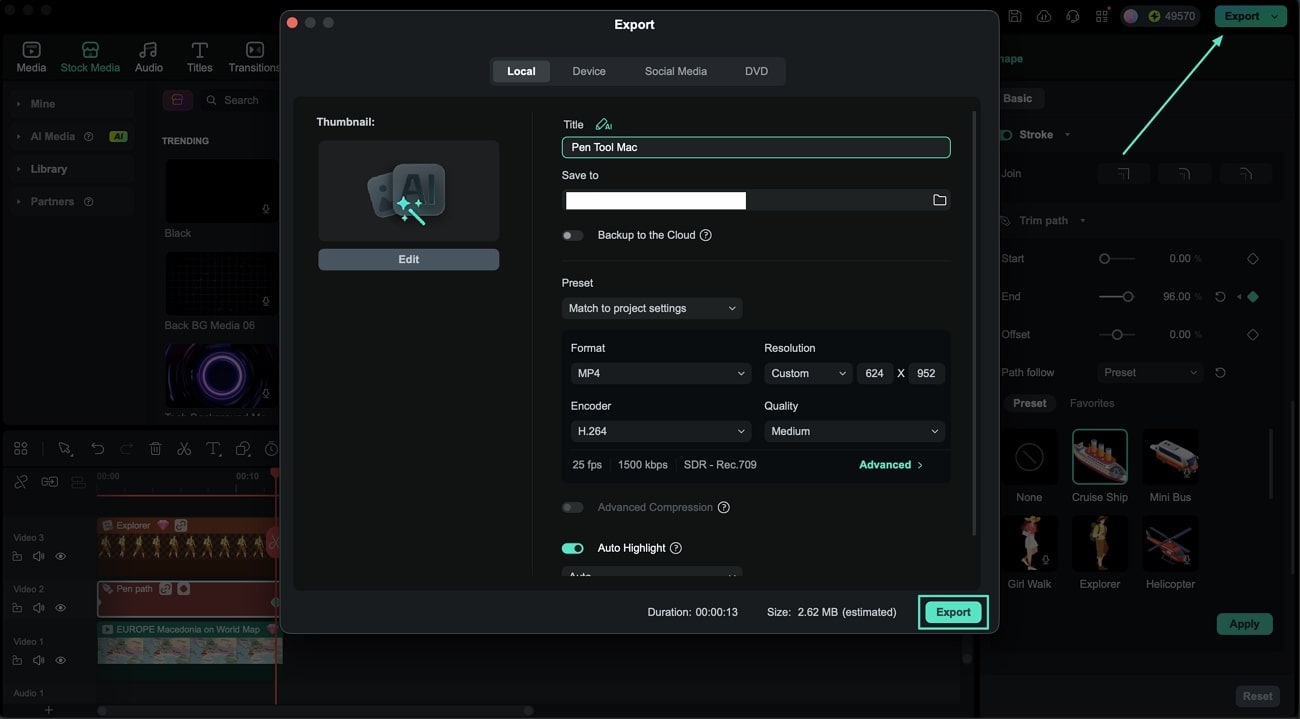
Step 6. Preview, Adjust, and Export Final Output
Fine-tune the path follower's position in the preview window until it fits perfectly with your clip. When satisfied, click the Export button in the top-right corner to save your edited video.
Here is the demo effect.

If you want to learn more about the Pen Tool in Filmora, please check out this step-by-step tutorial to master these techniques.
