For the Best Results, Use the Latest Version.
Filmora User Guide for Mac
-
Preparations for Mac
-
Account (Mac)
-
Get Started & Basic Settings (Mac)
- Release notes for Mac
- Latest Versions and Features for Mac
- Get Started on Mac - Full Guide
- Download/register/uninstall on Mac
- Panel Layout on Mac
- Keyboard shortcuts on Mac
- Touchbar on Mac
- Change playback quality on Mac
- Render preview files on Mac
- Manage Timeline on Mac
- Media for use on Mac
- Logo Reveal For Mac
- Marked Favorites for Mac
-
Compatibility & Tech Specs (Mac)
-
Performance Settings (Mac)
-
-
Creating Projects - Mac
-
Creating New Projects (Mac)
-
-
Importing & Recording - Mac
-
Importing (Mac)
-
Recording (Mac)
-
-
Video Editing for Mac
-
Basic Video Editing for Mac
- Edit Live Photos on Mac
- Enable/Disable Clip for Mac
- Magnetic Timeline For Mac
- Dual Monitor Setup for Video Editing on Mac
- Select All Clips on Timeline for Mac
- Auto Ripple for Mac
- Split & Cut Videos on Mac
- Compositing on Mac
- Crop and zoom on Mac
- Playback Zoom Level for Mac
- Change Speed on Mac
- Play Video in Reverse on Filmora for Mac
- Mark In and Mark Out for Mac
- Markers for Mac
- Group Clips in Filmora for Mac
- Customized Backgrounds for Videos and Images in Mac
- Video snapshot on Mac
- Freeze Frame on Mac
- Auto enhance on Mac
- Applying Drop Shadow for Mac
- Adjustment Layer for Mac
- Mark Clips in Filmora for Mac
- Video Editing Ruler – Mac
- Apply Transforming for Mac
-
Advanced Video Editing for Mac
- Text Animation Path for Mac
- Create Multi-Camera Clip for Mac
- Filmora Motion Blur | Mac
- Drawing Tools for Mac | Filmora Guide
- Compound Clips for Mac
- AI Video Enhancer for Mac
- Video Chapters in Filmora for Mac
- Filmora Flicker Removal Guide | Mac
- Multi-Clip Editing for Mac
- Keyframe Graph Editor for Mac
- Add Animation Keyframing in Filmora for Mac
- Multi-Frame in Filmora on Mac
- Masking in Filmora on Mac
- PIP (Picture in Picture) in Filmora on Mac
-
AI-Powered Video Editing for Mac
- Smart Scene Cut for Mac
- Smart Short Clips for Mac
- Filmora AI Eye Contact - Mac
- Filmora Image to Video for Mac
- AI Idea to Video for Mac
- AI Text-to-Video for Mac
- Instant Cutter Tool on Mac
- AI Face Mosaic for Mac
- Filmora Image to Prompt for Mac
- Keyframe Path Curve for Mac
- Filmora AI Image Enhancer Guide – macOS
- Planar Tracking for Mac
- Filmora AI Relight - Mac
- AI Extend For Mac
- AI Script-to-Video for Mac
- AI Text-Based Editing in Mac
- Create With Instant Mode on Mac
- ChatGPT Plugin - AI Copywriting on Mac
- AI Smart Cutout in Filmora for Mac
- Auto reframe on Mac
- Lens Correction in Filmora for Mac
- AI Portrait Cutout on Mac
- Scene detection on Mac
- AI Smart Masking for Mac
- AI Mate Editing for Mac
- Motion Tracking on Mac
- Video Stabilization for Mac
- AI Video/Photo Object Remover for Mac
- AI Smart Search for Mac
- AI Skin Tone Protection for Mac
- Green screen on Mac
- Super Slow Motion with Optical Flow for Mac
- AI Stylizer for Mac
- Video Denoise for Mac
-
-
Audio Editing for Mac
-
Basic Audio Editing for Mac
-
Advanced Audio Editing for Mac
-
AI-Powered Audio Editing for Mac
- Audio To Video for Mac
- AI Sound Effect for Mac
- Smart BGM Generation on Mac
- AI Voice Enhancer for Mac
- Audio Stretch for Mac
- AI Audio Denoise for Mac
- Auto Synchronization on Mac
- AI Vocal Remover for Mac
- AI Auto Beat Sync for Mac
- AI Music Generator for Mac
- AI Voice Cloning on Mac
- Silence Detection on Mac
-
-
Text Editing for Mac
-
Basic Text Editing for Mac
-
Advanced Text Editing for Mac
-
AI-Powered Text Editing for Mac
-
-
Video Customizations for Mac
-
Video Effects (Mac)
-
Audio Effects (Mac)
-
Transitions (Mac)
-
Stickers (Mac)
-
Filters (Mac)
-
Color Editing (Mac)
-
Animations (Mac)
-
Templates (Mac)
-
Asset Center (Mac)
-
-
Exporting & Share & Cloud Backup - Mac
Filmora Tutorial Videos
Filmora 13 & 14 User Guide in PDF
Filmora 12 User Guide in PDF
Filmora 11 User Guide in PDF
Filmora 9 & 10 User Guide
Audio To Video for Mac
Audio To Video is a technology that enables users to upload audio, with AI automatically generating video content that matches. The AI analyzes the audio to create visuals that reflect its tone and message, making it easier to produce synchronized audio-visual content.
For a complete overview of this feature, explore the details in the guide:
How to Generate Video Content
Here is a step-by-step guide for you:
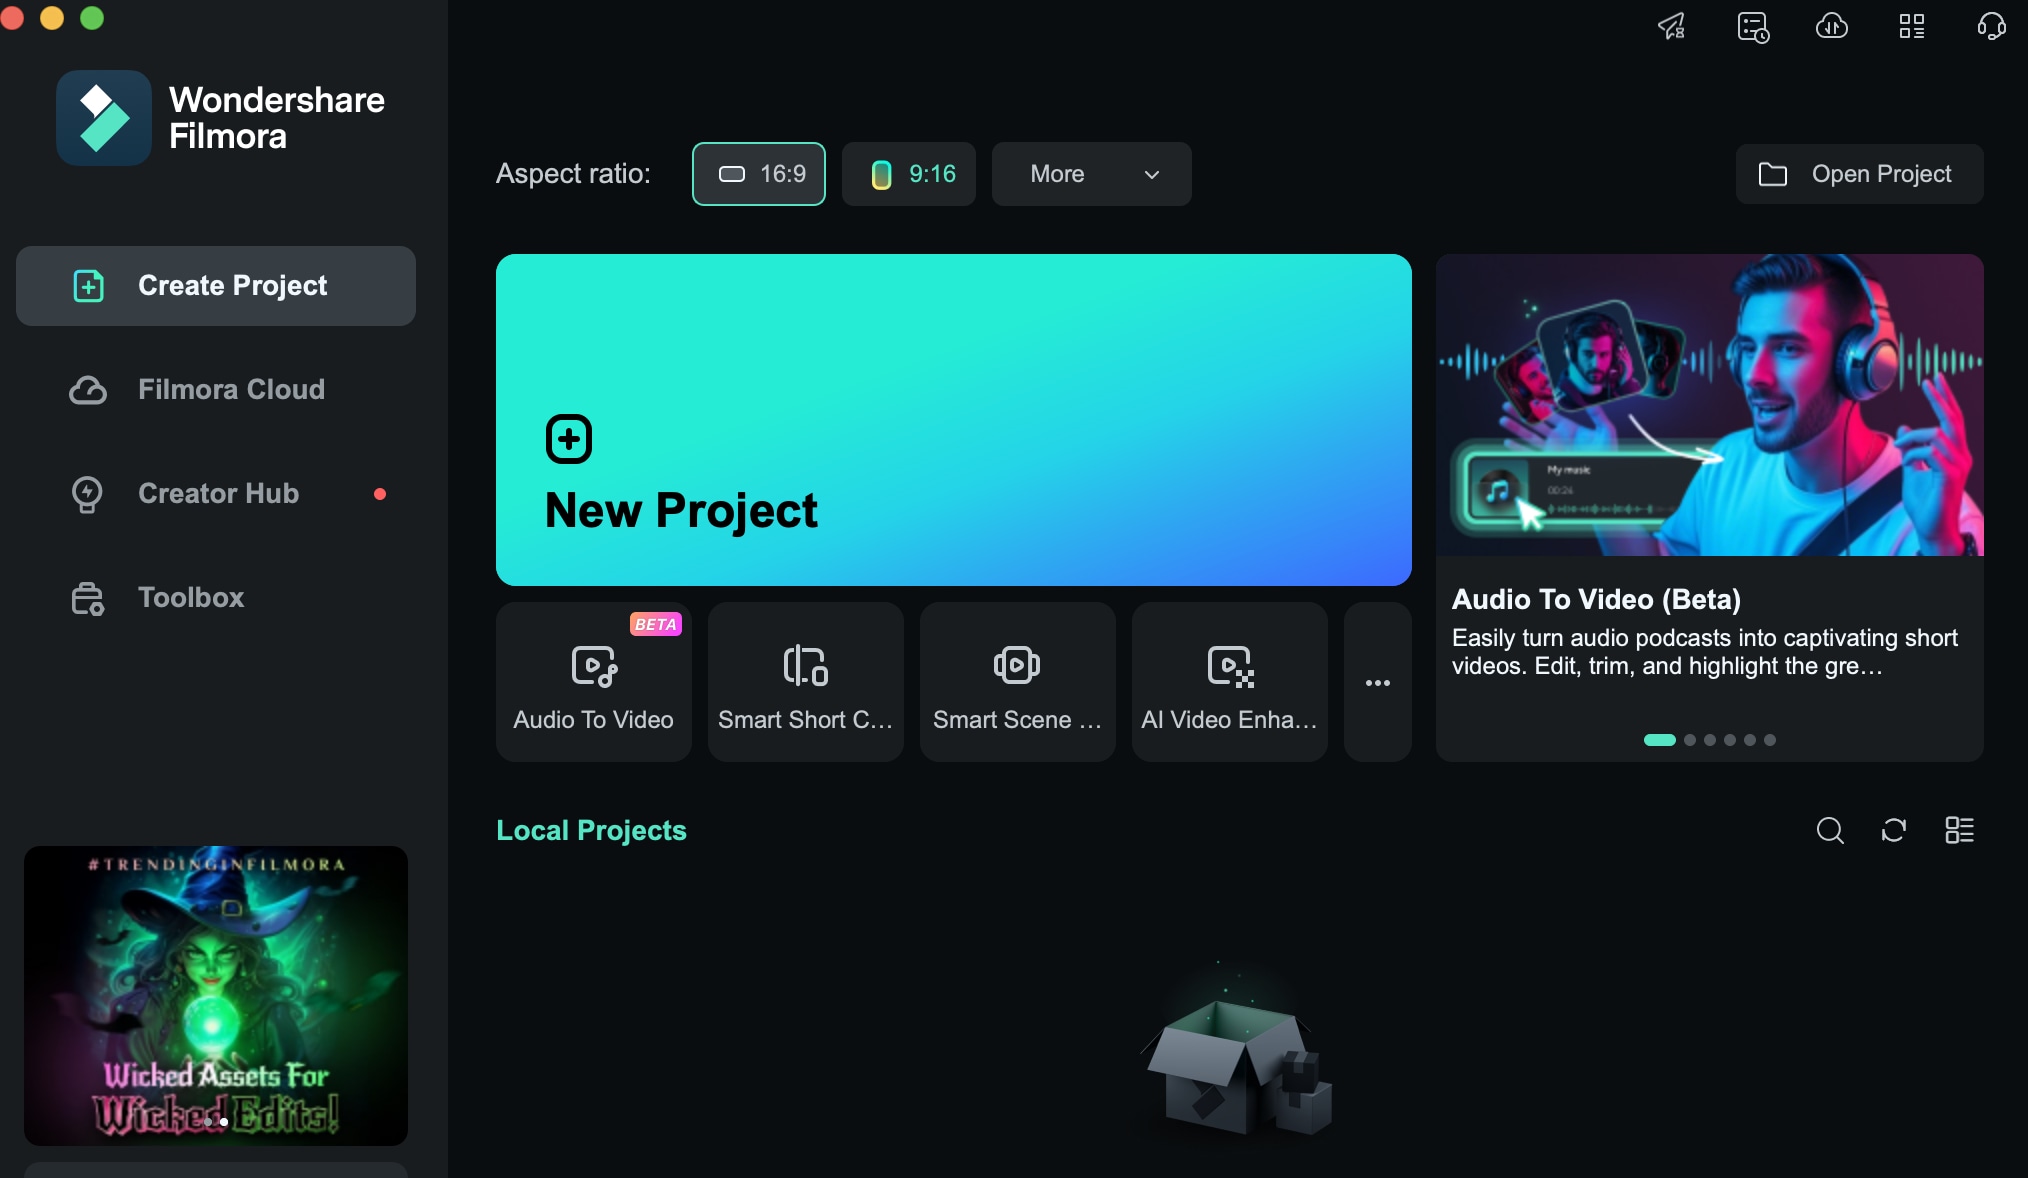
Step 1: Launch Filmora and Click Audio To Video
Open Filmora on your computer and, on the welcome screen, choose the Audio to Video option.
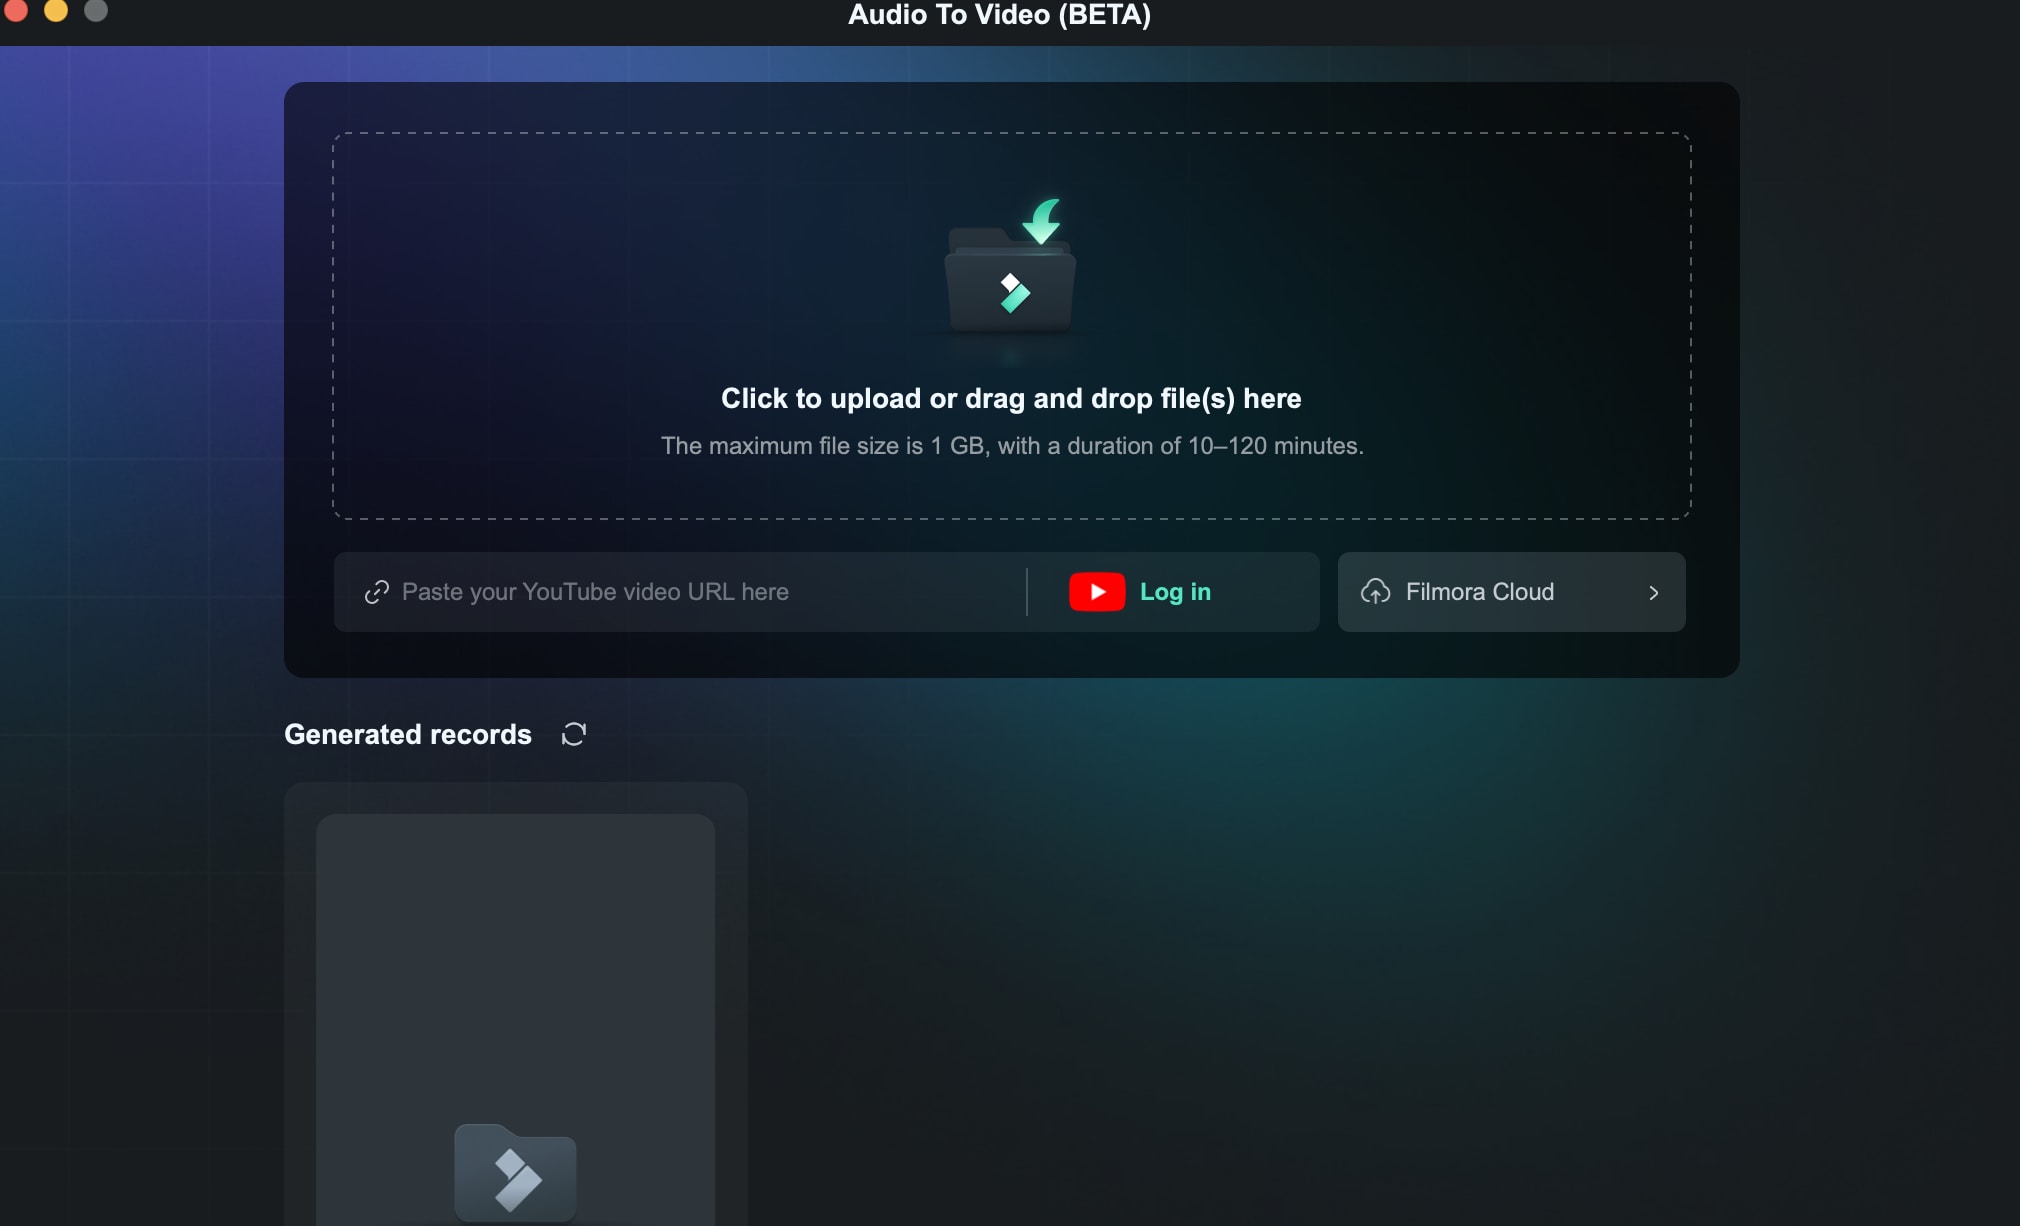
Step 2: Upload Audio Files
Once you select Audio to Video, you can upload your audio files or simply drag and drop them into the interface.
Step 3: Begin Creating Video Content
When uploading an audio file, you must manually choose the video source language. You can also specify the content type, set the aspect ratio, duration, and the number of videos to generate. Additionally, you can customize the screen settings.
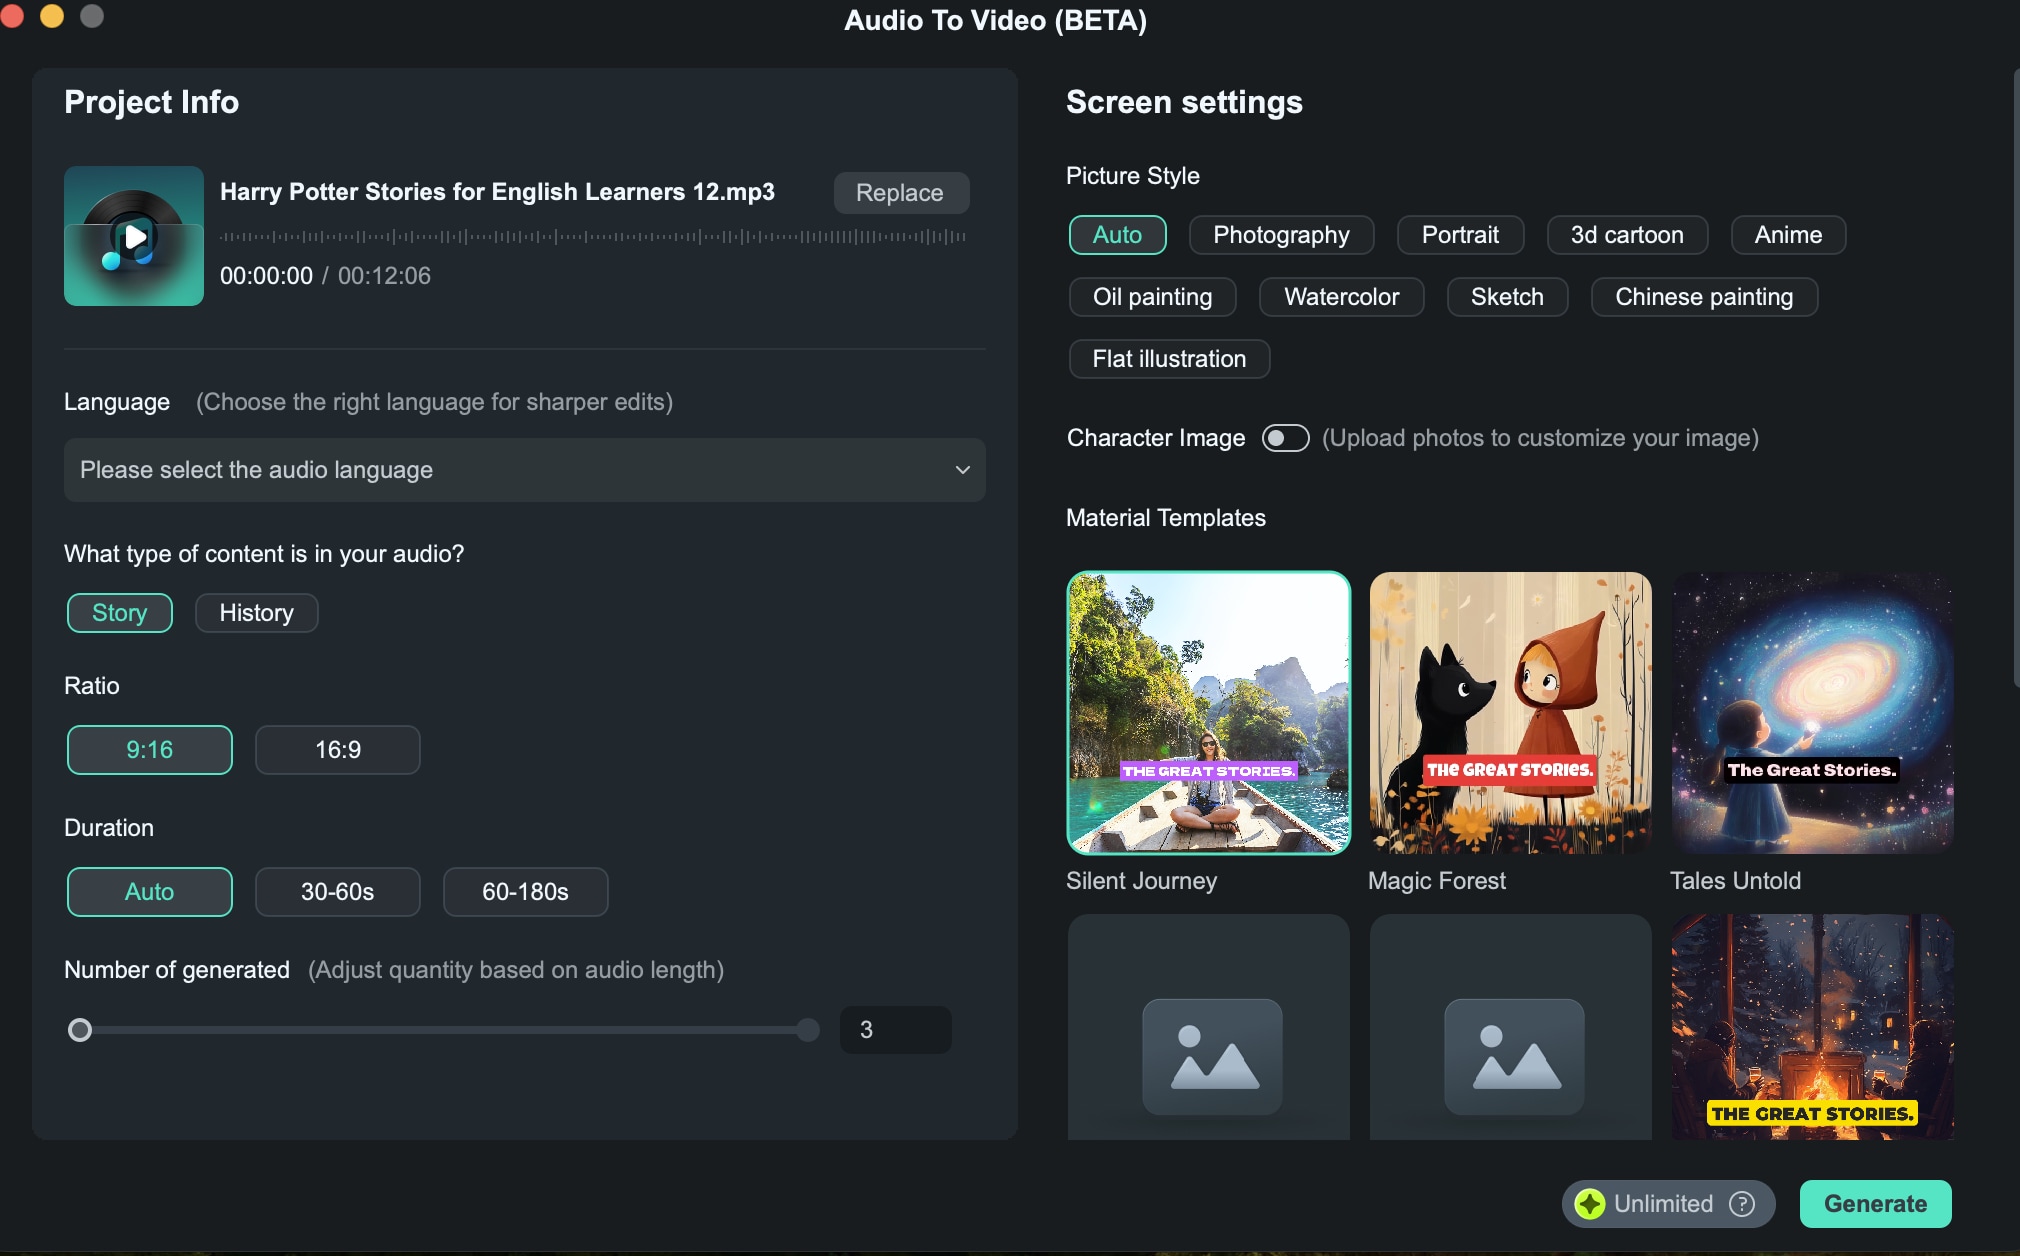
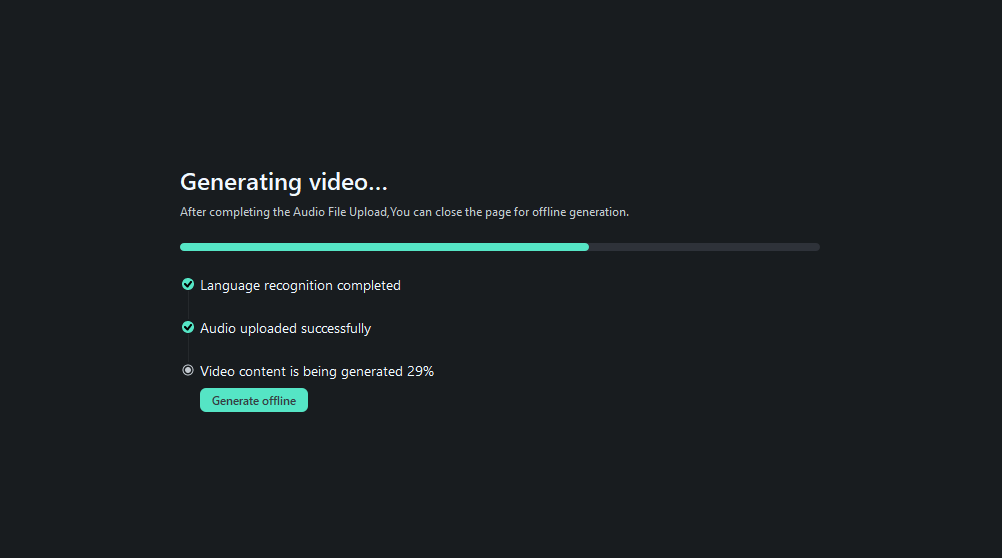
Once everything is configured, click on "Generate."
Tips: You can choose "Generate Offline" to create the video content in the background.
Step 4: Select Your Video
The system will generate multiple video options based on the uploaded audio and your selected settings, and each will be rated according to the platform's guidelines.
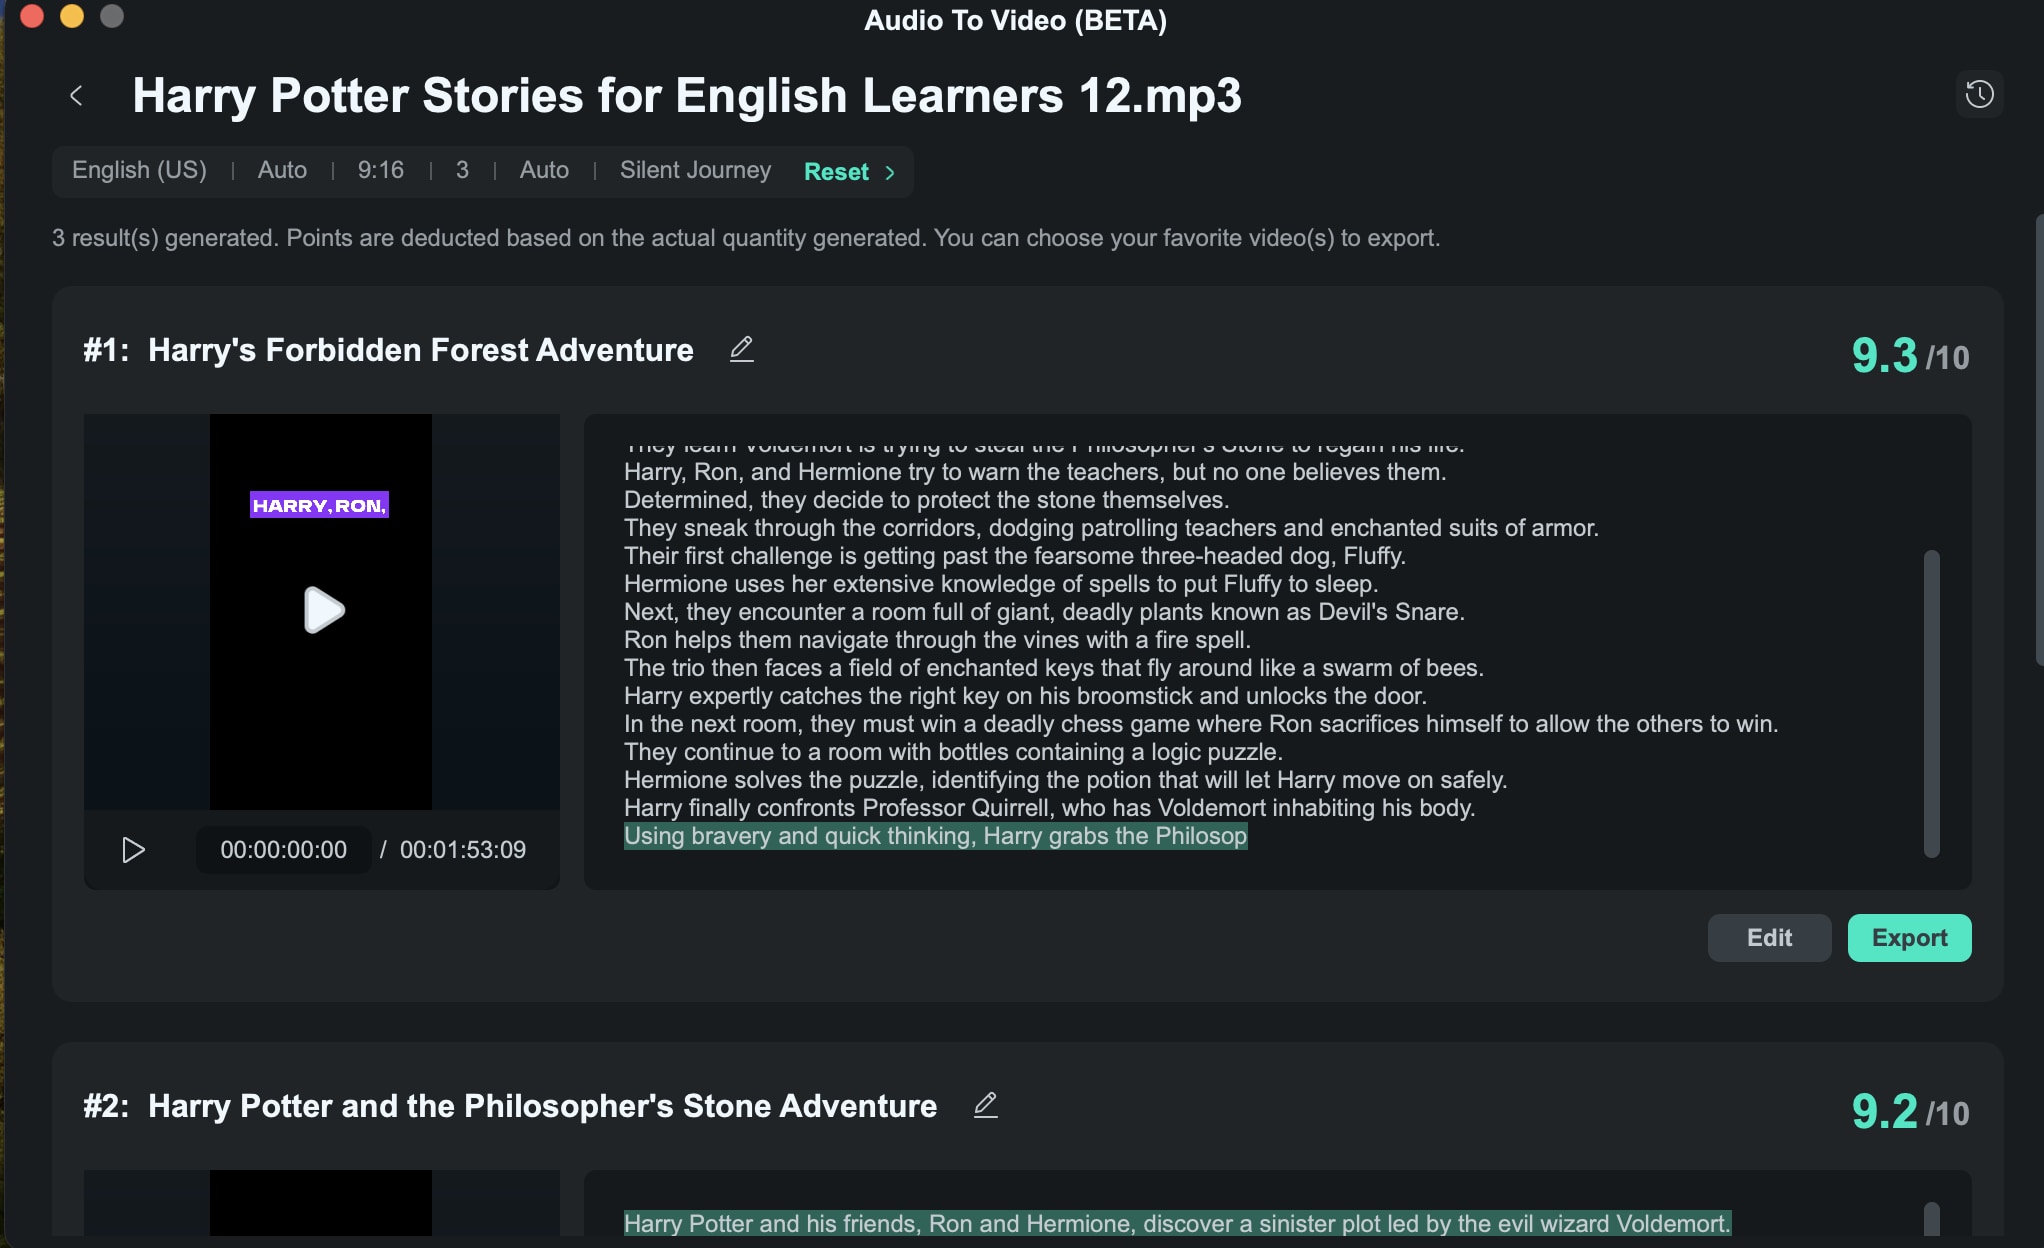
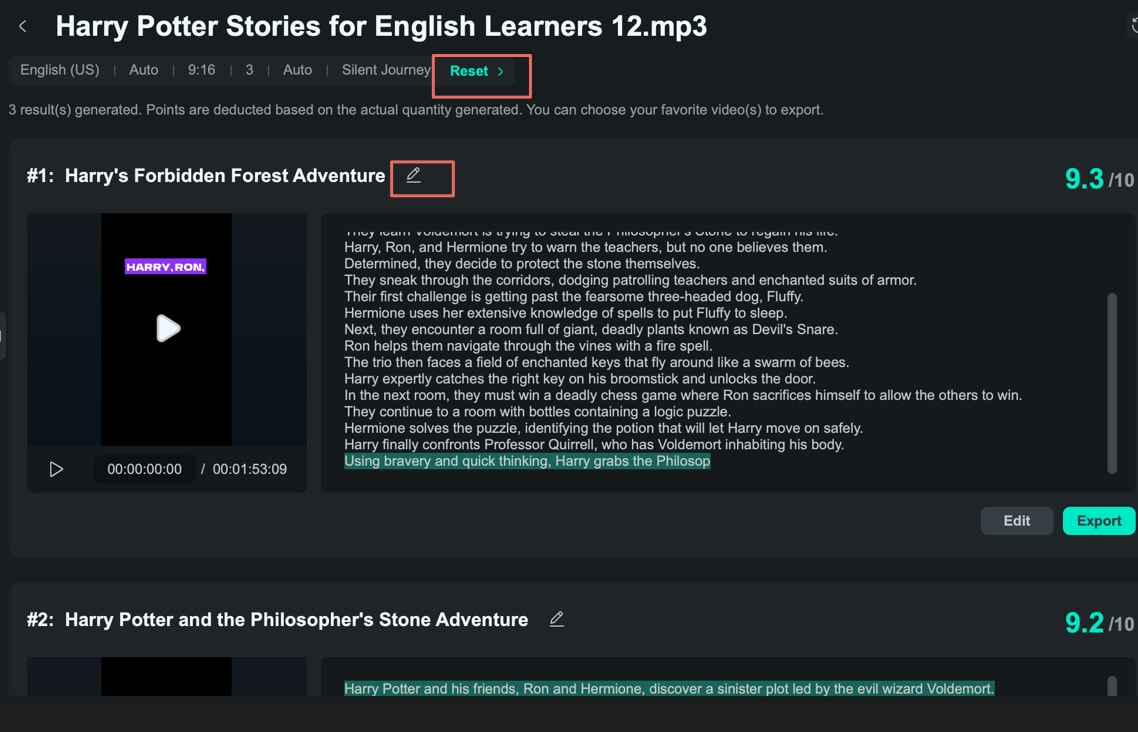
Tips:
- You can also click "Reset" to regenerate it.
- You can retitle the generated video.
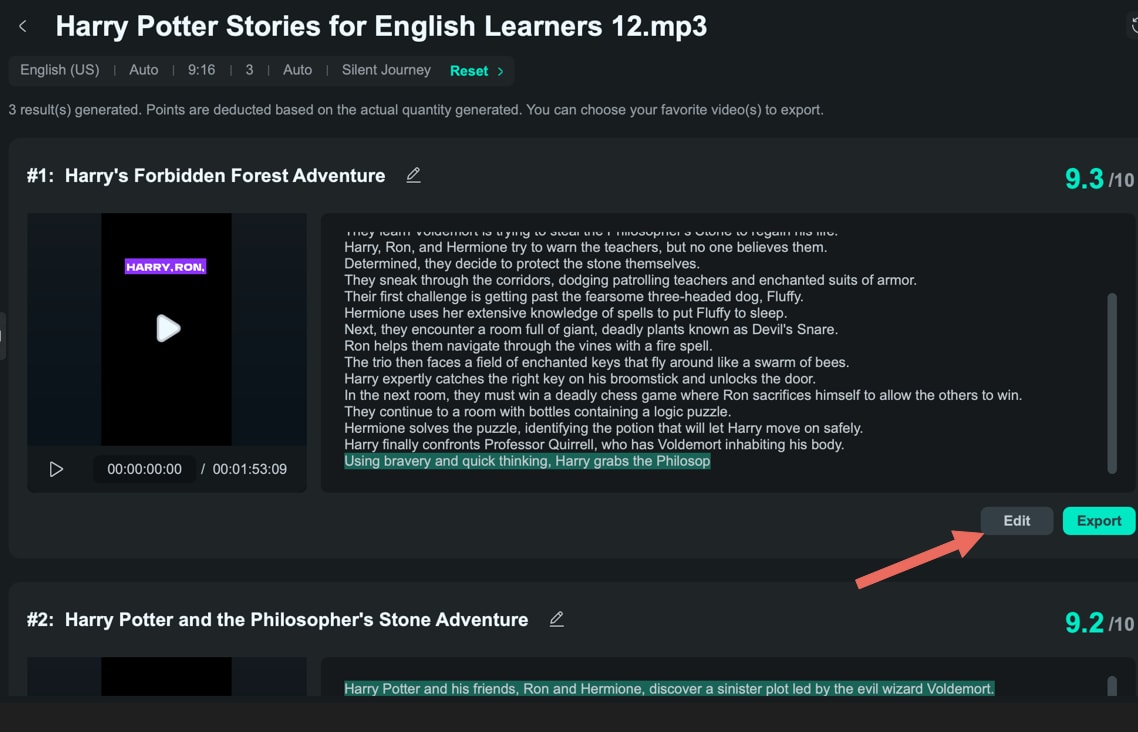
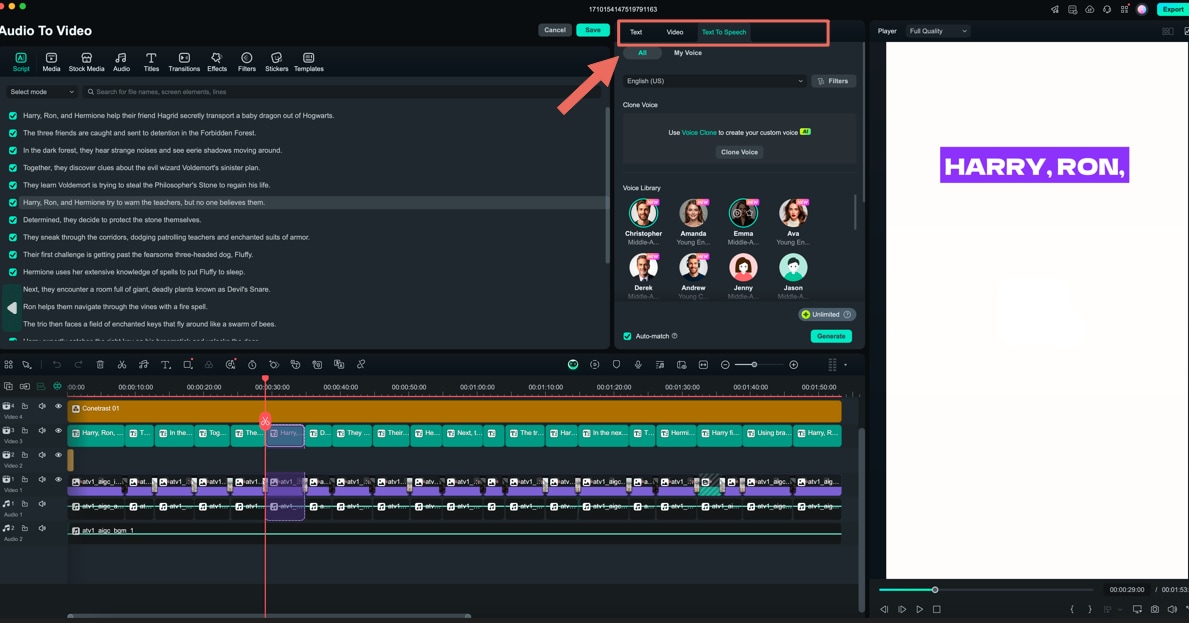
Step 5: Edit Your Video
Clicking "Edit" will open the editing panel, where you can choose to show or hide specific captions in Select Mode, or view the script by timecode for more detailed editing in Time Code Mode.
You can edit both the text and video. If you're not satisfied with the current speech or want to add more dialogue, you can use the Text-to-Speech feature to generate new voiceovers from the text.
📌Note:
To ensure transparency and compliance when using Filmora's AI features, please be aware of the following:
- The software interface will clearly identify all content created by AI.
- For traceability, exported or downloaded AI-generated assets may include a visible or invisible watermark.
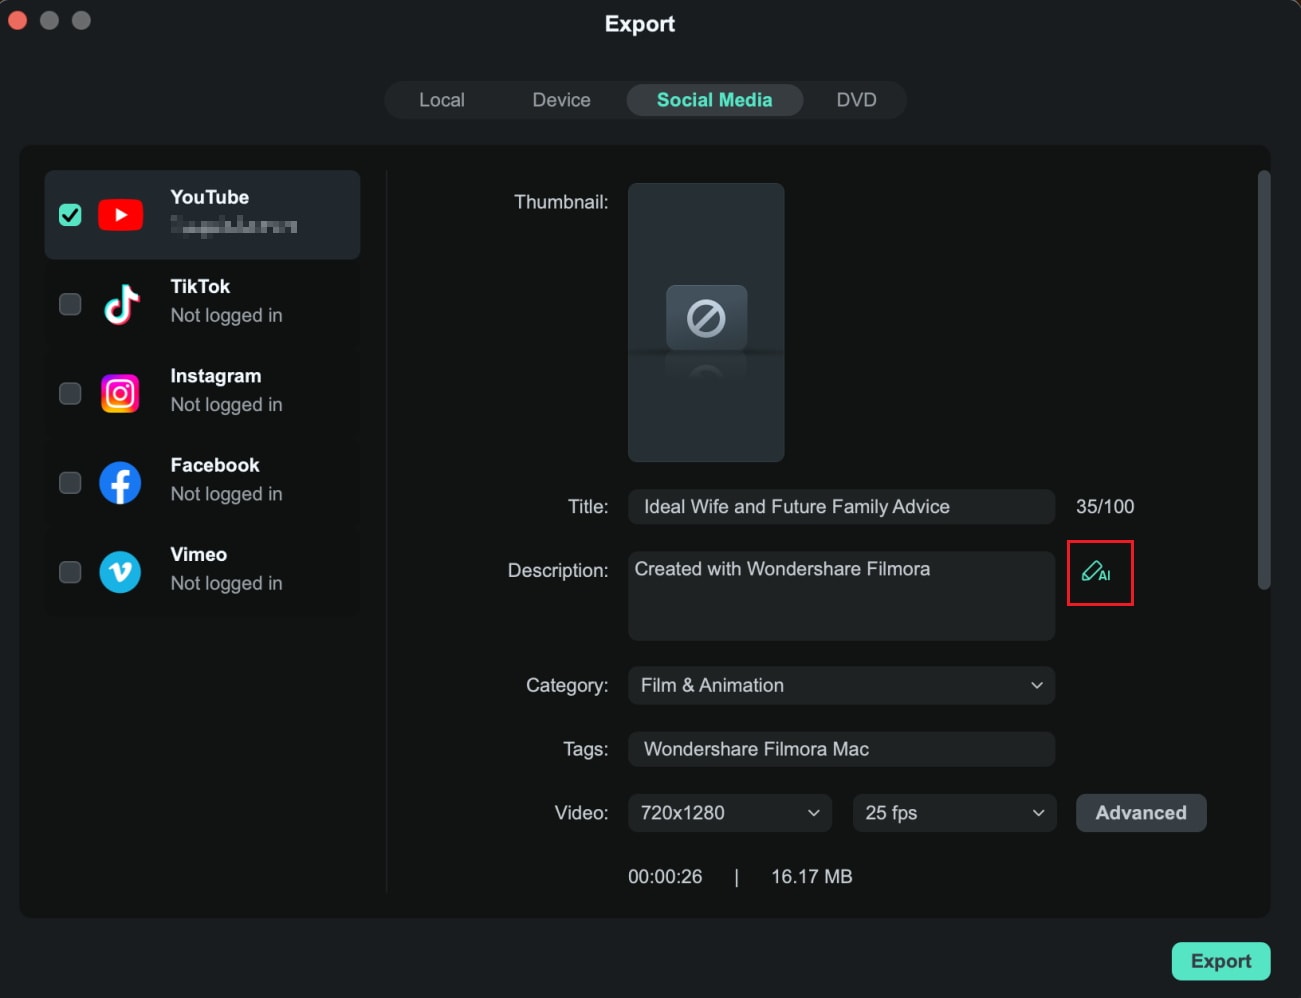
Step 6: Export Your Shorts
Finally, open the Export window, select the social media platform (YouTube, Vimeo, TikTok) for your video upload, and customize settings such as the title, description, category, resolution, and more.
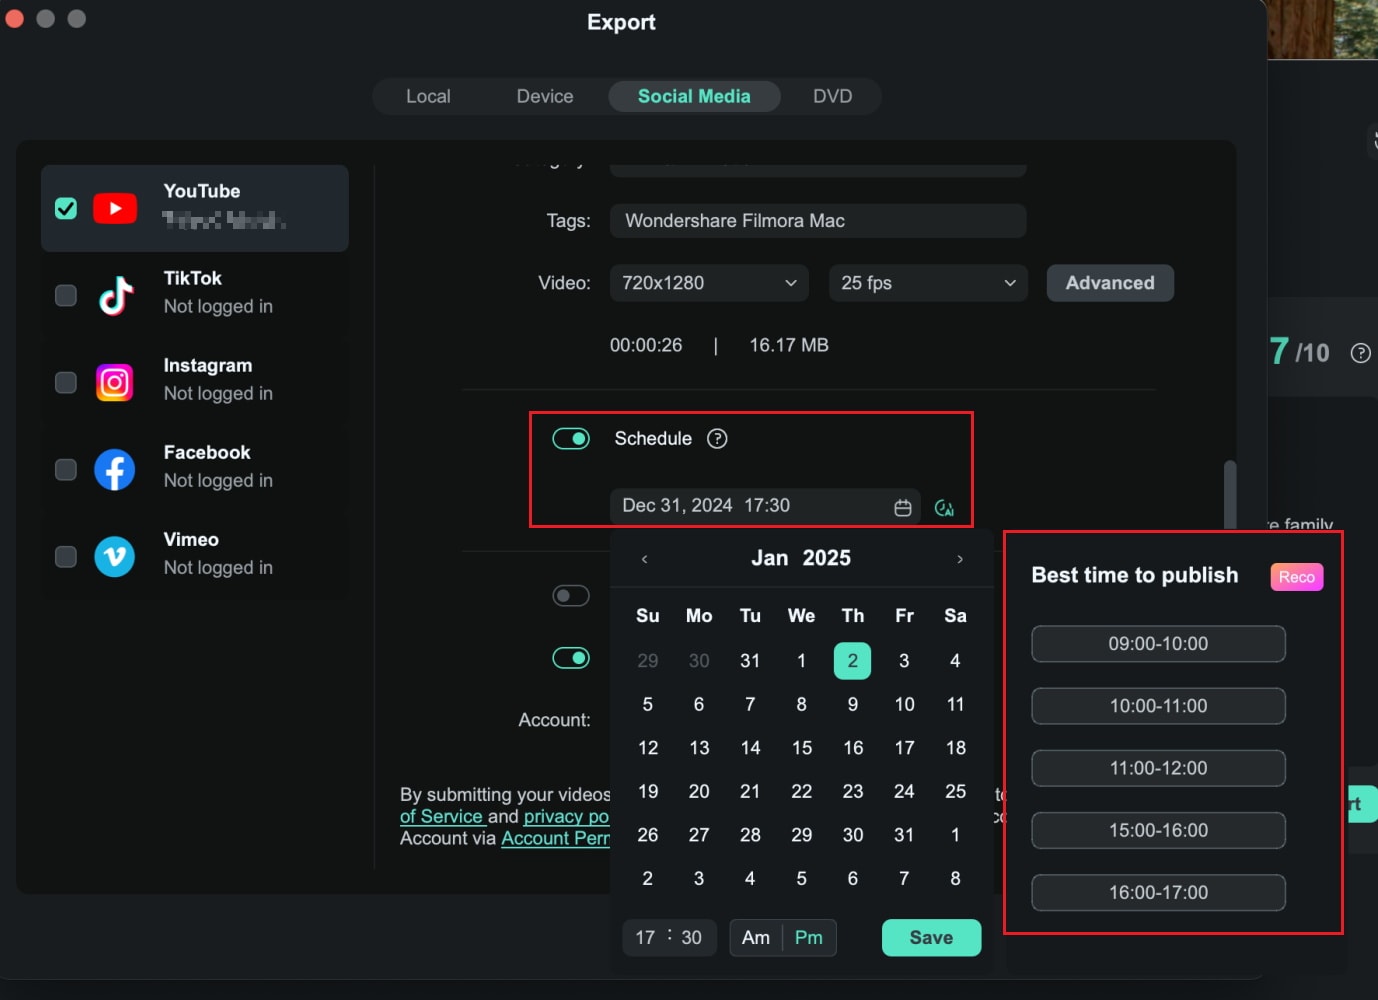
If you want to schedule your post, enable the Schedule option and set the desired date and time.
Related Posts
Featured Articles
Learn more popular articles from Wondershare.
Beginner's Guide to Before and After Video Transitions
If you want to know how to make a before-and-after transition video, this guide covers everything from editing steps to useful tips
How To Make Your Videos Look Like VHS With Filmora
Do you want to give your videos a nostalgic retro vibe? Learn how to apply the VHS effect using Filmora. Make your videos look like they came from the '80s.
How to Create Stunning CSS Loading Text Animations
Tired of boring loading screens? Learn to create fun CSS-loading text animation that keeps viewers engaged. Or try the easy way with Filmora!
Recommended User Guide
Learn how to use more features.
Silence Detection on Mac
Learn to perform silence detection in Filmora for Mac
AI Voice Cloning on Mac
When making a video using text for generating speech, you might desire using your voice. Discover the new AI voice cloning feature on Filmora Mac.
AI Voice Enhancer for Mac
Leverage the AI Voice Enhancer for Mac to automatically refine and elevate your audio recordings, providing clearer, more professional-sounding voice quality for podcasts, videos, and online communications.
