For the Best Results, Use the Latest Version.
-
Preparations for Mac
-
Account (Mac)
-
Get Started & Basic Settings (Mac)
- Release notes for Mac
- Latest Versions and Features for Mac
- Get Started on Mac - Full Guide
- Download/register/uninstall on Mac
- Panel Layout on Mac
- Keyboard shortcuts on Mac
- Touchbar on Mac
- Change playback quality on Mac
- Render preview files on Mac
- Manage Timeline on Mac
- Media for use on Mac
- Logo Reveal For Mac
- Marked Favorites for Mac
-
Compatibility & Tech Specs (Mac)
-
Performance Settings (Mac)
-
-
Creating Projects - Mac
-
Creating New Projects (Mac)
-
-
Importing & Recording - Mac
-
Importing (Mac)
-
Recording (Mac)
-
-
Video Editing for Mac
-
Basic Video Editing for Mac
- Edit Live Photos on Mac
- Enable/Disable Clip for Mac
- Magnetic Timeline For Mac
- Dual Monitor Setup for Video Editing on Mac
- Select All Clips on Timeline for Mac
- Auto Ripple for Mac
- Split & cut videos on Mac
- Compositing on Mac
- Crop and zoom on Mac
- Playback Zoom Level for Mac
- Change speed on Mac
- Play video in reverse on Mac
- Mark In and Mark Out for Mac
- Markers for Mac
- Group clips on Mac
- Customized Backgrounds for Videos and Images in Mac
- Video snapshot on Mac
- Freeze frame on Mac
- Auto enhance on Mac
- Applying Drop Shadow for Mac
- Adjustment Layer for Mac
- Mark clip on Mac
- Video Editing Ruler – Mac
- Apply Transforming for Mac
-
Advanced Video Editing for Mac
- Text Animation Path for Mac
- Create Multi-Camera Clip for Mac
- Drawing Tools for Mac | Filmora Guide
- Compound Clips for Mac
- AI Video Enhancer for Mac
- Filmora Flicker Removal Guide | Mac
- Multi-Clip Editing for Mac
- Keyframe Graph Editor for Mac
- Animation keyframing on Mac
- Mask on Mac
- PIP (picture in picture) on Mac
-
AI-Powered Video Editing for Mac
- Smart Scene Cut for Mac
- Smart Short Clips for Mac
- Filmora Image to Video for Mac
- AI Idea to Video for Mac
- AI Text-to-Video for Mac
- Instant Cutter Tool on Mac
- AI Face Mosaic for Mac
- Keyframe Path Curve for Mac
- Planar Tracking for Mac
- Filmora AI Relight - Mac
- AI Extend For Mac
- AI Script-to-Video for Mac
- AI Text-Based Editing in Mac
- Create With Instant Mode on Mac
- ChatGPT Plugin - AI Copywriting on Mac
- AI Smart Cutout for Mac
- Auto reframe on Mac
- Lens correction on Mac
- AI Portrait Cutout on Mac
- Scene detection on Mac
- AI Smart Masking for Mac
- AI Mate Editing for Mac
- Motion Tracking on Mac
- Video Stabilization for Mac
- AI Object Remover For Mac
- AI Smart Search for Mac
- AI Skin Tone Protection for Mac
- Green screen on Mac
- Super Slow Motion with Optical Flow for Mac
- AI stylizer on Mac
- Video Denoise for Mac
-
-
Audio Editing for Mac
-
Basic Audio Editing for Mac
-
Advanced Audio Editing for Mac
-
AI-Powered Audio Editing for Mac
- Audio To Video for Mac
- AI Sound Effect for Mac
- Smart BGM Generation for Mac
- AI Voice Enhancer for Mac
- Audio Stretch for Mac
- AI Audio Denoise for Mac
- Auto synchronization for Mac
- AI Vocal Remover for Mac
- Auto Beat Sync on Mac
- AI Music Generator for Mac
- How to Perform AI Voice Cloning in Wondershare Filmora?
- Silence detection on Mac
-
-
Text Editing for Mac
-
Basic Text Editing for Mac
-
Advanced Text Editing for Mac
-
AI-Powered Text Editing for Mac
-
-
Video Customizations for Mac
-
Video Effects (Mac)
-
Audio Effects (Mac)
-
Transitions (Mac)
-
Stickers (Mac)
-
Filters (Mac)
-
Color Editing (Mac)
-
Animations (Mac)
-
Templates (Mac)
-
Asset Center (Mac)
-
-
Exporting & Share & Cloud Backup - Mac
Different Types of Video Effects for Mac
Filmora is a powerful video editing software with thousands of video effects, which can help to make your videos or audios more creative and brilliant.
Upon reading this guide, you will learn about how to add, adjust, remove, and favorite different video effects:
Mosaic Effects
Mosaic is a very useful effect in editing videos and images, as it helps to blur the face, logo, and other sensitive parts.
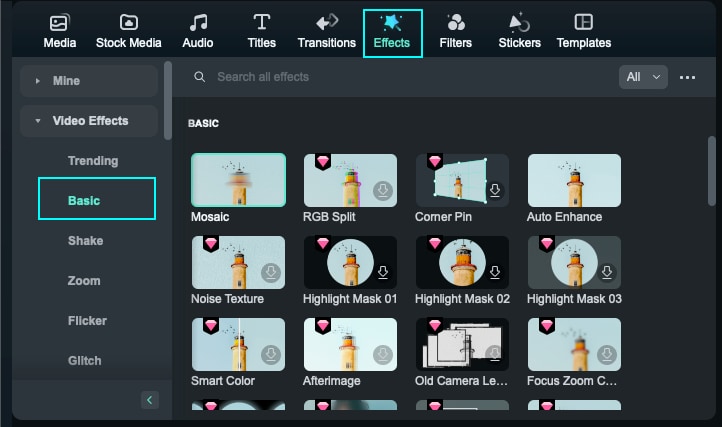
Step 1: Find Mosaic Effect
Click the Effects tab at the media area, find Video Effects, and click Basic.
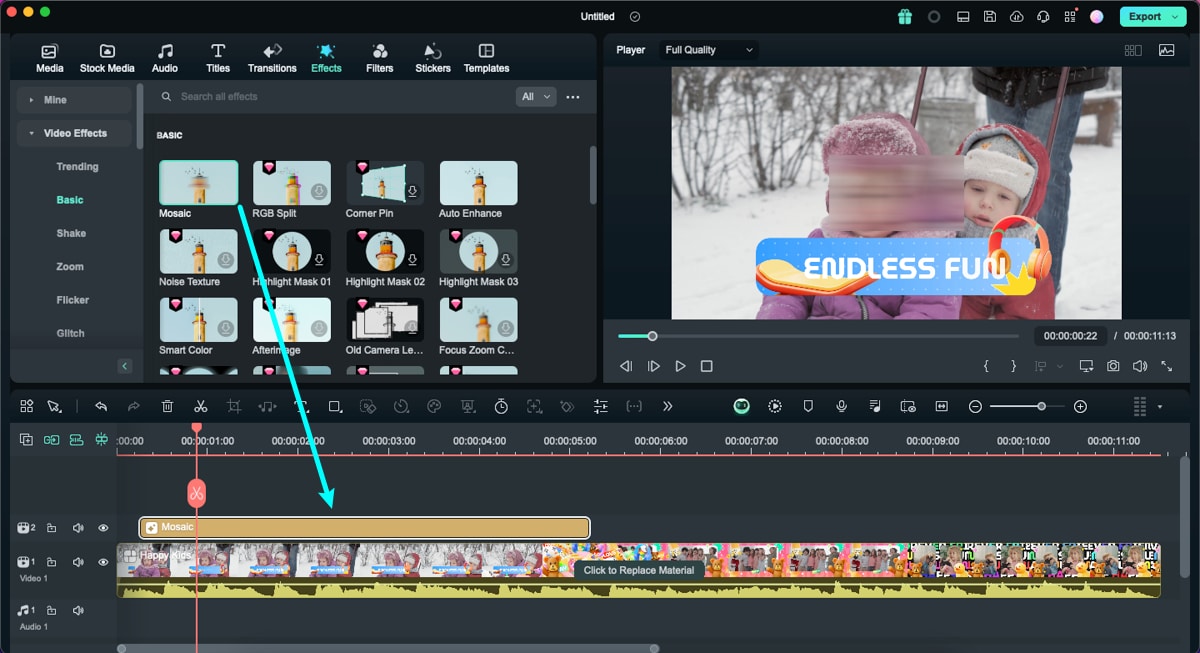
Step 2: Add Mosaic Effect
Drag the Mosaic effect to the track above the video. You can move it to the required timing in the timeline and adjust its duration.
In the Preview window, drag the handles of the mosaic effect to adjust its size and position to get the results you want.
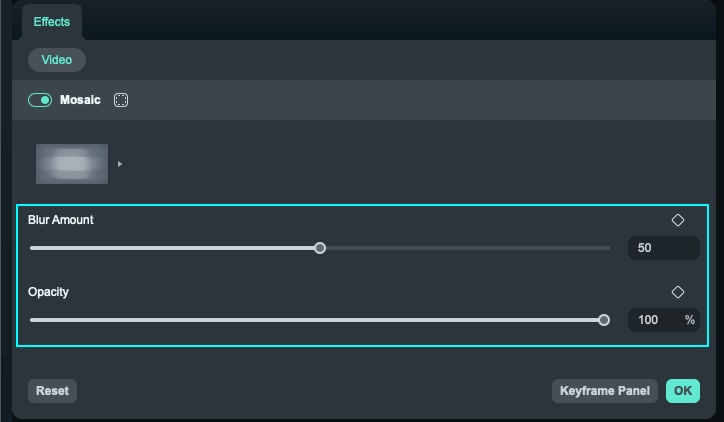
Step 3: Adjust Mosaic Effect
Click the mosaic effect in the timeline, and the setting panel will pop out. It allows you to change the Blur Amount and Opacity in the video. Customize the mosaic effect to your desired status.
Step 4: Adding Mosaic Effect to Whole Video
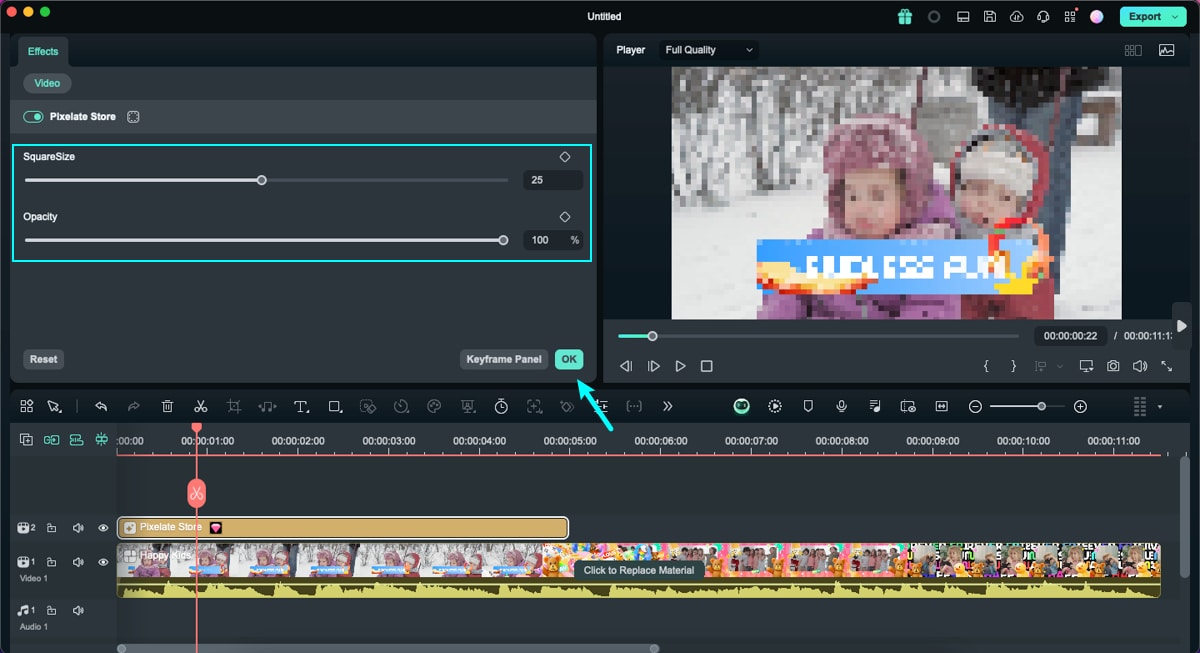
In the Effect tab, scroll down to the Video Effects category, and type "Pixelate" in the search box. Then a bunch of related effects will appear. Choose the "Pixelate Store" or the "Pixelate 2" effect and add it to the timeline.

Step 5: Adjust Pixelate Mosaic Effect
Drag one of the pixelate effects to the track above the video. Click the pixelate effect in the timeline to adjust its SquareSize and Opacity, and click OK if you are satisfied with the adjustment.
Face-Off Effects
The difference between the Mosaic effect and the Face-off effect is that with the Mosaic effect, you will be able to blur a stationary portion of your video clip, whereas with Face-off you will be able to cover moving faces.
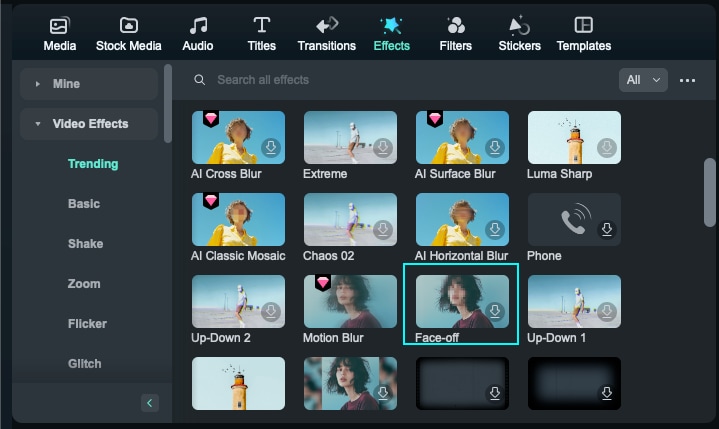
Step 1: Locate Face-Off Effect
Go to the Effects tab at the top and scroll down to the Video Effects, you will be able to find Face-off effects under that tab.
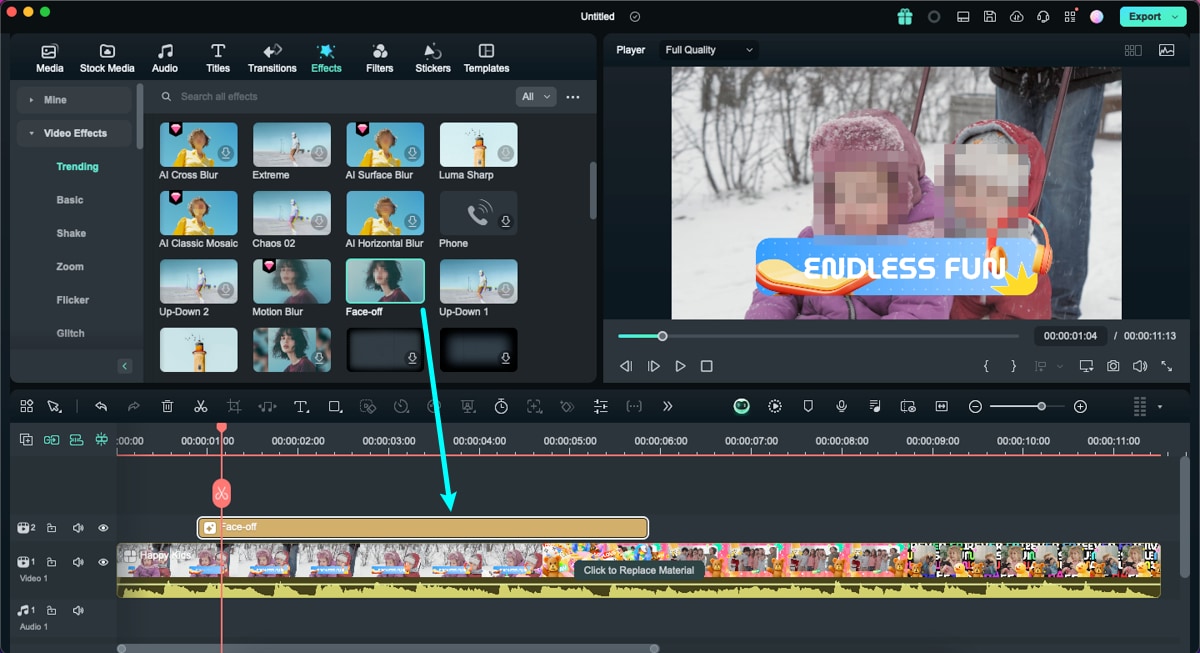
Step 2: Apply Face-off Effect
Drag the Face-Off effect onto the clip you want to apply it to in the timeline. Then, choose either the blurred effect or one of the replacement images. You can preview what your video looks like with the Face-Off effect by clicking the Play button in the Preview Window.
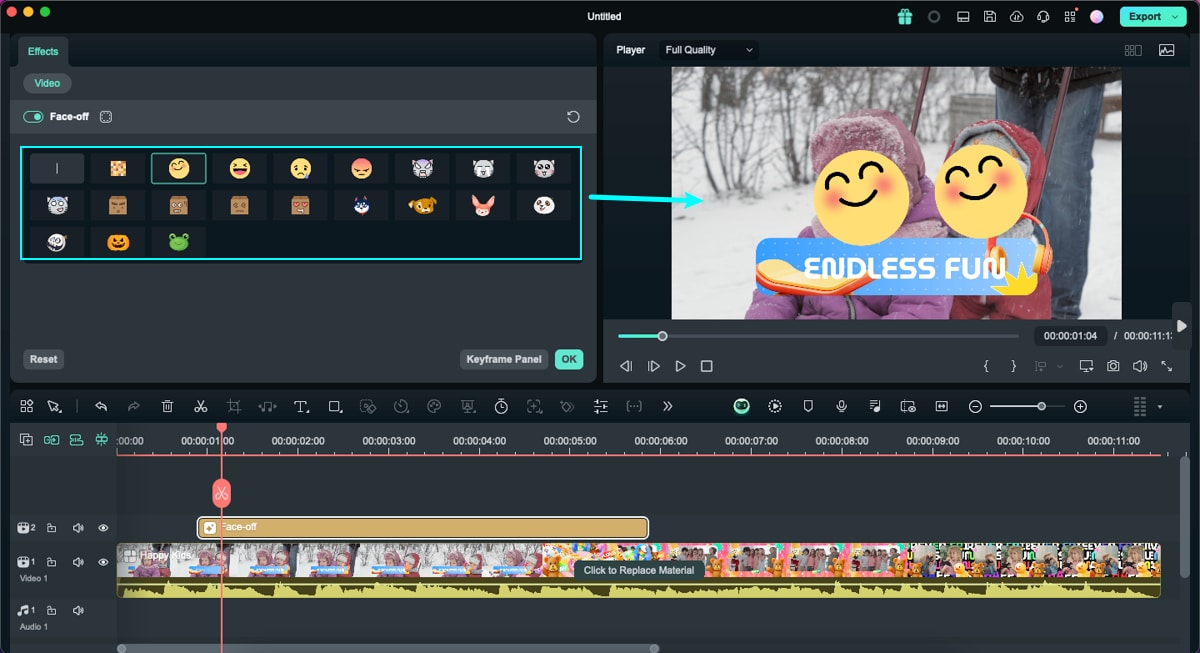
Step 3: Change Face-off Preset
Double-click the face-off effect in the timeline to enter the Effects editing panel. There are many face presets you can use for fun, choose one and click OK to save changes.
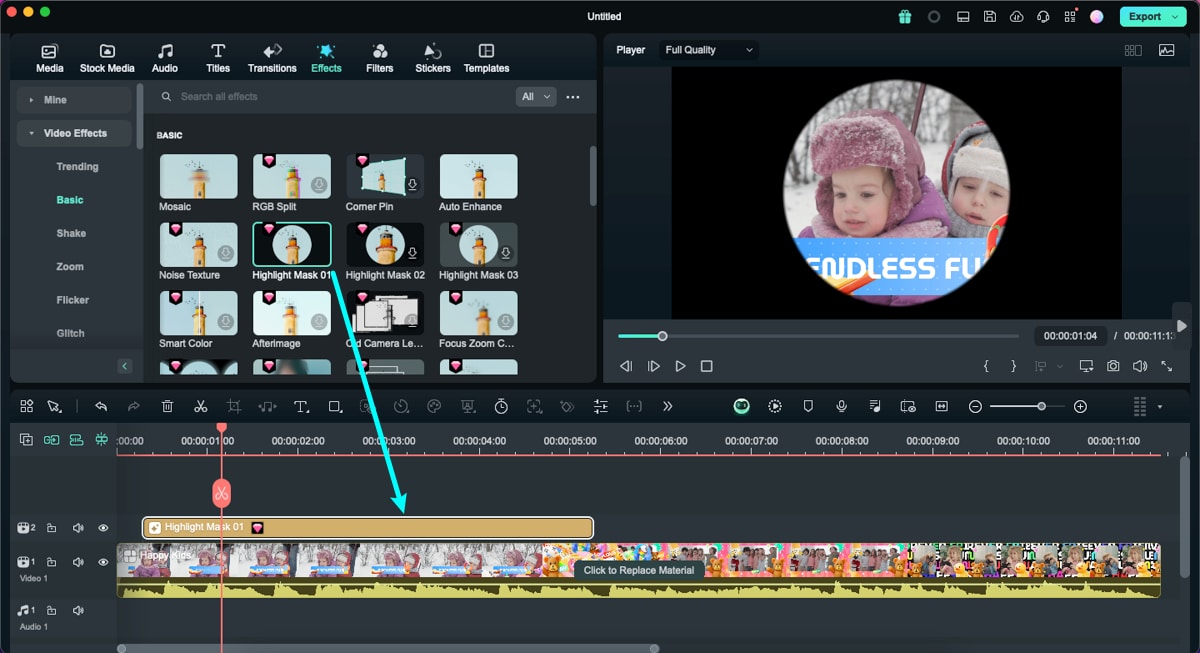
Mask Effects
The concept of masking is popular in professional video editing services, offering a reliable means to hide specific elements while enhancing others. These effects are designed to elevate your video's outlook without manual effort.
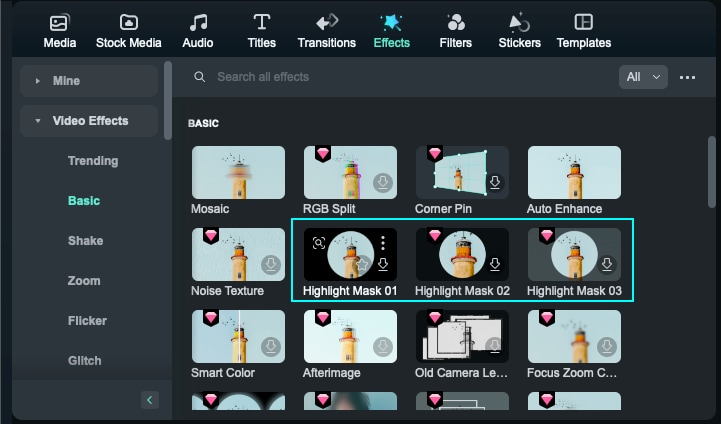
Step 1: Access the Mask Effects
Click the clip in the timeline, navigate towards the "Effects" tab, and go to the "Basic" category under "Video Effects".
Step 2: Apply the Chosen Mask Effects
Once you find a desired mask, integrate it into the video by placing it on the timeline through the drag-and-drop functionality. To witness the final results, press the "Play" button within the Preview Window.
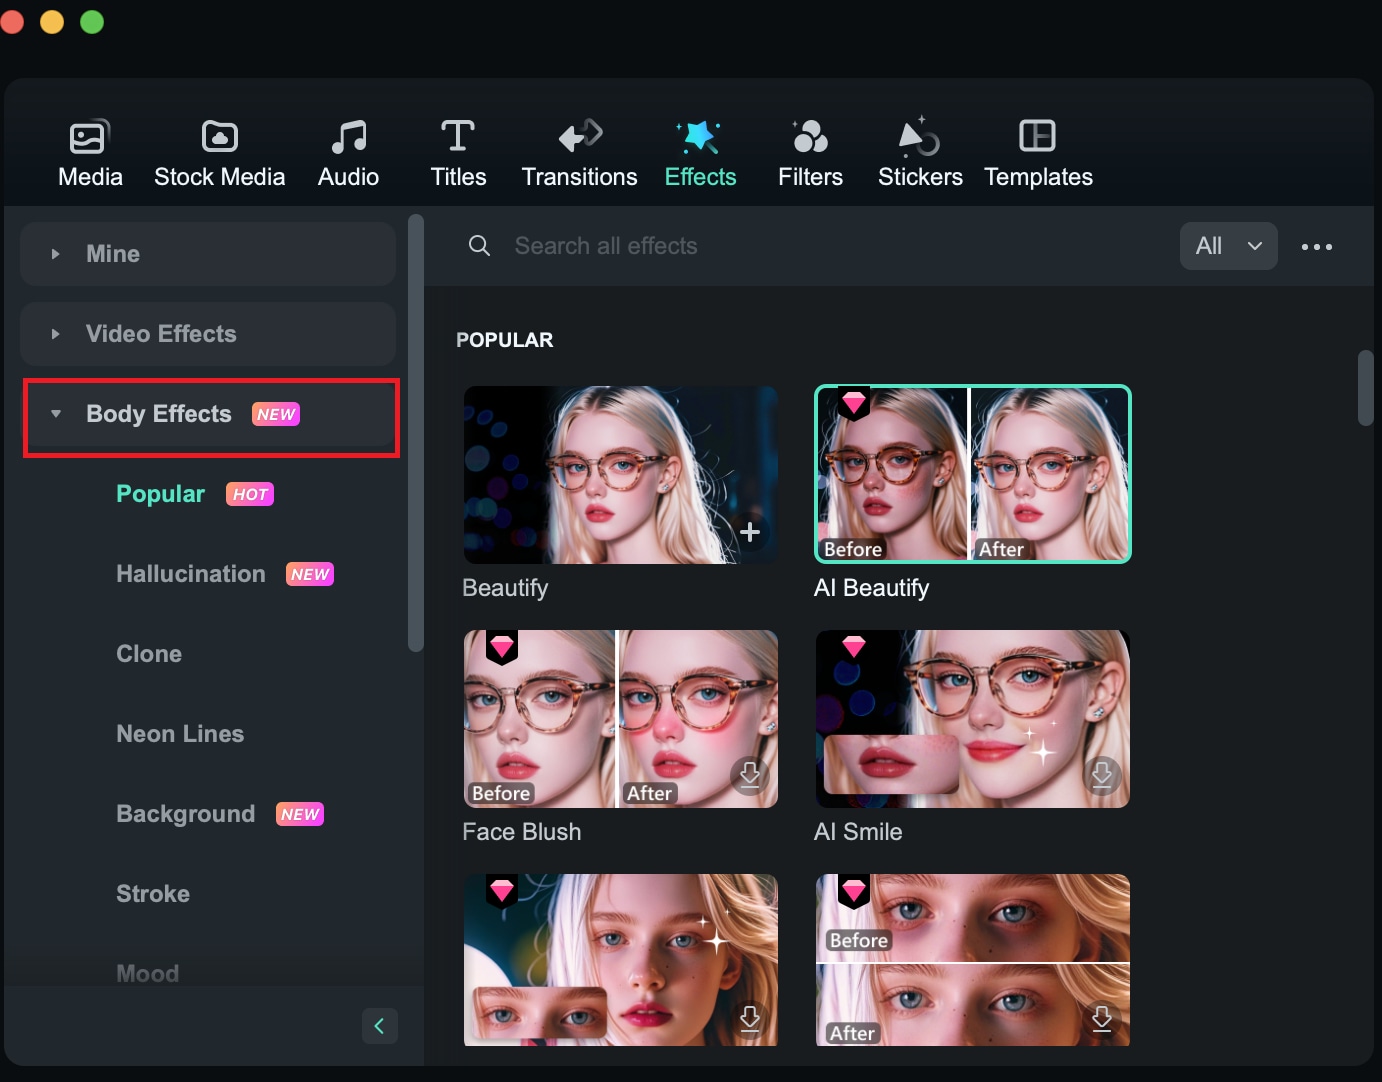
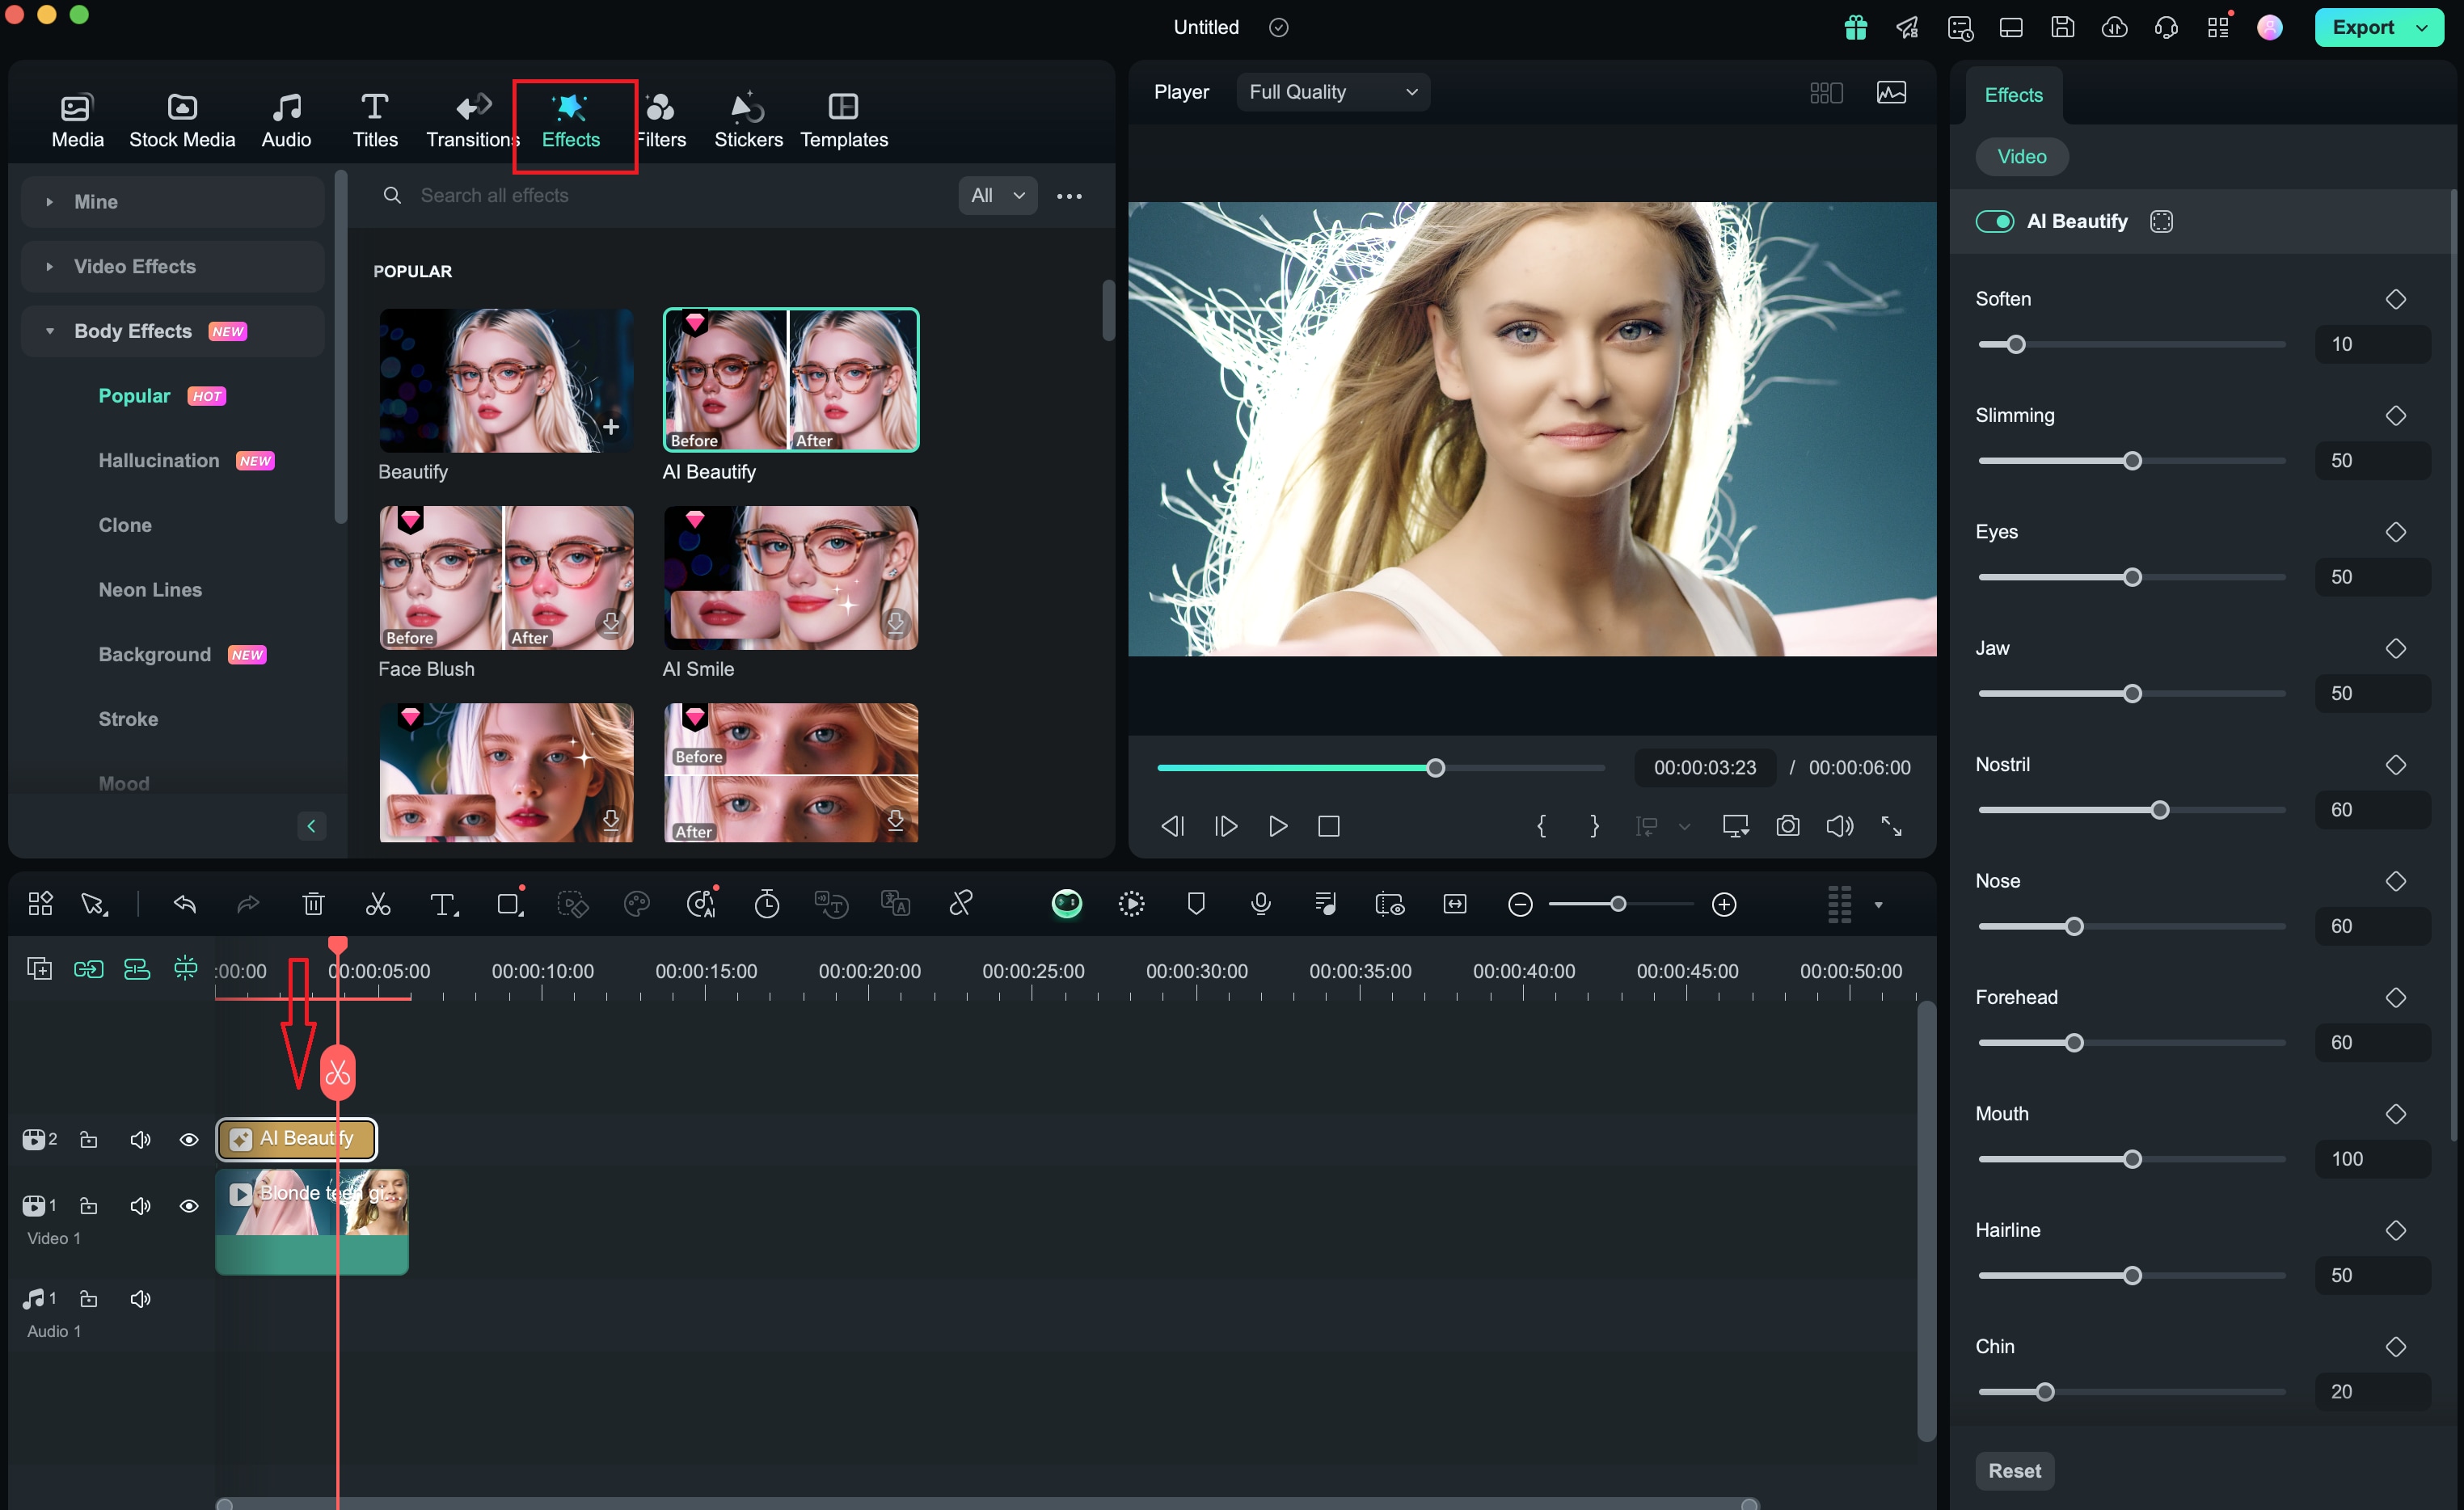
Body Effects
If your video features people on camera and you want to apply beauty effects or other facial effects during editing, body effects will be your best choice.
Step 1: Access the Body Effects
Click the clip in the timeline, navigate towards the "Effects" tab, and go to the "Body Effects" category.
Step 2: Apply the Chosen Body Effects
Once you find a desired effect, integrate it into the video by placing it on the timeline through the drag-and-drop functionality. Then you will find that the facial effects have already been applied to the person.
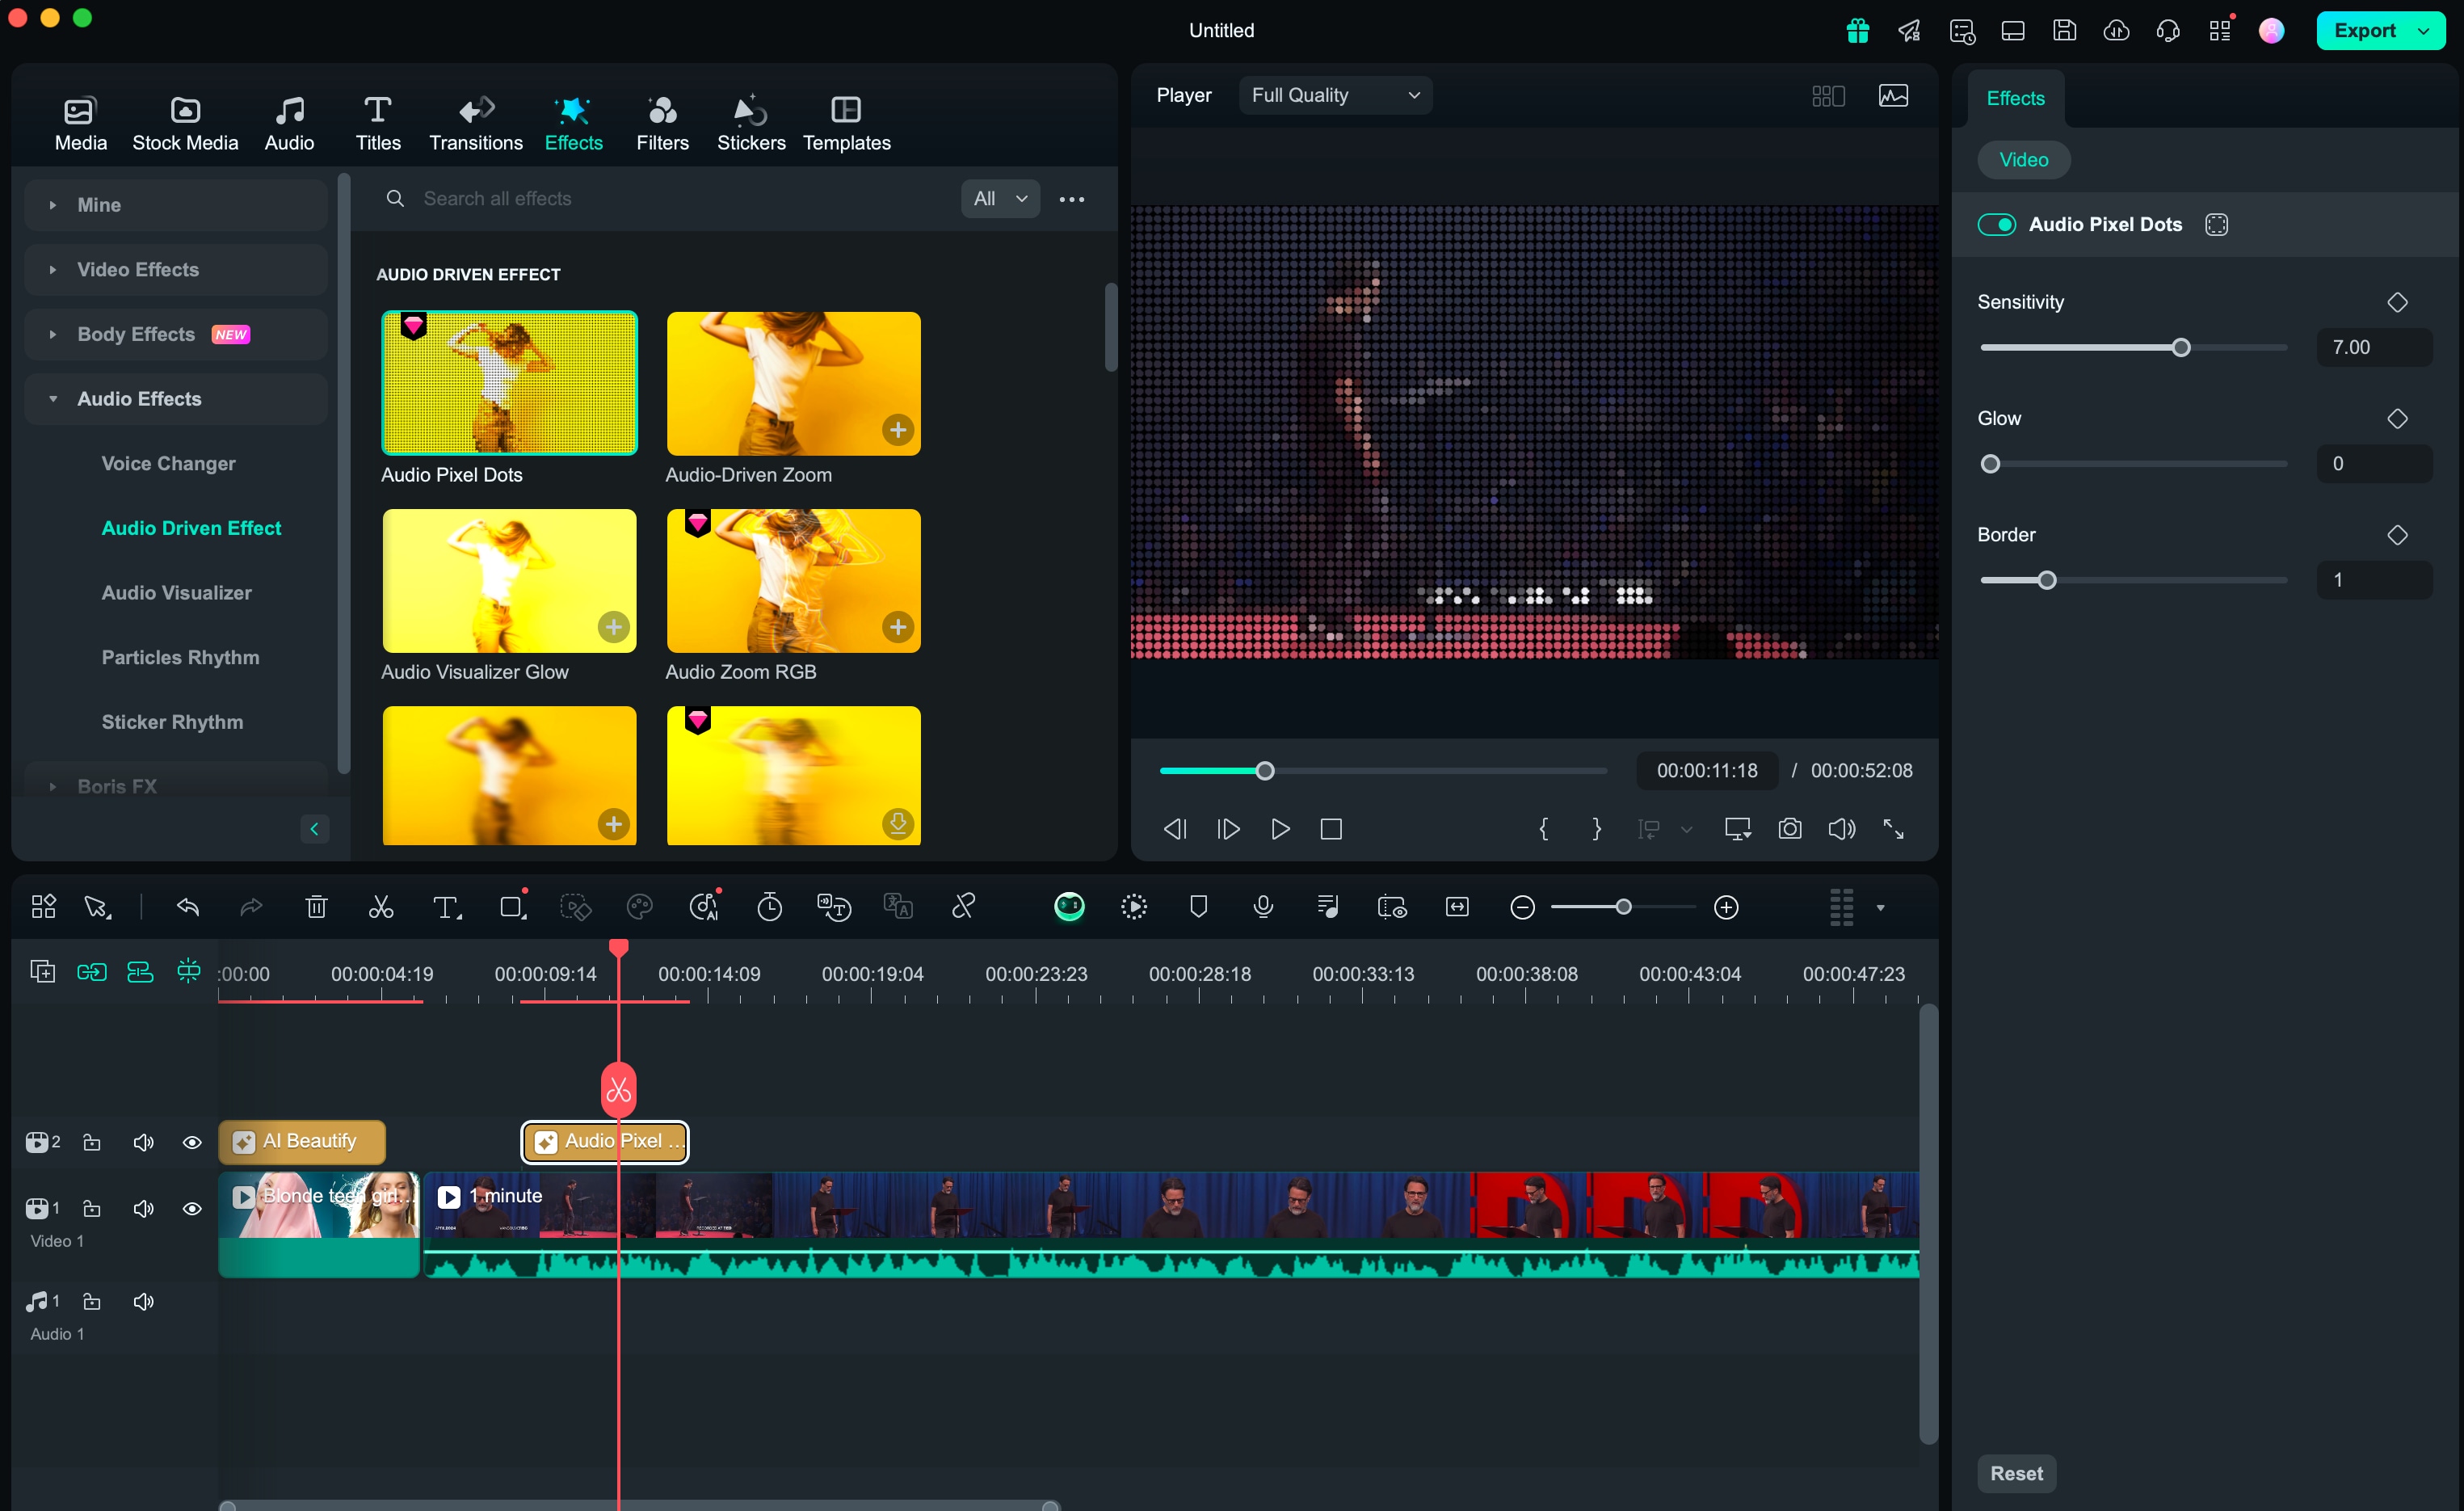
Audio Effects
This effect can make the visuals of the audio segments stand out and enhance the impact of the imagery.
Step 1: Access the Body Effects
Click the clip in the timeline, navigate towards the "Effects" tab, and go to the "Audio Effects" category.
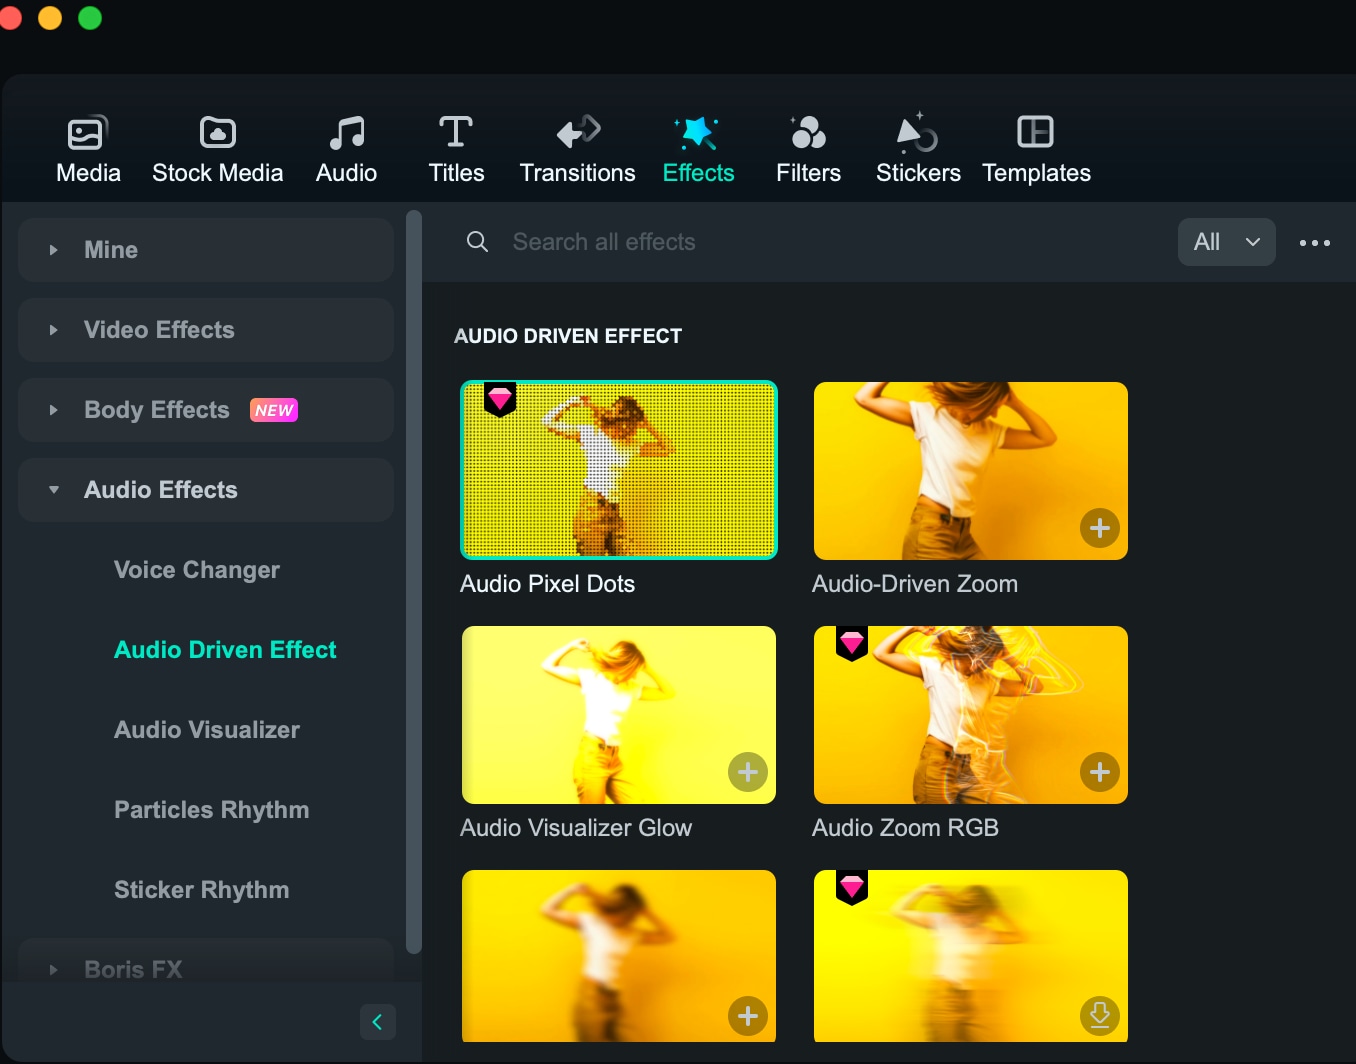
Step 2: Apply the Chosen Audio Effects
Once you find a desired effect, integrate it into the video by placing it on the timeline through the drag-and-drop functionality.
Timer Effects
Timer effects are widely used in exercise videos, e-commerce videos and travel vlogs. Filmora now provides you with various dynamic timer effects that will help you make the video more impressive.
Step 1: Find the Timer Effects
Run Filmora and then go to "Effects" from the navigation bar and find the category "Timer" under Video Effects. You'll see s list of timer effects templates.
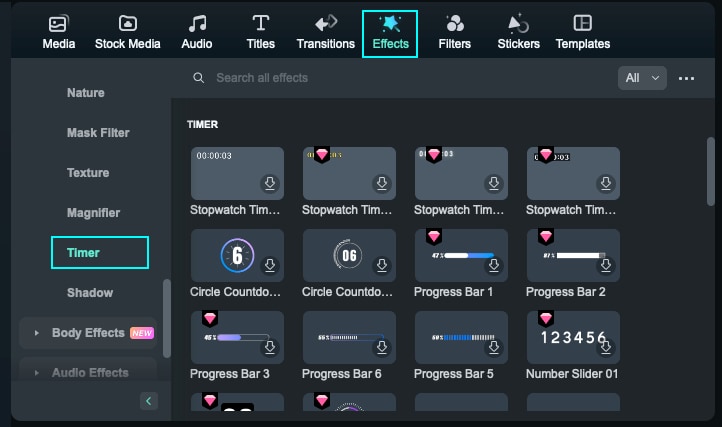
Step 2: Customize and Preview the effects
Select one of them and drop it to your video, you can customize and preview the effects simultaneously.

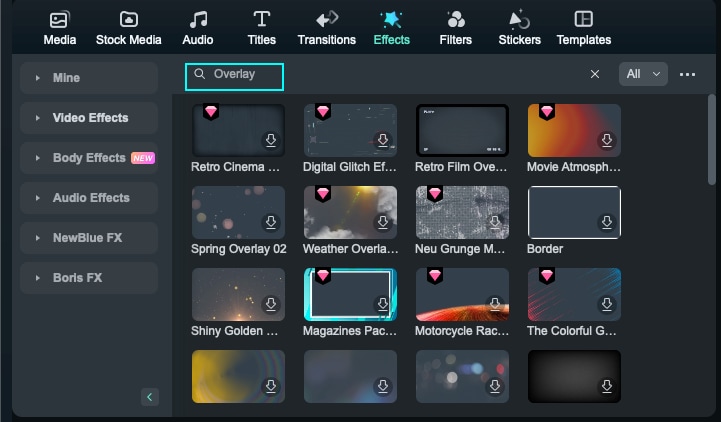
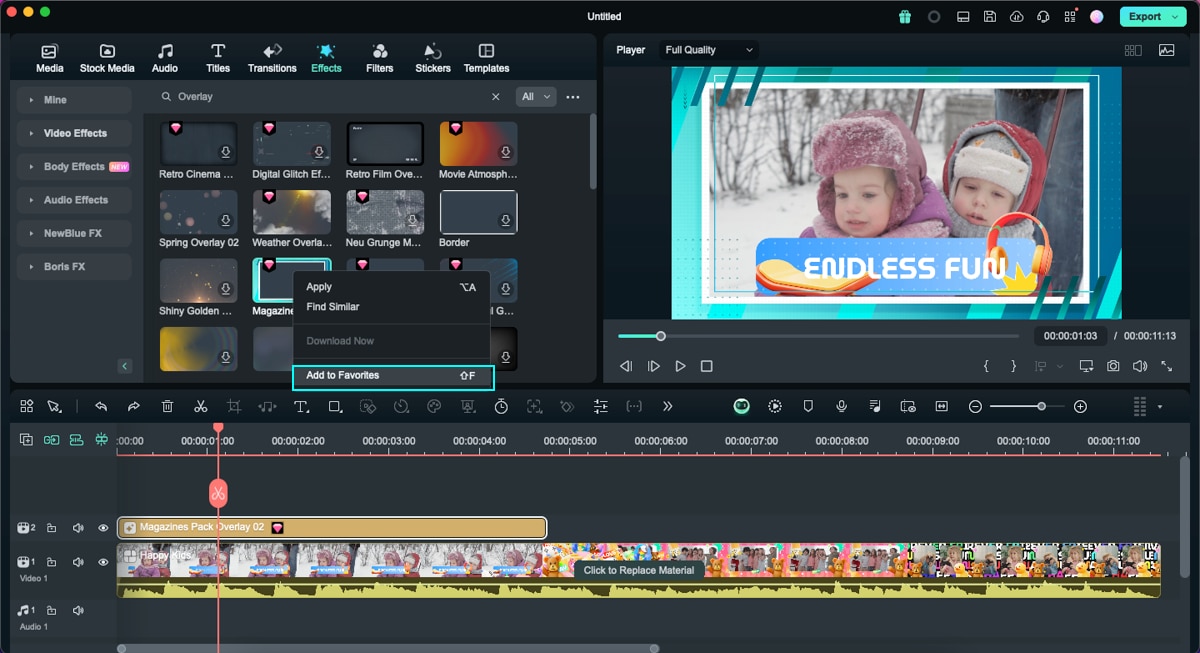
Overlay Effects
There are hundreds of overlay effects to help you create awesome videos. Just follow the steps below to learn how to use it.
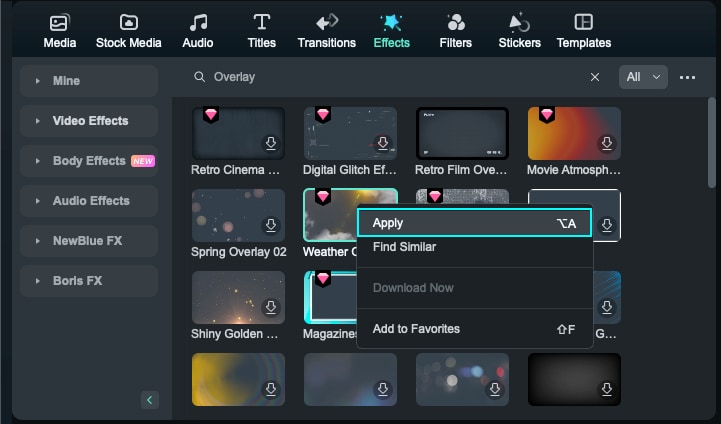
Step 1: Add Overlays Effects
In the Effect tab, scroll down to the Video Effects category, and type “Overlay” in the search box.
Hover your mouse over the overlay effect you want. Right-click on the overlay effect and click "Apply". Then, the effect will be added to the timeline.
Note:
If you are editing a "portrait" (9:16) clip in a 16:9 video, you can add background blur filters to replace the black bars.Step 2: Customize Overlays Effects
The default length is five seconds, but you can change its duration by dragging the edge of the overlay effect in your timeline.
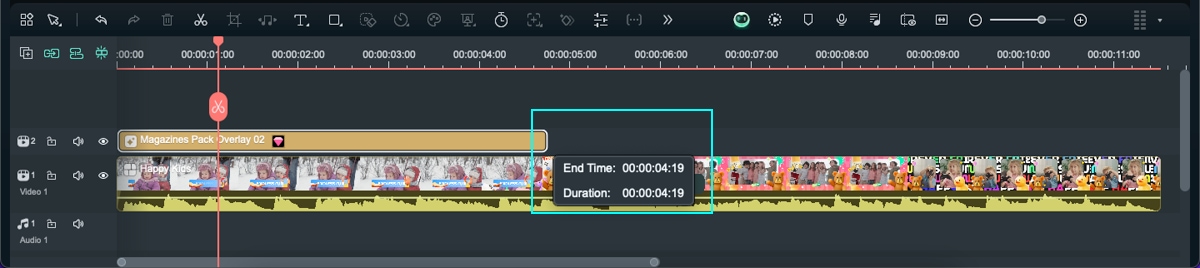
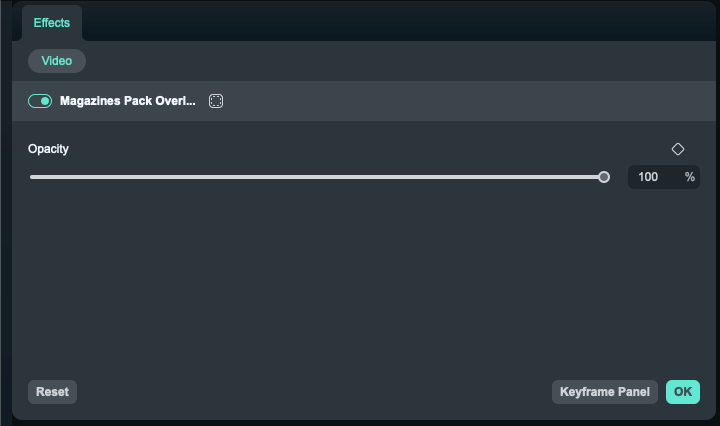
Step 3: Change the Opacity of Overlay Effects
The alpha opacity (transparency) property has a value of 0-100. The lower the number is, the more transparent the overlay is. You can double-click on the overlay in the timeline to customize its opacity.
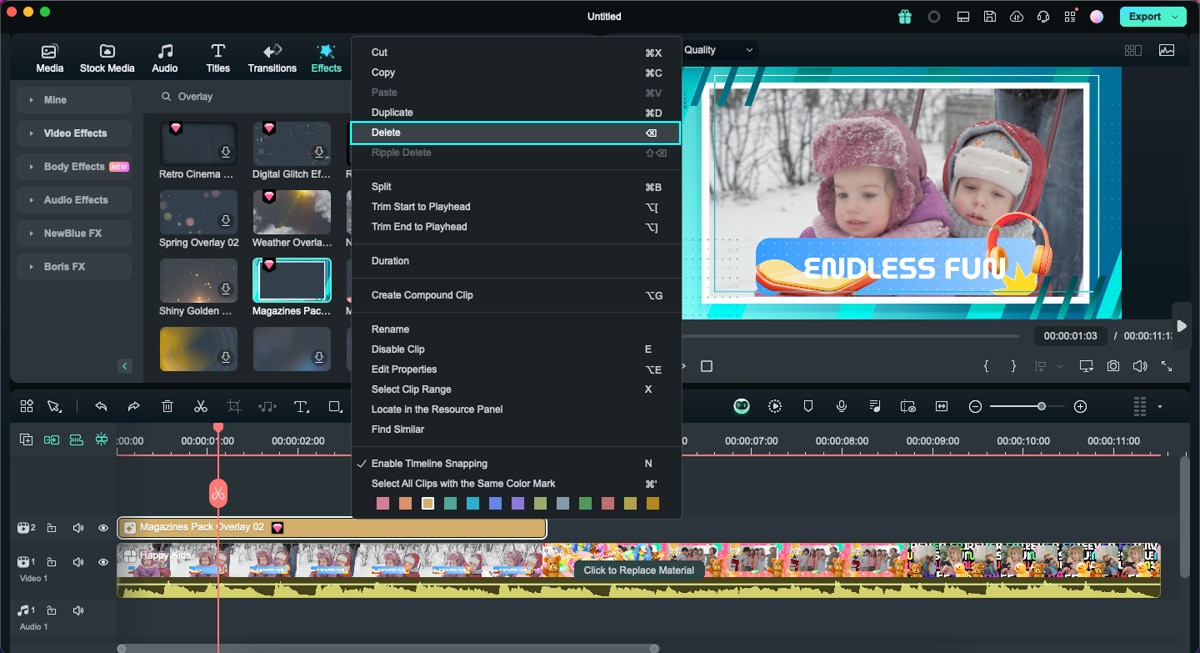
Step 4: Remove Overlay Effects
There are two ways to remove overlays from your project.
Method 1: Select the overlay effect in the timeline and click Delete.
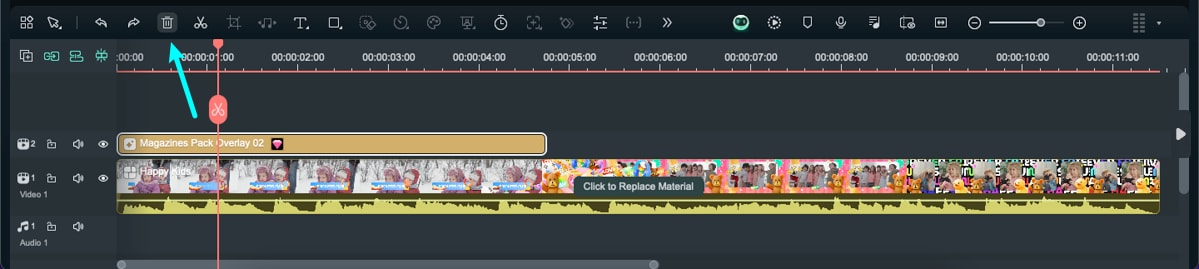
Method 2: Right-click on the overlay in the timeline and select Delete from the menu.
Step 5: Favorite Overlay Effects
Right-click on a filter effect in the Effects menu and select Add to Favorites. Or you can click the Star icon on the Effect cover. Then, go to the Favorite category to find it again quickly.
Related Posts
Featured Articles
The Trick to Using After Effects Color Match: A Compositor Guide
Learn how to give After Effects color match with precision? This article features a descriptive guide on how to enhance your footage using this tool.
3 Best Ways to Create Memes on iPhone
To create a meme on iPhone, all you need is a good sense of humor and some meme makers. Follow our guide to find the secret to making memes that everyone will love!
Top 11 Apps to Blur Faces in Videos: Protect Privacy with the Best Tools
Discover the best apps to blur faces in videos, including mobile and desktop options like Filmora. Learn how to protect privacy with top video face blur apps and techniques.
Recommended User Guide
Newblue FX effects for Mac
In this guide, you will learn the workflow of NewBlue FX Effects on Filmora for Mac.
Mocha Filmora - For Mac
Here is the guide on how to use the Mocha plugin in Filmora on Mac.
Filmora OpenFX Plugins for Mac
Learn how to install and use Filmora OpenFX plugins on Mac to add professional visual effects to your videos easily.
