Mocha Filmora - For Mac
For videos that have too rapid movements and motions, using the native tracking tool is not enough, as all the small motion details are missed. However, Wondershare Filmora has introduced a new plugin that allows users to mark the objects and surfaces and track motions across them. It provides the ability to apply the tracked effects that are more realistic and accurate by offering the Mocha UI.
This utility is available within the Filmora interface under the "Boris FX" effects section. This user interface provides various techniques to make selections for a specific object and track it effortlessly throughout the video. Moreover, users can create layers and insert objects like logos into a moving object in a video.
Index
How to Enter the Mocha Filmora Feature?
The Filmora Mocha UI utility enables users to perform various motion selections according to their needs. Provided below is a detailed guide on how to use this utility for tracking motion and planar with this plugin:
Step 1. Start by Creating a Project on Filmora
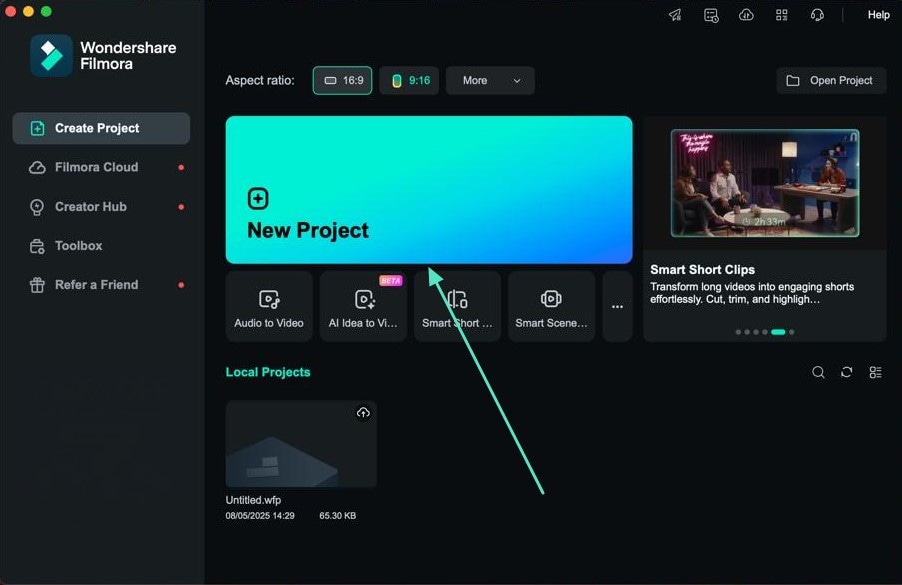
To begin the process, launch Filmora on your Mac and click on the "New Project" option, located within the homepage. Next, import your video to the tool's interface and drag it to the editing timeline to proceed forward.
Step 2. Access the Mocha Filmora Function
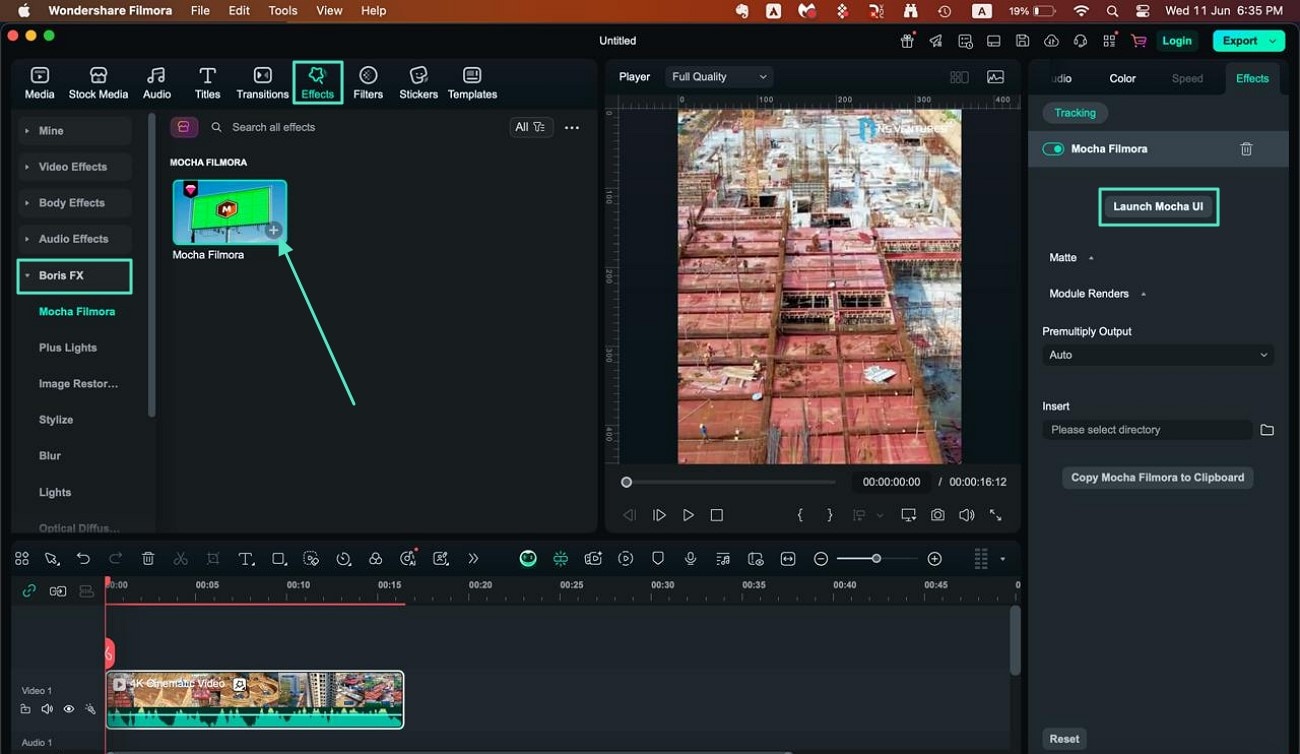
Next, access the "Effects" section from the toolbar on the top and expand the "Boris FX" effects option. Press the "+" icon to apply the effect and click the "Launch Mocha UI" after accessing the "Mocha Filmora" from the panel. Once you enter the Mocha UI, you can perform multiple tracking tasks using this tool.
Feature 1. Implement Planar Tracking
One of the most used tracking methods in video editing is planar tracking, which analyzes the flat surfaces in motion and delivers reliable results.
Step 1. Start by Creating Layers
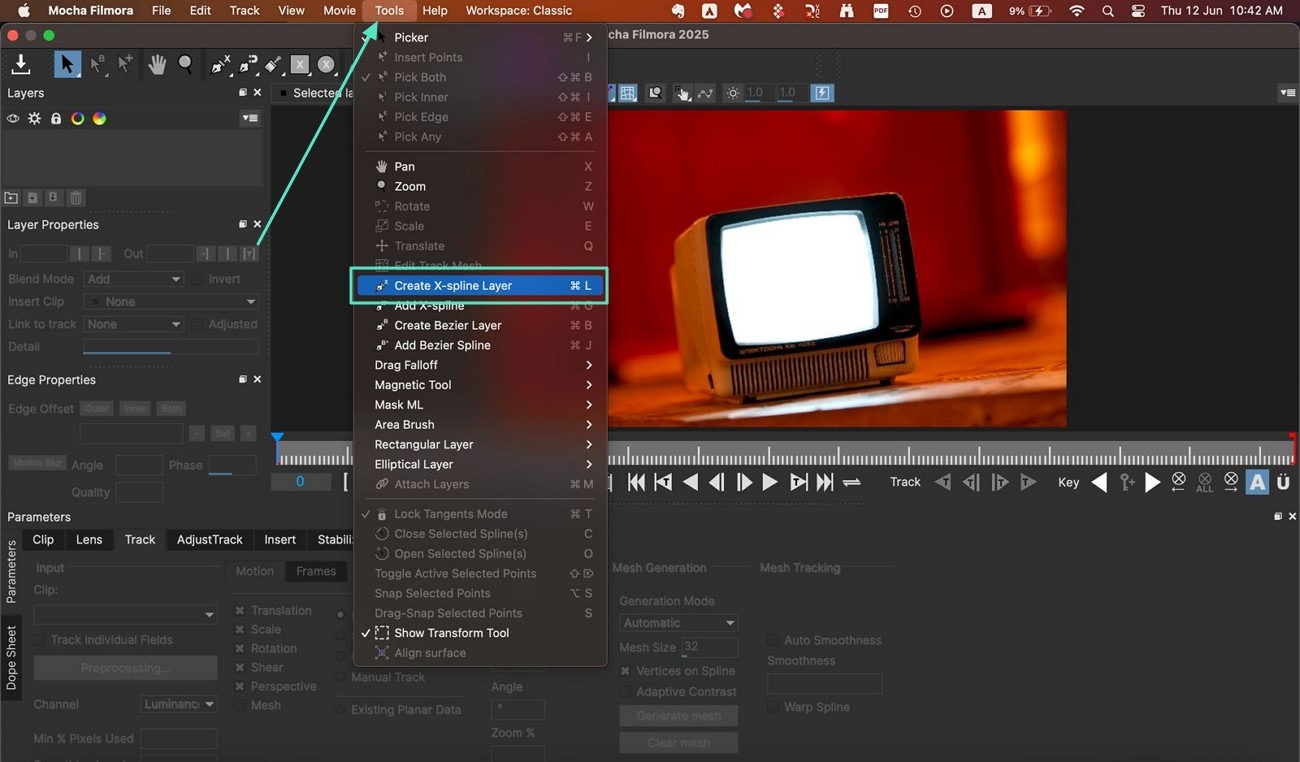
Once you enter the Mocha UI, head to the menu bar at the top and press the "Tools" menu. Next, locate the "Create X-Spline Layer" option.
Step 2. Make Selections of the Plain Area
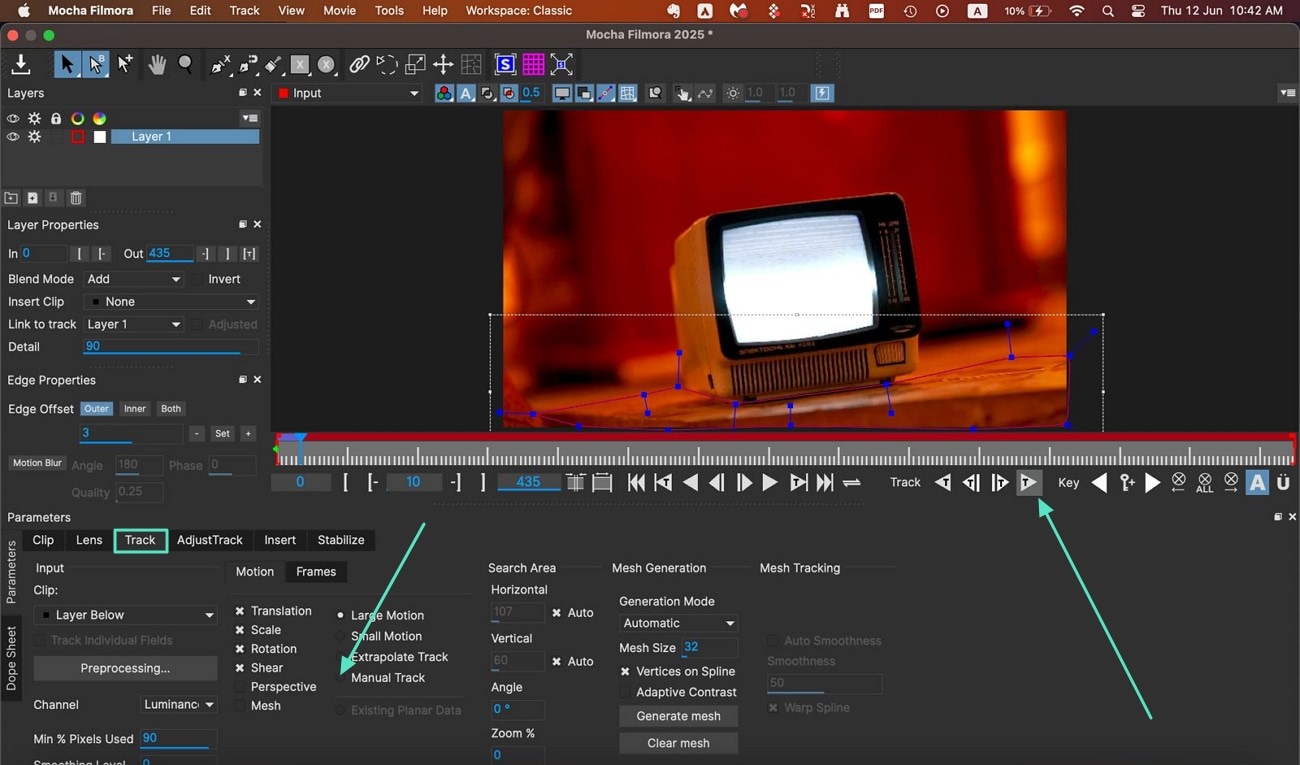
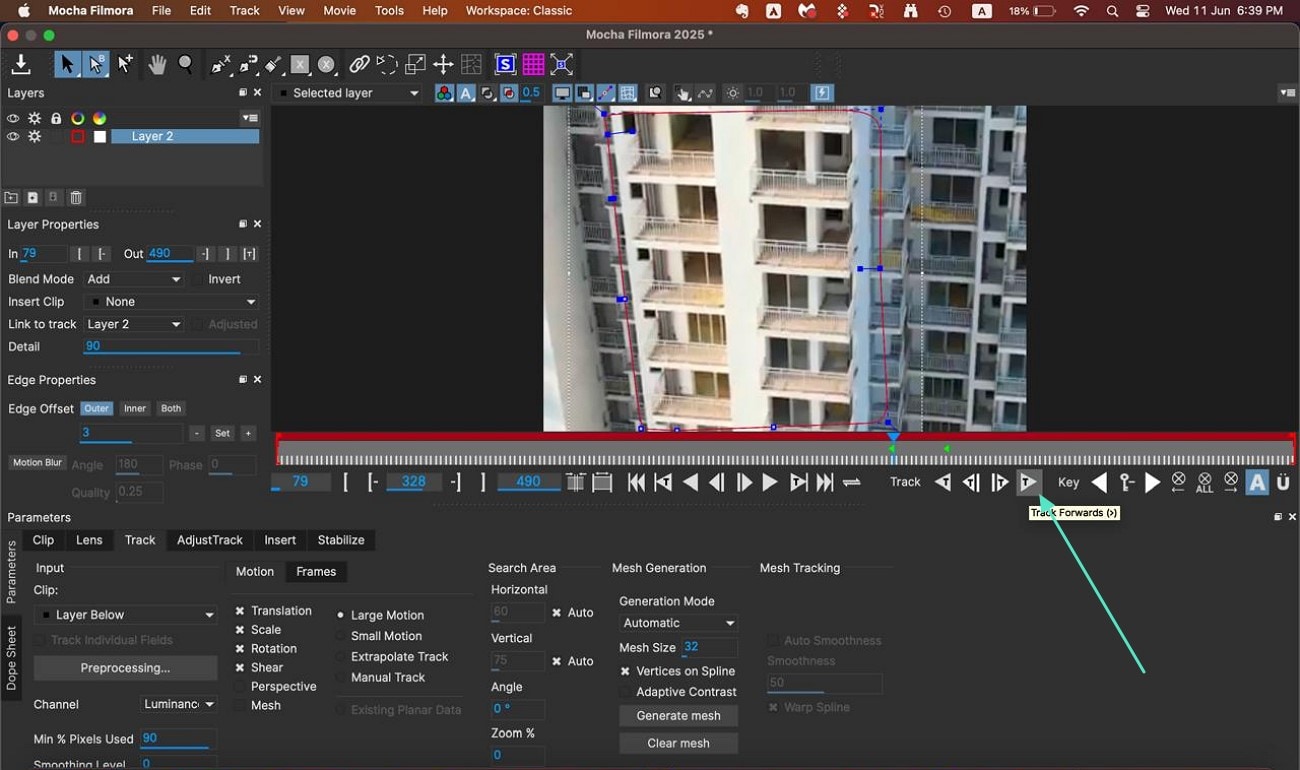
After the spline is enabled, make selections of the planar surface by dragging and clicking the cursor around the surface. Right-click on the selection to lock it and head to the "Track" section to enable the "manual Track" option. Finally, hit the "Track Forward" option to begin the tracking process.
To learn more about the Planar tracking functionality of Boris FX's Mocha, watch this video.
Feature 2. Insert Quick Masking and Roto
Users get the ability to draw mask shapes with the X-spline and magnetic spline tools to minimize the manual keyframing process.
Step 1. Select the Object and Track Forward
After accessing your video within the Mocha UI, enable the X-Spline layer and make the selection around the object using the cursor. Once done, hit the "Track Forward" icon located at the bottom of the preview window.
Step 2. Apply The Matte Layer Mask
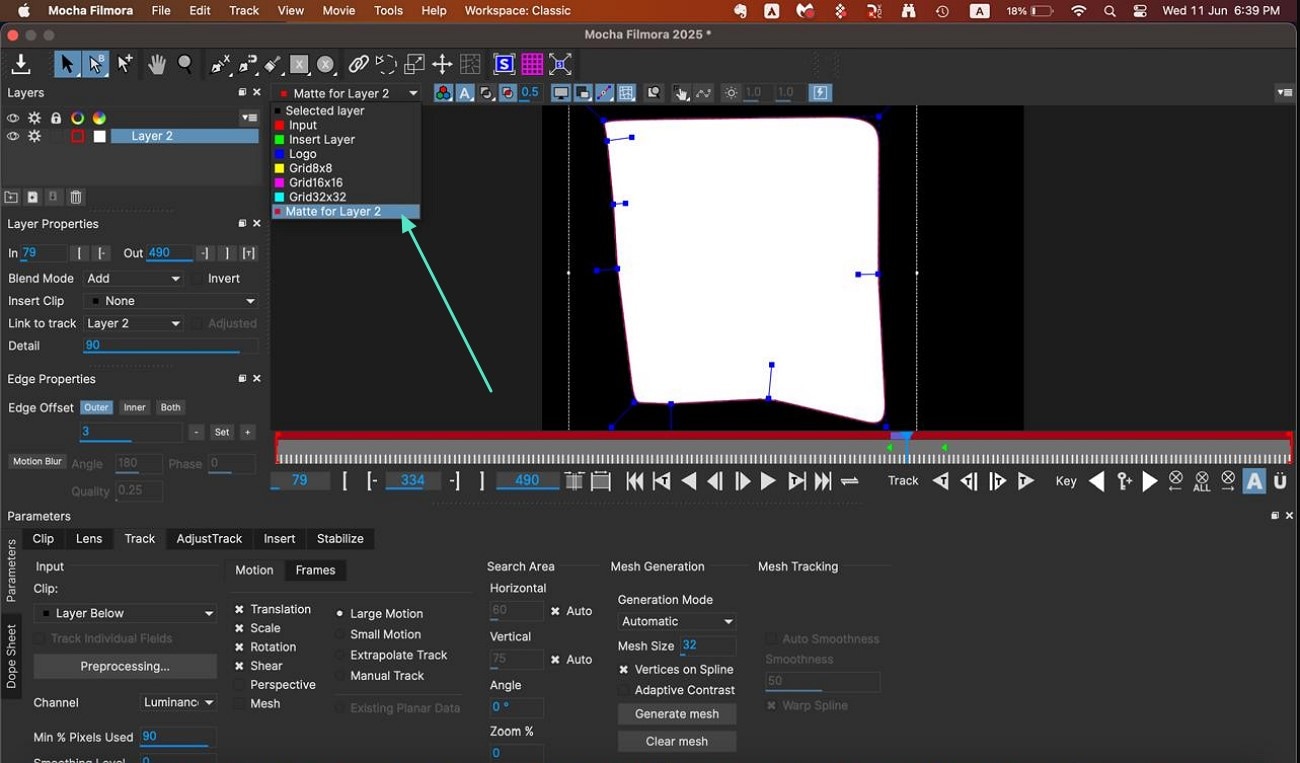
After this, move to the "Input" drop-down menu and press the "Matte for Layer 1" option to remove the selected object throughout the video.
Feature 3. PowerMesh Tracking
The PowerMesh Tracking in the Filmora Mocha UI is the function of bending and warping the uneven surfaces like cloth. It lets users apply precise motion overlays to maintain consistency through the video.
Step 1. Select Surface and Enable Track Mesh
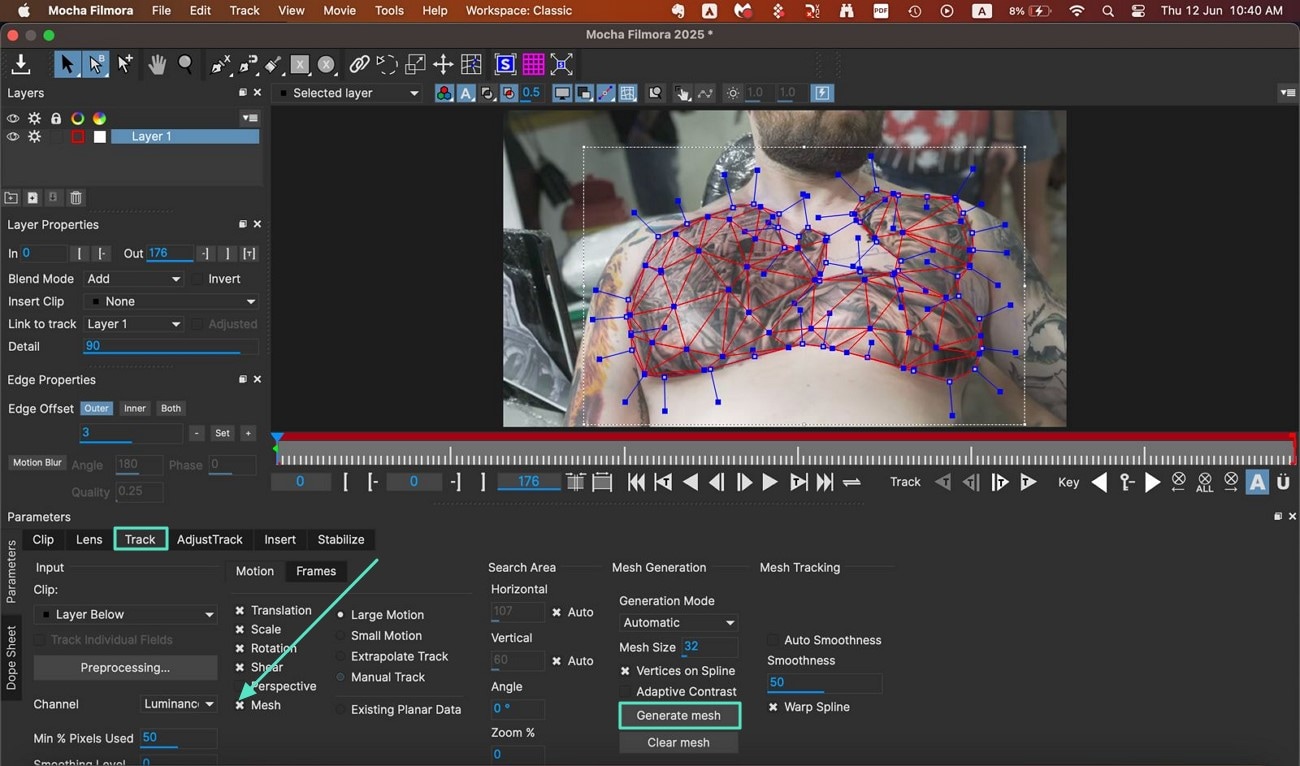
After creating the X-spline layer from the "Tools" menu bar, select the surface or object by clicking and dragging the cursor around it. Now, head to the bottom and enable the "Track" section to tick the "Mesh" checkbox. Click the "Generate Mesh" button to let the tool execute the process.
Step 2. Implement the Track Forward
Once all the settings are made, locate the "Track Forward" icon below the video preview to track the meshed object.

Generate and track more complex meshes in a video using Mocha Pro. This video will provide you a deeper insight into this function!
Feature 4. Mesh Warp Tracking
This utility offered by the Filmora Mocha UI helps in distorting the tracked surfaces with the meshed grid and performs texture binding conveniently:
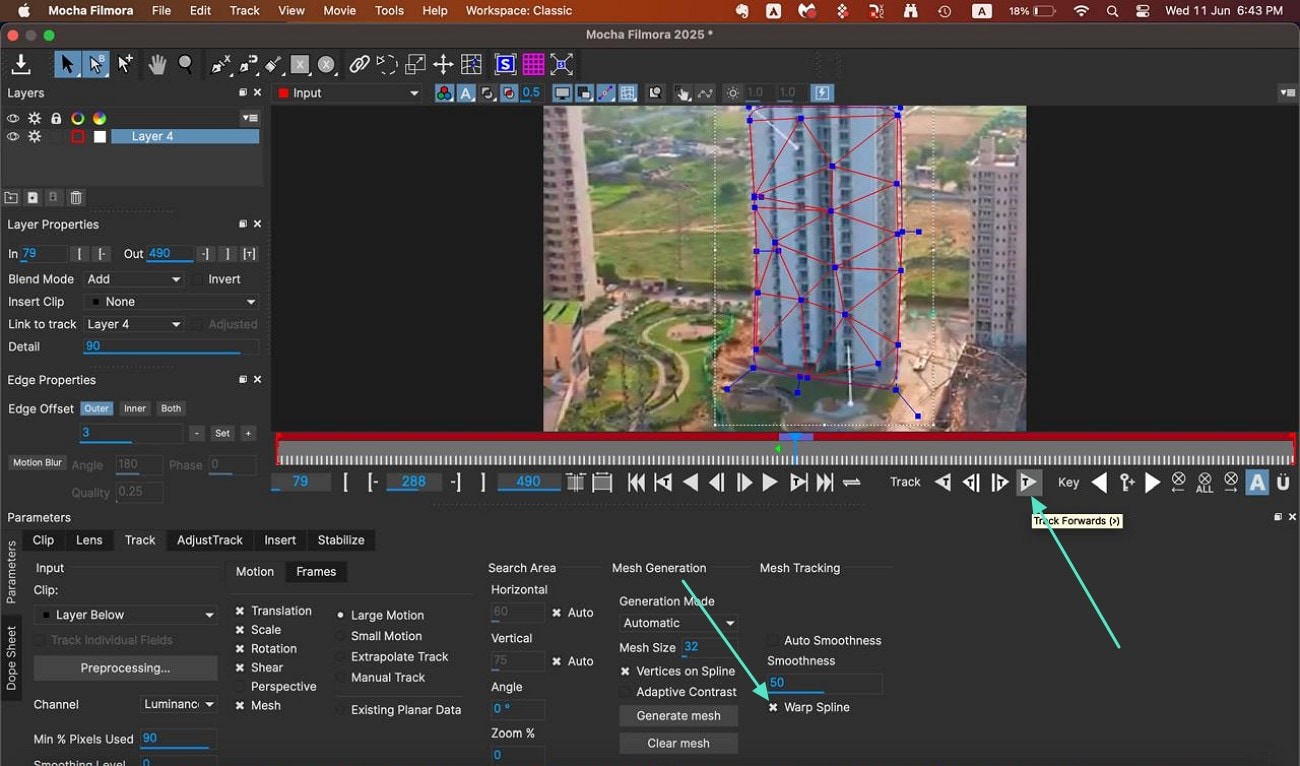
Step 1. Generate Mesh After Making Selection
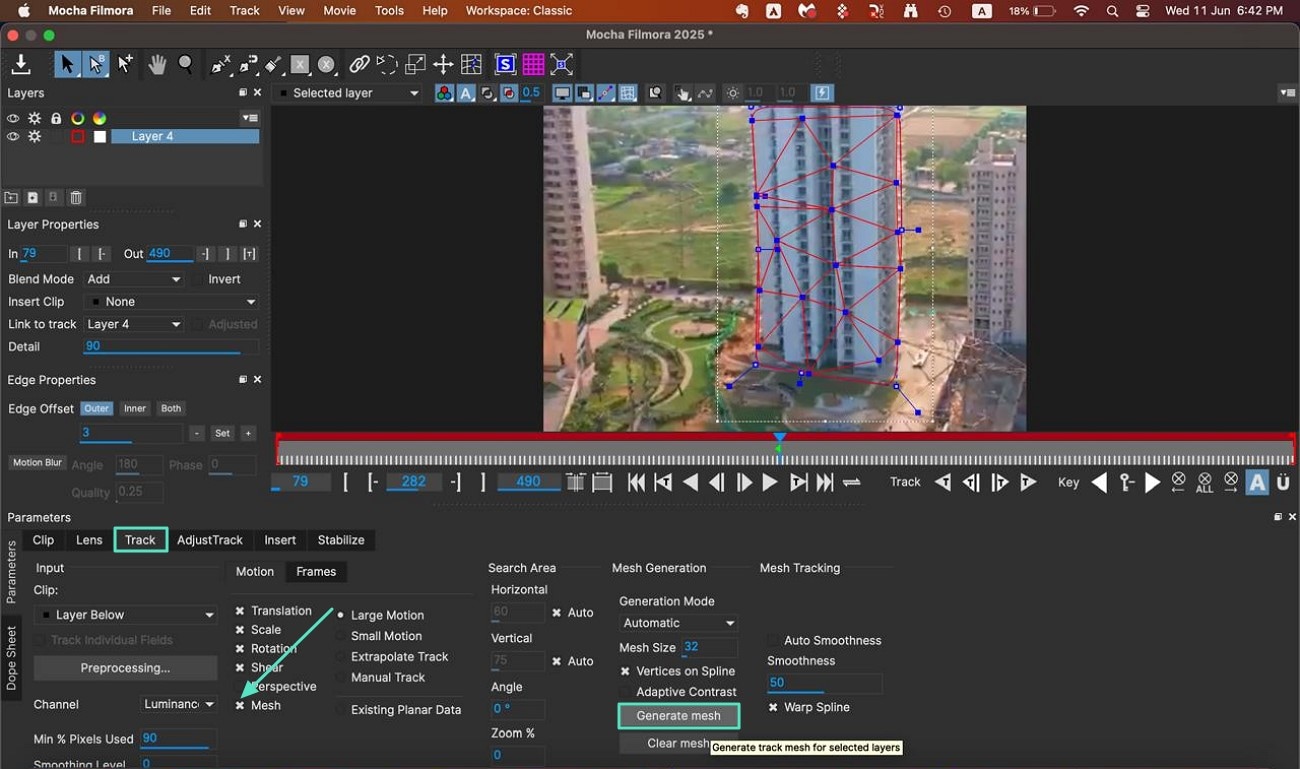
Start by creating the selection around the object using the X-Spline layer and head to the "Track" section at the bottom. Tick the "Mesh" checkbox and press the "Generate Mesh" button located within the interface.
Step 2. Opt for the Warp Spline and Track
Once the Mesh is generated, locate the "Warp Spline" option at the bottom and press the "Track Forward" option to create a motion distortion throughout the video.
Find out how to use the warp spline in your videos in detail by watching this comprehensive video.
Feature 5. Stabilization
To remove the unwanted camera shakes within the video, you can use Filmora's Mocha interface, which efficiently stabilizes videos by reverse tracking.
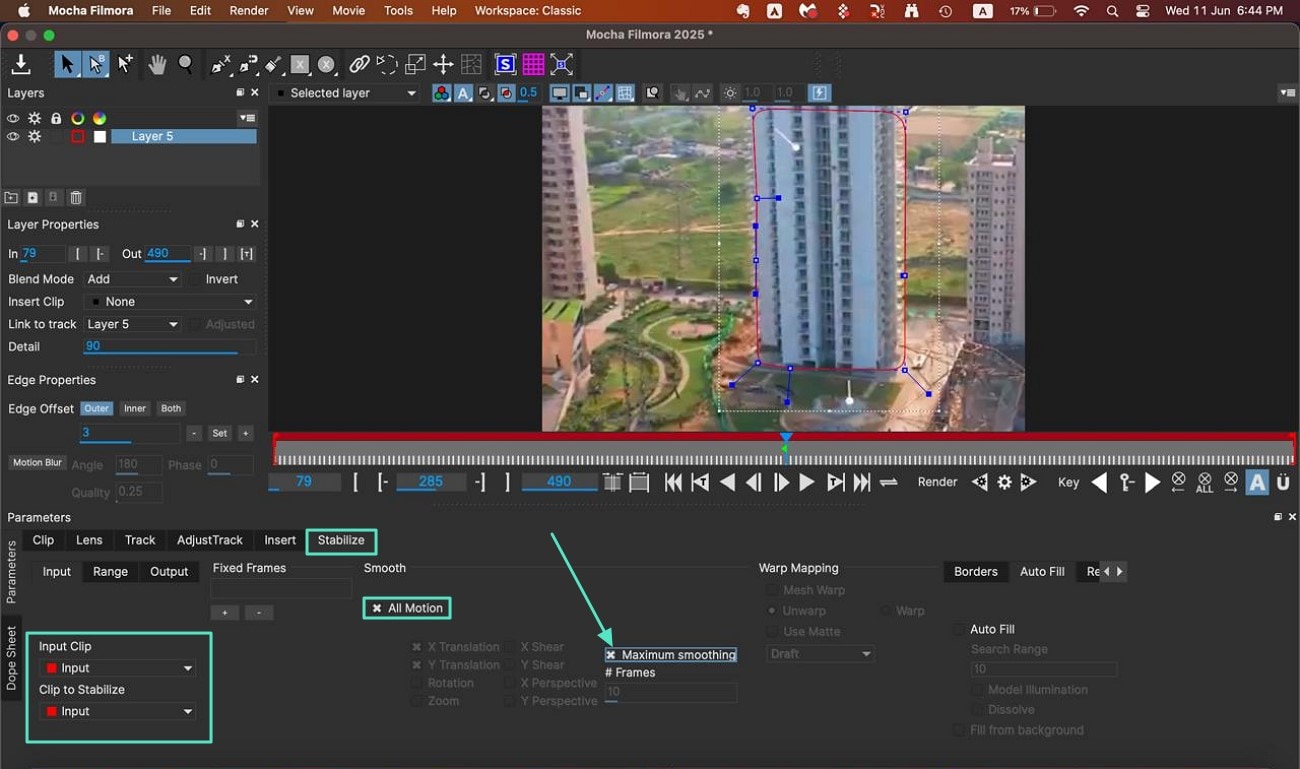
Step 1. Select the Area for Stabilization
After you have accessed the X-spline layer to make the selection of the unstable surface within the video, head to the bottom and access the "Stabilize‘ section. Next, choose the "Input Clip" and "Clip to Stabilize" from their drop-down menus and check the "All Motions" option. To get accurate stabilization, make sure to check the "Maximum Smoothing" option within the interface.
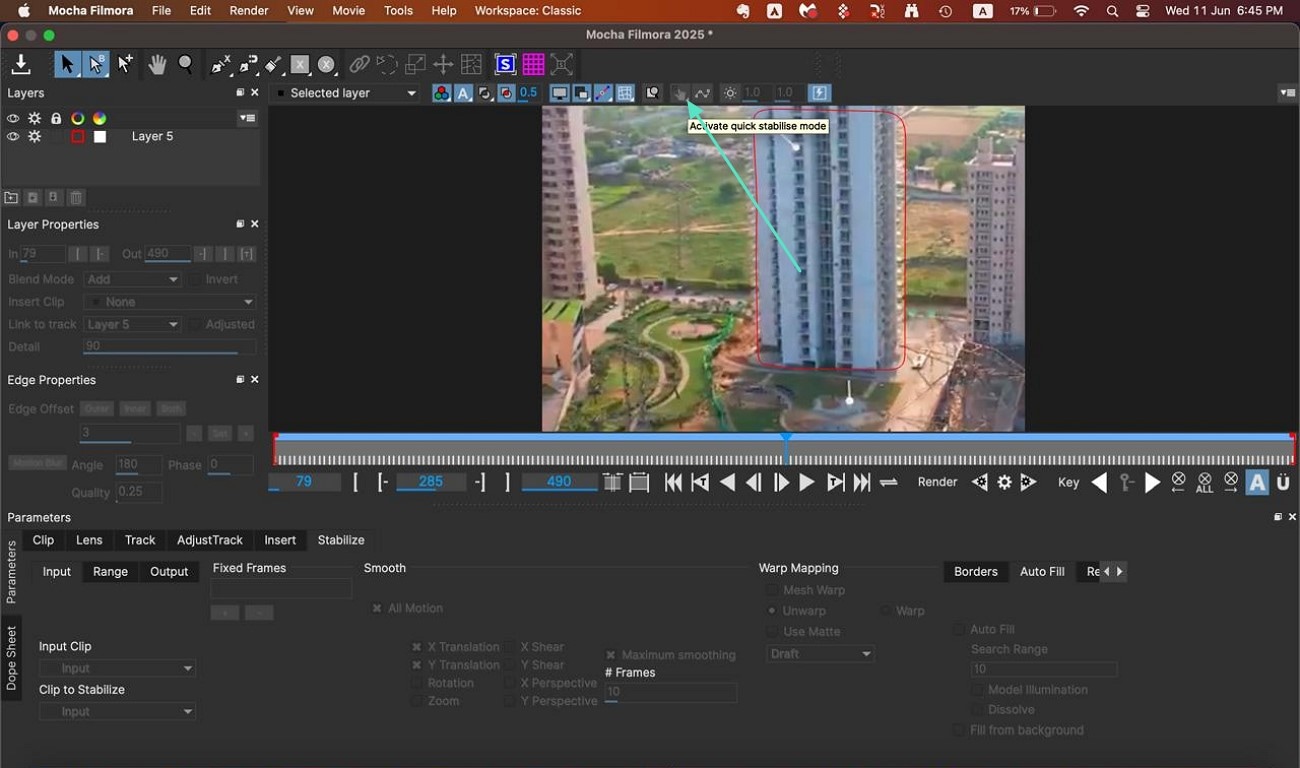
Step 2. Enable Quick Stabilization
To give a more stable look, head to the video preview and locate the "Quick Stabilization" icon. Click on it to activate the quick stabilization of the video.
Watch this video to have a deeper insight into the Stabilization function offered by Boris FX's Mocha UI.
Feature 6. Lens Distortion
If there is any lens distortion within your video, this utility removes it by analyzing the linear elements.
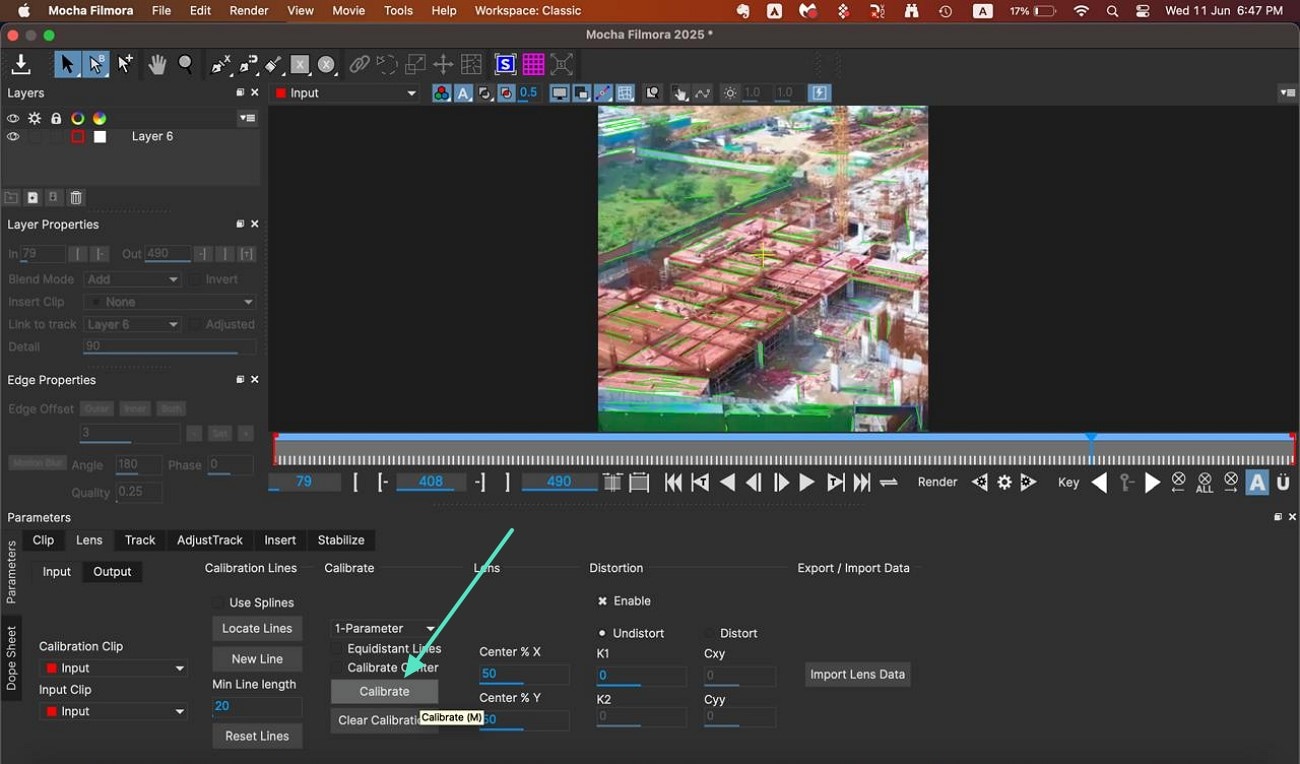
Step 1. Locate The Distorted Lines
After creating the spline layer within the Mocha module, acquire the "Lens‘ section from the bottom and press the "Locate Lines" options to detect the distorted lines. You can manually specify the uneven lines by clicking on the "New Lines" option and dragging the cursor on the screen.
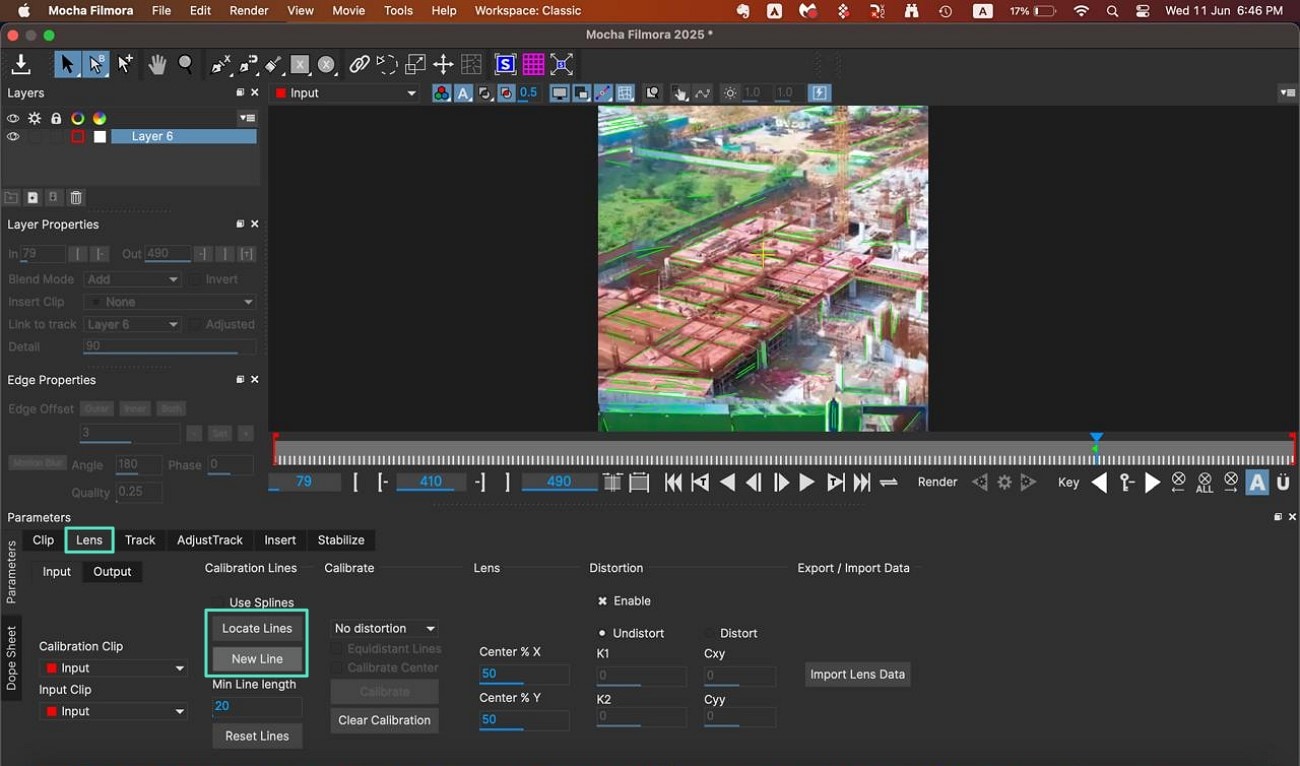
Step 2. Calibrate the Lines to Remove Lens Distortion
Now, find the "Calibrate" button and click on it once the lines are specified. Finally, hit the "Track Forward" button to preview the changes made within the video.
If you find this function interesting and want to learn more about it, watch this video instantly.
Feature 7. Insert Module
Starting from Filmora version V14.9.1, this module in the Filmora Mac version allows you to insert multiple elements into your video and perform enhancements within the Mocha interface. You can select a specific area within the video to add a layer, logo, or text seamlessly. You also get the ability to adjust the blend mode according to your preferences. The seamless switching between the Filmora and Mocha interfaces helps users experiment with multiple layers without any effort.
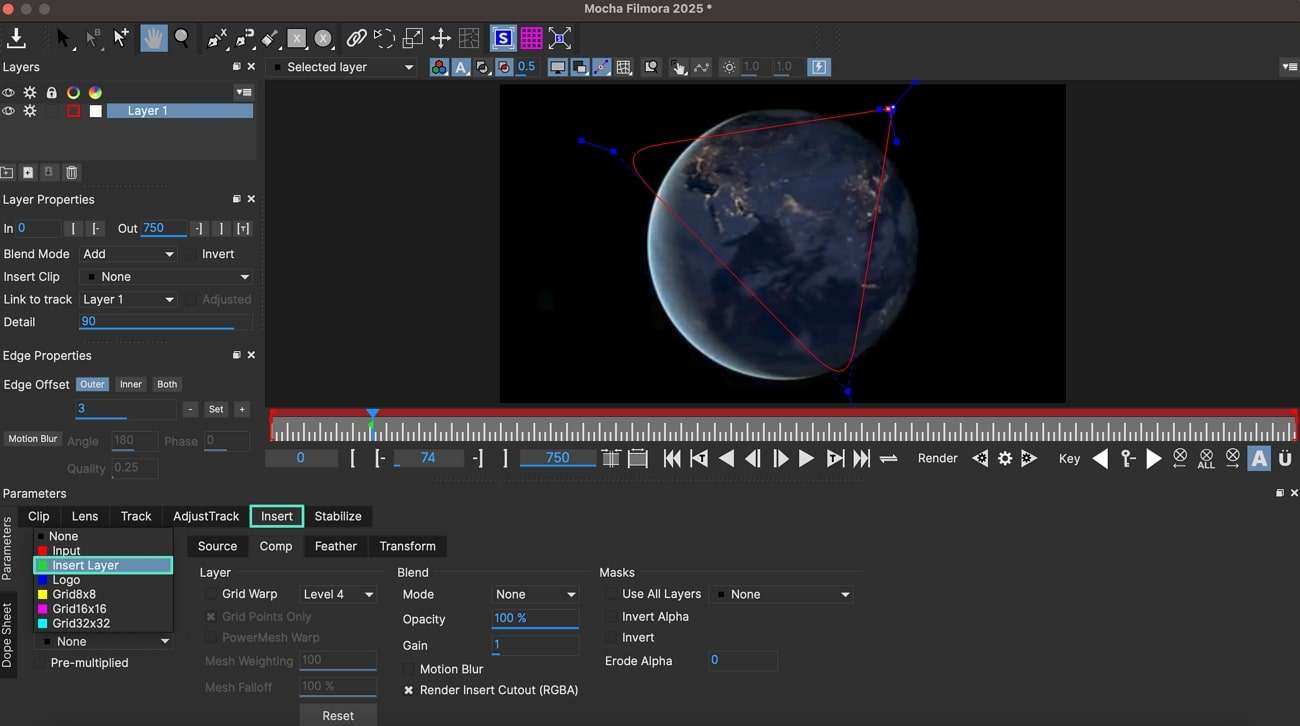
Step 1. Choose the Atrea For Inserting a Layer
Within the Mocha interface, select the area where you want to add the layer by creating an X-spline layer. Once the area is selected, head to the bottom and select the “Insert” section to expand the “Insert Clip” drop-down menu. Now, select the “Insert Layer” option and head back to the Filmora interface.
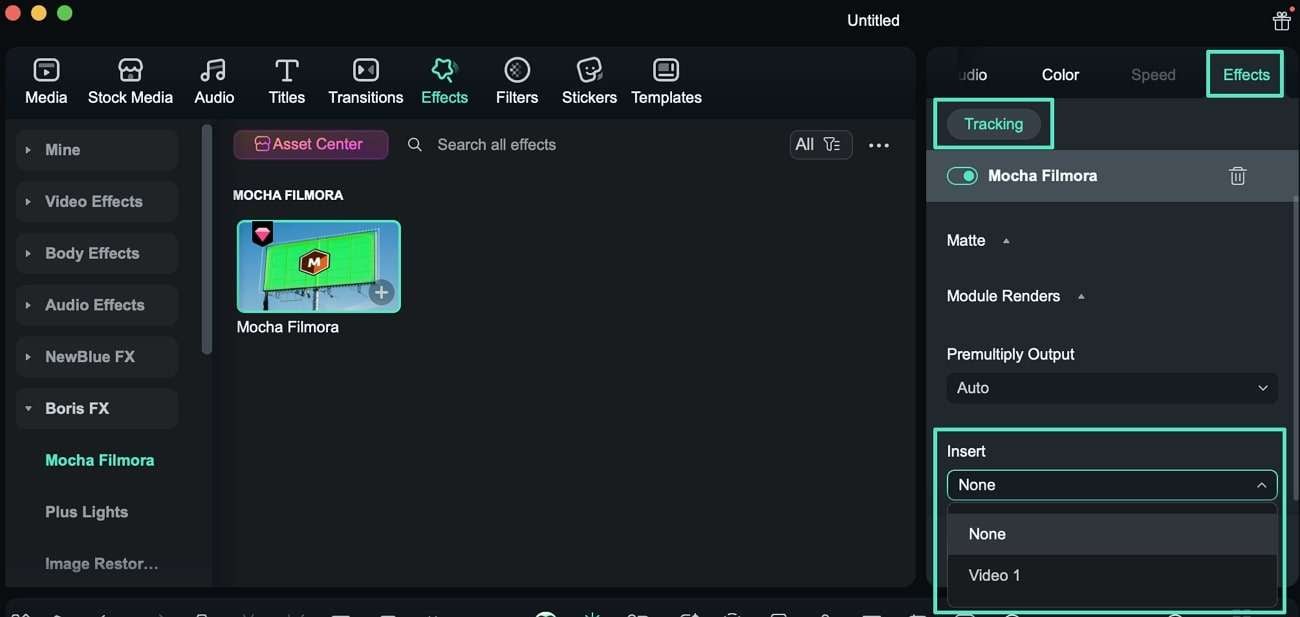
Step 2. Select the Layer Video to Insert
Head to the “Effects” panel on the right and access the “Tracking” section. Here, expand the “Insert” drop-down menu and choose the video. Next, enter the Mocha interface by tapping on the “Launch Mocha UI” option.
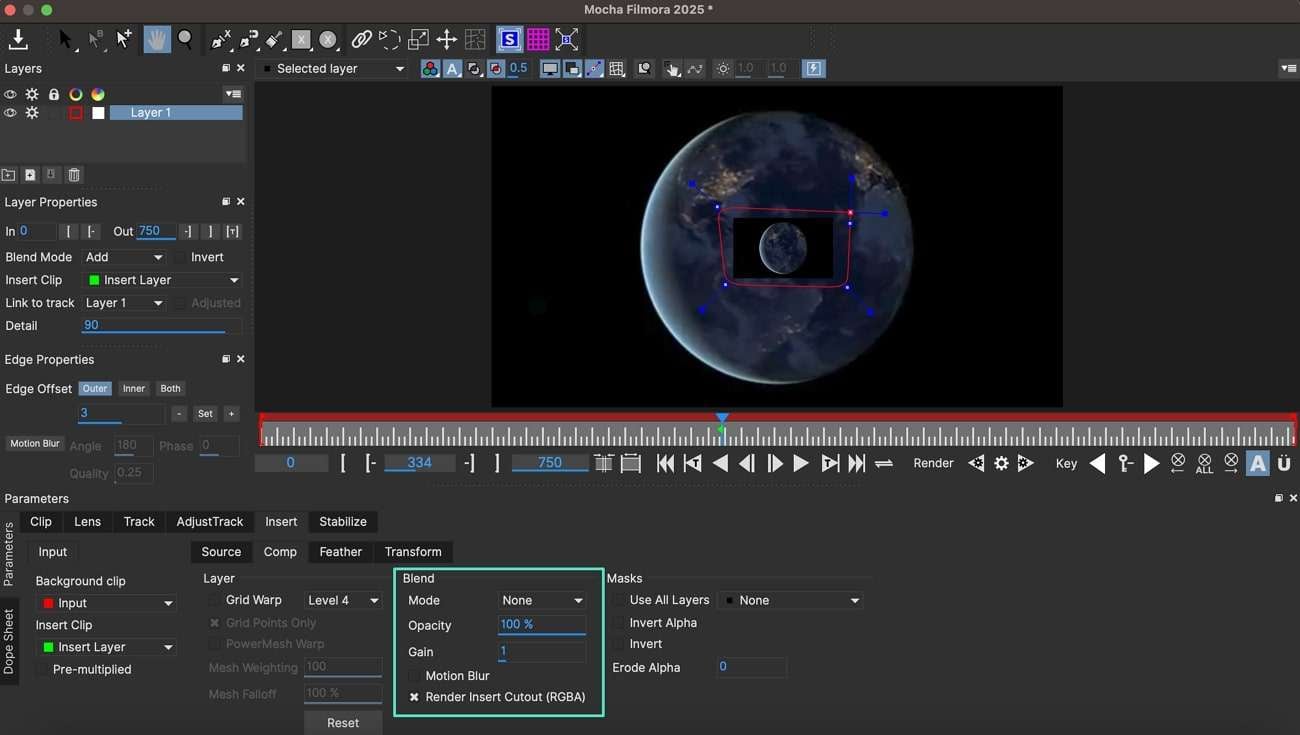
Step 3. Adjust the Applied Layer
In the Mocha interface, adjust the Blend Mode, Opacity, and other attributes of the inserted layer. Preview the changes made by clicking the “Play” icon located within the preview window.
Get a better grasp on the Insert Module of Boris FX's Mocha UI by watching this detailed video.
