For the Best Results, Use the Latest Version.
-
Preparations for Mac
-
Account (Mac)
-
Get Started & Basic Settings (Mac)
- Release notes for Mac
- Latest Versions and Features for Mac
- Get Started on Mac - Full Guide
- Download/register/uninstall on Mac
- Panel Layout on Mac
- Keyboard shortcuts on Mac
- Touchbar on Mac
- Change playback quality on Mac
- Render preview files on Mac
- Manage Timeline on Mac
- Media for use on Mac
- Logo Reveal For Mac
- Marked Favorites for Mac
-
Compatibility & Tech Specs (Mac)
-
Performance Settings (Mac)
-
-
Creating Projects - Mac
-
Creating New Projects (Mac)
-
-
Importing & Recording - Mac
-
Importing (Mac)
-
Recording (Mac)
-
-
Video Editing for Mac
-
Basic Video Editing for Mac
- Edit Live Photos on Mac
- Enable/Disable Clip for Mac
- Magnetic Timeline For Mac
- Dual Monitor Setup for Video Editing on Mac
- Select All Clips on Timeline for Mac
- Auto Ripple for Mac
- Split & Cut Videos on Mac
- Compositing on Mac
- Crop and zoom on Mac
- Playback Zoom Level for Mac
- Change Speed on Mac
- Play Video in Reverse on Filmora for Mac
- Mark In and Mark Out for Mac
- Markers for Mac
- Group Clips in Filmora for Mac
- Customized Backgrounds for Videos and Images in Mac
- Video snapshot on Mac
- Freeze Frame on Mac
- Auto enhance on Mac
- Applying Drop Shadow for Mac
- Adjustment Layer for Mac
- Mark Clips in Filmora for Mac
- Video Editing Ruler – Mac
- Apply Transforming for Mac
-
Advanced Video Editing for Mac
- Text Animation Path for Mac
- Create Multi-Camera Clip for Mac
- Filmora Motion Blur | Mac
- Drawing Tools for Mac | Filmora Guide
- Compound Clips for Mac
- AI Video Enhancer for Mac
- Filmora Flicker Removal Guide | Mac
- Multi-Clip Editing for Mac
- Keyframe Graph Editor for Mac
- Add Animation Keyframing in Filmora for Mac
- Mask on Mac
- PIP (Picture in Picture) in Filmora on Mac
-
AI-Powered Video Editing for Mac
- Smart Scene Cut for Mac
- Smart Short Clips for Mac
- Filmora AI Eye Contact - Mac
- Filmora Image to Video for Mac
- AI Idea to Video for Mac
- AI Text-to-Video for Mac
- Instant Cutter Tool on Mac
- AI Face Mosaic for Mac
- Filmora Image to Prompt for Mac
- Keyframe Path Curve for Mac
- Filmora AI Image Enhancer Guide – macOS
- Planar Tracking for Mac
- Filmora AI Relight - Mac
- AI Extend For Mac
- AI Script-to-Video for Mac
- AI Text-Based Editing in Mac
- Create With Instant Mode on Mac
- ChatGPT Plugin - AI Copywriting on Mac
- AI Smart Cutout in Filmora for Mac
- Auto reframe on Mac
- Lens Correction in Filmora for Mac
- AI Portrait Cutout on Mac
- Scene detection on Mac
- AI Smart Masking for Mac
- AI Mate Editing for Mac
- Motion Tracking on Mac
- Video Stabilization for Mac
- AI Object Remover For Mac
- AI Smart Search for Mac
- AI Skin Tone Protection for Mac
- Green screen on Mac
- Super Slow Motion with Optical Flow for Mac
- AI Stylizer for Mac
- Video Denoise for Mac
-
-
Audio Editing for Mac
-
Basic Audio Editing for Mac
-
Advanced Audio Editing for Mac
-
AI-Powered Audio Editing for Mac
- Audio To Video for Mac
- AI Sound Effect for Mac
- Smart BGM Generation on Mac
- AI Voice Enhancer for Mac
- Audio Stretch for Mac
- AI Audio Denoise for Mac
- Auto Synchronization on Mac
- AI Vocal Remover for Mac
- AI Auto Beat Sync for Mac
- AI Music Generator for Mac
- AI Voice Cloning on Mac
- Silence Detection on Mac
-
-
Text Editing for Mac
-
Basic Text Editing for Mac
-
Advanced Text Editing for Mac
-
AI-Powered Text Editing for Mac
-
-
Video Customizations for Mac
-
Video Effects (Mac)
-
Audio Effects (Mac)
-
Transitions (Mac)
-
Stickers (Mac)
-
Filters (Mac)
-
Color Editing (Mac)
-
Animations (Mac)
-
Templates (Mac)
-
Asset Center (Mac)
-
-
Exporting & Share & Cloud Backup - Mac
AI Music Generation on Mac
Creating custom background music no longer requires professional composing skills or external music libraries. Wondershare Filmora for Mac includes an advanced AI Music Generation feature that helps users produce unique soundtracks directly within the editor.
By selecting a preferred mood, genre, duration, and prompt, creators can instantly generate music that fits their video style. The feature supports multiple AI generation modes, making it suitable for everything from casual social media videos to cinematic productions.
Mode 1: Normal Mode
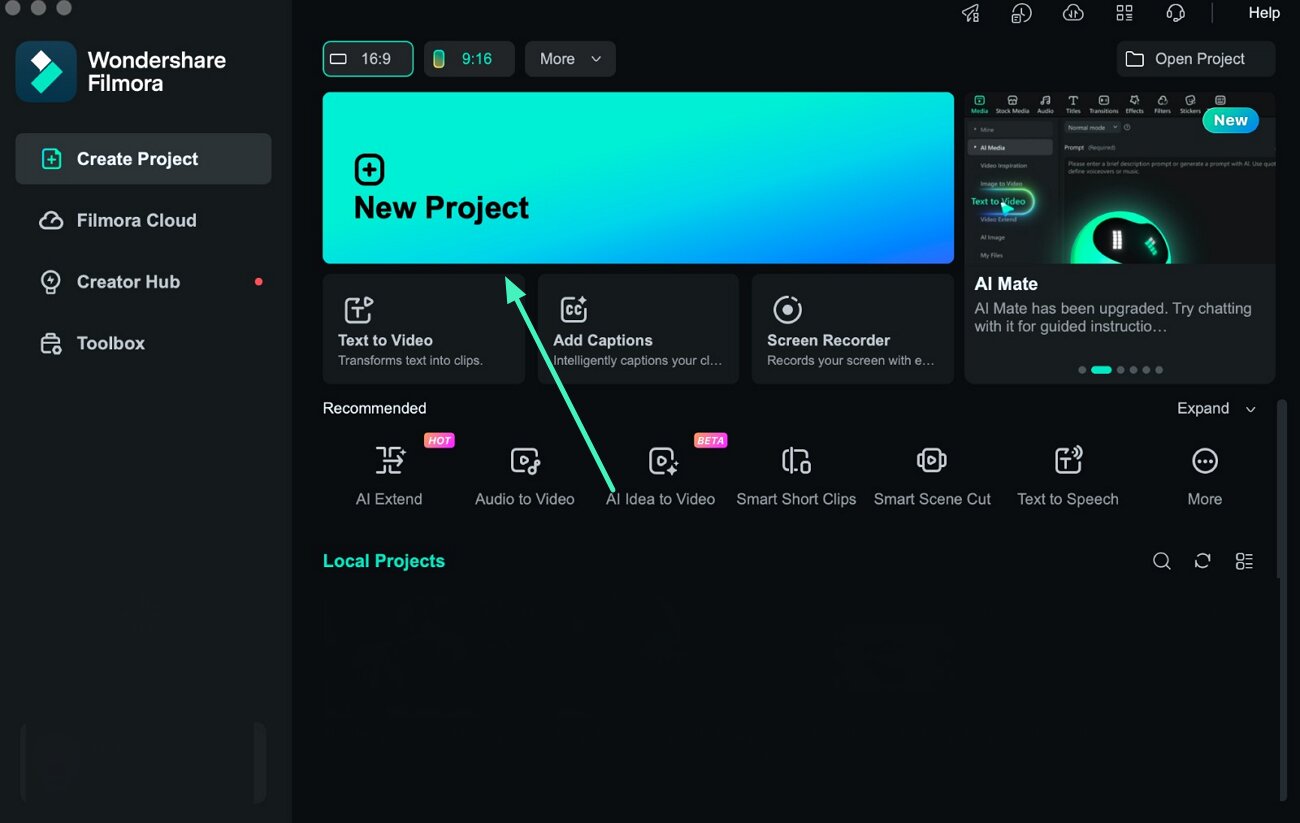
Step 1. Start a New Editing Project
Open Filmora on your Mac and click the New Project option from the homepage to enter the editing interface.
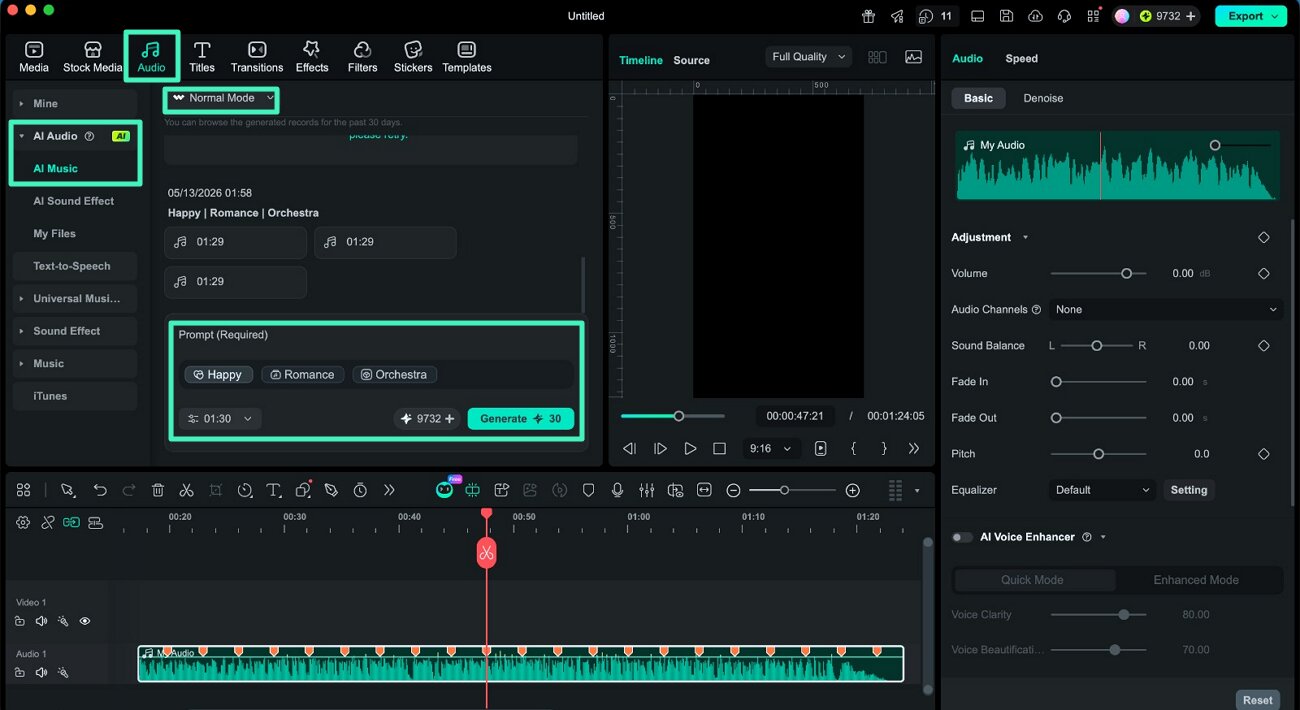
Step 2. Open AI Music and Select Normal Mode
Navigate to the Audio tab from the top toolbar and expand the AI Audio section. Choose AI Music and select Normal Mode from the mode options. Customize the soundtrack by selecting the mood, genre, and theme. Set the track duration and click the Generate button to create the music.
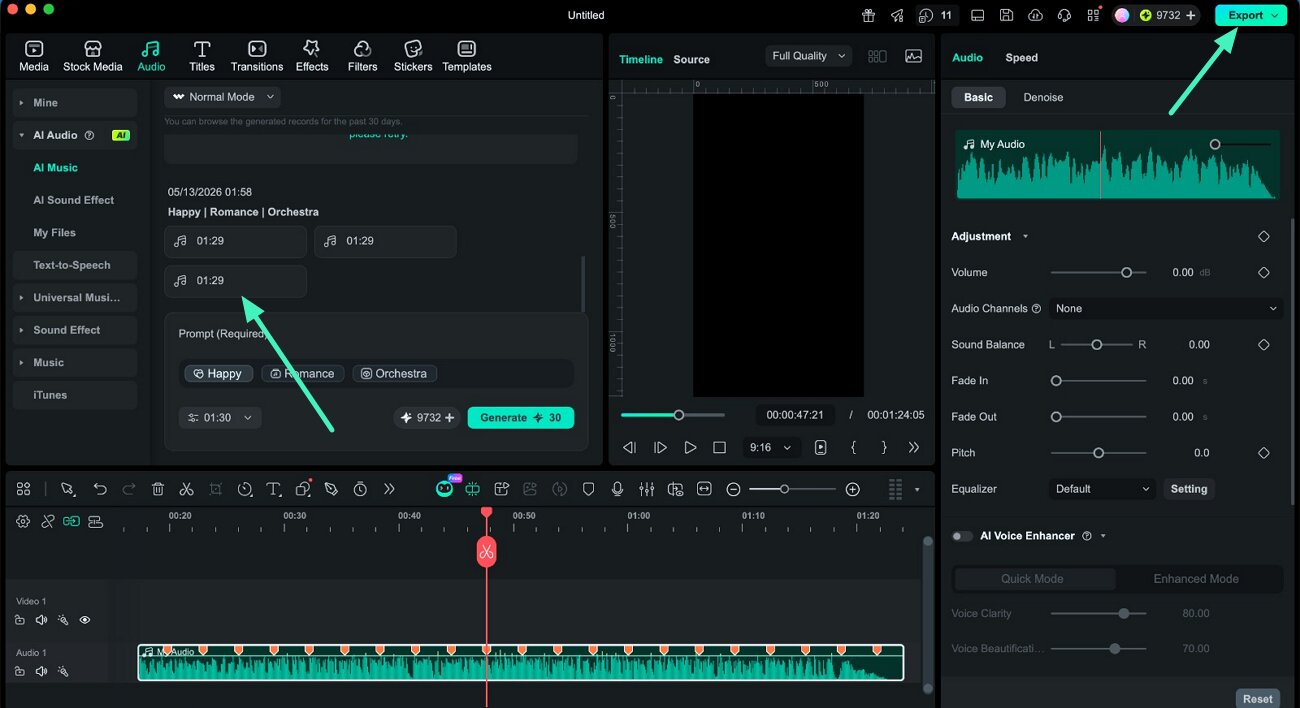
Step 3. Review and Export the Generated Music
Once the music is generated, drag the track onto the timeline and preview the result. If the output matches your project needs, click the Export button to save the final video.
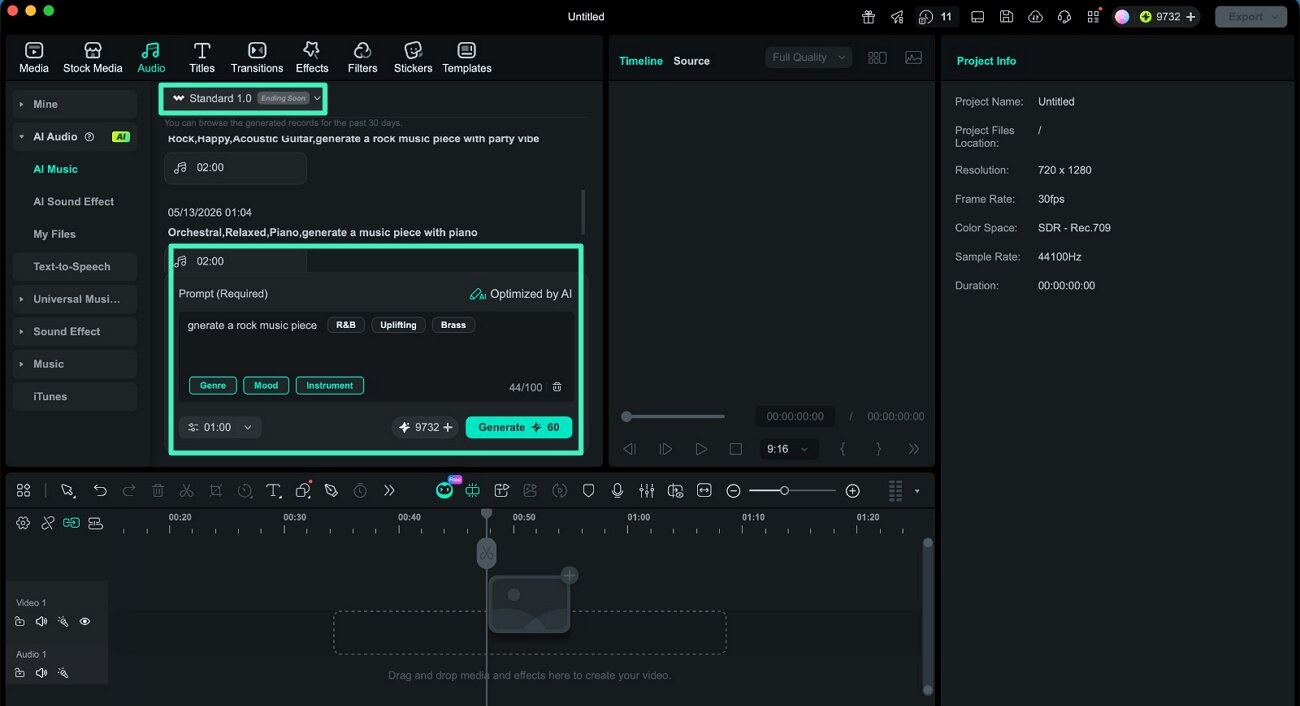
Mode 2: Standard 1.0
Standard 1.0 delivers more refined music generation with prompt-based customization and higher-quality audio output for professional content creation.
Step 1. Choose Standard 1.0 and Generate Music
Inside the AI Music section, select Standard 1.0 from the drop-down menu. Enter a text prompt describing your desired soundtrack and choose the genre, mood, instruments, and duration. Click the Generate button to begin the process.
Step 2. Customize and Save the Audio
After the soundtrack is created, drag it onto the timeline and enhance it using the Audio settings panel. Once the editing is complete, click the Export button to save the output.

Mode 3: ElevenLabs Mode
ElevenLabs Mode uses advanced AI processing to create highly detailed and realistic music tracks. This mode is suitable for cinematic projects, advertisements, and premium-quality productions.
Step 1. Select ElevenLabs Mode and Add Prompt
Access the AI Music feature and choose ElevenLabs from the available generation modes. Type your text prompt, then customize the music using the genre, mood, and instrument settings. Select the required duration and click the Generate button.
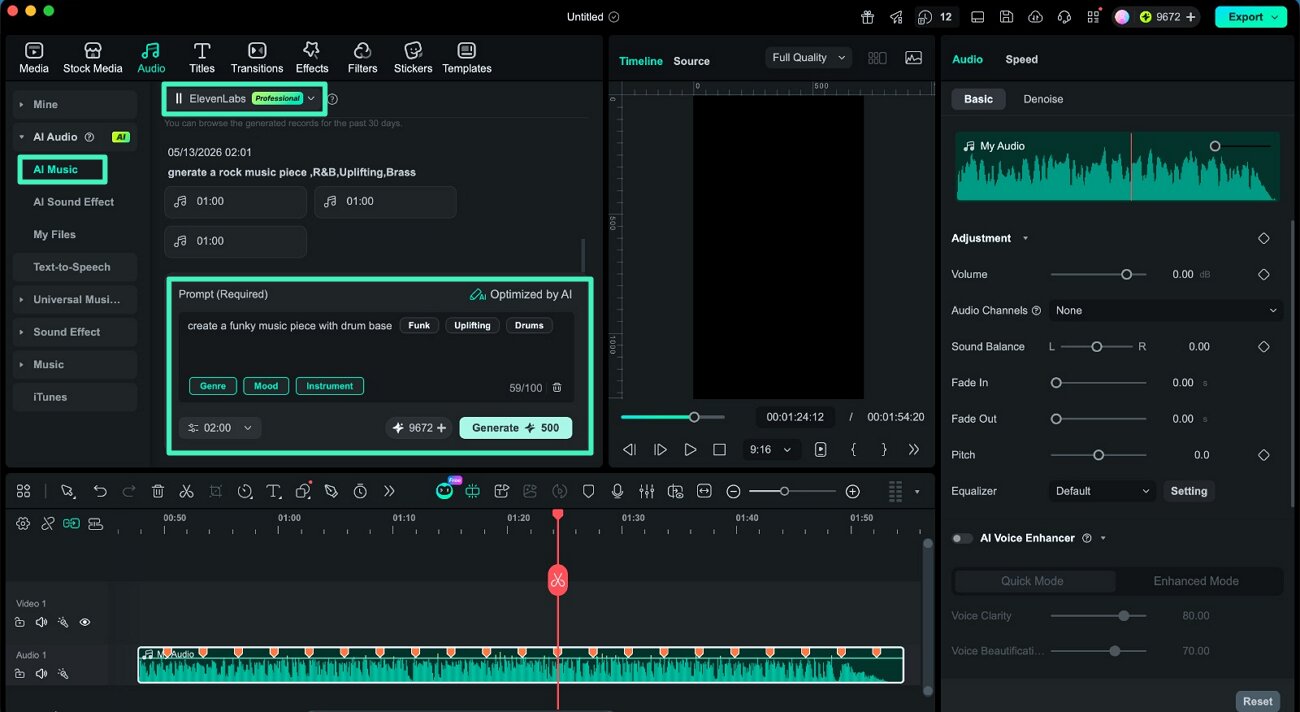
Step 2. Refine the Music and Export
Once the music generation process is complete, place the audio track onto the timeline and make final adjustments if needed. After reviewing the results, click the Export button to save the generated soundtrack.

Related Posts
Featured Articles
How to Add Shaking Effect to Video on Desktop, Mobile, and Online
Create dynamic content by applying a video shaking effect to highlight action or fun moments. Follow this guide to learn how to add shaking effects to video across different devices.
🆕 New 2026 Pinterest Idea Pins: What Works Now 📌
If you ask what Pinterest idea pins are and how to use them, this post is what you need. Here, we will explore the meaning of Pinterest idea pins and how to use them to your advantage when marketing your products or services.
How to Join a Google Meet: A Comprehensive Tutorial
Do you want to join Google Meet but are clueless? In this guide, we have discussed 5 ways how to join Google Meet using a PC and mobile.
Recommended User Guide
AI Voice Enhancer for Mac
Leverage the AI Voice Enhancer for Mac to automatically refine and elevate your audio recordings, providing clearer, more professional-sounding voice quality for podcasts, videos, and online communications.
Smart BGM Generation on Mac
Smart BGM Generation uses AI to create custom music instantly. By understanding user preferences and context, it makes tailored soundtracks for videos, games, and more. Using deep learning, the technology generates music that matches different moods and activities, providing quick and high-quality results.
