For the Best Results, Use the Latest Version.
-
Preparations for Mac
-
Account (Mac)
-
Get Started & Basic Settings (Mac)
- Release notes for Mac
- Latest Versions and Features for Mac
- Get Started on Mac - Full Guide
- Download/register/uninstall on Mac
- Panel Layout on Mac
- Keyboard shortcuts on Mac
- Touchbar on Mac
- Change playback quality on Mac
- Render preview files on Mac
- Manage timeline on Mac
- Media for use on Mac
- Logo Reveal For Mac
- Marked Favorites for Mac
-
Compatibility & Tech Specs (Mac)
-
Performance Settings (Mac)
-
-
Creating Projects - Mac
-
Creating New Projects (Mac)
-
-
Importing & Recording - Mac
-
Importing (Mac)
-
Recording (Mac)
-
-
Video Editing for Mac
-
Basic Video Editing for Mac
- Edit Live Photos on Mac
- Enable/Disable Clip for Mac
- Magnetic Timeline For Mac
- Select All Clips on Timeline for Mac
- Auto Ripple for Mac
- Split & cut videos on Mac
- Compositing on Mac
- Crop and zoom on Mac
- Playback Zoom Level for Mac
- Change speed on Mac
- Play video in reverse on Mac
- Mark In and Mark Out for Mac
- Markers for Mac
- Group clips on Mac
- Customized Backgrounds for Videos and Images in Mac
- Video snapshot on Mac
- Freeze frame on Mac
- Auto enhance on Mac
- Applying Drop Shadow for Mac
- Adjustment Layer for Mac
- Mark clip on Mac
- Video Editing Ruler – Mac
- Apply Transforming for Mac
-
Advanced Video Editing for Mac
-
AI-Powered Video Editing for Mac
- Smart Scene Cut for Mac
- Smart Short Clips for Mac
- Image to Video for Mac
- AI Idea to Video for Mac
- AI Text-to-Video for Mac
- Instant Cutter Tool on Mac
- AI Face Mosaic for Mac
- Keyframe Path Curve for Mac
- Planar Tracking for Mac
- AI Extend For Mac
- AI Script-to-Video for Mac
- AI Text-Based Editing in Mac
- Create With Instant Mode on Mac
- ChatGPT Plugin - AI Copywriting on Mac
- AI Smart Cutout for Mac
- Auto reframe on Mac
- Lens correction on Mac
- AI Portrait Cutout on Mac
- Scene detection on Mac
- AI Smart Masking for Mac
- AI Mate Editing for Mac
- Motion Tracking on Mac
- Stabilize video on Mac
- AI Object Remover For Mac
- AI Smart Search for Mac
- AI Skin Tone Protection for Mac
- Green screen on Mac
- Super Slow Motion with Optical Flow for Mac
- AI stylizer on Mac
- Video Denoise for Mac
-
-
Audio Editing for Mac
-
Basic Audio Editing for Mac
-
Advanced Audio Editing for Mac
-
AI-Powered Audio Editing for Mac
- Audio To Video for Mac
- AI Sound Effect for Mac
- Smart BGM Generation for Mac
- AI Voice Enhancer for Mac
- Audio Stretch for Mac
- AI Audio Denoise for Mac
- Auto synchronization for Mac
- AI Vocal Remover for Mac
- Auto Beat Sync on Mac
- AI Music Generator for Mac
- How to Perform AI Voice Cloning in Wondershare Filmora?
- Silence detection on Mac
-
-
Text Editing for Mac
-
Basic Text Editing for Mac
-
Advanced Text Editing for Mac
-
AI-Powered Text Editing for Mac
-
-
Video Customizations for Mac
-
Video Effects (Mac)
-
Audio Effects (Mac)
-
Transitions (Mac)
-
Stickers (Mac)
-
Filters (Mac)
-
Color Editing (Mac)
-
Animations (Mac)
-
Templates (Mac)
-
Asset Center (Mac)
-
-
Exporting & Share & Cloud Backup - Mac
AI Portrait Cutout for Mac
With the help of Artificial Intelligence technology, AI Portrait Cutout can automatically detect the human subject in a video or image and remove the background with just one simple click. You can remove the background easily without a green screen(chroma key) background. Moreover, we have 70+ body effects and sticker effects available, you can add body effects and swap in a new background or add creative effects to make standout video content.
How to Use AI Portrait Cutout?
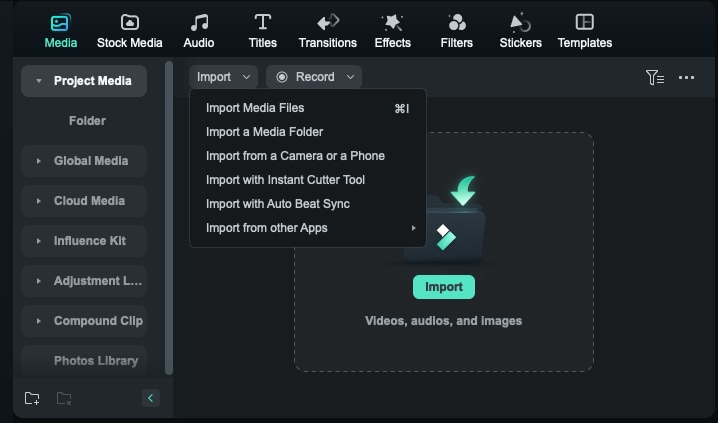
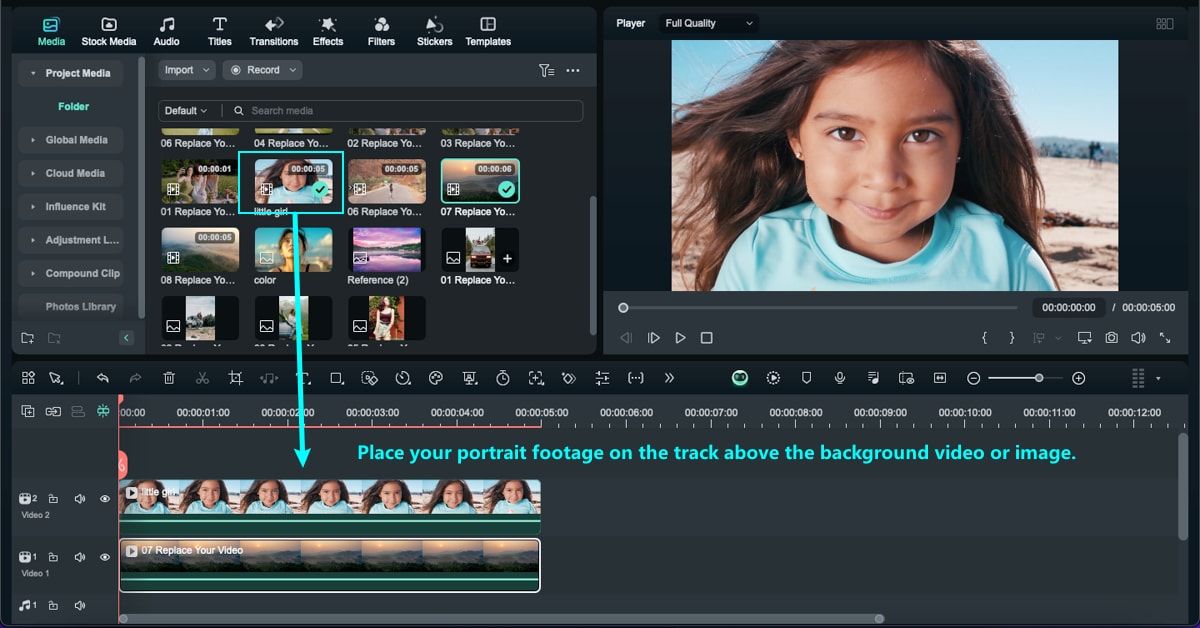
Step 1: Import and Add Media Files to the Timeline
If you have Filmora installed, open the program and create a new project. Import the background video and portrait footage onto the media library. Drag your background video or image onto the first track of the timeline. then place your portrait video or image on the track above it.
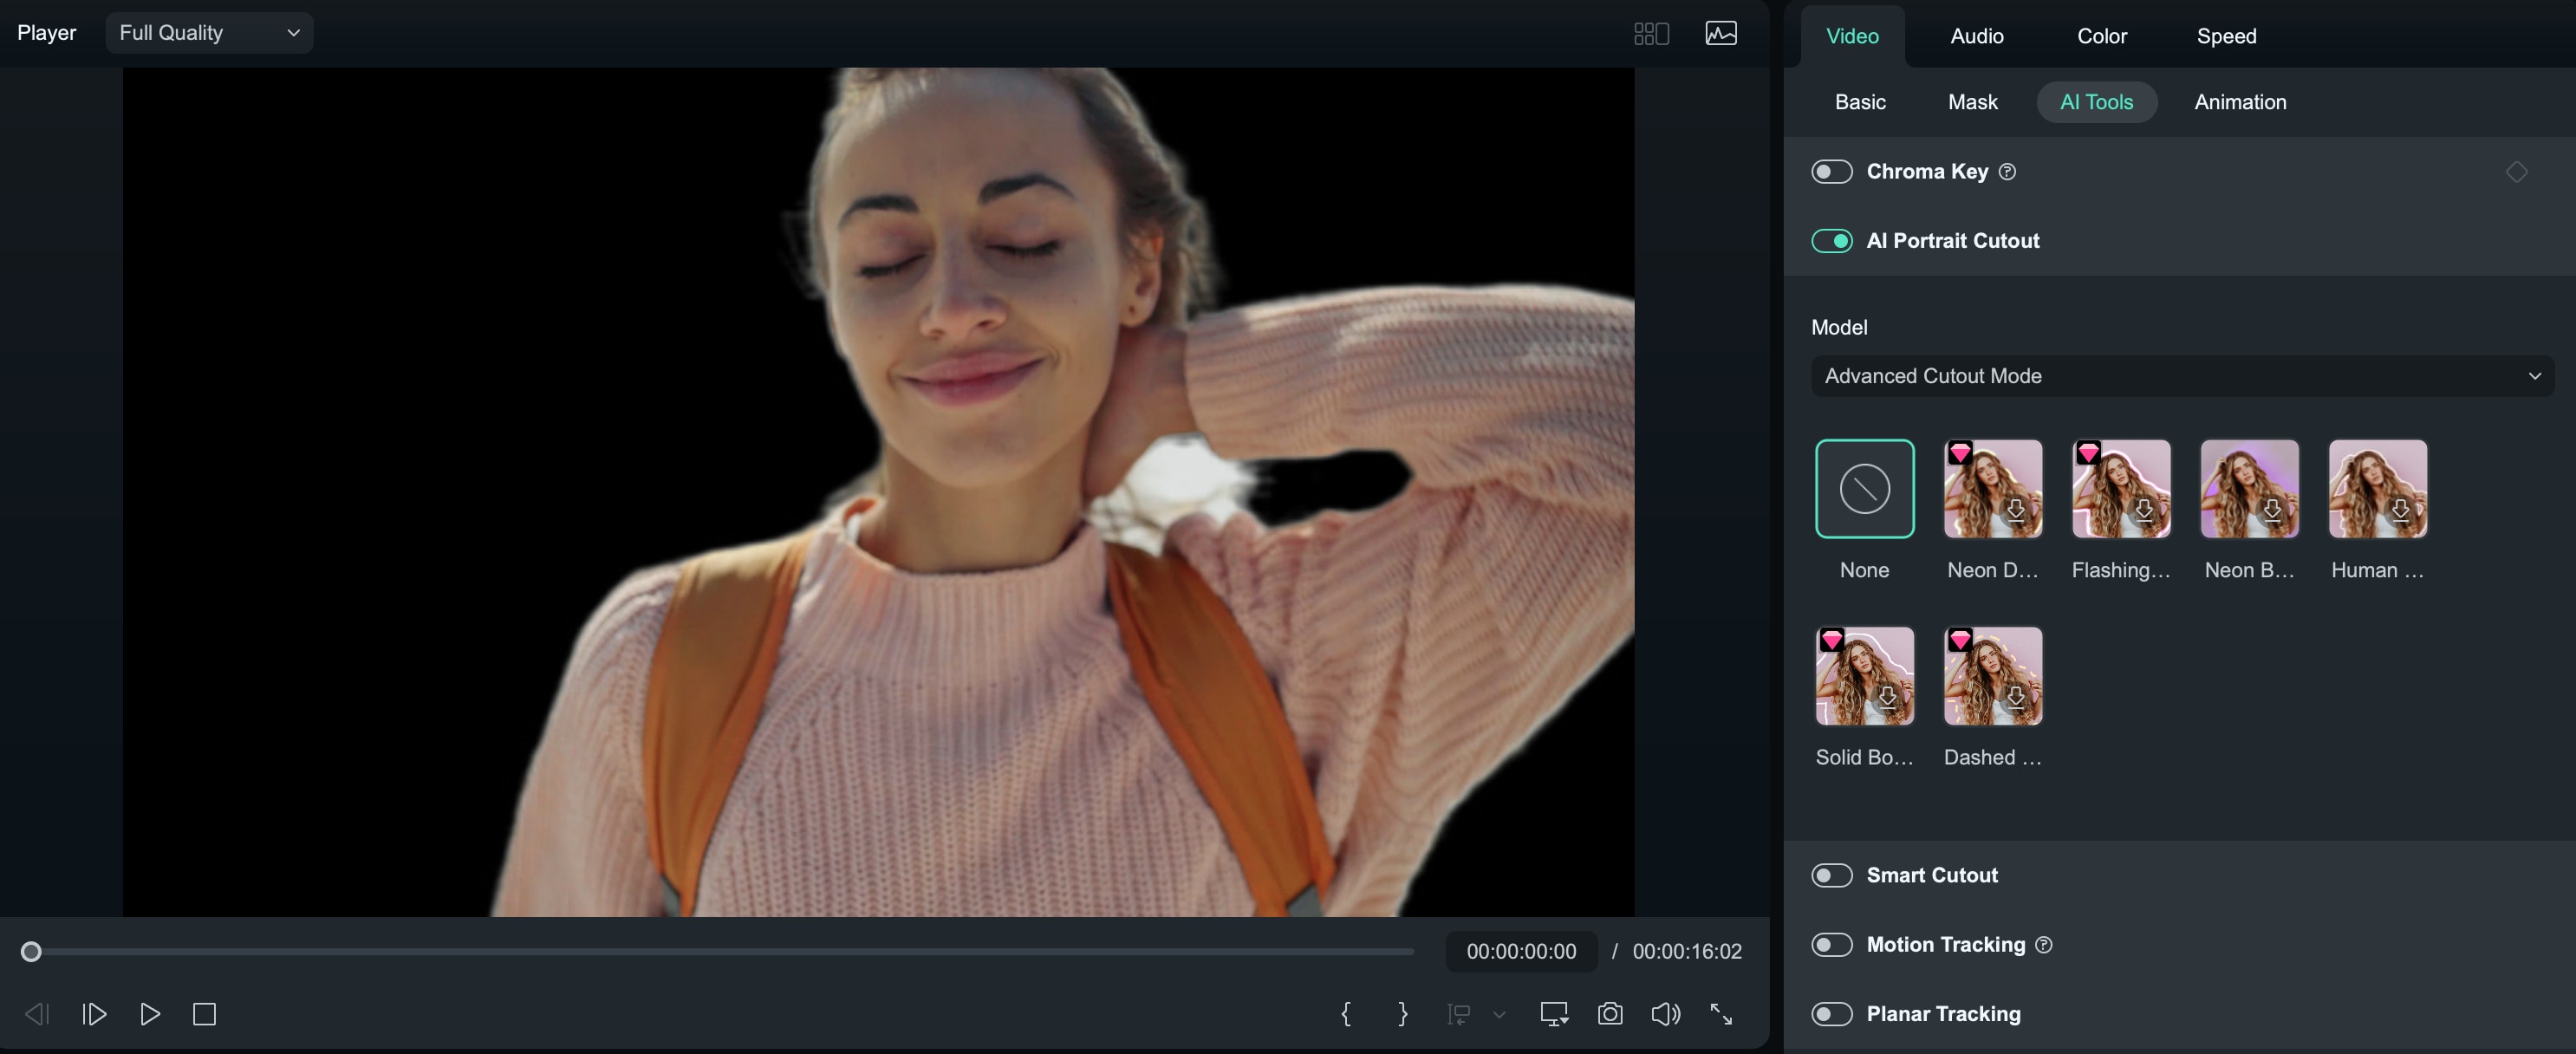
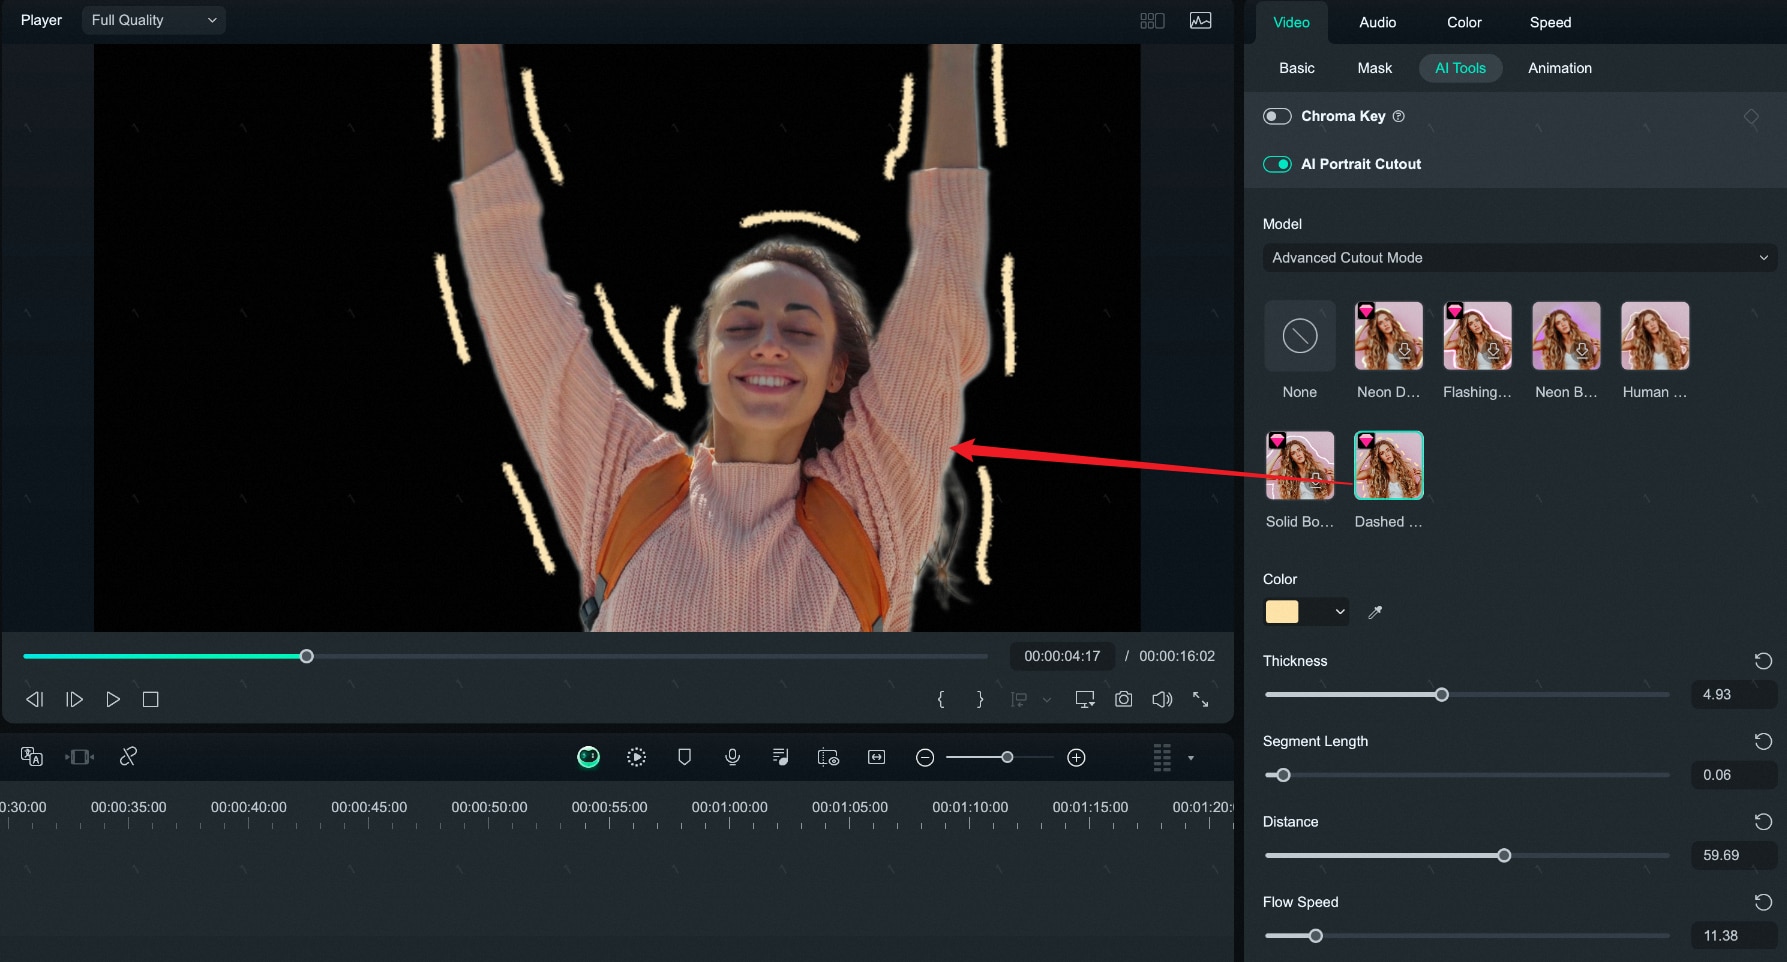
Step 2: Enable AI Portrait Cutout
Double-click on the clip in your timeline to open the editing panel, and check the box next to AI Portrait Cutout. You can also select the video in the timeline first and then click on the AI Portrait Cutout icon on the toolbar to automatically enable the AI Portrait Cutout feature.
AI Portrait Cutout offers two modes:
- Instant Mode: Removes the background with a single click, ideal for clear character edges.
- Precision Mode: Able to handle complex, semi-transparent objects like hair, providing a more detailed background removal.
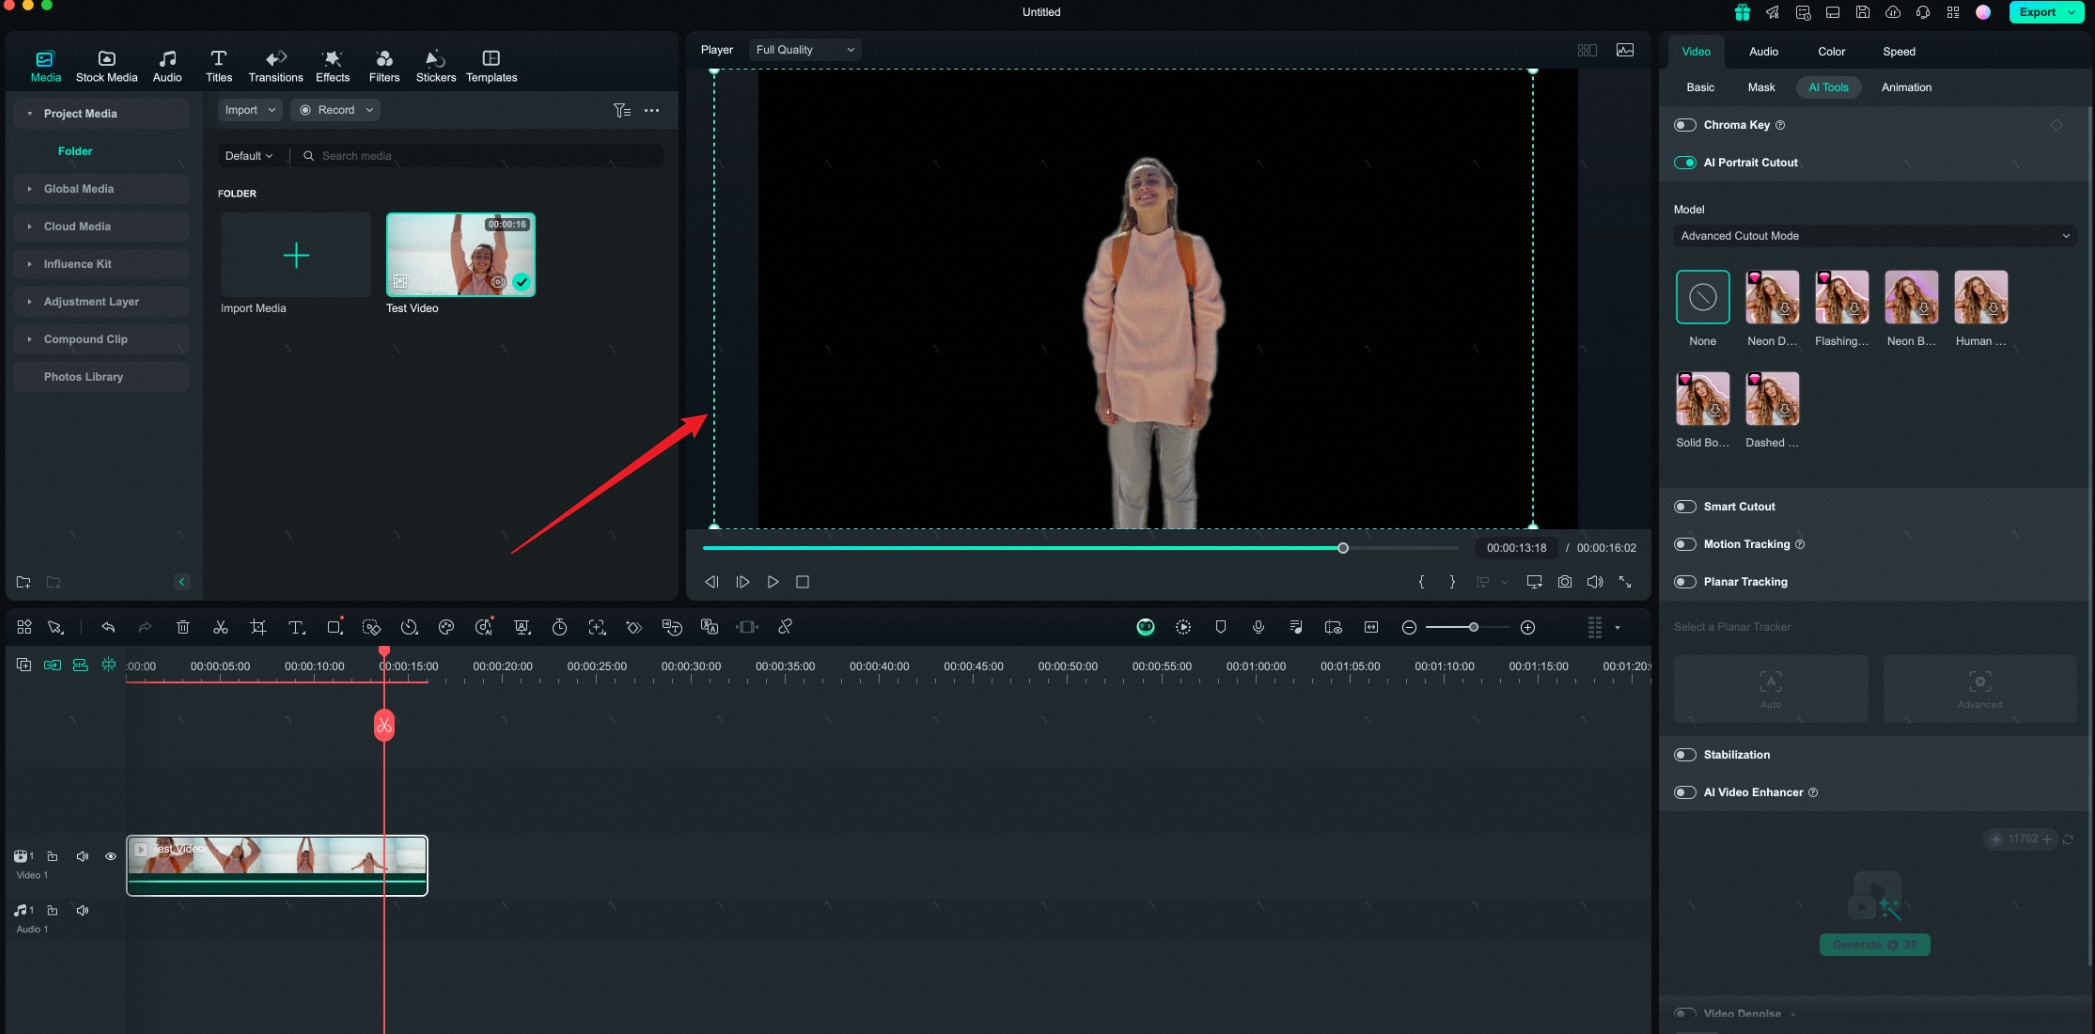
Step 3: Preview and Adjust the Footage
Once you enable the AI Portrait Cutout feature, Filmora will automatically make the background of portrait footage transparent. You can preview the video, adjust the portrait's position, and ensure it meets your needs.
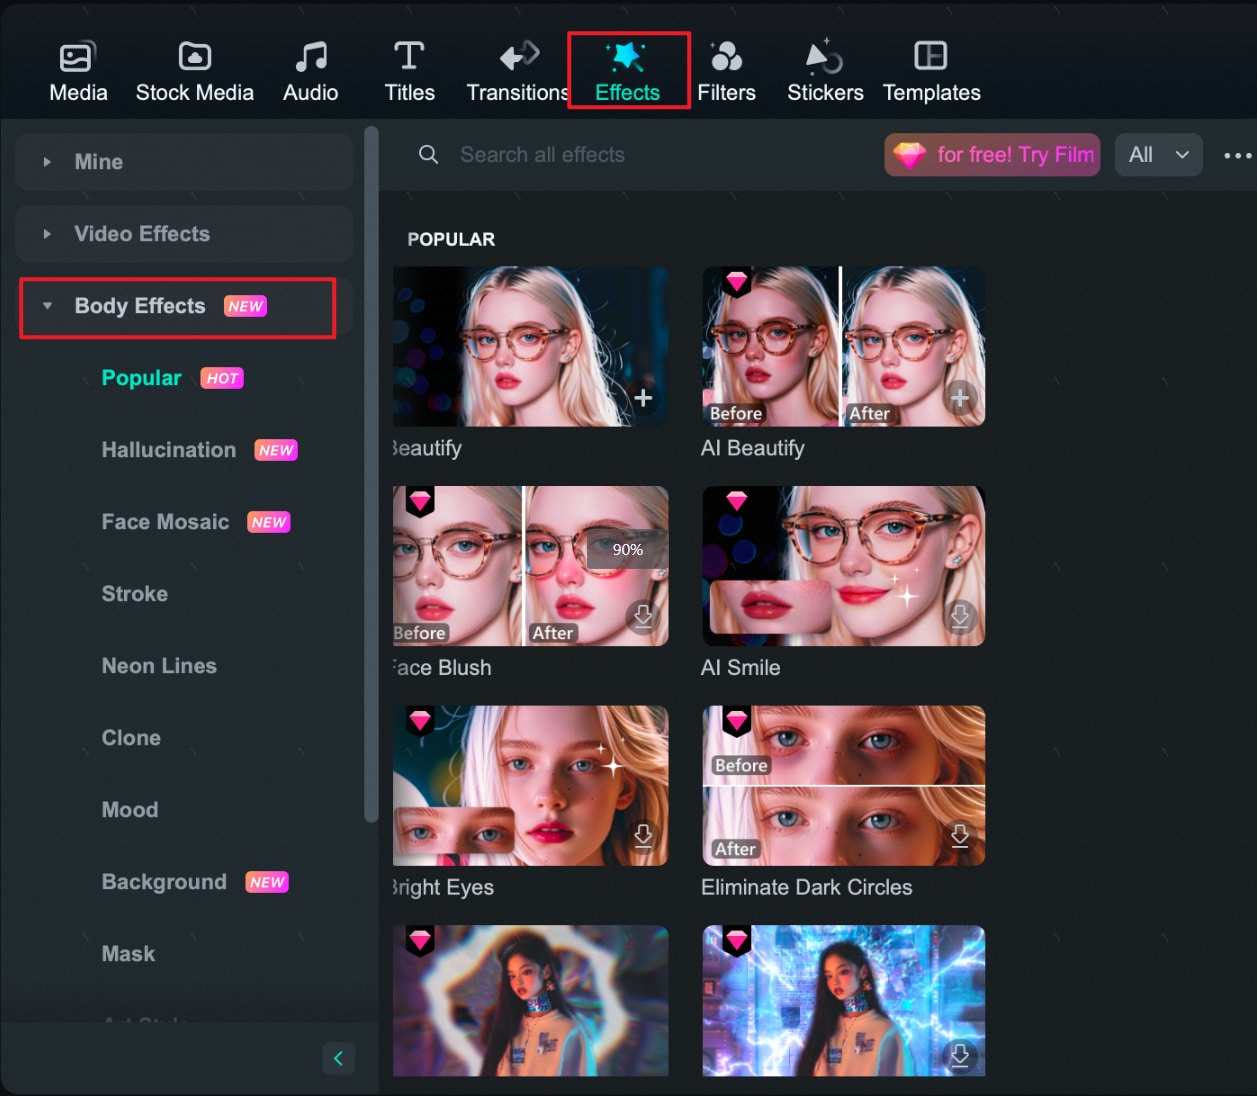
Step 4: Add Body Effects
These effects can be used to enhance, alter, or stylize the appearance of the subject.
Choose the Body Effects
Method 1: Select the Preset Body Effects in the AI Portrait Cutout panel, and then adjust the parameters as needed.
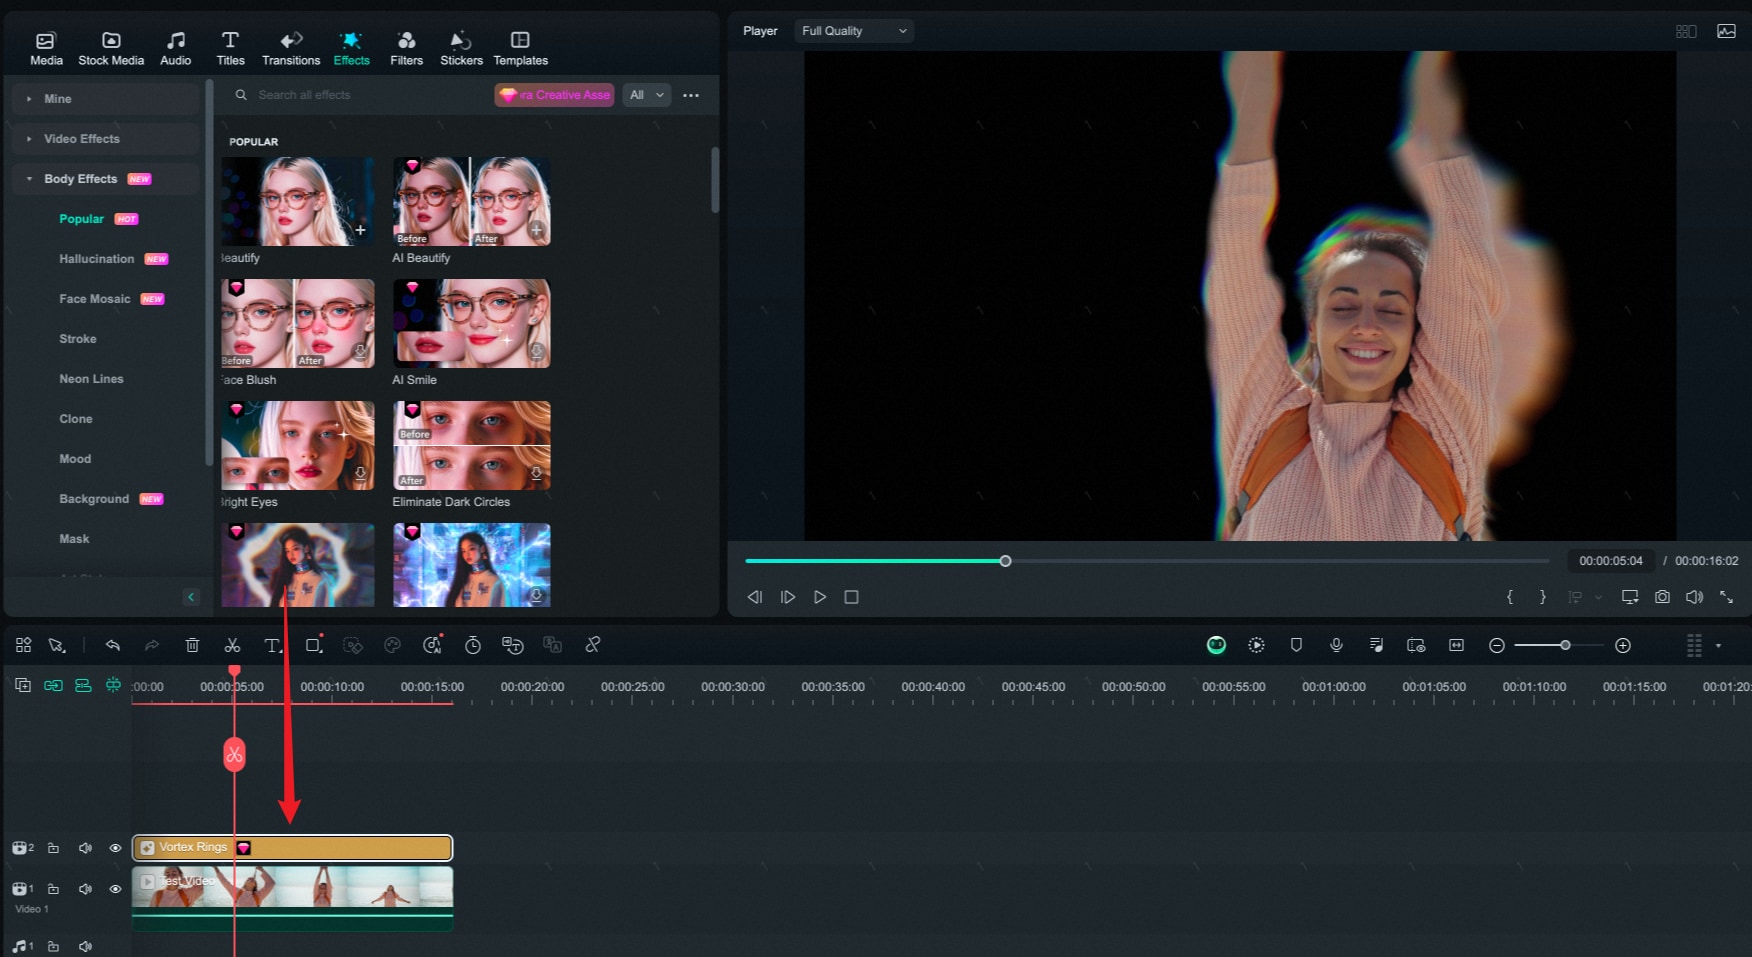
Method 2: Go to Effects>Body Effects on the top toolbar. You will see all the body effects here. Click the Body thumbnail and check it in the preview window. To add the Body effect, drag the body effect to the timeline or click the Add icon on the Body Effects thumbnail.
Preview Body Effects
Elongate or shorten the effect to fit the video clip length. Play the video and check the results. Add multiple effects to the clip by dragging and dropping them to the timeline.
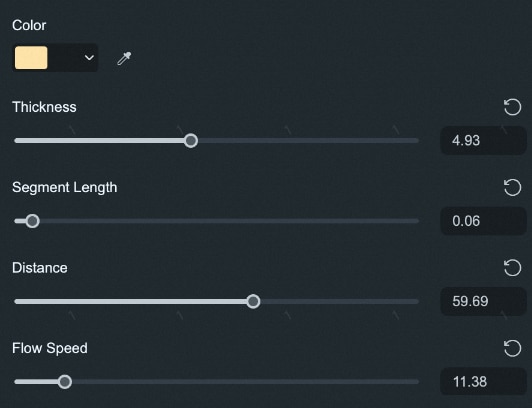
Adjust Body Effects
Adjust the settings of the effect to get the best results. Different effects have different settings. Double-click the added effect in the timeline and scroll down to Video Effects, check the settings of the portrait effect that you can change.
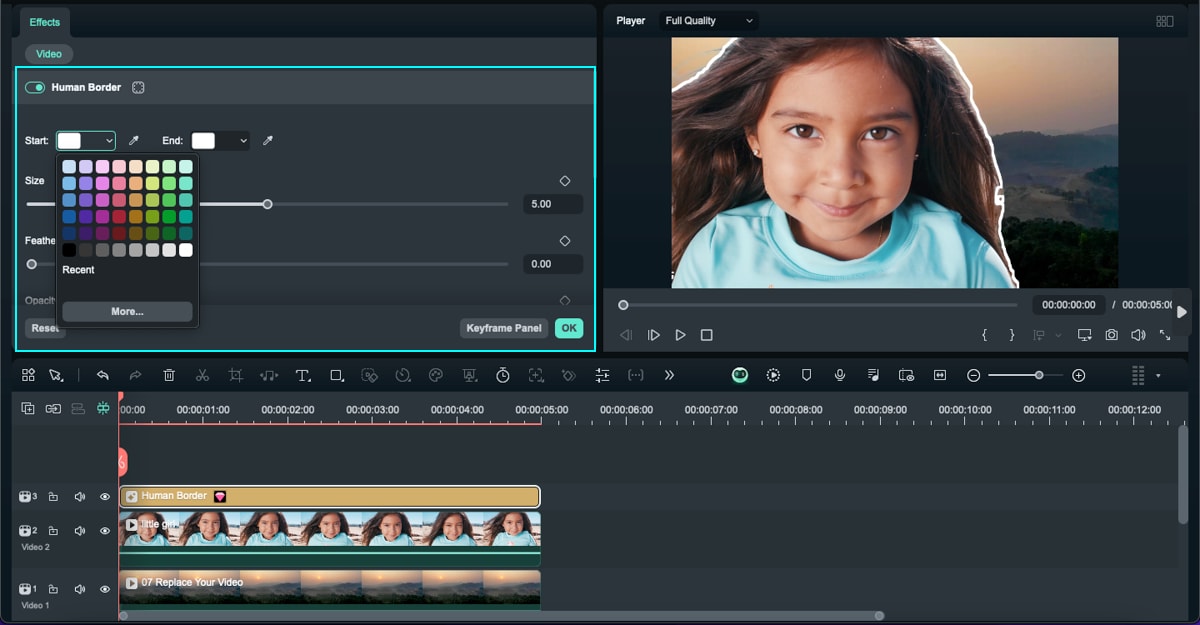
If you are not satisfied with the settings, you can click on the Reset button next to the value boxes.

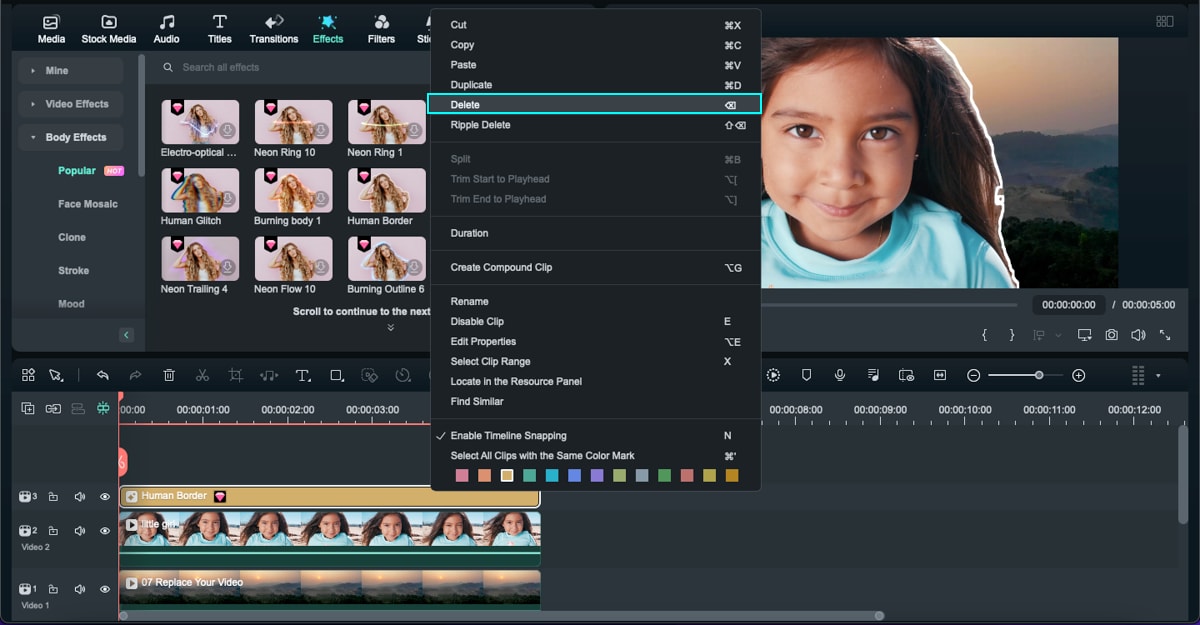
Remove Body Effects
To remove the Effects, you have three ways:
- Select the unwanted Portrait Effects and tab the Delete .
- To delete multiple Effects, click on Ctrl to select several Effects at one time, and then click Delete.
- Right-click on the effect, and then select Delete.
Related Posts
Featured Articles
How to Change Snapchat to Dark Mode (Android&iOS&Web)
Wondering how to get dark mode on Snapchat? Follow our complete guide for Android, iPhone, and the web.
How To Make a Video Podcast: A Beginner's Guide
Learn how to make a video podcast. Here’s a complete guide on everything there is to know about video podcasts, their types, uses, and editing.
Aiseesoft Screen Recorder Review | Key Features and How to Use
Don't know how to use an Aiseesoft screen recorder? Check our detailed review and step-by-step guide.
Recommended User Guide
Auto reframe on Mac
Overview of Auto Reframe.
Keyframe Path Curve for Mac
Are you frustrated with not being able to create smooth animation paths? Filmora has recently introduced the keyframe path curve feature. When you adjust the transition effects between keyframes, you can change keyframe type to control the speed and pacing of the animation, making it look smoother and more natural, and helping you create high-quality video clips. Now Let us know how to use it.
Image to Video for Mac
This guide explains how to use Image to Video feature on Mac.
