For the Best Results, Use the Latest Version.
-
Preparations for Mac
-
Account (Mac)
-
Get Started & Basic Settings (Mac)
- Release notes for Mac
- Latest Versions and Features for Mac
- Get Started on Mac - Full Guide
- Download/register/uninstall on Mac
- Panel Layout on Mac
- Keyboard shortcuts on Mac
- Touchbar on Mac
- Change playback quality on Mac
- Render preview files on Mac
- Manage Timeline on Mac
- Media for use on Mac
- Logo Reveal For Mac
- Marked Favorites for Mac
-
Compatibility & Tech Specs (Mac)
-
Performance Settings (Mac)
-
-
Creating Projects - Mac
-
Creating New Projects (Mac)
-
-
Importing & Recording - Mac
-
Importing (Mac)
-
Recording (Mac)
-
-
Video Editing for Mac
-
Basic Video Editing for Mac
- Edit Live Photos on Mac
- Enable/Disable Clip for Mac
- Magnetic Timeline For Mac
- Dual Monitor Setup for Video Editing on Mac
- Select All Clips on Timeline for Mac
- Auto Ripple for Mac
- Split & cut videos on Mac
- Compositing on Mac
- Crop and zoom on Mac
- Playback Zoom Level for Mac
- Change speed on Mac
- Play video in reverse on Mac
- Mark In and Mark Out for Mac
- Markers for Mac
- Group clips on Mac
- Customized Backgrounds for Videos and Images in Mac
- Video snapshot on Mac
- Freeze frame on Mac
- Auto enhance on Mac
- Applying Drop Shadow for Mac
- Adjustment Layer for Mac
- Mark clip on Mac
- Video Editing Ruler – Mac
- Apply Transforming for Mac
-
Advanced Video Editing for Mac
-
AI-Powered Video Editing for Mac
- Smart Scene Cut for Mac
- Smart Short Clips for Mac
- Filmora Image to Video for Mac
- AI Idea to Video for Mac
- AI Text-to-Video for Mac
- Instant Cutter Tool on Mac
- AI Face Mosaic for Mac
- Keyframe Path Curve for Mac
- Planar Tracking for Mac
- AI Extend For Mac
- AI Script-to-Video for Mac
- AI Text-Based Editing in Mac
- Create With Instant Mode on Mac
- ChatGPT Plugin - AI Copywriting on Mac
- AI Smart Cutout for Mac
- Auto reframe on Mac
- Lens correction on Mac
- AI Portrait Cutout on Mac
- Scene detection on Mac
- AI Smart Masking for Mac
- AI Mate Editing for Mac
- Motion Tracking on Mac
- Video Stabilization for Mac
- AI Object Remover For Mac
- AI Smart Search for Mac
- AI Skin Tone Protection for Mac
- Green screen on Mac
- Super Slow Motion with Optical Flow for Mac
- AI stylizer on Mac
- Video Denoise for Mac
-
-
Audio Editing for Mac
-
Basic Audio Editing for Mac
-
Advanced Audio Editing for Mac
-
AI-Powered Audio Editing for Mac
- Audio To Video for Mac
- AI Sound Effect for Mac
- Smart BGM Generation for Mac
- AI Voice Enhancer for Mac
- Audio Stretch for Mac
- AI Audio Denoise for Mac
- Auto synchronization for Mac
- AI Vocal Remover for Mac
- Auto Beat Sync on Mac
- AI Music Generator for Mac
- How to Perform AI Voice Cloning in Wondershare Filmora?
- Silence detection on Mac
-
-
Text Editing for Mac
-
Basic Text Editing for Mac
-
Advanced Text Editing for Mac
-
AI-Powered Text Editing for Mac
-
-
Video Customizations for Mac
-
Video Effects (Mac)
-
Audio Effects (Mac)
-
Transitions (Mac)
-
Stickers (Mac)
-
Filters (Mac)
-
Color Editing (Mac)
-
Animations (Mac)
-
Templates (Mac)
-
Asset Center (Mac)
-
-
Exporting & Share & Cloud Backup - Mac
Filmora OpenFX Plugins - Mac
Filmora's OpenFX Plugins elevate your editing setup by bringing high-end visual-effects capabilities straight into the Filmora workspace. With this integration, creators can seamlessly use professional OpenFX-based tools, such as Boris FX, NewBlue, and similar effect suites, directly on the timeline. These plugins add dramatic visual styles, cinematic color enhancements, particle simulations, custom transitions, and advanced compositing options typically used in industry-level workflows.
Smooth performance and real-time previews make it incredibly easy to experiment while staying within Filmora's familiar interface. Below is how you can start using these OpenFX plugins to refine your content with precision:
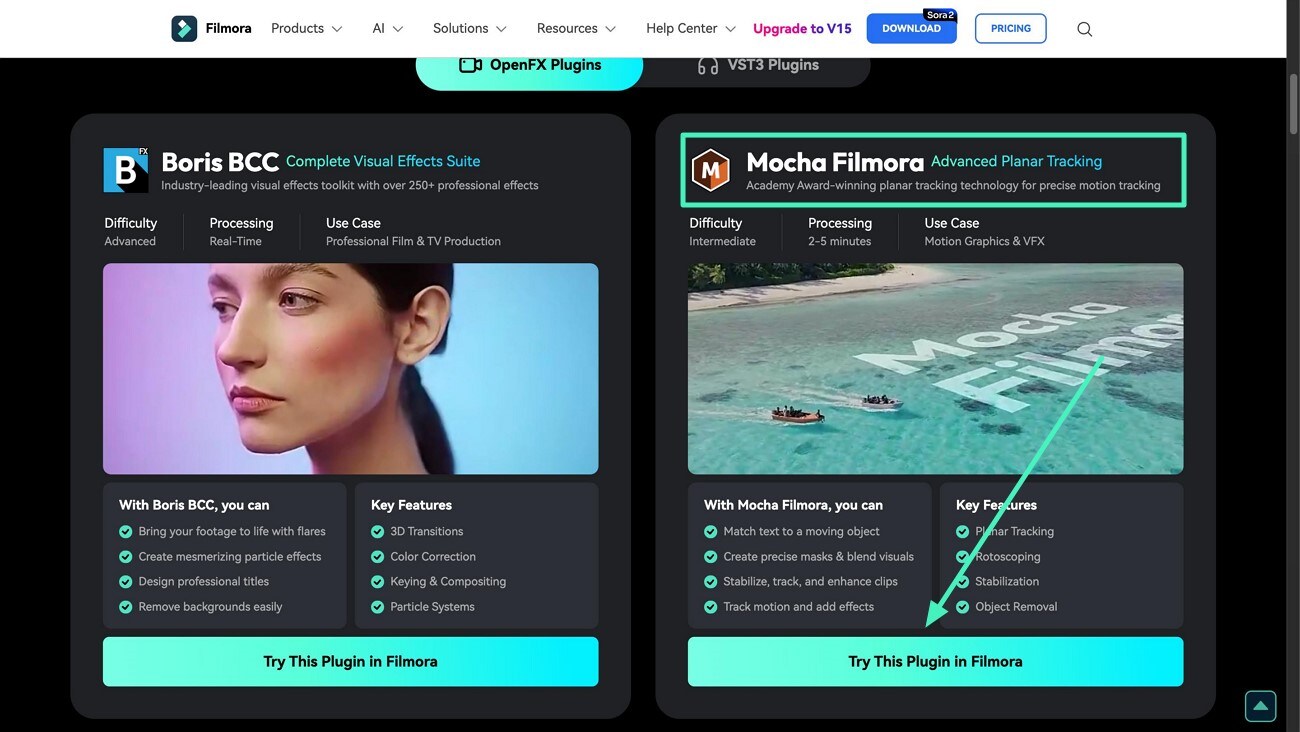
Mode 1. Use Boris BCC Plugin
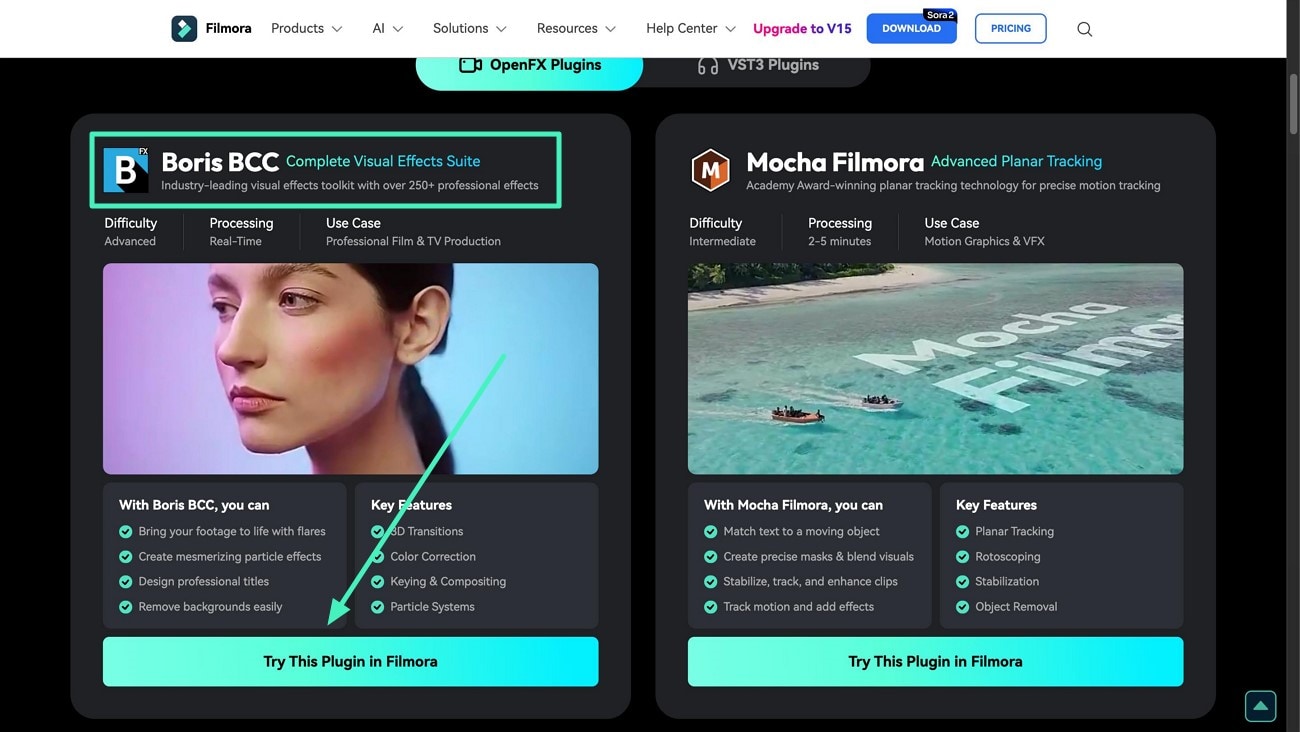
Step 1. Visit the Plugin Page and Download
Start by heading to Filmora's official plugin hub and looking for the Boris CC package. Once you find it, click the Try This Plugin in Filmora button to download it safely onto your device.
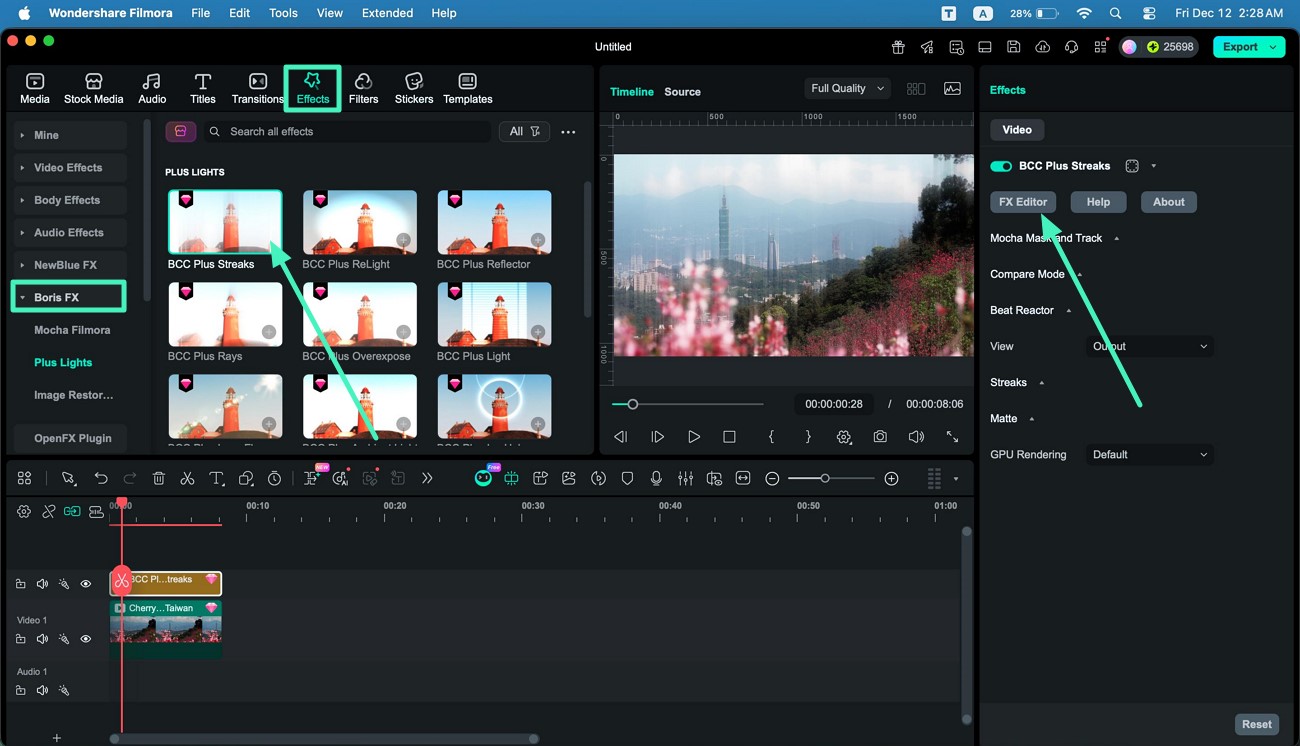
Step 2. Acquire the Plugin in Filmora
Open Filmora on your device and bring in the video you want to enhance. From the top toolbar, head to the Effects tab. On the left-side list, find and select BorisFX. Pick any CC effect you want and apply it to your clip using the + icon. After that, move to the right-hand panel and click FX Editor to open the plugin's dedicated editing interface.
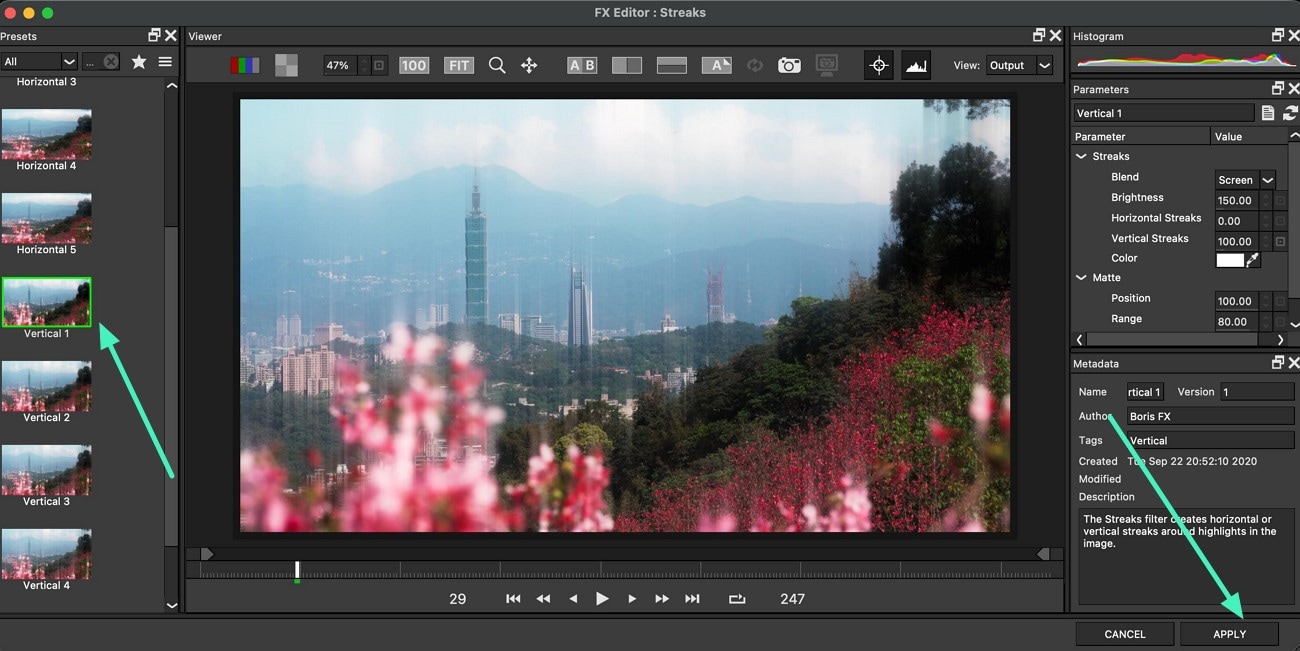
Step 3. Select Effect and Apply
Inside the BCC Effects window, browse the collection displayed on the left. Choose the effect you want to use and press the Apply button to add it to your video.
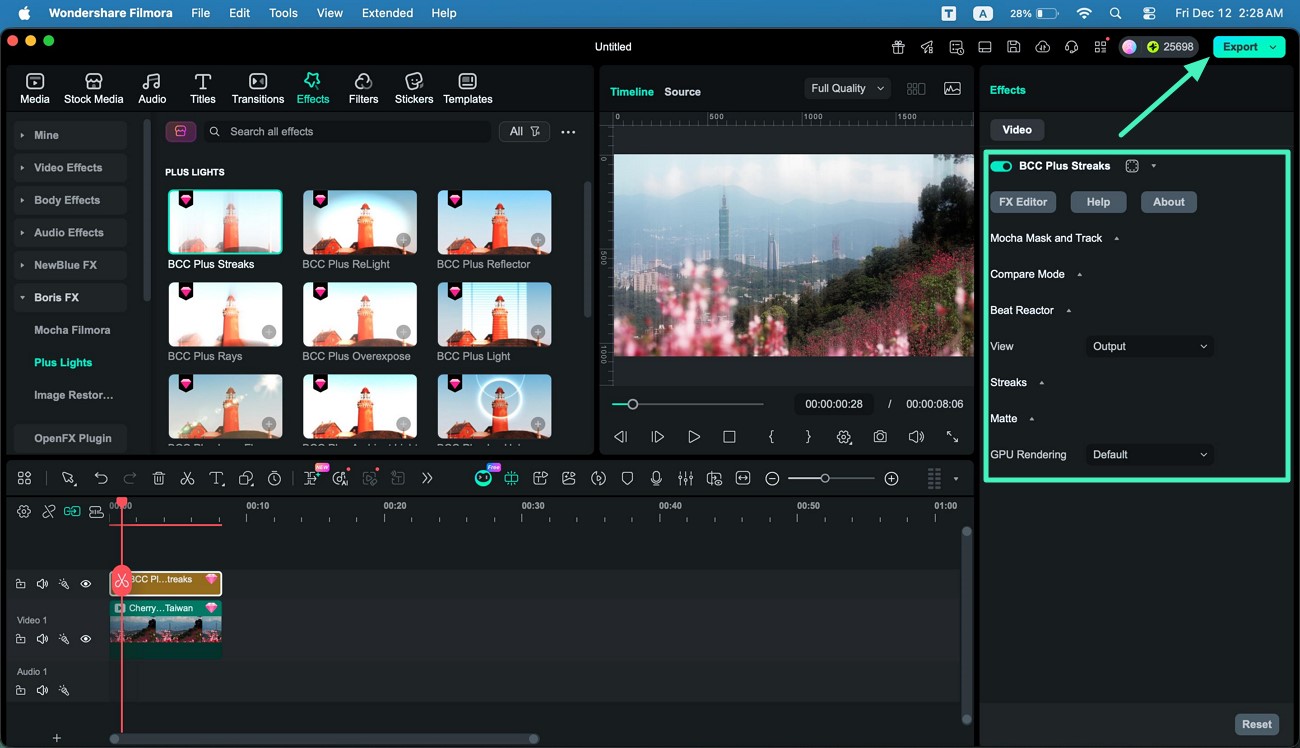
Step 4. Save Results to Your Computer
Use the adjustment options in the right panel to fine-tune the effect until it matches your vision. Once everything looks perfect, head to the top-right corner and hit Export to save your final video.
Mode 2. Use Mocha Filmora Plugin
Step 1. Download The Plugin
Visit the Filmora website and head to the section where Mocha is listed. From there, download the plugin to your computer by clicking the Try This Plugin in Filmora.
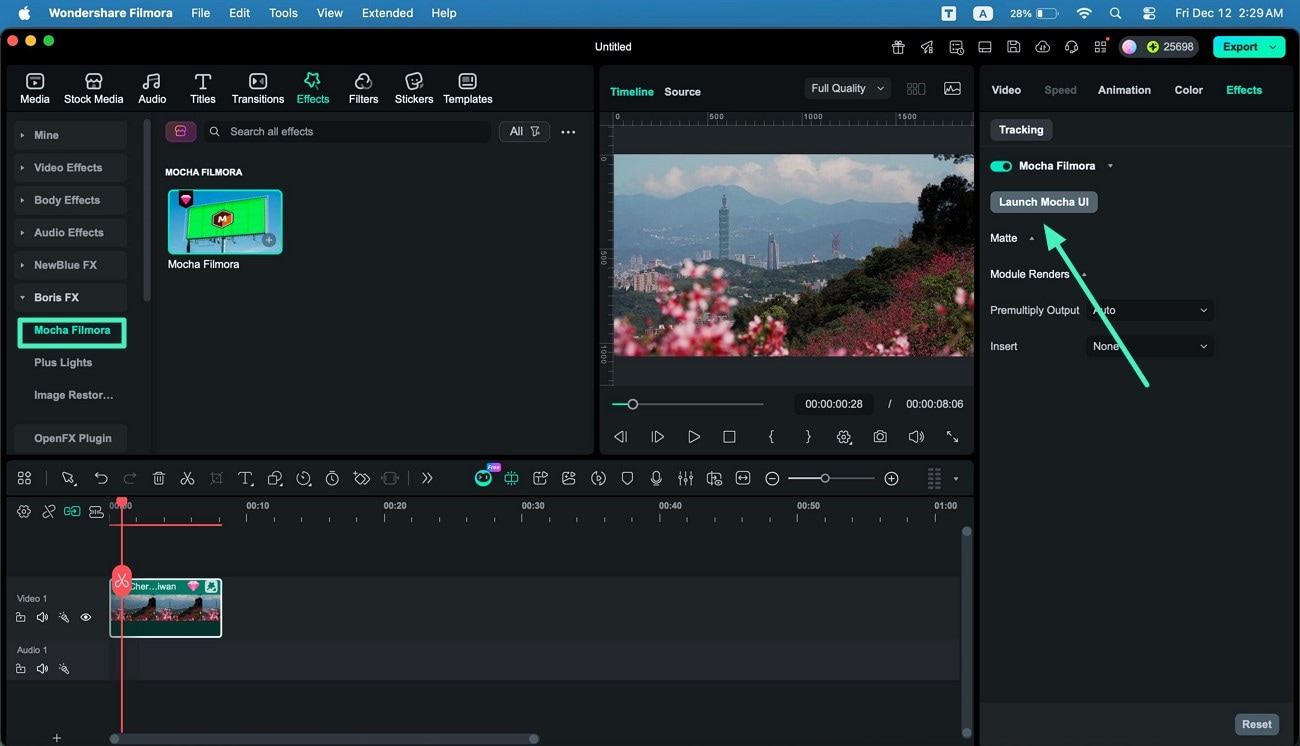
Step 2. Import Video and Access Mocha
After opening Filmora, load your video file and navigate to the Effects panel through the top toolbar. In the left-side menu, locate Filmora Mocha, tap the + icon, and then select Launch Mocha to enter its tracking workspace.
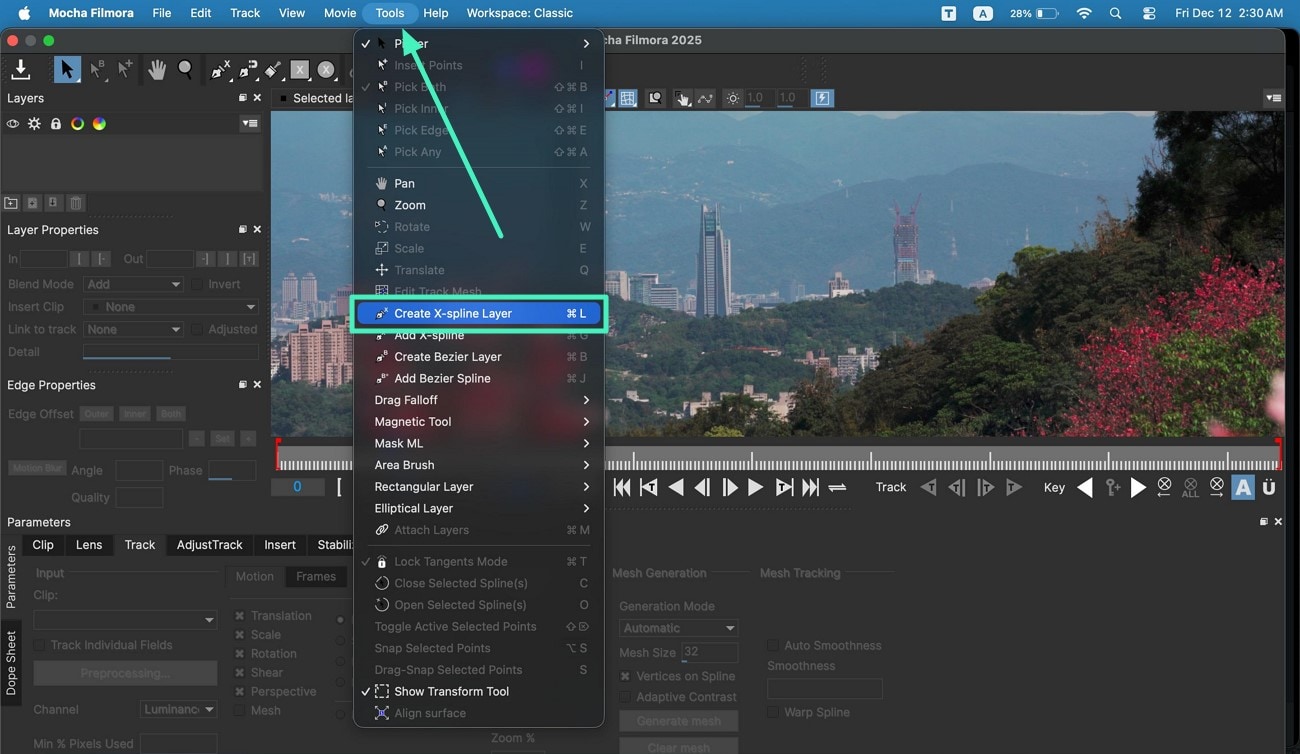
Step 3. Perform Your Required Task
Inside Mocha's interface, a variety of functions are available, such as planar tracking, logo insertion, text warping, and more. To add a logo, open the Tools menu at the top and click the Create X-Spline Layer tool.
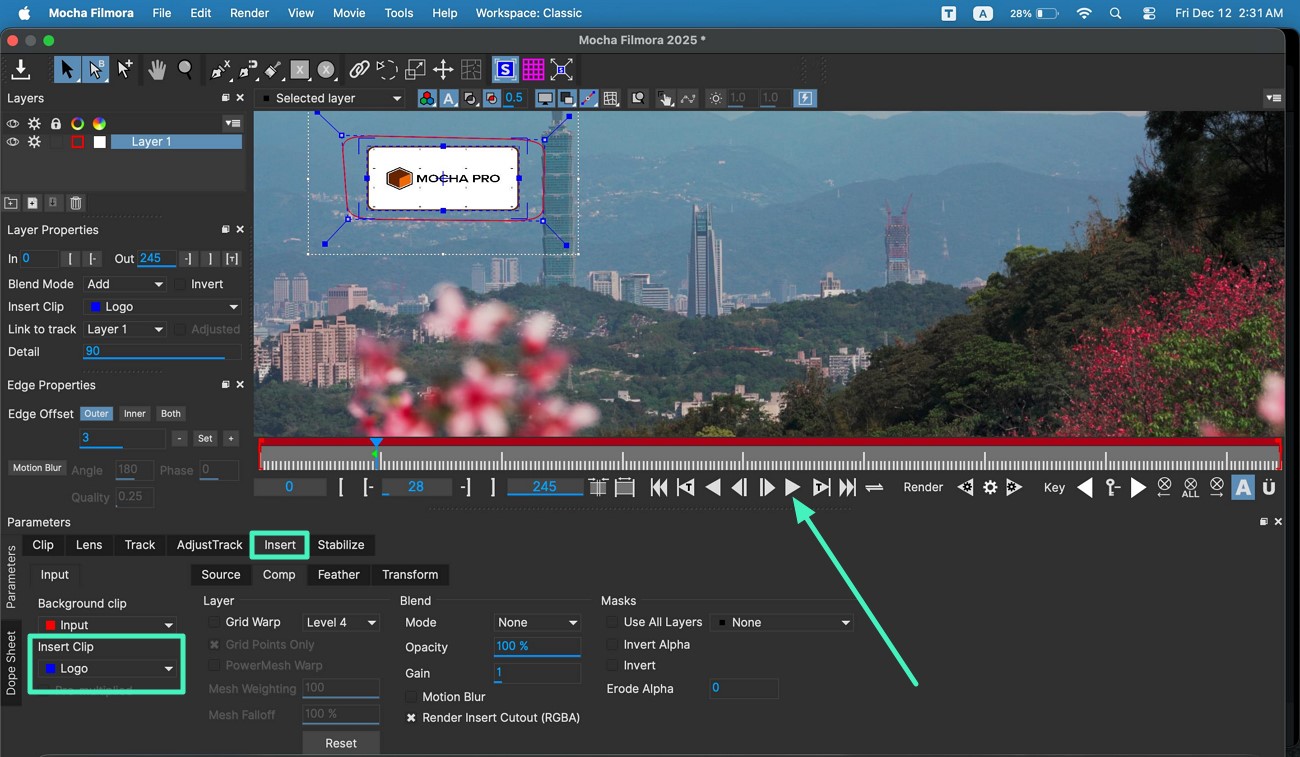
Step 4. Insert the Logo
Click and drag on the preview screen to outline the region where the logo should appear, ending the selection with a right-click. Then, move to the Insert tab at the bottom, open the Insert Clip dropdown, and choose Logo. Finally, press the Play button under the preview window to process and apply the effect.
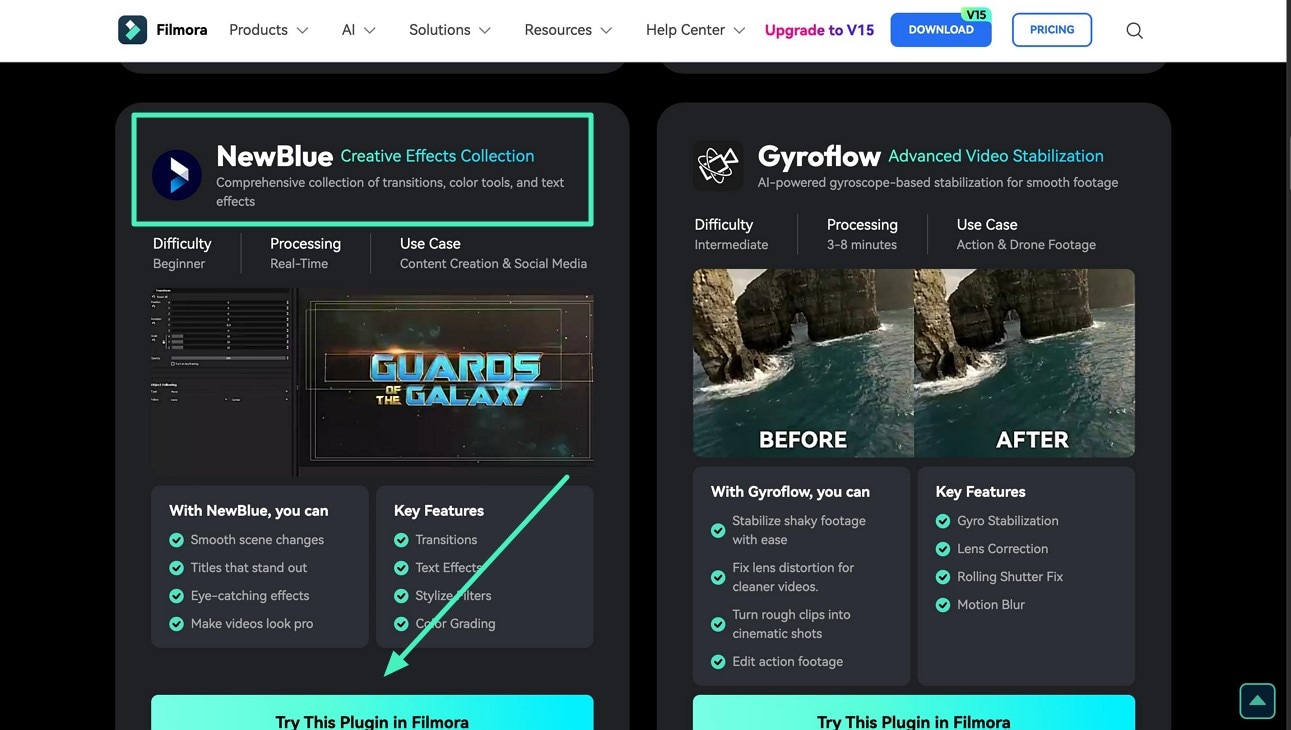
Mode 3. Use NewBlue Plugin
Step 1. Embed Plugin From Website
Start by visiting Filmora's official Plugin page. Locate the NewBlue plugin and download it to your system by clicking the Try This Plugin in Filmora button.
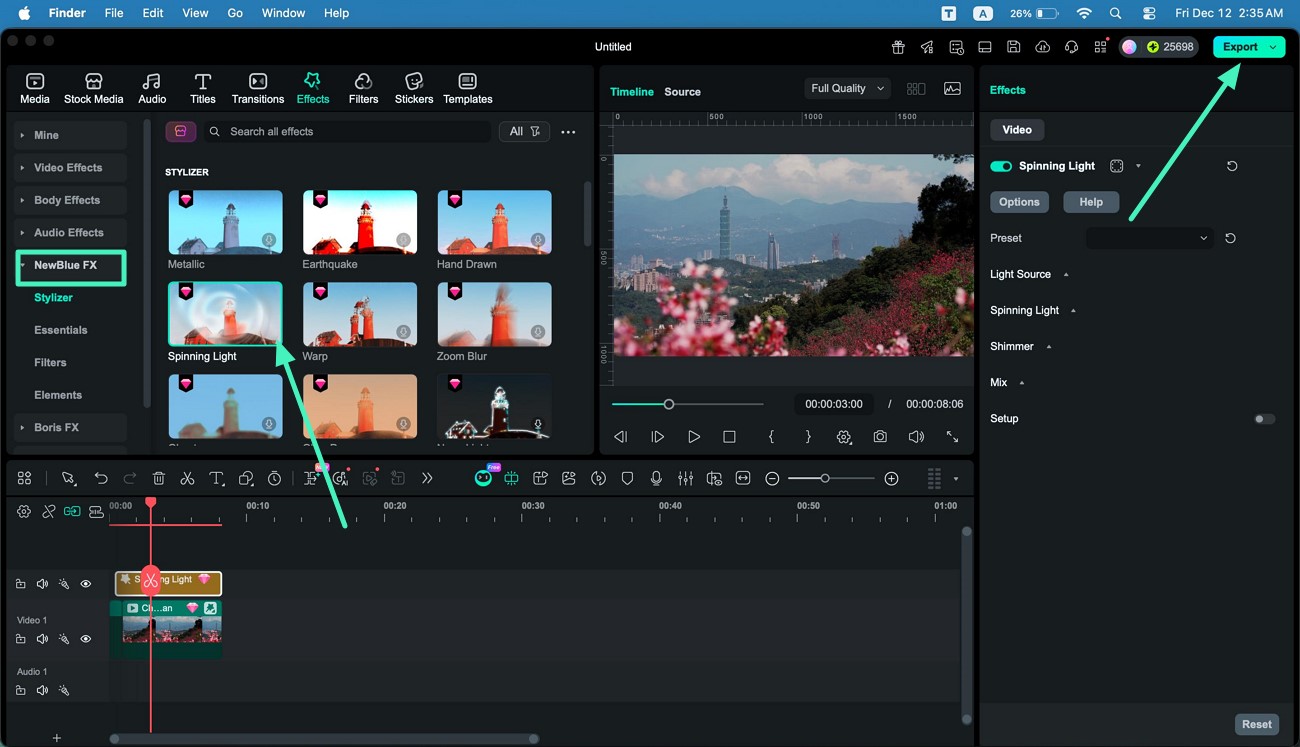
Step 2. Access Plugin From the Right
Once you're in Filmora's editing window, open the Effects section from the top menu. Find the NewBlue plugin in the list on the right, explore its collection of effects, and add any effect to your video using the + icon. When your adjustments are complete, go to the top-right corner and click Export to save your final output.
Related Posts
Featured Articles
How to Flip a Video Online for Free with the Best Horizontal Video Flippers in 2025
Ready to flip a video online in seconds? Check out these 5 free and easy tools that make flipping videos quick and effortless.
How to Upload Videos to Vimeo | Solved
Searching for ways to keep up with posting content on Vimeo? Learn how to upload a video to Vimeo with an easy-step guide and the best alternative.
How to Record AVI Videos: 4 Simple Methods
This article covers the 4 best avi screen recorder tools you can put to best use. Record AVI videos without any hassle or interruptions with these screen recorders.
Recommended User Guide
Body Effects for Mac
Overview of AR Stickers.
Different Types of Video Effects for Mac
Overview about types of video effects.
Retouch for Mac
Are you not satisfied with the outlook of your face for the new video? Learn how Filmora helps you in beautifying the face with its Retouch feature.
