For the Best Results, Use the Latest Version.
-
Preparations
-
Account
-
Get Started & Basic Settings
-
Compatibility & Tech Specs
-
Performance Settings
-
-
Creating Projects
-
Creating New Projects
-
-
Importing & Recording
-
Video Editing for Windows
-
Basic Video Editing
- Enable/Disable Clip in Windows
- Magnetic Timeline for Windows
- Dual Monitor Setup for Video Editing on Windows
- Select All Clips on Timeline for Windows
- Manage Timeline and Tracks on Windows
- Auto Ripple for Windows
- Split & trim video
- Crop & Pan & Zoom Video
- Compositing
- Change Video Speed on Windows
- Playing videos in reverse
- Mark In and Mark Out for Windows
- Markers for Windows
- Group editing
- Customizable Backgrounds for Videos and Images in Windows
- Video snapshot
- Using freeze frame
- Logo Reveal For Windows
- Apply auto enhance
- Applying drop shadow
- Adjustment layer for Windows
- Transforming
- Video Editing Ruler – Windows
-
Advanced Video Editing
- Drawing Tools for Windows | Filmora Guide
- Create Multi-Camera Clip
- Compound Clip for Windows
- Multi-Clip Editing for Windows
- Filmora Motion Blur | Windows
- Filmora Flicker Removal Guide | Windows
- Apply mask to video
- Creating a PIP effect
- Keyframe Graph Editor for Windows
- Add animation keyframing for Windows
- Keyframe Path Curve for Windows
-
AI-Powered Video Editing
- Smart Scene Cut for Windows
- Smart Short Clips for Windows
- AI Face Mosaic for Windows
- Filmora AI Eye Contact- Windows
- AI Video Enhancer for Windows
- AI Text-to-Video for Windows
- Planar Tracking for Windows
- AI Idea to Video for Windows
- Filmora Image to Video for Windows
- Filmora Image to Prompt for Windows
- Instant Cutter Tool for Windows
- AI Extend
- Filmora AI Relight - Windows
- Filmora AI Image Enhancer Guide - Windows
- AI Script to Video Guide for Windows
- AI Text-Based Editing for Windows
- AI Mate Editing for Windows
- Create with instant mode
- ChatGPT Plugin - AI Copywriting
- AI Smart Cutout
- Lens correction on Windows
- Auto reframe video
- AI Portrait Cutout
- Scene detection feature
- AI Smart Masking for Windows
- Make motion tracking
- Video Stabilization for Windows
- AI Video/Photo Object Remover for Windows
- AI Smart Search for Windows
- AI Skin Tone Protection for Windows
- AI Image for Windows
- Chroma key (green screen)
- Super Slow Motion with Optical Flow for Windows
- Video Denoise for Windows
-
-
Audio Editing for Windows
-
Basic Audio Editing
-
Advanced Audio Editing
-
AI-Powered Audio Editing
-
-
Text Editing for Windows
-
Basic Text Editing
-
Advanced Text Editing
-
AI-Powered Text Editing
-
-
Video Customizations
-
Video Effects
-
Audio Effects
-
Transitions
-
Stickers
-
Filters
-
Color Editing
-
Animations
-
Templates
-
Asset Center
-
-
Exporting & Share & Cloud Backup
Filmora OpenFX Plugins
Filmora's OpenFX plugin integration brings an exciting boost to creative editing by allowing users to add powerful, professional-grade visual-effects tools directly inside the Filmora interface. With OpenFX support, you can enhance your workflow using advanced third-party effects like Boris FX, NewBlue, and others without leaving your timeline.
These plugins unlock cinematic looks, stylized transitions, realistic particle effects, color-grading enhancements, and high-level compositing options typically found in pro studios. Everything runs smoothly with real-time previews and optimized performance, giving creators a flexible, scalable way to achieve stunning visuals using familiar OpenFX standards. Let us learn how to use these plugins in the Filmora environment and make your content flawless:
Mode 1. Use Boris BCC Plugin
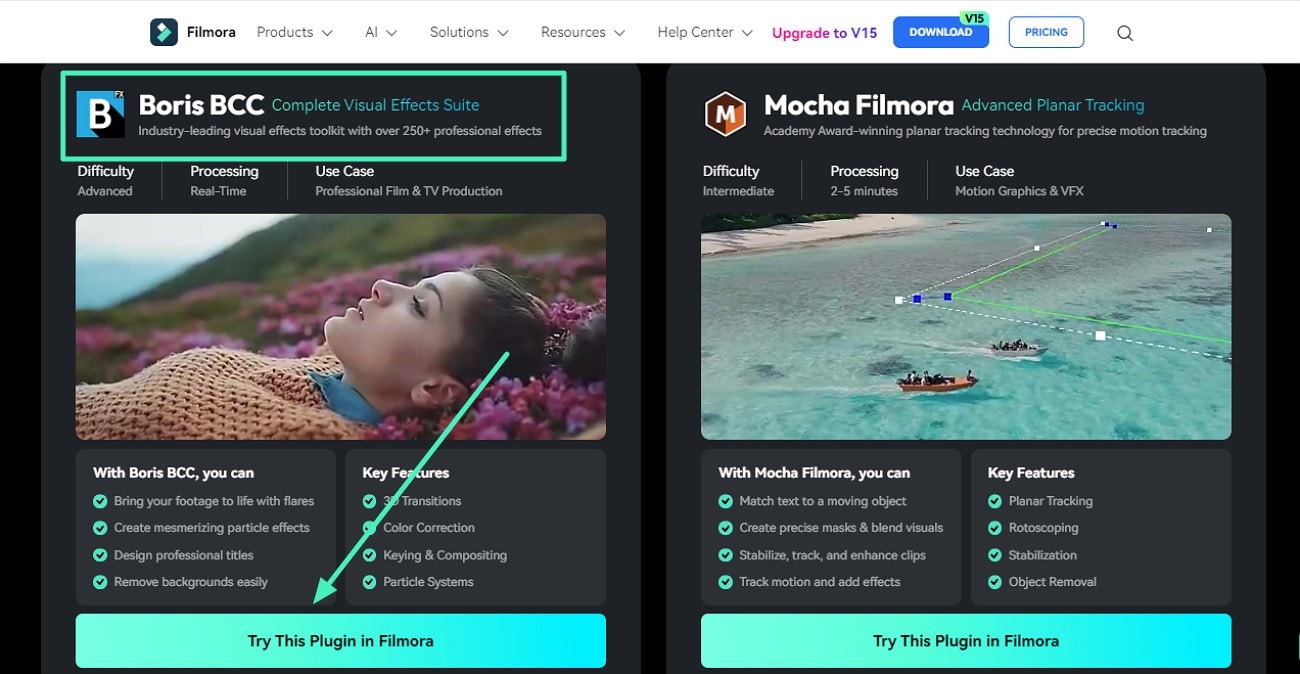
Step 1. Access Plugin Page and Download
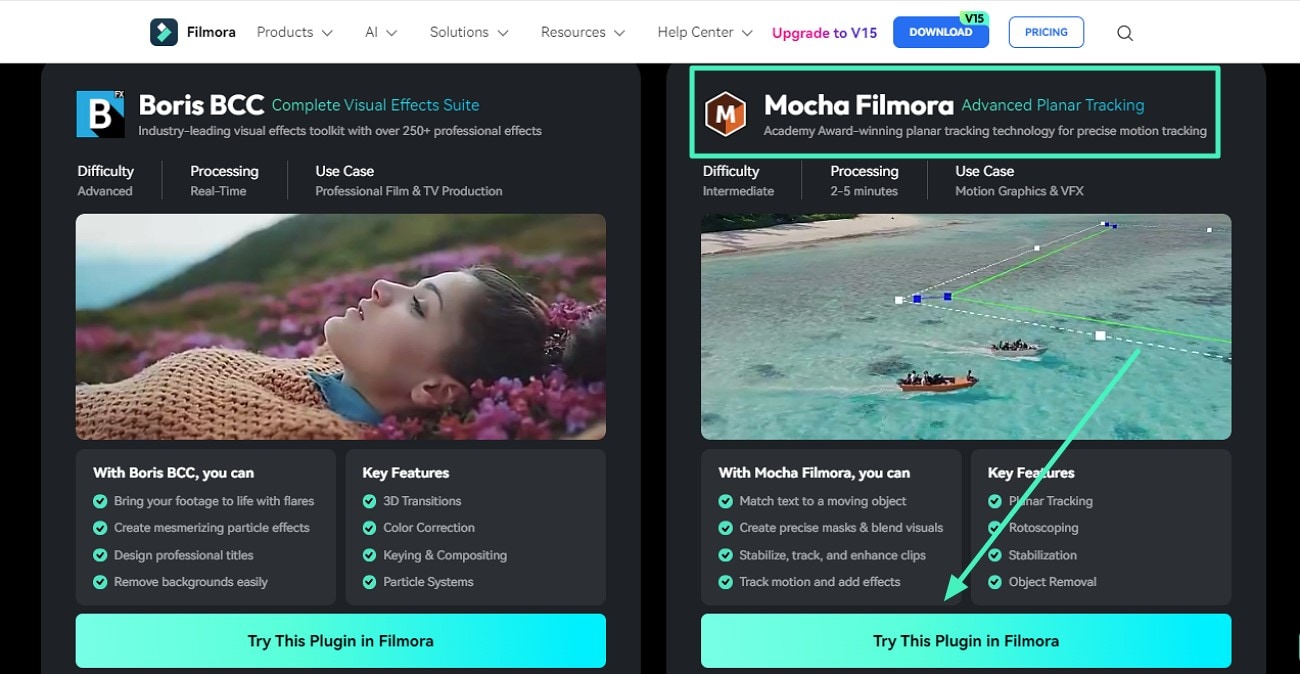
To begin the process, access the plugin page on Filmora's official website and locate the Boris CC plugin on the page. Next, click on the Try This Plugin in Filmora button to download the plugin.
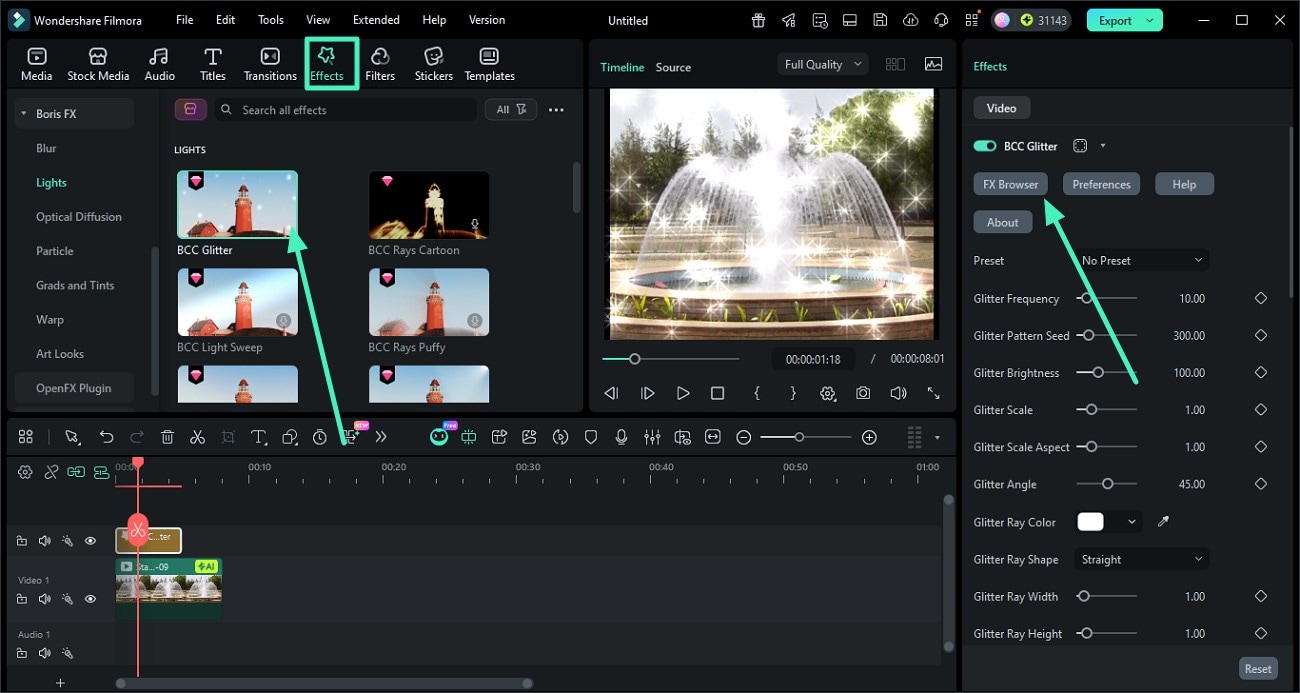
Step 2. Acquire the Plugin in Filmora
Moving forward, launch Filmora on your device and import the video on which you want to apply the effect. Next, access the Effects option from the toolbar at the top. Scroll the options on the left and choose the BorisFX option. Choose the CC effect of your choice and apply it to the video using the + icon. Now, head to the panel on the right and click on the FX Browser option to enter the plugin editing interface.
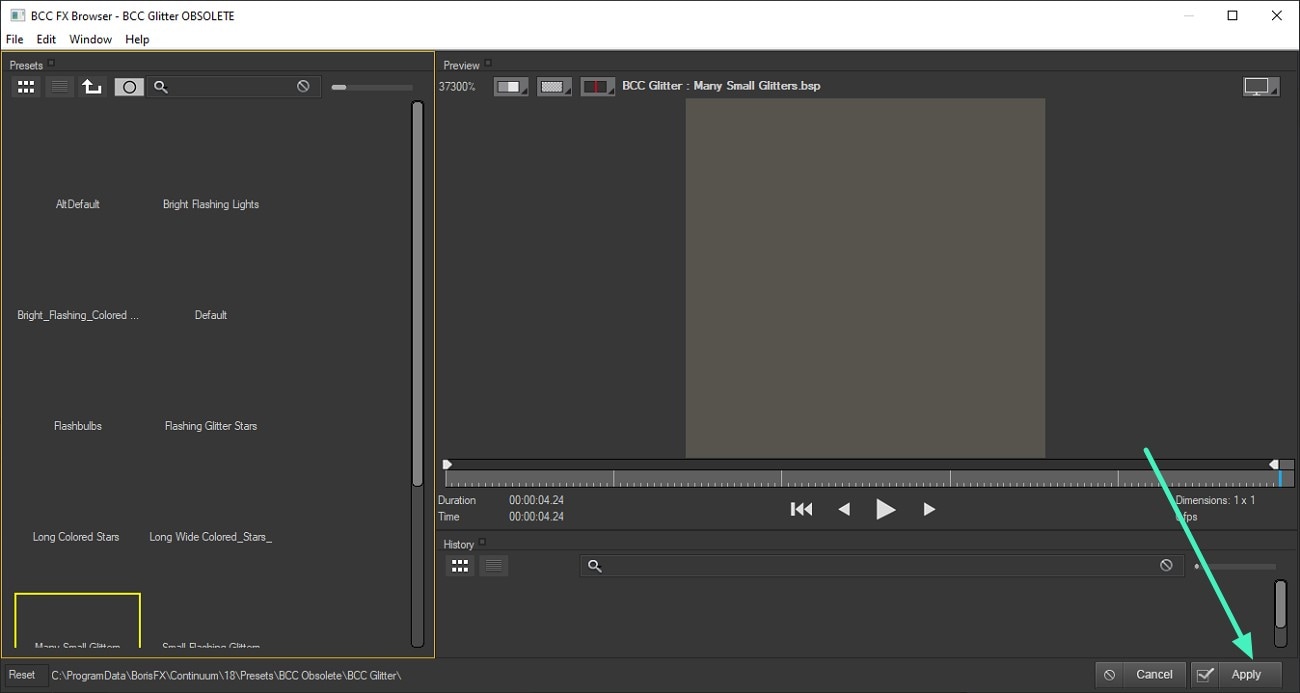
Step 3. Select Effect and Apply
In the BCC effect UI, choose the effect of your choice from the library on the left and add it to your video using the Apply button.
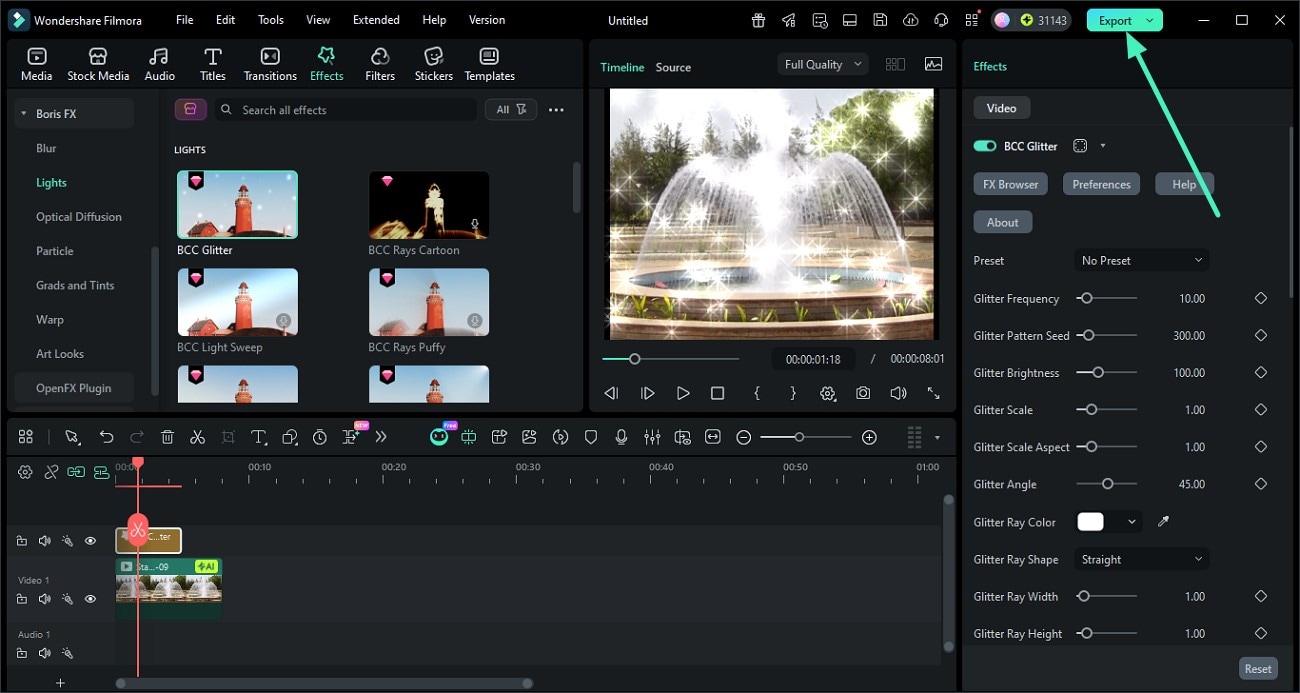
Step 4. Save Results to Your Computer
Now, access the panel on the right and adjust the effect according to your preferences. When you are satisfied with the look, go to the upper-right corner and click Export to save your edited file.
Mode 2. Use Mocha Filmora Plugin
Step 1. Download the Plugin
Head to the Filmora website and select the plugin from the designated page. Download it to your system using the Try This Plugin in Filmora option.
Step 2. Import Video and Access Mocha
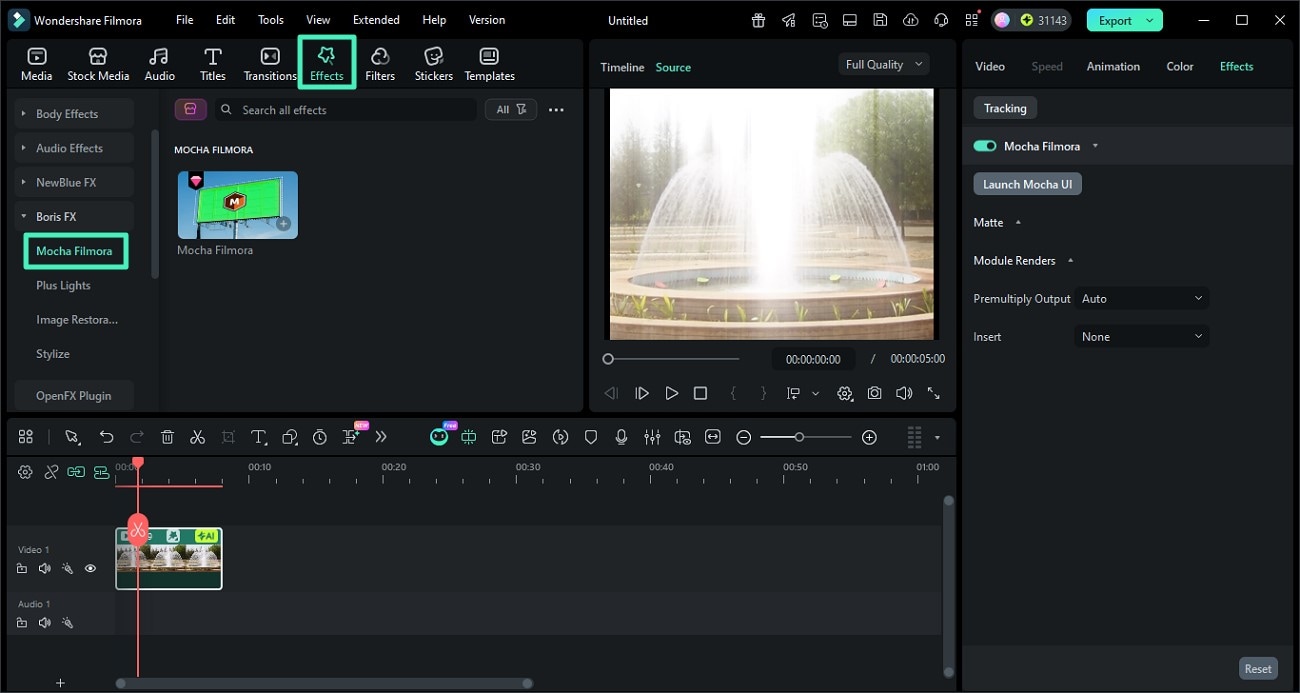
In the following interface, import the video and head to the toolbar at the top to access the Effects section. Now, head to the sidebar on the left and select Filmora Mocha, press the + icon, and choose Launch Mocha from the left.
Step 3. Perform Desired Operation
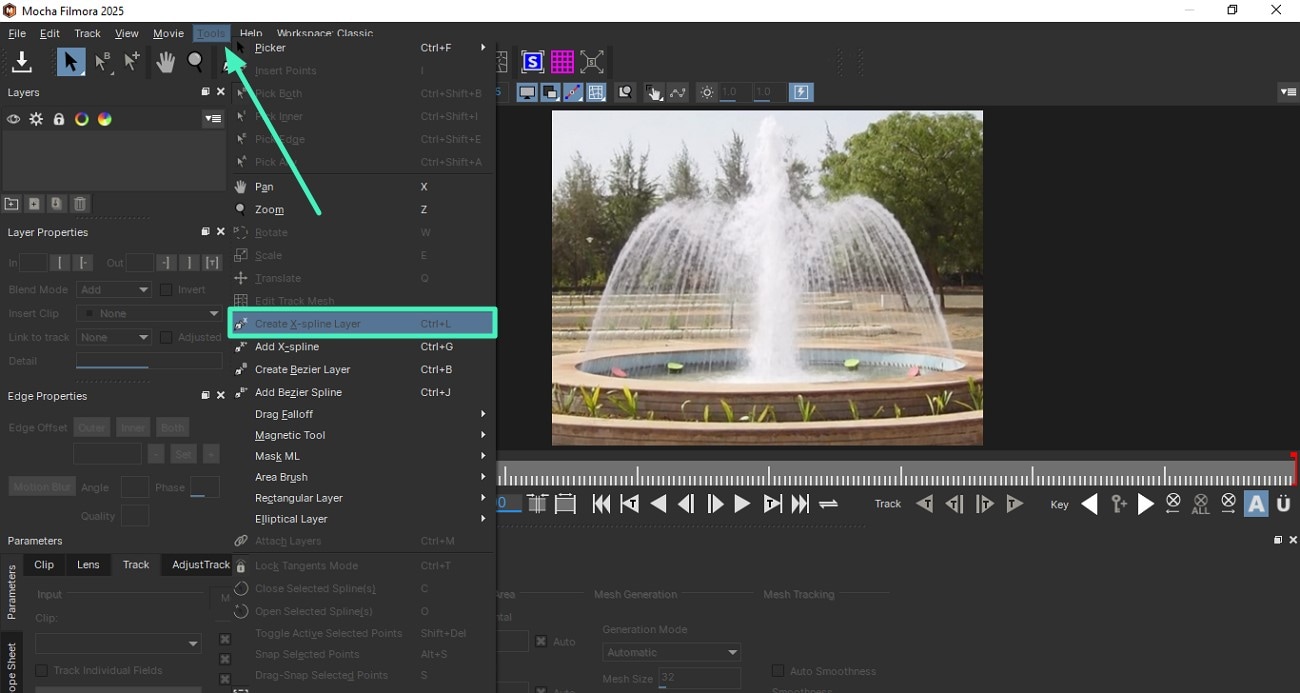
In the Mocha UI, you can perform various tasks like track plane, insert logo, warp text, and more. To insert a logo, head to the toolbar at the top and expand the Tools option. Next, choose the Create X-Spline Layer option by clicking on it.
Step 4. Insert the Logo
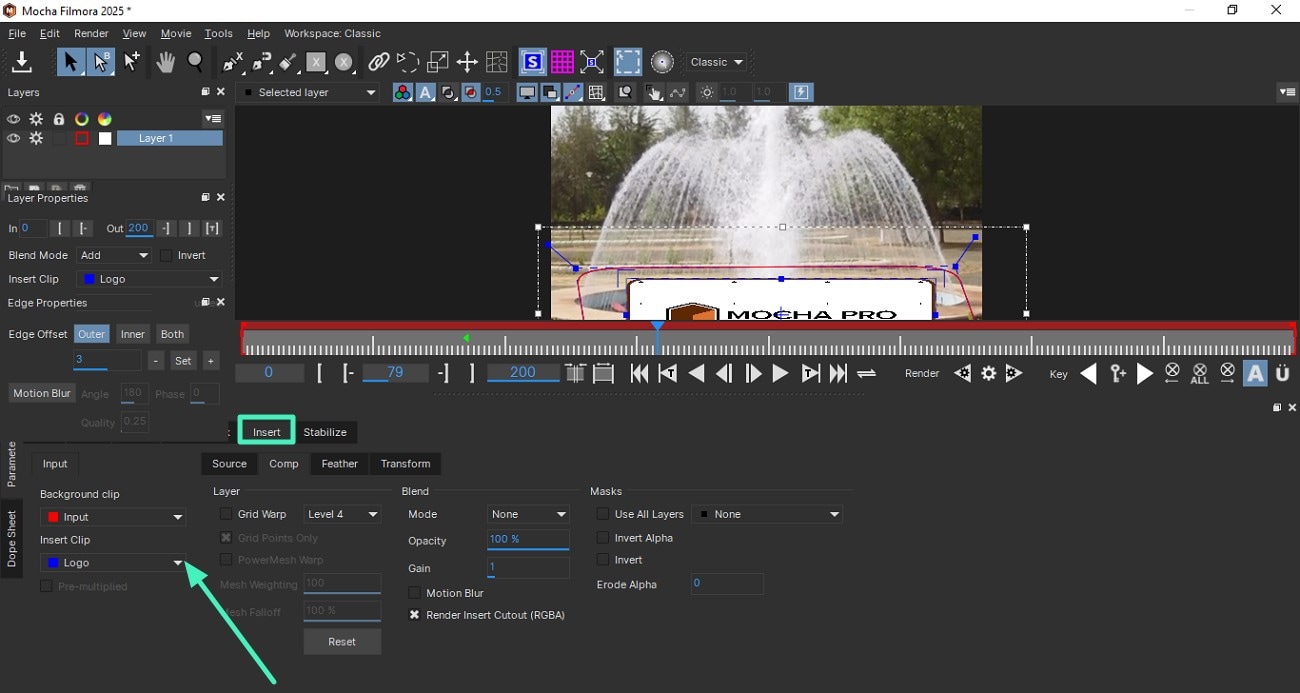
Now, drag the cursor on the preview window to make a selection of the area in which you want to insert the logo. Complete the selection by right-clicking on your mouse. Next, access the Insert tab from the bottom and expand the Insert Clip drop-down menu to select Logo. Once done, press the Play button below the preview window to render the effect successfully.
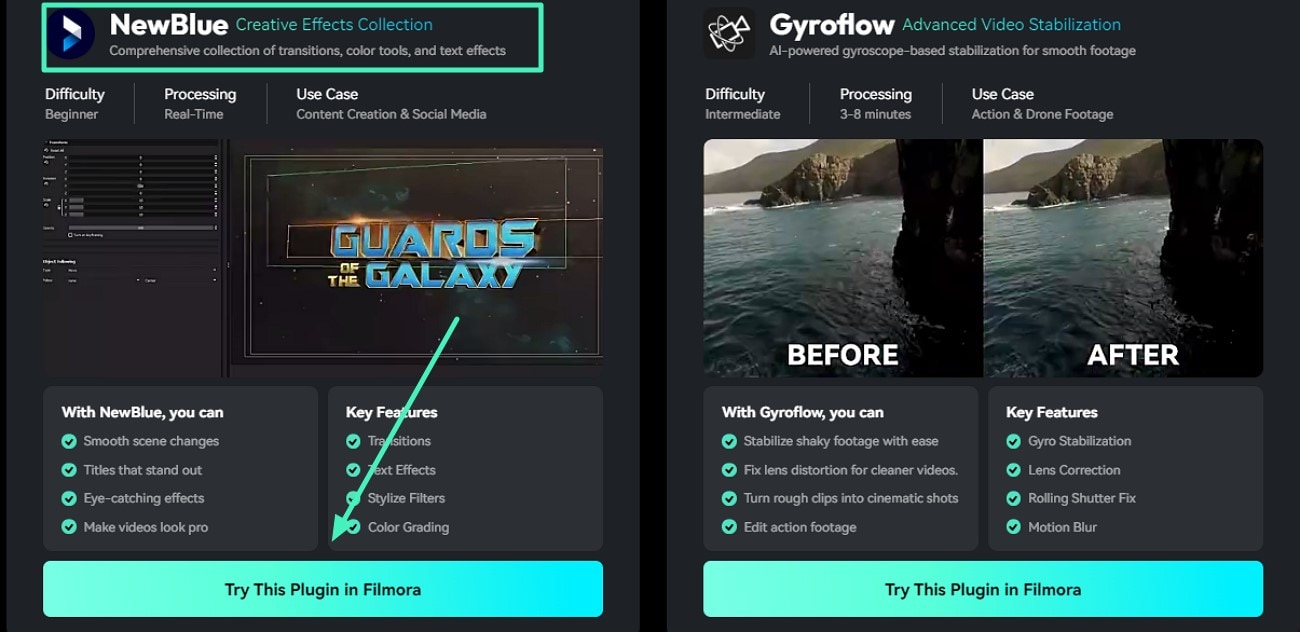
Mode 3. Use NewBlue Plugin
Step 1. Embed Plugin From Website
To begin, access the plugin page from the official website of Wondershare Filmora and save it to your system using the Try This Plugin in Filmora button.
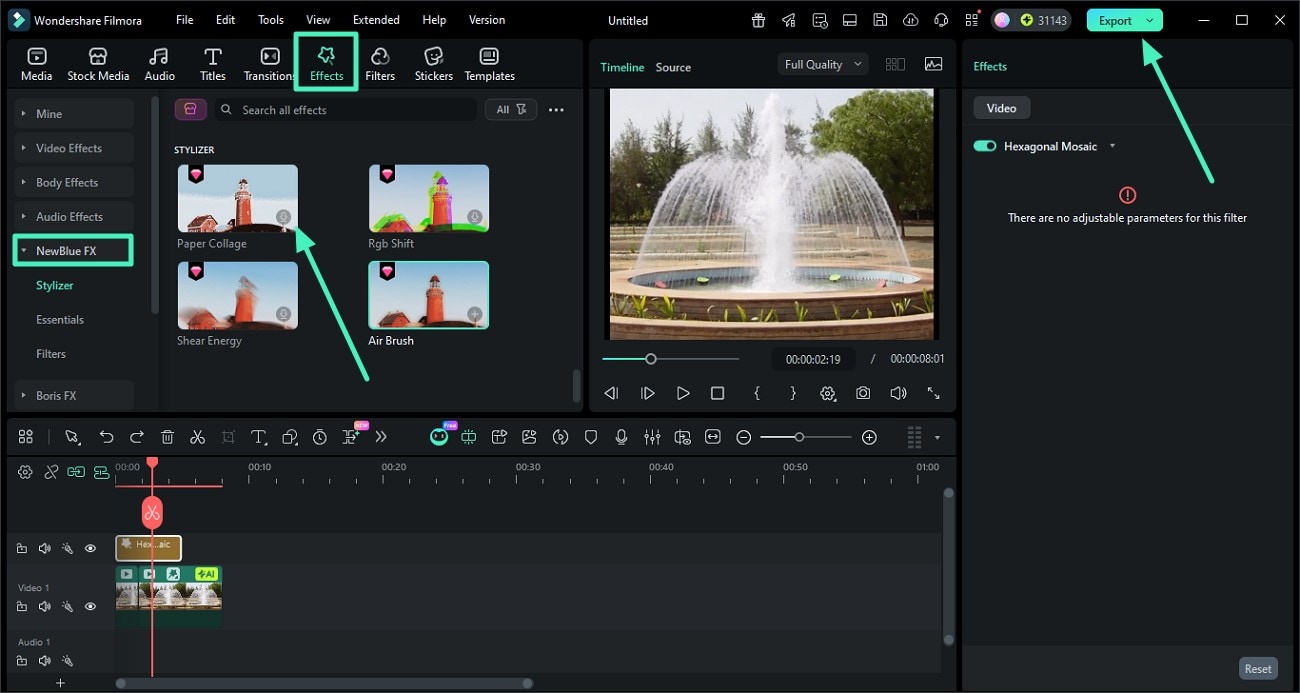
Step 2. Access Plugin From the Right
Once you enter the editing interface of Filmora, head to the Effect section from the top toolbar and select the NewBlue plugin by clicking on it. Now, choose the effects from the library and apply them to the video using the icon. When you are done with the editing, head to the top-right corner of the interface and press the Export button to save the results.
Related Posts
Featured Articles
How To Record Voiceover With Final Cut Pro [2026]
For people looking to add voice to their visual content, this article is a perfect read as it offers a proper guide to record voiceover in Final Cut Pro.
How to Make a Video Best Fits Snapchat Size | Updated
Create impactful content by mastering the perfect Snapchat video size and ensuring every detail fits the platform’s requirements with our guide below.
Highlight NBA Videos Using Smart Scene Cut With Filmora
Learn how to create NBA video highlights with Filmora’s new smart scene cut feature. Discover additional features such as motion tracking and more.
Recommended User Guide
Filmora -Filmstock Asset
you may see some effects and resources from Filmstock. And you will feel confused about that.Read this guide and you will find the answers.
NewBlue FX effects
Learn how to add and modify NewBlue FX Effects in Filmora for Windows.
Retouch
Want to enhance the features and complexion of your videos with facial shots? Find out how Filmora's Retouch feature addresses such issues.
