AI Mate Editing for Windows
Filmora's AI Mate feels incredibly exciting because it transforms editing into a smooth, conversational workflow. Instead of searching through menus, you simply tell the assistant what you want, and it intelligently interprets your intent. This conversational assistant understands your project's context, identifies assets you're working on, and adapts its actions in real time.
Whether you need quick parameter tweaks, effect adjustments, or deeper guidance, it automatically switches between Action, Guide, and AIGC modes. It even translates vague instructions like “make this brighter” into precise edits. With smart self-correction, intent detection, and quick prompts, AI Mate turns Filmora into a more intuitive, responsive, and creatively empowering editing environment. Let us explore this feature further in the following section:
In this article
Mode 1. Action Mode
Action Mode in Filmora's AI Mate is all about instant, hands-on execution. It reads your commands and applies changes directly to clips, no digging through menus. From generating hook and end-screen clips, to audio denoising, screen recording, and freezing frames, it handles a wide range of edits automatically. With Action Mode, your edits respond the moment you speak, keeping creativity fast and effortless.
Steps to Use the Action Mode of AI Mate
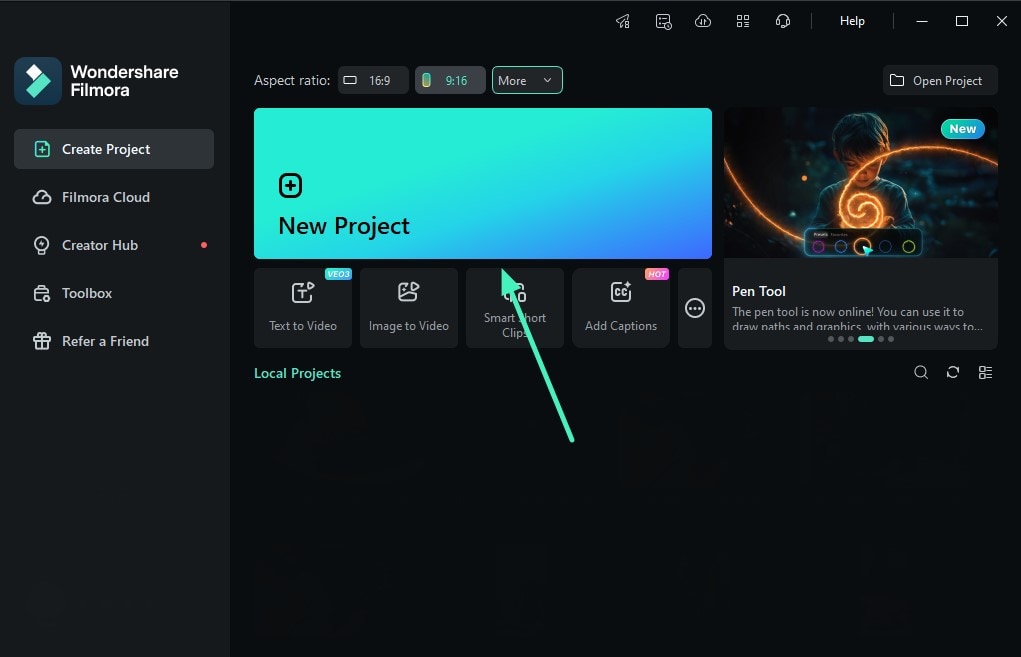
Step 1. Launch Filmora and Create a Project
To begin the process, launch Filmora on your device and start the process by creating a New Project. Now import your video for which you need AI assistance.
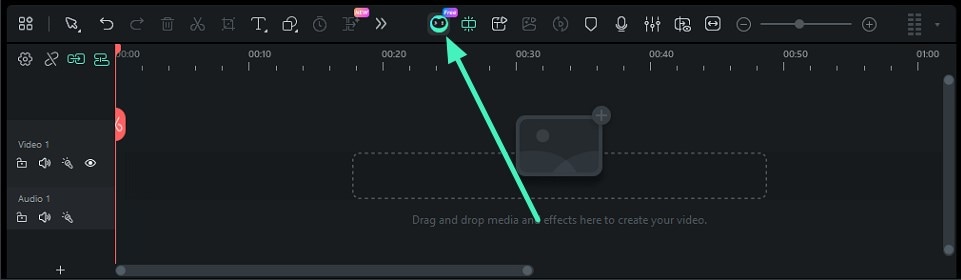
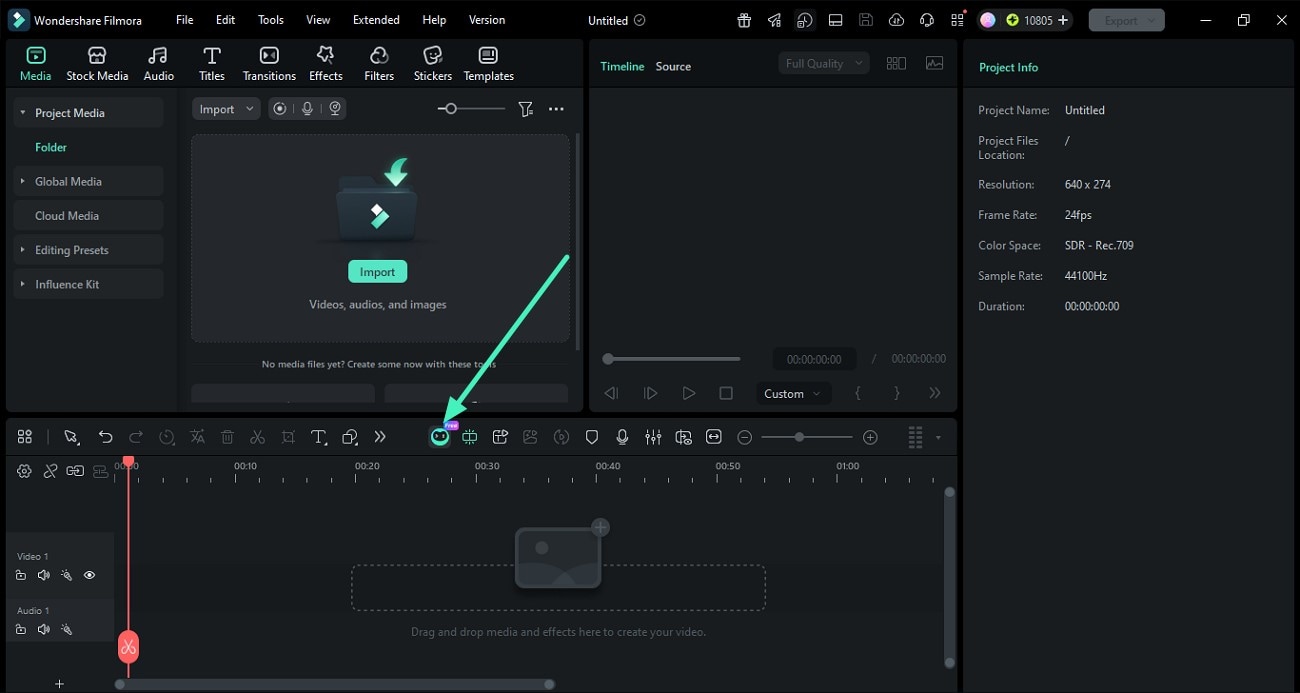
Step 2. Access the AI Mate Feature
In the following editing interface of Filmora, head to the timeline at the bottom and locate the AI Mate icon, and click on it.
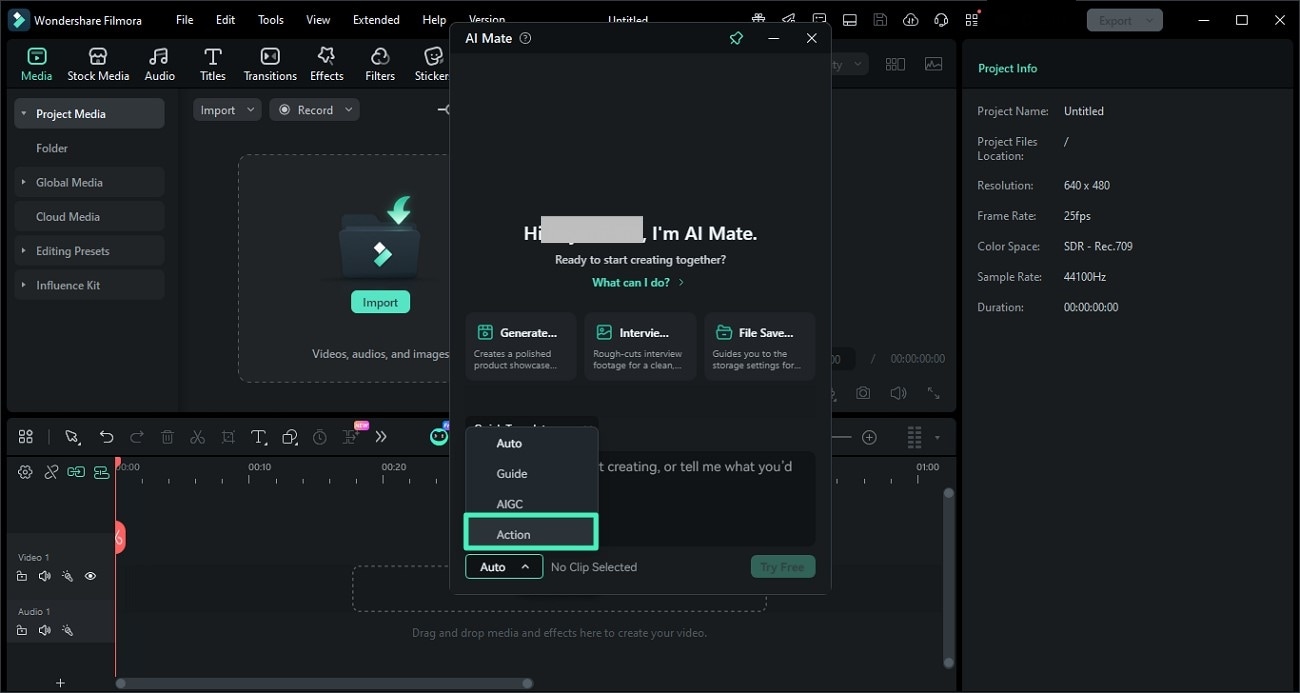
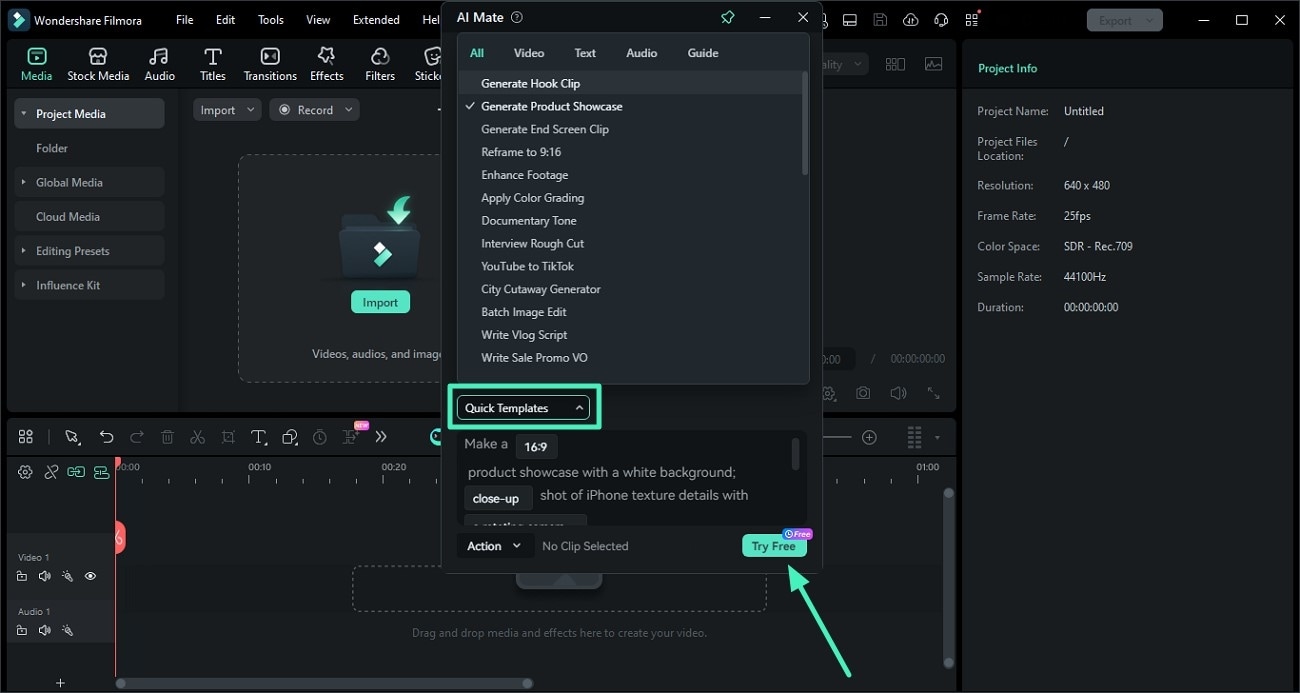
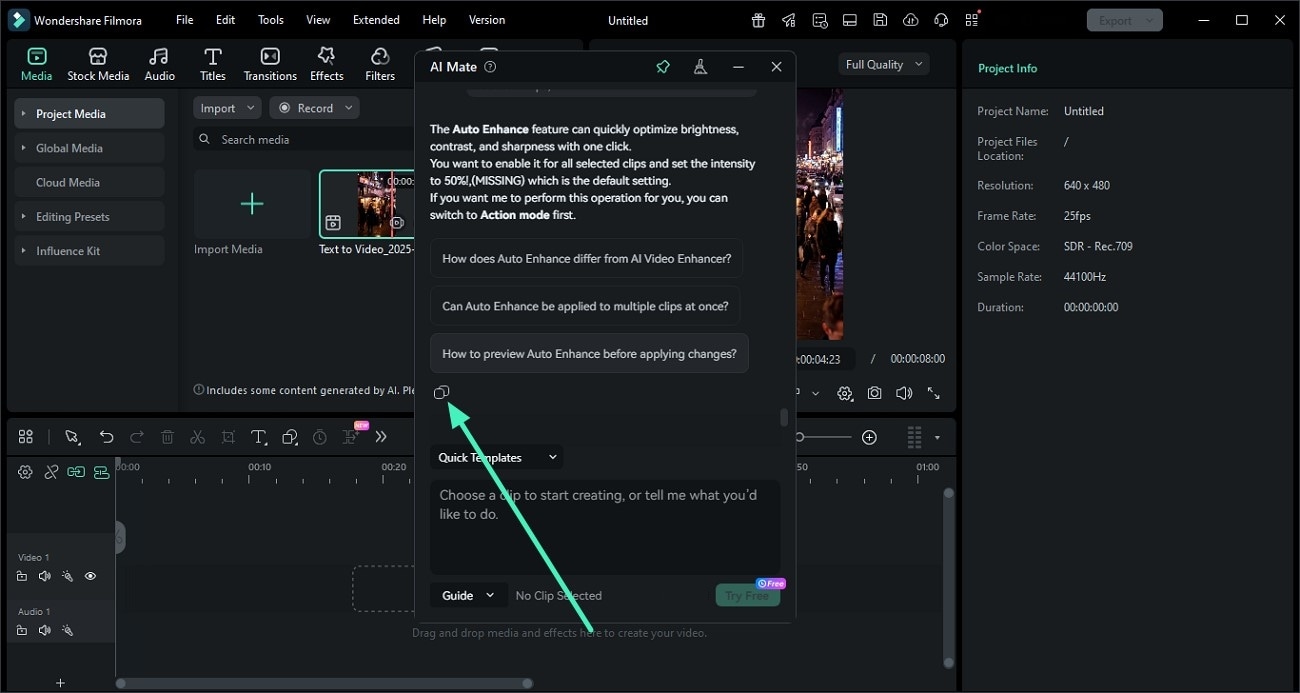
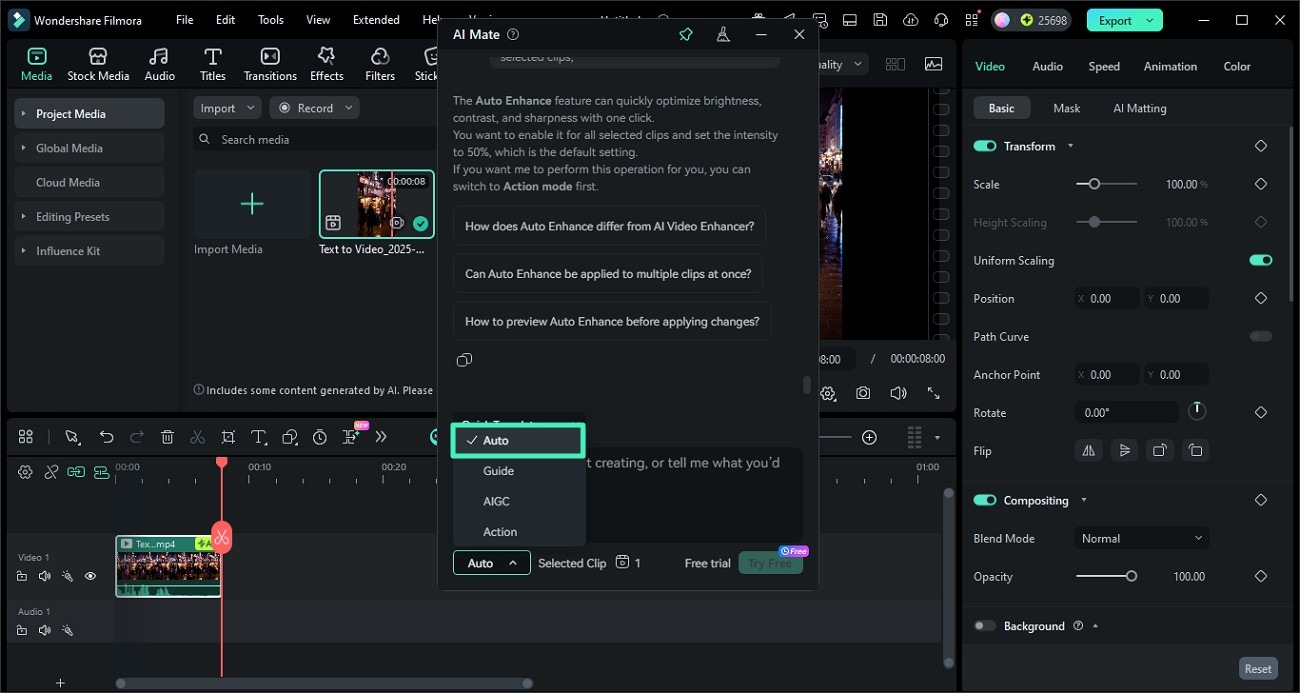
Step 3. Select Action Mode
In the following small AI Mate window, choose the dropdown menu at the bottom left and expand it. Now, select the Action option from there by clicking on it.
Step 4. Enter Prompt and Execute
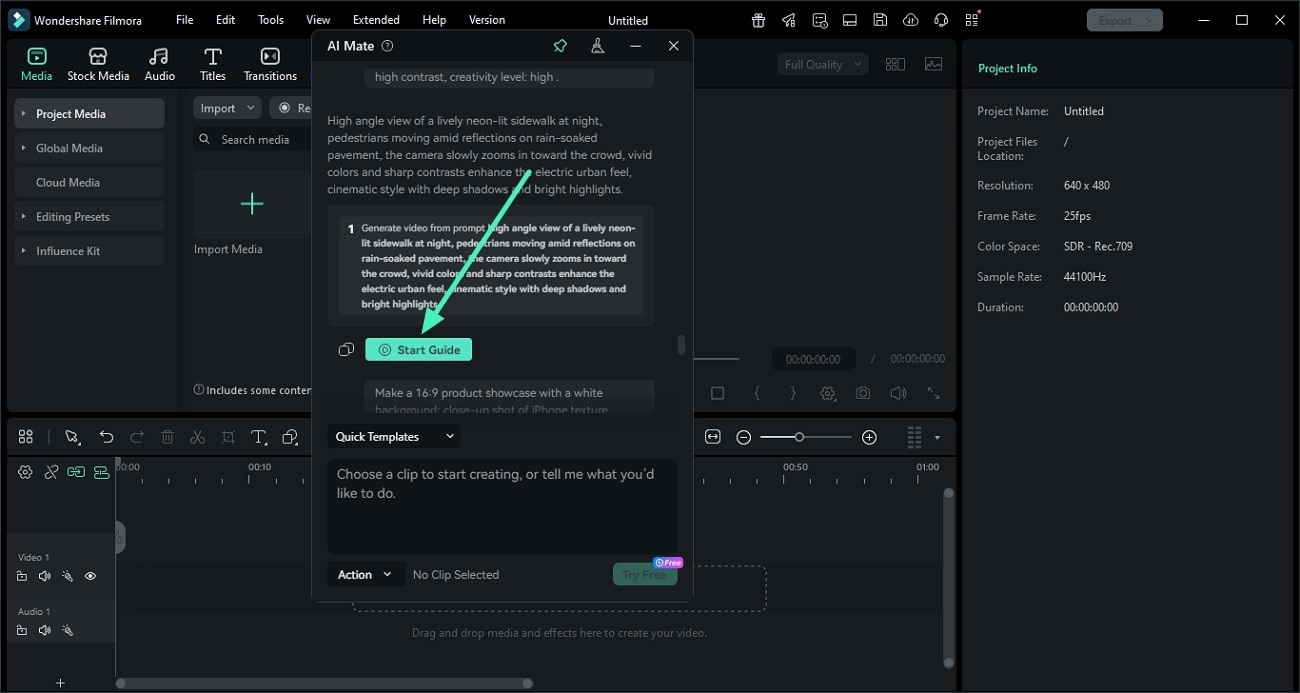
Once the mode is selected, enter the prompt in the text field or choose Quick Templates to instantly select the command. Once done, execute the process by clicking on the Send button.
Step 5. Observe the Results
Once you press Send, the AI assistant will perform the commanded action or will provide you with a complete navigation to perform the action. To walk through the process, click on the Start Guide button to get on-screen navigation and instructions for performing your desired task.
Mode 2. Guide Mode
Guide Mode in Filmora's AI Mate works like an enthusiastic in-app tutor, giving you instant answers and directing you exactly where you need to go. Whenever you ask “How do I…?” it offers clear guidance or jumps straight to the feature inside the interface. It covers various guides like changing interface language, adjusting preview size, recording screen, adjusting rotation and more.
Steps for Using Guide Mode in AI Mate
Step 1. Access The Guide Mode
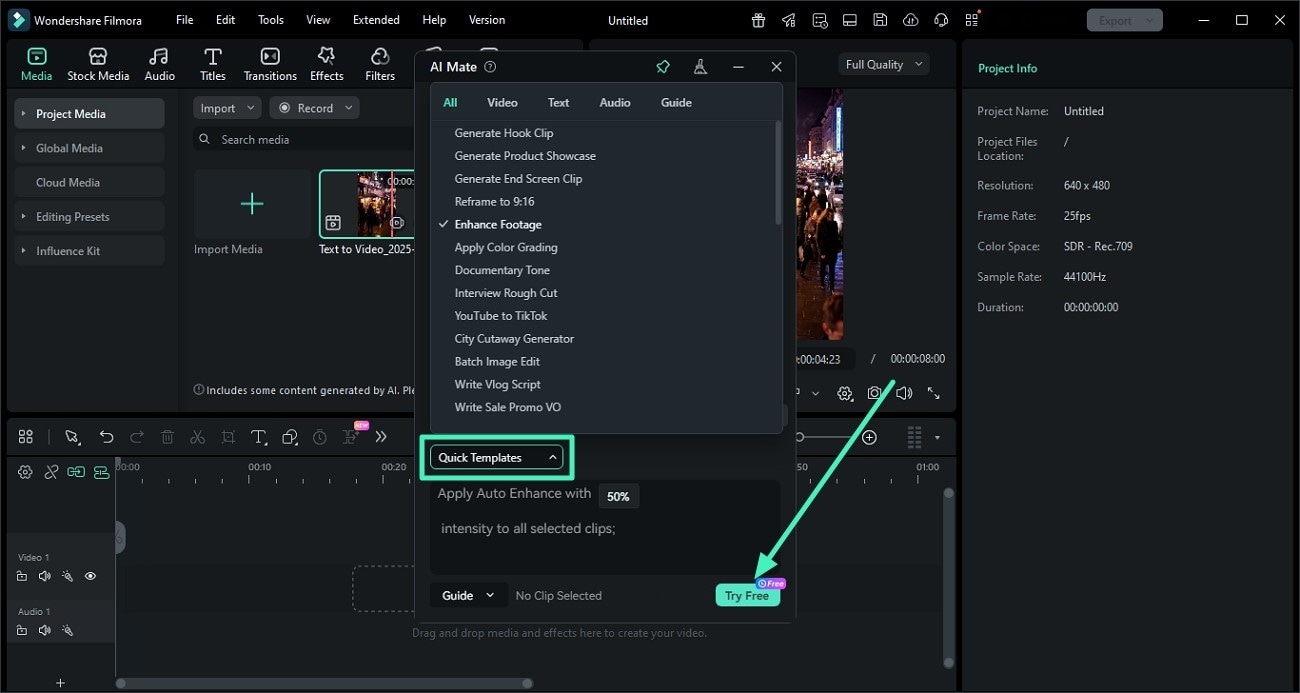
After selecting the AI Mate icon from the timeline, enter the AI Mate window and select the Guide mode by expanding the drop-down menu located on the bottom left.
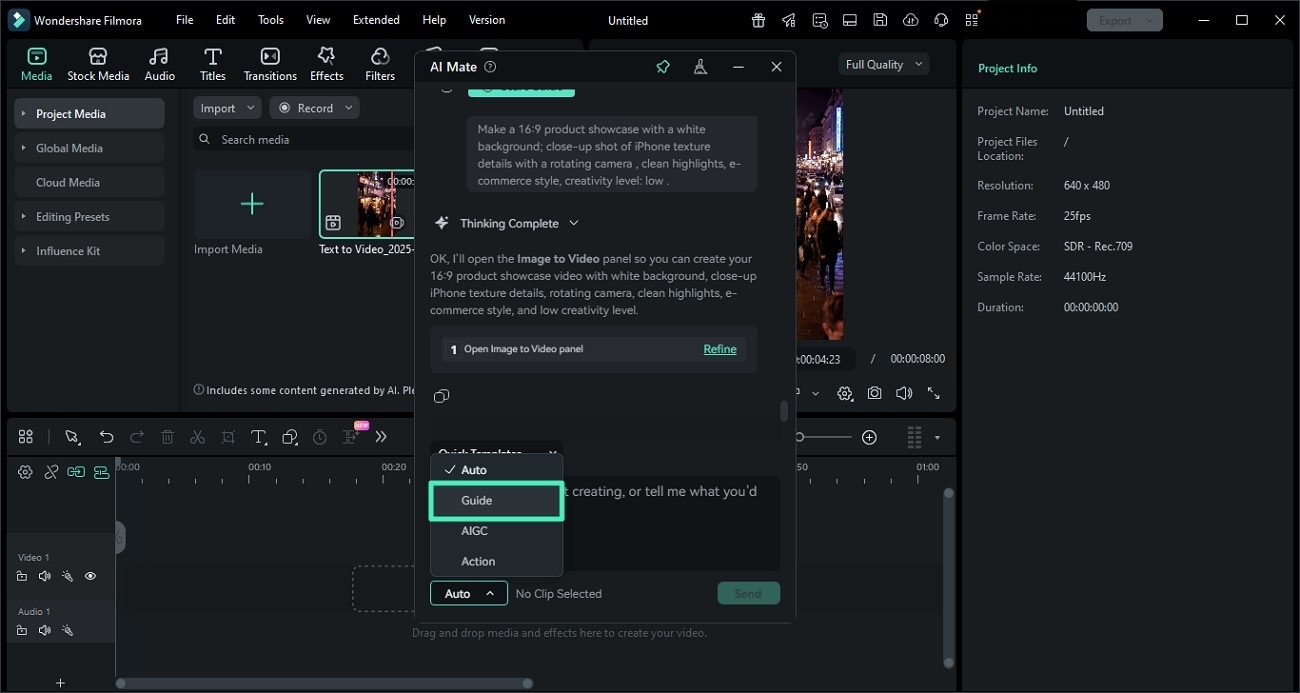
Step 2. Select Template Execute Command
Browse the Quick Templates to select a specific task or input the requirement manually in text form. Press the Send button to execute the process.
Step 3. Copy The Generated Results
Once the guide is generated for the specific task, follow it to achieve the desired results or simply copy it and paste it wherever you want.
Mode 3. AIGC Mode
AIGC Mode in Filmora's AI Mate specializes in Text-to-Video creation, allowing you to generate videos directly from your prompts with customizable settings. It also serves as a smart hub to quickly launch other generative tools like AI Image and AI Copywriting, streamlining your creative process. You simply describe your idea, and the system produces content tailored to your preferred aspect ratio and creativity level. It supports detailed prompts up to 500 characters and offers flexible output options like text-to-video, image-to-video, and even text-to-music.
Steps For Using AIGC Mode in AI Mate
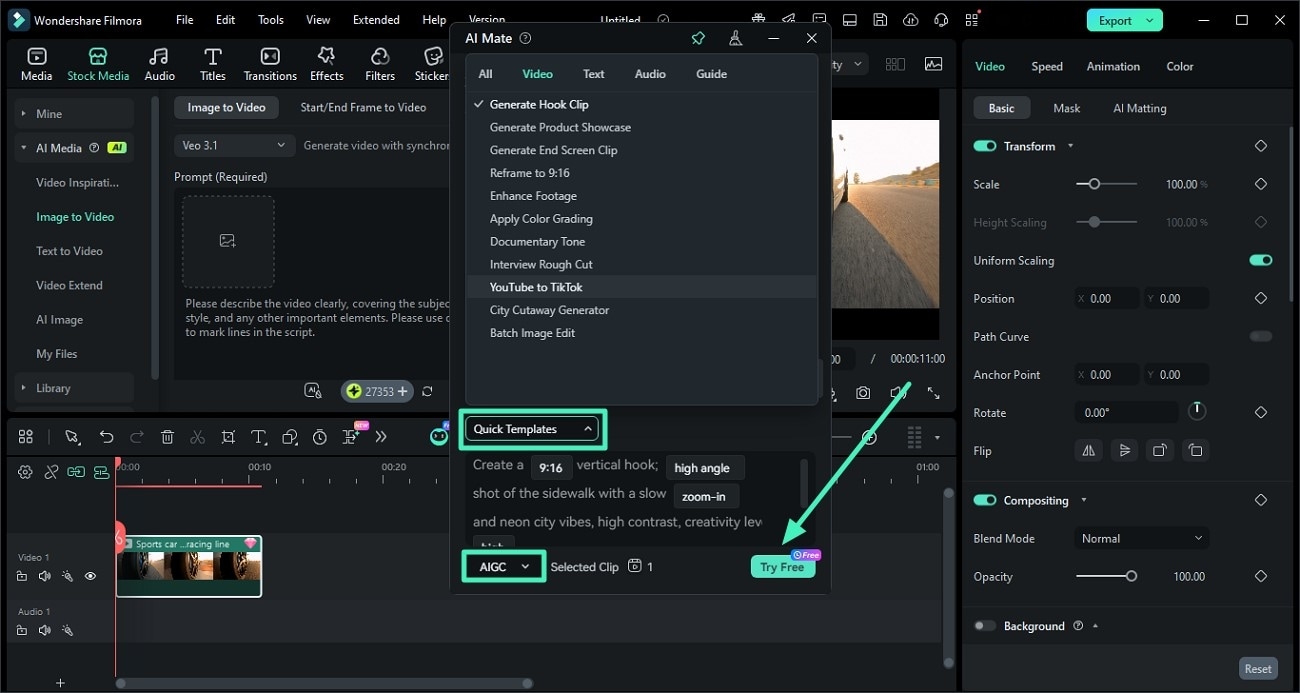
Step 1. Select AIGC and Input Command
Once you have entered the AI Mate interface, select the AIGC mode from the drop-down menu. Next, select the Quick Templates or input the text prompt in the text field and press the Send button to begin.
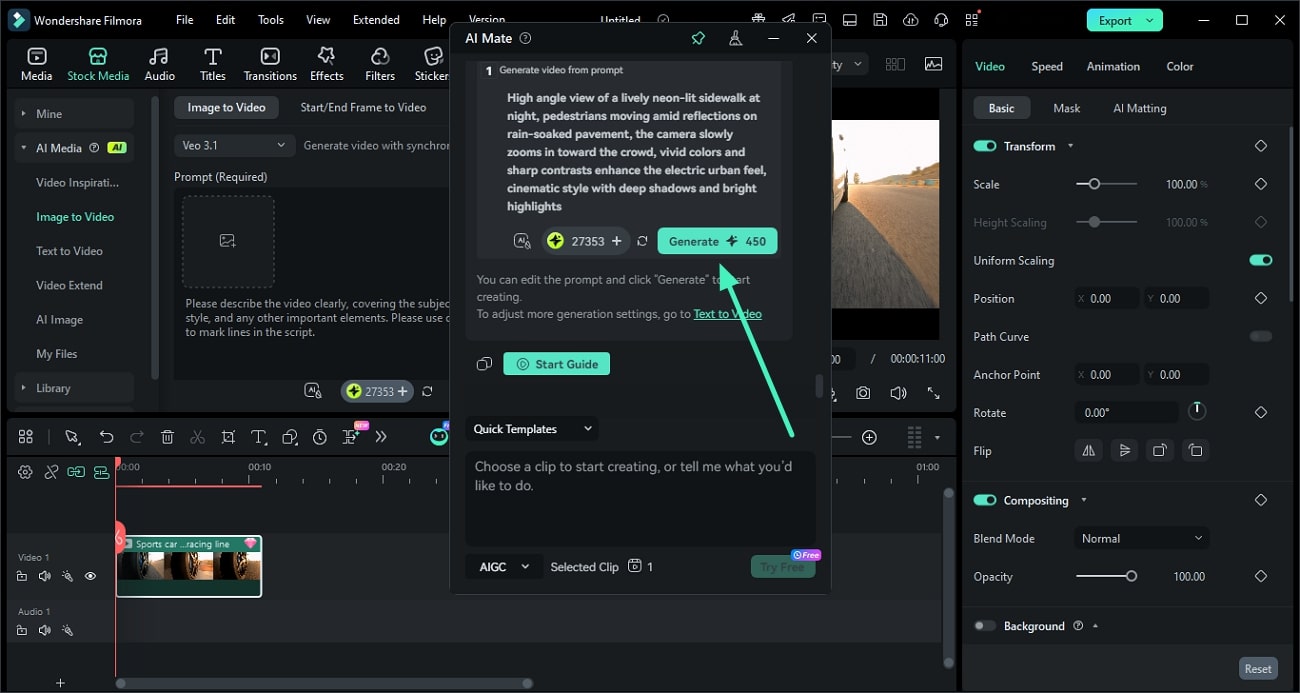
Step 2. Follow the Instructions in the Results
Preview the results across your provided command and hit the Generate button to start generating the visual content. Alternatively, you can press the Start Guide button to perform the task manually using on-screen navigation.
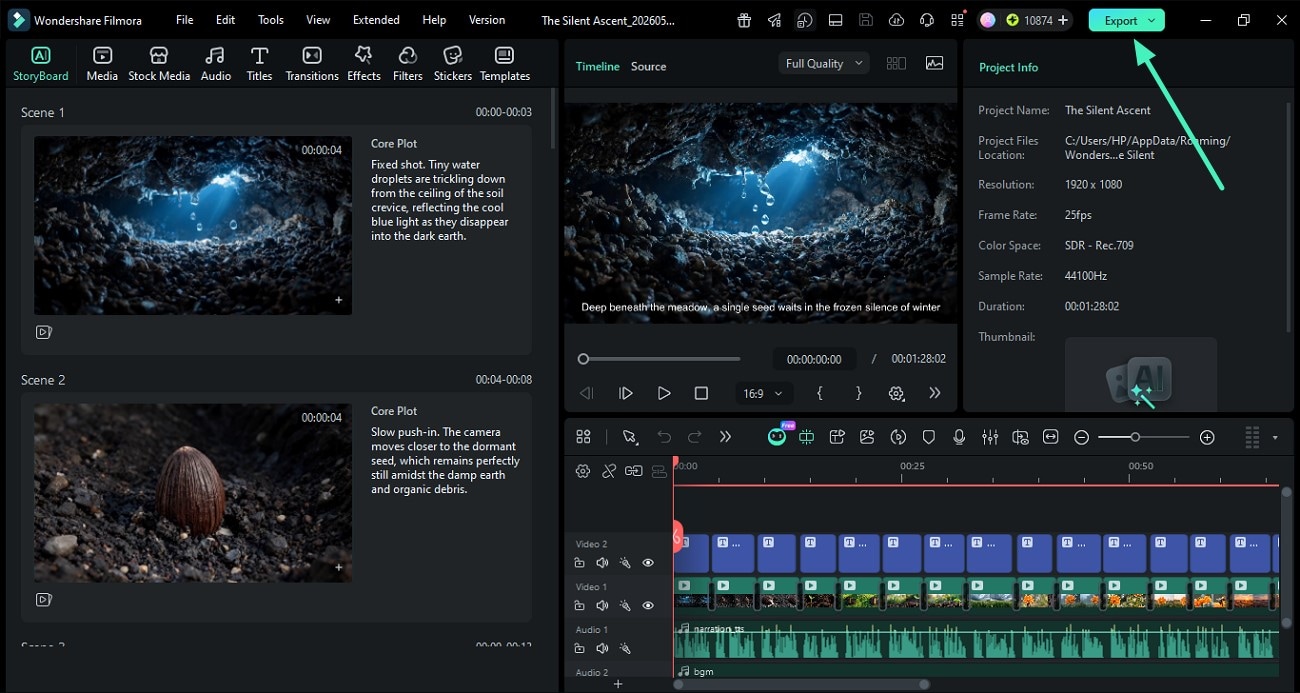
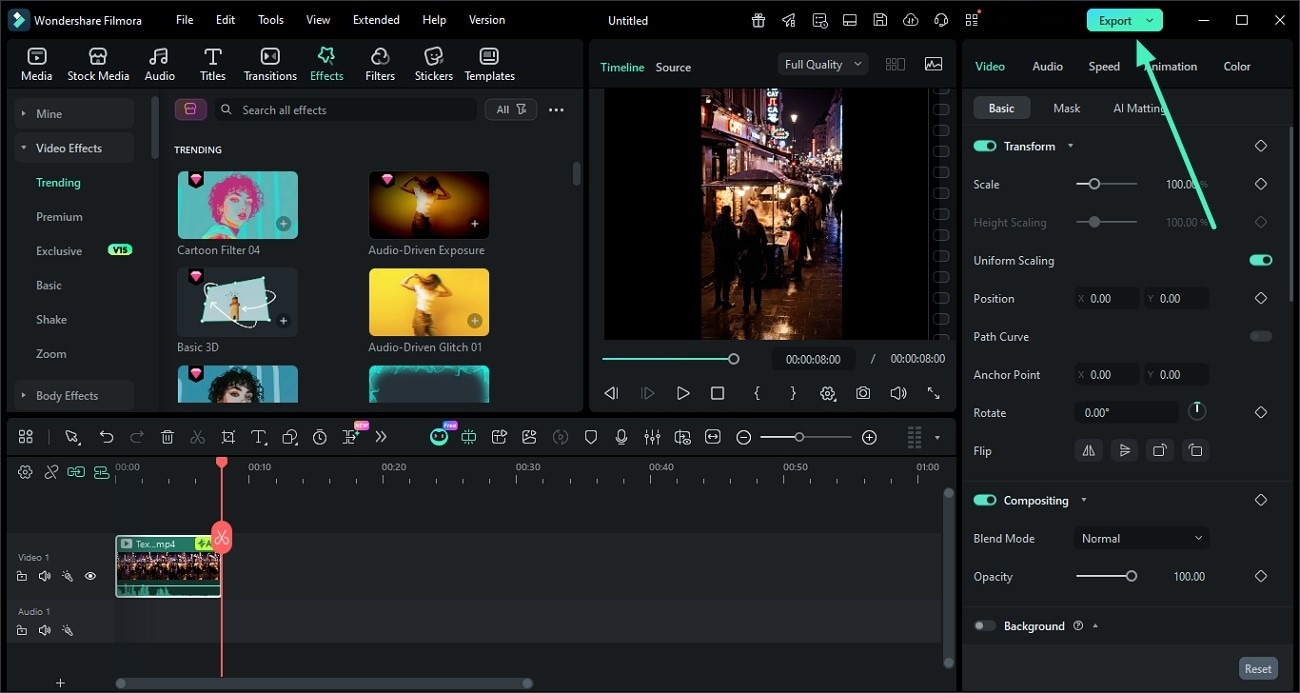
Step 3. Review the Generated Results and Export
Once the results are generated, review them within the preview window and hit the Export button located at the top-right corner to save them to your device.
Note: The AI Mate in Filmora also offers the Auto Mode, where the system automatically chooses one of the 3 modes to process and execute the task, based on the user's detected language.
Mode 4. Inspiration to Video Agent Mode
Inspiration to Video Agent Mode in Filmora's AI Mate is built for beginners and creators who want to turn ideas into story-driven videos without handling complicated editing workflows. Whether you are creating comic-style videos, short dramas, web novel adaptations, or other narrative content, this mode helps transform simple prompts into complete visual stories.
It automatically assists with tasks like finding assets, arranging scenes, adding motion, layering visuals, and generating dubbing, making the entire experience faster and more conversational. Instead of manually editing every detail, users can simply describe their idea and let AI guide the creative process from start to finish.
As discussed, users can conveniently turn their ideas into proper visuals using this mode. To learn how to use this co-pilot mode, read the steps provided below:
Steps for Using Inspiration to Video Agent Mode in AI Mate
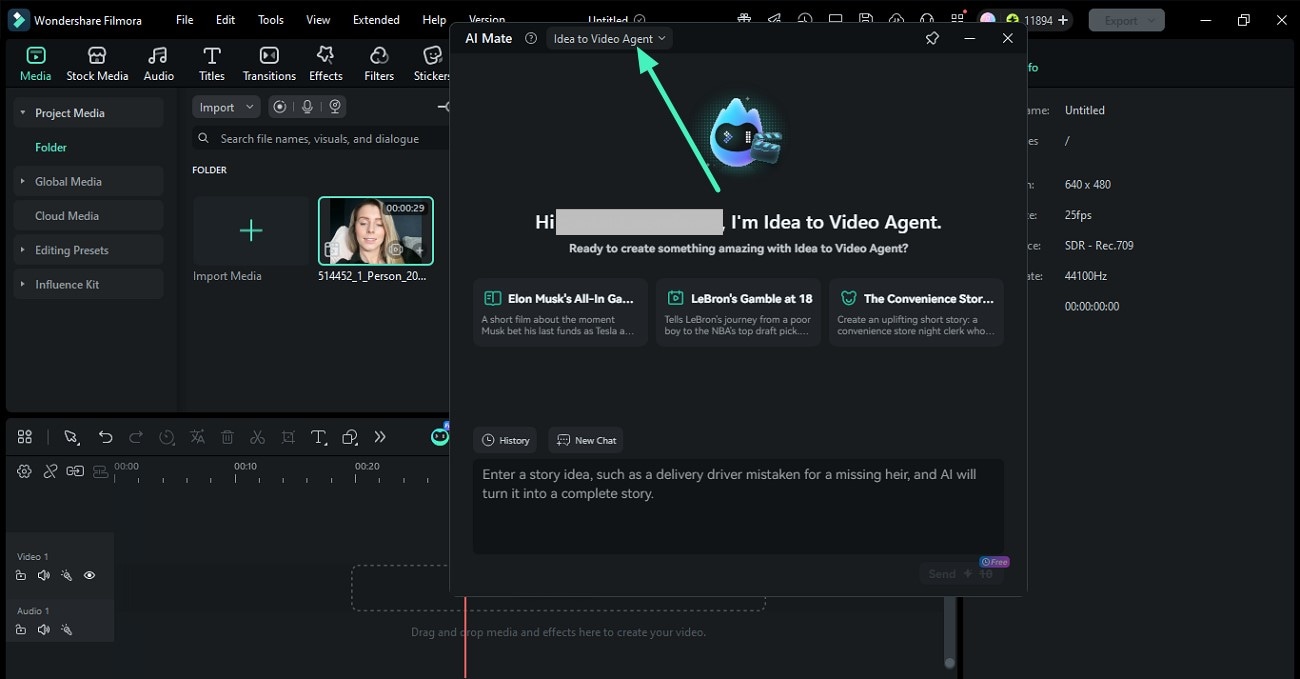
Step 1. Launch AI Mate and Access Inspiration to Video
Start by opening Filmora on your device and creating a New Project. Once you enter the editing interface, click the AI Mate icon from the timeline to access the AI Copilot window.
Step 2. Enter Inspiration to Video Mode
Inside the AI Copilot interface, the system can automatically detect prompts related to story-based video creation and switch to Inspiration to Video mode automatically. Alternatively, manually select the Inspiration to Video tab from the top bar to enter the mode yourself.
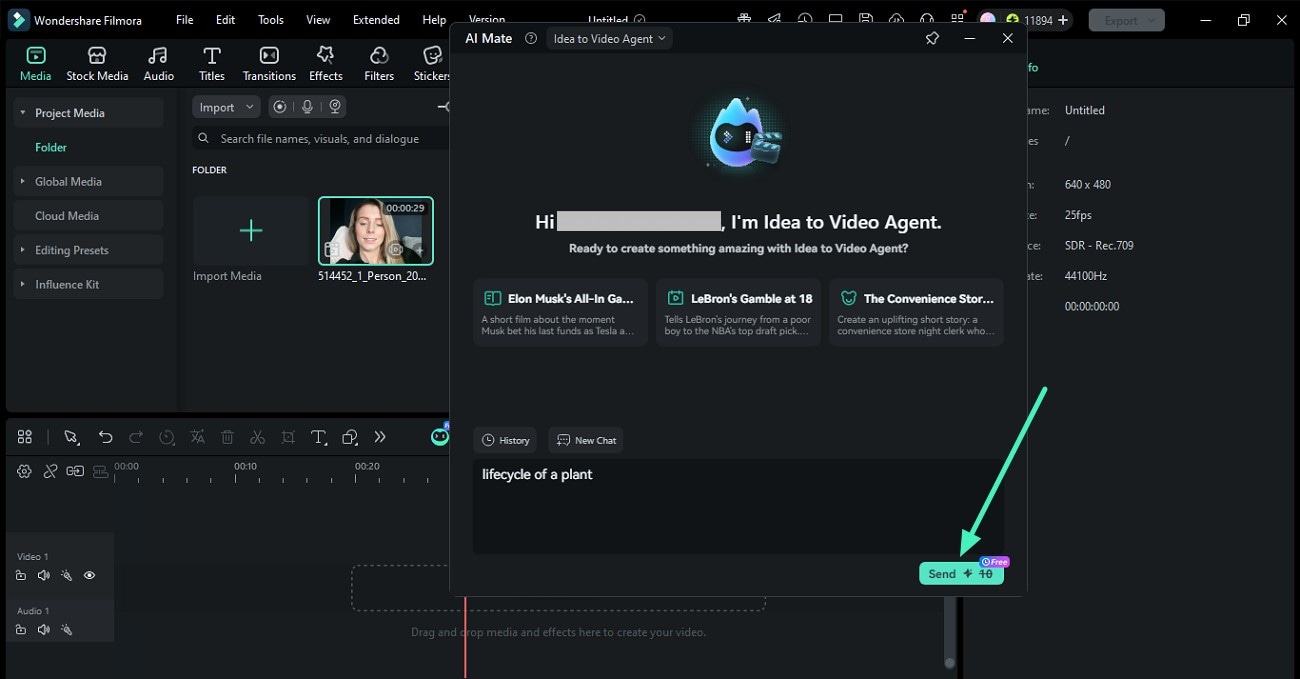
Step 3. Input Your Story Idea or Prompt
In the provided text field, type your story idea, script, or creative prompt. You can describe scenes, characters, or the overall theme of the video. Once done, click the Send button to let AI process your request.
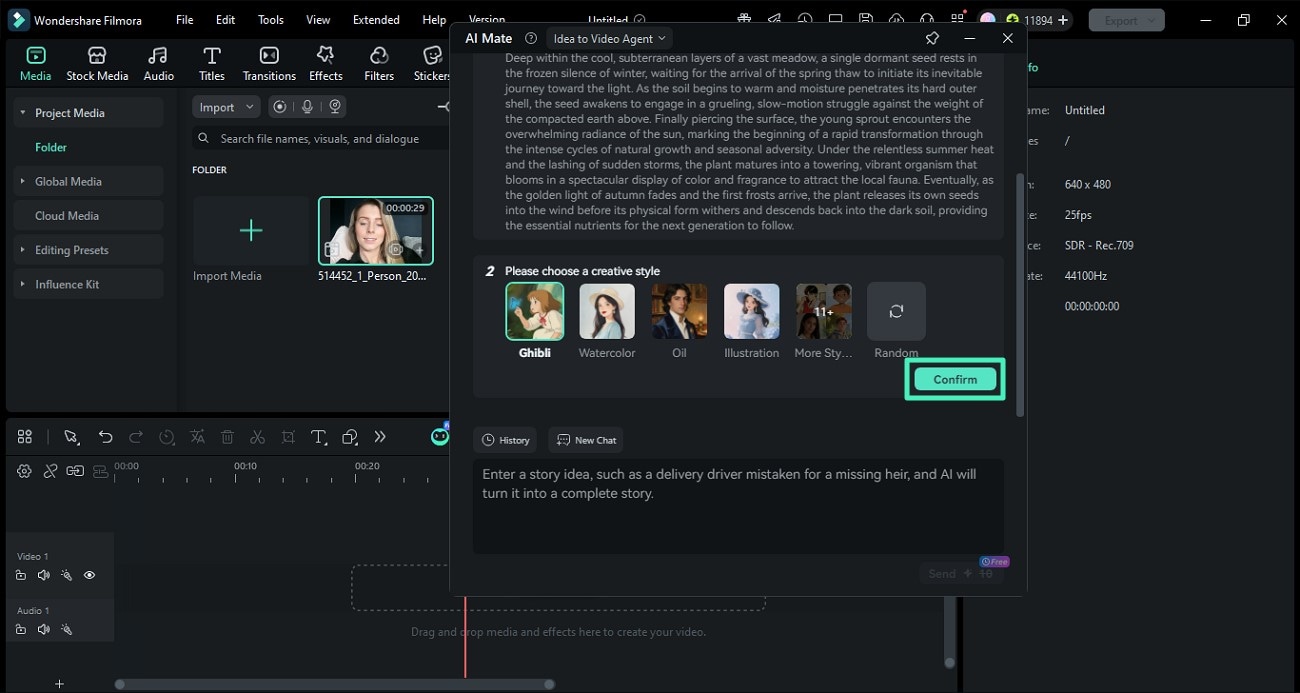
Step 4. Choose a Creative Style
The tool will generate a script for the idea that you provided and will ask you for the visual style. Choose from the options provided and hit the Confirm button to continue.
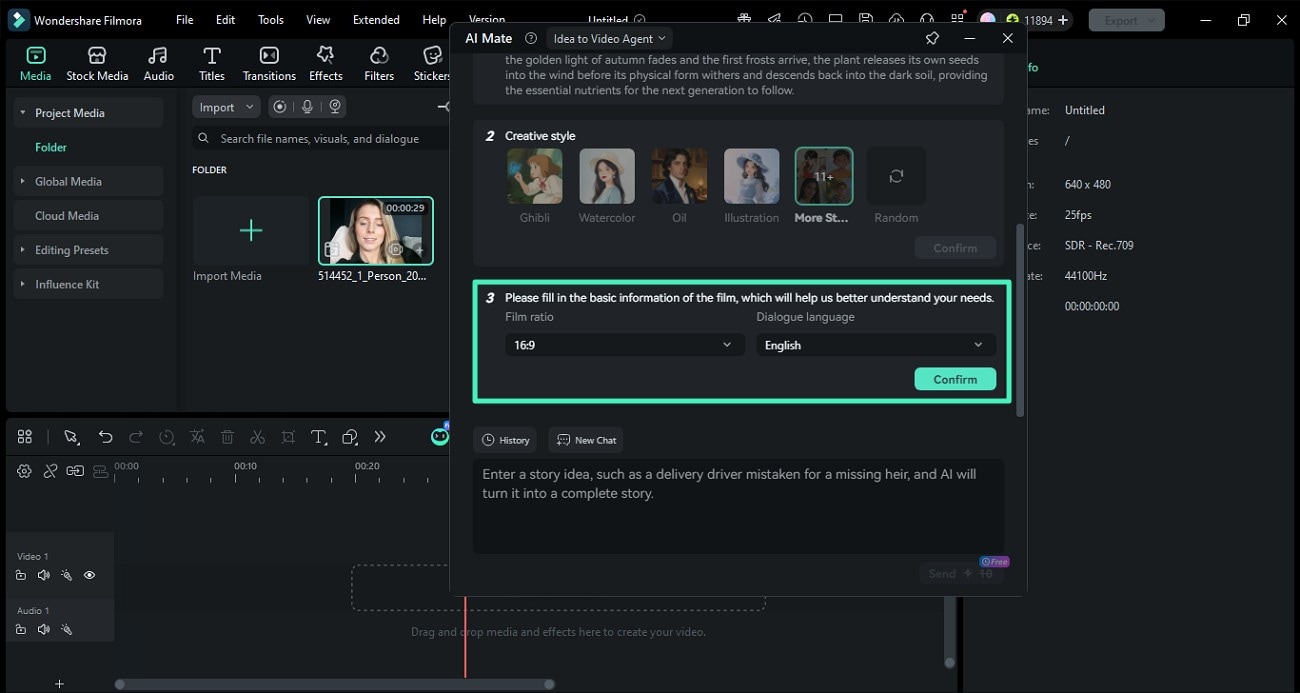
Step 5. Select Aspect Ratio and Language
Moving forward, choose the aspect ratio and the language for the video by expanding the respective drop-down menus. Press the Confirm button to execute the process.
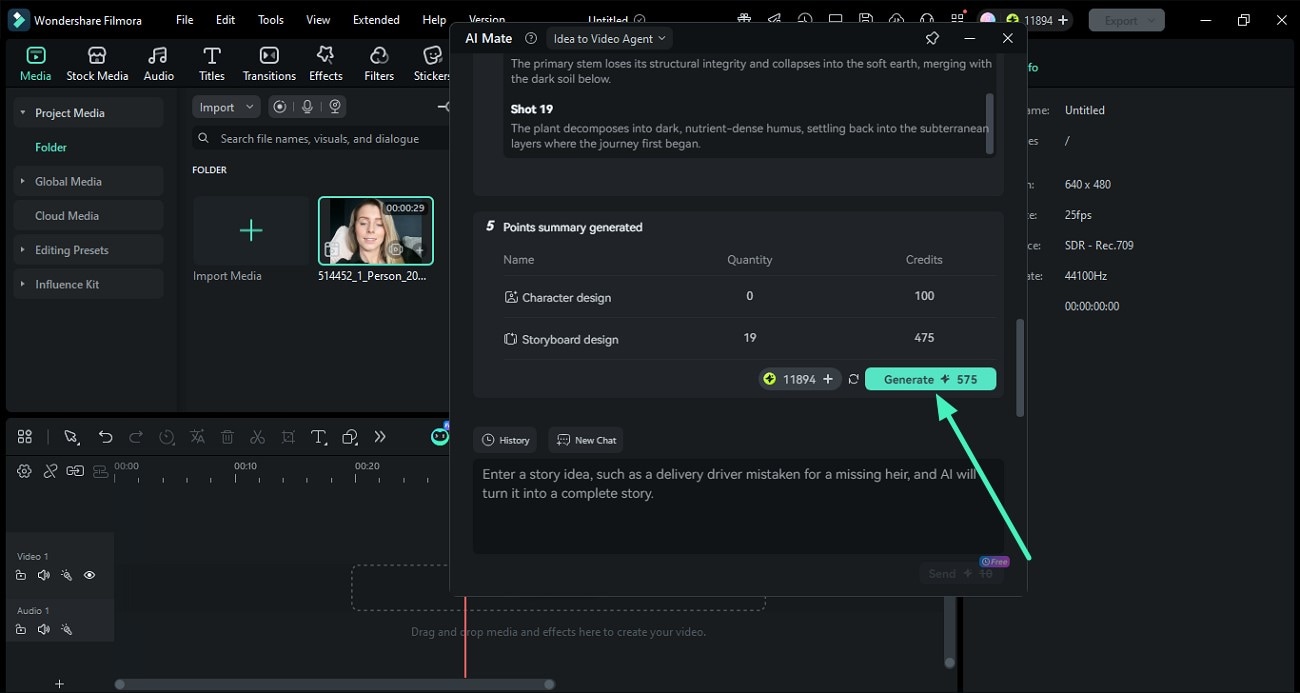
Step 6. Preview Story Script and Generate
Once the tool creates a script, preview it, and the elements like characters and storyboard design. Hit the Generate button to let Filmora begin the scenes creation.
Step 7. Review Storyboard and Generate Video
The tool will generate a complete visual storyboard in the following interface. Preview the results and press the Generate button to start the video creation process.

Step 8. Review Generated Results and Export
Once the video across the script and storyboard is generated, preview the results and make modifications in the elements such as subtitles or background music. Once done, hit the Export button to save the results.