For the Best Results, Use the Latest Version.
-
Preparations
-
Account
-
Get Started & Basic Settings
-
Compatibility & Tech Specs
-
Performance Settings
-
-
Creating Projects
-
Creating New Projects
-
-
Importing & Recording
-
Video Editing for Windows
-
Basic Video Editing
- Enable/Disable Clip in Windows
- Magnetic Timeline for Windows
- Dual Monitor Setup for Video Editing on Windows
- Select All Clips on Timeline for Windows
- Manage Timeline and Tracks on Windows
- Auto Ripple for Windows
- Split & trim video
- Crop & Pan & Zoom Video in Filmora for Windows
- Compositing
- Change Video Speed on Windows
- Playing videos in reverse
- Mark In and Mark Out for Windows
- Markers for Windows
- Group editing
- Customizable Backgrounds for Videos and Images in Windows
- Video snapshot
- Using Freeze Frame in Filmora for Windows
- Logo Reveal For Windows
- Auto Enhance in Filmora for Windows
- Applying drop shadow
- Adjustment layer for Windows
- Apply Transforming for Windows
- Video Editing Ruler – Windows
-
Advanced Video Editing
- Drawing Tools for Windows | Filmora Guide
- Create Multi-Camera Clip in Filmora for Windows
- Compound Clip for Windows
- Multi-Clip Editing for Windows
- Filmora Motion Blur | Windows
- Video Chapters in Filmora on Windows
- Filmora Flicker Removal Guide | Windows
- Apply mask to video
- Creating a PIP Effect for Windows
- Keyframe Graph Editor for Windows
- Add animation keyframing for Windows
- Keyframe Path Curve for Windows
-
AI-Powered Video Editing
- Smart Scene Cut for Windows
- Smart Short Clips for Windows
- AI Face Mosaic for Windows
- Filmora AI Eye Contact- Windows
- AI Video Enhancer for Windows
- AI Text-to-Video for Windows
- Planar Tracking for Windows
- AI Idea to Video for Windows
- Filmora Image to Video for Windows
- Filmora Image to Prompt for Windows
- Instant Cutter Tool for Windows
- AI Extend
- Filmora AI Relight - Windows
- Filmora AI Image Enhancer Guide - Windows
- AI Script to Video Guide for Windows
- AI Text-Based Editing for Windows
- AI Mate Editing for Windows
- Instant Mode in Filmora
- ChatGPT Plugin - AI Copywriting
- AI Smart Cutout for Windows
- Lens correction on Windows
- Auto Reframe Video for Windows
- AI Portrait Cutout
- Scene detection feature
- AI Smart Masking for Windows
- Motion Tracking on Windows
- Video Stabilization for Windows
- AI Video/Photo Object Remover for Windows
- AI Smart Search for Windows
- AI Skin Tone Protection for Windows
- AI Image for Windows
- Chroma key (green screen)
- Super Slow Motion with Optical Flow for Windows
- Video Denoise for Windows
-
-
Audio Editing for Windows
-
Basic Audio Editing
-
Advanced Audio Editing
-
AI-Powered Audio Editing
- Auto synchronization
- AI Sound Effects in Filmora for Windows
- Smart BGM Generation on Windows
- AI Voice Enhancer in Filmora
- AI Voice Cloning in Wondershare Filmora
- AI Music Generator for Windows
- Audio To Video
- AI Vocal Remover for Windows
- AI Auto Beat Sync for Windows
- AI Audio Stretch for Windows
- AI Audio Denoise for Windows
- Silence Detection on Windows
-
-
Text Editing for Windows
-
Basic Text Editing
-
Advanced Text Editing
-
AI-Powered Text Editing
-
-
Video Customizations
-
Video Effects
-
Audio Effects
-
Transitions
-
Stickers
-
Filters
-
Color Editing
-
Animations
-
Templates
-
Asset Center
-
-
Exporting & Share & Cloud Backup
Compound Clip for Windows
Users can try out one of the new functionalities in Filmora, navigating under the name of compound clip. This feature combines two separate videos, allowing users to edit them simultaneously. If you have also taken multiple shots and want to apply the same effects and filters on them, learn how to make a compound clip here:
Making a Compound Clip
If you also want to bring smoothness and consistency to your videos using the compound clip feature, follow the step-by-step guide given below:
Method 1: Using the Top Toolbar
Step 1: Create a New Project
Once you download Filmora and log in to your account, navigate towards the left side panel and click the "Create Project" option. This will bring up many tabs on the main screen; find and choose the "New Project" option.
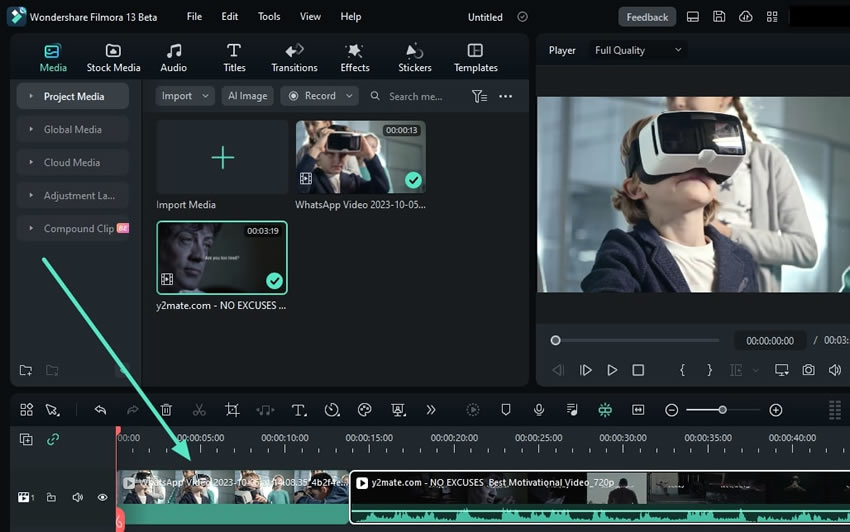
Step 2: Import Clips and Place in the Timeline Panel
Upon accessing the editing window of Filmora, press the "Ctrl+I" keys on your keyboard simultaneously and select clips from your device to upload. After a successful media import, bring the clips to a similar timeline track using the drag-and-drop action.
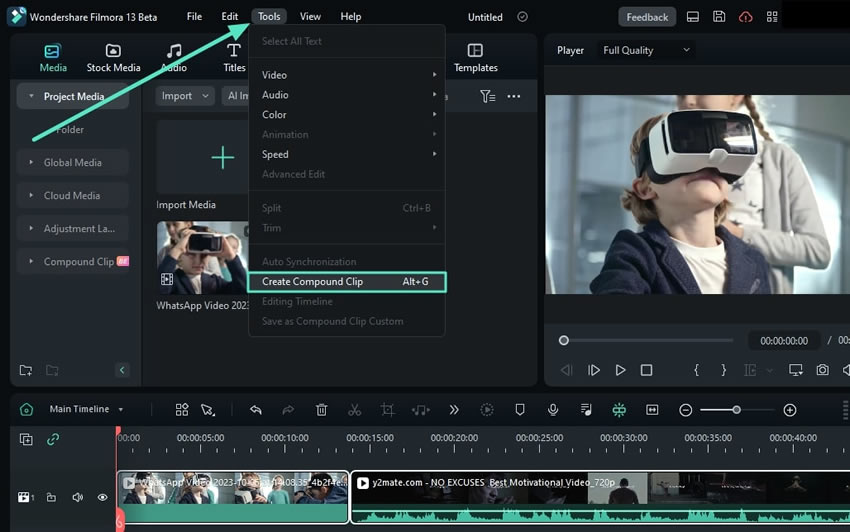
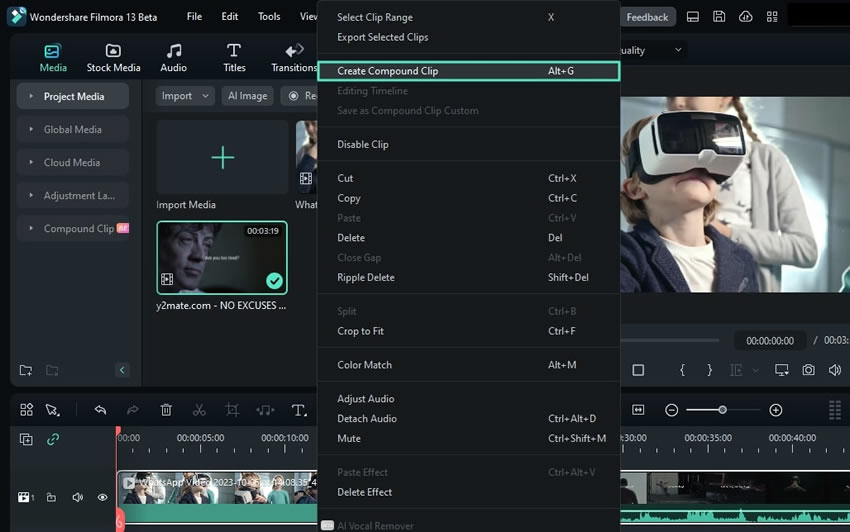
Step 3: Create a Compound Clip
Once the clips are in the timeline panel, select both and navigate towards the top toolbar. From the given tabs, select "Tools", and from the dropdown menu, choose "Create Compound Clip". This will open a pop-up window, name your compound clip, and click "OK".
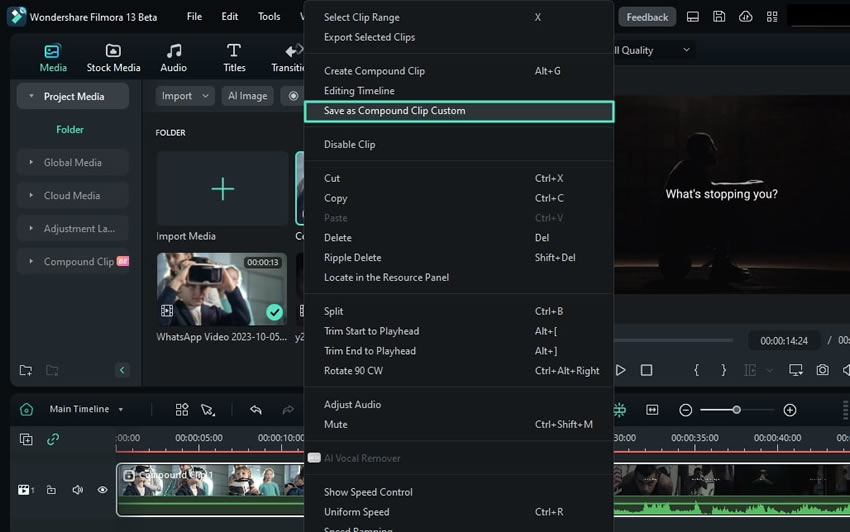
Step 4: Save the Compound Clip
If you want to save this compound clip, navigate towards the timeline panel where your compound clip is and select it. Right-click on it, and from the options menu, select "Save as Compound Clip Custom".
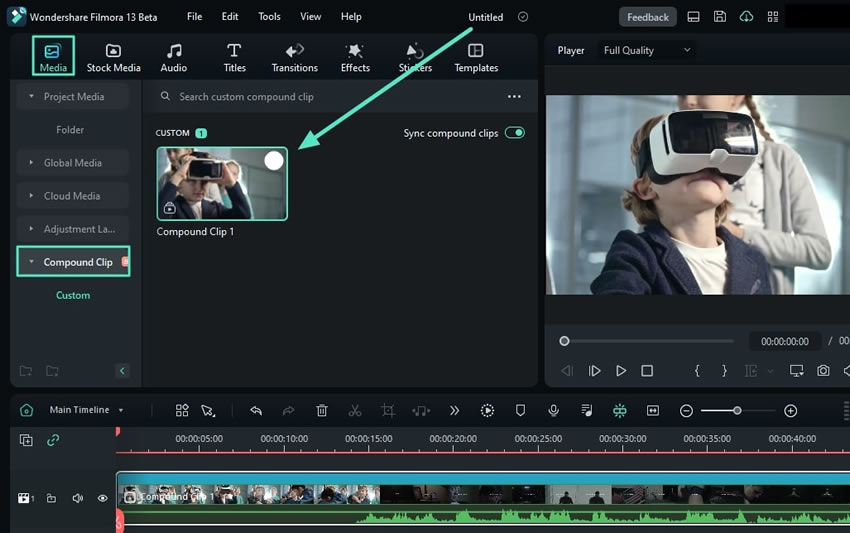
Step 5: Access Saved Compound Clip
This clip will be saved in Filmora’s cloud storage. To access it, navigate towards the top left panel and select the "Compound Clip" option. You can see your saved clip there.
Method 2: From the Timeline Control Menu
After dropping the media into the timeline panel, select the clip in the timeline and right-click on it. From the control panel appearing, click the "Create Compound Clip" option. Further, name your clip and click "OK".
Navigating Through Compound Clips
Once you have created compound clips in your Filmora project, the platform offers proper timeline management. To understand more about how compound clips work once created, the steps below are to ease the idea:
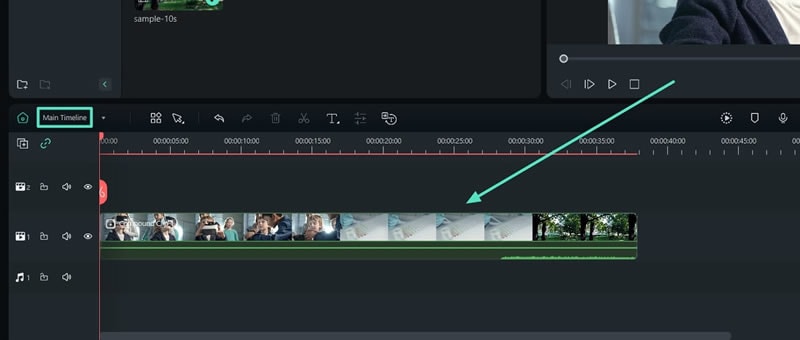
Step 1: Access Compound Clips in Main Timeline
Once you have created the compound clip in Windows, they are not only displayed in the media tab but are also properly shown across the timeline. After creating compound clips, the timeline toolbar starts displaying the layering in the video timeline. When you are in the "Main Timeline" layer, you can view all the clips as a compound clip.
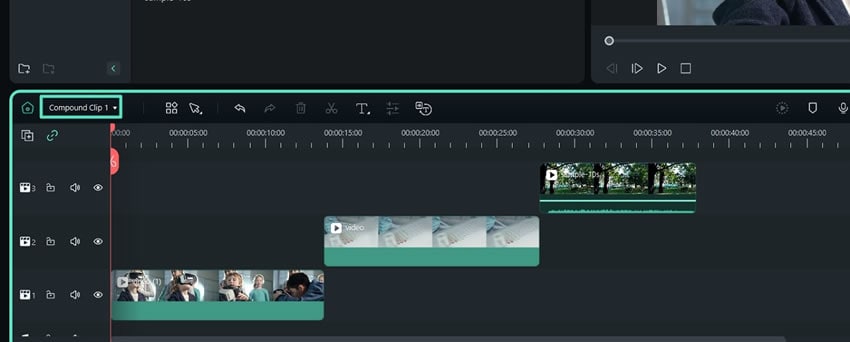
Step 2: Open Up Compound Clip in Timeline
On changing the tab to the respective compound clip from the dropdown menu, the clips combined in the compound clip are displayed in the same manner they were combined. This helps you in switching through your video editing easily and make significant changes easily.
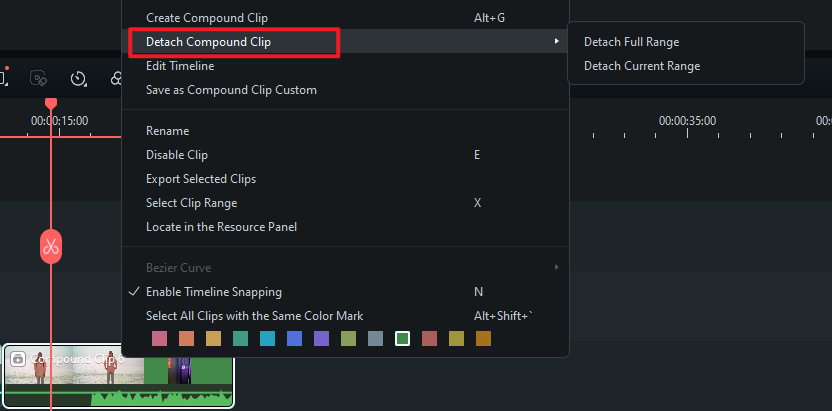
Detach Compound Clips
In the new version of Filmora, Detach compound clip is supported. Now you can restore the compound clip, making video editing more flexible.
Right click on the compound clip on the main timeline, then select "Detach Compound Clip" to restore the compound clip.
Related Posts
Featured Articles
10 Best Sora 2 Prompts for High-Quality AI Video Creations
Unlock the full potential of Sora 2! Discover top 10 prompts, expert tips, and inspiring examples to generate breathtakingly realistic and cinematic AI videos.
Unveiling the Premier League Highlights on YouTube
Do you want to create action-packed Premier League Highlights for YouTube? Our guide will help you engage fans by making such videos using Filmora!
Step By Step: HitFilm Express Motion Tracking Guide
Keep reading to learn more about using motion tracking features in HitFilm Express to automatically enhance your video content with top-grade visuals.
Recommended User Guide
Create Multi-Camera Clip in Filmora for Windows
Create Multi-Camera Clip allows you to combine and edit footage from multiple cameras into a single cohesive video.
Filmora Motion Blur | Windows
Here is the guide on how to use the Motion Blur feature in Filmora.
