For the Best Results, Use the Latest Version.
-
Preparations
-
Account
-
Get Started & Basic Settings
-
Compatibility & Tech Specs
-
Performance Settings
-
-
Creating Projects
-
Creating New Projects
-
-
Importing & Recording
-
Video Editing for Windows
-
Basic Video Editing
- Enable/Disable Clip in Windows
- Magnetic Timeline for Windows
- Dual Monitor Setup for Video Editing on Windows
- Select All Clips on Timeline for Windows
- Manage Timeline and Tracks on Windows
- Auto Ripple for Windows
- Split & trim video
- Crop & Pan & Zoom Video
- Compositing
- Change Video Speed on Windows
- Playing videos in reverse
- Mark In and Mark Out for Windows
- Markers for Windows
- Group editing
- Customizable Backgrounds for Videos and Images in Windows
- Video snapshot
- Using freeze frame
- Logo Reveal For Windows
- Apply auto enhance
- Applying drop shadow
- Adjustment layer for Windows
- Transforming
- Video Editing Ruler – Windows
-
Advanced Video Editing
- Drawing Tools for Windows | Filmora Guide
- Create Multi-Camera Clip
- Compound Clip for Windows
- Multi-Clip Editing for Windows
- Filmora Motion Blur | Windows
- Filmora Flicker Removal Guide | Windows
- Apply mask to video
- Creating a PIP effect
- Keyframe Graph Editor for Windows
- Add animation keyframing for Windows
- Keyframe Path Curve for Windows
-
AI-Powered Video Editing
- Smart Scene Cut for Windows
- Smart Short Clips for Windows
- AI Face Mosaic for Windows
- Filmora AI Eye Contact- Windows
- AI Video Enhancer for Windows
- AI Text-to-Video for Windows
- Planar Tracking for Windows
- AI Idea to Video for Windows
- Filmora Image to Video for Windows
- Filmora Image to Prompt for Windows
- Instant Cutter Tool for Windows
- AI Extend
- Filmora AI Relight - Windows
- Filmora AI Image Enhancer Guide - Windows
- AI Script to Video Guide for Windows
- AI Text-Based Editing for Windows
- AI Mate Editing for Windows
- Create with instant mode
- ChatGPT Plugin - AI Copywriting
- AI Smart Cutout
- Lens correction on Windows
- Auto reframe video
- AI Portrait Cutout
- Scene detection feature
- AI Smart Masking for Windows
- Make motion tracking
- Video Stabilization for Windows
- AI Video/Photo Object Remover for Windows
- AI Smart Search for Windows
- AI Skin Tone Protection for Windows
- AI Image for Windows
- Chroma key (green screen)
- Super Slow Motion with Optical Flow for Windows
- Video Denoise for Windows
-
-
Audio Editing for Windows
-
Basic Audio Editing
-
Advanced Audio Editing
-
AI-Powered Audio Editing
-
-
Text Editing for Windows
-
Basic Text Editing
-
Advanced Text Editing
-
AI-Powered Text Editing
-
-
Video Customizations
-
Video Effects
-
Audio Effects
-
Transitions
-
Stickers
-
Filters
-
Color Editing
-
Animations
-
Templates
-
Asset Center
-
-
Exporting & Share & Cloud Backup
Video Editing Ruler – Windows
Filmora is known for providing ease to video editors on the overall scale. There are multiple video editing tools available that support ease of use and guide users to efficient video editing. However, for scaled editing across a video through rulers, there is a recent addition to Filmora, which helps with layout settings through such visual editing.
How To Use Video Editing Ruler in Filmora?
While working on your video editing project, if it comes to managing a specific layout within the video at different time instances, you might have to scale it thoroughly. Filmora provides a video editing ruler that helps create reference lines as guides for assisting with the layout. To figure out how it is done effectively, look through the step-by-step instructions provided:
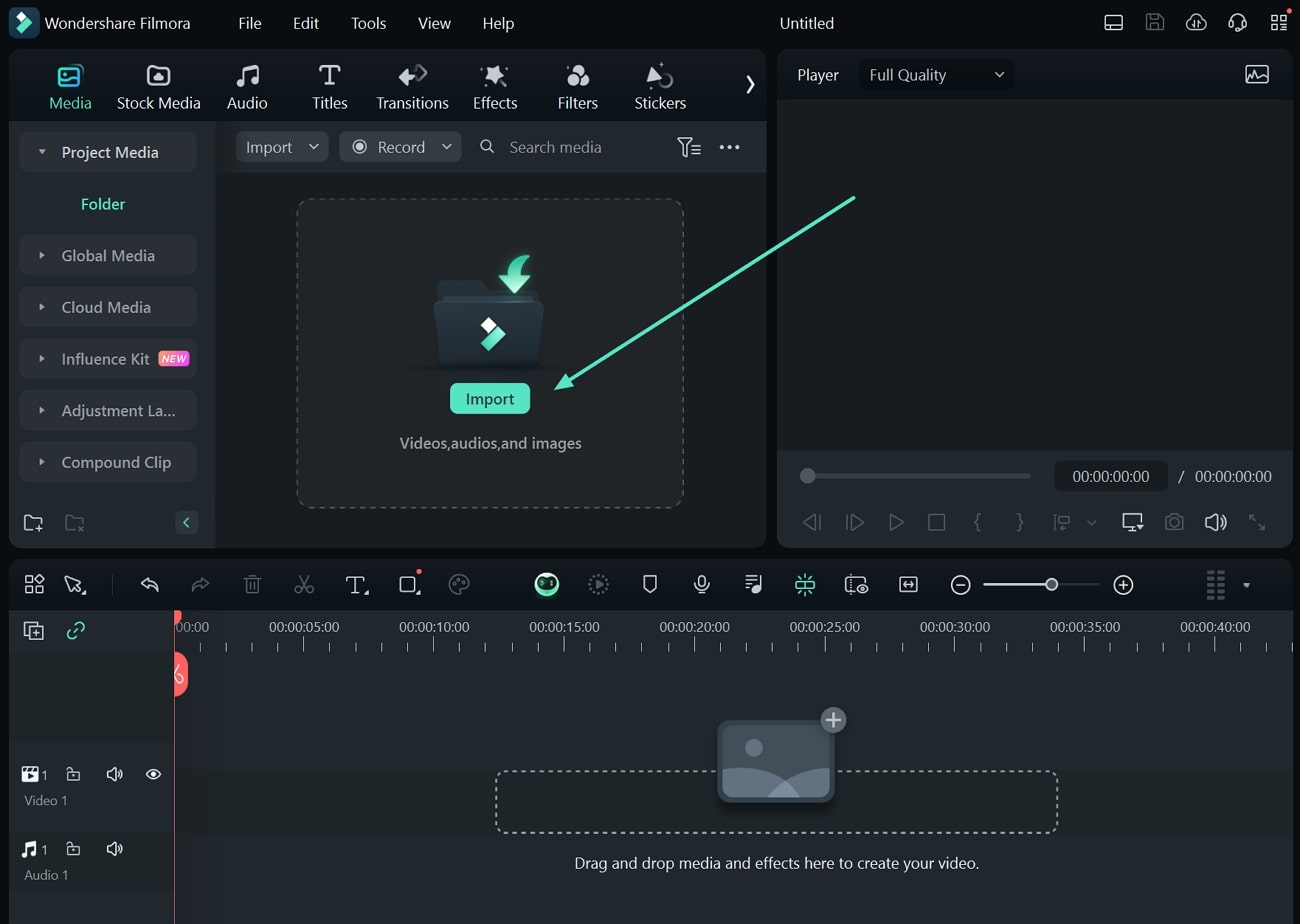
Step 1. Import Video To Filmora
As you initiate working on Filmora, set up a new video project using the "New Project" button. Proceed to the video editing interface and use the "Import" button to add your content.
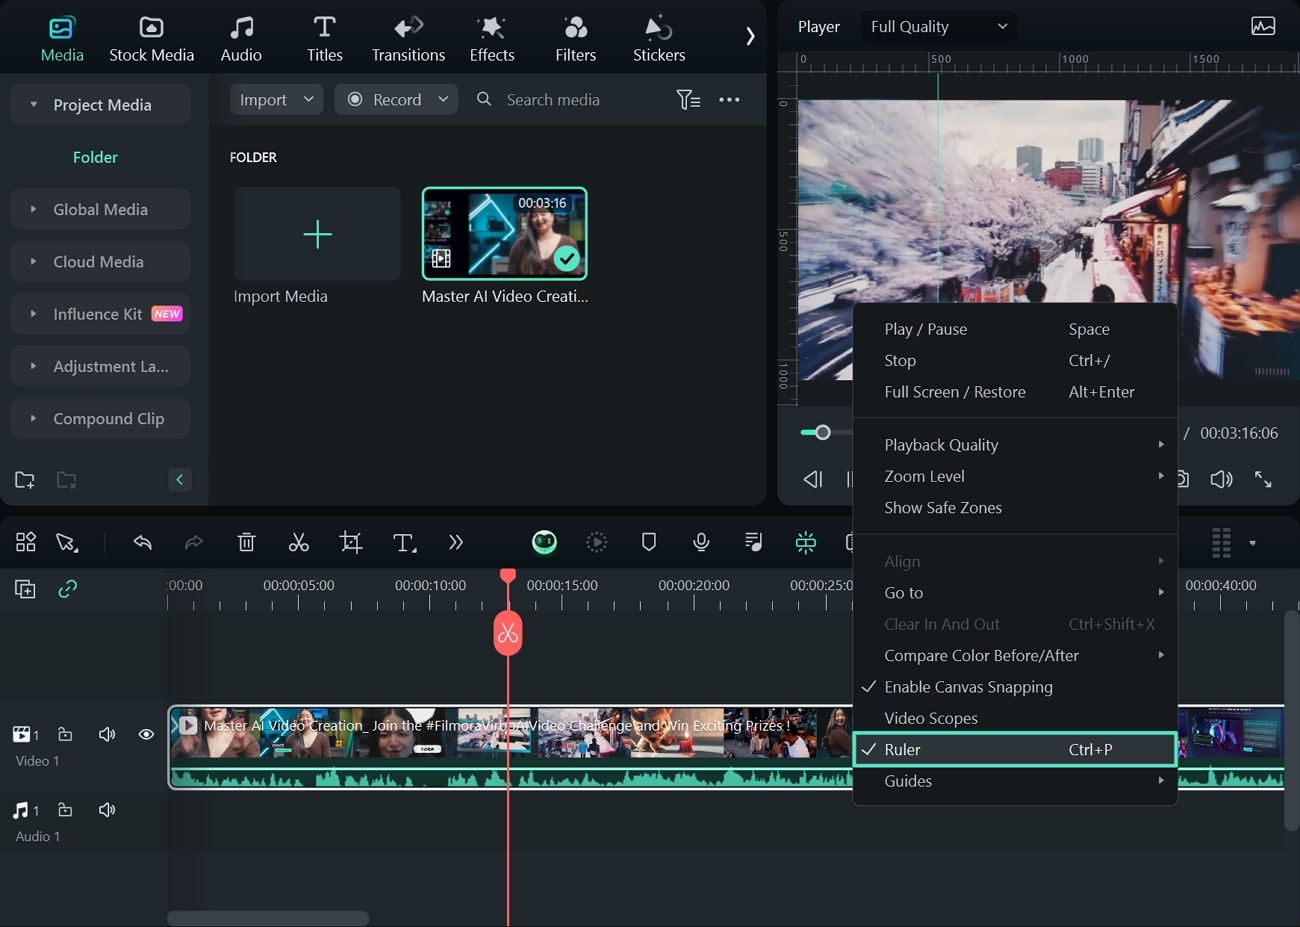
Step 2. Access Video Ruler on Filmora
With your video added to Filmora, drag it across the timeline for further editing. To access the video ruler, lead to the preview window within Filmora and right-click your mouse or trackpad. Look for the "Ruler" option in the drop-down menu and click to activate it. Similarly, you can use the "CTRL + P" shortcut key for activating this option. This will display the ruler across the preview window to act as reference lines.
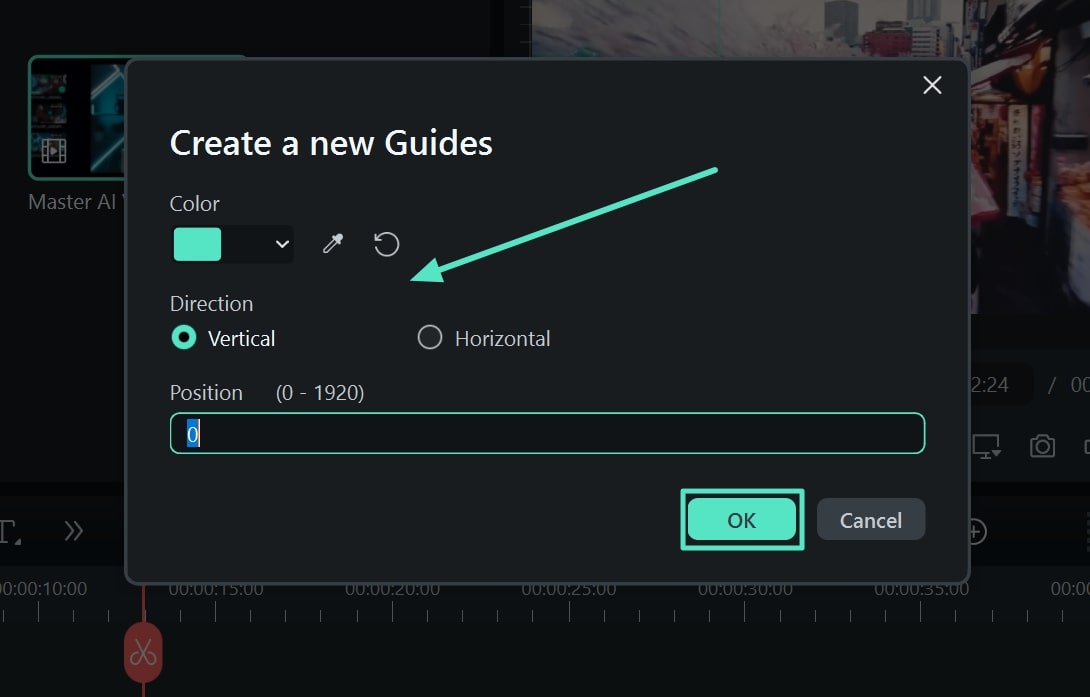
Step 3. Create a New Reference Line
To create new reference lines within your video preview, you can go to the same drop-down menu and find the "Guides" option. In the protruding menu ahead of it, click the "Add Guide" option to open a new pop-up window. You'll have to set up the "Color," "Direction," and "Position" of the reference line before clicking "OK."
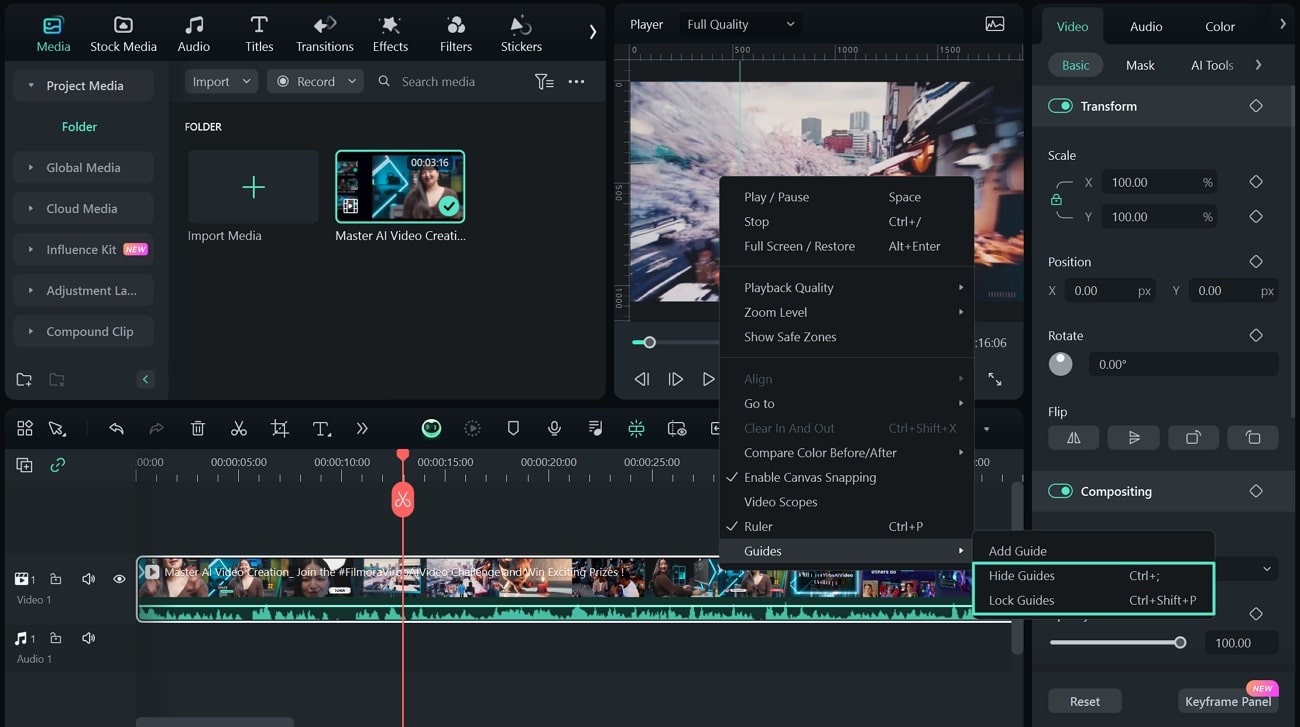
Step 4. Hide or Lock Reference Lines of Video Ruler
While creating new reference lines, there are multiple ways to manage them across Filmora. If you want to remove all reference lines from the display, use the “Hide Guides” option. Furthermore, if you have to restrict these reference lines across a specific point, the “Lock Guides" option would do the trick.
Related Posts
Featured Articles
Master the Art of Sound: Top 8 Audio Editors for Android
If you want to take your editor wherever you are, we have the best solutions for you. Check out these Android audio editors to transform your experience and become a professional.
Achieve VHS Green Screen Effect in 2 Easy Ways
Dig up that retro vibe for your video projects using VHS effect through green screen technology. Learn how to achieve that nostalgic VHS charm in your content through these two effective methods.
How to Create a White Background Video Like A Pro
If you're looking to use the white background effect but are unsure what app to use to create it in your videos, then this article is just for you! In it, we will explore how to add a white background in video editing.
Recommended User Guide
Group editing
Group Edit
Customizable Backgrounds for Videos and Images in Windows
With Wondershare Filmora's new updates come with pre-built and customizable backgrounds for videos.
Mark In and Mark Out for Windows
In Filmora, users can mark in and mark out their clips to specify the region for editing, eliminating, exporting, and more.
