For the Best Results, Use the Latest Version.
-
Preparations
-
Account
-
Get Started & Basic Settings
-
Compatibility & Tech Specs
-
Performance Settings
-
-
Creating Projects
-
Creating New Projects
-
-
Importing & Recording
-
Video Editing for Windows
-
Basic Video Editing
- Enable/Disable Clip in Windows
- Magnetic Timeline for Windows
- Dual Monitor Setup for Video Editing on Windows
- Select All Clips on Timeline for Windows
- Manage Timeline and Tracks on Windows
- Auto Ripple for Windows
- Split & trim video
- Crop & Pan & Zoom Video
- Compositing
- Change video playback speed
- Playing videos in reverse
- Mark In and Mark Out for Windows
- Markers for Windows
- Group editing
- Customizable Backgrounds for Videos and Images in Windows
- Video snapshot
- Using freeze frame
- Logo Reveal For Windows
- Apply auto enhance
- Applying drop shadow
- Adjustment layer for Windows
- Transforming
- Video Editing Ruler – Windows
-
Advanced Video Editing
- Drawing Tools for Windows | Filmora Guide
- Create Multi-Camera Clip
- Compound Clip for Windows
- Multi-Clip Editing for Windows
- Filmora Motion Blur | Windows
- Filmora Flicker Removal Guide | Windows
- Apply mask to video
- Creating a PIP effect
- Keyframe Graph Editor for Windows
- Add animation keyframing for Windows
- Keyframe Path Curve for Windows
-
AI-Powered Video Editing
- Smart Scene Cut for Windows
- Smart Short Clips for Windows
- AI Face Mosaic for Windows
- Filmora AI Eye Contact- Windows
- AI Video Enhancer for Windows
- AI Text-to-Video for Windows
- Planar Tracking for Windows
- AI Idea to Video for Windows
- Filmora Image to Video for Windows
- Filmora Image to Prompt for Windows
- Instant Cutter Tool for Windows
- AI Extend
- Filmora AI Relight - Windows
- Filmora AI Image Enhancer Guide - Windows
- AI Script to Video Guide for Windows
- AI Text-Based Editing for Windows
- AI Mate Editing for Windows
- Create with instant mode
- ChatGPT Plugin - AI Copywriting
- AI Smart Cutout
- Lens correction on Windows
- Auto reframe video
- AI Portrait Cutout
- Scene detection feature
- AI Smart Masking for Windows
- Make motion tracking
- Video Stabilization for Windows
- AI Video/Photo Object Remover for Windows
- AI Smart Search for Windows
- AI Skin Tone Protection for Windows
- AI Image for Windows
- Chroma key (green screen)
- Super Slow Motion with Optical Flow for Windows
- Video Denoise for Windows
-
-
Audio Editing for Windows
-
Basic Audio Editing
-
Advanced Audio Editing
-
AI-Powered Audio Editing
-
-
Text Editing for Windows
-
Basic Text Editing
-
Advanced Text Editing
-
AI-Powered Text Editing
-
-
Video Customizations
-
Video Effects
-
Audio Effects
-
Transitions
-
Stickers
-
Filters
-
Color Editing
-
Animations
-
Templates
-
Asset Center
-
-
Exporting & Share & Cloud Backup
Importing
Wondershare Filmora enables you to import standard, HD, and even 4K videos. You can also record a video with Filmora using your computer's webcam or recording your computer screen. You can even record a voiceover with Filmora.
Your media clips - including imported videos, images, and audio files will be shown in the Media Library, where you can access them quickly and easily.
Index
Methods to Import Media Files into Filmora
There are 3 ways to import media files into Filmora.
Check the complete list of supported file formats here.
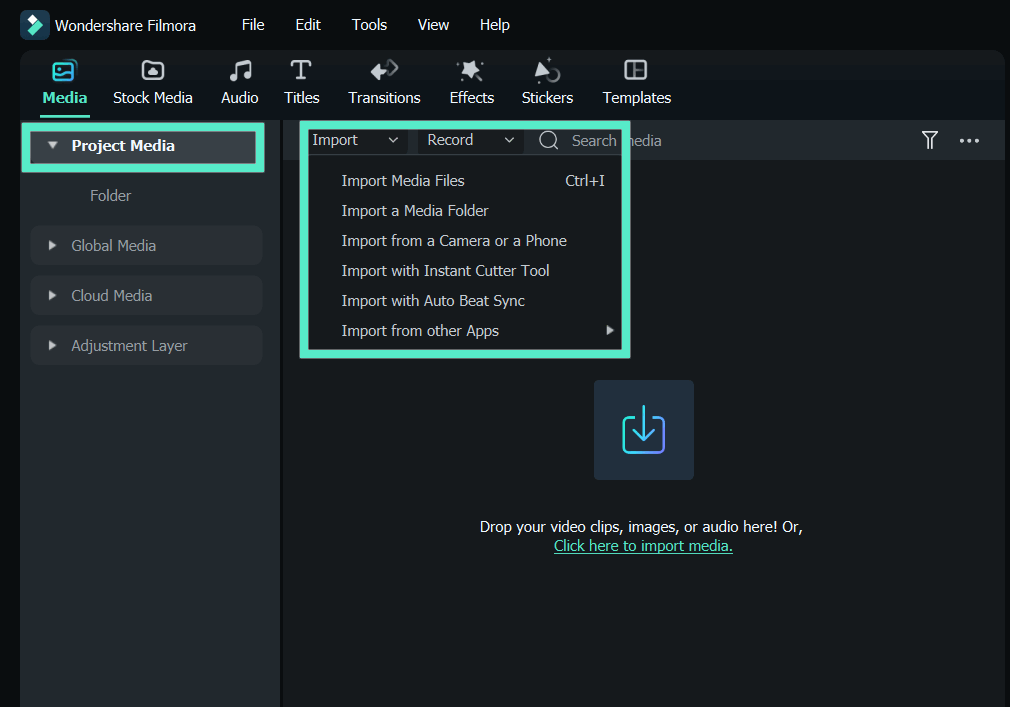
Method 1
Click File > Import Media. Choose Import Media Files, Import a Media Folder, Import from a Camera or a Phone, or Import with Auto Beat Sync.

There is also a click entry for Import in the bar next to Project Media.
The Beat Sync operation window will pop up if you click Import with Auto Beat Sync. Click Import Media from the upper left corner.
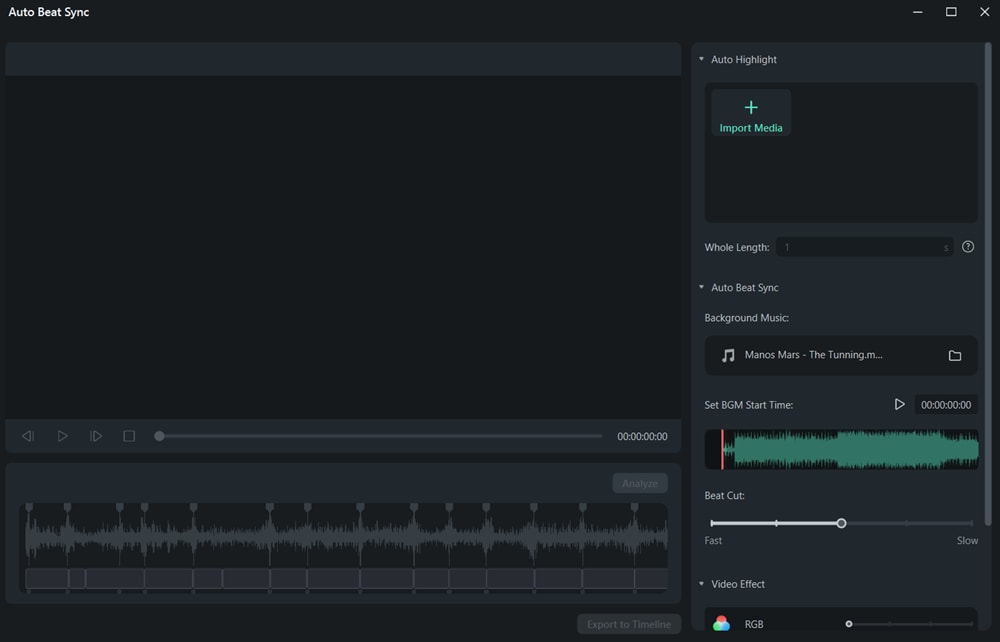
You can click to learn more about Auto Beat Sync.
Method 2
With media selected in the menu bar, click on the first tab Project Media. Click the import media area as shown below, and then choose one or more media files from the pop-up window.

Method 3
Drag and drop media files into the Media Library.
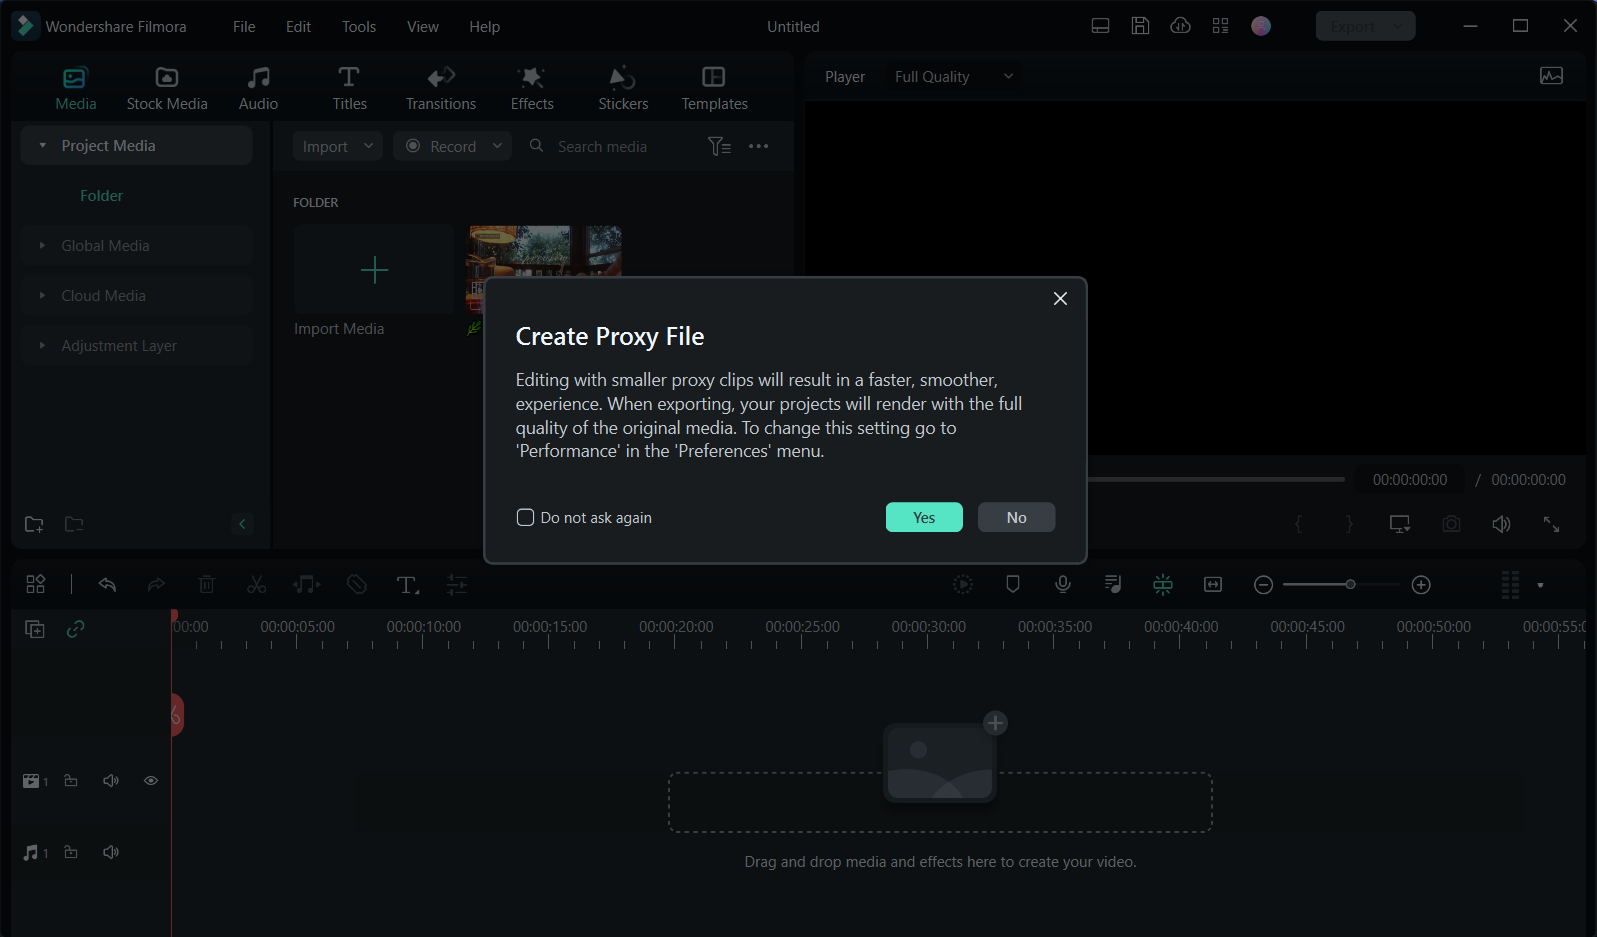
When you import a media file, Filmora may ask you to create a proxy file to accelerate your editing process.
A proxy file is a second media file smaller than your original file. Usually, more timeline efficiency will be required when the video has a very high resolution.
Creating a proxy file can lower the video resolution in the editing to accelerate the whole editing process without affecting the final export quality.
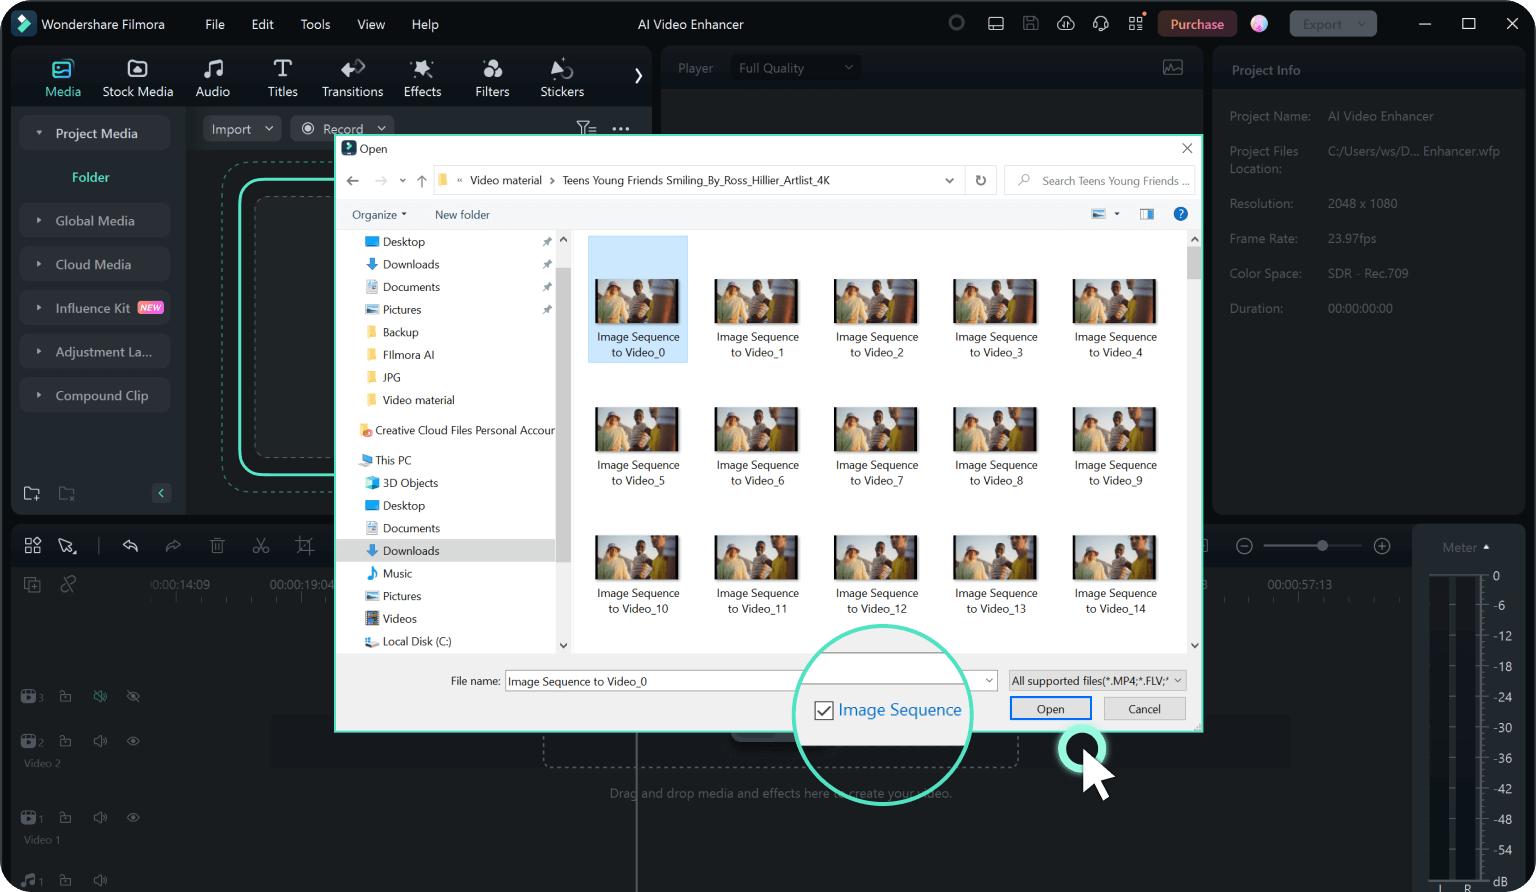
How To Make Image Sequence Into a Video
- Import Image Sequence: Click "Import" to upload your JPEG/JPG images. Alternatively, you can drag and drop them into the media library. Select the first image, check the "Import as image sequence" box, and click "Open." Make sure your images are in JPEG format and named in order.(e.g., image001.jpg, image002.jpg).
- Add to Timeline: Drag the image sequence to the timeline. Right-click any image to adjust the duration if needed.
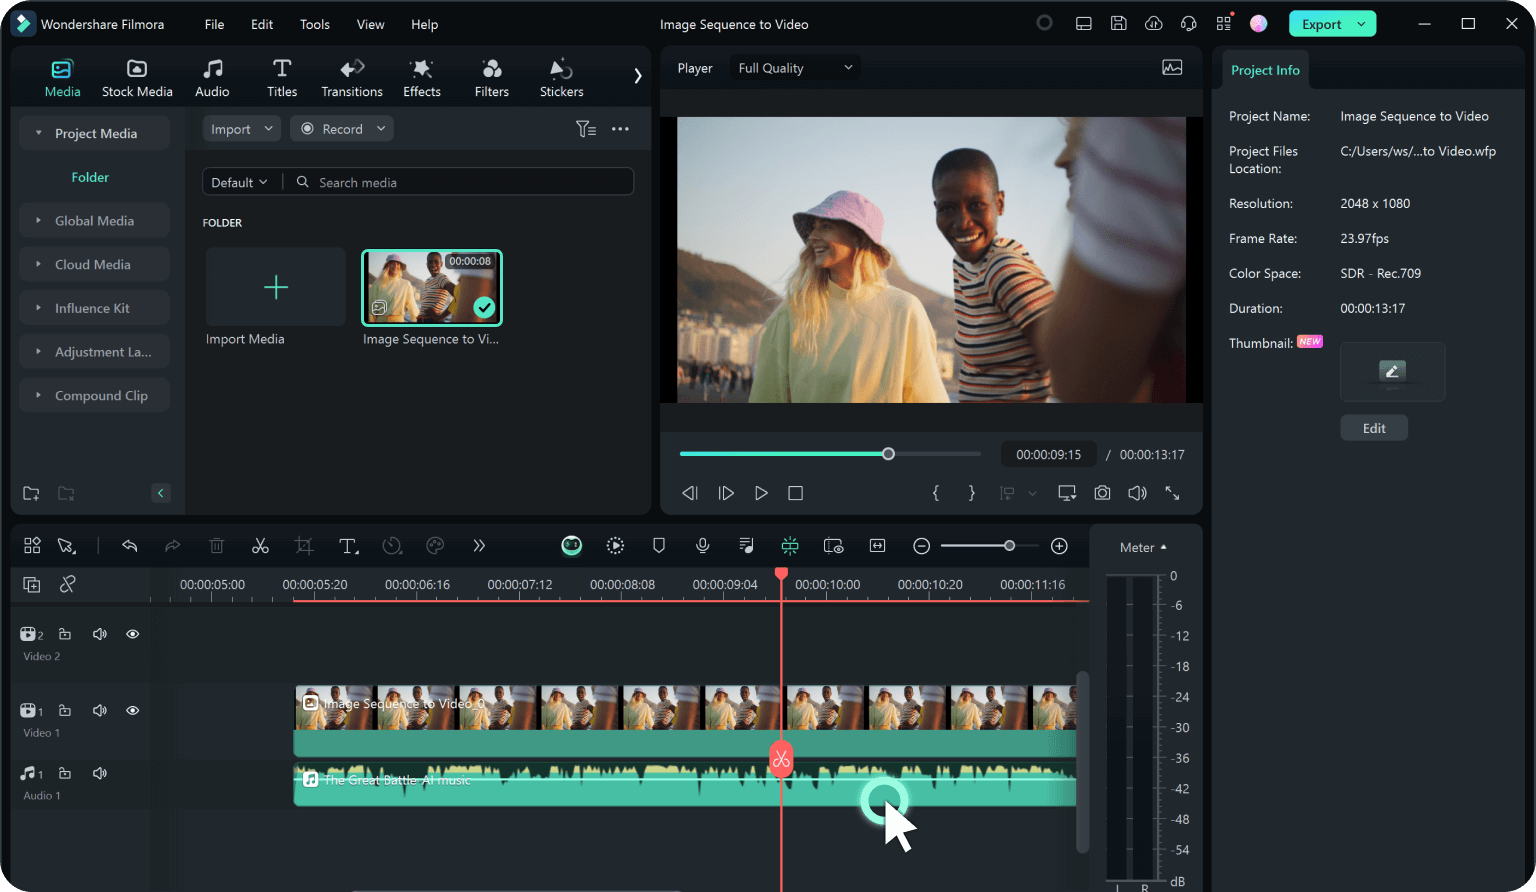
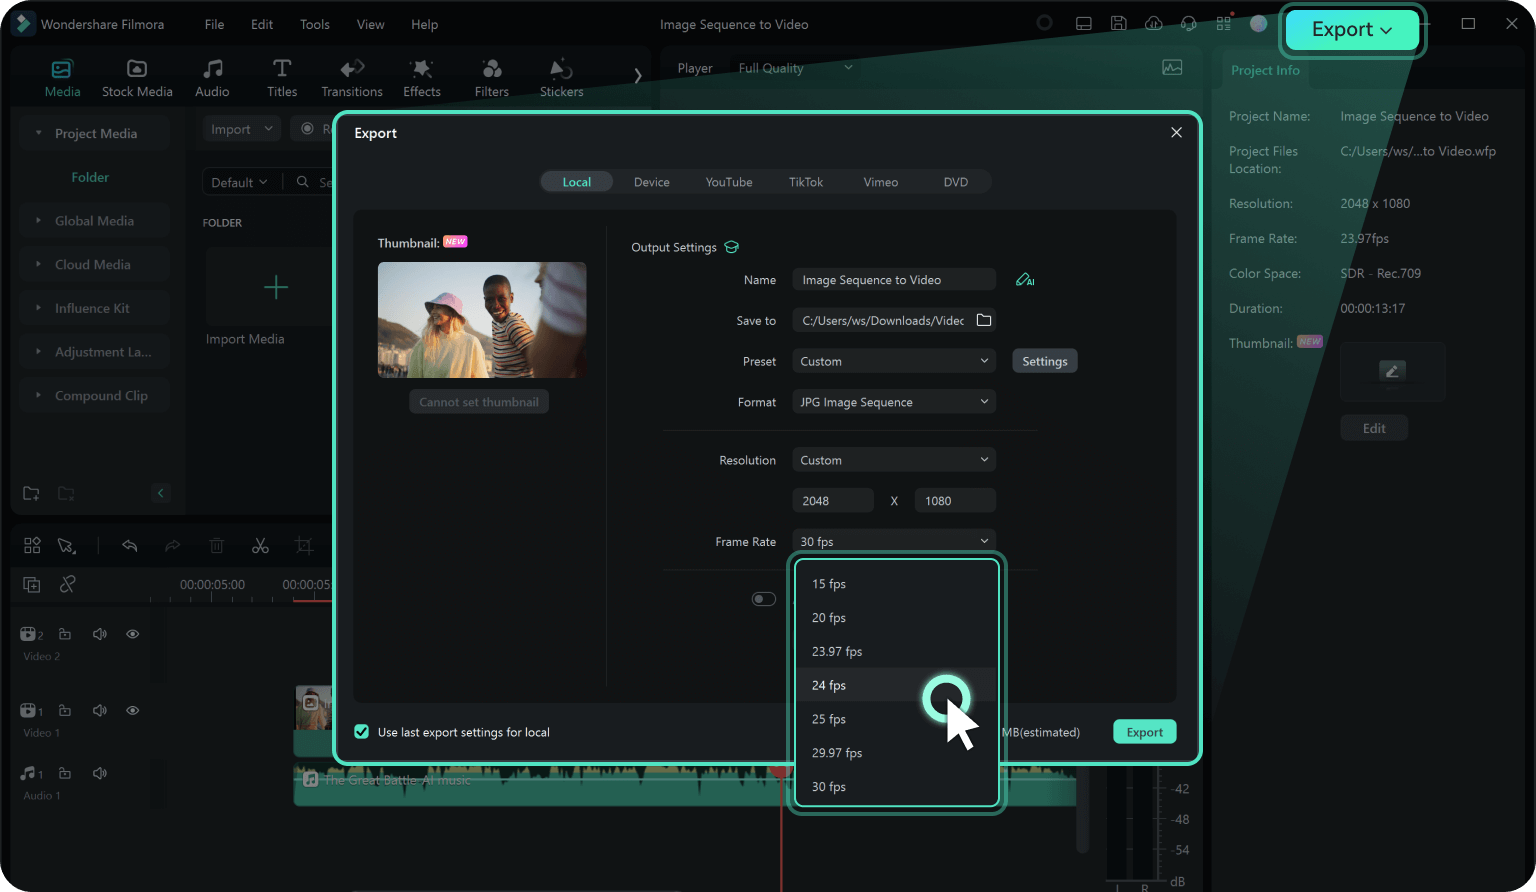
- Export Your Video: Click "Export," choose your video format and frame rate, set the output location, and click "Export" to create your video.
Note:
We recommend selecting Yes to create proxy files for a faster video editing experience.How to Select Multiple Files at Once
- Holding down the Ctrl key or the Shift key as you click a file.
- Ctrl allows you to select multiple files anywhere on your file list, not necessarily next to each other.
- Shift allows you to choose a group of files next to each other. Click one file, hold Shift and click the last file. All in-between files can be selected.
You only have to have the Ctrl or Shift key held down while clicking. Once you are finished selecting files, you can let go of the key, and the files you selected will remain selected. Note: If you're using Filmora 9 or 10, click here to learn how to import media clips.
Related Posts
Featured Articles
How to Record Voiceover with Adobe Premiere Pro [Updated]
Need to record and edit voiceover using a tool? Read this article and learn the details of recording voiceover Premiere Pro while exploring an alternative.
The 10 Best Video Editing Software to Edit Videos Like a Pro
This guide will help you learn more about the 10 best editing software tools for top-grade videography. Find out more about their features, compatibility, user ratings, strengths, weaknesses, and pricing plans.
How to Make a Reel on TikTok Easily
Are you interested in how to make a reel on TikTok? A well-crafted TikTok reel can grab attention within seconds. So, are you ready to create your engaging reel? This article will give you a simple guide to create a reel on TikTok easily.
Recommended User Guide
Import files from third-party cloud drives
Filmora now supports import video and media files from third-party cloud storage. This guide will show you how to use this new feature.
Import Subprojects on Windows
Learn how to efficiently manage multiple projects in Filmora for Mac. Import subprojects to reuse media, timelines, and templates, streamlining your editing workflow and enhancing collaboration.
