For the Best Results, Use the Latest Version.
-
Preparations
-
Account
-
Get Started & Basic Settings
-
Compatibility & Tech Specs
-
Performance Settings
-
-
Creating Projects
-
Creating New Projects
-
-
Importing & Recording
-
Video Editing for Windows
-
Basic Video Editing
- Enable/Disable Clip in Windows
- Magnetic Timeline for Windows
- Drawing Tools for Windows
- Dual Monitor Setup for Video Editing on Windows
- Select All Clips on Timeline for Windows
- Dual Monitor Setup for Video Editing on Mac
- Manage Timeline and Tracks on Windows
- Auto Ripple for Windows
- Split & trim video
- Crop & Pan & Zoom Video
- Compositing
- Change video playback speed
- Playing videos in reverse
- Mark In and Mark Out for Windows
- Markers for Windows
- Group editing
- Customizable Backgrounds for Videos and Images in Windows
- Video snapshot
- Using freeze frame
- Logo Reveal For Windows
- Apply auto enhance
- Applying drop shadow
- Adjustment layer for Windows
- Transforming
- Video Editing Ruler – Windows
-
Advanced Video Editing
-
AI-Powered Video Editing
- Smart Scene Cut for Windows
- Smart Short Clips for Windows
- AI Face Mosaic for Windows
- AI Video Enhancer
- AI Text-to-Video for Windows
- Planar Tracking
- AI Idea to Video for Windows
- Image to Video for Windows
- Instant Cutter Tool for Windows
- AI Extend
- AI Script to Video Guide for Windows
- AI Text-Based Editing for Windows
- AI Mate Editing for Windows
- Create with instant mode
- ChatGPT Plugin - AI Copywriting
- AI Smart Cutout
- Lens correction
- Auto reframe video
- AI Portrait Cutout
- Scene detection feature
- AI Smart Masking for Windows
- Make motion tracking
- Stabilization
- AI Video/Photo Object Remover for Windows
- AI Smart Search for Windows
- AI Skin Tone Protection for Windows
- AI Image for Windows
- Chroma key (green screen)
- Super Slow Motion with Optical Flow for Windows
- Video Denoise for Windows
-
-
Audio Editing for Windows
-
Basic Audio Editing
-
Advanced Audio Editing
-
AI-Powered Audio Editing
-
-
Text Editing for Windows
-
Basic Text Editing
-
Advanced Text Editing
-
AI-Powered Text Editing
-
-
Video Customizations
-
Video Effects
-
Audio Effects
-
Transitions
-
Stickers
-
Filters
-
Color Editing
-
Animations
-
Templates
-
Asset Center
-
-
Exporting & Share & Cloud Backup
Add and Modify Audio on Windows
Learn how to add, adjust, remove, and favorite audio.
1. Types of Audio
Filmora has 1000+ audio resources to help you edit your videos better.
Where to Find Audio?
Double-click on Filmora's desktop icon, and once the welcome window pops up on the screen, click on the New Project option.
In the upper corner of the editor's main window, you can see a number of tabs, like Audio, Titles, or Effects. Click on the Audio tab.
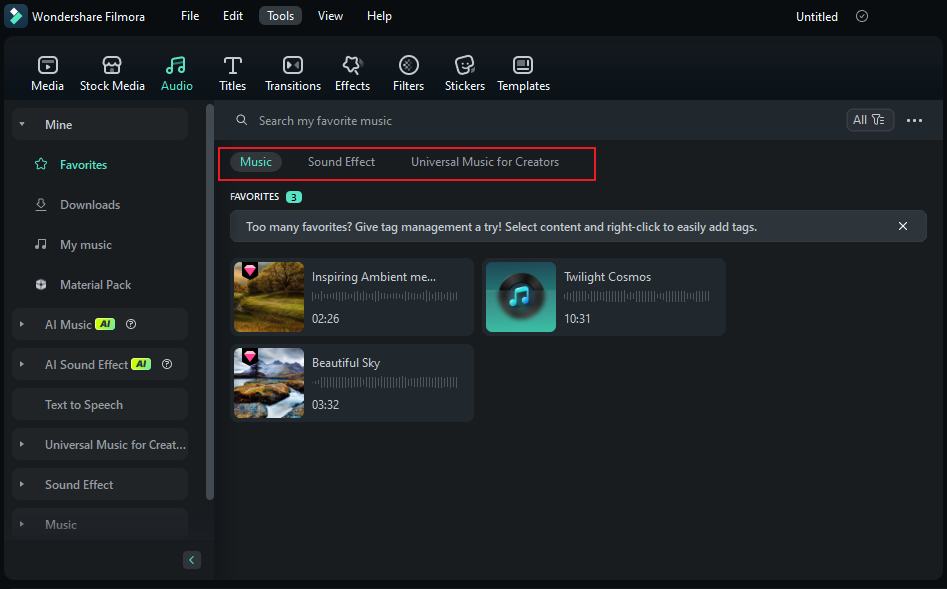
Types of Filmora Audio
- Exclusive Music
- Sound Effect
- Intro
- Happy
- Young & Bright
- Tender & Sentimental
- Rock
2. Add Audio
Adding audio can drastically change the tone of your video. Filmora provides a royalty-free music library you can access within the program or import your own music.
Here are two ways to add audio to your videos:
Note:
The music and sound effects found within Filmora are for personal and NON-COMMERCIAL use only. Learn More1 Import Audio from your Computer
- Select an audio file stored on your PC and bring it into Filmora.
- Click the "Import Media" button above the Media Library panel, then browse the audio files on your computer.
- When you find the song or other audio file you want, please select it and import it into the Media Library.
- You can also drag and drop audio files into the Media Library.
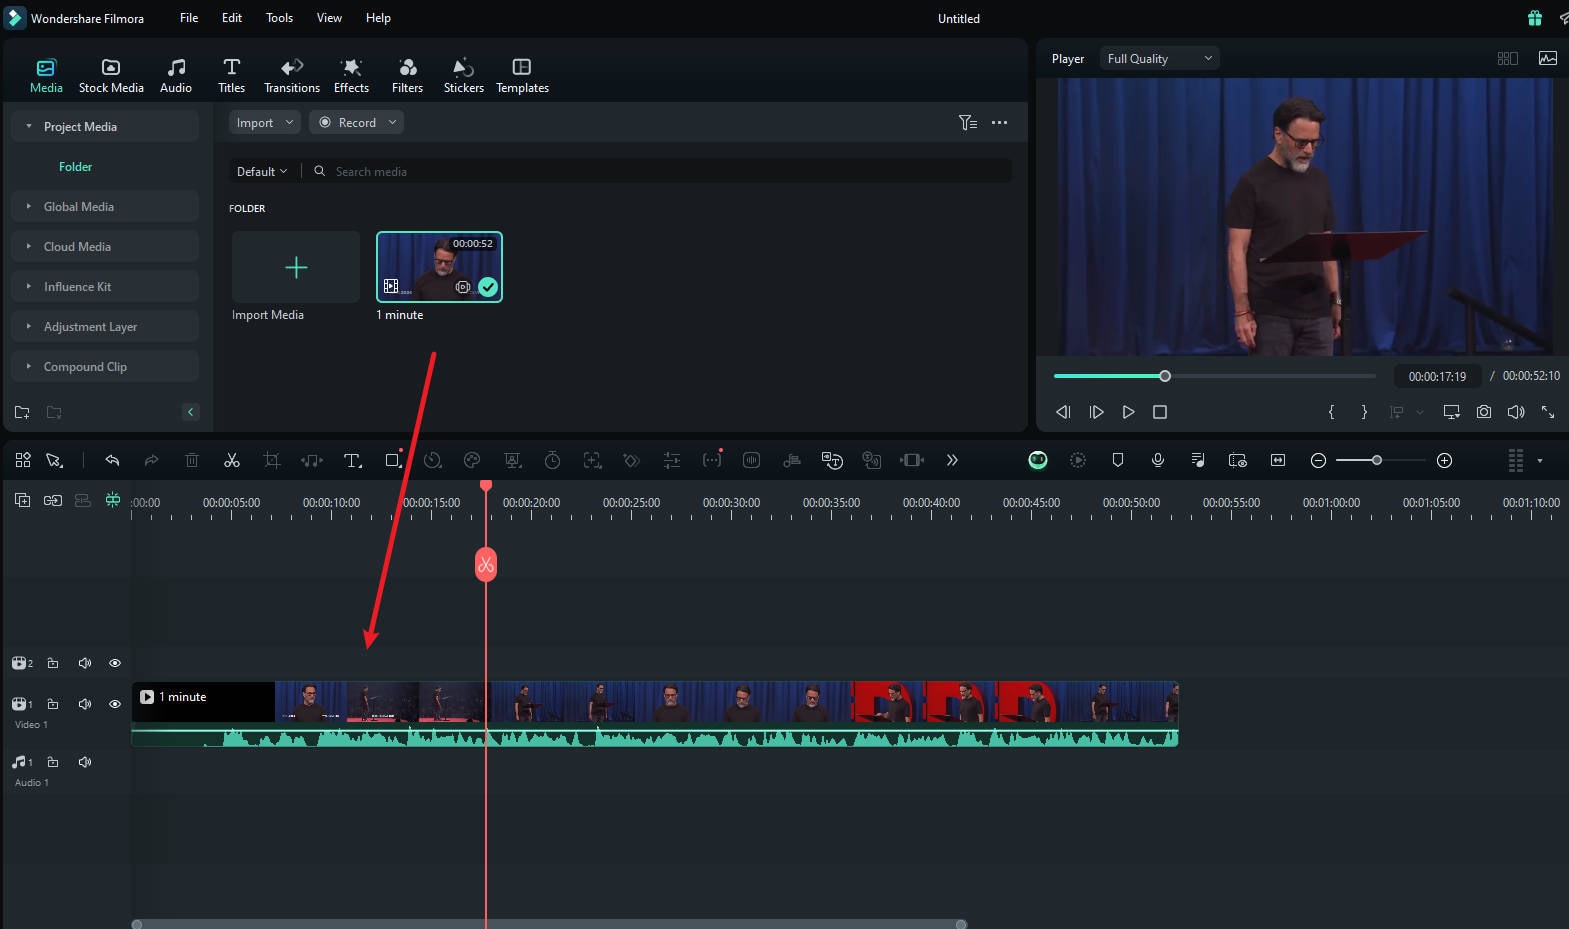
- From there, you can drag and drop your audio into an Audio Track in the timeline.
2 Using Audio from Filmora
The audio library has 200+ songs divided into five categories: YOUNG & BRIGHT, TENDER & SENTIMENTAL, ROCK, FOLK, and ELECTRONIC. There are also sound effects available under SOUND EFFECT. Explore more audio effects to add fun and variety to your video, and turn your audio into a robot, child, diving sounds etc., with the new audio effects.
Here are still two ways you can add music from the audio library to your video:
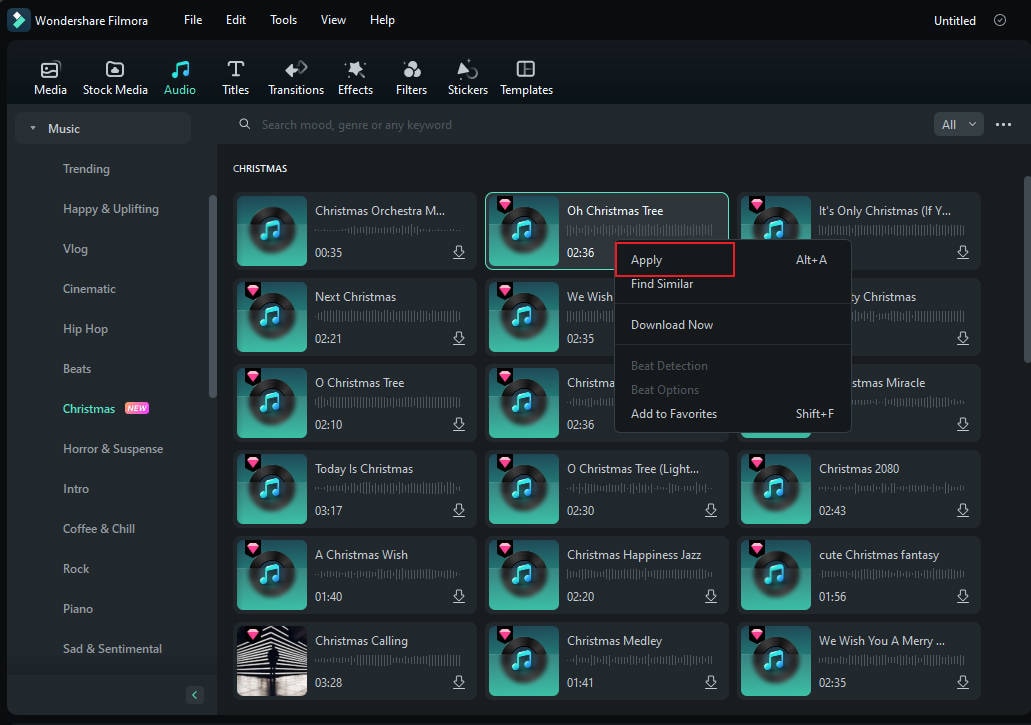
- Select audio, right-click, and choose to Apply
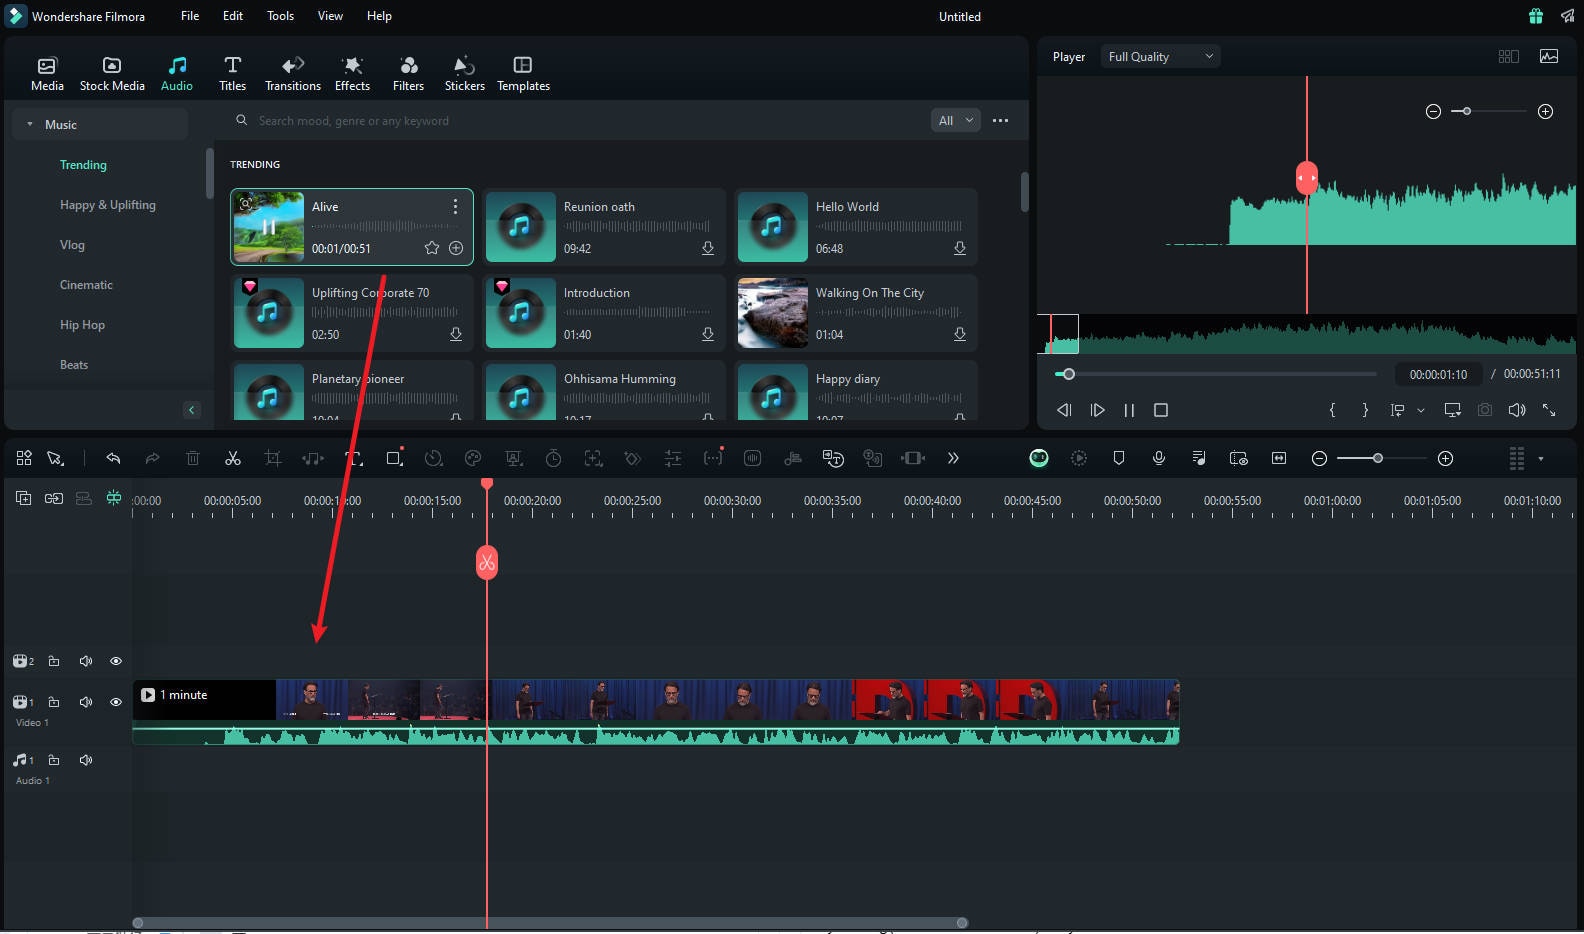
- Drag and drop the audio into the Timeline.
Note:
Filmora Version 15 introduces an upgraded 32-bit Float audio processing pipeline. This enhancement ensures lossless import and editing of 32-bit Float audio, preserving original quality without downsampling, and is the default for new projects. For projects requiring compatibility with Filmora Version 14 and earlier, a "Save as legacy Project" entry under the File menu offers both "Save Project As" and "Archive Project" options. When utilizing these options, the audio pipeline automatically converts to 16-bit, ensuring seamless backward compatibility.3. Adjust Audio
Once you've added your music, double-click on the music in the timeline to bring up the Audio window. In this window, you can adjust the volume and pitch of the music. You can also make audio keyframing(fade in and fade out) for your music.
Enable the Solo Feature and Adjust Audio
After multiple audio tracks are successfully imported to the timeline, click on your desired audio track and press the "Enable Solo" icon on the left side of the track. This will disable the audio of other tracks on the timeline automatically. You can access the "Audio" panel and adjust parameters like "Volume," "Sound Balance," and "Fade."
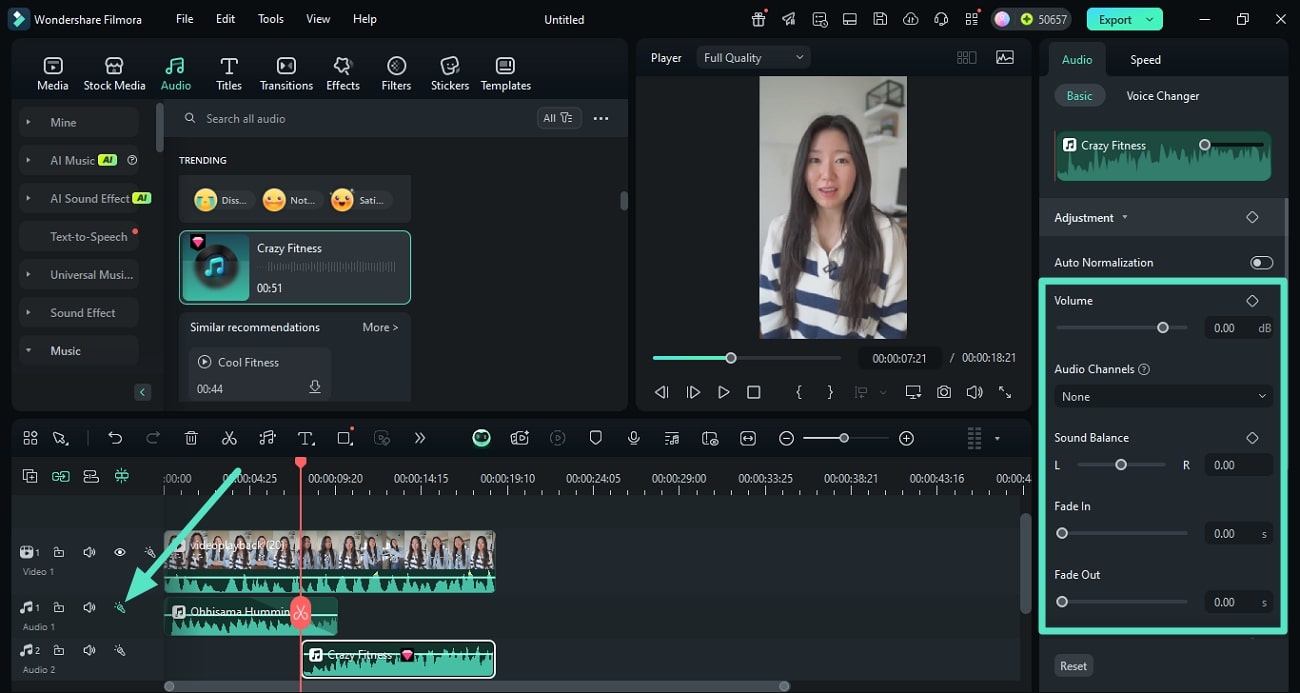
Note:
The Solo Track feature by Filmora allows users to control and isolate audio tracks on the timeline. It lets users play the specific track in isolation for precise adjustment while getting the option to mute other tracks. Moreover, the utility ensures enhanced editing control by offering seamless synchronization between audio and video.4. Remove Audio
Select the audio you want to remove from the timeline and hit Delete on your keyboard.
Or right-click on the audio in the timeline and select DELETE from the menu.
5. Favorite Audio
- Right-click on the audio in the Audio menu and choose to Add to Favorites.
- Or choose the audio you like. You will see a "heart" shape on the top right; click the "heart" in red.
- You can check your favorite audio on the left - Favorites.
Related Posts
Featured Articles
Beginner’s Guide to Before and After Video Transitions
If you want to know how to make a before-and-after transition video, this guide covers everything from editing steps to useful tips
Latest | Best 5 Screen Recorders for iPhone
Discover the top 5 screen recorders for your iPhone and easily capture gameplay, tutorials, or funny videos! Get ready to see what we have prepared for your Apple device!
Auto Ripple Filmora: A Step-By-Step Guide for Quality Videos
Learn how to perform Auto Ripple in Filmora to get high-quality videos. Keep reading to save time while editing with Filmora's unique features.
Recommended User Guide
Detach audio
This is a guide teaching you to detach audio in Filmora.
Mute Audio
This is a guide telling you to mute audio in Filmora.
Trim audio
Learn how to trim audio in Filmora.
