For the Best Results, Use the Latest Version.
-
Preparations
-
Account
-
Get Started & Basic Settings
-
Compatibility & Tech Specs
-
Performance Settings
-
-
Creating Projects
-
Creating New Projects
-
-
Importing & Recording
-
Video Editing for Windows
-
Basic Video Editing
- Enable/Disable Clip in Windows
- Magnetic Timeline for Windows
- Dual Monitor Setup for Video Editing on Windows
- Select All Clips on Timeline for Windows
- Manage Timeline and Tracks on Windows
- Auto Ripple for Windows
- Split & trim video
- Crop & Pan & Zoom Video in Filmora for Windows
- Compositing
- Change Video Speed on Windows
- Playing videos in reverse
- Mark In and Mark Out for Windows
- Markers for Windows
- Group editing
- Customizable Backgrounds for Videos and Images in Windows
- Video snapshot
- Using Freeze Frame in Filmora for Windows
- Logo Reveal For Windows
- Auto Enhance in Filmora for Windows
- Applying drop shadow
- Adjustment layer for Windows
- Apply Transforming for Windows
- Video Editing Ruler – Windows
-
Advanced Video Editing
- Drawing Tools for Windows | Filmora Guide
- Create Multi-Camera Clip in Filmora for Windows
- Compound Clip for Windows
- Multi-Clip Editing for Windows
- Filmora Motion Blur | Windows
- Video Chapters in Filmora on Windows
- Filmora Flicker Removal Guide | Windows
- Apply mask to video
- Creating a PIP Effect for Windows
- Keyframe Graph Editor for Windows
- Add animation keyframing for Windows
- Keyframe Path Curve for Windows
-
AI-Powered Video Editing
- Smart Scene Cut for Windows
- Smart Short Clips for Windows
- AI Face Mosaic for Windows
- Filmora AI Eye Contact- Windows
- AI Video Enhancer for Windows
- AI Text-to-Video for Windows
- Planar Tracking for Windows
- AI Idea to Video for Windows
- Filmora Image to Video for Windows
- Filmora Image to Prompt for Windows
- Instant Cutter Tool for Windows
- AI Extend
- Filmora AI Relight - Windows
- Filmora AI Image Enhancer Guide - Windows
- AI Script to Video Guide for Windows
- AI Text-Based Editing for Windows
- AI Mate Editing for Windows
- Instant Mode in Filmora
- ChatGPT Plugin - AI Copywriting
- AI Smart Cutout for Windows
- Lens correction on Windows
- Auto Reframe Video for Windows
- AI Portrait Cutout
- Scene detection feature
- AI Smart Masking for Windows
- Motion Tracking on Windows
- Video Stabilization for Windows
- AI Video/Photo Object Remover for Windows
- AI Smart Search for Windows
- AI Skin Tone Protection for Windows
- AI Image for Windows
- Chroma key (green screen)
- Super Slow Motion with Optical Flow for Windows
- Video Denoise for Windows
-
-
Audio Editing for Windows
-
Basic Audio Editing
-
Advanced Audio Editing
-
AI-Powered Audio Editing
- Auto synchronization
- AI Sound Effects in Filmora for Windows
- Smart BGM Generation on Windows
- AI Voice Enhancer in Filmora
- AI Voice Cloning in Wondershare Filmora
- AI Music Generator for Windows
- Audio To Video
- AI Vocal Remover for Windows
- AI Auto Beat Sync for Windows
- AI Audio Stretch for Windows
- AI Audio Denoise for Windows
- Silence Detection on Windows
-
-
Text Editing for Windows
-
Basic Text Editing
-
Advanced Text Editing
-
AI-Powered Text Editing
-
-
Video Customizations
-
Video Effects
-
Audio Effects
-
Transitions
-
Stickers
-
Filters
-
Color Editing
-
Animations
-
Templates
-
Asset Center
-
-
Exporting & Share & Cloud Backup
AI Text-to-Video for Windows
Filmora for Windows offers a dedicated Text-to-Video feature, enabling you to convert written scripts and prompts into engaging videos. You get the ability to input text and select the video language according to your preferences. Moreover, you also get the ability to select the aspect ratio and duration for the video to be generated. The negative prompt feature specifies things you do not want to include in your generated video.
The platform offers 3 modes of video generation using advanced AI. The normal mode 2.0 creates videos across the prompts and other settings according to your preferences. Whereas the Google Veo 3.1 mode offers high-quality video generation with relevant background music added. The Sora 2 mode focuses on producing cinematic, story-driven videos with enhanced motion, detailed scenes, and stronger character consistency.
Read the steps mentioned below to learn how to use different modes of Filmora AI Text to Video on your Windows:
Mode 1. Normal Mode 2.0
Step 1. Start By Opting For Text To Video
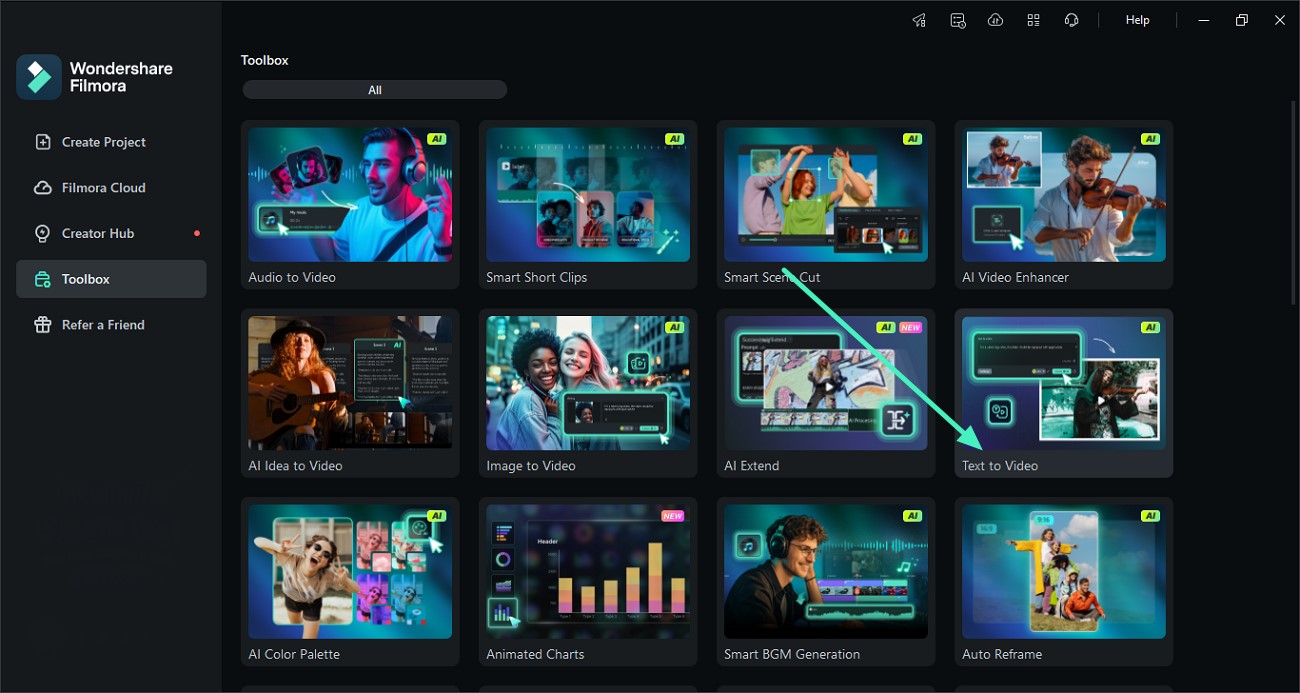
After launching the tool on your Windows, locate and press the Text to Video feature from the homepage.
Step 2. Choose the Normal Mode 2.0 and Enter Prompt
Expand the Normal Mode 2.0 drop-down menu within the Text-to-Video interface and input your prompt in the text field, mentioning the specifications.
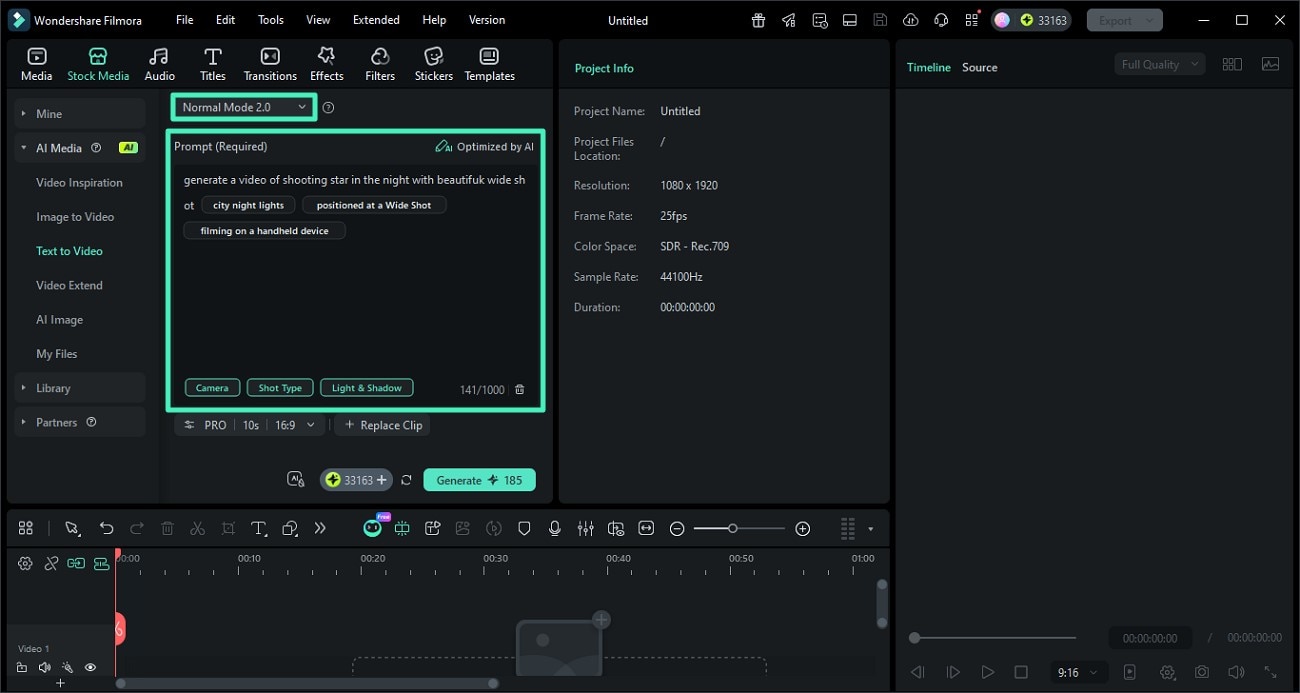
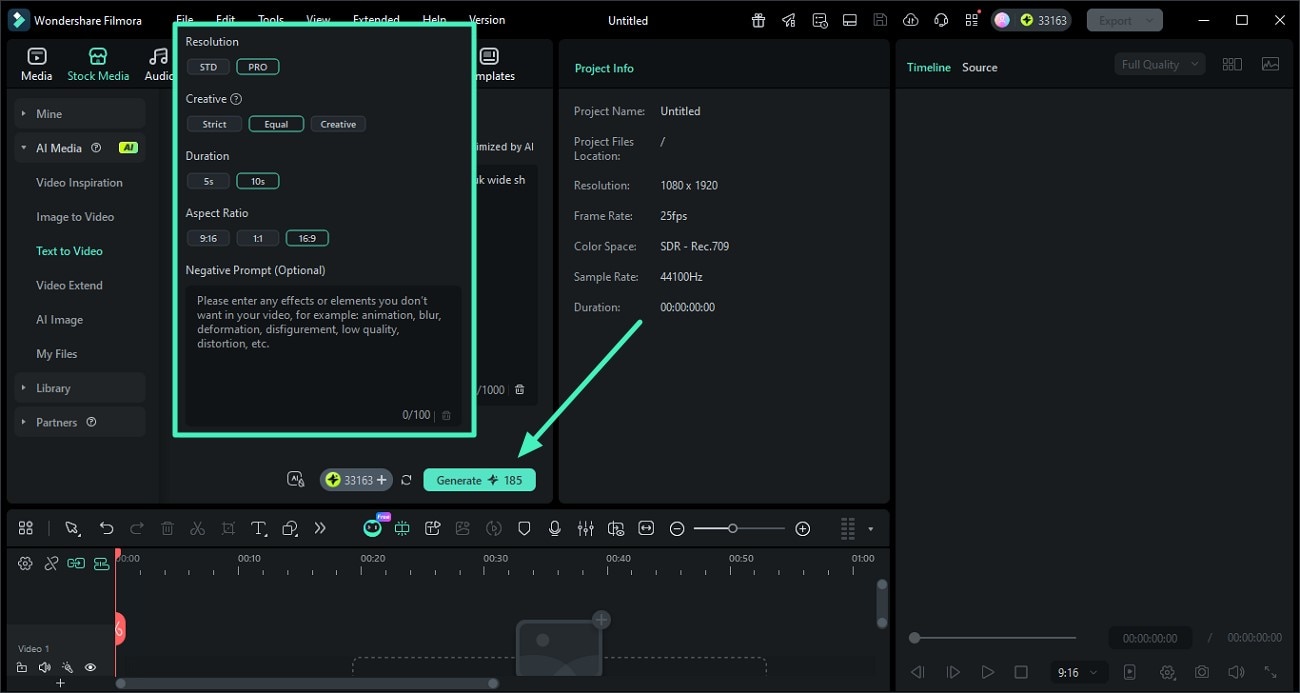
Step 3. Configure Other Settings and Generate
Moving forward, expand the Drop-down icon and type the negative prompt to avoid things you don’t want to include. Configure the video settings, such as Resolution, Duration, and Aspect Ratio, from the options provided. Finally, hit the Generate button to execute the video creation process.
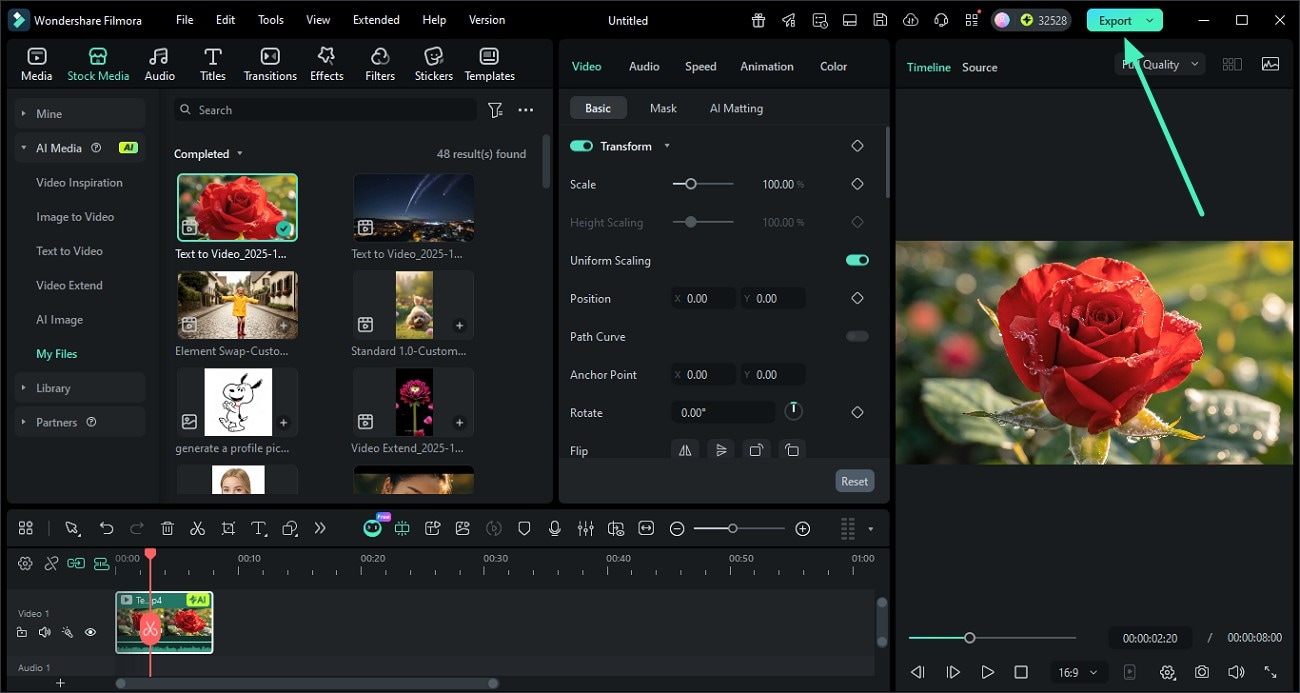
Step 4. Preview the Generated Video and Export
Once the video is generated as per your given prompts, drag it to the timeline and preview it by tapping on the Play button. Once you are satisfied with the results, press the Export button to save the video to your computer.

📌Note:
To ensure transparency and compliance when using Filmora's AI features, please be aware of the following:
- The software interface will clearly identify all content created by AI.
- For traceability, exported or downloaded AI-generated assets may include a visible or invisible watermark.
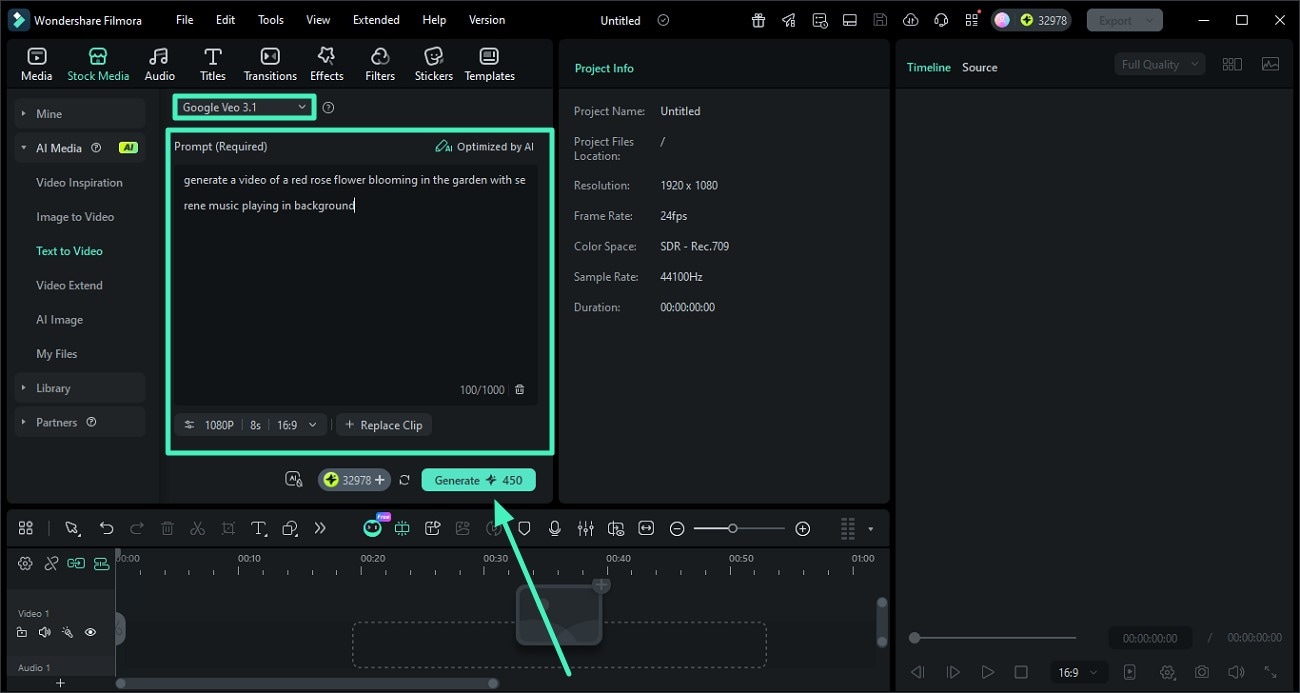
Mode 2. Google Veo 3.1
Step 1. Choose the Google Veo 3.1 Mode
After choosing AI Text to Video from the homepage of the tool, expand the Google Veo 3.1 mode using the drop-down menu in the following interface. Input the text prompt and adjust the settings (like Resoultion, Duration and Aspect Ratio) from the options. Next, hit the Generate button to execute the video generation process across the input text provided.
Step 2. Play The Video and Save Once Satisfied
Once the video is generated, review and edit it in the editing interface of Filmora. Finally, hit the Export button to save the results.
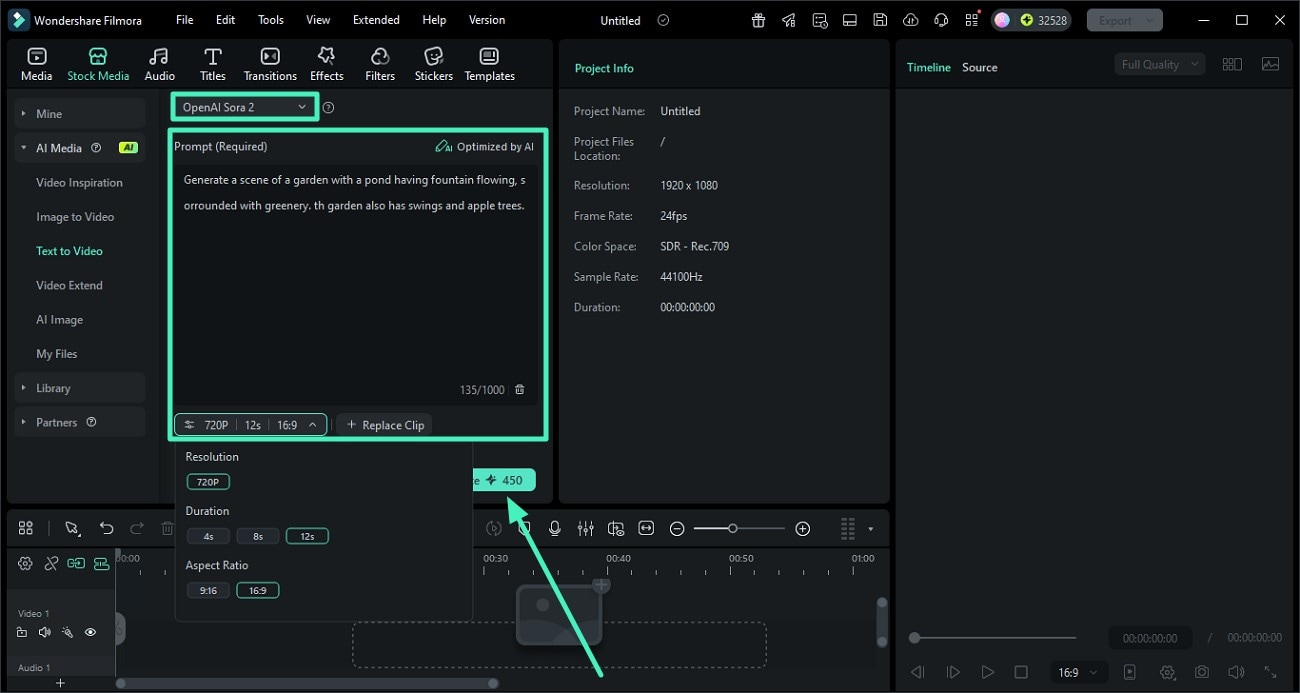
Mode 3. Open AI Sora 2
Step 1. Input Desired Prompt
Once you have selected the Text to Video function, head to the mode dropdown menu and select OpenAI Sora 2. Now, input your requirement for the video in the text field and configure settings. When done, hit the Generate button to execute the process.
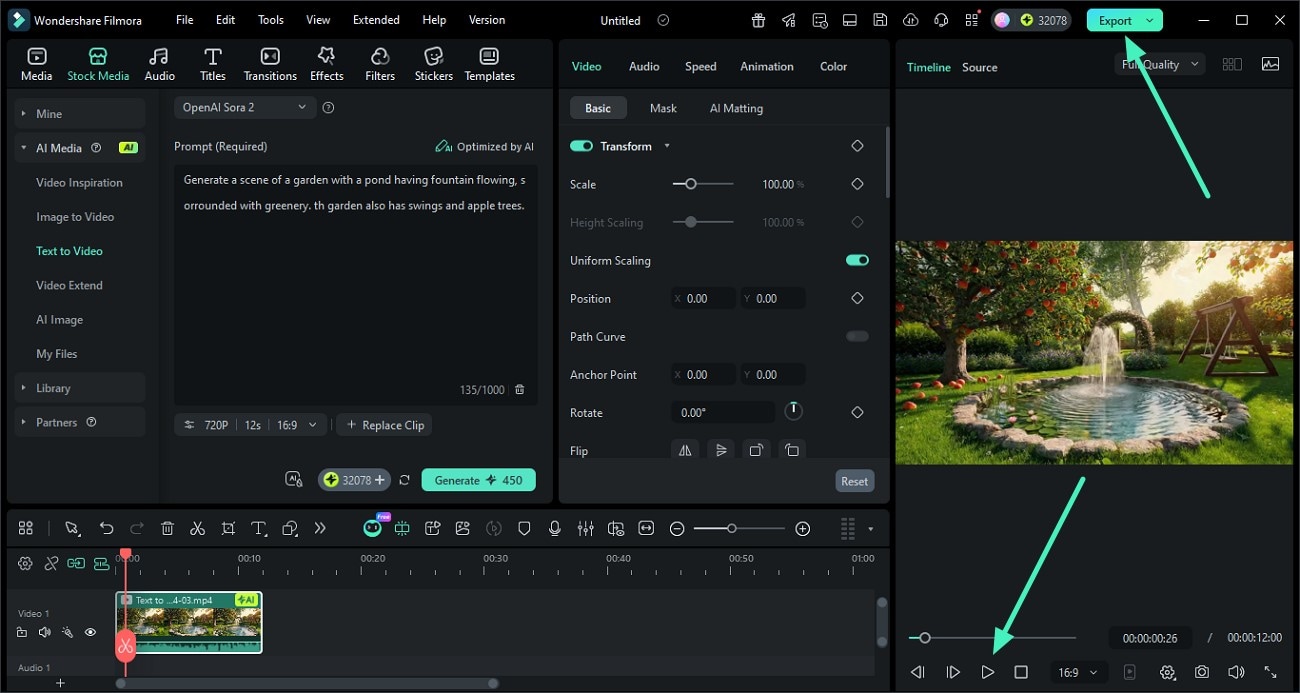
Step 2. Preview the Results and Save Video
When the video is successfully generated, click the Play button to preview the generated video. When you are satisfied with the results, press Export to save the final file.
Related Posts
Featured Articles
Best Frame Rate for 4K Video: Easy Breakdown for Creators
Sharp resolution means nothing without the right frame rate for 4K video. Our guide makes it easy to pick the best fps so your footage feels flawless.
Top-Rated Solutions | How to Record Switch for More Than 30 Seconds
Wondering how to record your Nintendo Switch for more than 30 seconds? Discover easy and effective methods for high-quality Switch recording.
Full Review of Cinch Audio Recorder
Explore a comprehensive review of the Cinch Audio Recorder, highlighting its features and limitations. Find out the best record and edit audio software in the market.
Recommended User Guide
Auto Reframe Video for Windows
This is a guide on Filmora auto reframing.
AI Smart Cutout for Windows
This guide helps you remove the background of an image or a video. The AI Smart Cutout is good at cutting an image out and performs well in identifying needed sections in a continuous clip.
AI Smart Masking for Windows
Editing video elements independently is an important part of video creation, and Filmora's masking provides multiple options.
