For the Best Results, Use the Latest Version.
-
Preparations
-
Account
-
Get Started & Basic Settings
-
Compatibility & Tech Specs
-
Performance Settings
-
-
Creating Projects
-
Creating New Projects
-
-
Importing & Recording
-
Video Editing for Windows
-
Basic Video Editing
- Enable/Disable Clip in Windows
- Magnetic Timeline for Windows
- Dual Monitor Setup for Video Editing on Windows
- Select All Clips on Timeline for Windows
- Manage Timeline and Tracks on Windows
- Auto Ripple for Windows
- Split & trim video
- Crop & Pan & Zoom Video
- Compositing
- Change Video Speed on Windows
- Playing videos in reverse
- Mark In and Mark Out for Windows
- Markers for Windows
- Group editing
- Customizable Backgrounds for Videos and Images in Windows
- Video snapshot
- Using freeze frame
- Logo Reveal For Windows
- Apply auto enhance
- Applying drop shadow
- Adjustment layer for Windows
- Transforming
- Video Editing Ruler – Windows
-
Advanced Video Editing
- Drawing Tools for Windows | Filmora Guide
- Create Multi-Camera Clip
- Compound Clip for Windows
- Multi-Clip Editing for Windows
- Filmora Motion Blur | Windows
- Filmora Flicker Removal Guide | Windows
- Apply mask to video
- Creating a PIP effect
- Keyframe Graph Editor for Windows
- Add animation keyframing for Windows
- Keyframe Path Curve for Windows
-
AI-Powered Video Editing
- Smart Scene Cut for Windows
- Smart Short Clips for Windows
- AI Face Mosaic for Windows
- Filmora AI Eye Contact- Windows
- AI Video Enhancer for Windows
- AI Text-to-Video for Windows
- Planar Tracking for Windows
- AI Idea to Video for Windows
- Filmora Image to Video for Windows
- Filmora Image to Prompt for Windows
- Instant Cutter Tool for Windows
- AI Extend
- Filmora AI Relight - Windows
- Filmora AI Image Enhancer Guide - Windows
- AI Script to Video Guide for Windows
- AI Text-Based Editing for Windows
- AI Mate Editing for Windows
- Create with instant mode
- ChatGPT Plugin - AI Copywriting
- AI Smart Cutout
- Lens correction on Windows
- Auto reframe video
- AI Portrait Cutout
- Scene detection feature
- AI Smart Masking for Windows
- Make motion tracking
- Video Stabilization for Windows
- AI Video/Photo Object Remover for Windows
- AI Smart Search for Windows
- AI Skin Tone Protection for Windows
- AI Image for Windows
- Chroma key (green screen)
- Super Slow Motion with Optical Flow for Windows
- Video Denoise for Windows
-
-
Audio Editing for Windows
-
Basic Audio Editing
-
Advanced Audio Editing
-
AI-Powered Audio Editing
-
-
Text Editing for Windows
-
Basic Text Editing
-
Advanced Text Editing
-
AI-Powered Text Editing
-
-
Video Customizations
-
Video Effects
-
Audio Effects
-
Transitions
-
Stickers
-
Filters
-
Color Editing
-
Animations
-
Templates
-
Asset Center
-
-
Exporting & Share & Cloud Backup
Filmora Image to Video for Windows
Filmora's Image to Video feature lets you effortlessly convert your style photos into captivating video content. With a wide selection of creative templates, you can bring static images to life in just a few clicks. Enhanced with the newly introduced Veo 3 and Sora 2 models, Filmora takes image-to-video generation to the next level.
It offers smoother transitions, realistic animation, and advanced customization for visually stunning results. Veo 3 is the latest AI video generation model introduced by Google to convert images and text prompts into high-quality videos with native audio integration. The Sora 2 model adds even more realism and consistency across complex scenes.
📌Note:
The V3.1 and Sora2 models used for Filmora's image-to-video features will be available after version 15.1.0.
Entry 1. Access the Video Generation Section
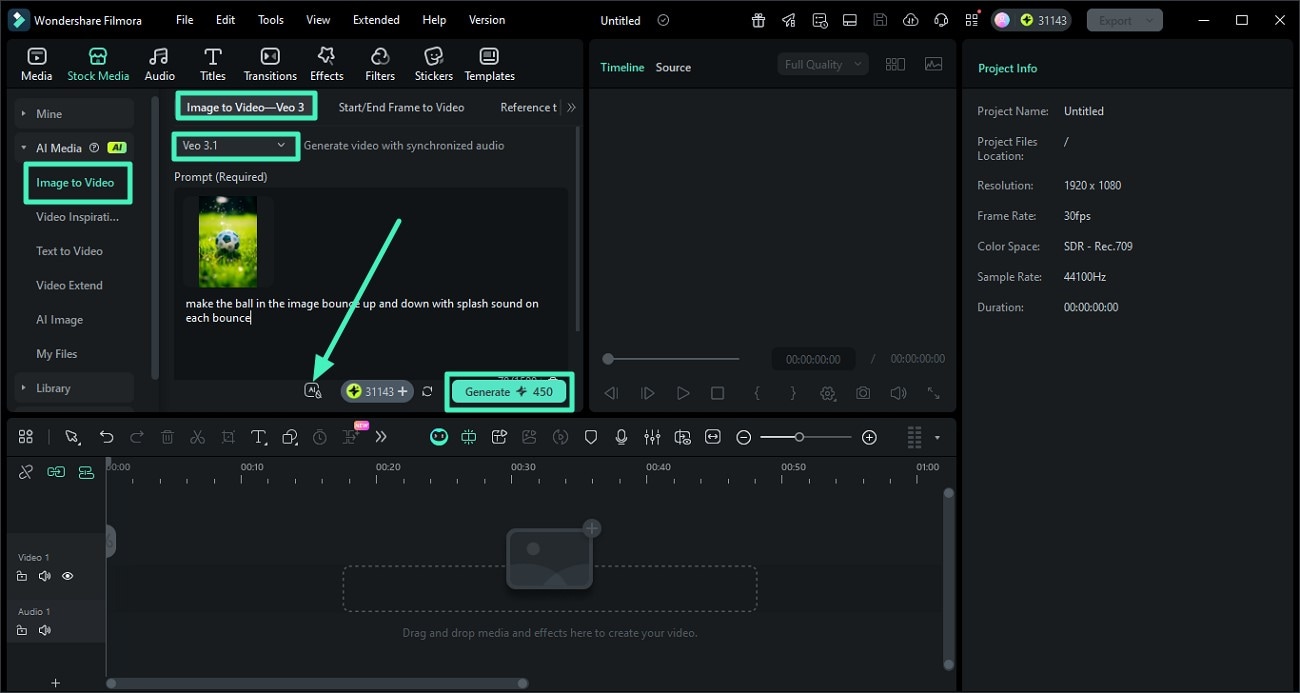
Mode 1. Image to Video - Veo 3
Step 1. Select Image to Video - Veo 3
Enter Filmora's main interface, access the Image to Video - Veo 3 option, and insert your reference image. Enter the text prompt, select Veo 3.1 quality, define Resolution and Video Length, agree to the AIGC Usage Agreement, and press Generate.
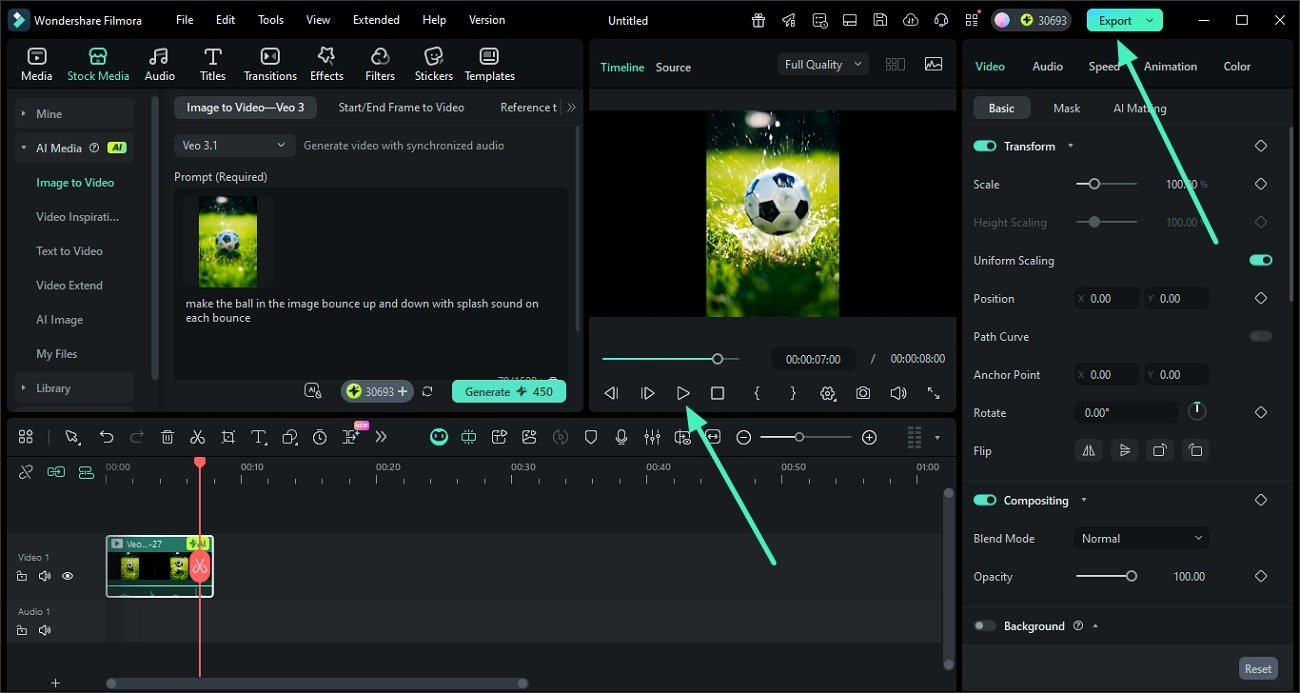
Step 2. Review the Generated Video and Export
The video with audio will be generated. Access it in My Files, add to the timeline to preview, and save the results by clicking Export.
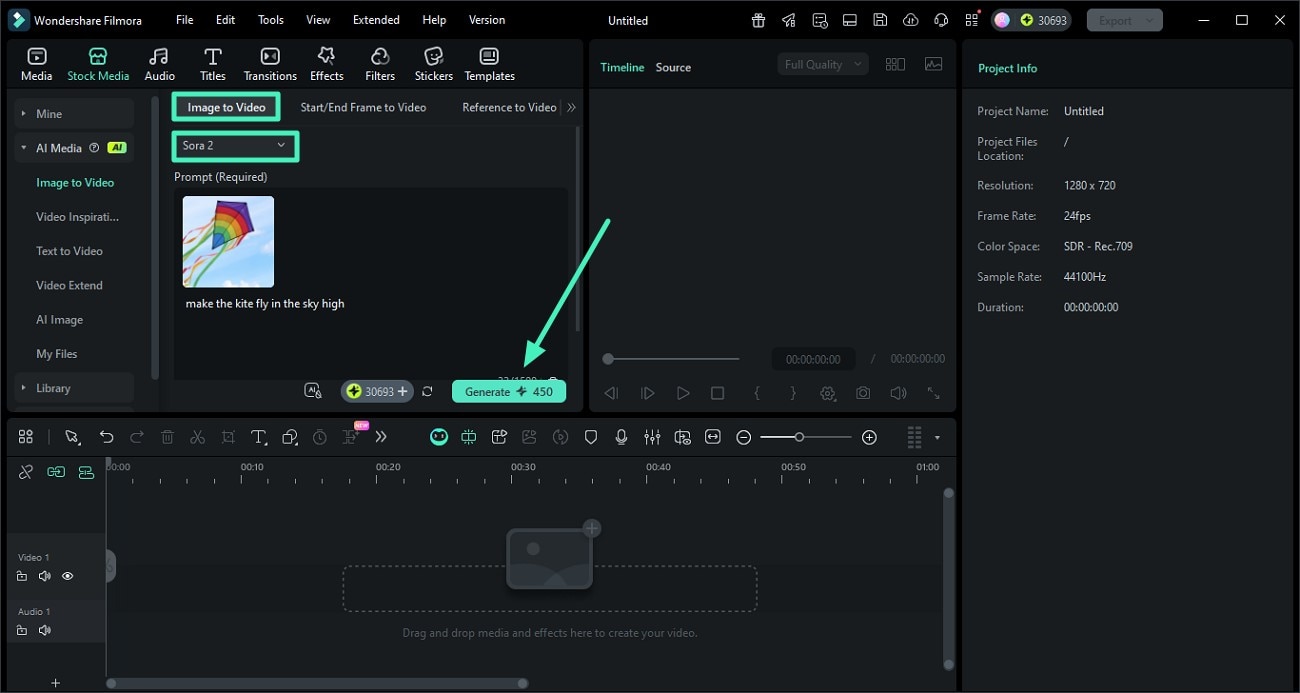
Mode 2. Image to Video - Sora 2
Step 1. Choose Sora 2 Model
Expand the mode dropdown menu and choose Sora 2. Import the picture, add your text prompt, and hit Generate.
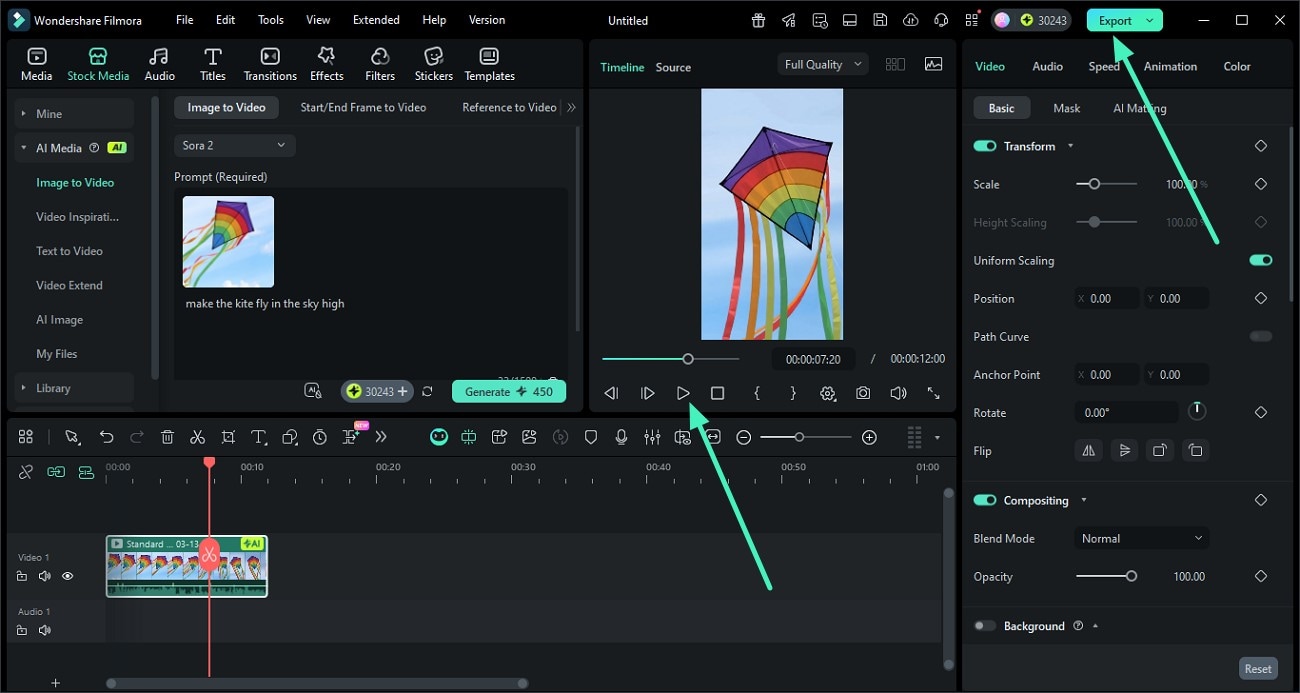
Step 2. Preview and Modify Video
Edit the generated video using Filmora's functions and hit Export to save.
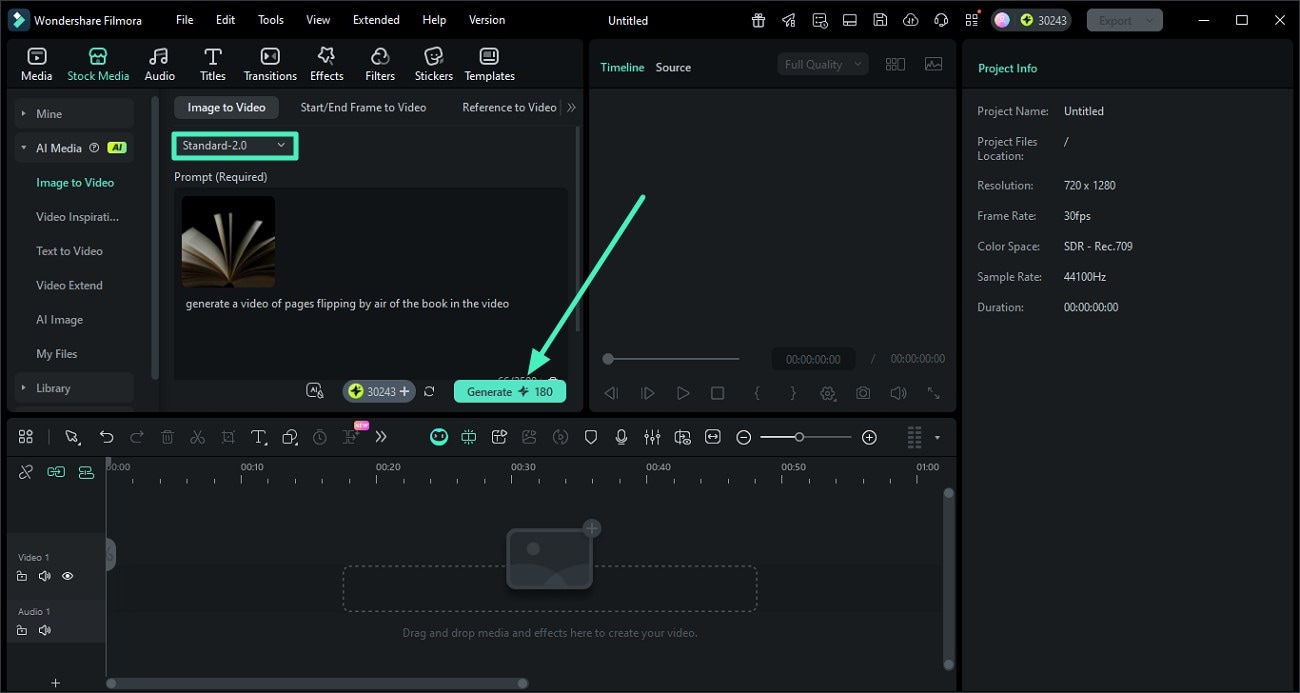
Mode 3. Image to Video - Standard 2.0
Step 1. Access Standard 2.0 Mode
Access the Image-to-Video feature, choose Standard 2.0 from the dropdown, input your image and text requirements, then hit Generate.
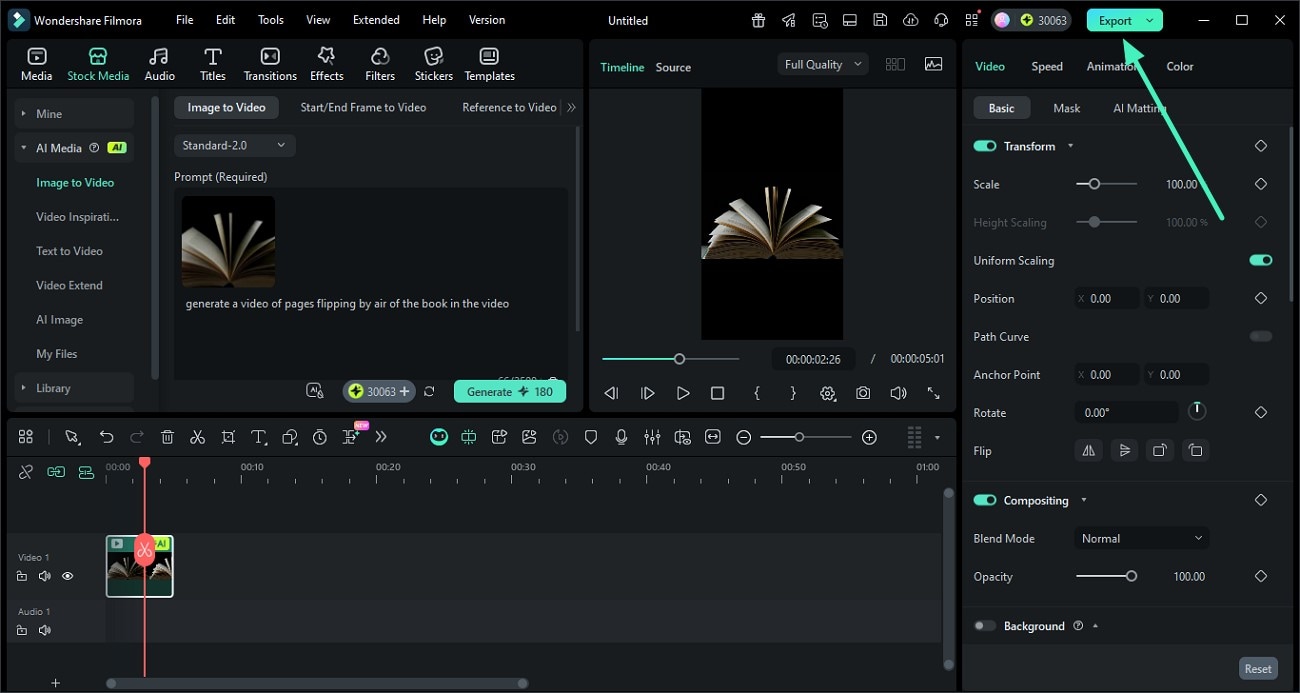
Step 2. Edit the Video and Export
Preview or edit the video, then press Export to save.
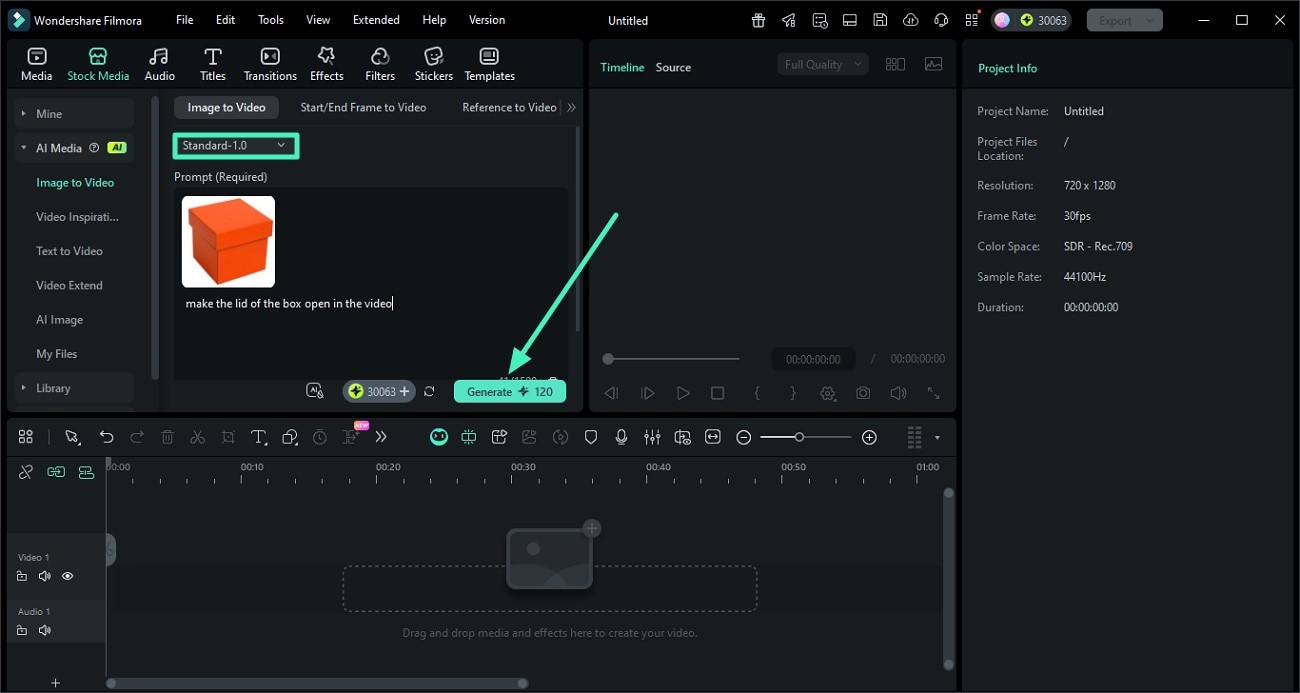
Mode 4. Image to Video - Standard 1.0
Step 1. Begin by Accessing Standard 1.0 Mode
Access the Image-to-Video feature, choose Standard 1.0, add your image and text, choose Duration and Resolution, then hit Generate.
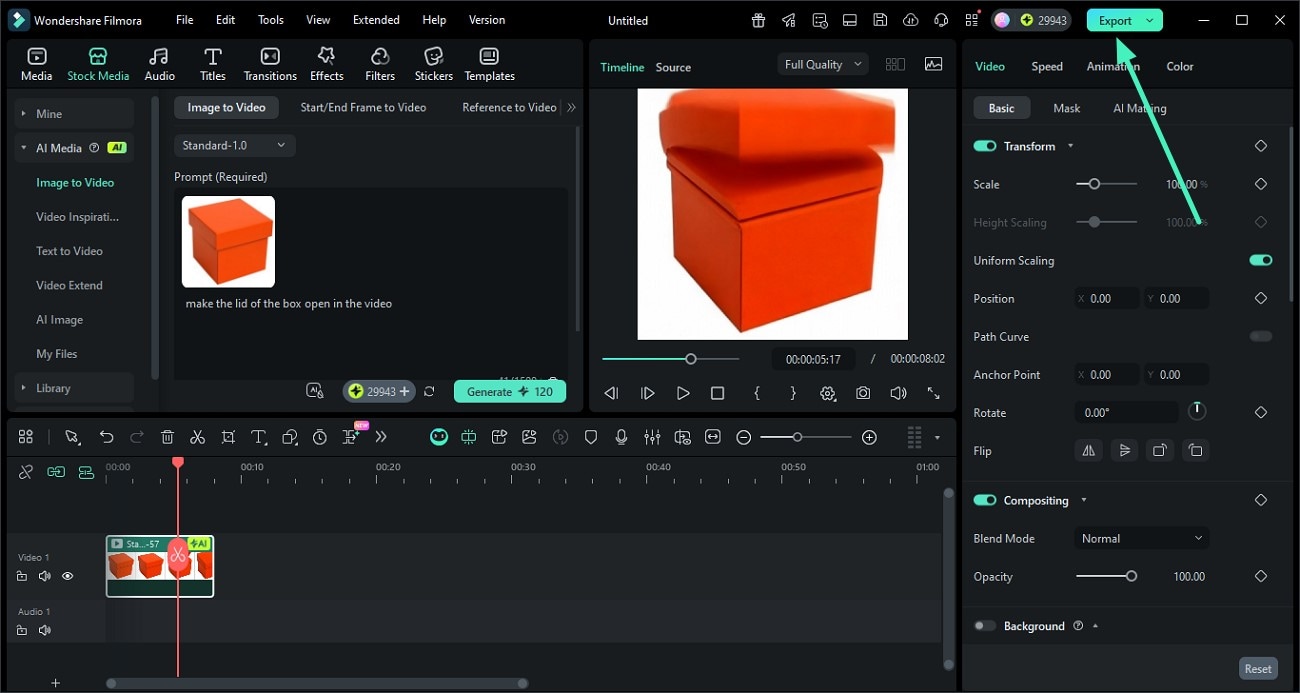
Step 2. Modify the Video and Export
Modify the video using Filmora's functions, then press Export to save.
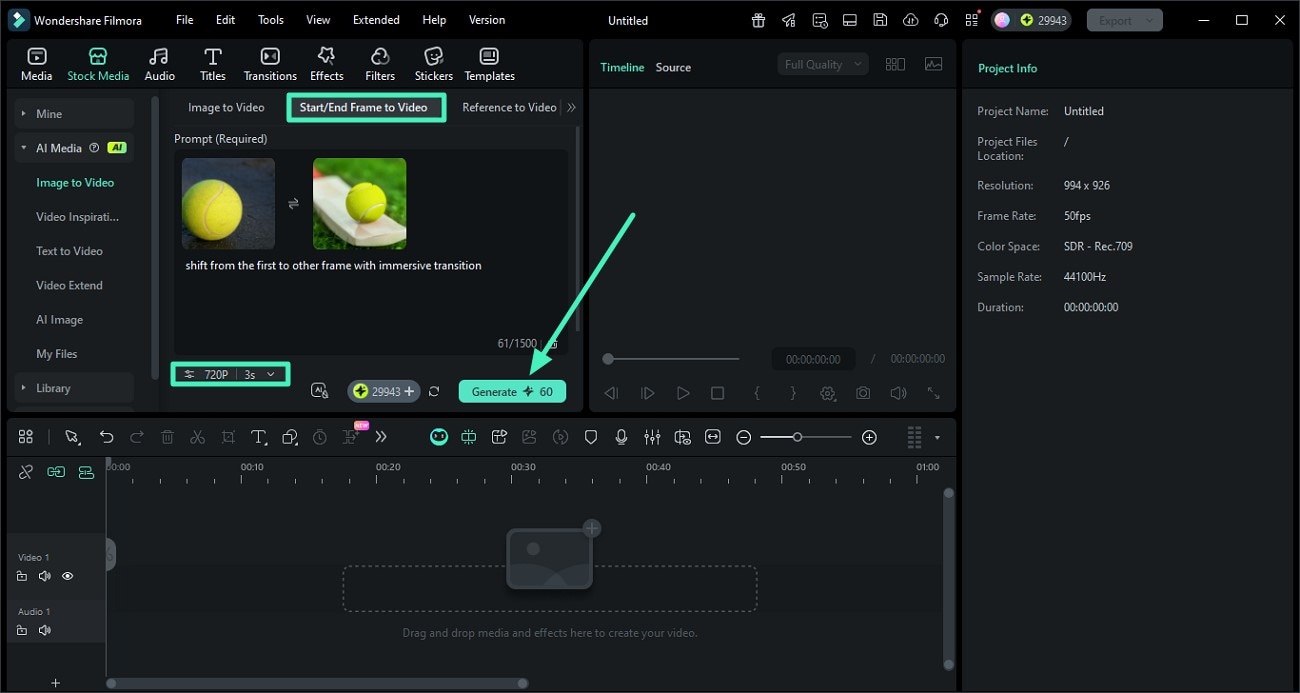
Mode 5. Start/End Frame to Video
Step 1. Enter Start And End Frames And Generate
Enable the Start/End Frame to Video section, insert start and end frame images, enter your text prompt, select Resolution and Duration, agree to AIGC Usage Agreement, and press Generate.
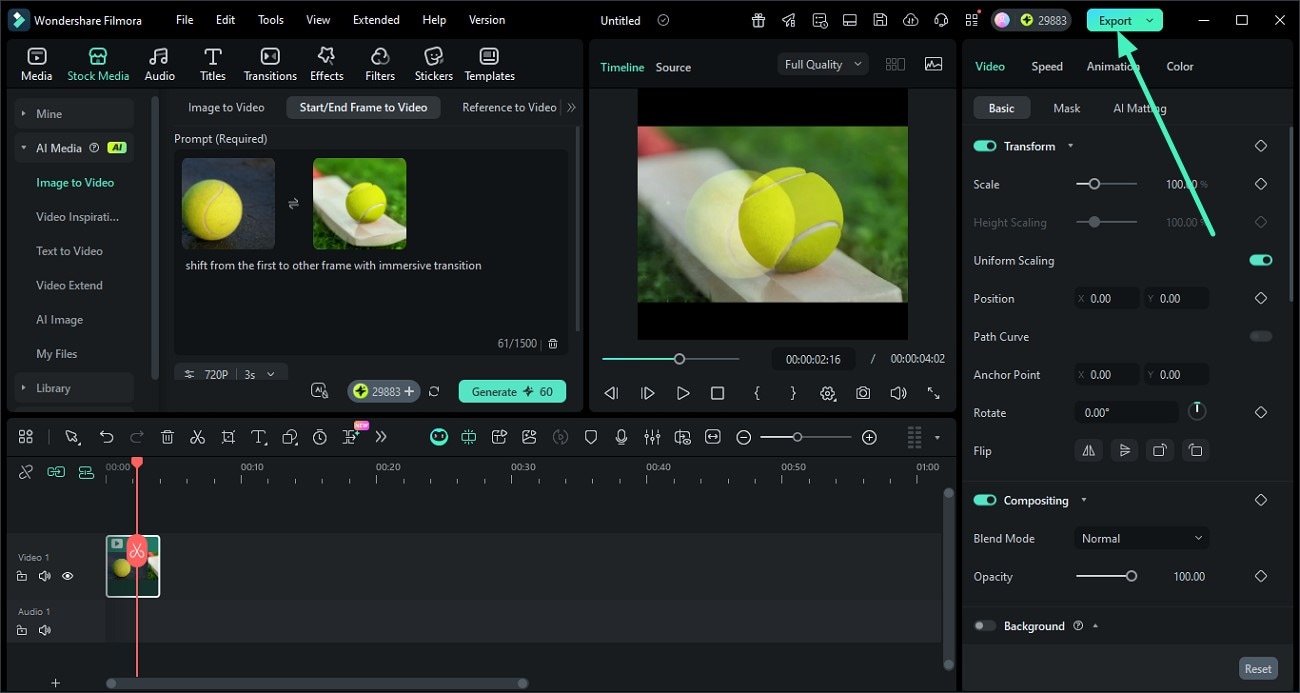
Step 2. Make Edits if Required and Save the Video
Edit the video as needed, then press Export to save.
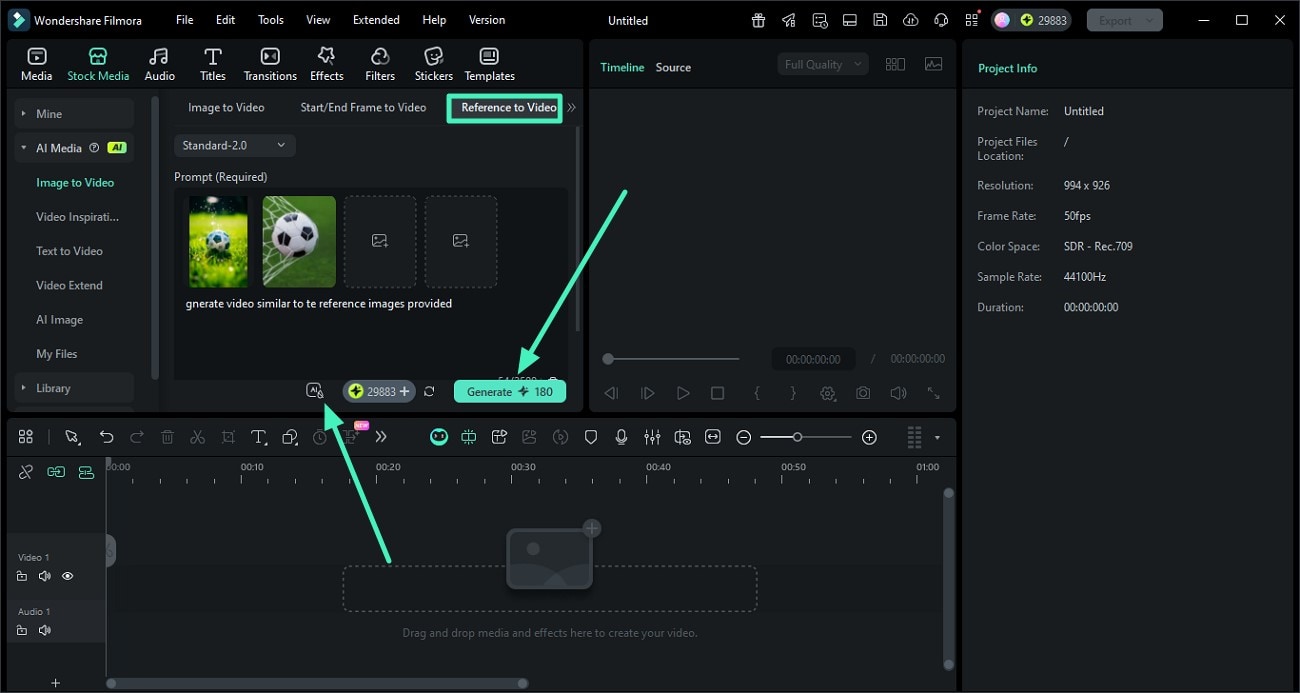
Mode 6. Reference to Video
Step 1. Add Reference Images and Start Generation
Add reference images, input your text requirement, enable AIGC Usage Agreement, and click Generate.
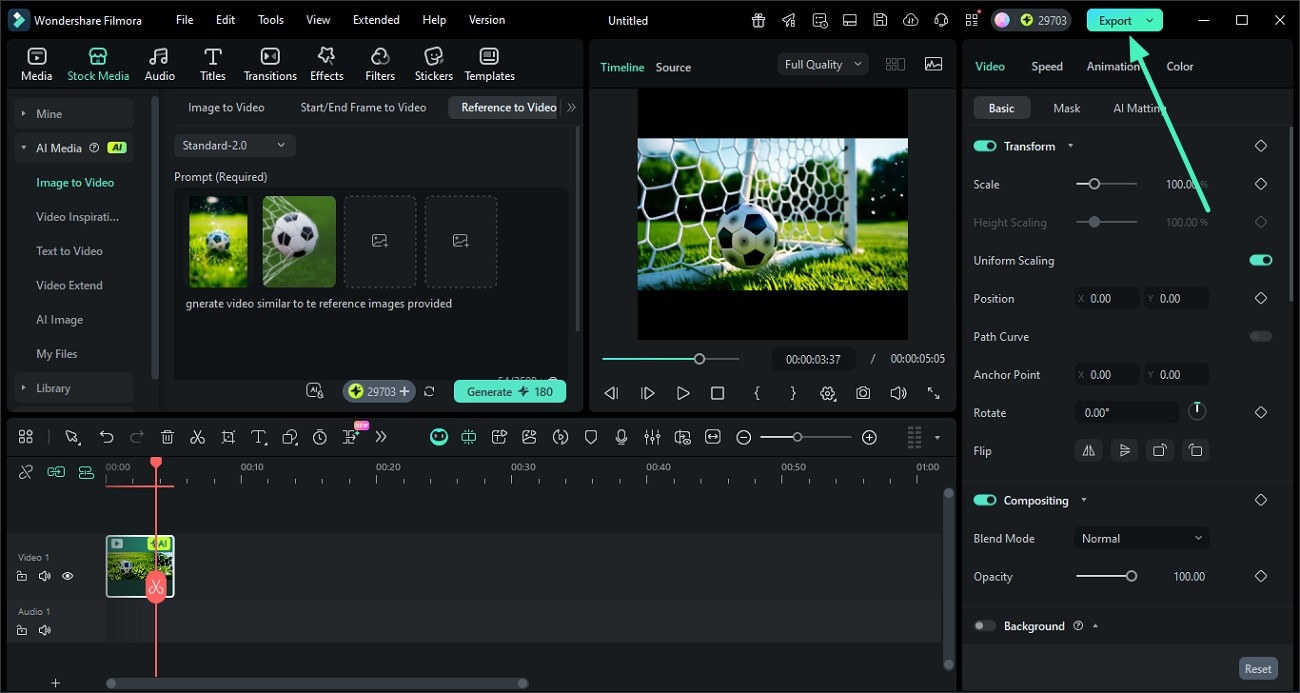
Step 2. Modify the Generated Video and Export
Add effects and other elements, then save using Export.
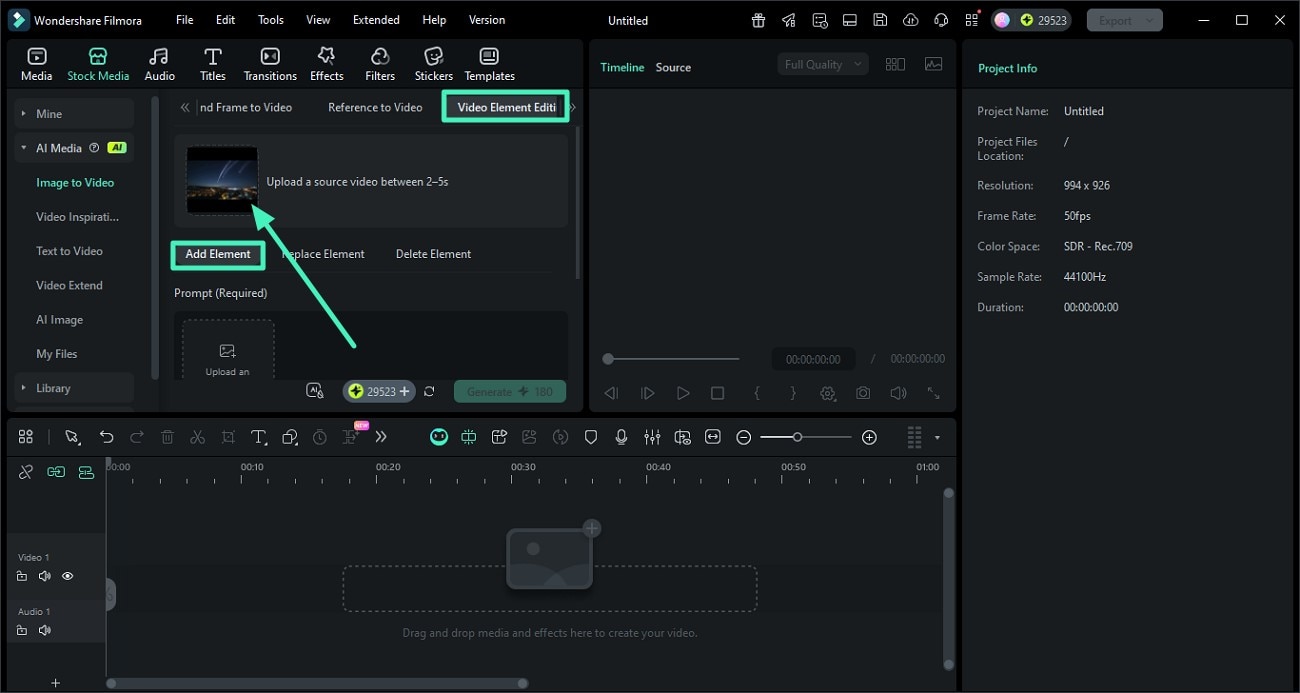
Mode 7. Video Editing Element
This utility allows you to blend the picture and video to generate a video with various modifications. You can add, replace, or delete elements by adding their pictures.
Add Element
Step 1. Select Video Element Editing and Add Element
Access the Video Element Editing section, enable Add Element, and import the source video.
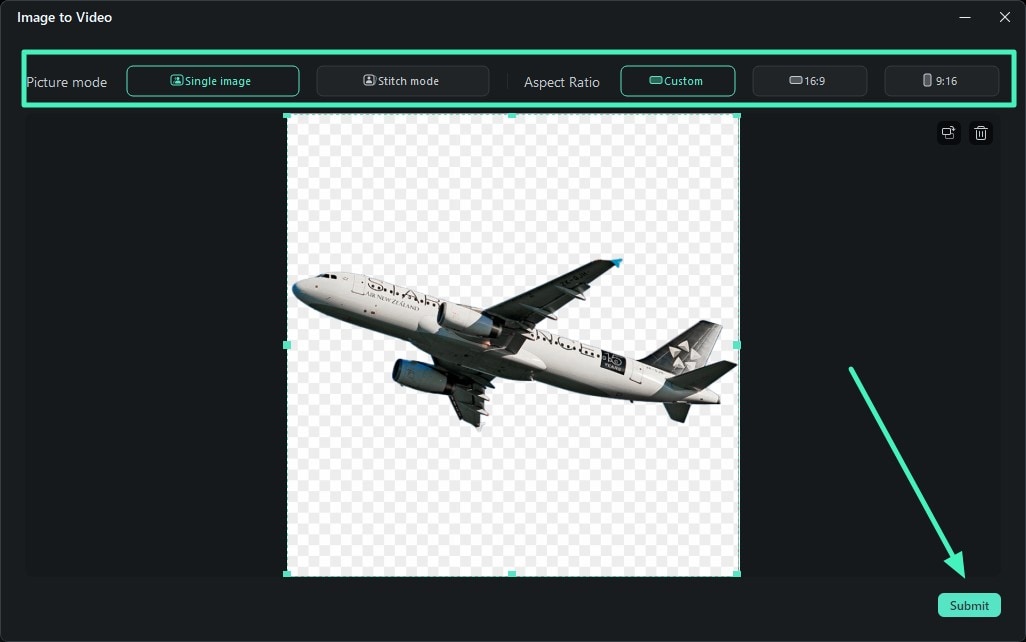
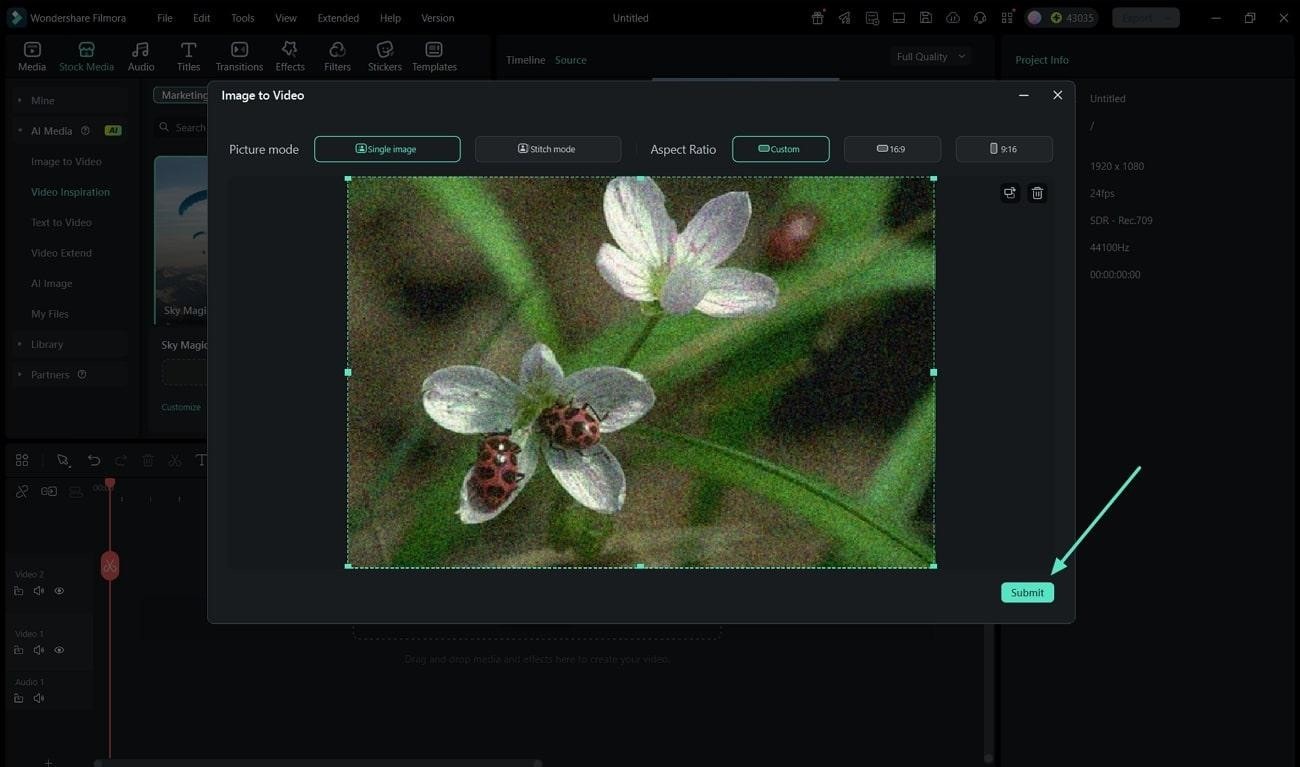
Step 2. Add Image After Cropping
Insert the image to add as an element, select Picture Mode, choose Aspect Ratio, and hit Submit.
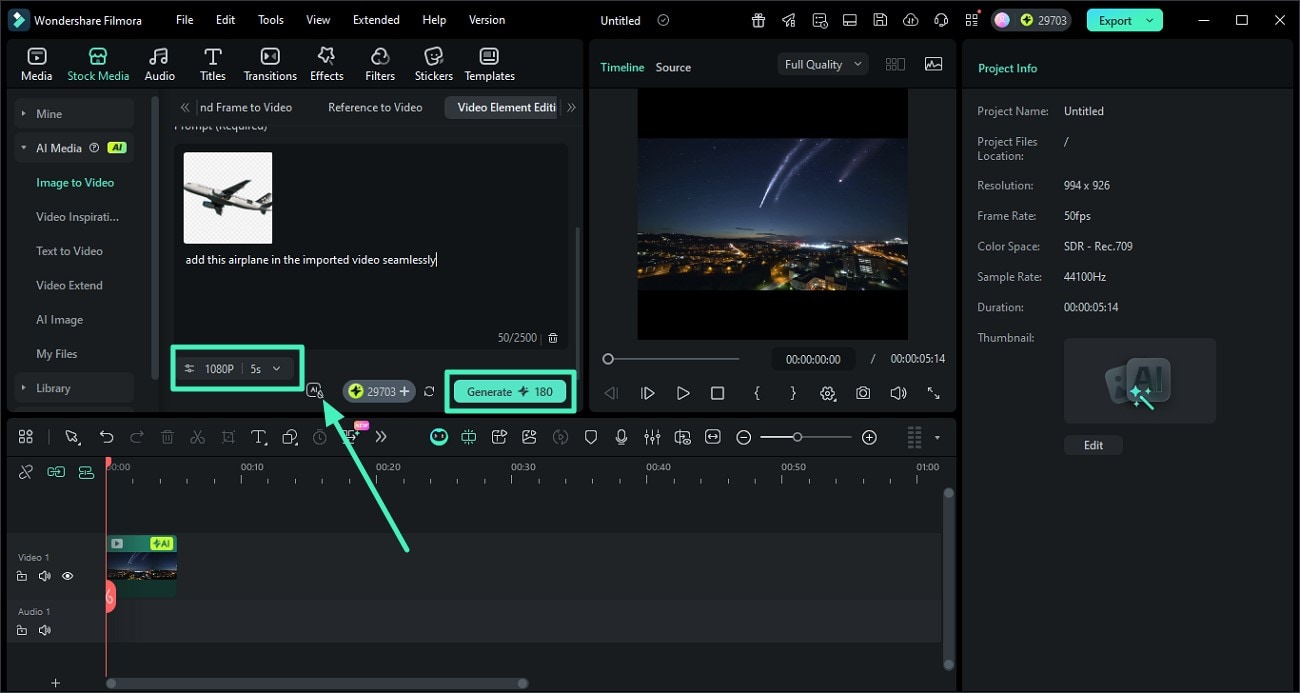
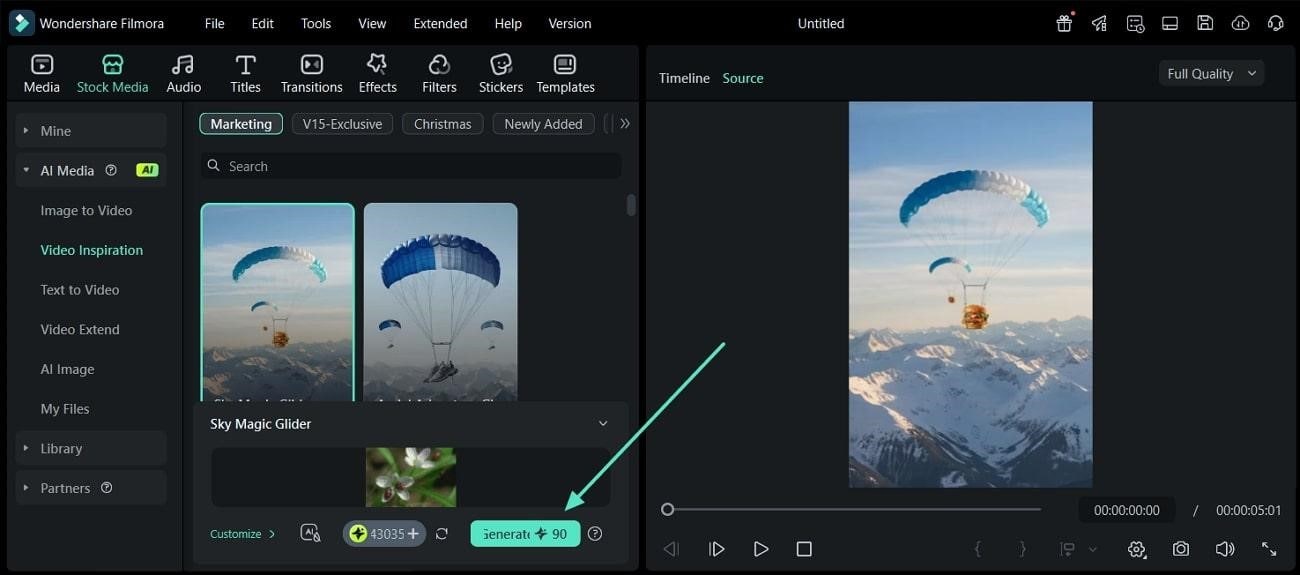
Step 3. Add Prompt and Configure Settings
Input the text prompt, specify Duration and Resolution, enable AIGC Usage Agreement, and hit Generate.
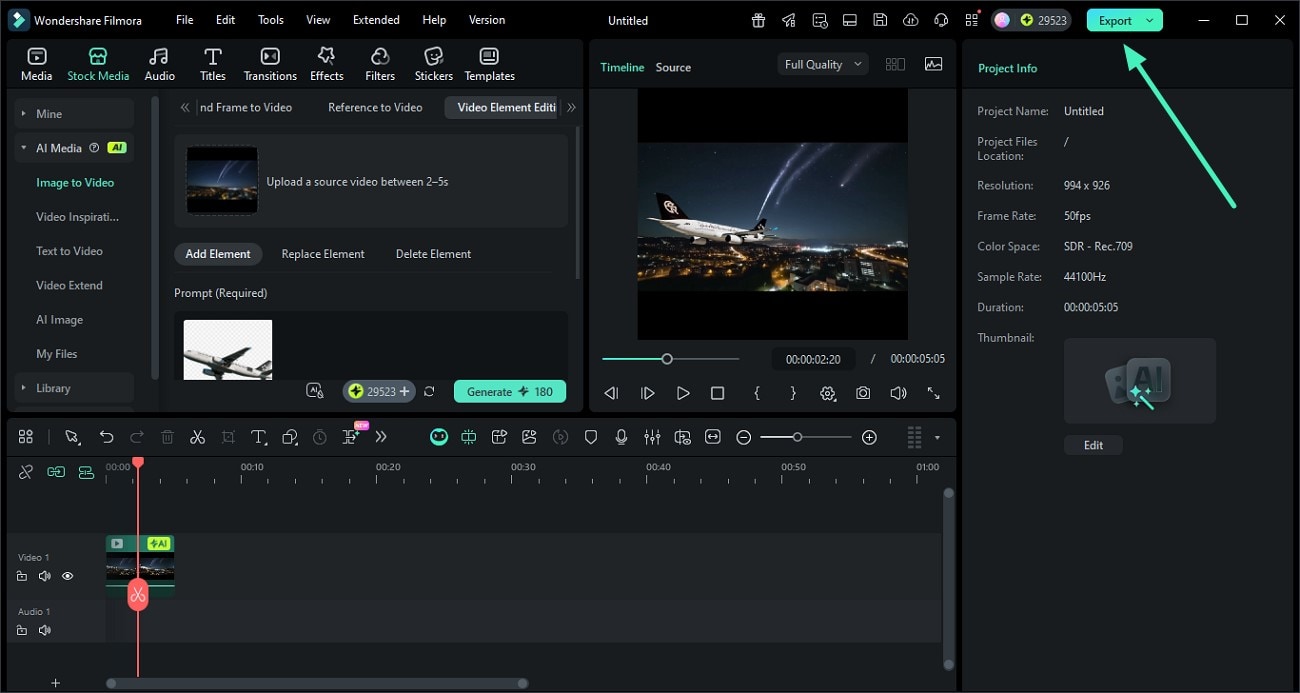
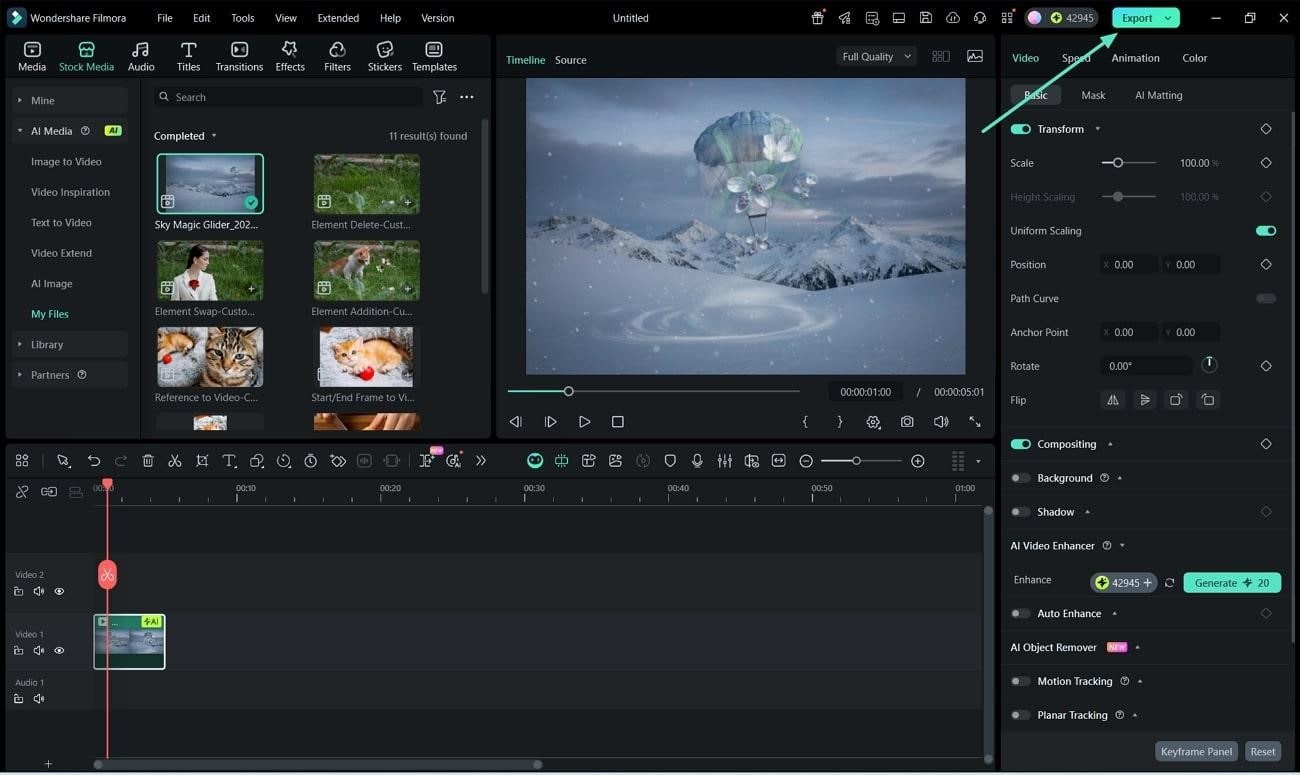
Step 4. Edit the Video and Export
Drag the video to the editing timeline for enhancements, then press Export to save.
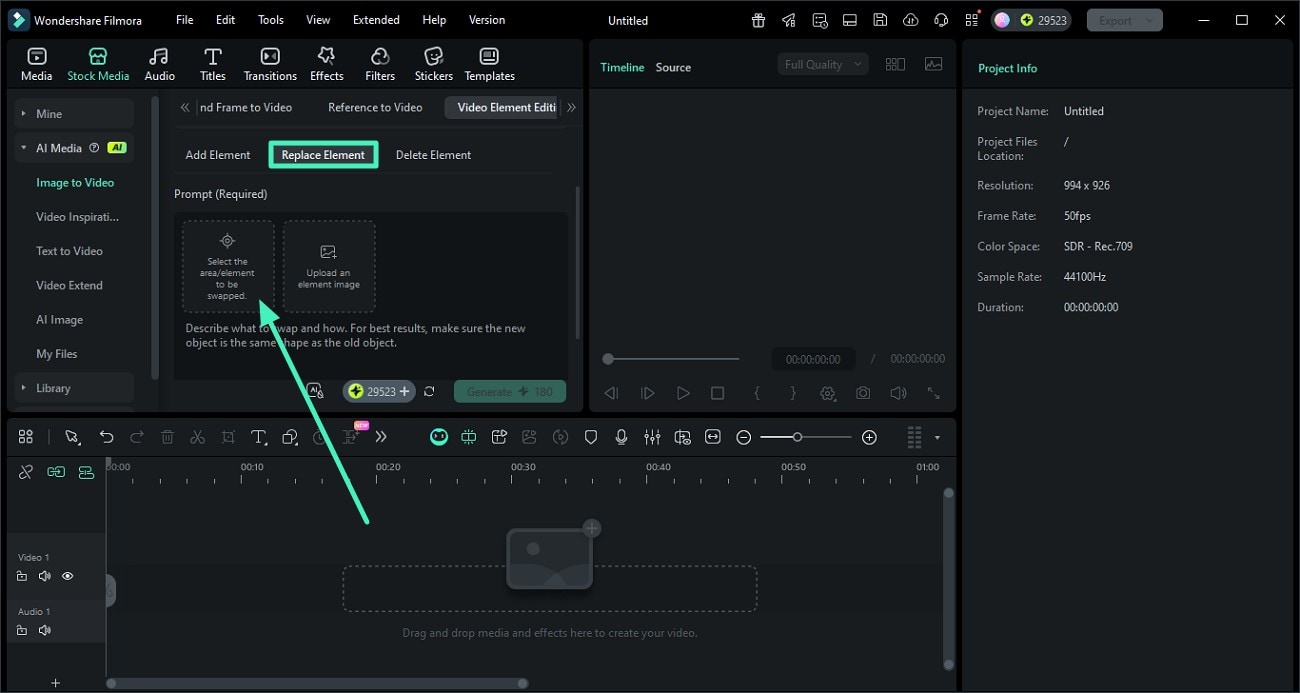
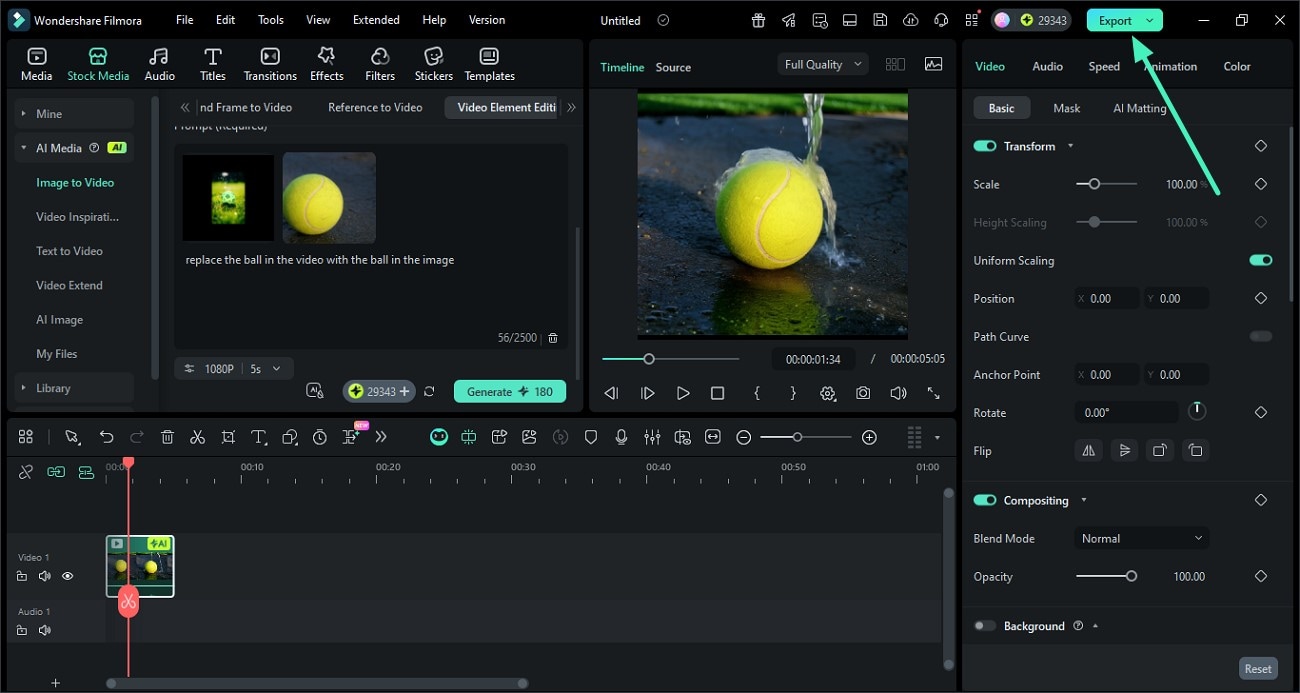
Replace Element
Step 1. Access Replace Element and Add Video
Access Replace Element, add the video, and press Select the Area to be Swapped.
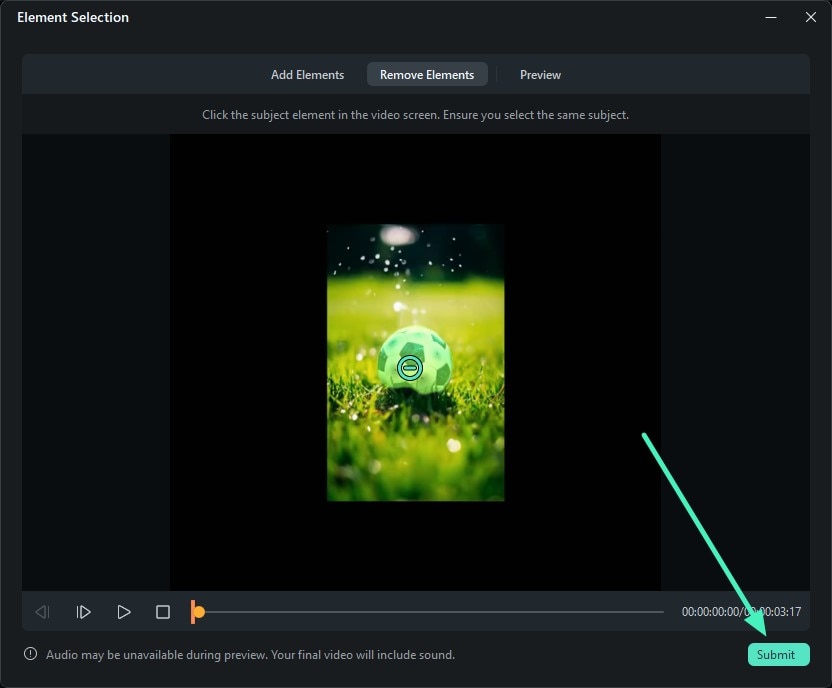
Step 2. Select the Area to be Replaced
Select the element to remove and press Submit.
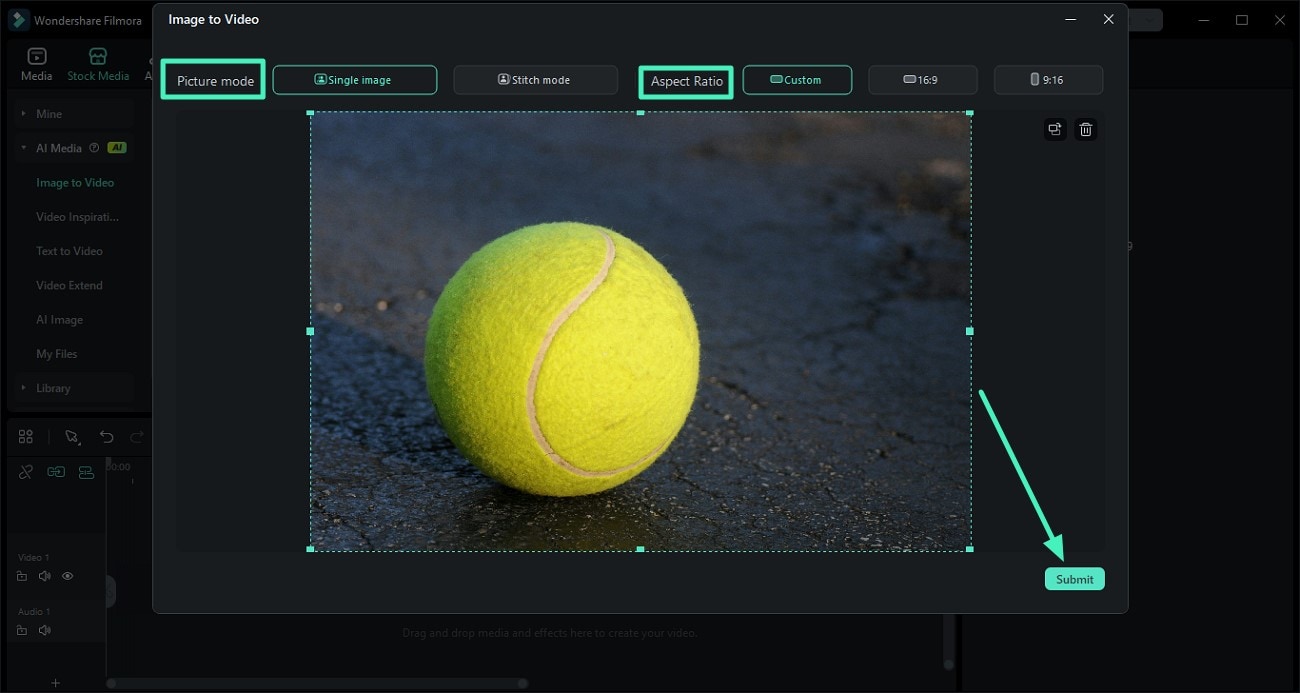
Step 3. Add an Image of the Element to be Added
Import the picture of the new element, select Picture Mode and Aspect Ratio, and hit Submit.
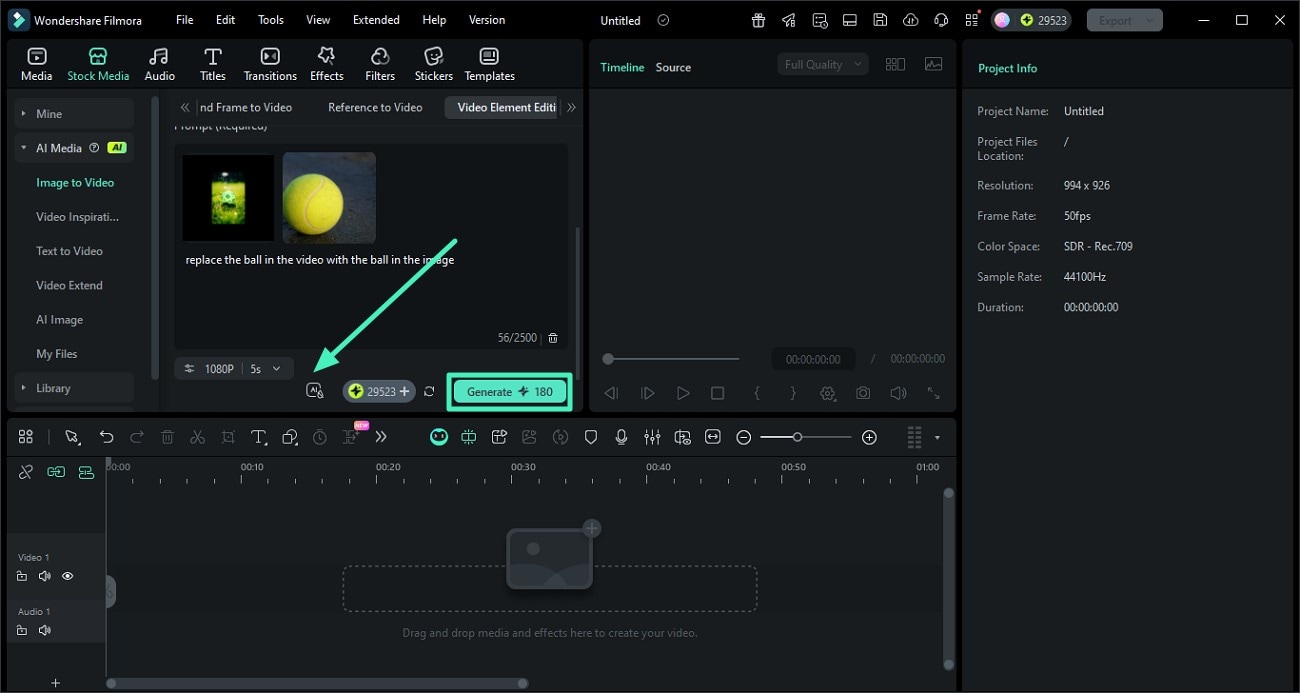
Step 4. Input Text Prompt and Generate Video
Add the text prompt, select duration and resolution, enable AIGC Usage Agreement, and press Generate.
Step 5. Modify Video and Save
Add the result to the timeline, edit as needed, and hit Export to save.
Delete Element
Step 1. Start By Accessing Delete Element Mode
Access Delete Element and add the video to remove an element.
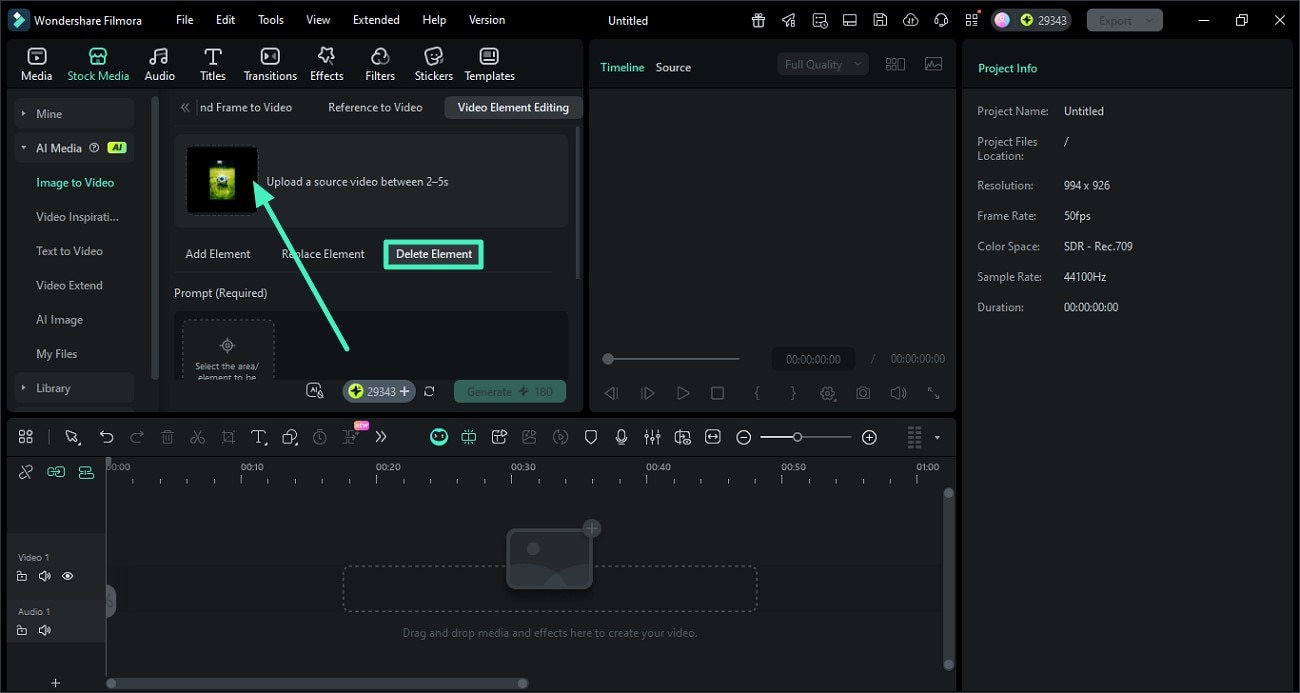
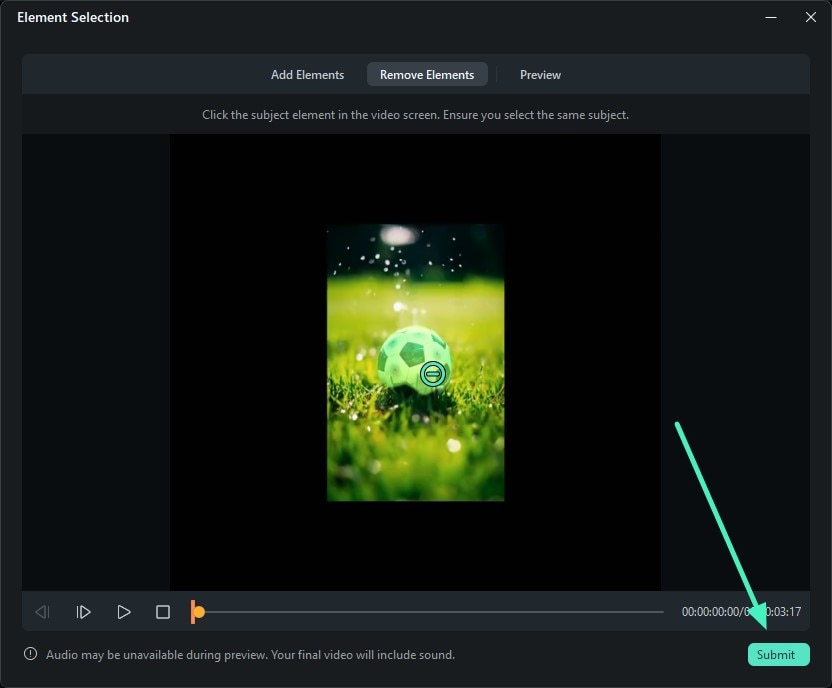
Step 2. Select the Element To Be Removed
Select the element to delete and press Submit.
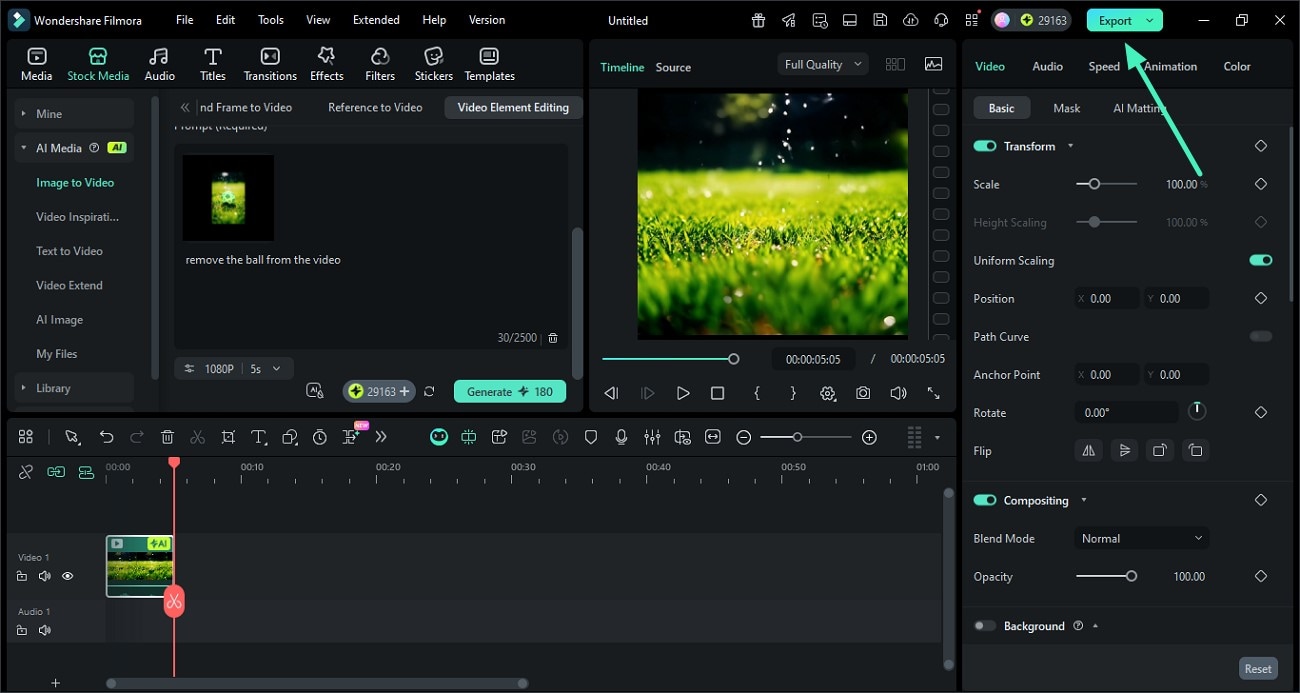
Step 3. Add Text Requirement and Generate
Input the text prompt and press Generate.

Step 4. Review and Edit the Generated Video
Drag the video to the editing interface, edit if required, and press Export to save.
Entry 2. Acquire the Video Inspiration Section
Step 1. Choose the Desired Template in Filmora
Access the Video Inspiration section, scroll through categories, and choose your template.

Step 2. Add Image and Crop It
Add the image, choose your preferred Aspect Ratio, and click Submit.
Step 3. Start the Inspiration Video Generation
Locate and click Generate to start the video generation process.
Step 4. Have a Look at the Video Inspiration and Save
Play the generated video in the preview window and save it using Export.
Related Posts
Featured Articles
Top 7 Applications for Adding Audio to Video on Android
Are you curious about how to add audio to video on Android? Read this article to find the best apps used to do the job.
10 Best Video Merger Apps for iPhone and Android
You have several clips you want to stitch together, but you're not sure what is the best app to merge videos? This top 10 list will give you a clue.
How To Create Curved Text in Canva [Most Updated]
Finding it difficult to apply curved text in Canva? Check out this comprehensive article and learn how to utilize the Canva curved text feature in your editing with ease!
Recommended User Guide
AI Smart Masking for Windows
Editing video elements independently is an important part of video creation, and Filmora's masking provides multiple options.
AI Text-Based Editing for Windows
Filmora now offers dedicated AI Text-Based Editing to make video editing easier.
Instant Cutter Tool for Windows
Want to quickly trim your videos? Filmora's Instant Cutter tool is the perfect solution for immediate video trimming.
