For the Best Results, Use the Latest Version.
-
Preparations
-
Account
-
Get Started & Basic Settings
-
Compatibility & Tech Specs
-
Performance Settings
-
-
Creating Projects
-
Creating New Projects
-
-
Importing & Recording
-
Video Editing for Windows
-
Basic Video Editing
- Enable/Disable Clip in Windows
- Magnetic Timeline for Windows
- Dual Monitor Setup for Video Editing on Windows
- Select All Clips on Timeline for Windows
- Manage Timeline and Tracks on Windows
- Auto Ripple for Windows
- Split & trim video
- Crop & Pan & Zoom Video
- Compositing
- Change video playback speed
- Playing videos in reverse
- Mark In and Mark Out for Windows
- Markers for Windows
- Group editing
- Customizable Backgrounds for Videos and Images in Windows
- Video snapshot
- Using freeze frame
- Logo Reveal For Windows
- Apply auto enhance
- Applying drop shadow
- Adjustment layer for Windows
- Transforming
- Video Editing Ruler – Windows
-
Advanced Video Editing
-
AI-Powered Video Editing
- Smart Scene Cut for Windows
- Smart Short Clips for Windows
- AI Face Mosaic for Windows
- AI Video Enhancer for Windows
- AI Text-to-Video for Windows
- Planar Tracking for Windows
- AI Idea to Video for Windows
- Filmora Image to Video for Windows
- Instant Cutter Tool for Windows
- AI Extend
- AI Script to Video Guide for Windows
- AI Text-Based Editing for Windows
- AI Mate Editing for Windows
- Create with instant mode
- ChatGPT Plugin - AI Copywriting
- AI Smart Cutout
- Lens correction on Windows
- Auto reframe video
- AI Portrait Cutout
- Scene detection feature
- AI Smart Masking for Windows
- Make motion tracking
- Video Stabilization for Windows
- AI Video/Photo Object Remover for Windows
- AI Smart Search for Windows
- AI Skin Tone Protection for Windows
- AI Image for Windows
- Chroma key (green screen)
- Super Slow Motion with Optical Flow for Windows
- Video Denoise for Windows
-
-
Audio Editing for Windows
-
Basic Audio Editing
-
Advanced Audio Editing
-
AI-Powered Audio Editing
-
-
Text Editing for Windows
-
Basic Text Editing
-
Advanced Text Editing
-
AI-Powered Text Editing
-
-
Video Customizations
-
Video Effects
-
Audio Effects
-
Transitions
-
Stickers
-
Filters
-
Color Editing
-
Animations
-
Templates
-
Asset Center
-
-
Exporting & Share & Cloud Backup
AI Portrait Cutout
With the help of Artificial Intelligence technology, AI Portrait Cutout can automatically detect the portrait in video or image and remove the background directly. You can remove the background easily without a green screen(chroma key) background. Moreover, we have 70+ body effects and sticker effects available, you can add body effects to make your video stand out.
How to Use AI Portrait Cutout?
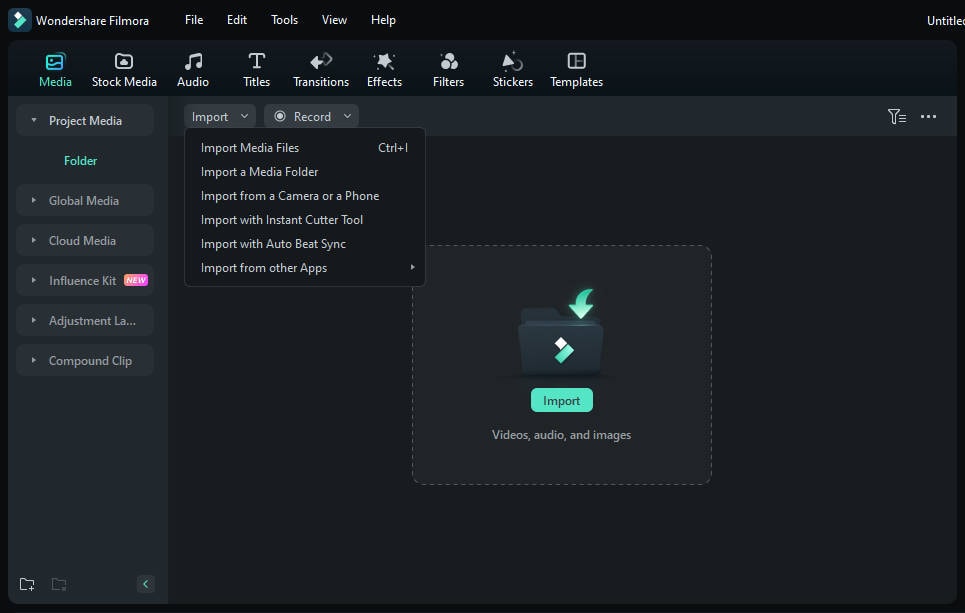
Step 1: Import and Add Media Files to the Timeline
If you have Filmora installed, open the program and create a new project. Import the background video and portrait footage onto the media library. Drag your background video or image onto the first track of the timeline. then place your portrait video or image on the track above it.

Step 2: Enable AI Portrait Cutout
Double-click on the clip in your timeline to open the editing panel, and check the box next to AI Portrait Cutout. You can also select the video in the timeline first and then click on the AI Portrait Cutout icon on the toolbar to automatically enable the AI Portrait Cutout feature.
AI Portrait Cutout offers two modes:
Advanced Cutout Mode and Quick Cutout Mode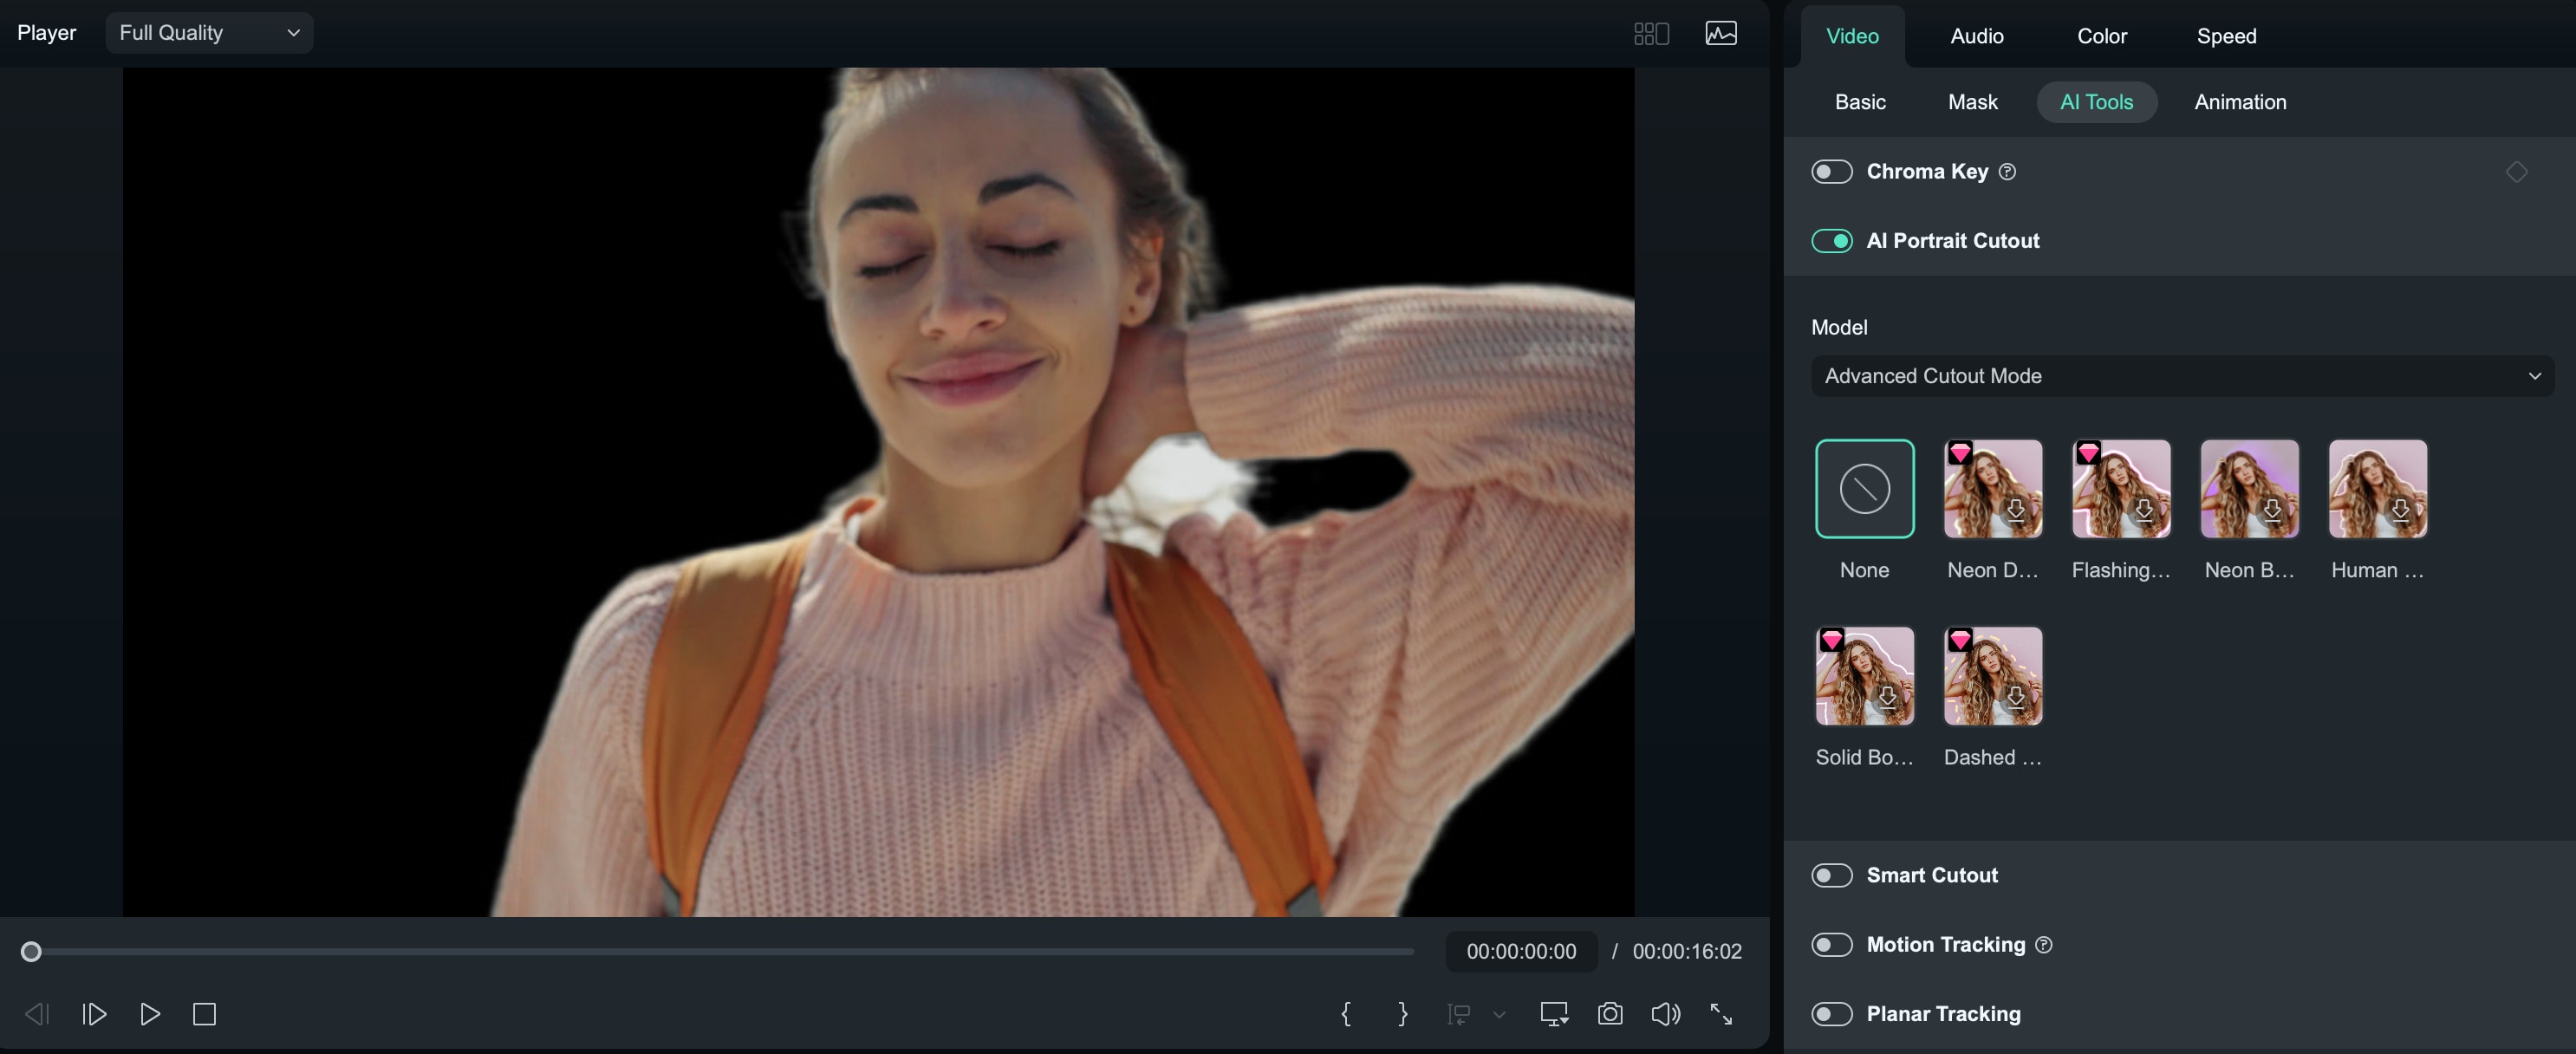
Step 3: Preview and Adjust the Footage
Once you enable the AI Portrait Cutout feature, Filmora will automatically make the background of portrait footage transparent. You can preview the video, adjust the portrait's position, and ensure it meets your needs.
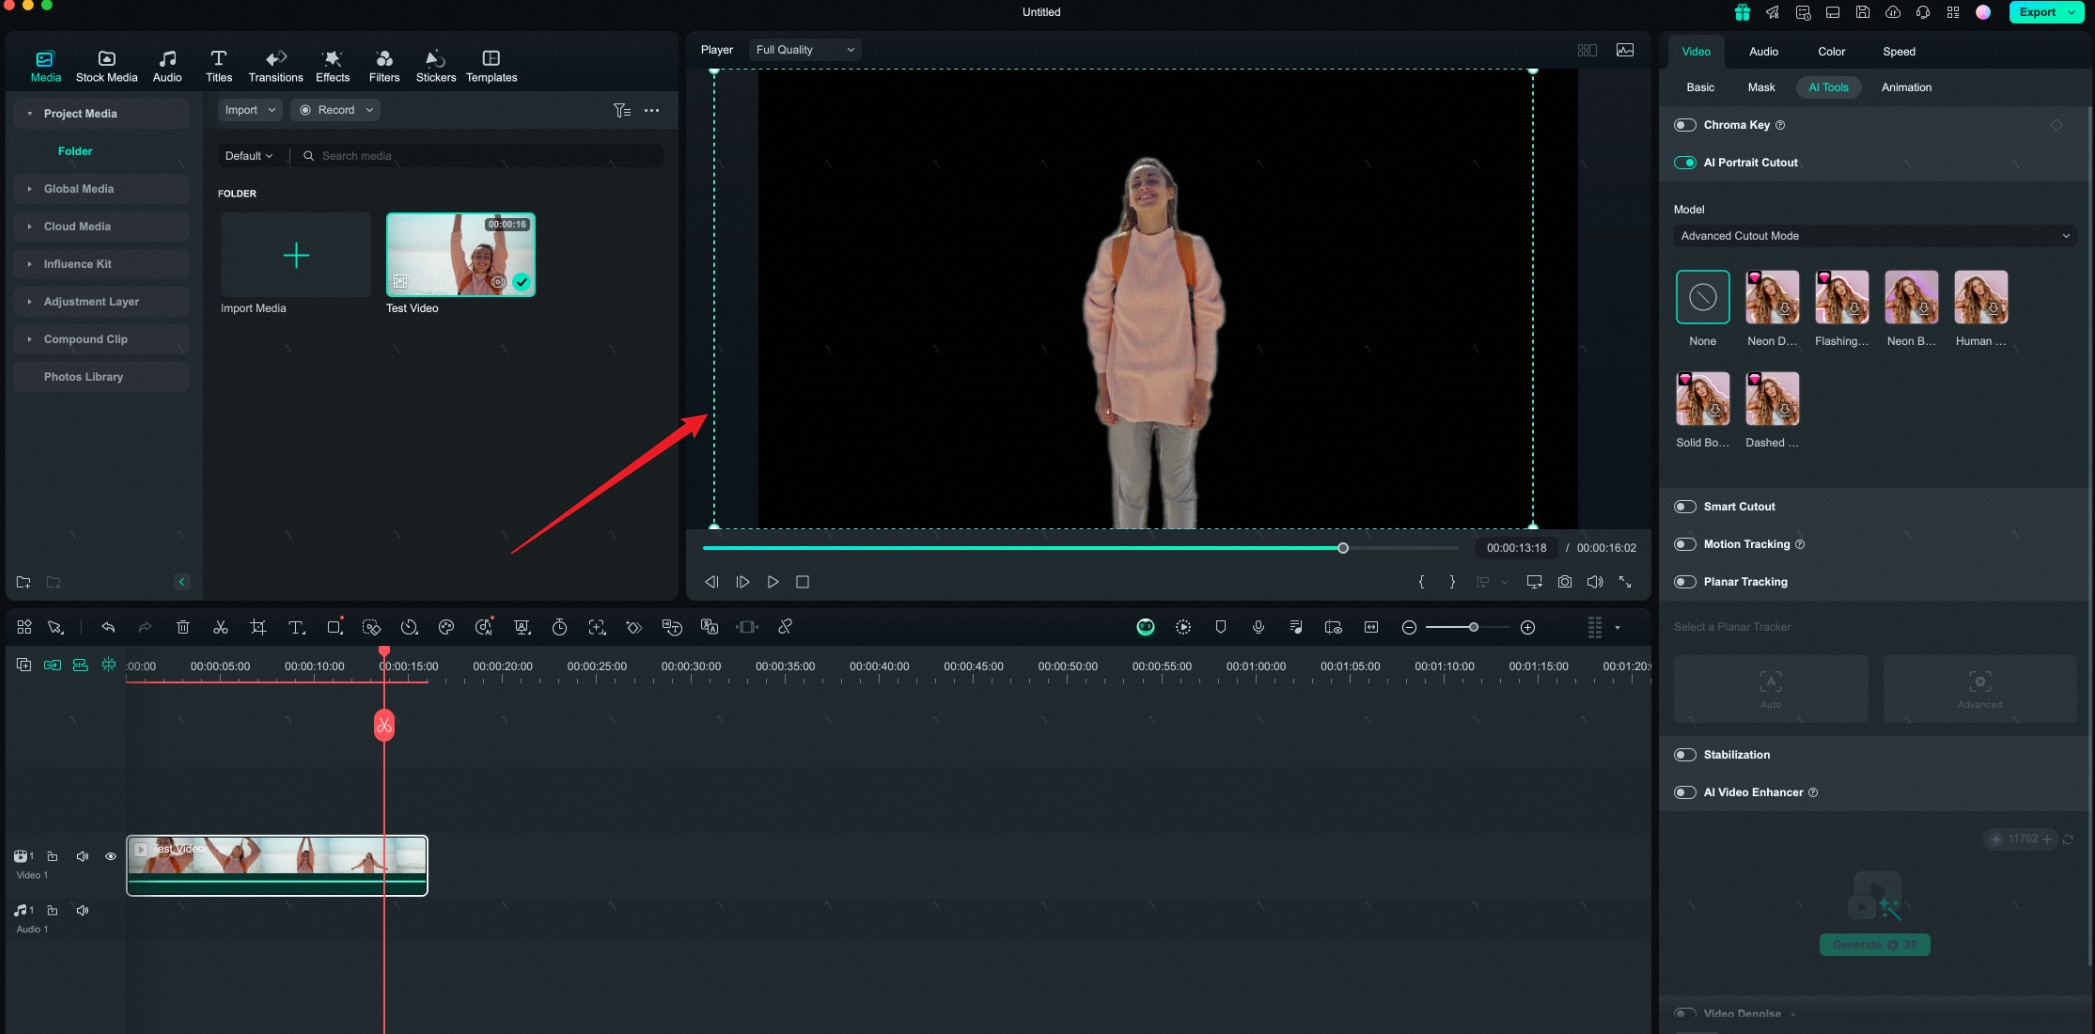
Step 4: Add Body Effects
These effects can be used to enhance, alter, or stylize the appearance of the subject.
Choose the Body Effects
Method 1: Select the Preset Body Effects in the AI Portrait Cutout panel, and then adjust the parameters as needed.
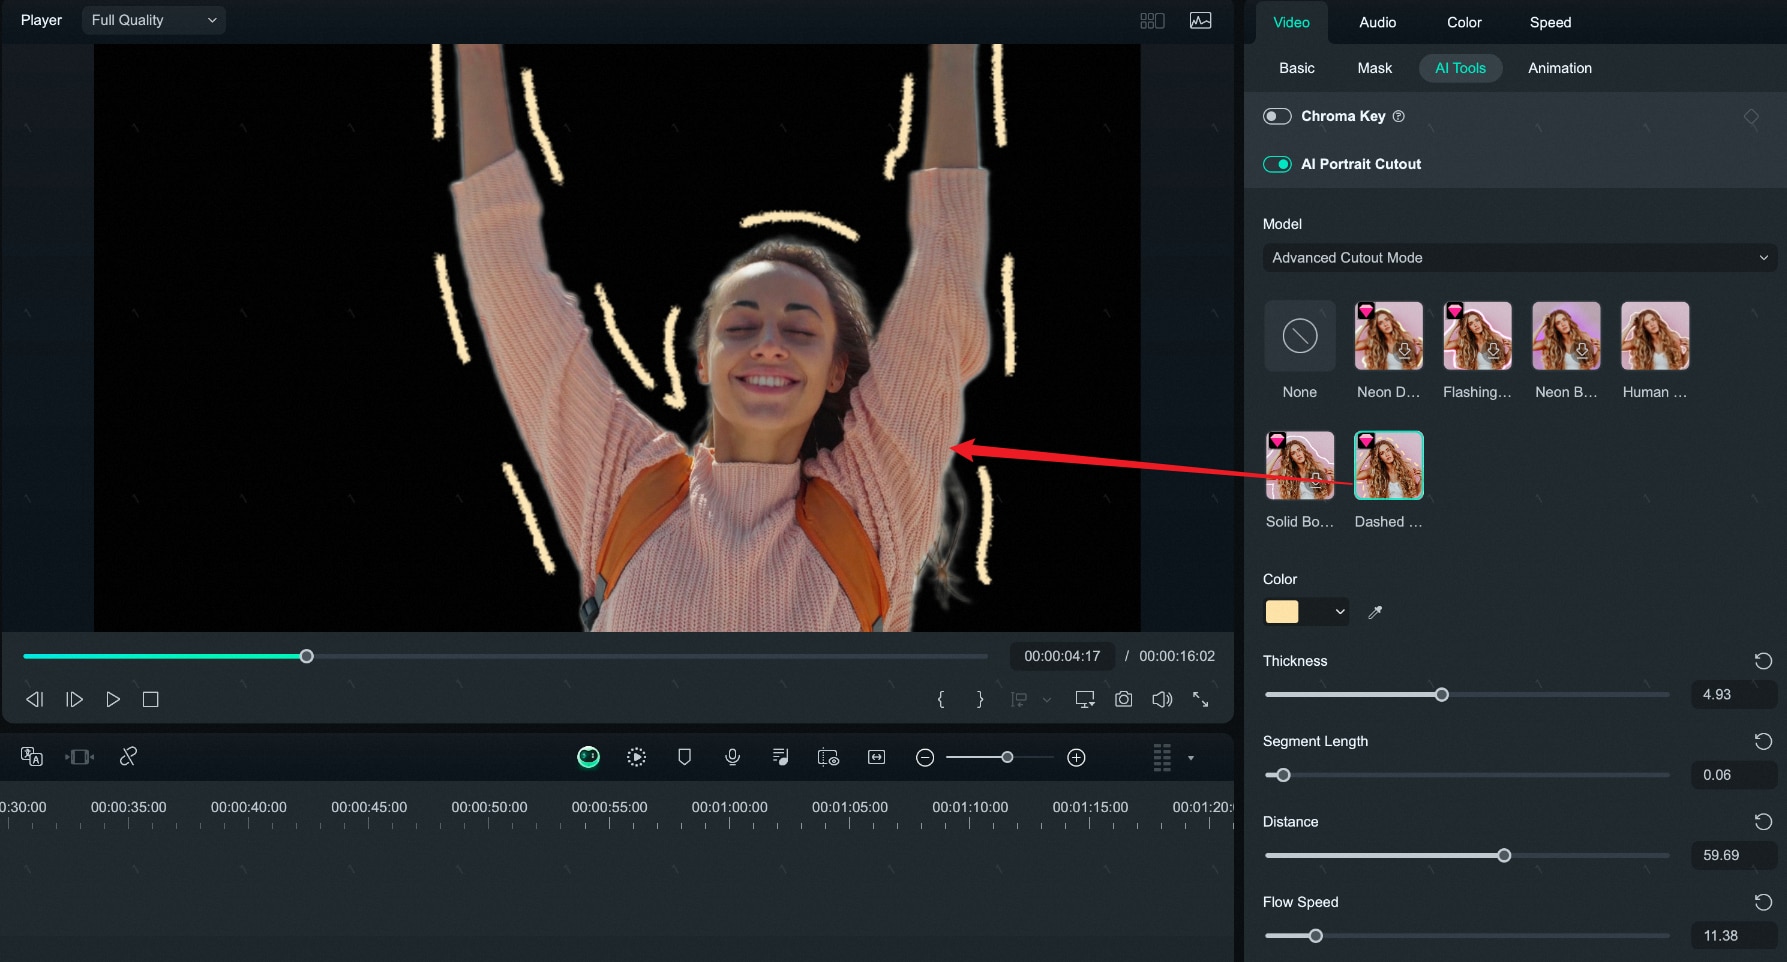
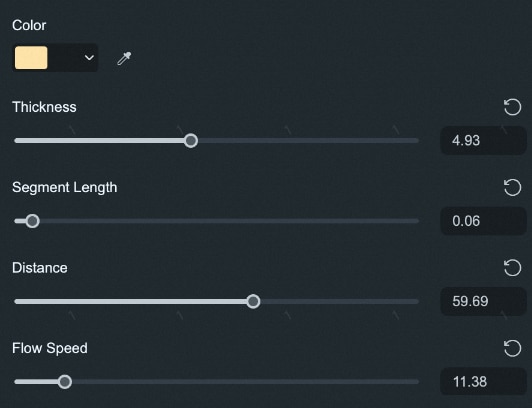
Method 2: Go to Effects>Body Effects on the top toolbar. You will see all the body effects here. Click the Body thumbnail and check it in the preview window. To add the Body effects, drag the body effect to the timeline or click the Add icon on the Body Effects thumbnail.
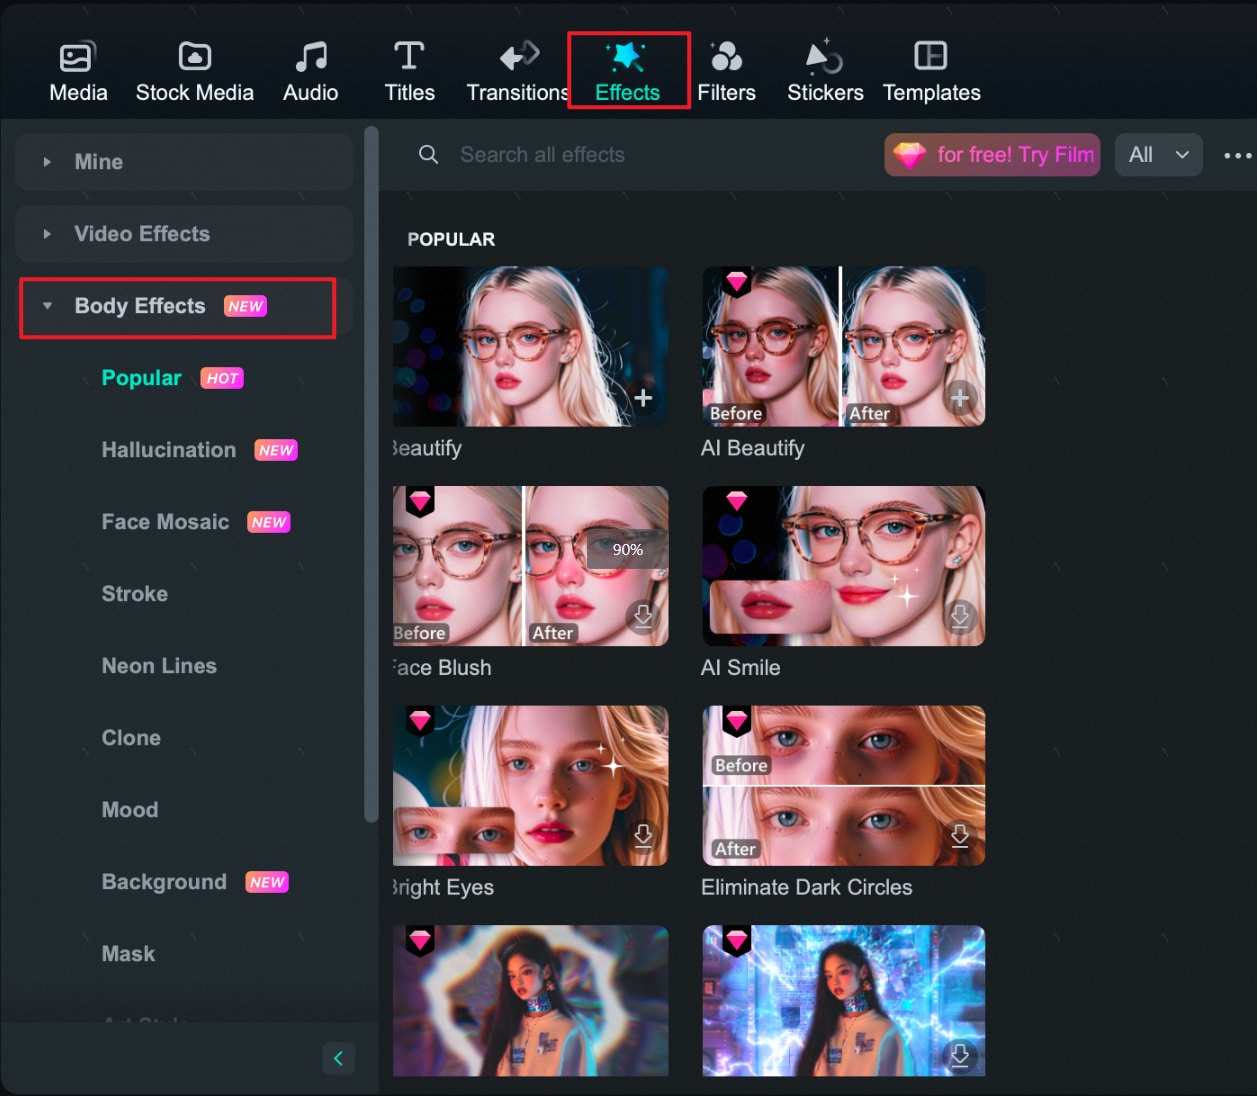
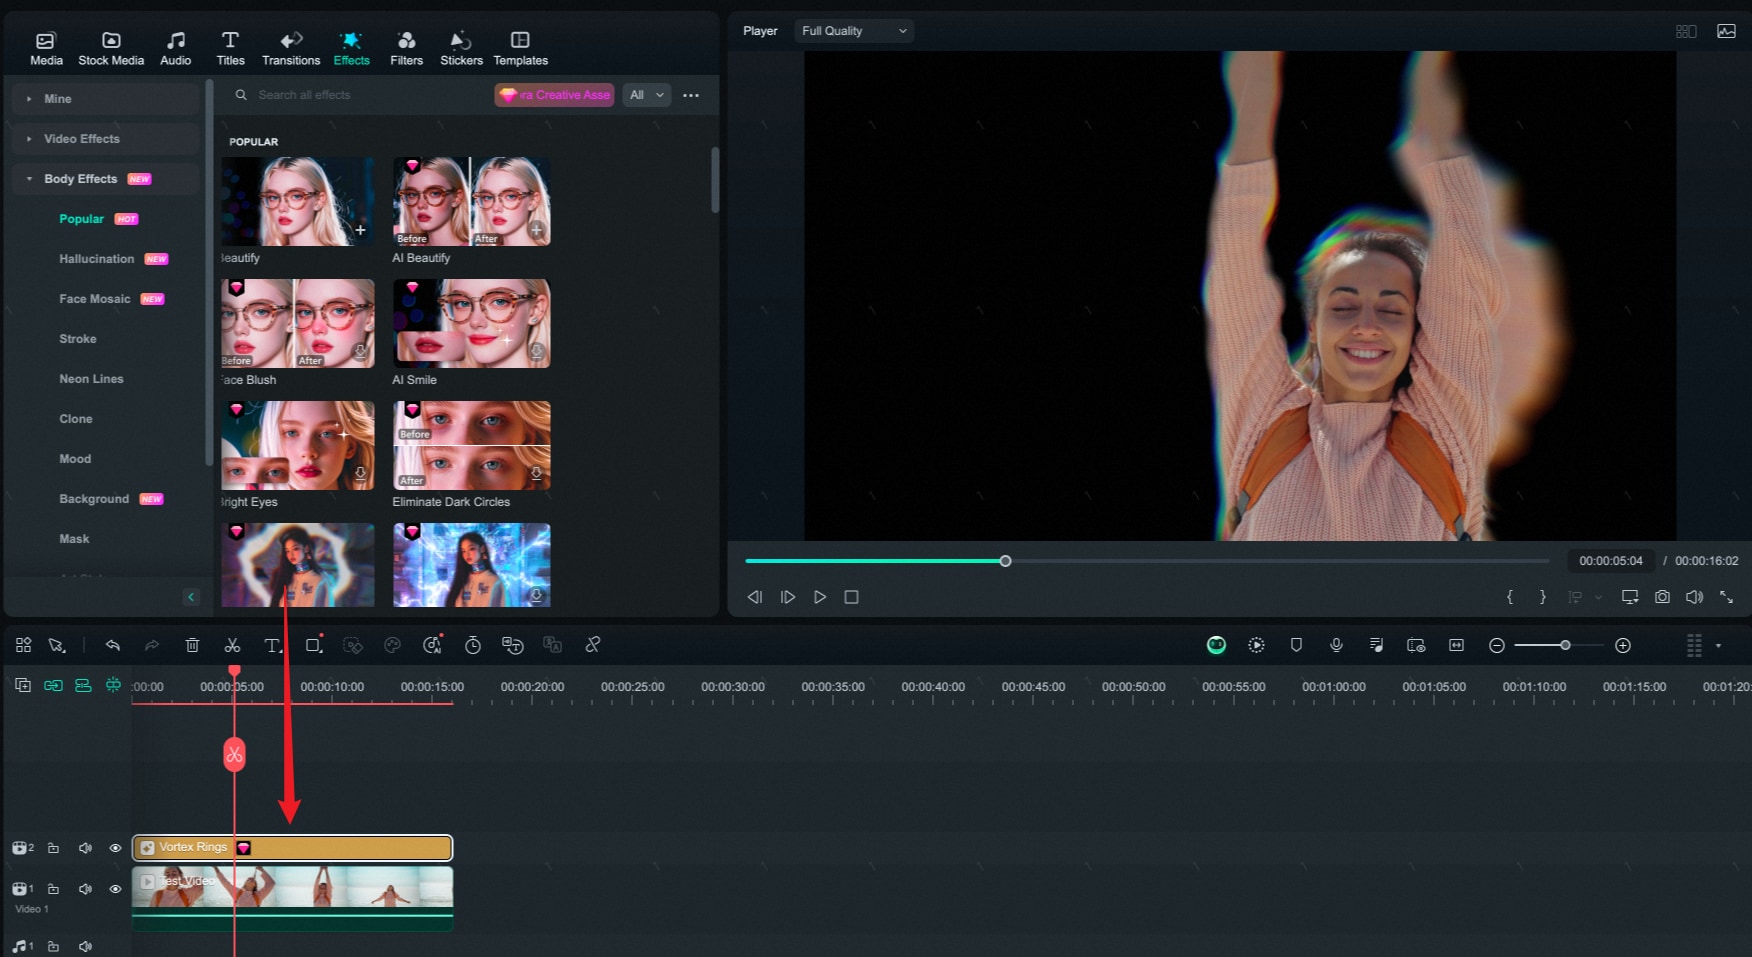
Preview Body Effects
Elongate or shorten the effect to fit the video clip length. Play the video and check the results. Add multiple effects to the clip by dragging and dropping them to the timeline.
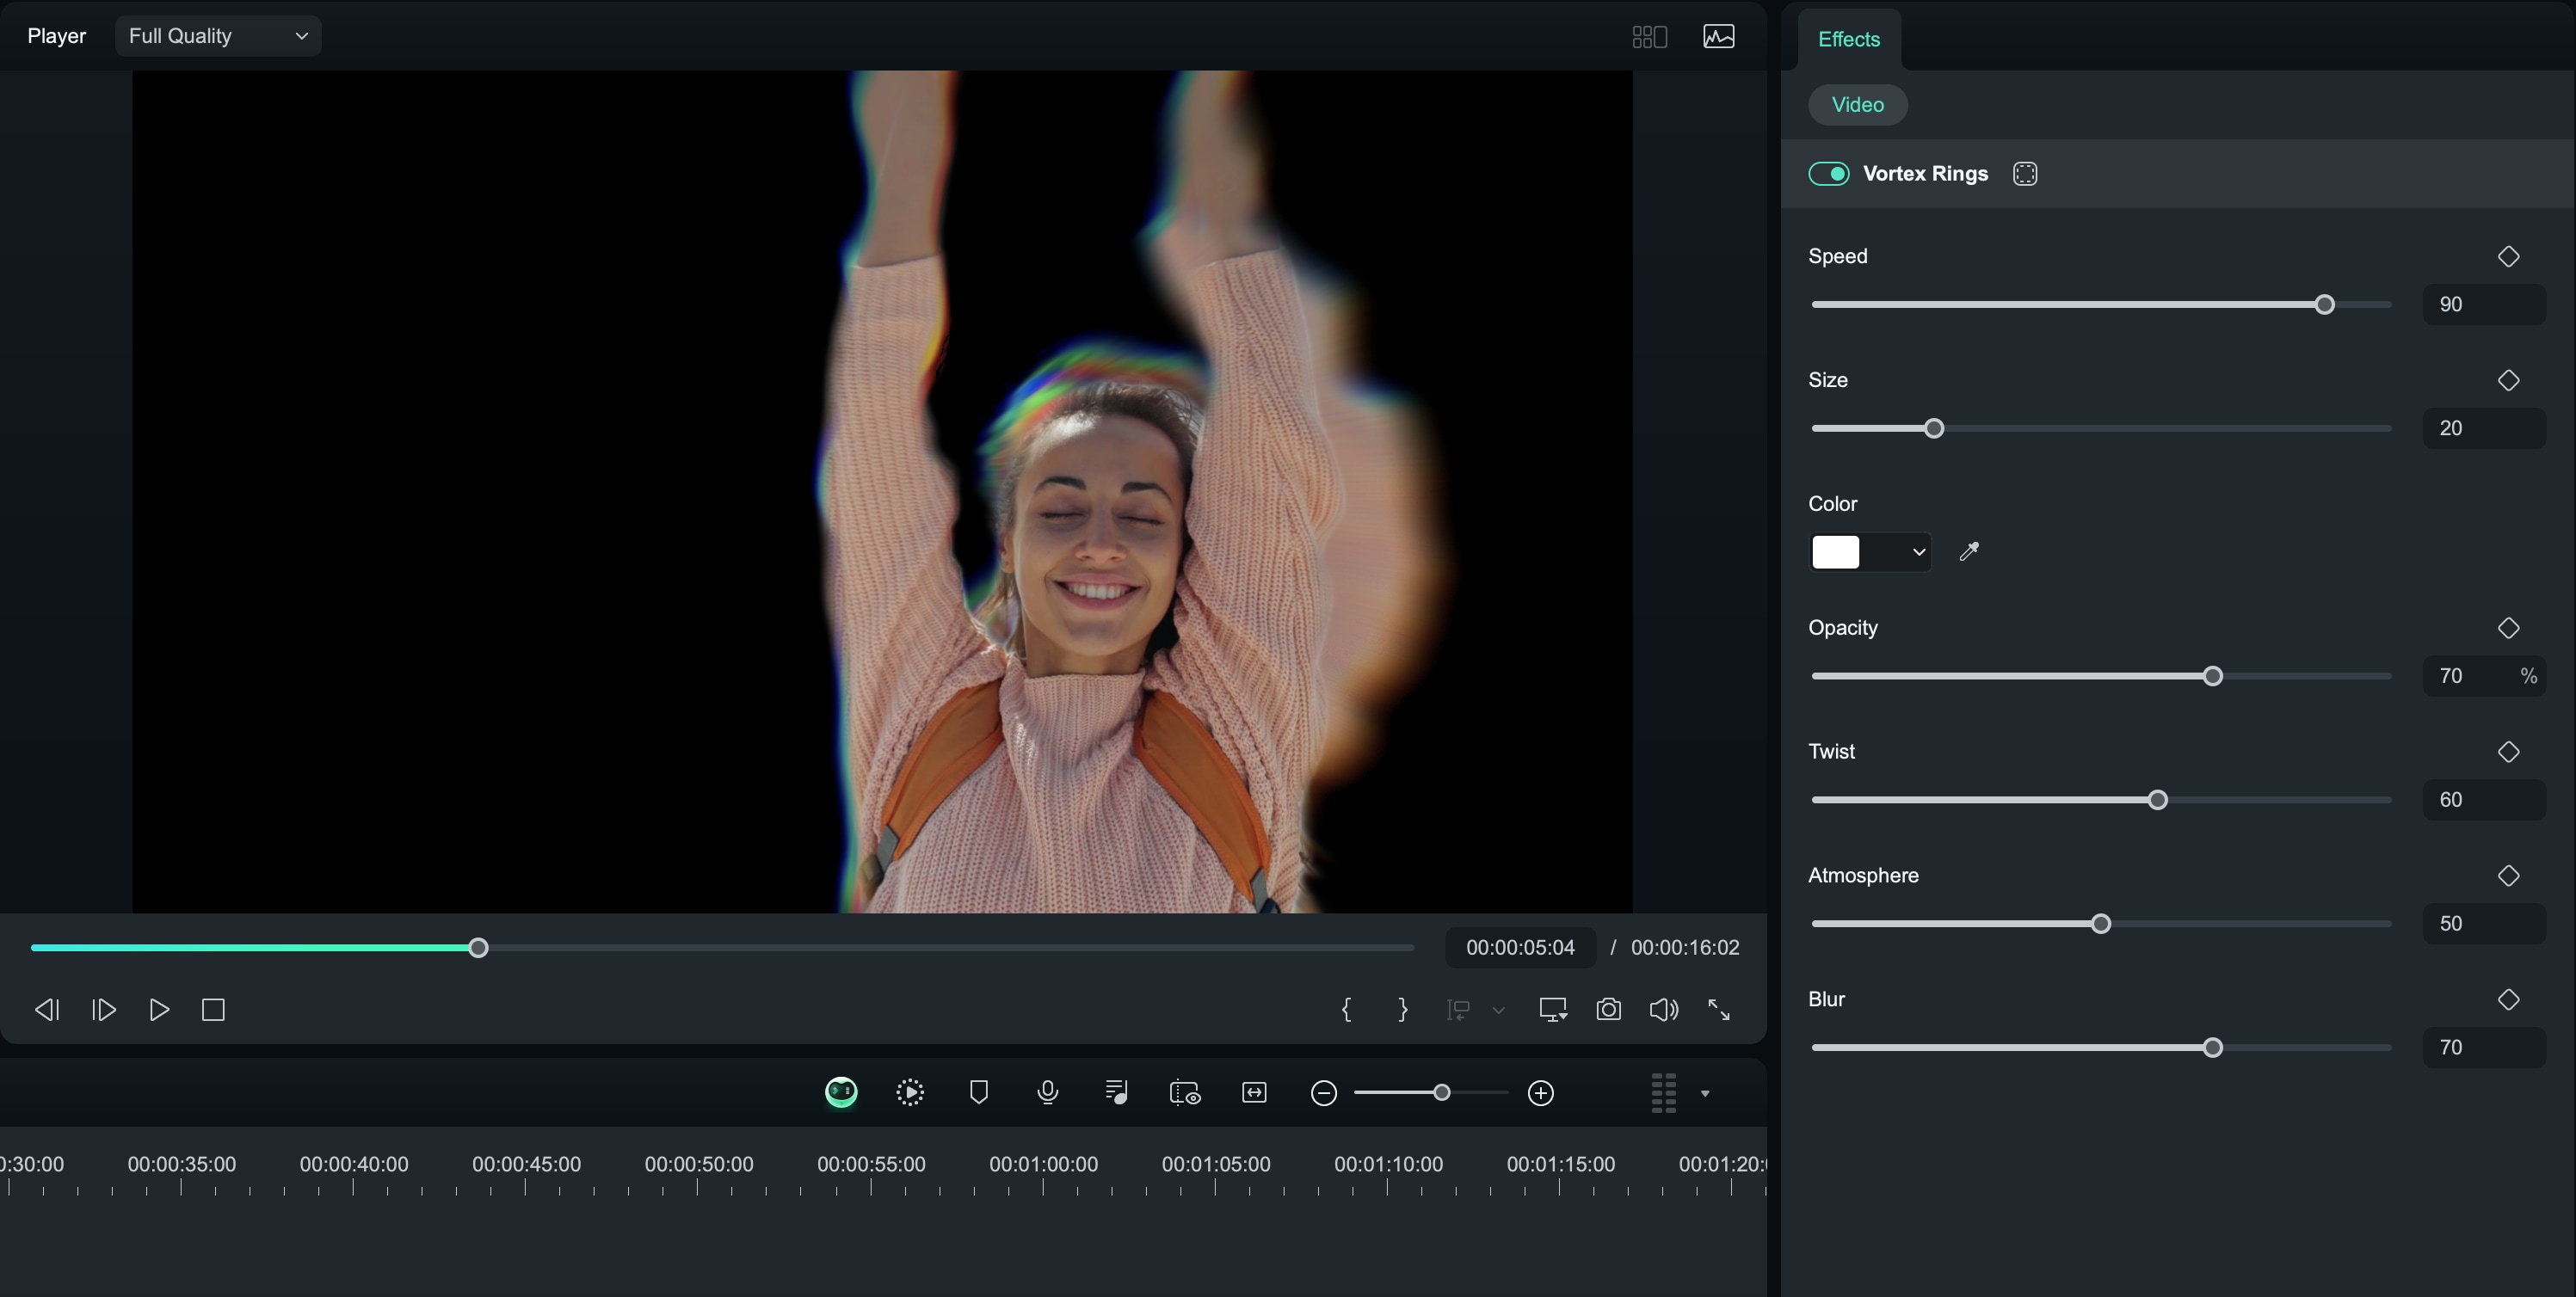
Adjust Body Effects
Adjust the settings of the effect to get the best results. Different effects have different settings. Double-click the added effect in the timeline and scroll down to Video Effects, check the settings of the portrait effect that you can change.

If you are not satisfied with your settings, you can click on the Reset button next to the value boxes.
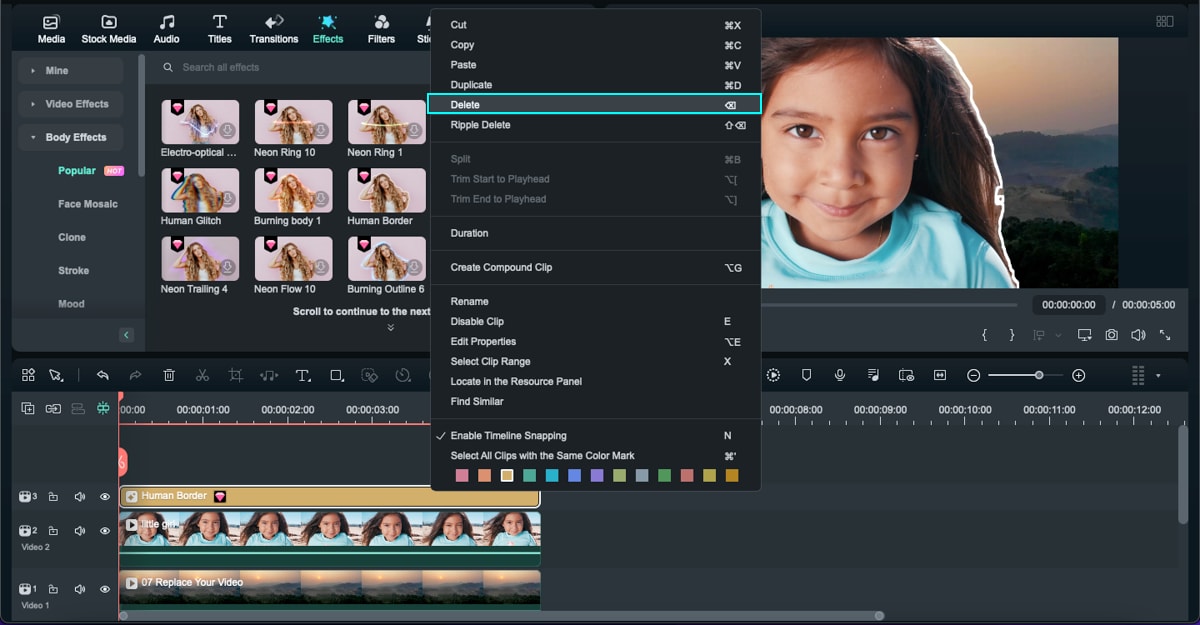
Delete Body Effects
To delete the Effects, you have three ways:
- Select the unwanted Portrait Effects and tab the Delete .
- To delete multiple Effects, click on Ctrl to select several Effects at one time, and then click Delete.
- Right-click on the effect, and then select Delete.
Step 5: Export and Share
Click Export when you finish editing and choose the format you want to save. Using Filmora 9 or 10? Click here to add AI portrait.
Related Posts
Featured Articles
What is the Audio Crossfade Transition and How to Use it in FCP
The audio crossfade transition effect in Final Cut Pro is a must-know for anyone who is looking to develop a career in video or audio editing.
How to Record High-Quality WhatsApp Video Call on iPhone & Android
Are you wondering how to record WhatsApp video calls on an iPhone? No worries; this article will give you the full guide to do it.
How To Make a Funny Skit Highlights: Guide and Tips
After learning how to make funny skits, Filmora can also help you create comedy skit highlights to increase your chance of going viral without the time-consuming processes.
Recommended User Guide
Video Stabilization for Windows
Discover the ease of editing clips in Filmora: this feature of Filmora will allow you to smooth out shaky footage.
AI Text-to-Video for Windows
Wondershare Filmora is an AI-supported desktop tool designed to assist in video editing to its core. Its new V13 upgrade includes many video editing features, and one of them is AI Text-to-Video.
AI Smart Search for Windows
Use powerful AI technology to easily search objects, people, texts, dialogues, and other visual elements from your videos.
