For the Best Results, Use the Latest Version.
-
Preparations
-
Account
-
Get Started & Basic Settings
-
Compatibility & Tech Specs
-
Performance Settings
-
-
Creating Projects
-
Creating New Projects
-
-
Importing & Recording
-
Video Editing for Windows
-
Basic Video Editing
- Enable/Disable Clip in Windows
- Magnetic Timeline for Windows
- Dual Monitor Setup for Video Editing on Windows
- Select All Clips on Timeline for Windows
- Manage Timeline and Tracks on Windows
- Auto Ripple for Windows
- Split & trim video
- Crop & Pan & Zoom Video in Filmora for Windows
- Compositing
- Change Video Speed on Windows
- Playing videos in reverse
- Mark In and Mark Out for Windows
- Markers for Windows
- Group editing
- Customizable Backgrounds for Videos and Images in Windows
- Video snapshot
- Using Freeze Frame in Filmora for Windows
- Logo Reveal For Windows
- Auto Enhance in Filmora for Windows
- Applying drop shadow
- Adjustment layer for Windows
- Apply Transforming for Windows
- Video Editing Ruler – Windows
-
Advanced Video Editing
- Drawing Tools for Windows | Filmora Guide
- Create Multi-Camera Clip in Filmora for Windows
- Compound Clip for Windows
- Multi-Clip Editing for Windows
- Filmora Motion Blur | Windows
- Filmora Flicker Removal Guide | Windows
- Apply mask to video
- Creating a PIP Effect for Windows
- Keyframe Graph Editor for Windows
- Add animation keyframing for Windows
- Keyframe Path Curve for Windows
-
AI-Powered Video Editing
- Smart Scene Cut for Windows
- Smart Short Clips for Windows
- AI Face Mosaic for Windows
- Filmora AI Eye Contact- Windows
- AI Video Enhancer for Windows
- AI Text-to-Video for Windows
- Planar Tracking for Windows
- AI Idea to Video for Windows
- Filmora Image to Video for Windows
- Filmora Image to Prompt for Windows
- Instant Cutter Tool for Windows
- AI Extend
- Filmora AI Relight - Windows
- Filmora AI Image Enhancer Guide - Windows
- AI Script to Video Guide for Windows
- AI Text-Based Editing for Windows
- AI Mate Editing for Windows
- Instant Mode in Filmora
- ChatGPT Plugin - AI Copywriting
- AI Smart Cutout for Windows
- Lens correction on Windows
- Auto Reframe Video for Windows
- AI Portrait Cutout
- Scene detection feature
- AI Smart Masking for Windows
- Motion Tracking on Windows
- Video Stabilization for Windows
- AI Video/Photo Object Remover for Windows
- AI Smart Search for Windows
- AI Skin Tone Protection for Windows
- AI Image for Windows
- Chroma key (green screen)
- Super Slow Motion with Optical Flow for Windows
- Video Denoise for Windows
-
-
Audio Editing for Windows
-
Basic Audio Editing
-
Advanced Audio Editing
-
AI-Powered Audio Editing
- Auto synchronization
- AI Sound Effect
- Smart BGM Generation on Windows
- AI Voice Enhancer
- AI Voice Cloning in Wondershare Filmora
- AI Music Generator for Windows
- Audio To Video
- AI Vocal Remover for Windows
- AI Auto Beat Sync for Windows
- AI Audio Stretch for Windows
- AI Audio Denoise for Windows
- Silence Detection on Windows
-
-
Text Editing for Windows
-
Basic Text Editing
-
Advanced Text Editing
-
AI-Powered Text Editing
-
-
Video Customizations
-
Video Effects
-
Audio Effects
-
Transitions
-
Stickers
-
Filters
-
Color Editing
-
Animations
-
Templates
-
Asset Center
-
-
Exporting & Share & Cloud Backup
AI Voice Cloning
The AI Voice Cloning feature, also known as AI modeling in Wondershare Filmora, allows users to replicate a person’s voice using advanced AI technology. By analyzing voice samples, it generates realistic voiceovers that match tone and style. This feature is useful for narration, dubbing, and multilingual content creation, helping creators produce consistent and professional audio without repeated recordings.
Comprehensive Steps to Clone Voice in Filmora
The text-to-speech feature in Filmora lets you narrate the text in your voice by cloning it. To learn how to clone your voice using this tool, read the steps provided below:
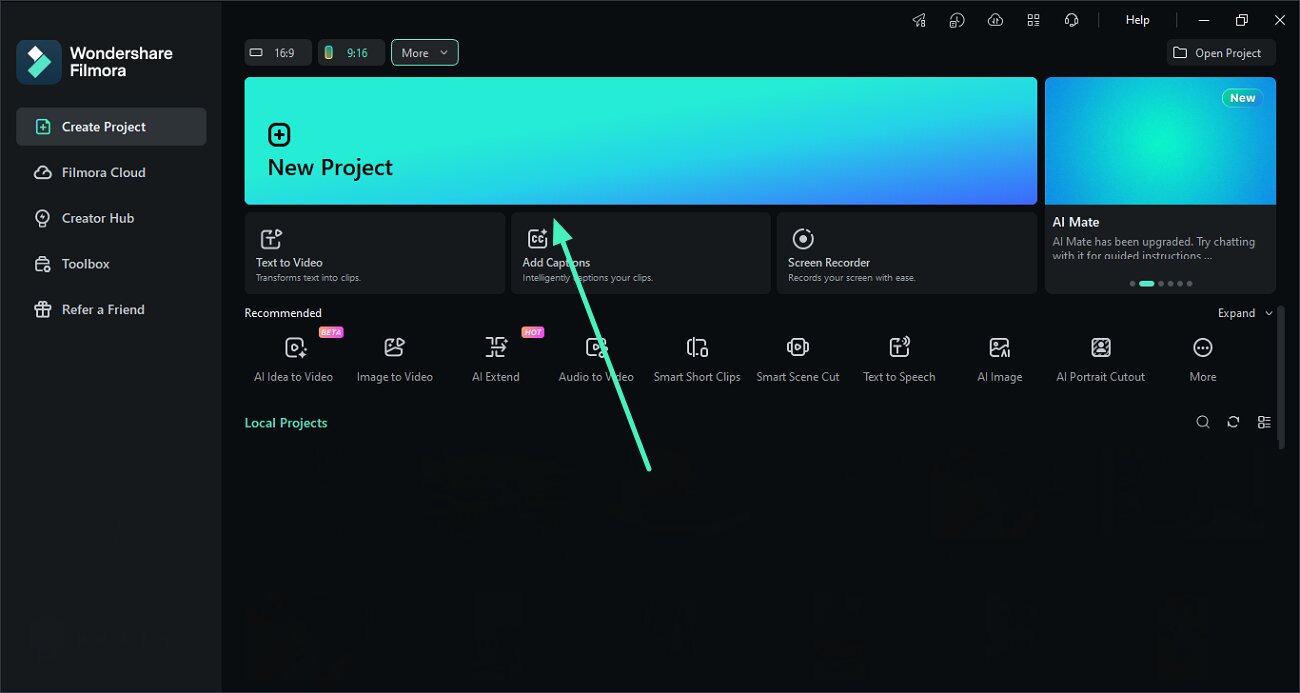
Step 1. Start with a New Filmora Project
To begin, launch Filmora on your device and create a project using the New Project option. Import the video to the tool’s interface and drag it to the timeline.
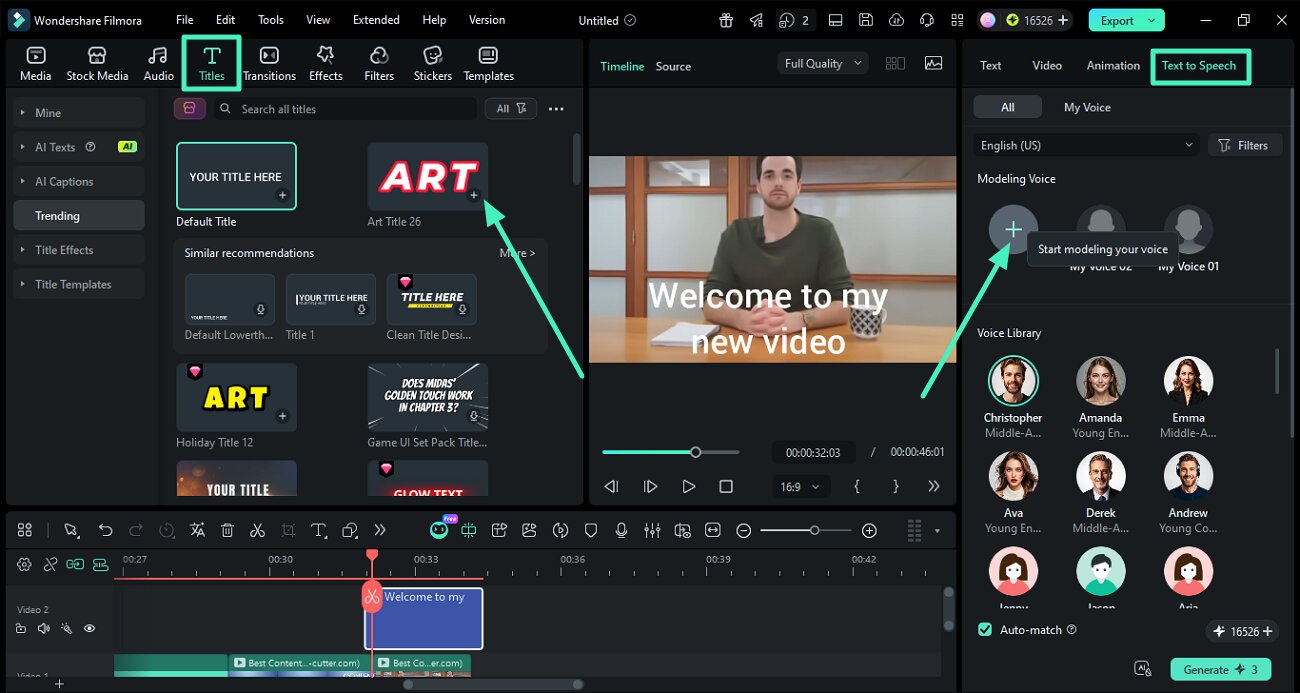
Step 2. Add Text for Narration
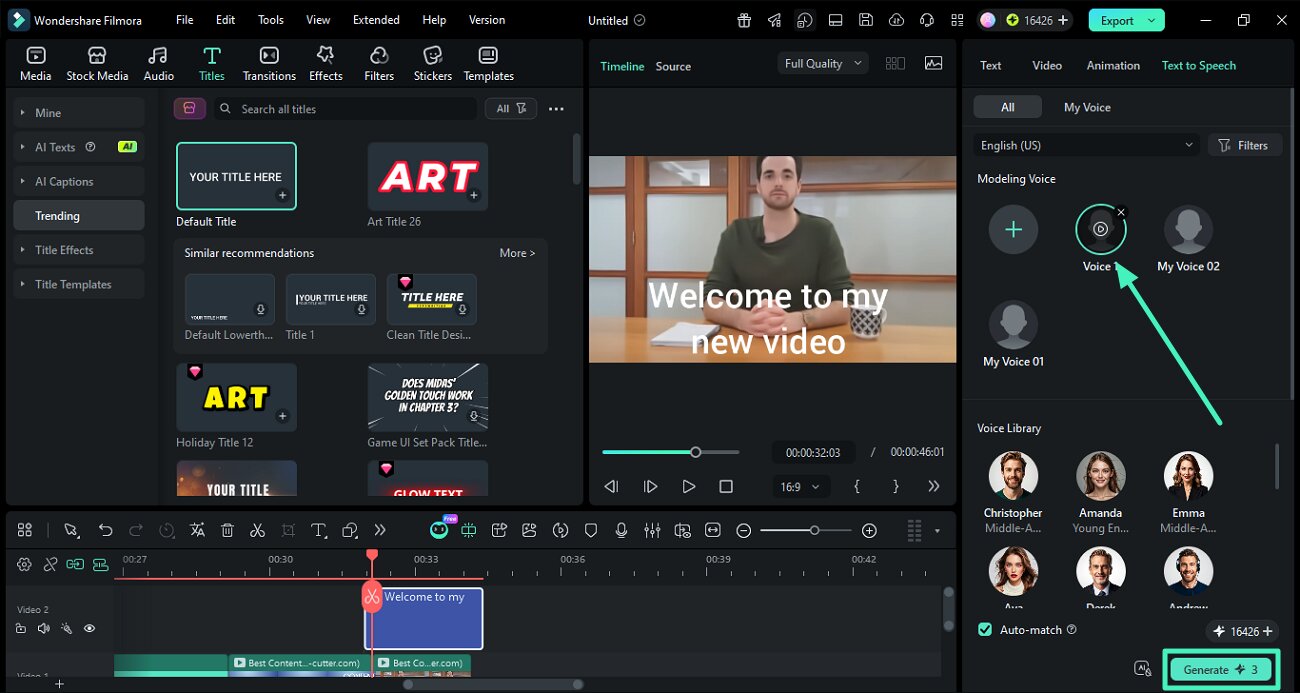
After entering the editing interface, enable the Titles option from the menu and type in your text for narration. Now, head to the Text to Speech section from the properties panel on the right. Access the Modeling Voice section and press the + icon to begin the process.
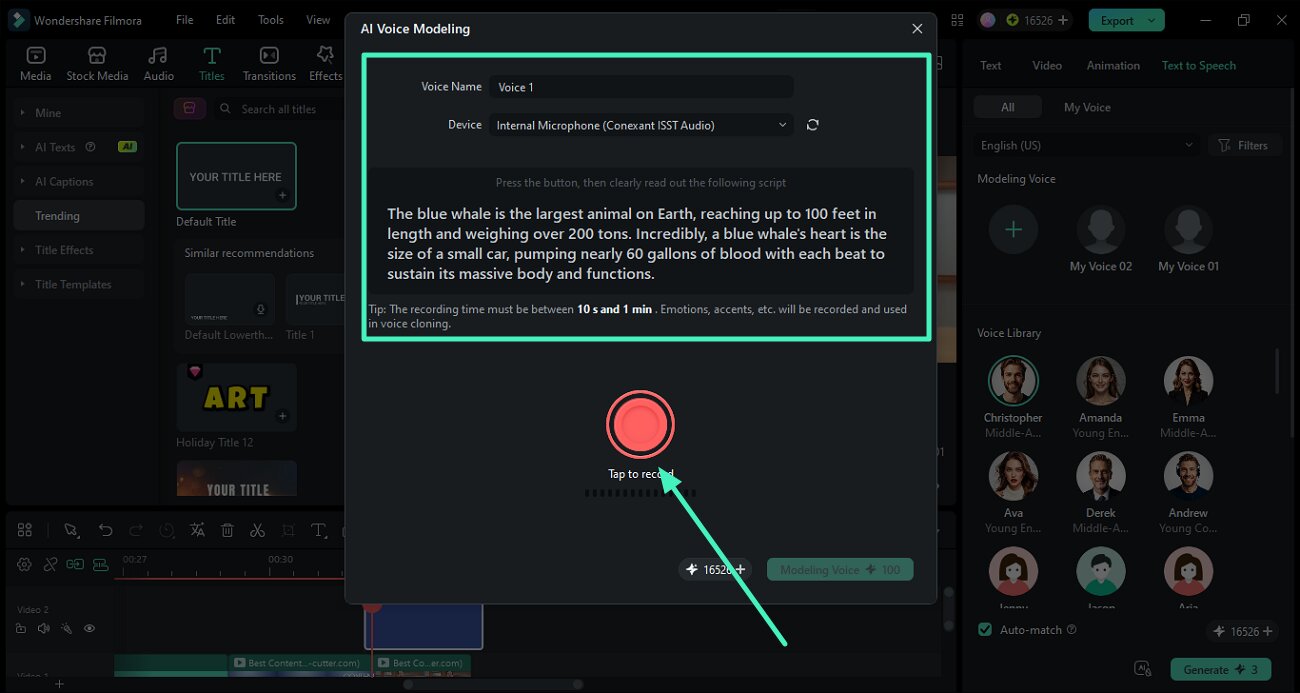
Step 3. Record Voice for Narration
In the following interface, name the voice and select the microphone settings. Now press the Red round button to start the voice recording and read the text on the screen out loud and clear. Once you are done reading, press the stop button to abort.
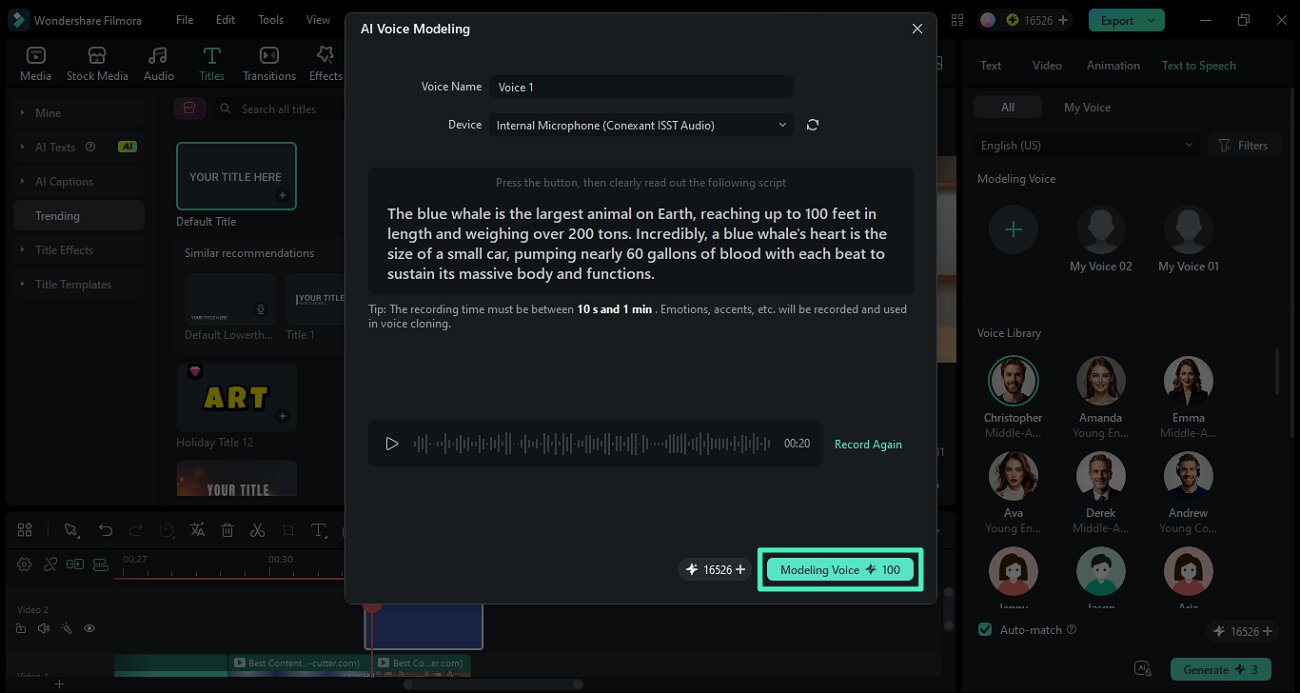
Step 4. Clone Recorded Voice
After the recording is completed, preview it and press the Generate button to create the voice model. You can also rerecord the audio if it does not sound perfect.
Step 5. Generate Text Narration for Cloned Voice
When the voice model is cloned and available in the library, select it from there and press the Generate button to execute the process.
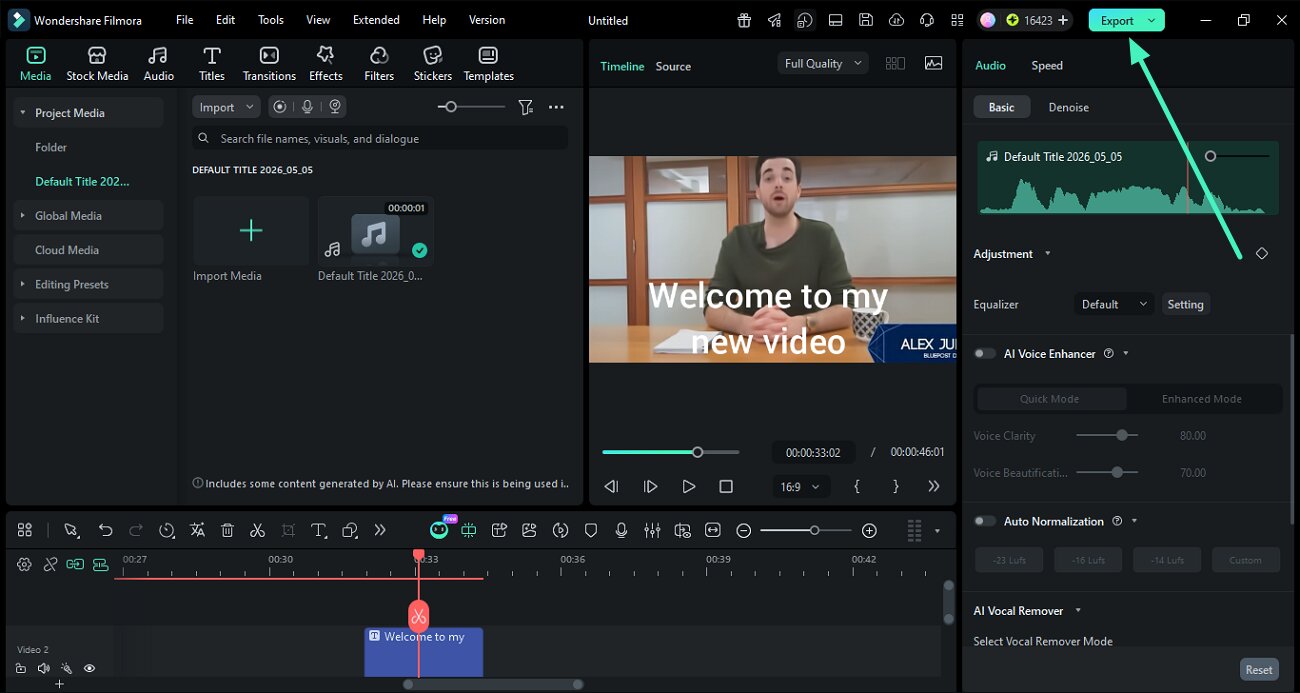
Step 6. Review Results and Export
Once the narration is generated with the cloned voice, preview it within the preview window. Press the Export button from the top-right corner of the interface to save the results.
Related Posts
Featured Articles
Still Looking for Topaz Video AI Crack? There’s a Safer Alternative You Should Know
Thinking about a Topaz Video AI crack? Learn the risks and find a safer way to upscale and restore videos without hurting your system.
How to Make an Effective Elevator Pitch Video
Let us show you how to create an elevator pitch video. Start by planning your message, record with confidence, and follow the steps in this guide to bring it all together.
Twitch Video Banner Size: Maintaining the Right Limits
Learn about Twitch video banner size, profile dimensions, and expert tips to optimize banners. Discover how to simplify resizing for perfect banner media.
Recommended User Guide
Auto synchronization
This guide helps you match your audio with your video and make the sound clear.
AI Audio Denoise for Windows
AI approach is trained by deep learning model with a great amount of data. It performs better in removing the noise, generating a new clear audio signal with distortion at the minimum.
AI Music Generator for Windows
With advanced versions come advanced features, and one of Wondershare Filmora's V13 innovations is AI Music Generation.
