For the Best Results, Use the Latest Version.
-
Preparations
-
Account
-
Get Started & Basic Settings
-
Compatibility & Tech Specs
-
Performance Settings
-
-
Creating Projects
-
Creating New Projects
-
-
Importing & Recording
-
Video Editing for Windows
-
Basic Video Editing
- Enable/Disable Clip in Windows
- Magnetic Timeline for Windows
- Dual Monitor Setup for Video Editing on Windows
- Select All Clips on Timeline for Windows
- Manage Timeline and Tracks on Windows
- Auto Ripple for Windows
- Split & trim video
- Crop & Pan & Zoom Video
- Compositing
- Change video playback speed
- Playing videos in reverse
- Mark In and Mark Out for Windows
- Markers for Windows
- Group editing
- Customizable Backgrounds for Videos and Images in Windows
- Video snapshot
- Using freeze frame
- Logo Reveal For Windows
- Apply auto enhance
- Applying drop shadow
- Adjustment layer for Windows
- Transforming
- Video Editing Ruler – Windows
-
Advanced Video Editing
- Drawing Tools for Windows | Filmora Guide
- Create Multi-Camera Clip
- Compound Clip for Windows
- Multi-Clip Editing for Windows
- Filmora Motion Blur | Windows
- Filmora Flicker Removal Guide | Windows
- Apply mask to video
- Creating a PIP effect
- Keyframe Graph Editor for Windows
- Add animation keyframing for Windows
- Keyframe Path Curve for Windows
-
AI-Powered Video Editing
- Smart Scene Cut for Windows
- Smart Short Clips for Windows
- AI Face Mosaic for Windows
- Filmora AI Eye Contact- Windows
- AI Video Enhancer for Windows
- AI Text-to-Video for Windows
- Planar Tracking for Windows
- AI Idea to Video for Windows
- Filmora Image to Video for Windows
- Filmora Image to Prompt for Windows
- Instant Cutter Tool for Windows
- AI Extend
- Filmora AI Relight - Windows
- Filmora AI Image Enhancer Guide - Windows
- AI Script to Video Guide for Windows
- AI Text-Based Editing for Windows
- AI Mate Editing for Windows
- Create with instant mode
- ChatGPT Plugin - AI Copywriting
- AI Smart Cutout
- Lens correction on Windows
- Auto reframe video
- AI Portrait Cutout
- Scene detection feature
- AI Smart Masking for Windows
- Make motion tracking
- Video Stabilization for Windows
- AI Video/Photo Object Remover for Windows
- AI Smart Search for Windows
- AI Skin Tone Protection for Windows
- AI Image for Windows
- Chroma key (green screen)
- Super Slow Motion with Optical Flow for Windows
- Video Denoise for Windows
-
-
Audio Editing for Windows
-
Basic Audio Editing
-
Advanced Audio Editing
-
AI-Powered Audio Editing
-
-
Text Editing for Windows
-
Basic Text Editing
-
Advanced Text Editing
-
AI-Powered Text Editing
-
-
Video Customizations
-
Video Effects
-
Audio Effects
-
Transitions
-
Stickers
-
Filters
-
Color Editing
-
Animations
-
Templates
-
Asset Center
-
-
Exporting & Share & Cloud Backup
Templates
Preset Templates in Filmora populate the timeline with some introductory clips, audio tracks, elements, stickers, and a stock video that you can replace with your footage to personalize the output. Furthermore, you can also customize any or all the other decorative objects to get the engaging movie that you want.
These preset templates not only make your post-production task quick and easy but also help you avoid the tedious process of fine-editing that you have to go through otherwise.
Index
Add a Template to the Timeline
Go to the Templates tab at the top and click the Templates menu under the Mine category on the left side. You can see there are dozens of templates, click one to preview it, and then drag the template to the timeline.

Note:
To switch from one template menu to the other, you only need to scroll down to the bottom.Replace the Template Footage
On the timeline, there will be a box indicating how many segments of the template can be replaced with materials, and you can click to edit the materials.
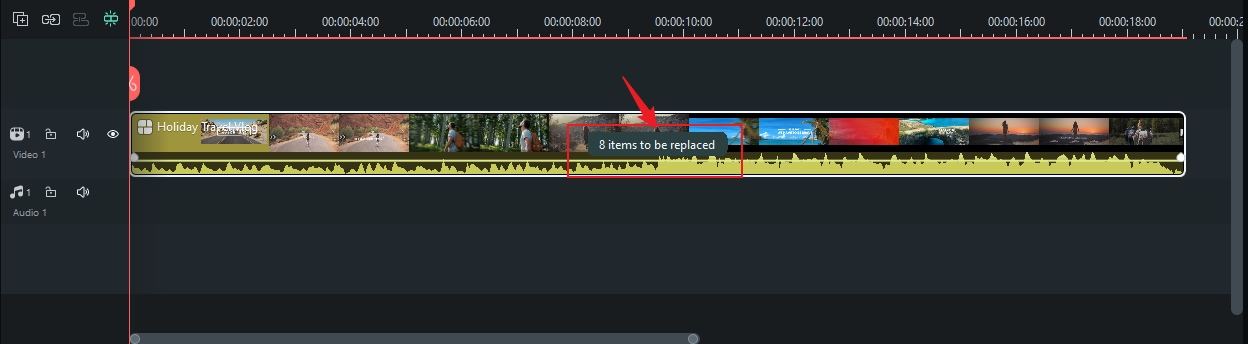
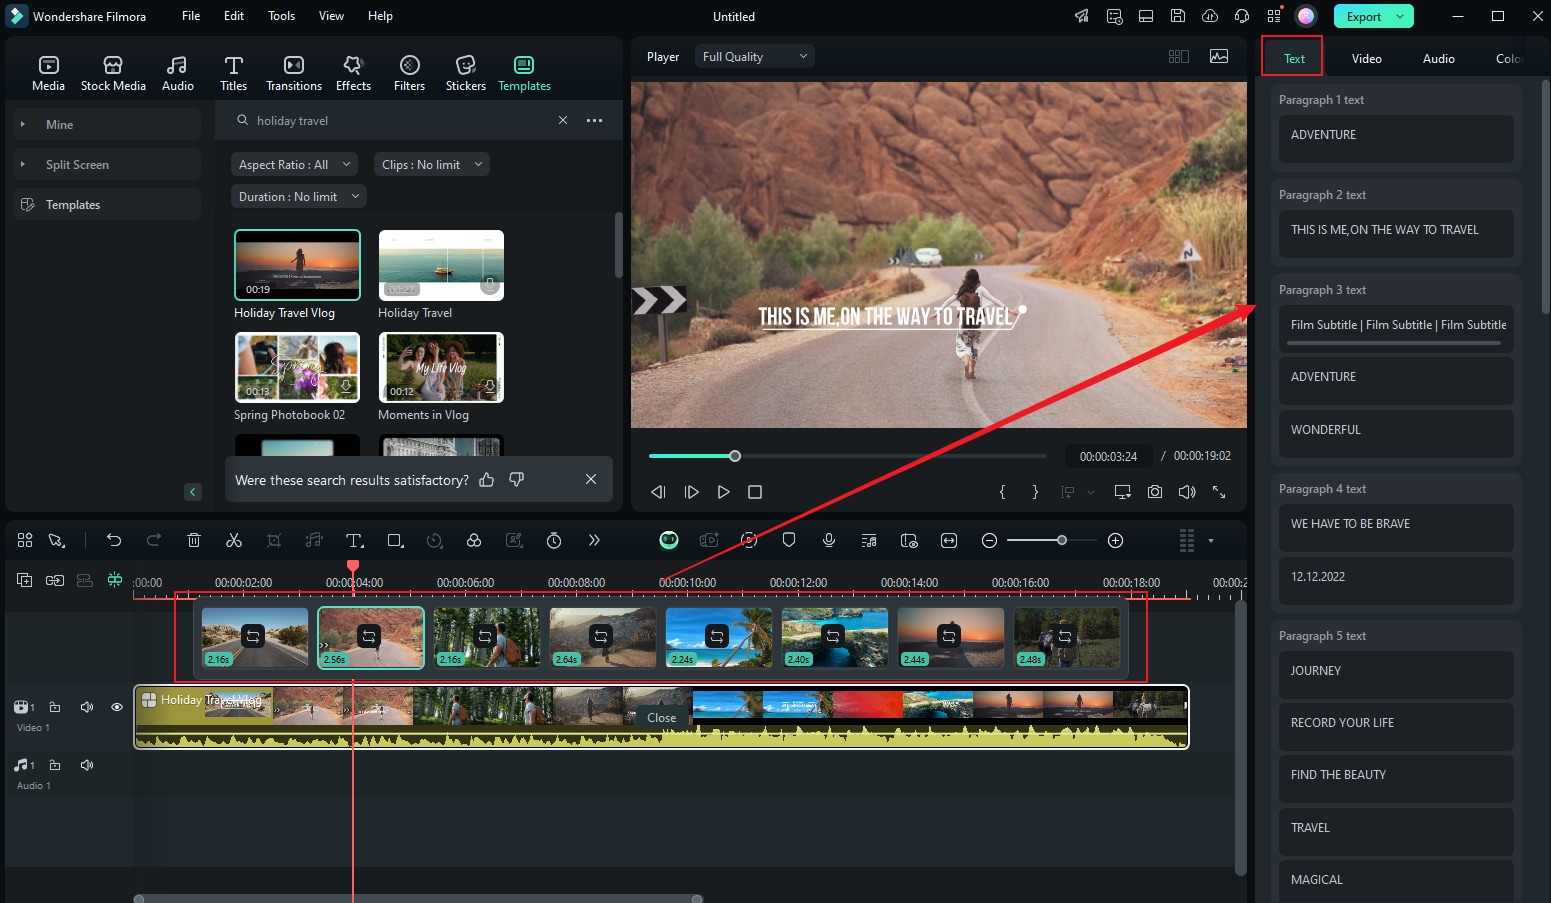
For example, if this template has 8 items that can be replaced, when you click "8 items can be replaced," the replacement material segments will appear directly above the timeline. You can click the loop icon on each material to replace the video, and customize the text in each segment in the text section on the right.
After you have replaced the material segments, you can click the "Edit" button in the middle of the video to customize the video segment selection. Once everything is complete, click "close" to finish replacing the materials.

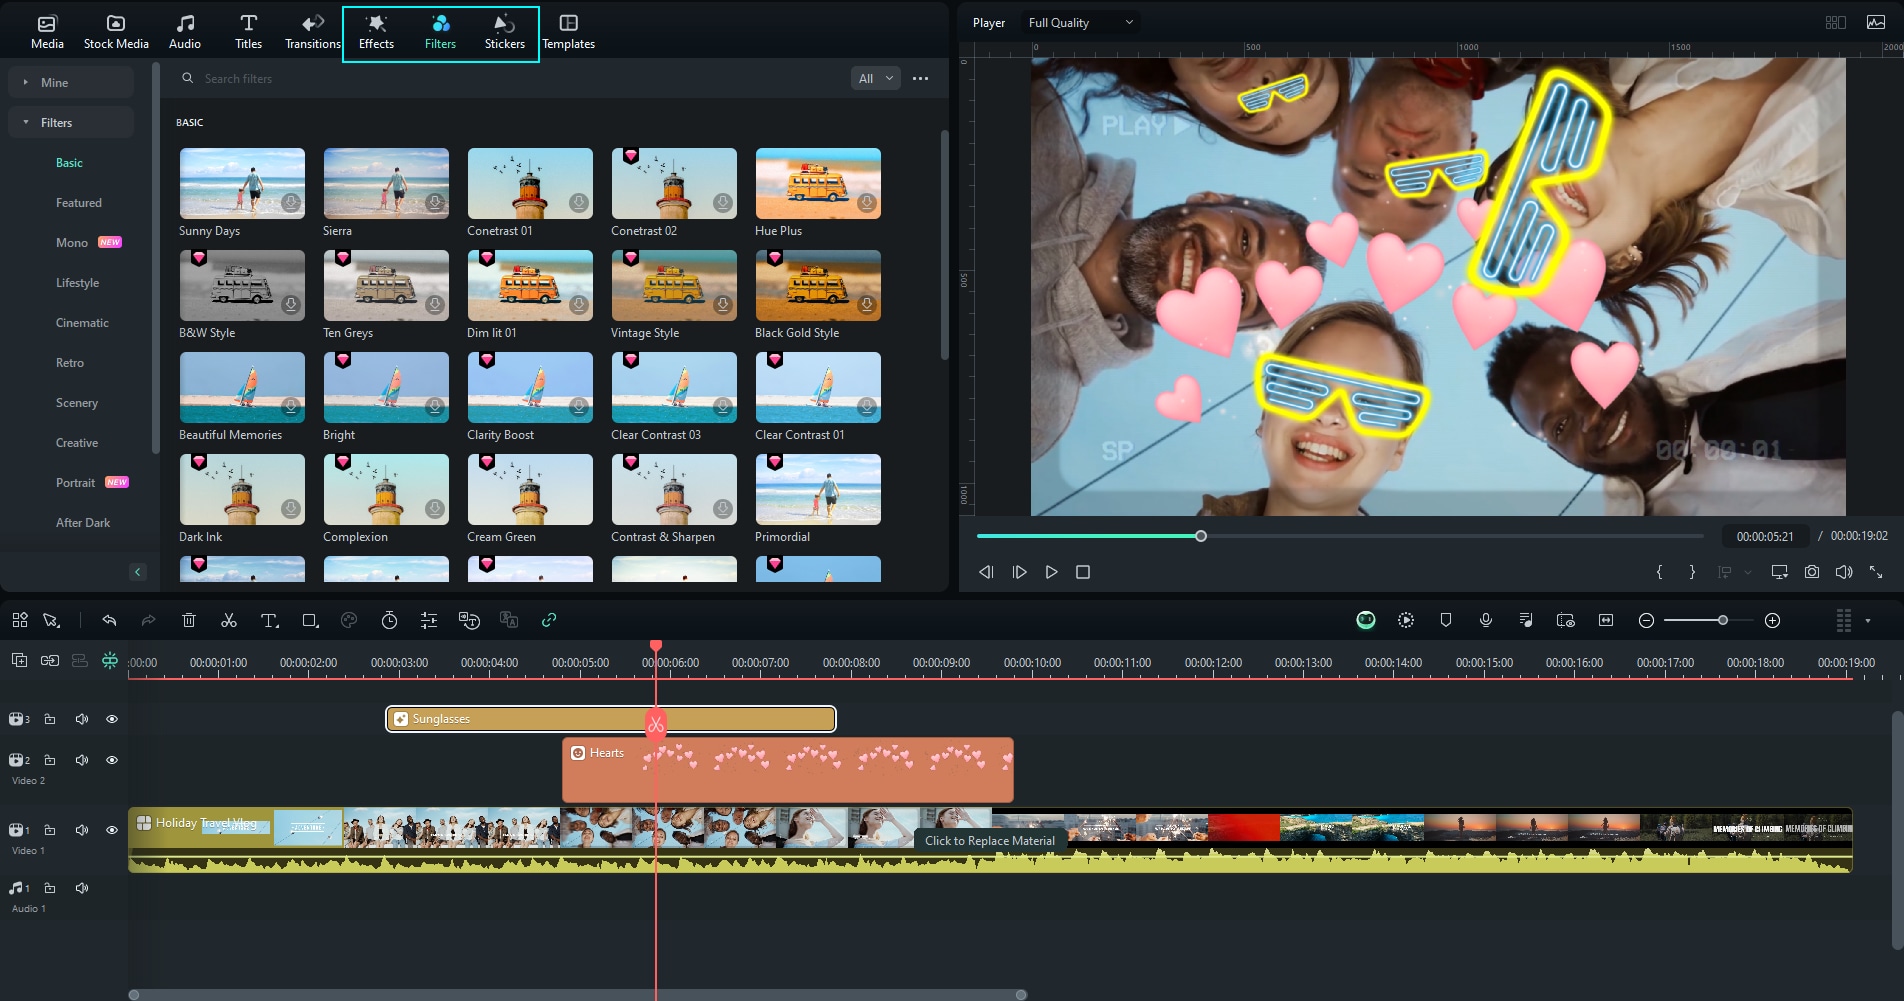
Customize the Video Template
Return to the timeline to add stickers, effects, and other elements.
Preview and Export the Video
Click the Play button that is present below the Preview window to preview the expected output. Click Export from the top-center and use your preferred option to export the final video.

Related Posts
Featured Articles
Trending Twitter Videos: Discover the Hottest Clips on X (Twitter) Today
Explore the exciting world of trending videos on Twitter (X). From funny memes to breaking news, discover viral clips and learn how Filmora can boost your content!
Everything You Need to Know About VSCO: Features, Filters, and Best Alternative
Learn more before you download VSCO for your social media video needs! Find out about VSCO’s features, filters, editing tools, and the best alternative for it.
10 of the Best Happy New Year GIF Video Websites
Do you want to create a Happy New Year GIF video for your loved ones? Here are 10 of the best Happy New Year GIF video websites to help you out.
Recommended User Guide
Split Screen Template
Learn how to create Split Screen in FIlmora
