For the Best Results, Use the Latest Version.
-
Preparations
-
Account
-
Get Started & Basic Settings
-
Compatibility & Tech Specs
-
Performance Settings
-
-
Creating Projects
-
Creating New Projects
-
-
Importing & Recording
-
Video Editing for Windows
-
Basic Video Editing
- Enable/Disable Clip in Windows
- Magnetic Timeline for Windows
- Dual Monitor Setup for Video Editing on Windows
- Select All Clips on Timeline for Windows
- Manage Timeline and Tracks on Windows
- Auto Ripple for Windows
- Split & trim video
- Crop & Pan & Zoom Video
- Compositing
- Change Video Speed on Windows
- Playing videos in reverse
- Mark In and Mark Out for Windows
- Markers for Windows
- Group editing
- Customizable Backgrounds for Videos and Images in Windows
- Video snapshot
- Using freeze frame
- Logo Reveal For Windows
- Apply auto enhance
- Applying drop shadow
- Adjustment layer for Windows
- Transforming
- Video Editing Ruler – Windows
-
Advanced Video Editing
- Drawing Tools for Windows | Filmora Guide
- Create Multi-Camera Clip
- Compound Clip for Windows
- Multi-Clip Editing for Windows
- Filmora Motion Blur | Windows
- Filmora Flicker Removal Guide | Windows
- Apply mask to video
- Creating a PIP effect
- Keyframe Graph Editor for Windows
- Add animation keyframing for Windows
- Keyframe Path Curve for Windows
-
AI-Powered Video Editing
- Smart Scene Cut for Windows
- Smart Short Clips for Windows
- AI Face Mosaic for Windows
- Filmora AI Eye Contact- Windows
- AI Video Enhancer for Windows
- AI Text-to-Video for Windows
- Planar Tracking for Windows
- AI Idea to Video for Windows
- Filmora Image to Video for Windows
- Filmora Image to Prompt for Windows
- Instant Cutter Tool for Windows
- AI Extend
- Filmora AI Relight - Windows
- Filmora AI Image Enhancer Guide - Windows
- AI Script to Video Guide for Windows
- AI Text-Based Editing for Windows
- AI Mate Editing for Windows
- Create with instant mode
- ChatGPT Plugin - AI Copywriting
- AI Smart Cutout
- Lens correction on Windows
- Auto reframe video
- AI Portrait Cutout
- Scene detection feature
- AI Smart Masking for Windows
- Make motion tracking
- Video Stabilization for Windows
- AI Video/Photo Object Remover for Windows
- AI Smart Search for Windows
- AI Skin Tone Protection for Windows
- AI Image for Windows
- Chroma key (green screen)
- Super Slow Motion with Optical Flow for Windows
- Video Denoise for Windows
-
-
Audio Editing for Windows
-
Basic Audio Editing
-
Advanced Audio Editing
-
AI-Powered Audio Editing
-
-
Text Editing for Windows
-
Basic Text Editing
-
Advanced Text Editing
-
AI-Powered Text Editing
-
-
Video Customizations
-
Video Effects
-
Audio Effects
-
Transitions
-
Stickers
-
Filters
-
Color Editing
-
Animations
-
Templates
-
Asset Center
-
-
Exporting & Share & Cloud Backup
AI Skin Tone Protection for Windows
Do you find it troublesome when skin tone becomes distorted after applying LUT? Filmora has come up with the perfect feature to fix this issue. The recently launched version has a Skin Tone Protection feature that uses AI to analyze the tones and make them right. Follow this guide and know how to apply it.
How to Enhance Skin Tone Using Filmora’s New AI Feature
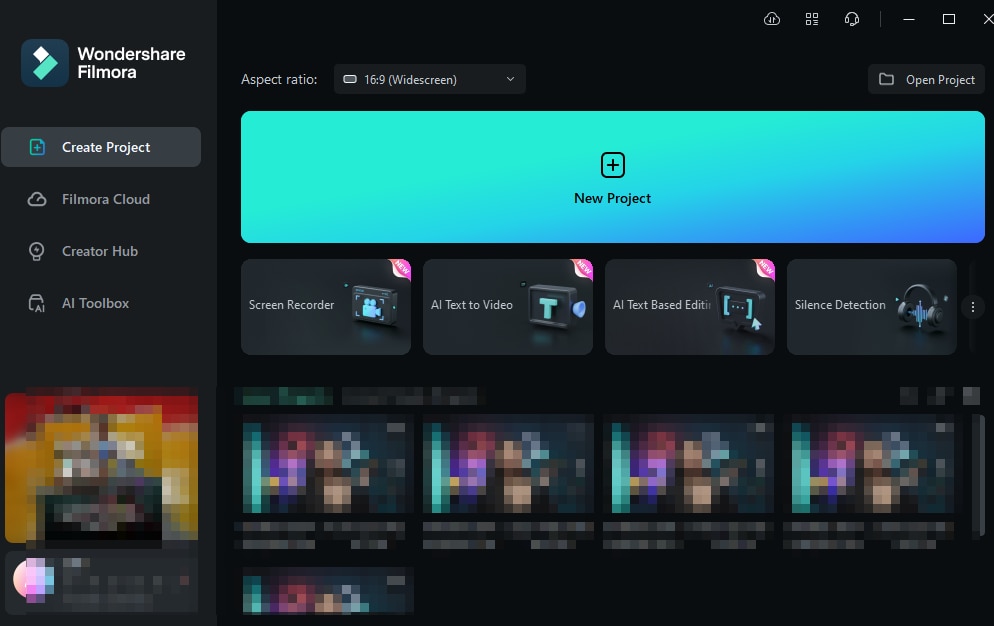
Step 1: Launch Filmora on your Desktop and Start a Project
If you have not downloaded Wondershare Filmora on your desktop, download it. Once you have it opened, log in or sign up and head towards the left side panel to select "Create Project". Multiple tabs will display on the main screen, out of which you must select the "New Project" option.
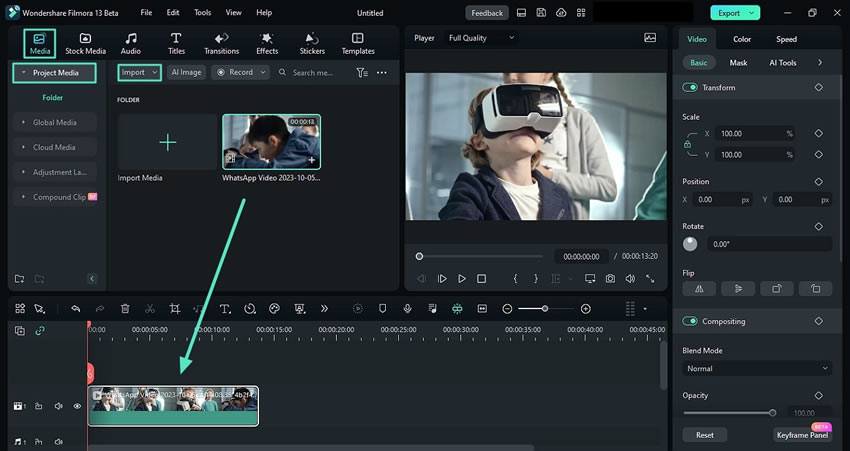
Step 2: Import Media and Drag it to the Timeline
After creating the new project successfully, you will be led to the main interface of Filmora. From the custom toolbar, select the "Media" tab and further select "Project Media" from the categories available at the left panel. Select "Import" to upload your media files, and drag and drop these files onto the timeline.
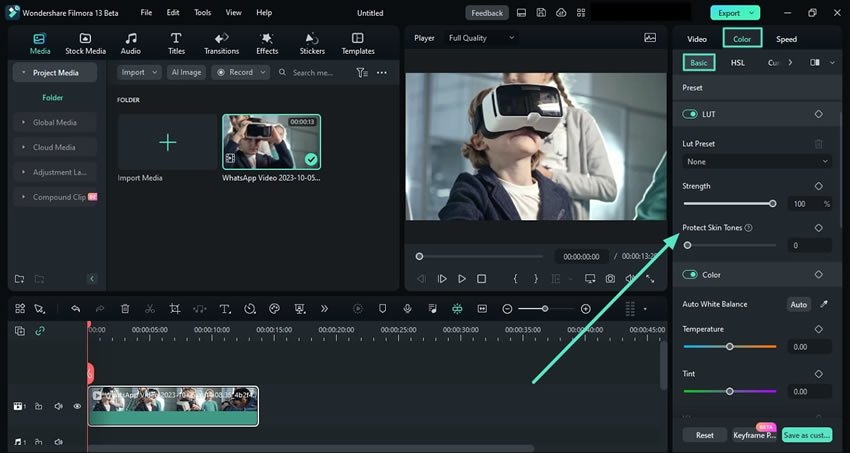
Step 3: Access the AI Skin Tone Option
For the final step of getting skin tone protection, select the clip in the timeline, hover the mouse towards the right-side panel, and click the "Color" tab. Furthermore, select the "Basic" option, and under the "LUT" section, you'll find the "Protect Skin Tones" slider. You can increase or decrease the level of skin tone protection by adjusting the slider or entering a value in the box.
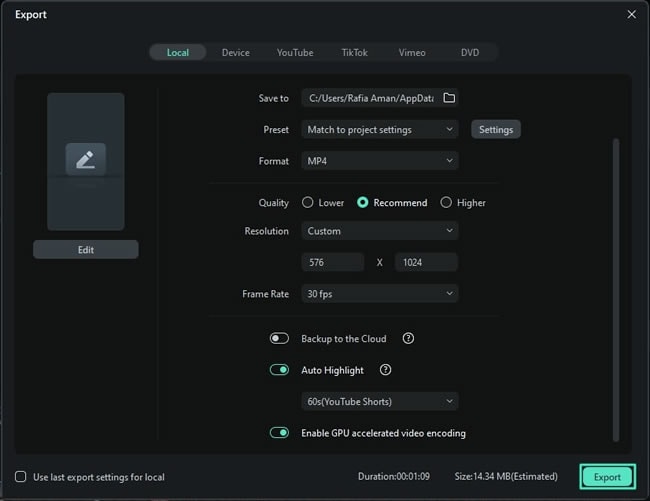
Step 4: Export the Edited Video
Once you’ve edited your video and applied all the effects and filters, it is time for finalization. Click the "Play" button in the preview screen to see the final results, and if you are satisfied, navigate towards the top right corner and click "Export". From the export window, name your video, make other adjustments, and tap on the "Export" button to download it on your device.
Related Posts
Featured Articles
Convert YouTube Videos to Scripts in Different Ways | Ultimate Guide 2026
Explore multiple ways to turn your YouTube videos to scripts, from built-in options to smarter AI-powered tools. Find the method that fits your scenario and needs in this ultimate guide!
How to Create Thumbnails with & without Capcut?
Wondering how to make thumbnails after CapCut's ban in the U.S.? Learn how to create eye-catching thumbnails using Filmora, a robust alternative with professional tools.
2026 Updated | Crop GIFs Like a Pro – Top 7 Online and Offline GIF Croppers
Are you searching for a dedicated tool to crop an animated GIF? Check out our comprehensive guide on the seven best GIF crop tools and make the process a breeze.
Recommended User Guide
Video Stabilization for Windows
Discover the ease of editing clips in Filmora: this feature of Filmora will allow you to smooth out shaky footage.
Smart Scene Cut for Windows
This guide explains how to use Smart Scene Cut in your videos on Windows.
Filmora AI Relight - Windows
Learn how to use Filmora AI Relight on Windows to relight photos and enhance lighting with AI for professional results.
