
For the Best Results, Use the Latest Version.
-
Preparations
-
Account
-
Get Started & Basic Settings
-
Compatibility & Tech Specs
-
Performance Settings
-
-
Creating Projects
-
Creating New Projects
-
-
Importing & Recording
-
Video Editing for Windows
-
Basic Video Editing
- Enable/Disable Clip in Windows
- Magnetic Timeline for Windows
- Dual Monitor Setup for Video Editing on Windows
- Select All Clips on Timeline for Windows
- Timeline and Track Management
- Auto Ripple for Windows
- Split & Trim Video
- Crop & Pan & Zoom Video in Filmora for Windows
- Compositing
- Change Video Speed on Windows
- Reverse Video for Windows
- Mark In and Mark Out for Windows
- Markers for Windows
- Group editing
- Customizable Backgrounds for Videos and Images in Windows
- Video Snapshot
- Using Freeze Frame in Filmora for Windows
- Logo Reveal For Windows
- Auto Enhance in Filmora for Windows
- Applying drop shadow
- Adjustment layer for Windows
- Apply Transforming for Windows
- Video Editing Ruler – Windows
-
Advanced Video Editing
- Keyframe Motion Blur for Windows
- Drawing Tools for Windows | Filmora Guide
- Camera Tracking for Windows
- Create Multi-Camera Clip in Filmora for Windows
- Compound Clip for Windows
- Multi-Clip Editing for Windows
- Filmora Motion Blur | Windows
- 360° Video Reframing for Windows
- Track Matte for Windows
- Video Chapters in Filmora on Windows
- Filmora Flicker Removal Guide | Windows
- Create Multi-Screen Videos in Filmora on Windows
- Masking in Filmora on Windows
- Creating a PIP Effect for Windows
- Keyframe Graph Editor for Windows
- Animation Keyframing for Windows
- Keyframe Path Curve
-
AI-Powered Video Editing
- Smart Scene Cut for Windows
- Smart Short Clips for Windows
- AI Face Mosaic for Windows
- Filmora AI Eye Contact- Windows
- AI Video Enhancer for Windows
- AI Text-to-Video for Windows
- Planar Tracking for Windows
- AI Idea to Video for Windows
- AI Media Analysis for Windows
- Filmora Image to Video for Windows
- Filmora Image to Prompt for Windows
- Instant Cutter Tool for Windows
- AI Extend
- Filmora AI Relight - Windows
- Filmora AI Image Enhancer Guide - Windows
- AI Script to Video Guide for Windows
- AI Text-Based Editing for Windows
- AI Mate Editing for Windows
- Instant Mode for Windows
- ChatGPT Plugin - AI Copywriting
- AI Smart Cutout for Windows
- Lens correction on Windows
- Auto Reframe Video for Windows
- AI Portrait Cutout
- Scene Detection for Windows
- AI Smart Masking for Windows
- Motion Tracking on Windows
- Video Stabilization for Windows
- AI Video/Photo Object Remover for Windows
- AI Smart Search for Windows
- AI Skin Tone Protection for Windows
- AI Image for Windows
- Chroma Key (Green Screen) for Windows
- Super Slow Motion with Optical Flow for Windows
- Video Denoise for Windows
-
-
Audio Editing for Windows
-
Basic Audio Editing
-
Advanced Audio Editing
-
AI-Powered Audio Editing
- Auto synchronization
- AI Sound Effects in Filmora for Windows
- Smart BGM Generation on Windows
- AI Voice Enhancer in Filmora
- AI Voice Cloning in Wondershare Filmora
- AI Music Generator for Windows
- Audio To Video
- AI Vocal Remover for Windows
- AI Auto Beat Sync for Windows
- AI Audio Stretch for Windows
- AI Audio Denoise for Windows
- Silence Detection on Windows
-
-
Text Editing for Windows
-
Basic Text Editing
-
Advanced Text Editing
-
AI-Powered Text Editing
-
-
Video Customizations
-
Video Effects
- Filmora VST3 Plugins for Windows
- Filmora OpenFX Plugins for Windows
- Retouch Guide for Windows
- Filmora Pen Tool Tutorial: Motion Paths & Animation Guide
- Animated Charts
- Mocha Filmora - For Windows
- Different Types of Video Effects
- NewBlue FX effects
- Boris FX effects | Filmora Windows Guide
- Body Effects for Windows
- Filmora -Filmstock Asset
-
Audio Effects
-
Transitions
-
Stickers
-
Filters
-
Color Editing
-
Animations
-
Templates
-
Asset Center
-
-
Exporting & Share & Cloud Backup
STT and TTS in Filmora for Windows
Filmora provides Speech-to-Text (STT) and Text-to-Speech (TTS) tools for working with spoken and written content during video editing. STT automatically converts spoken dialogue into on-screen subtitles, while TTS transforms written text into voiceovers with AI-powered voices. With Smart Text Correction, Filmora can also detect problematic subtitle text and provide correction suggestions during the transcription workflow.
Using Speech to Text
Turn on the correction option before generating your captions by following these steps:
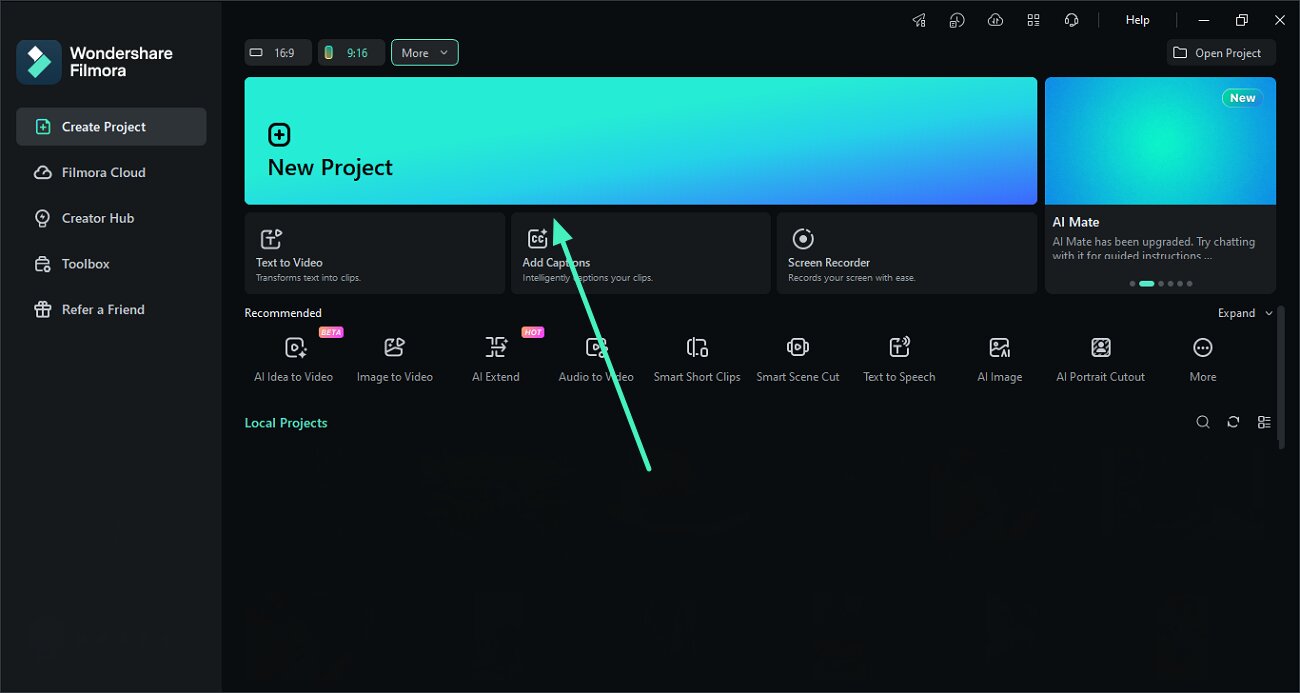
Step 1. Begin With a New Filmora Project
Launch Filmora and create a new project. Import the video into the interface, then drag it onto the editing Timeline to prepare it for transcription.
Step 2. Access the Speech to Text Feature
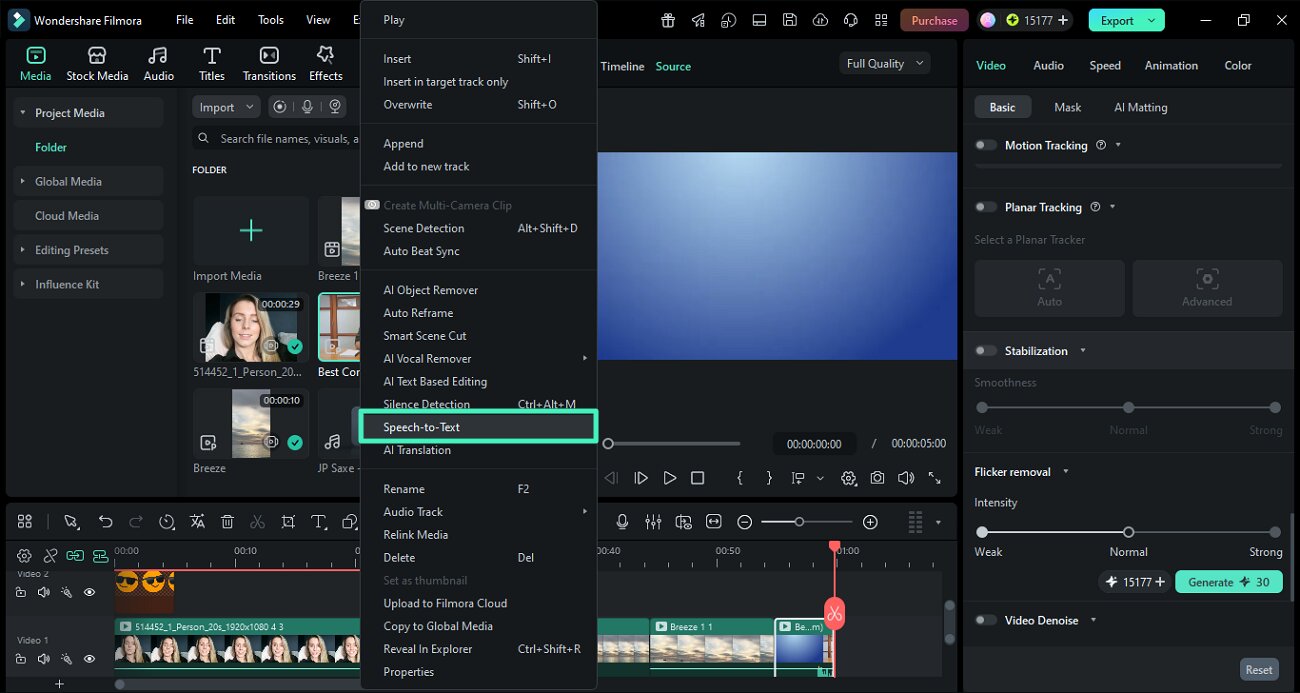
Once the video is within the interface, right-click on it to expand a list of options. Now, locate the Speech to Text option from there.
Step 3. Configure Settings, Generate Text
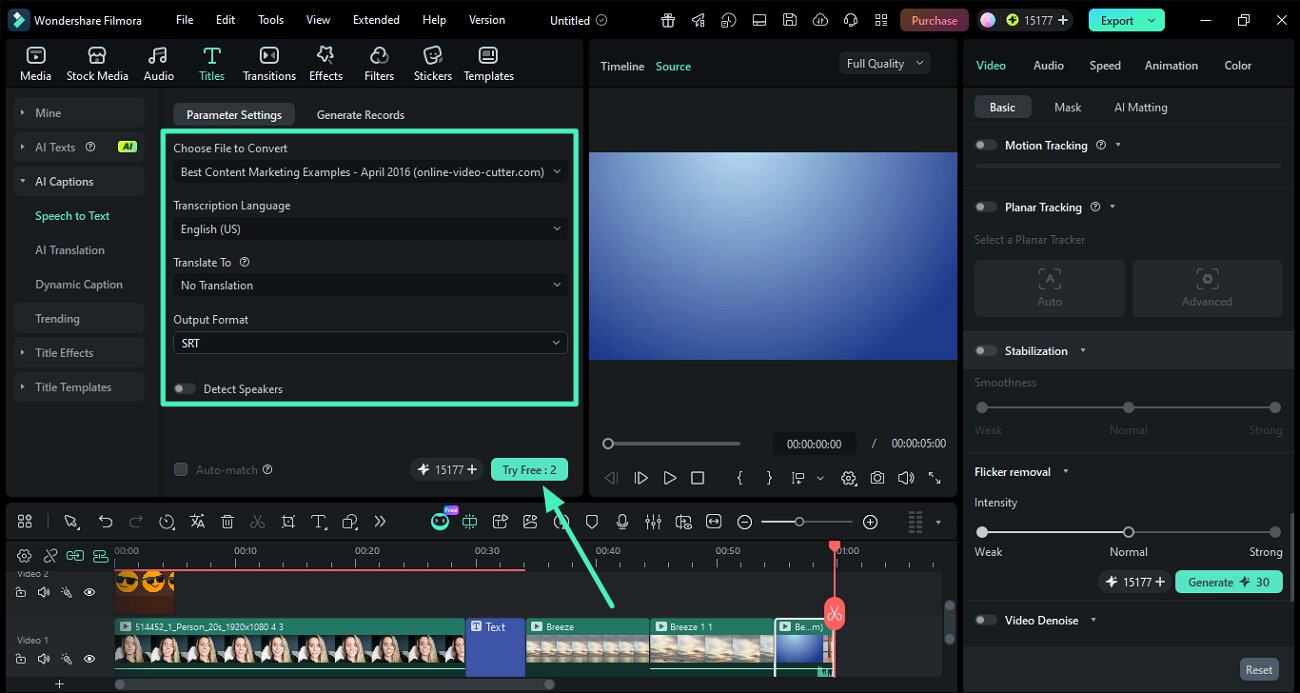
Next, choose the Language for the text using the drop-down menu and choose whether you want a translation or not. Select the format for the output as SRT and hit the Generate button.
Step 4. Enable Smart Text Correction
In the Speech to Text settings, turn on Smart Text Correction. This allows you to automatically highlight potentially incorrect subtitle sections and receive intelligent modification suggestions before generating the captions.
Step 5. Preview Text and Export
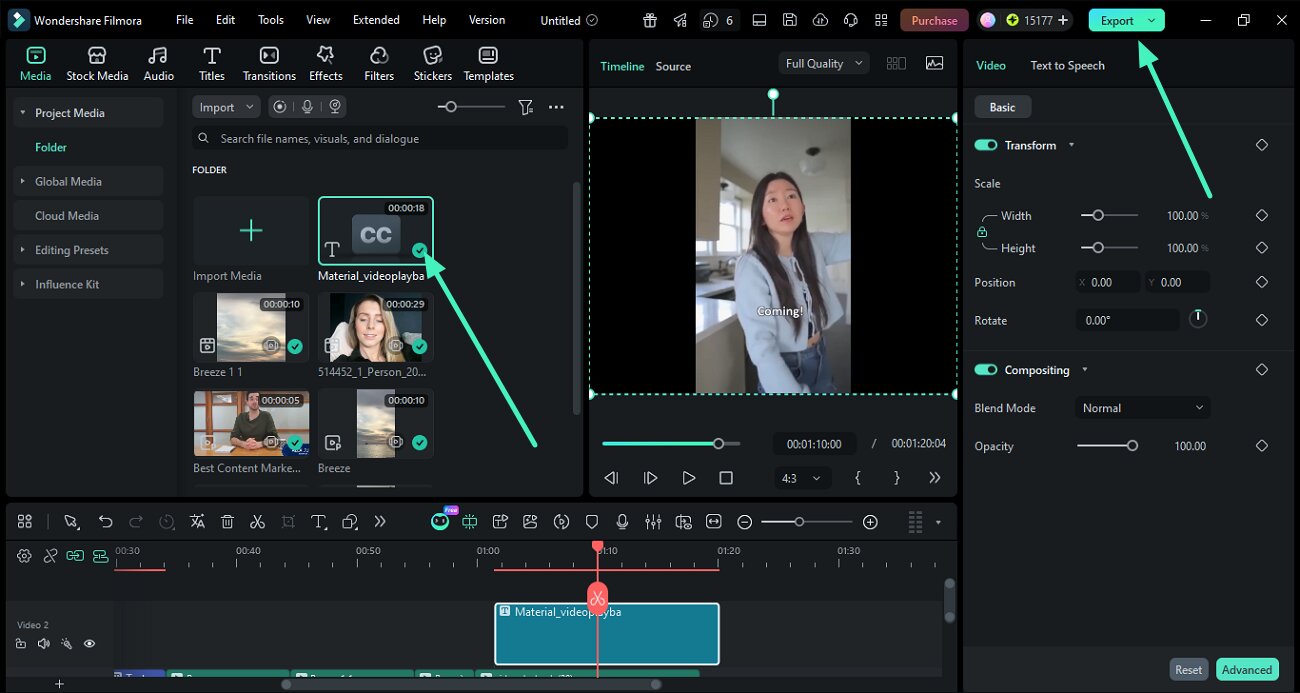
Once the text across speech is generated, drag it to the timeline to add it to the video. Preview the results in the corresponding window and save them to the device using the Export button.
Other Ways to Access Speech to Text
Filmora provides additional entry points for Speech to Text, allowing you to start transcription from the homepage, Tools menu, or timeline toolbar.
From Homepage
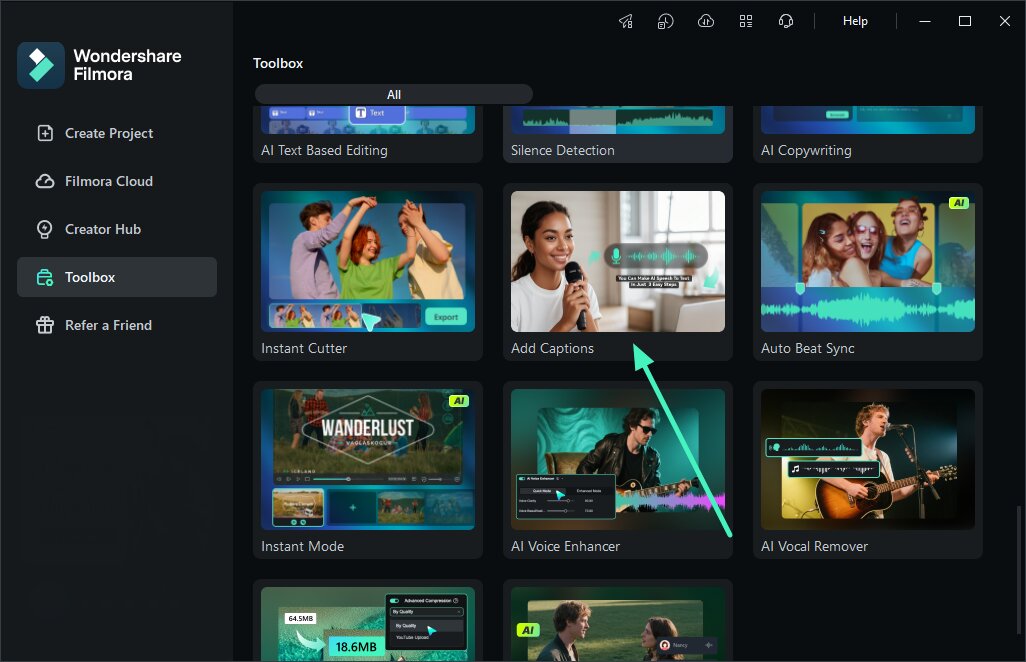
After launching Filmora on your device, head to the Toolbox on the left. Now, locate the AI Captions feature and click on it.
From Tools Menu
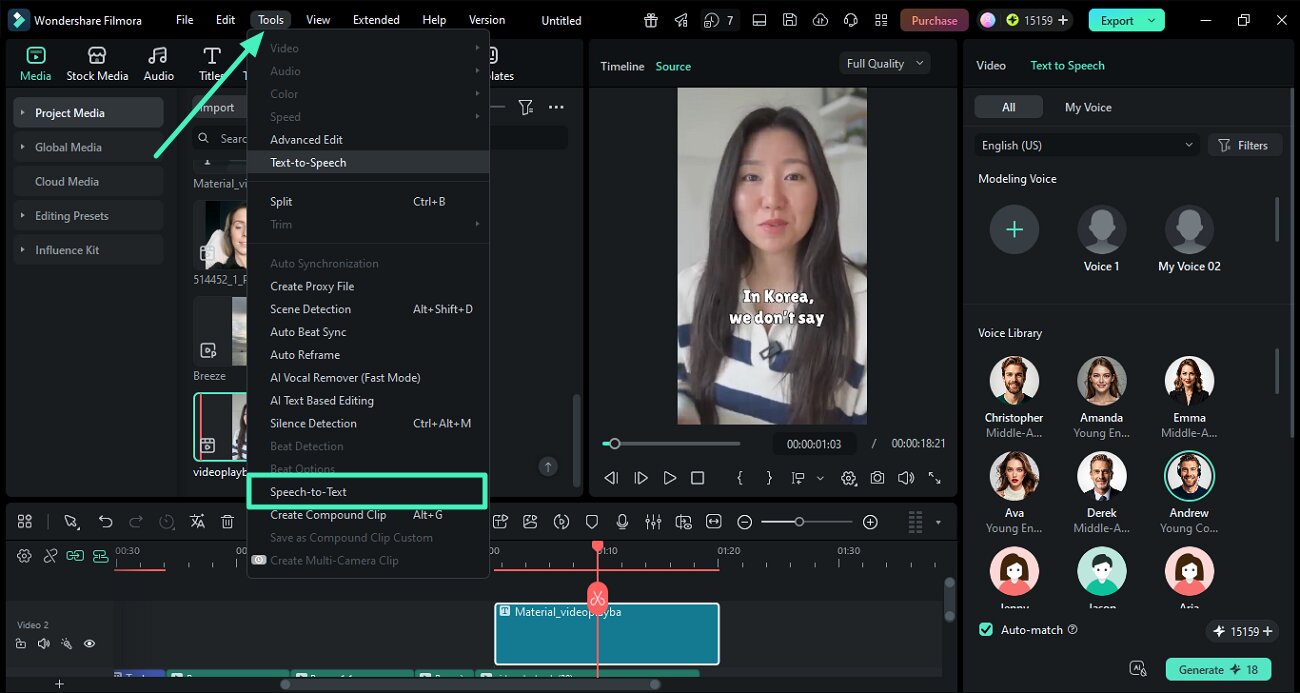
Go to the top menu bar, click Titles, and select AI Captions. Then select Speech to Text to start the conversion.
From Timeline Toolbar
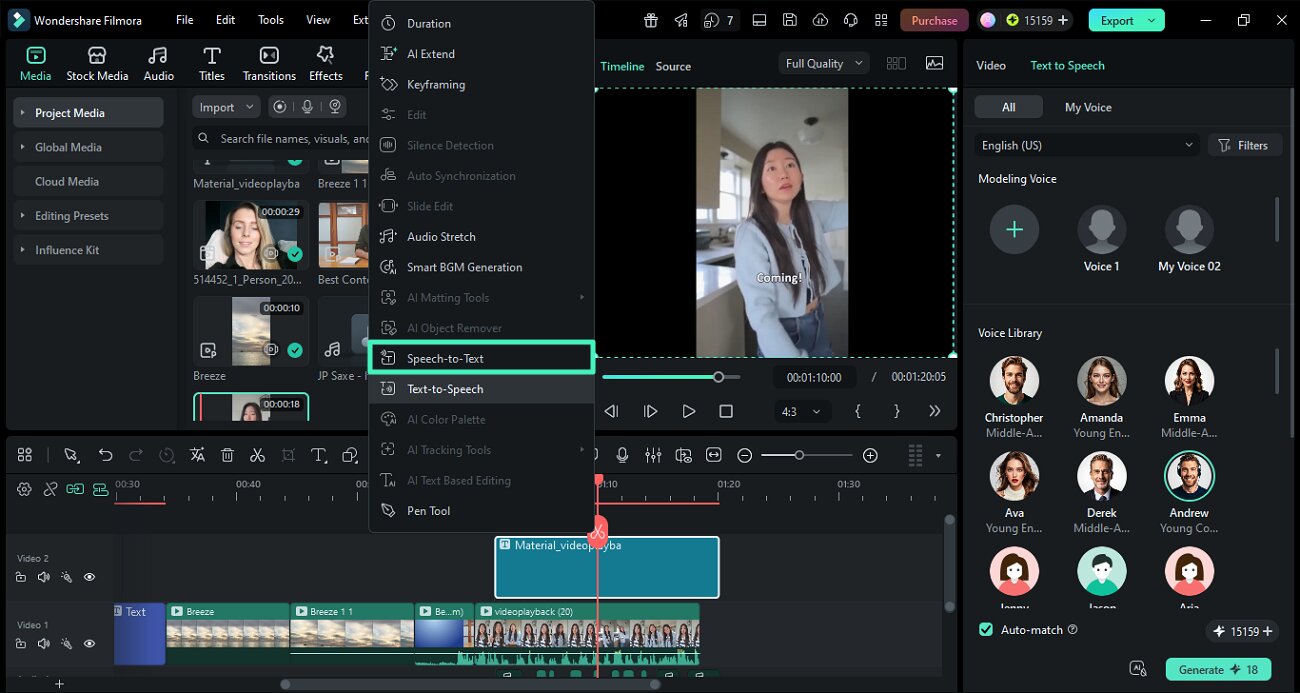
Import your video and place it on the timeline. Expand the toolbar above it and select the Speech to Text feature to access transcription directly from the editing workspace.
Using Text to Speech
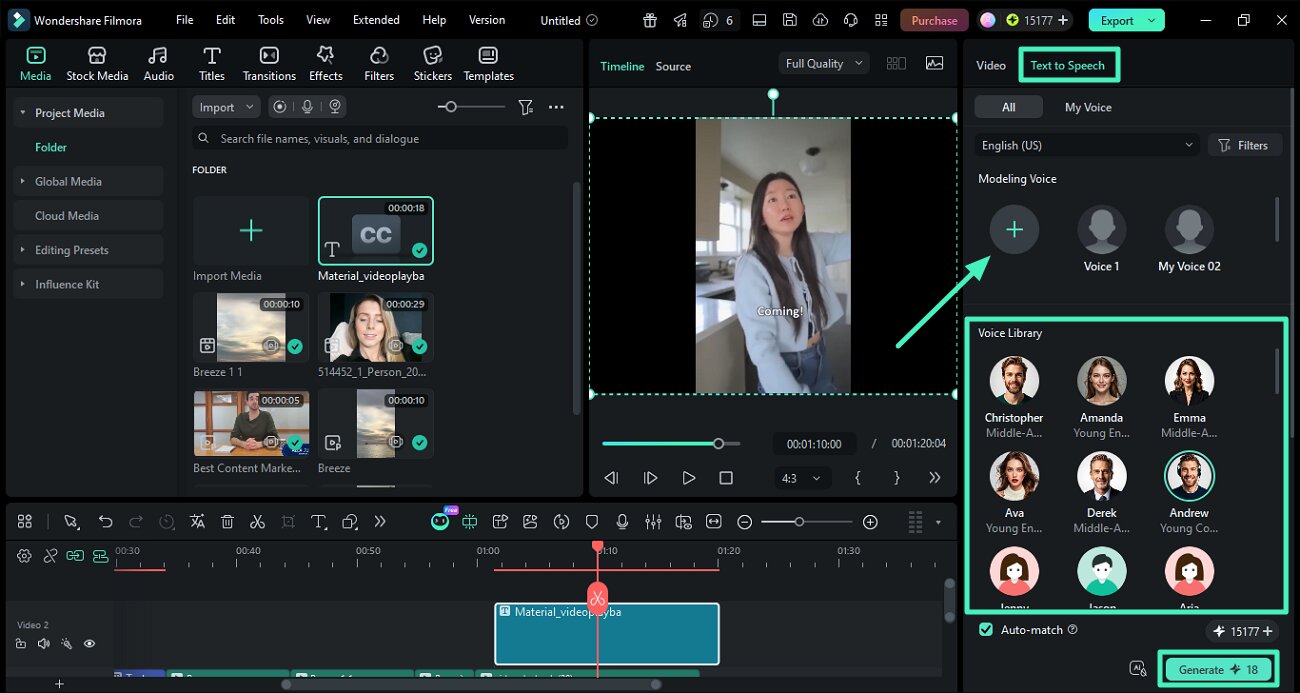
Filmora's Text-to-Speech feature converts written content into AI-generated narration. You can select from the available voices or use Voice Modeling to create a voice based on your own, making it easier to add spoken narration without recording each line manually.
Step 1. Enter Text and Select a Voice
Open Text to Speech, enter or paste your script into the text box, and select the required language. Choose a voice from the Voice Library or Modeling Voice options. You can also use options such as Auto Split, AI Polish, or AI Expand Text when needed. Click Generate to create the voiceover.
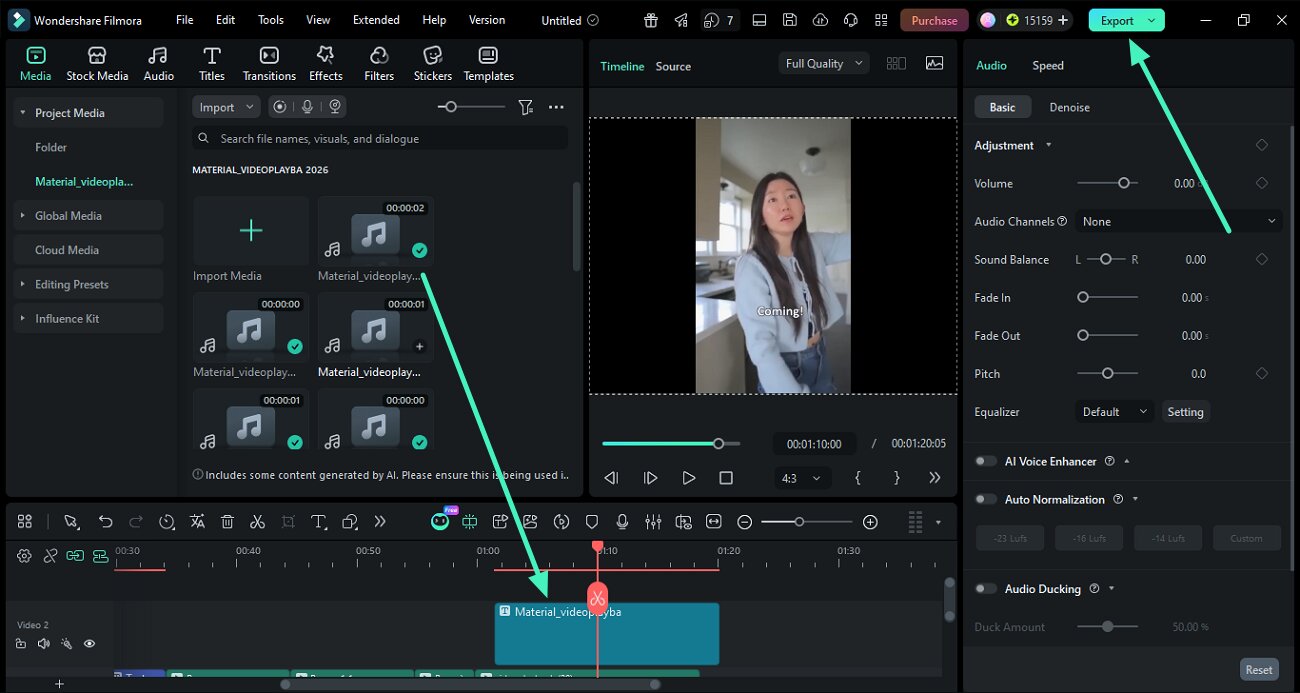
Step 2. Preview and Export the Result
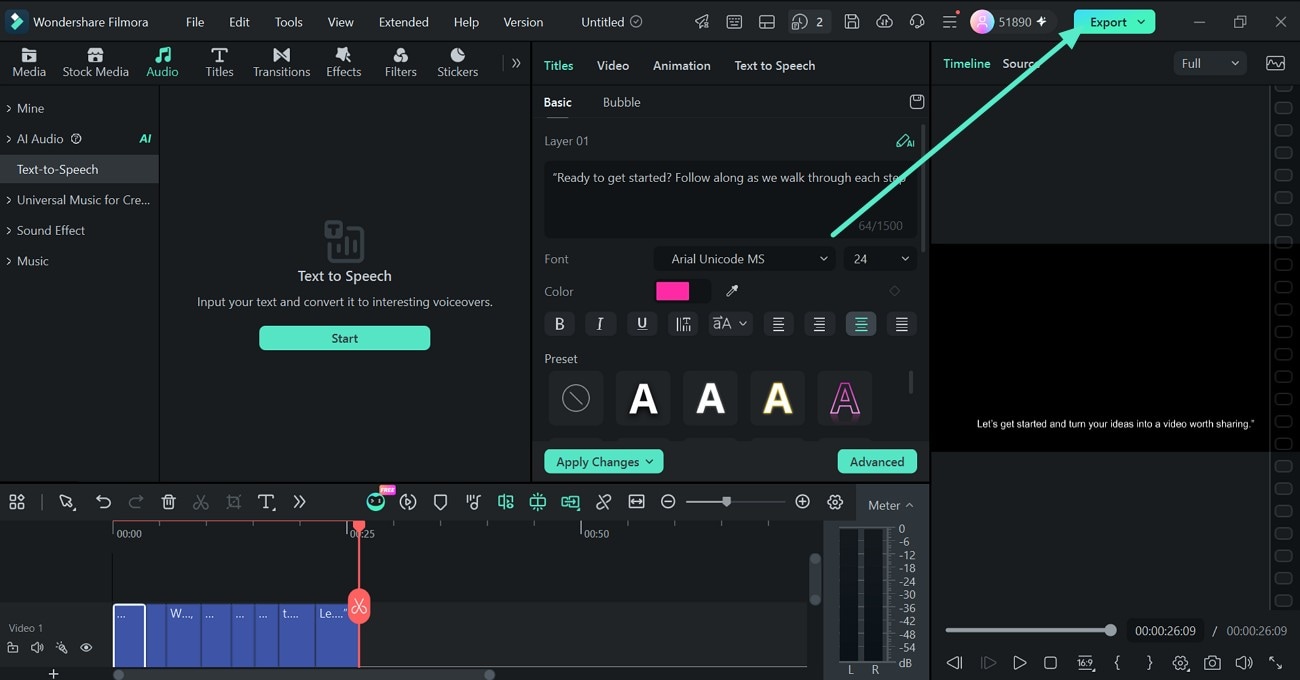
After Filmora generates the speech, review the resulting content on the timeline and preview it to check the output. Make any required adjustments, then click Export in the upper-right corner to save the finished video.
Related Posts
Featured Articles
Learn Painting With Bob Ross Videos and Filmora
Discover the joy of Bob Ross videos on YouTube. Learn how to create your Bob Ross-style tutorial using Filmora for professional-level editing.
Convert YouTube Videos to Scripts in Different Ways | Ultimate Guide 2026
Explore multiple ways to turn your YouTube videos to scripts, from built-in options to smarter AI-powered tools. Find the method that fits your scenario and needs in this ultimate guide!
How To Use CapCut to Translate Video– A Simple Guide
Learn how to use CapCut's translation tool to translate your videos easily. Expand your global reach with this step-by-step guide for content creators.
Recommended User Guide
AI Translation for Windows
Wondershare Filmora’s AI translation feature can effectively translate multiple sources of languages into your desired one. This is a guide about filmora's AI video translation
Auto Caption for Windows
Do you wish to add dynamic subtitle effects to your video? Learn how Wondershare Filmora makes this easy with an auto-captioning effect within Speech-to-Text.
