For the Best Results, Use the Latest Version.
-
Preparations
-
Account
-
Get Started & Basic Settings
-
Compatibility & Tech Specs
-
Performance Settings
-
-
Creating Projects
-
Creating New Projects
-
-
Importing & Recording
-
Video Editing for Windows
-
Basic Video Editing
- Enable/Disable Clip in Windows
- Magnetic Timeline for Windows
- Dual Monitor Setup for Video Editing on Windows
- Select All Clips on Timeline for Windows
- Manage Timeline and Tracks on Windows
- Auto Ripple for Windows
- Split & trim video
- Crop & Pan & Zoom Video
- Compositing
- Change Video Speed on Windows
- Playing videos in reverse
- Mark In and Mark Out for Windows
- Markers for Windows
- Group editing
- Customizable Backgrounds for Videos and Images in Windows
- Video snapshot
- Using freeze frame
- Logo Reveal For Windows
- Apply auto enhance
- Applying drop shadow
- Adjustment layer for Windows
- Transforming
- Video Editing Ruler – Windows
-
Advanced Video Editing
- Drawing Tools for Windows | Filmora Guide
- Create Multi-Camera Clip
- Compound Clip for Windows
- Multi-Clip Editing for Windows
- Filmora Motion Blur | Windows
- Filmora Flicker Removal Guide | Windows
- Apply mask to video
- Creating a PIP effect
- Keyframe Graph Editor for Windows
- Add animation keyframing for Windows
- Keyframe Path Curve for Windows
-
AI-Powered Video Editing
- Smart Scene Cut for Windows
- Smart Short Clips for Windows
- AI Face Mosaic for Windows
- Filmora AI Eye Contact- Windows
- AI Video Enhancer for Windows
- AI Text-to-Video for Windows
- Planar Tracking for Windows
- AI Idea to Video for Windows
- Filmora Image to Video for Windows
- Filmora Image to Prompt for Windows
- Instant Cutter Tool for Windows
- AI Extend
- Filmora AI Relight - Windows
- Filmora AI Image Enhancer Guide - Windows
- AI Script to Video Guide for Windows
- AI Text-Based Editing for Windows
- AI Mate Editing for Windows
- Create with instant mode
- ChatGPT Plugin - AI Copywriting
- AI Smart Cutout
- Lens correction on Windows
- Auto reframe video
- AI Portrait Cutout
- Scene detection feature
- AI Smart Masking for Windows
- Make motion tracking
- Video Stabilization for Windows
- AI Video/Photo Object Remover for Windows
- AI Smart Search for Windows
- AI Skin Tone Protection for Windows
- AI Image for Windows
- Chroma key (green screen)
- Super Slow Motion with Optical Flow for Windows
- Video Denoise for Windows
-
-
Audio Editing for Windows
-
Basic Audio Editing
-
Advanced Audio Editing
-
AI-Powered Audio Editing
-
-
Text Editing for Windows
-
Basic Text Editing
-
Advanced Text Editing
-
AI-Powered Text Editing
-
-
Video Customizations
-
Video Effects
-
Audio Effects
-
Transitions
-
Stickers
-
Filters
-
Color Editing
-
Animations
-
Templates
-
Asset Center
-
-
Exporting & Share & Cloud Backup
Retouch
Filmora’s Retouch features address common issues with beauty filters like unrealistic effects and over-slimming by enhancing feature completeness and optimizing user experience. The upgraded "Beautify" effect offers granular controls over skin (texture, tone, smoothing, whitening, wrinkle, and under-eye bag removal), face shape, and bone structure (slimming, narrowing, V-shape, and detailed adjustments). It also focuses on the adjustment of other features such as eyes, nose, mouth, and eyebrows.
You get the ability to adjust effects in real-time with intuitive sliders for a natural, personalized look. This upgrade supports diverse face shapes and aesthetics, catering to vloggers and professional video producers seeking quick, high-quality beauty enhancements.
Upon reading this guide, you will learn how to use Filmora’s Retouch feature:
Index
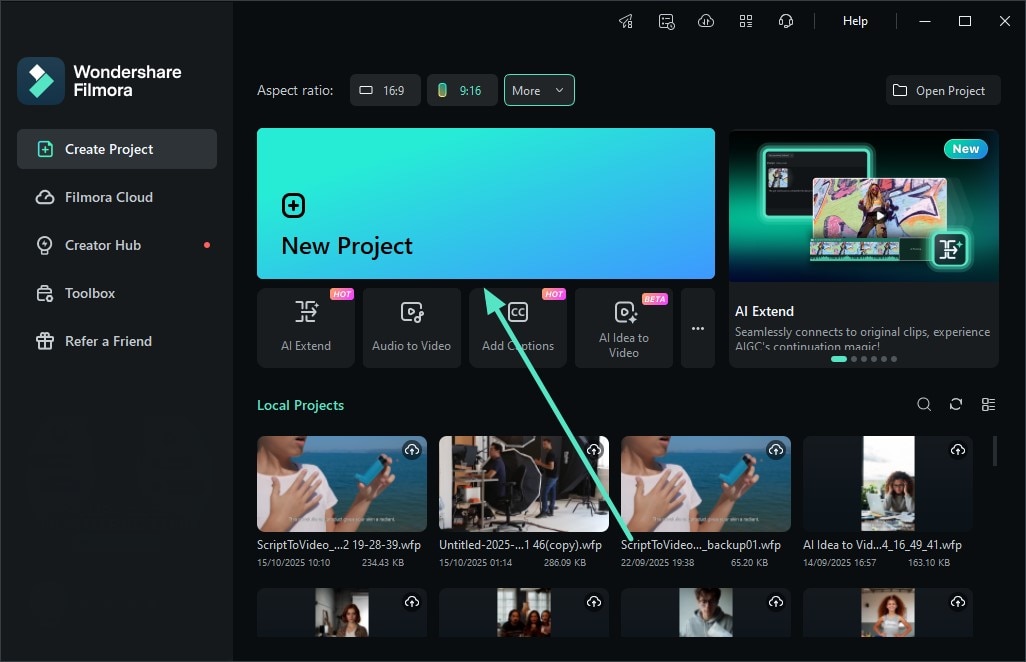
Step 1: Start By Creating a Project
After launching Filmora, click on the New Project tab and import your video for beautification. Next, drag the video to the editing timeline to proceed forward.
Step 2: Choose Body Effect And Apply
Once you are in the editing interface, head to the menu bar on the top and click on the Effects option. Next, expand the Body Effects section from the left and choose the Beautify option from the library. Apply the effect by dragging it to the timeline or clicking on the + icon.
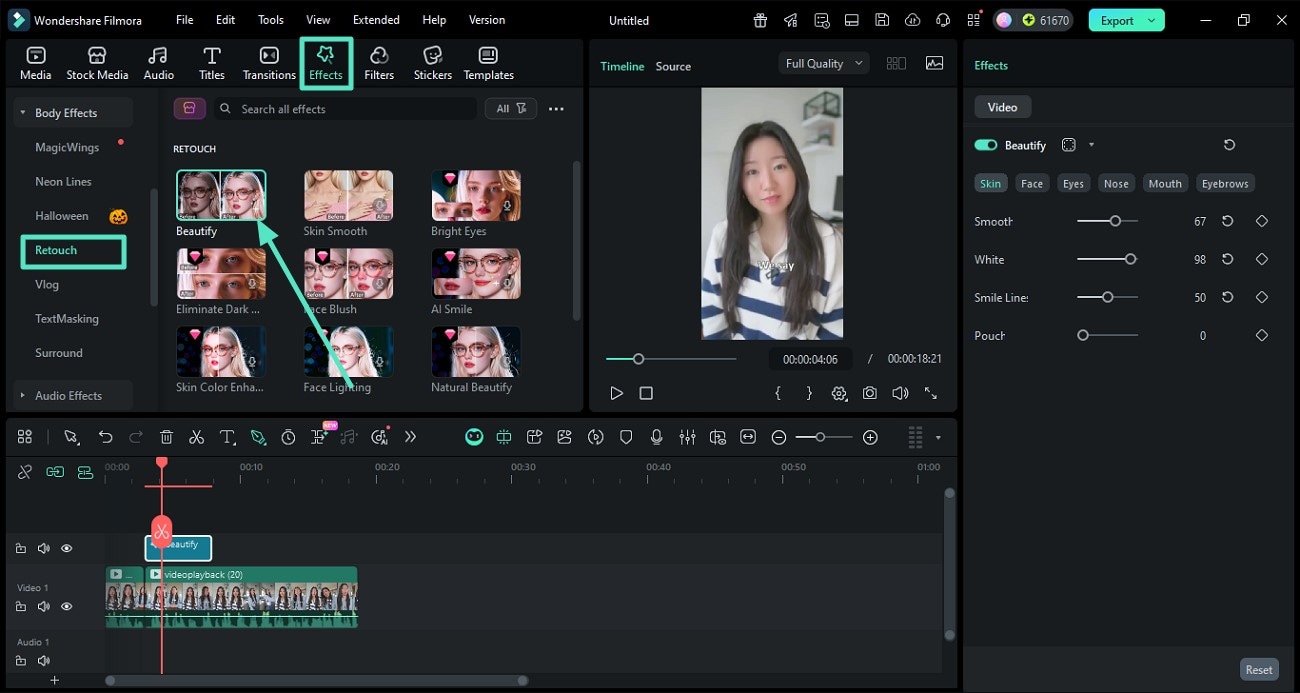
Step 3: Adjust Skin Attributes
Now, head to the Effects panel on the right and enable the Skin section. Now, adjust the Smoothness and other attributes by dragging the respective sliders.

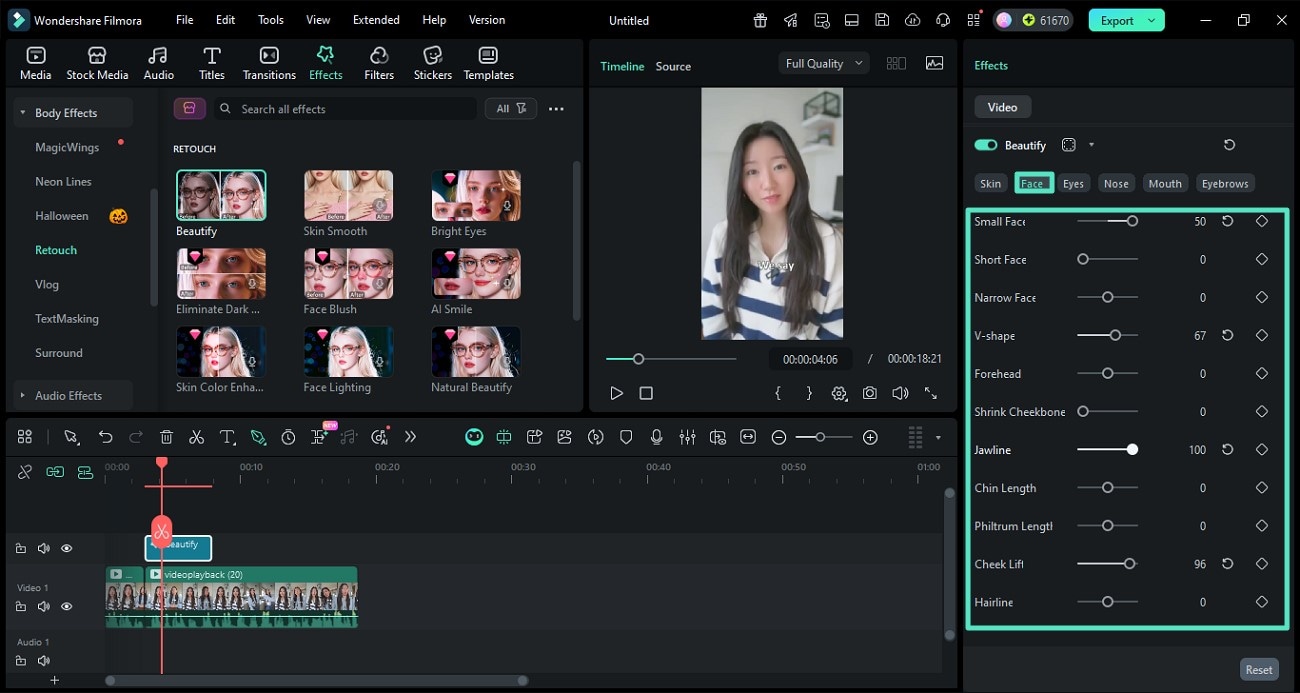
Step 4: Modify Face Features
Moving forward, access the Face tab and adjust the sliders for face length, cheek position, and other attributes according to your preferences.
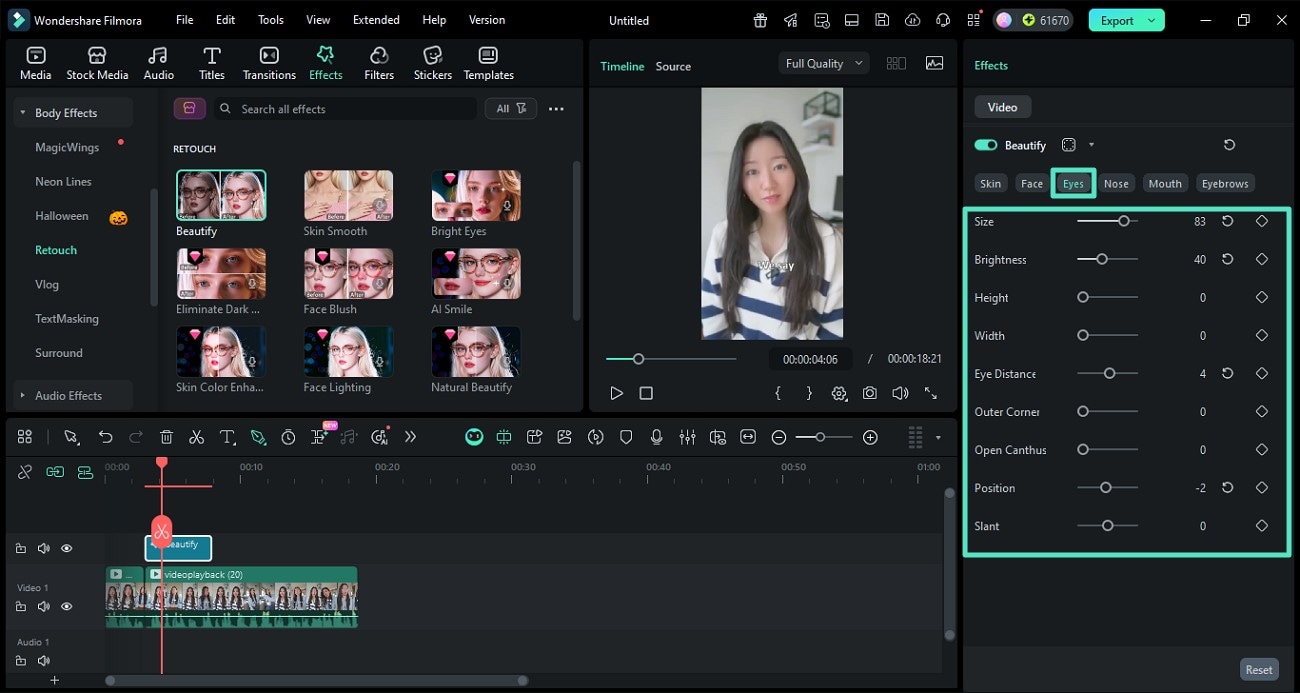
Step 5: Further Beautify the Eyes
Head to the Eyes section and modify the Size, Brightness, EyeDistance, and other attributes. Drag each slider carefully and preview the results within the Preview Window.
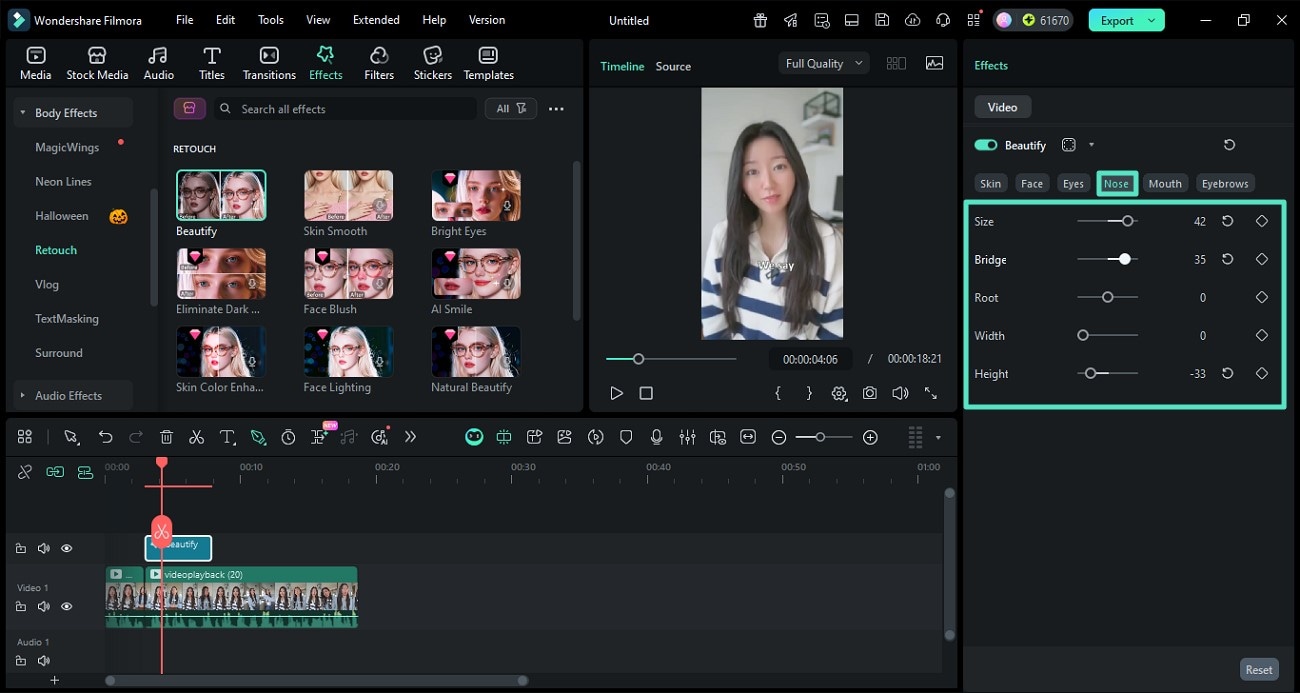
Step 6: Make Changes to the Nose
Now go to the Nose section and change the Size, Bridge, Root, and other features by making adjustments to the respective sliders.
Step 7: Modify the Mouth
Make the smile wider or increase the Teeth Whiteness by dragging the sliders available under the Mouth section. You can make further adjustments by selecting and modifying the attributes.

Step 8: Beautify the Eyebrows
Finally, access the Eyebrows section and modify attributes like Tilt, Distance, and Position by dragging the slider. Make further enhancements in Length, Thickness, and Shape, and press the Export button once you are satisfied with the results.

Related Posts
Featured Articles
How to Convert 2D Images into 3D Animations?
Are you curious about converting static 2D images to 3D animation videos? Check our best three methods to animate static images with AI image to video, 3D animation, and zoom effects.
Best 5 AI Anime Filter Apps
If you are looking for the best anime filter apps for Android and iOS devices, then you are at the right place. Explore the popular AI anime filter apps to turn your photos into anime art.
Best MP4 Video File Size Reducers: Top Tools for Quick Compression
Need to reduce your MP4 file sizes? Check out our guide to the best MP4 file size reducers that offer quick compression solutions for content creators and marketers!
Recommended User Guide
Mocha Filmora - For Windows
Here is the guide on how to use Mocha Plugin in Filmora on Windows.
Filmora VST3 Plugins for Windows
Learn how to install, scan, and manage VST3 plugins in Filmora on Windows with this step-by-step setup and troubleshooting guide.
