Mocha Filmora - For Windows
Using Filmora's native tracking tool, the editor struggles to maintain accurate placement, especially when the runner's body twists and moves rapidly, causing the logo to jitter or lose alignment. However, with the new plugin introduced by Wondershare Filmora, users can now conveniently mark objects, add parameters, and adjust the parameters according to their preferences. Editors can now apply tracked effects with greater realism, accuracy, and speed using Mocha UI.
You can access this utility under the "Effects" section of this tool. You get the ability to utilize this feature in two languages, including English and Japanese. The effect provides various functions to create a visually appealing video with in-depth editing that looks professional.
Index
How to Enter the Mocha Filmora Feature?
To perform multiple tracking on plain and even surfaces in your video, Filmora Mocha offers various features that let you track motion and apply different functionalities to it. Mentioned below is a detailed guide on how to use this utility efficiently:
Step 1. Create a New Project On Filmora
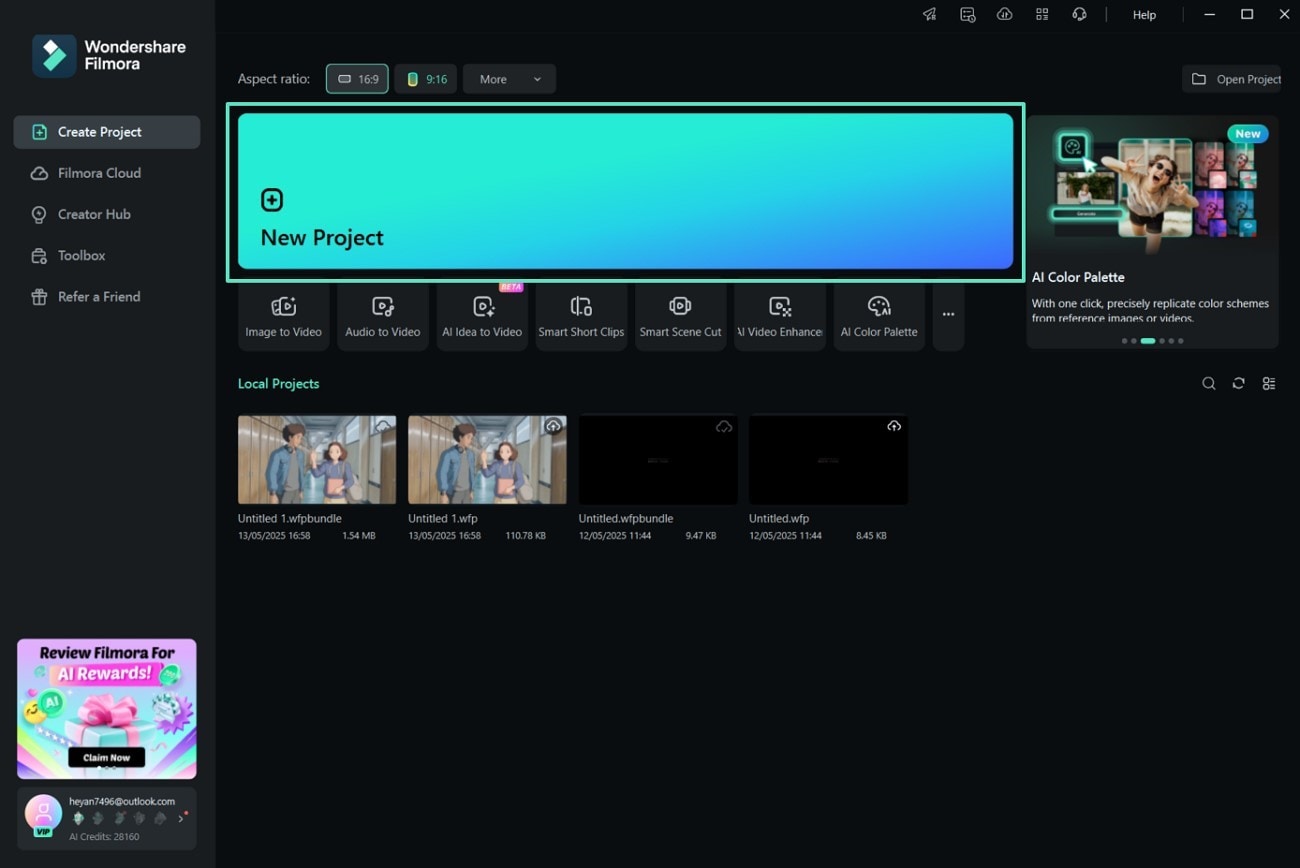
To initiate the process, launch Filmora on your device and click on the "New Project" option located on the homepage. Next, import your video to the tool's interface and drag it to the editing timeline to perform editing.
Step 2. Locate the Mocha Filmora Under the Effects Section
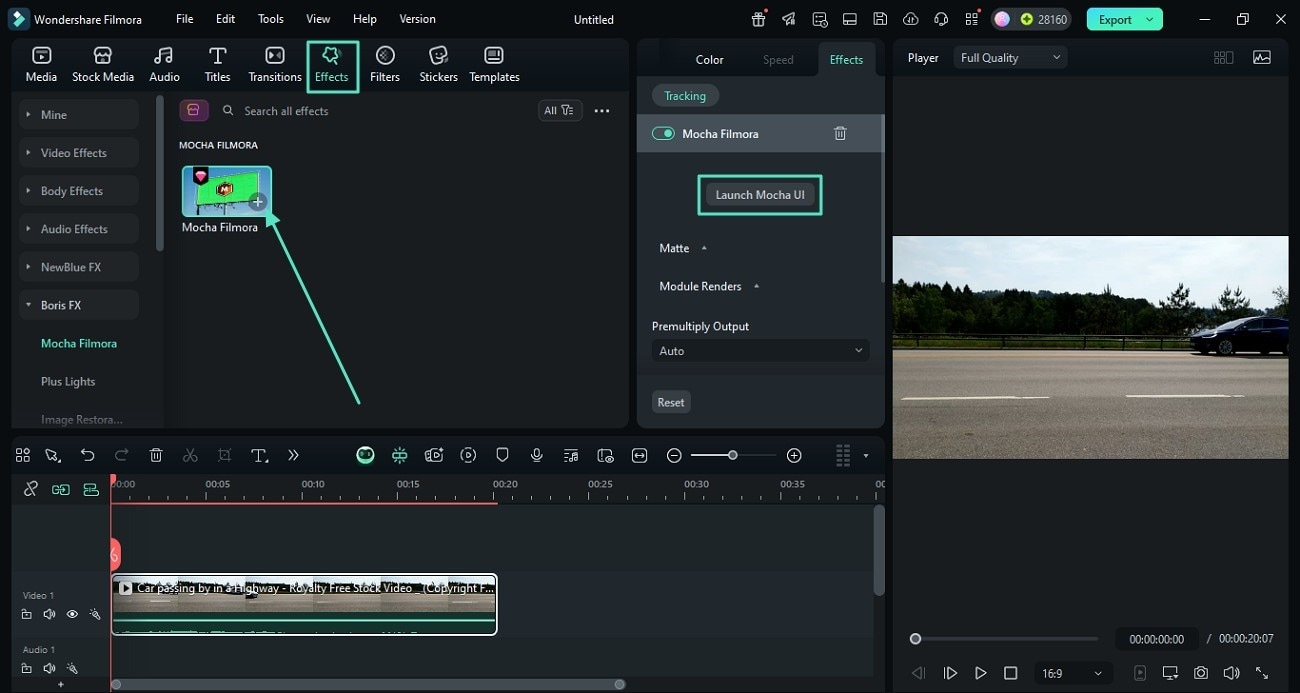
Once the video is imported into the interface, head to the "Effects" section and expand the "Boris FX" effect from the left side. Now, click on the "+" icon next to Mocha Filmora effect to apply it to the video. Next, locate the "Effects" panel within the interface and press the "Launch Mocha UI" option. In the Mocha UI, you can apply different operations to your video.
Feature 1. Apply Planar Tracking
Mocha Filmora's planar tracking analyzes motion within flat surfaces, delivering more stable and reliable results than traditional point tracking.
Step 1. Create X-Spline Layer
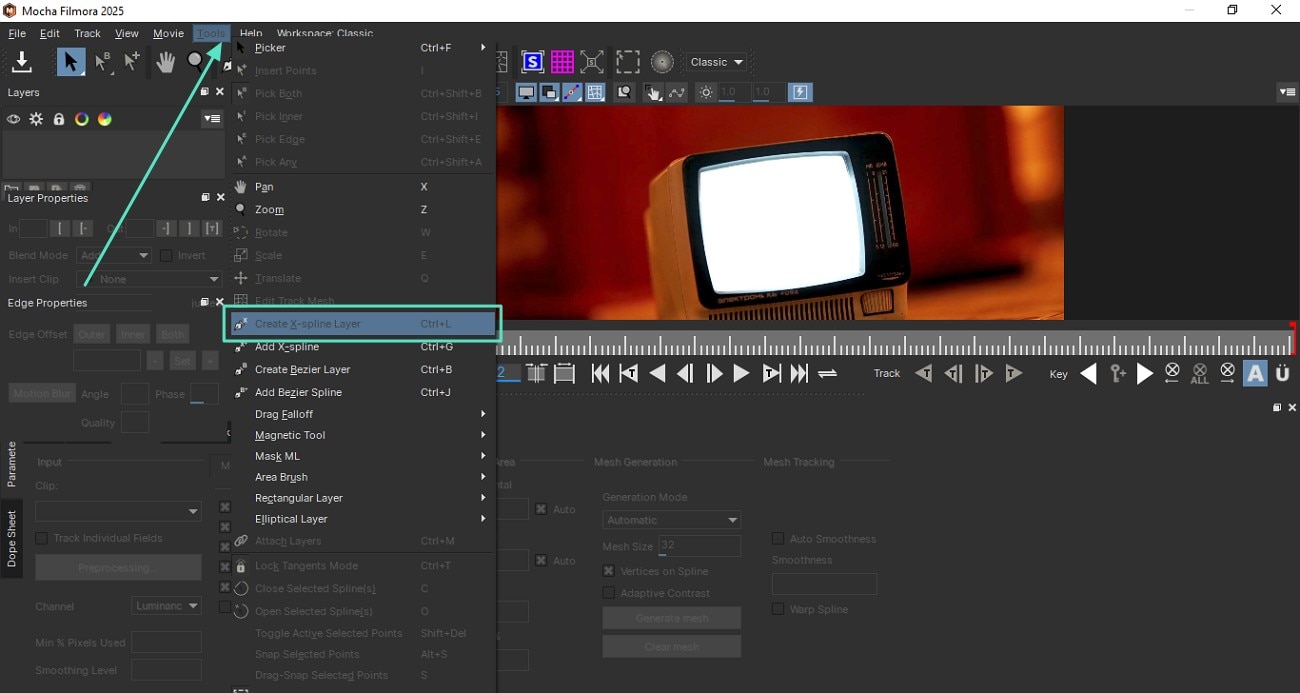
To begin, head to the "Tools" menu from the toolbar at the top and expand the list. Next, locate the "Create X-Spline" layer to create a new layer in the plugin's interface.
Step 2. Select the Plain Area in the Video
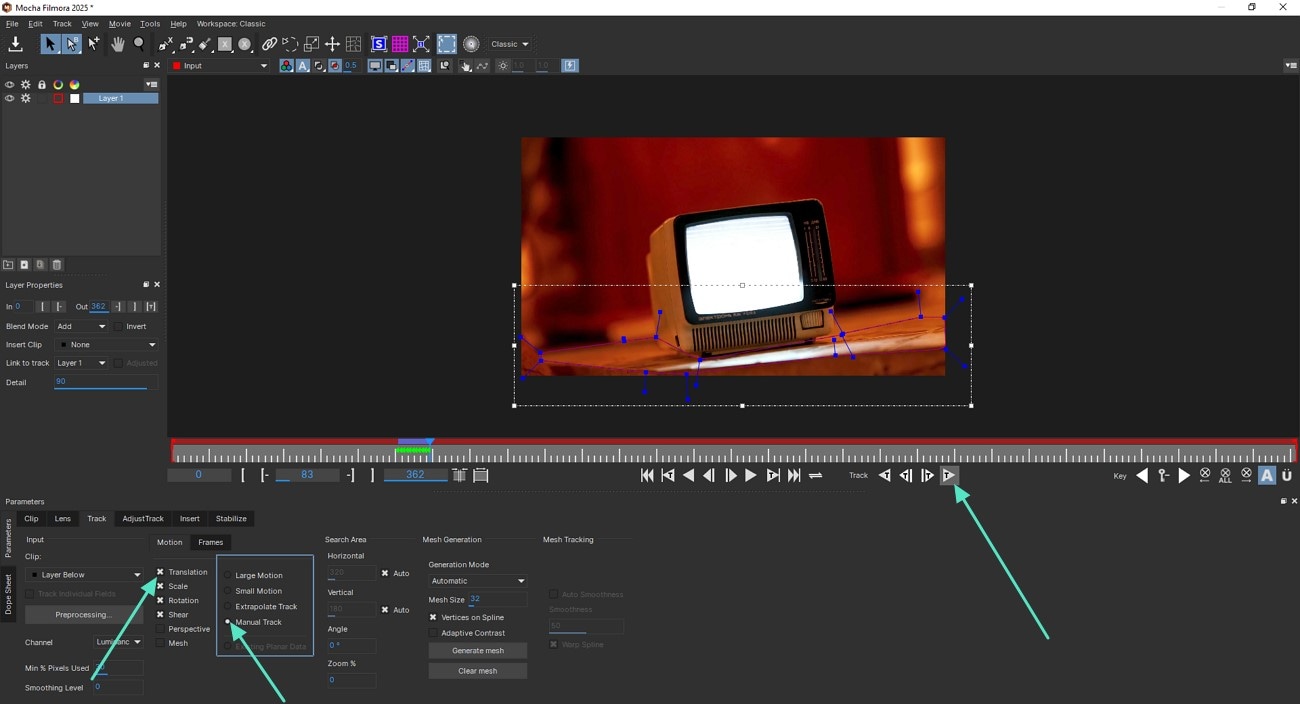
Now, create points to select the surface in the video by dragging and clicking the cursor. Press the right-click button on your mouse once the selection is made to lock the selection. Head to the bottom of the interface and enable the "Track" section. Next, select "Translation" and "Manual Track" by ticking the check box. Press the "Track Forward" option and play the video; the planar surface will be automatically tracked along with the motion.
To learn more about the Planar tracking functionality of Boris FX's Mocha, watch this video.
Feature 2. Add Quick Masking and Roto
With intuitive X-Spline and magnetic spline tools, users can quickly create and automatically drive mask shapes in combination with planar tracking data, reducing manual keyframe work.
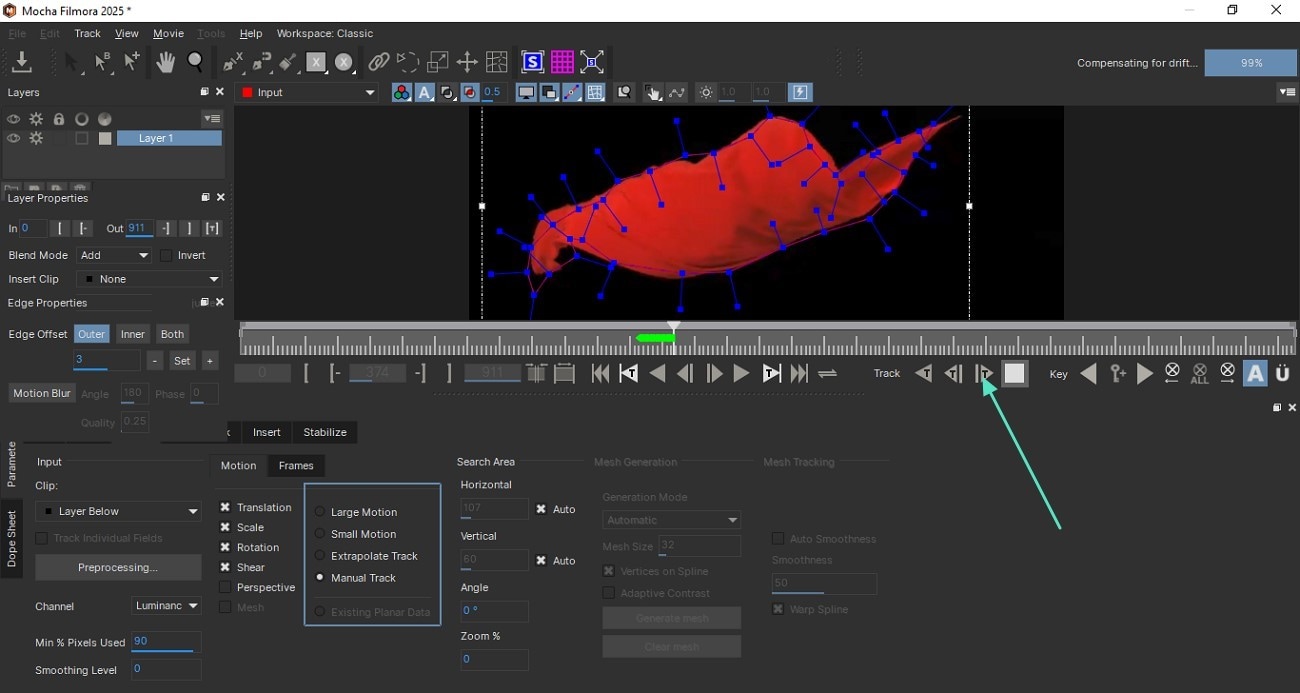
Step 1. Make Selections and Track Forward
Once you are within the Mocha UI, enable the X-Spline layer and make the selection. Now, choose your desired motion from the options provided and press the "Track Forward" icon located below the preview window.
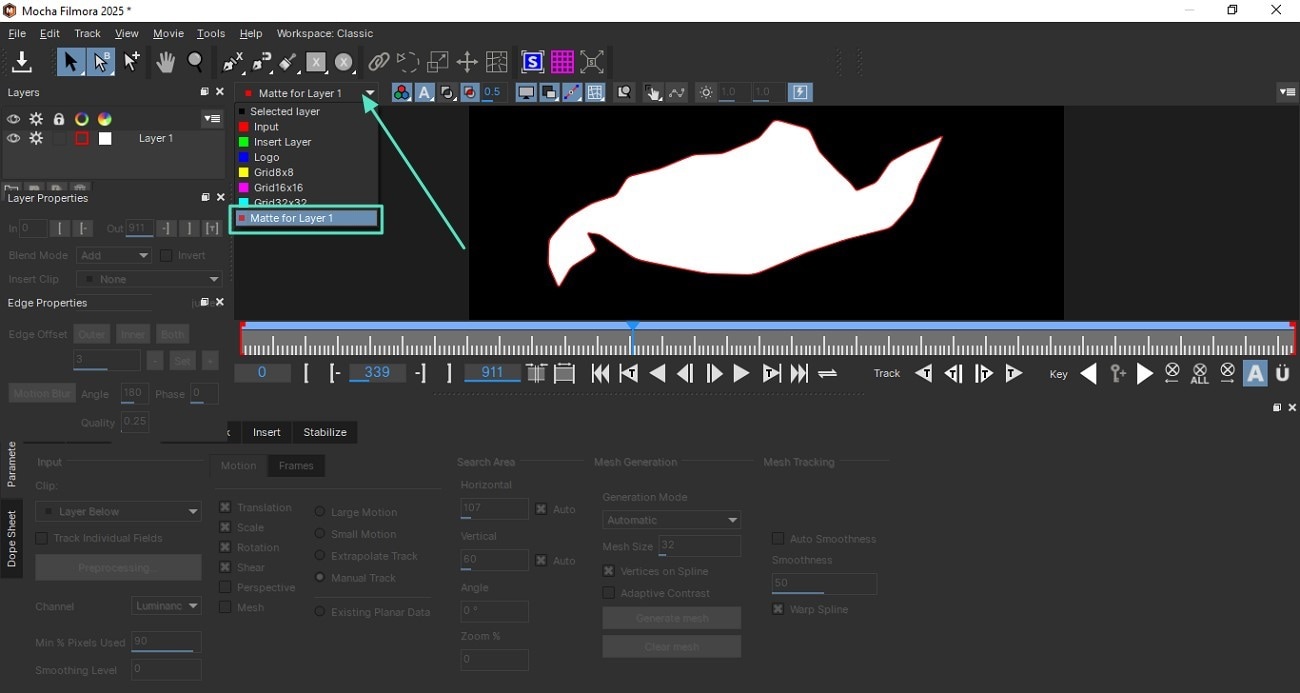
Step 2. Apply Matte Layer
To remove the selected object throughout the video, head to the "Input" drop-down menu and click on the "Matte for Layer 1" option to remove the selected moving object from the video.
Feature 3. PowerMesh Tracking
Filmora Mocha's PowerMesh enables advanced tracking of bending or warping surfaces like clothing or muscles. It adapts to complex deformations, ensuring precision for organic motion overlays.
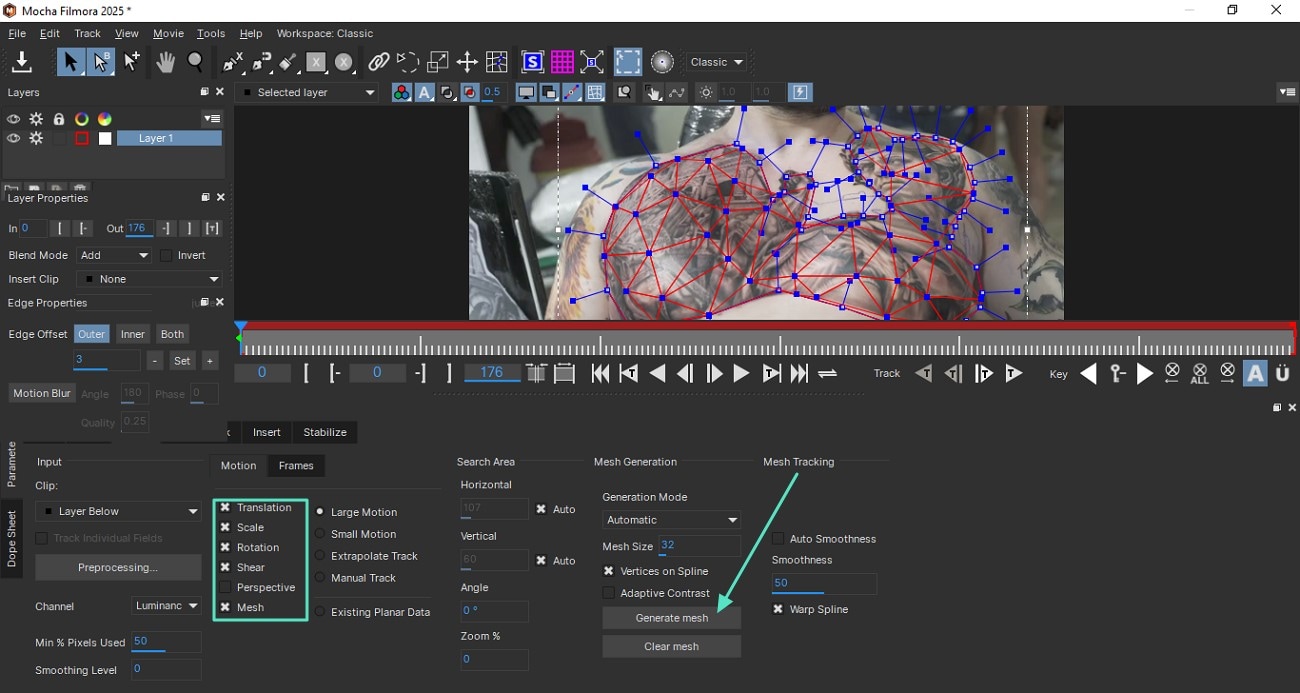
Step 1. Select the Moving Object
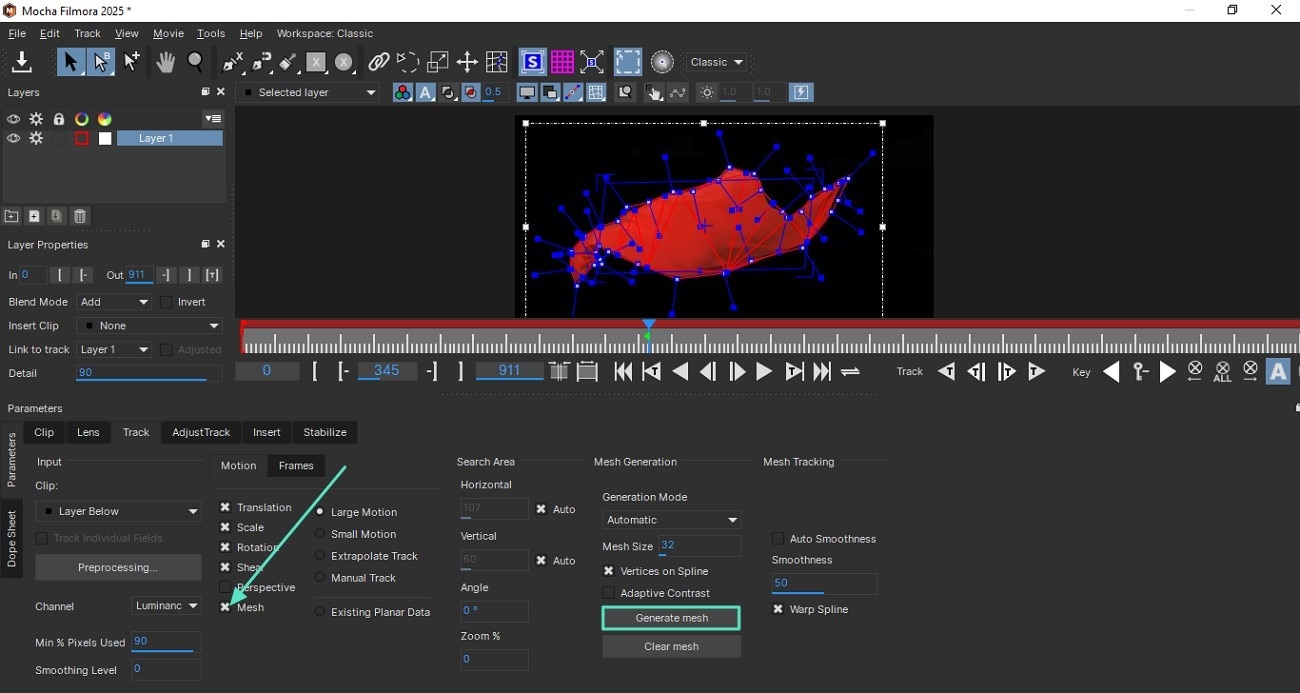
To begin, create an X-Spline layer and drag the cursor to select the non-planar area in the video by tracing around it. Next, head to the "Track" section at the bottom and tick the checkboxes for "Mesh," "Translation," "Scale," and "Rotation." Next, locate the "Generate Mesh" button and click on it.
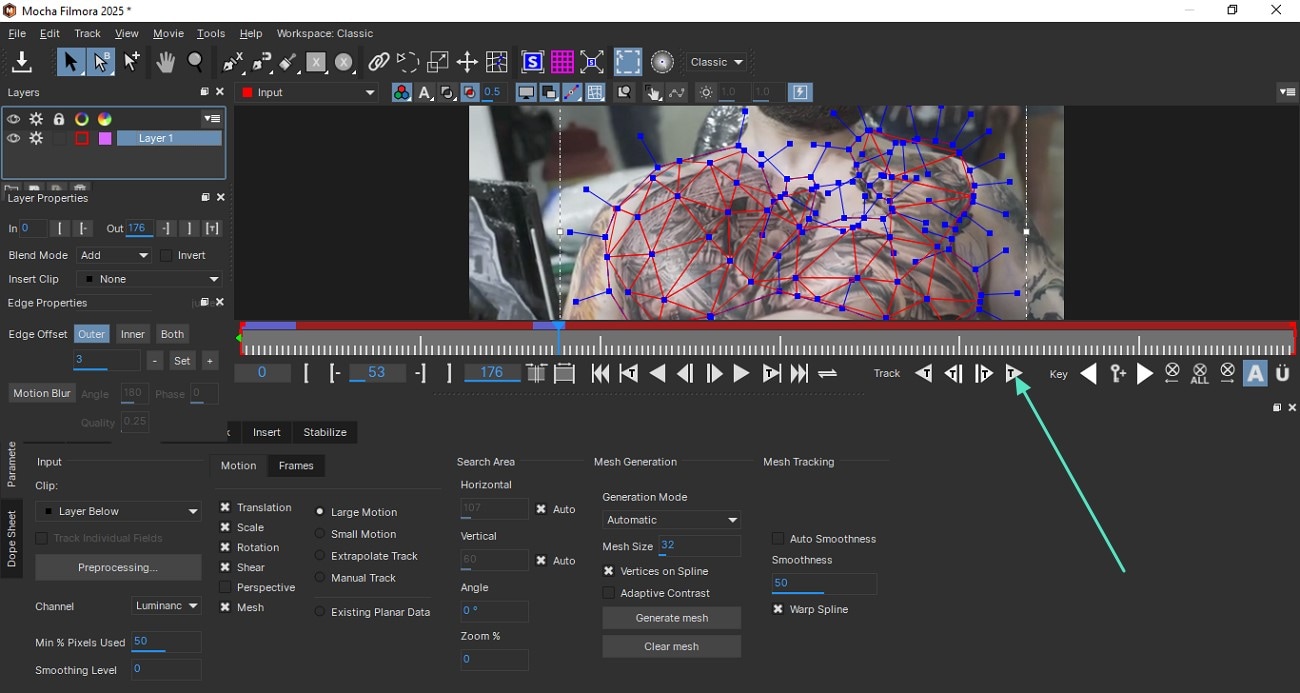
Step 2. Apply Track Forward
To remove the selected object throughout the video, head to the "Input" drop-down menu and click on the "Matte for Layer 1" option to remove the selected moving object from the video.
Discover more about PowerMesh Tracking and what it offers in this video.
Feature 4. Mesh Warp Tracking
This feature distorts tracked surfaces using an auto-generated mesh grid, ideal for effects like screen warping or texture bending.
Step 1. Make Selections and Generate Mesh
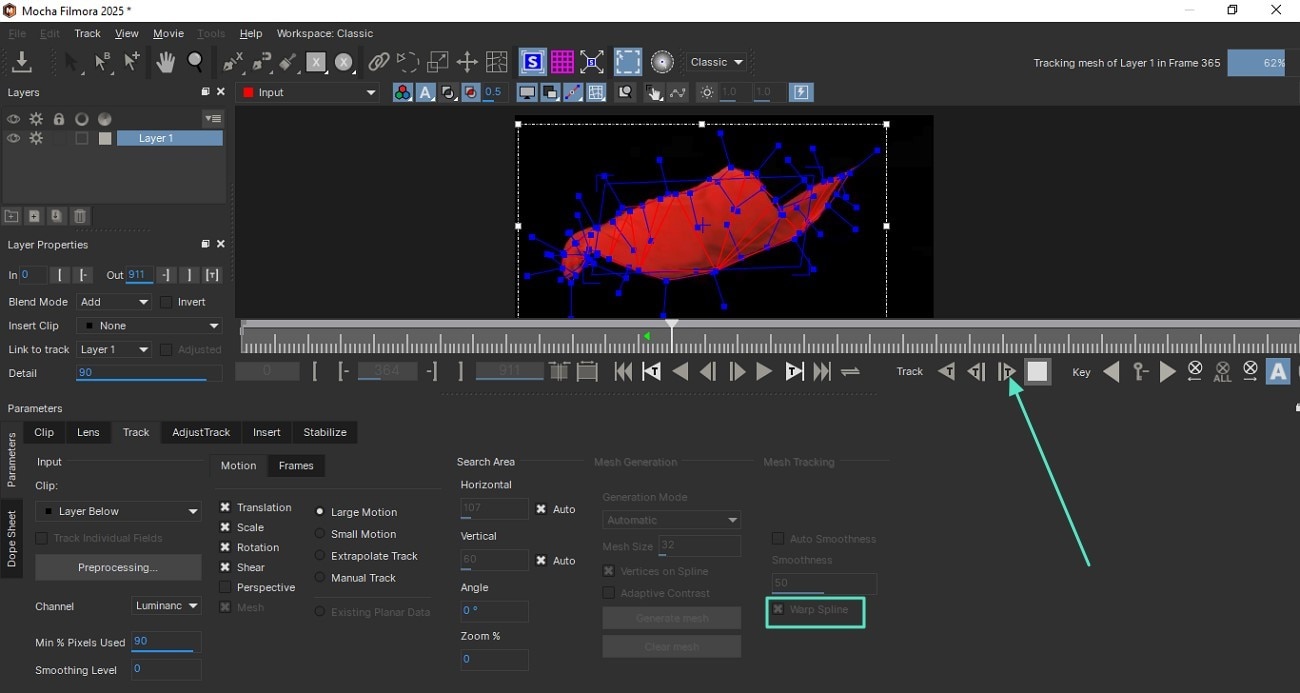
Once you have made the selections using the Spline tool, enable the "Mesh" option from the bottom and click on the "Generate Mesh" button below.
Step 2. Choose Warp Spline and Track
Next, locate the "Warp Spline" option and click on it to enable the feature. Next, head to the toolbar below the preview window and tap on "Track Forward" to create a distorted motion for the selected object.
For a detailed walkthrough of Mesh Warp distortion ins Mocha UI, consider watching this video.
Feature 5. Stabilization
Mocha Filmora's stabilization removes unwanted camera shake by reversing tracking data from planar layers.
Step 1. Choose the Planar Area To Stabilize
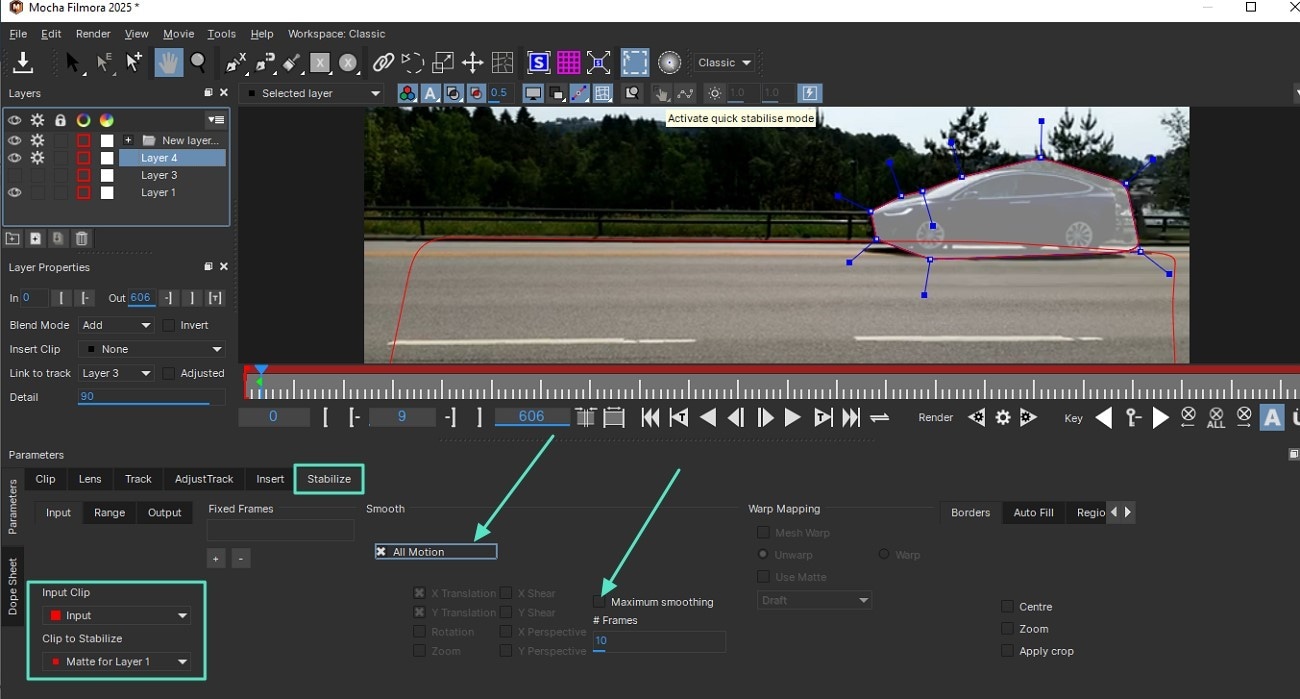
After making the selection through the Spline tool, access the "Stabilize" section at the bottom and select the "Input Clip" and "Clip to Stabilize" using the respective Drop-down menus. Enable the "All Motions" option and check the "Maximum Smoothing" for accurate results.
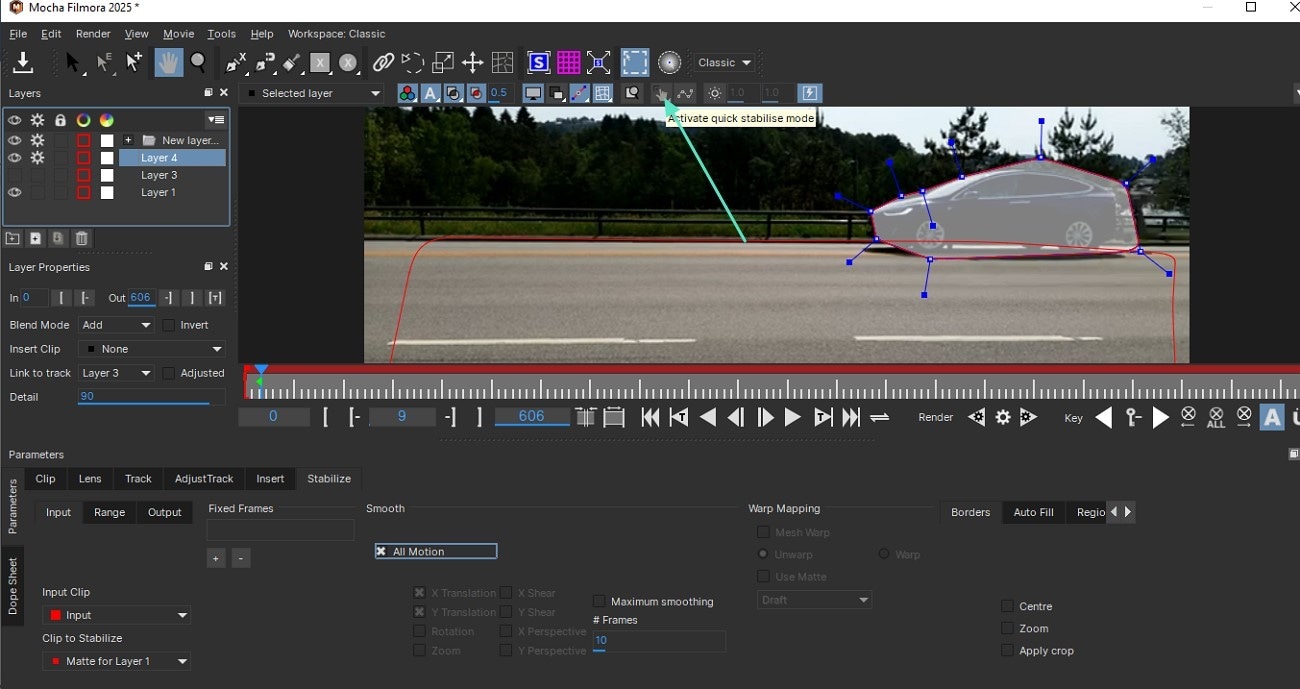
Step 2. Activate Quick Stabilization
Once done, head to the top of the preview window and click on the "Activate Quick Stabilization" option to remove the shakiness and unwanted jitters from the motion easily.
Watch this video to learn how you can stabilize your uneven videos with the Boris FX's Mocha UI.
Feature 6. Lens Distortion
By analyzing linear elements in footage, this tool corrects lens distortion and outputs calibration data.
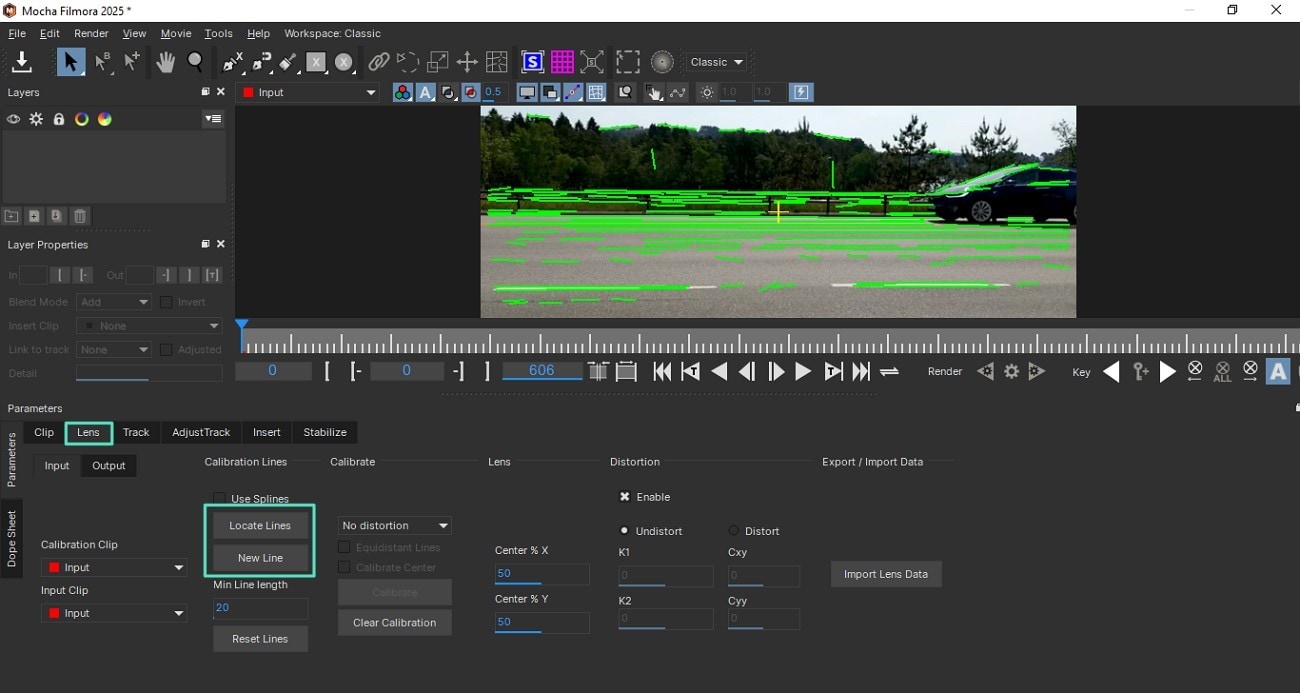
Step 1. Locate Calibration Lines
Once you have entered the Mocha module, head to the bottom and enable the "Lens" section. Next, press the "Locate Lines" option to let the tool detect the uneven lines. Next, click on the "New Lines" to manually draw lines that you want to make even.
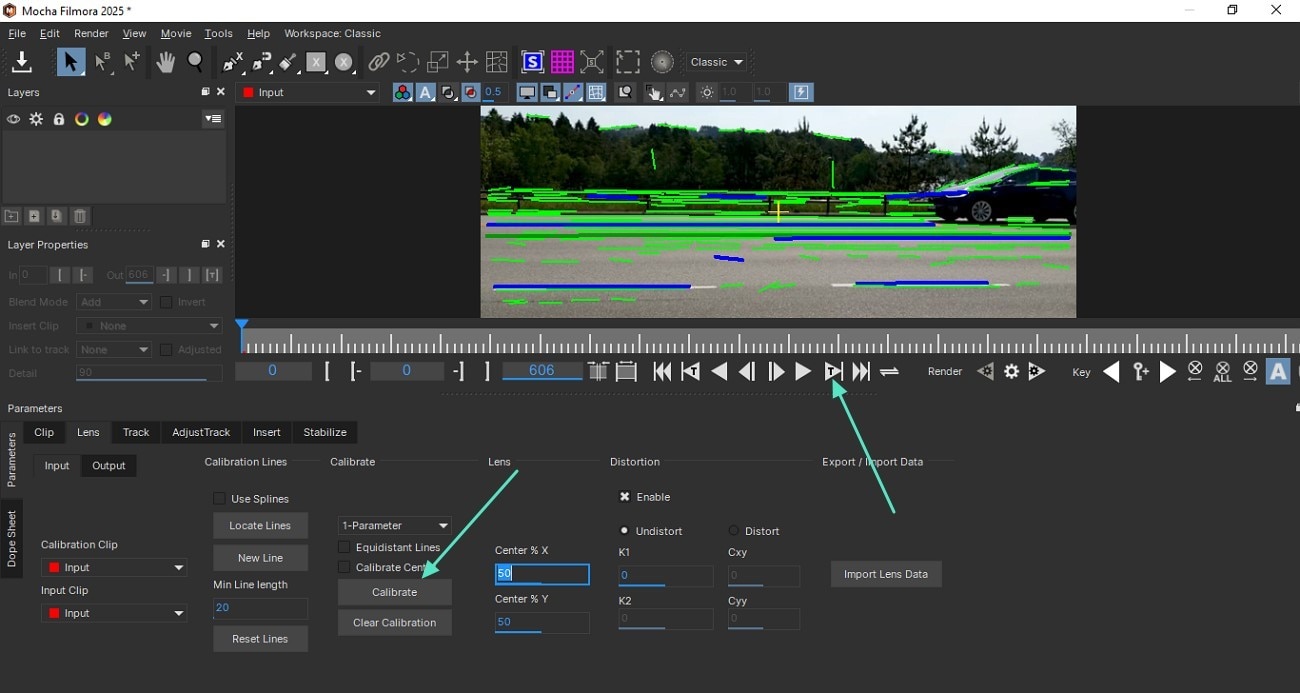
Step 2. Calibrate The Lines and Track Forward
Moving on, locate the "Calibrate" button to click it and then press the "Track Forward" icon to preview the video without any distortions.
If you are interested in learning more about what this feature holds for you in term of video editing, watch this video now.
Feature 7. Insert Module
Starting from Filmora version V14.9.1, the Insert module in Filmora’s Mocha tracking workflow enhances compositing by allowing users to select any timeline layer as the insert object directly within the interface. This integration streamlines editing by enabling precise alignment of tracked composites with existing timeline assets to improve efficiency. The chosen insert layer acts like a regular timeline element, offering flexible control over duration and other elements like opacity.
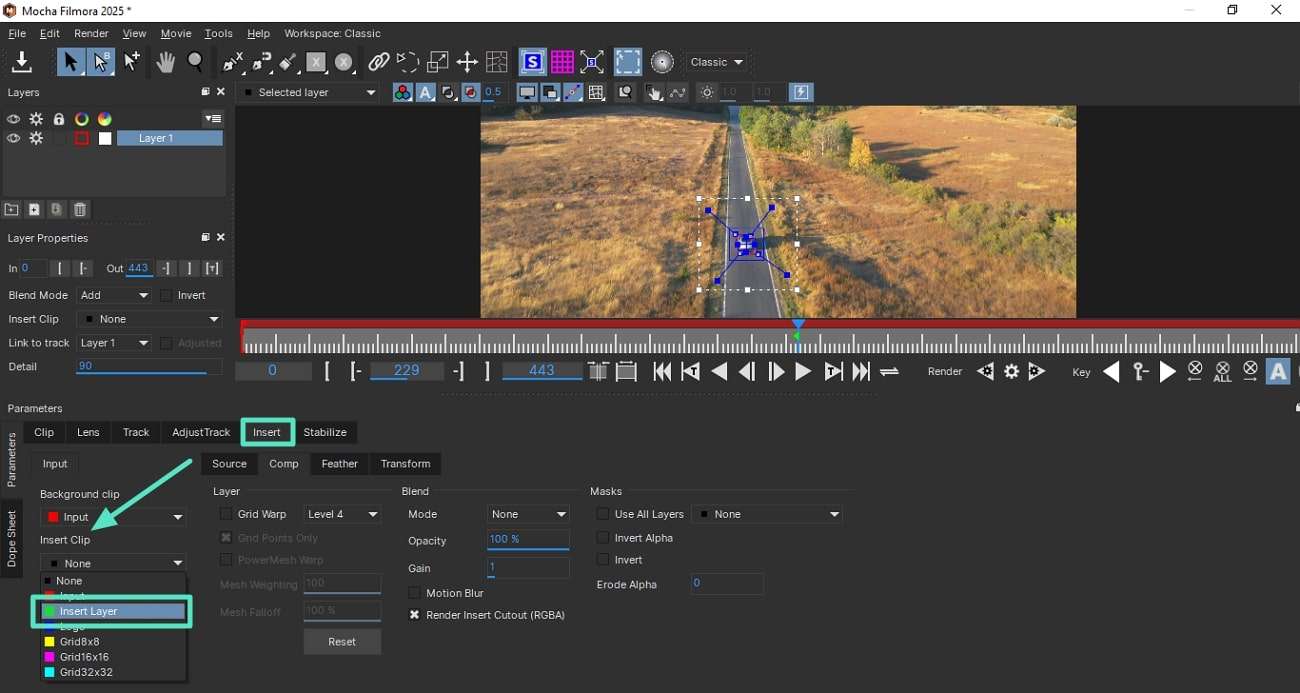
Step 1. Make Selection By Creating X-Spline Layer
Once you have made the selection on the area where you want to insert the layer, head to the bottom area and access the “Insert” section. Now, expand the “Insert Clip” drop-down menu and choose the “Insert Layer” option.
Step 2. Choose the Layer in the Filmora Interface
Now, head back to the Filmora interface and access the “Effects” panel on the right. Expand the “Insert” drop-down menu under the “Tracking” section and choose the video layer. Tap on the “Launch Mocha UI” to review the added video layer.

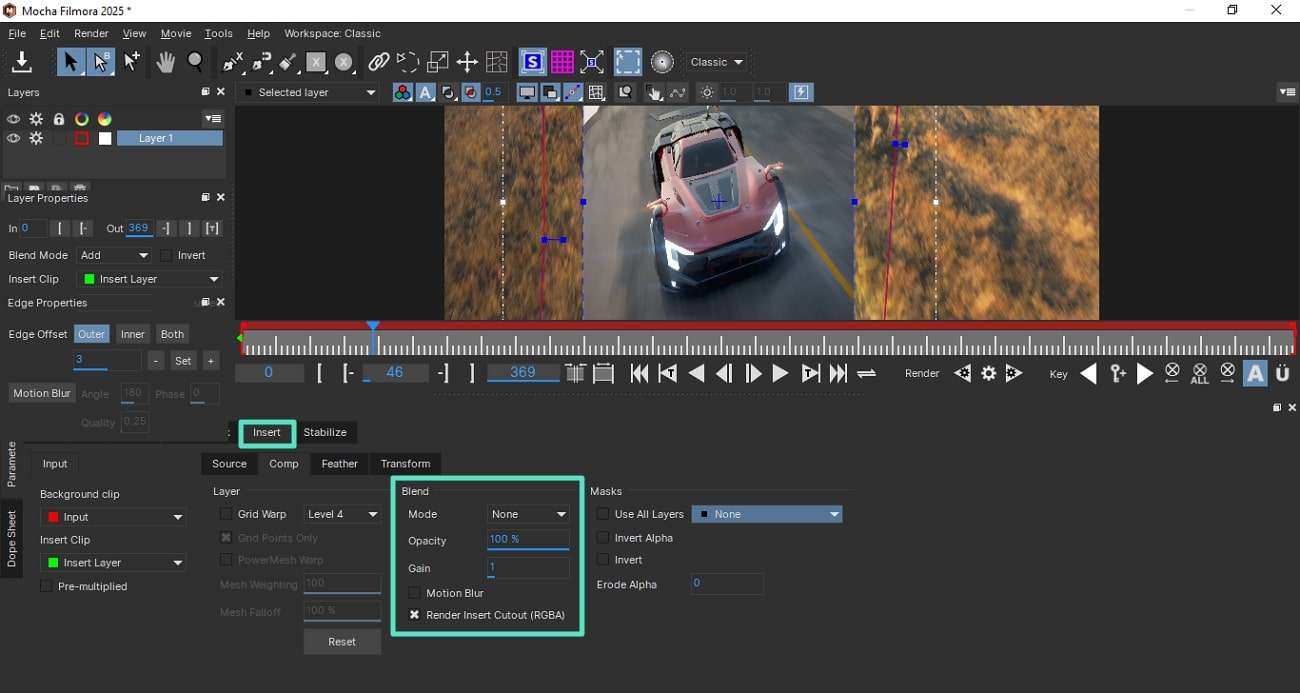
Step 3. Enter Mocha Interface and Preview the Insertion
Once you preview the added video layer in the Mocha interface, access the “Insert” section to adjust like “Blend Mode” and “Opacity.”
Explore what and how you can insert in a video while tracking motion by watching this informative video.
