

 ChatGPT
 Perplexity
 Gemini
 Claude
 Grok
Grok
Whether attending a business meeting or a crucial lecture, you might need to record the audio for future reference. However, using the default recorder of your phone might lack clarity and advanced features. For this, tools like Wondershare Filmora come in handy as they offer incredible abilities to capture the audio and add voiceover to the videos.
In this article, we will explore the Filmora voiceover function and its ability to record. The article will also discover its features and reasons why it's the perfect choice for capturing and managing your important moments.

In this article
Part 1. How to Record Voiceover Using Filmora Desktop?
When working on a video project and looking to add a voiceover to enhance your story, Wondershare Filmora could be a great option to explore. This all-in-one multimedia solution allows users to import files in numerous formats and record a voiceover using their device's microphone. Moreover, you can apply different enhancement features to the recorded audio to create polished results.
Moreover, the tool offers multiple recording settings for users to select the microphone and other external devices according to their choice. The real-time waveform for the recording gives you an insight into the pitch of the voice being captured. With the Filmora record audio option, the file automatically gets imported to the editing interface while saving a copy to the device's storage.
Powerful AI video editor for all creators


A Detailed Guide on Recording Voiceover with Filmora
As discussed, Filmora is one of the most versatile tools that offers incredible voiceover options along with other audio enhancement abilities. To learn how to record audio on Filmora, read the steps mentioned below:
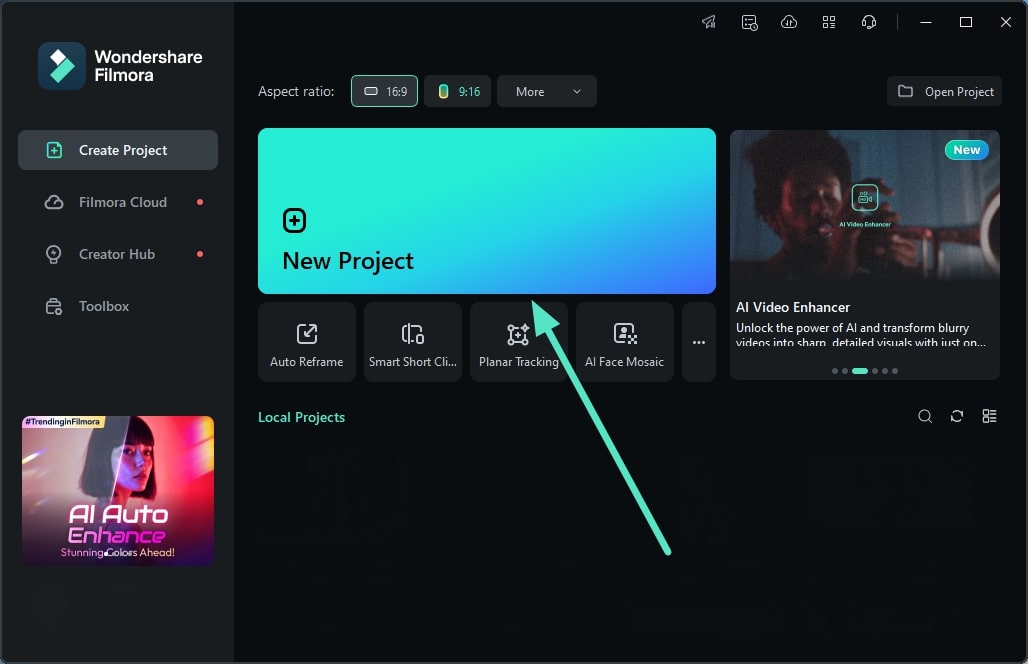
Step 1. Create a New Project After Launching Filmora
To begin, launch the Filmora desktop version on your PC and click the "New Project" option located on the homepage. Next, import the video you want to add a voiceover to the tool's interface and drag it to the editing timeline.
Step 2. Locate the Record Button and Initiate Voiceover
Moving forward, locate the “Record” button within the “Media” section and expand it to select the “Record Voiceover” option.

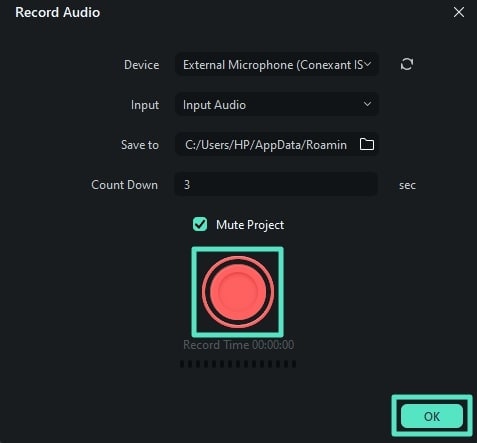
Step 3. Input Recording Settings and Start Recording
In the following small window, configure the recording settings, such as microphone, device, and storage. Once they are configured, press the “Red” button to initiate the voice capturing. Start speaking in the device's microphone and press the same red button to abort recording once you are done speaking. Now, click the “OK” button located within the interface to proceed forward.
Step 4. Apply Audio Enhancements to the Recorded Audio
Once the recording is imported to the tool's main interface, access the “Audio” panel on the right side and expand the “Basic” section. From here, find the “Auto Normalization” option and turn its toggle on. Next, adjust the sound balance and fade in and out settings by dragging the respective sliders according to your preferences.

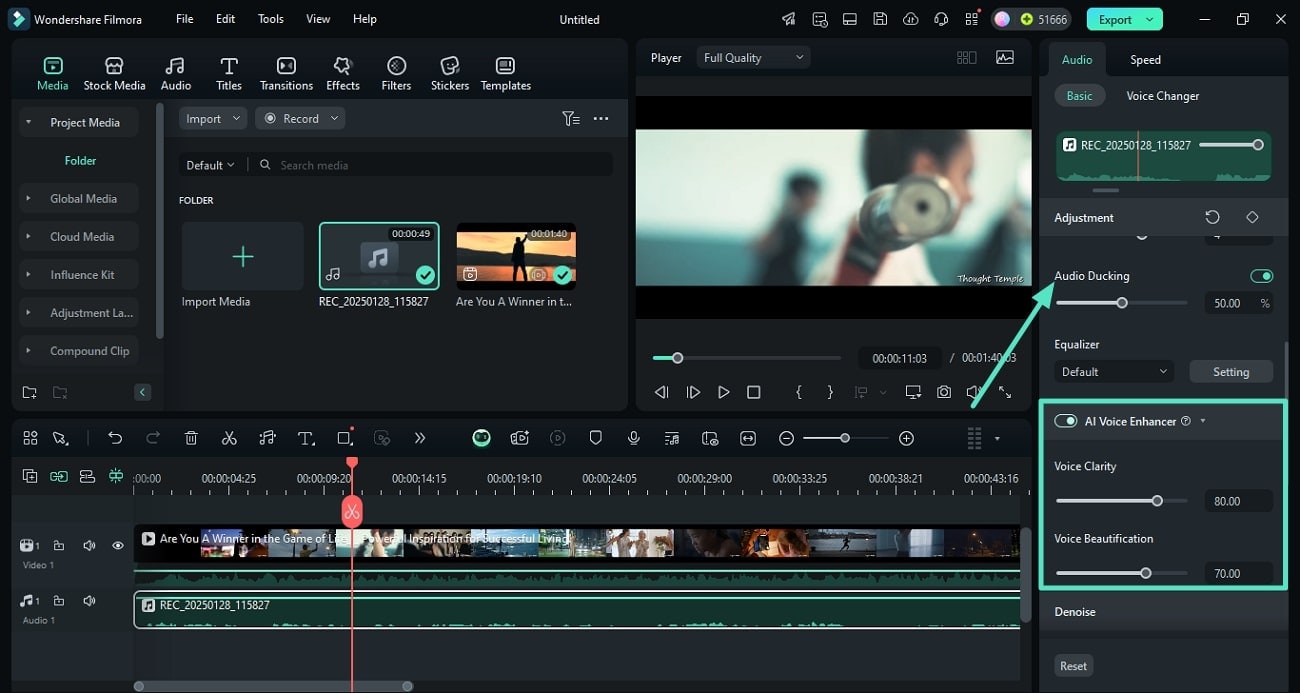
Step 5. Enhance the Voice Using AI
Moving forward, through the same audio panel, slide the “Audio Ducking” slider to adjust the audio dynamically. Next, turn the toggle on for the “AI Voice Enhancer” to adjust the “Voice Clarity” and “Voice Beautification” of the audio.
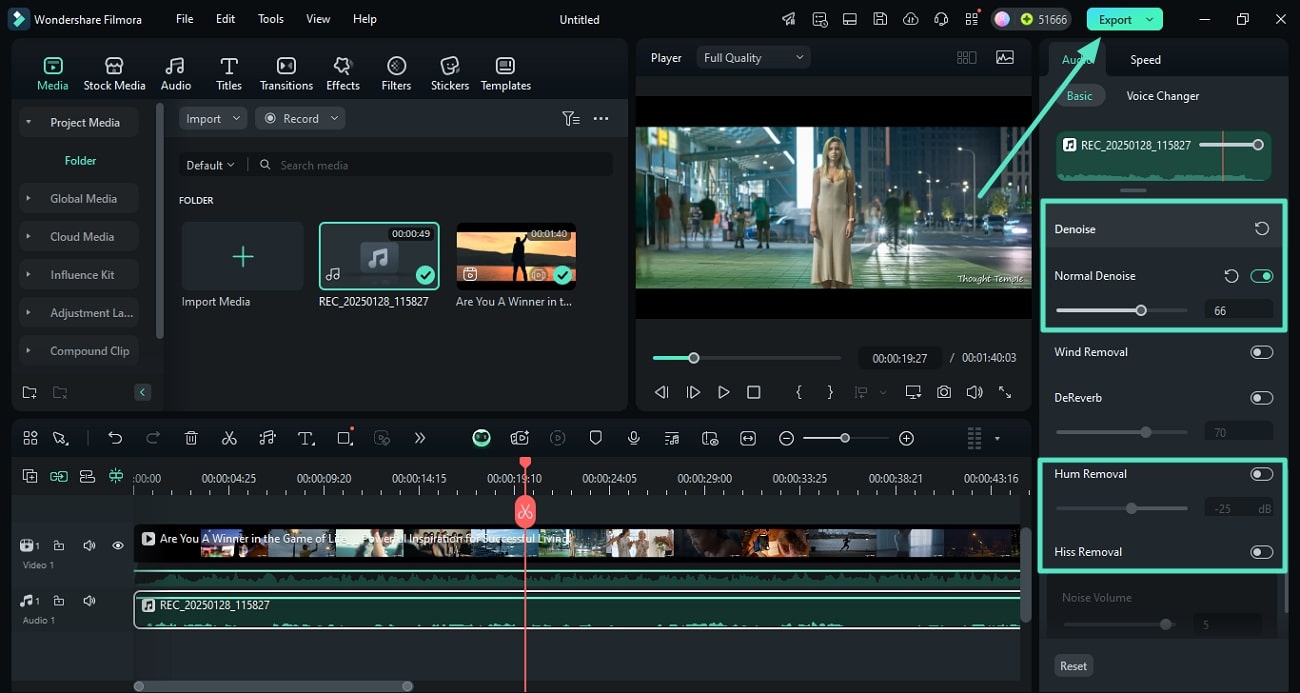
Step 6. Denoise the Audio and Remove Hums
Scroll and find the “Denoise” option and adjust the level of intensity for denoising the voice in the background. You can also remove unwanted hums and hisses from the sound by adjusting the respective sliders. Once you are satisfied with the results, head to the top-right corner of the interface and press the “Export” button to save the voiceover video.
👉✨You May Interest:
How to Do Voice Overs on Instagram
Powerful AI video editor for all creators
Part 2. How to Add Voiceover Using The Filmora App?
The Filmora App [Android/iOS] is the right resource to add voiceover by recording voice from your smartphone. Users can import multiple video files to add voiceover simultaneously to the clips. Besides recording audio, you can ask the AI to generate background music for your video using the Filmora voiceover app. Moreover, adjust the speed and add fade-ins and outs to the audio for a more dynamic feel.
Tutorial To Record Voiceover With the Filmora App
Having learned about this app in detail, let us now know how to record audio on your smartphone using the Filmora App:
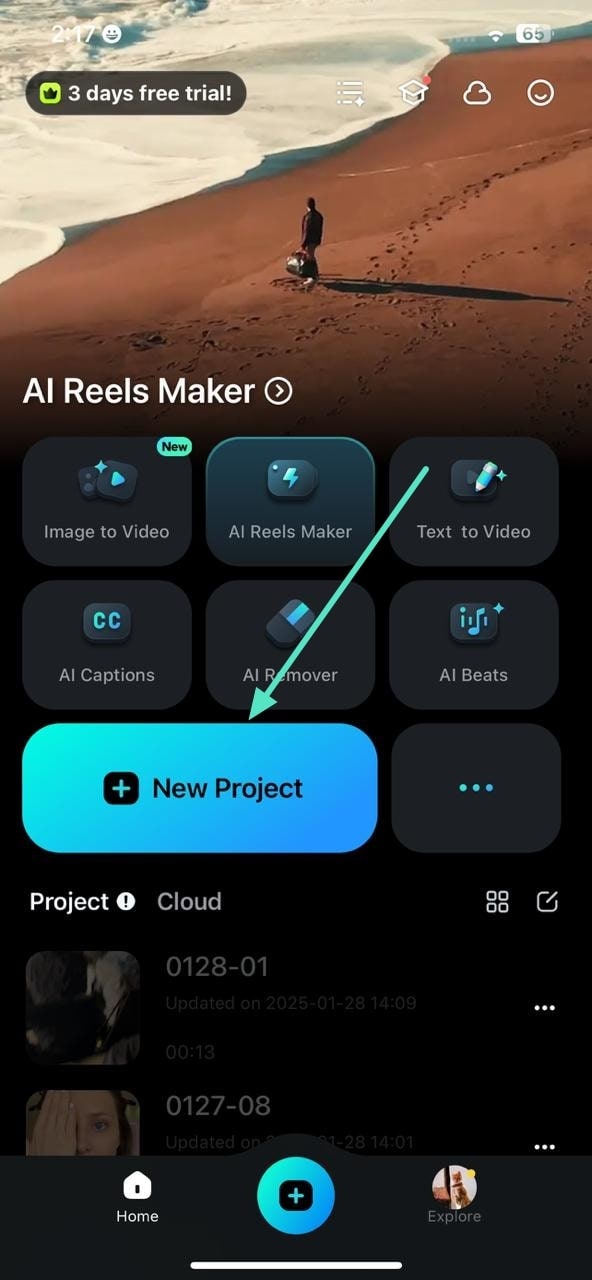
Step 1. Start by Creating a Project and Importing Video
To initiate, launch the Filmora App on your smartphone and tap the “New Project” option located on the homepage. Next, import your video for voiceover recording to the app's interface using the “Import” button.
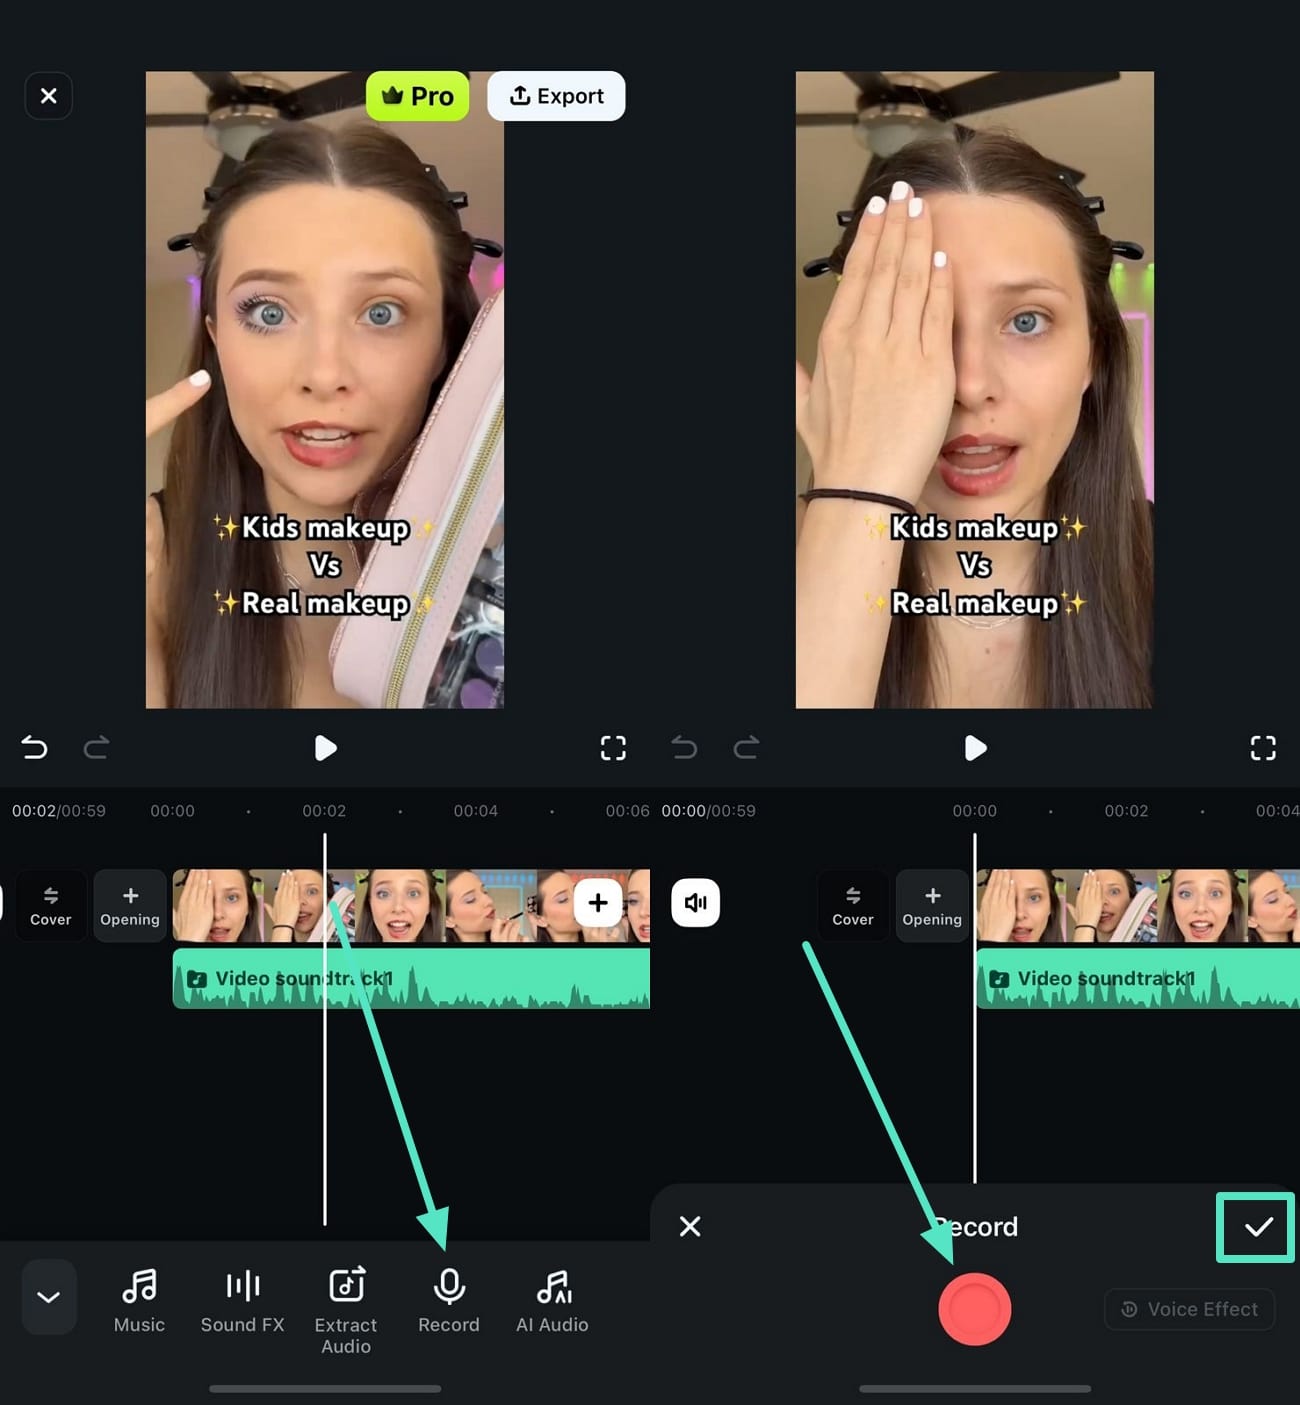
Step 2. Record the Voiceover for Video
Access the toolbar located at the bottom of the screen and locate the "Record" button to tap it. Now, press the "Red" button to start the recording process. Once you finish the recording by speaking through your phone, press the same red button to stop the process. To import the recorded audio to the app, use the small “Tick” on the right side.
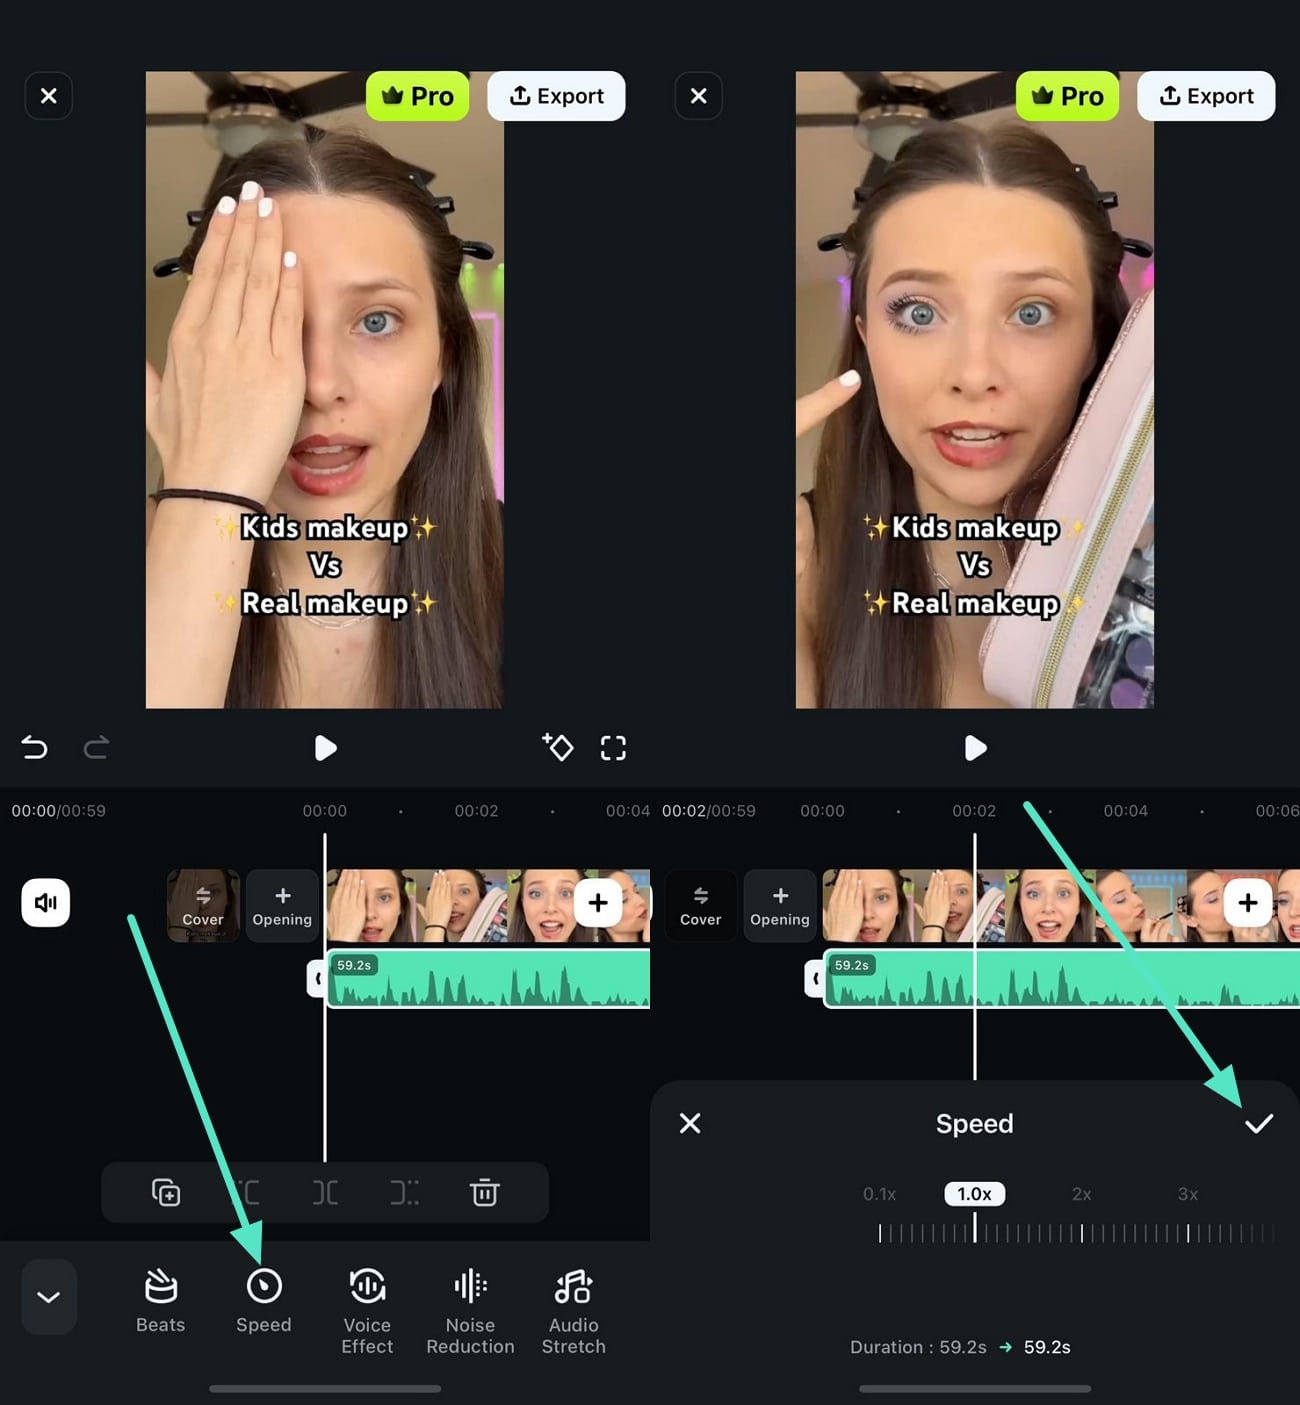
Step 3. Adjust the Speed of the Volume For Recorded Audio
To make the video align with the recorded audio, access the “Speed” icon to enable the speed adjustment slider. Next, drag it accordingly and preview the adjustment by playing the video in the preview window. Once the speed is configured according to your preferences, tap the small “Tick” located on the right side.
Step 4. Insert the Voice Effect into the Recorded Media
If you do not like the vocals of the recorded audio, acquire the “Voice Effects” function from the Filmora audio record app's toolbar and select your desired voices from the options provided. Tap the “Tick” on the right to apply the selected effect to the audio file.
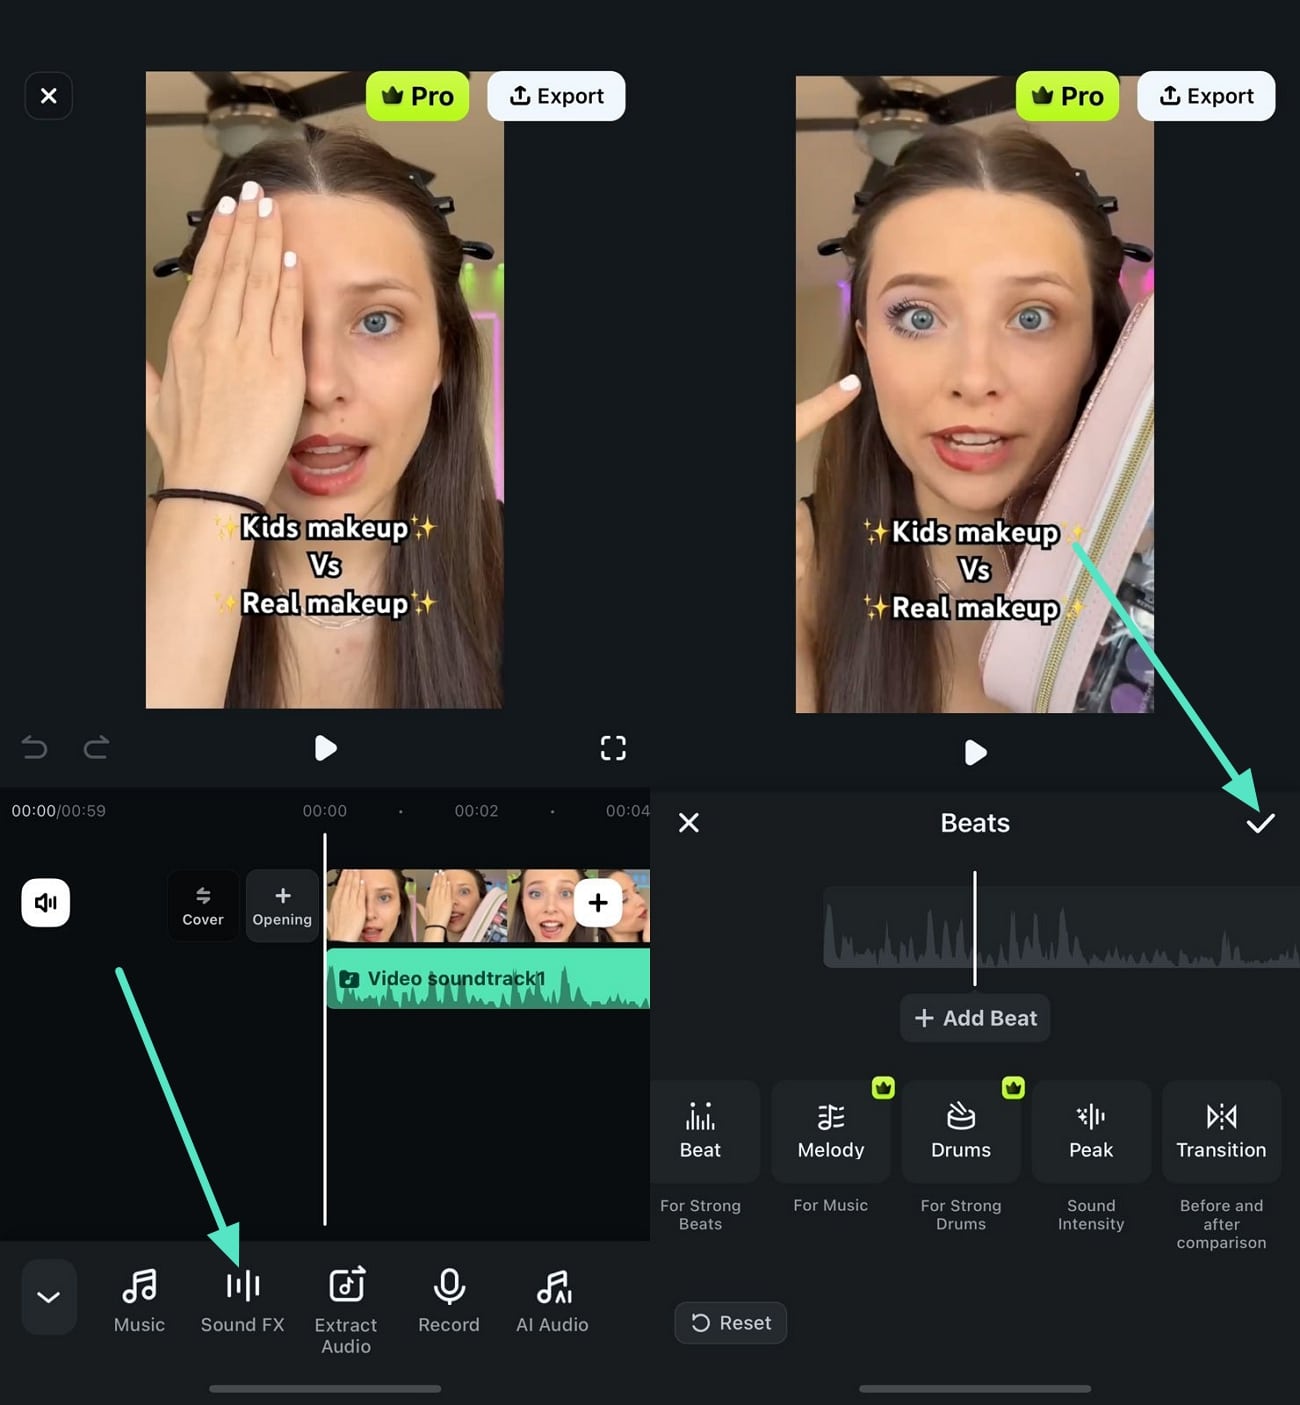
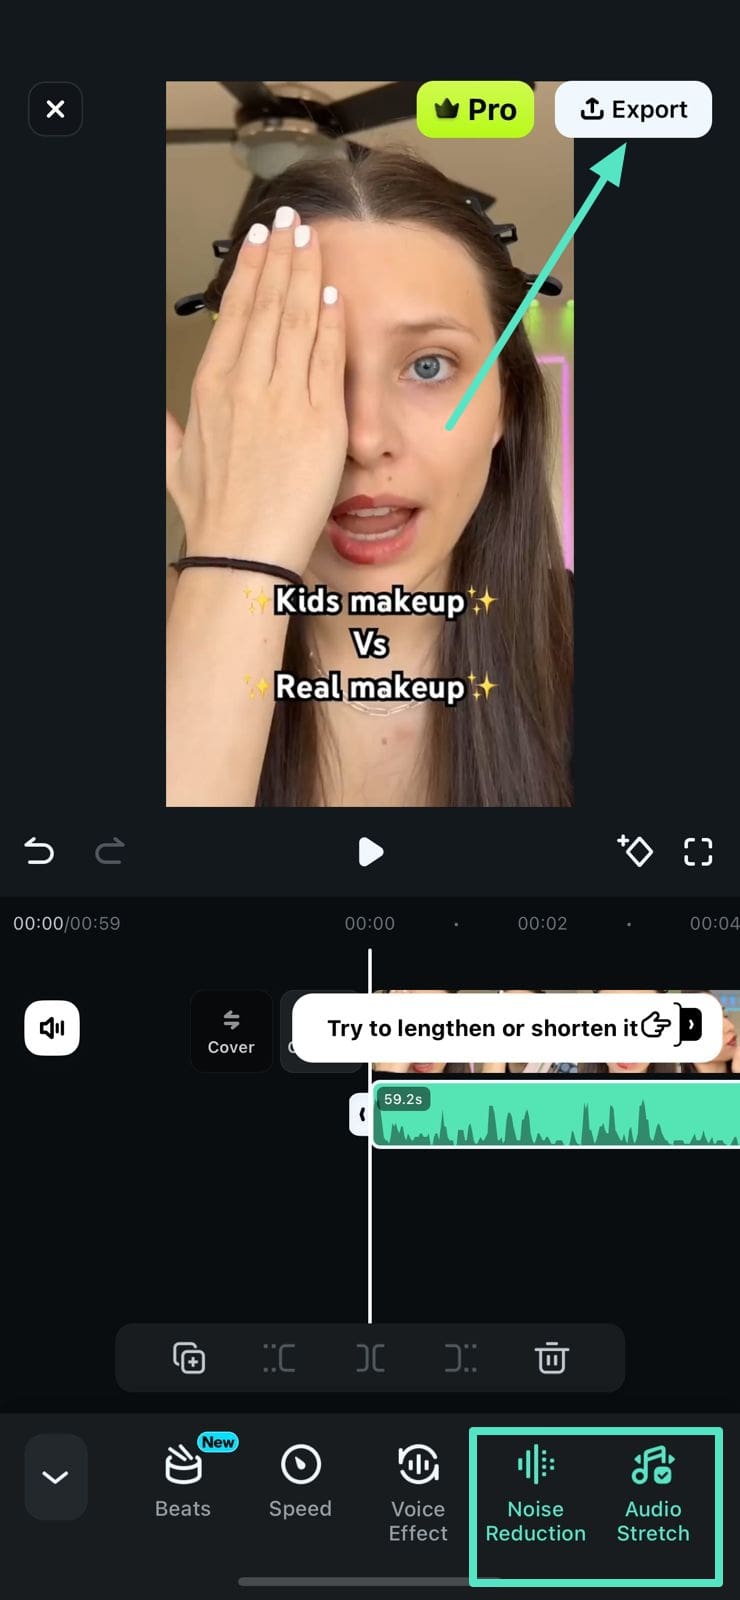
Step 5. Apply Other Audio Effects and Export
Once all the adjustments are made, swipe through the toolbar and press the “Noise Reduction” feature to remove unwanted background noises from the audio. Next, apply the “Audio Stretch” icon to align the audio with the video accordingly. Once done, head to the top-right corner of the screen to press the “Export” button to save the file.
Filmora for Mobile Filmora for Mobile Filmora for Mobile Filmora for Mobile Filmora for Mobile
Enhance Your Videos with Filmora's Voice Over Feature
- • Powerful Brand New AI Features.
- • User-friendly video editing for beginners.
- • Full-featured video editing for professional.


Conclusion
To conclude, this article discussed how you can use Filmora voiceover to record your voice for visual content. It showed two different methods of utilizing this platform from your desktop and smartphone for instant voice recording. Using the advanced audio enhancement functionalities of Filmora, users can modify and enhance the overall audio quality with AI.
