For the Best Results, Use the Latest Version.
-
Preparations
-
Account
-
Get Started & Basic Settings
-
Compatibility & Tech Specs
-
Performance Settings
-
-
Creating Projects
-
Creating New Projects
-
-
Importing & Recording
-
Video Editing for Windows
-
Basic Video Editing
- Enable/Disable Clip in Windows
- Magnetic Timeline for Windows
- Dual Monitor Setup for Video Editing on Windows
- Select All Clips on Timeline for Windows
- Manage Timeline and Tracks on Windows
- Auto Ripple for Windows
- Split & trim video
- Crop & Pan & Zoom Video in Filmora for Windows
- Compositing
- Change Video Speed on Windows
- Playing videos in reverse
- Mark In and Mark Out for Windows
- Markers for Windows
- Group editing
- Customizable Backgrounds for Videos and Images in Windows
- Video snapshot
- Using Freeze Frame in Filmora for Windows
- Logo Reveal For Windows
- Auto Enhance in Filmora for Windows
- Applying drop shadow
- Adjustment layer for Windows
- Apply Transforming for Windows
- Video Editing Ruler – Windows
-
Advanced Video Editing
- Drawing Tools for Windows | Filmora Guide
- Create Multi-Camera Clip in Filmora for Windows
- Compound Clip for Windows
- Multi-Clip Editing for Windows
- Filmora Motion Blur | Windows
- Filmora Flicker Removal Guide | Windows
- Apply mask to video
- Creating a PIP Effect for Windows
- Keyframe Graph Editor for Windows
- Add animation keyframing for Windows
- Keyframe Path Curve for Windows
-
AI-Powered Video Editing
- Smart Scene Cut for Windows
- Smart Short Clips for Windows
- AI Face Mosaic for Windows
- Filmora AI Eye Contact- Windows
- AI Video Enhancer for Windows
- AI Text-to-Video for Windows
- Planar Tracking for Windows
- AI Idea to Video for Windows
- Filmora Image to Video for Windows
- Filmora Image to Prompt for Windows
- Instant Cutter Tool for Windows
- AI Extend
- Filmora AI Relight - Windows
- Filmora AI Image Enhancer Guide - Windows
- AI Script to Video Guide for Windows
- AI Text-Based Editing for Windows
- AI Mate Editing for Windows
- Instant Mode in Filmora
- ChatGPT Plugin - AI Copywriting
- AI Smart Cutout for Windows
- Lens correction on Windows
- Auto Reframe Video for Windows
- AI Portrait Cutout
- Scene detection feature
- AI Smart Masking for Windows
- Motion Tracking on Windows
- Video Stabilization for Windows
- AI Video/Photo Object Remover for Windows
- AI Smart Search for Windows
- AI Skin Tone Protection for Windows
- AI Image for Windows
- Chroma key (green screen)
- Super Slow Motion with Optical Flow for Windows
- Video Denoise for Windows
-
-
Audio Editing for Windows
-
Basic Audio Editing
-
Advanced Audio Editing
-
AI-Powered Audio Editing
- Auto synchronization
- AI Sound Effects in Filmora for Windows
- Smart BGM Generation on Windows
- AI Voice Enhancer in Filmora
- AI Voice Cloning in Wondershare Filmora
- AI Music Generator for Windows
- Audio To Video
- AI Vocal Remover for Windows
- AI Auto Beat Sync for Windows
- AI Audio Stretch for Windows
- AI Audio Denoise for Windows
- Silence Detection on Windows
-
-
Text Editing for Windows
-
Basic Text Editing
-
Advanced Text Editing
-
AI-Powered Text Editing
-
-
Video Customizations
-
Video Effects
-
Audio Effects
-
Transitions
-
Stickers
-
Filters
-
Color Editing
-
Animations
-
Templates
-
Asset Center
-
-
Exporting & Share & Cloud Backup
Auto Normalization for Windows
Auto Normalization in Filmora for Windows is an intelligent audio balancing feature that automatically adjusts the loudness of audio clips to match professional LUFS/LKFS standards. It analyzes sound levels and ensures consistent volume across different platforms, making your audio suitable for YouTube, streaming services, podcasts, and broadcast media. This helps maintain clarity, avoids sudden volume spikes, and delivers a more polished listening experience.
Index
Steps to Use Auto Normalization
Filmora provides a simple workflow to enable, adjust, and reset audio normalization directly from the audio settings panel. Follow the steps mentioned below to learn how to use this feature:
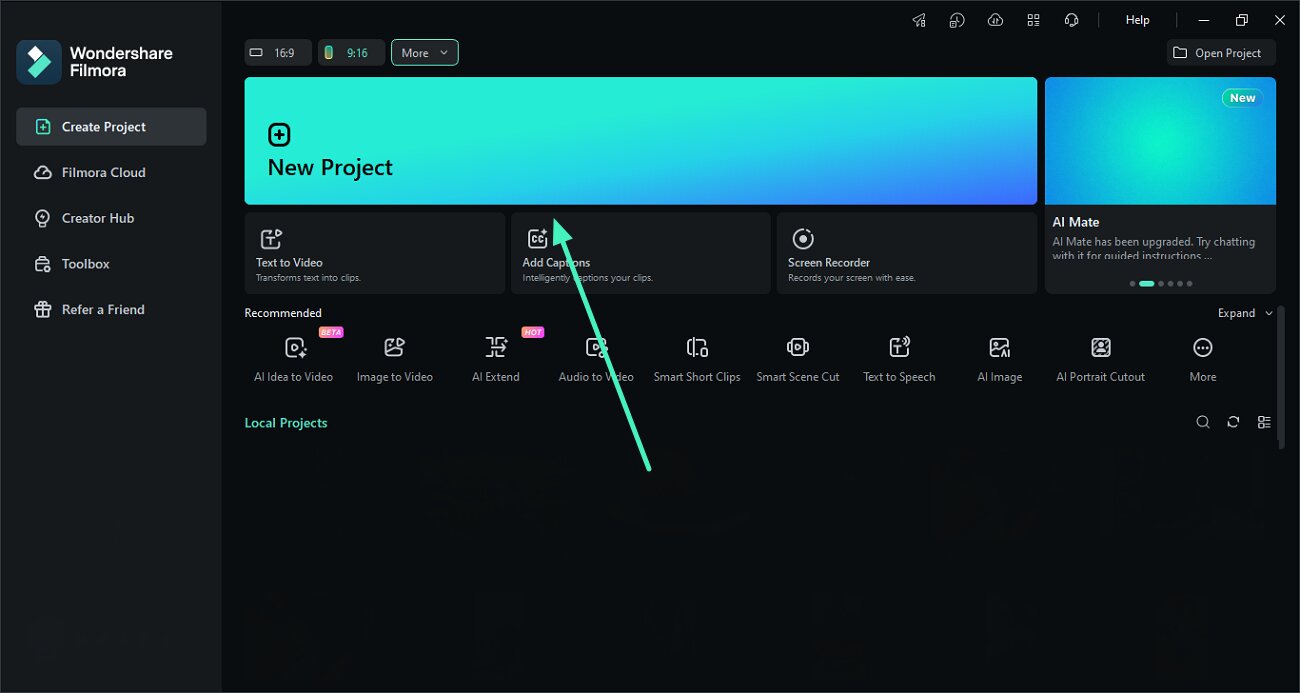
Step 1. Start Creating a New Filmora Project
Initiate the process by creating the project using the New Project option located on the homepage. Add the media clip to the tool’s interface and drag it to the editing timeline.
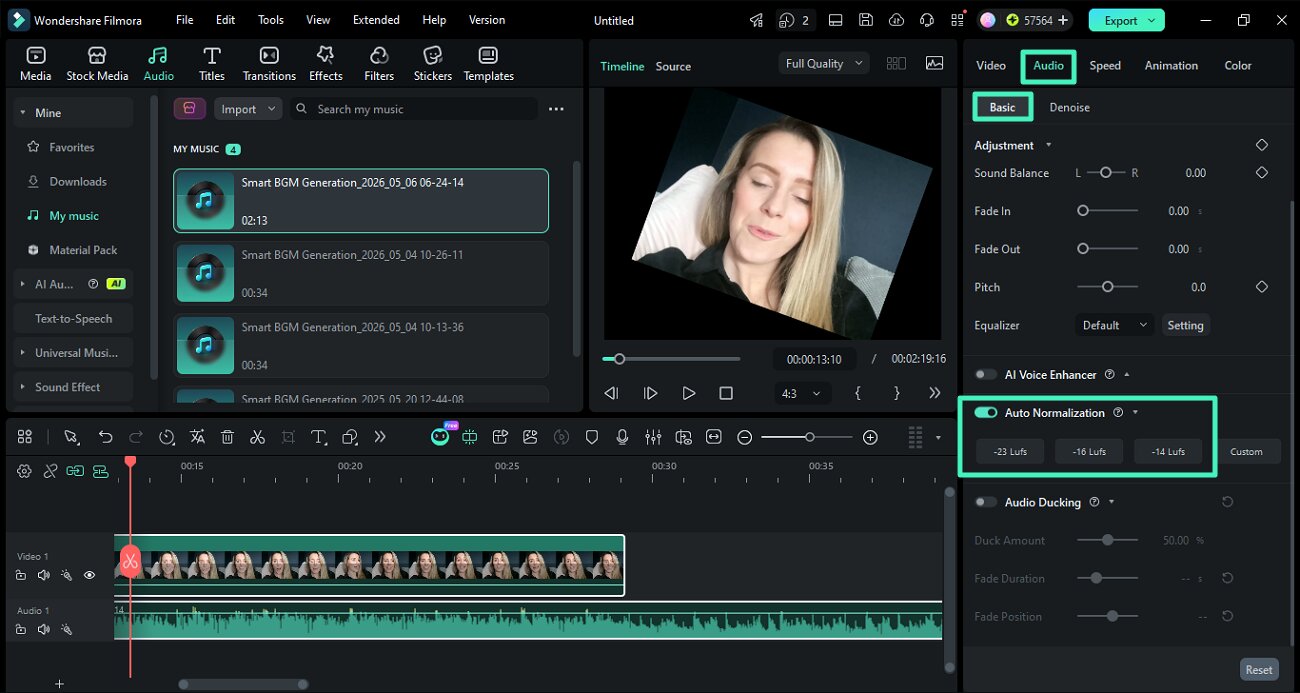
Step 2. Select Audio Clip and Enable Feature
Click the audio clip in the timeline that you want to normalize. Go to the right-side properties panel and navigate to the Audio section to enable the Basic option. Find and activate the Auto Normalization option within the basic audio settings. Select the preset loudness levels optimized for different platforms.
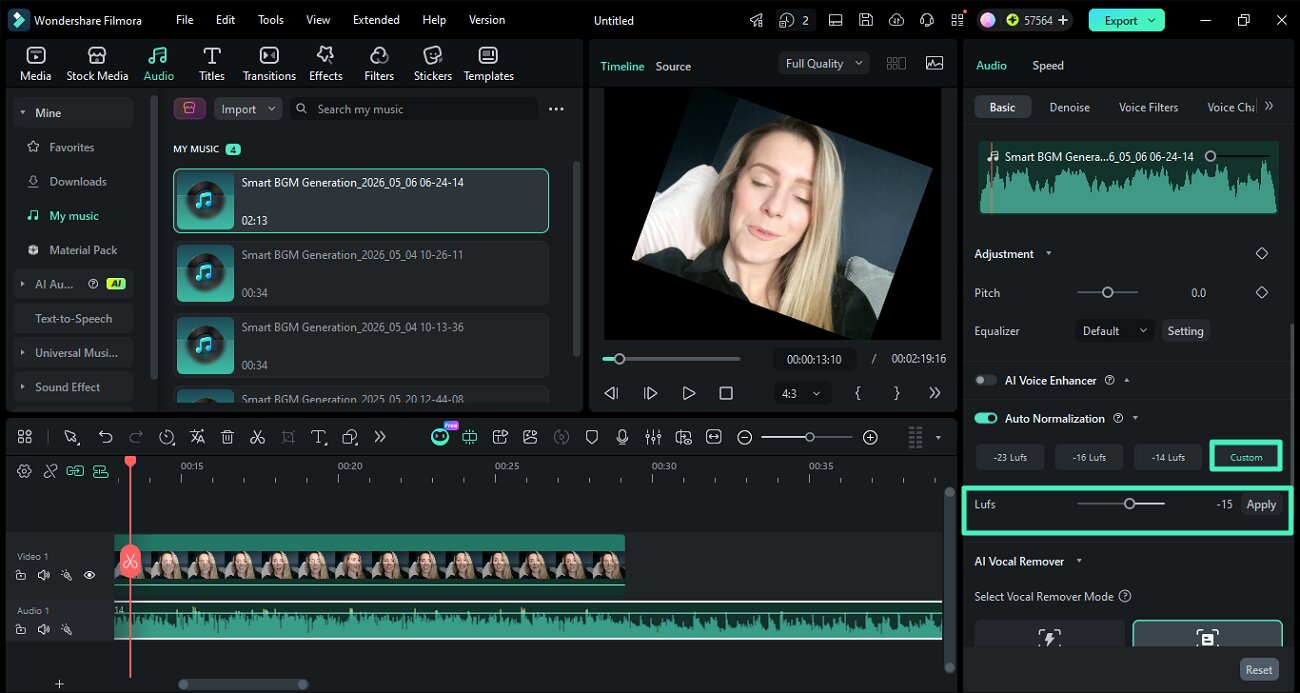
Step 3. Set Custom Loudness Values
Press the Custom option to enable manual control and use the LUFS slider or enter a specific value manually. Adjust within a flexible range, typically from -23 LUFS to -10 LUFS and click the Apply button.
Step 4. Reset Auto Normalization Settings
Turn the toggle off for Auto Normalization to disable the applied feature. Once done, press the Export button to save the results.

Related Posts
Featured Articles
Nano Banana AI: Full Review and How to Create Viral Miniature Figurine Model 3D from Photos
Discover Nano Banana AI: Practical review of its features and how to make AI figures with Nano Banana, also learn how to animate the 3D model figurines with Filmora.
How to Record Audio with Audacity? [With Audio Editing Tips]
If you are curious about how to use Audacity for audio recording, check this article. We'll present you a step-by-step guide to record audio with Audacity and how to edit audio on it.
2026 Updated | Our Selection of the Best 8 Free Online Video Croppers
Do you want to crop your video creations but don’t want to spend a fortune? Check out these online video croppers to help you meet your video goals easily.
Recommended User Guide
Beat detection
Learn to perform beat detection in Filmora.
Access Audio Meter in Windows
The Audio Meter is an independent functionality in Filmora, and users can enable it during or after editing.
Audio Gain for Windows
Learn to use Audio Gain feature in Filmora
