For the Best Results, Use the Latest Version.
-
Preparations
-
Account
-
Get Started & Basic Settings
-
Compatibility & Tech Specs
-
Performance Settings
-
-
Creating Projects
-
Creating New Projects
-
-
Importing & Recording
-
Video Editing for Windows
-
Basic Video Editing
- Enable/Disable Clip in Windows
- Magnetic Timeline for Windows
- Dual Monitor Setup for Video Editing on Windows
- Select All Clips on Timeline for Windows
- Manage Timeline and Tracks on Windows
- Auto Ripple for Windows
- Split & trim video
- Crop & Pan & Zoom Video
- Compositing
- Change video playback speed
- Playing videos in reverse
- Mark In and Mark Out for Windows
- Markers for Windows
- Group editing
- Customizable Backgrounds for Videos and Images in Windows
- Video snapshot
- Using freeze frame
- Logo Reveal For Windows
- Apply auto enhance
- Applying drop shadow
- Adjustment layer for Windows
- Transforming
- Video Editing Ruler – Windows
-
Advanced Video Editing
- Drawing Tools for Windows | Filmora Guide
- Create Multi-Camera Clip
- Compound Clip for Windows
- Multi-Clip Editing for Windows
- Filmora Motion Blur | Windows
- Filmora Flicker Removal Guide | Windows
- Apply mask to video
- Creating a PIP effect
- Keyframe Graph Editor for Windows
- Add animation keyframing for Windows
- Keyframe Path Curve for Windows
-
AI-Powered Video Editing
- Smart Scene Cut for Windows
- Smart Short Clips for Windows
- AI Face Mosaic for Windows
- Filmora AI Eye Contact- Windows
- AI Video Enhancer for Windows
- AI Text-to-Video for Windows
- Planar Tracking for Windows
- AI Idea to Video for Windows
- Filmora Image to Video for Windows
- Filmora Image to Prompt for Windows
- Instant Cutter Tool for Windows
- AI Extend
- Filmora AI Relight - Windows
- Filmora AI Image Enhancer Guide - Windows
- AI Script to Video Guide for Windows
- AI Text-Based Editing for Windows
- AI Mate Editing for Windows
- Create with instant mode
- ChatGPT Plugin - AI Copywriting
- AI Smart Cutout
- Lens correction on Windows
- Auto reframe video
- AI Portrait Cutout
- Scene detection feature
- AI Smart Masking for Windows
- Make motion tracking
- Video Stabilization for Windows
- AI Video/Photo Object Remover for Windows
- AI Smart Search for Windows
- AI Skin Tone Protection for Windows
- AI Image for Windows
- Chroma key (green screen)
- Super Slow Motion with Optical Flow for Windows
- Video Denoise for Windows
-
-
Audio Editing for Windows
-
Basic Audio Editing
-
Advanced Audio Editing
-
AI-Powered Audio Editing
-
-
Text Editing for Windows
-
Basic Text Editing
-
Advanced Text Editing
-
AI-Powered Text Editing
-
-
Video Customizations
-
Video Effects
-
Audio Effects
-
Transitions
-
Stickers
-
Filters
-
Color Editing
-
Animations
-
Templates
-
Asset Center
-
-
Exporting & Share & Cloud Backup
Boris FX Effects
Filmora now supports Continuum, professional-quality effects plugins from award-winning developer Boris FX. 7 Continuum Units have been customized for Filmora users, unleashing amazing creative visual effects and graphics potential. Each Continuum Unit contains multiple filters with complementary creative presets designed by Boris FX. Browse from the unique effects and thousands of presets.
Index
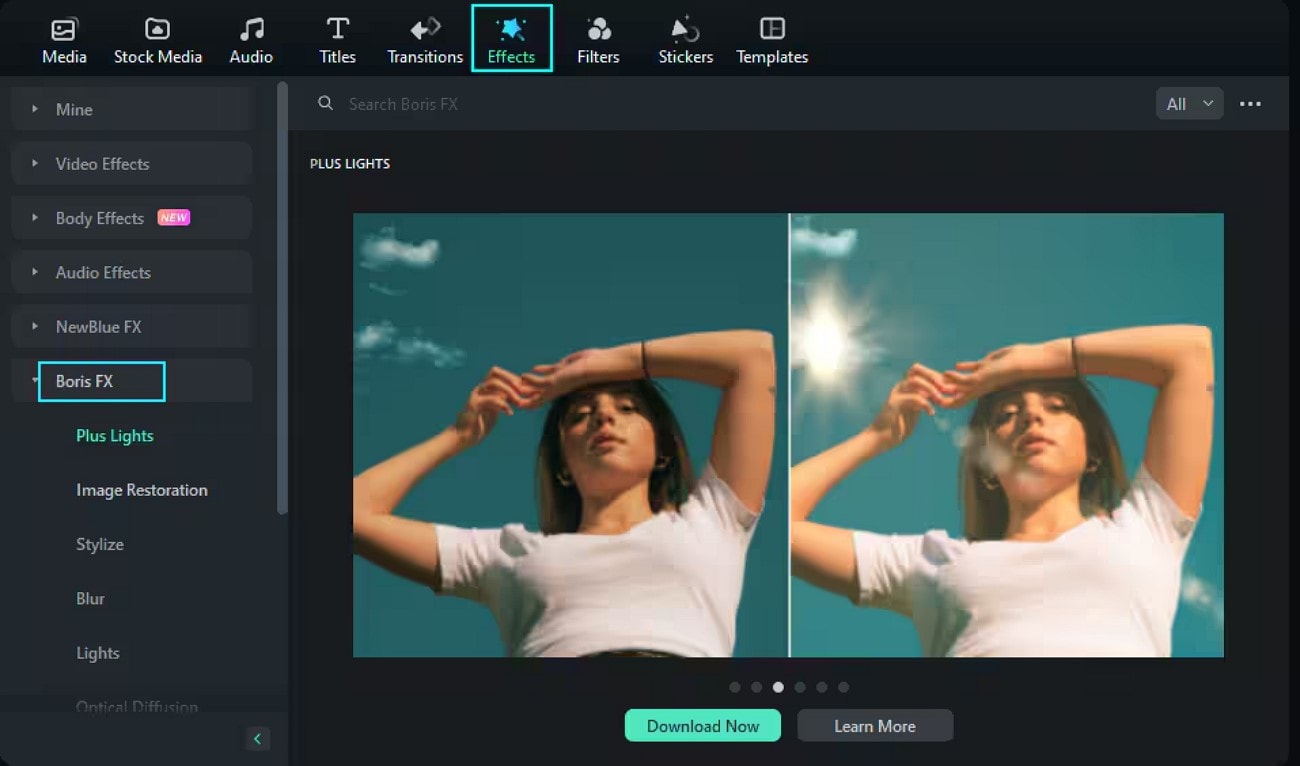
Step 1. Find Boris FX Effects
Launch Filmora on your device and import the video files. After importing the files, go to Effects > Boris FX. You can also click Learn More to get more information about Boris FX effects before downloading the plugin.
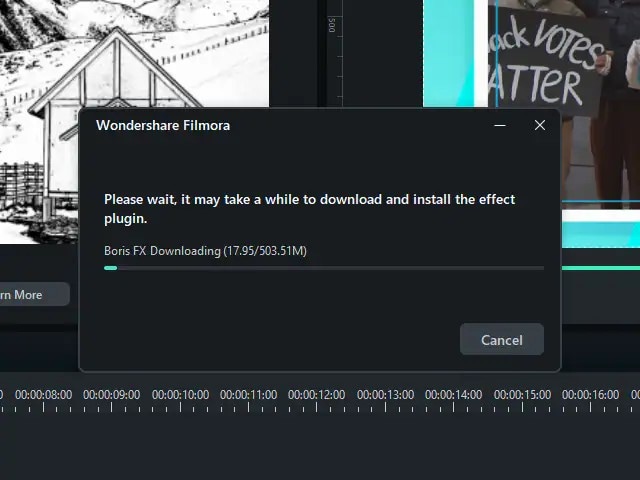
Step 2. Download and Install Boris FX
To use the Boris FX plugin, you need to download and install the Boris FX effect plugin. Since the plugin effect package is about 500 MB, it will take time to download the package.
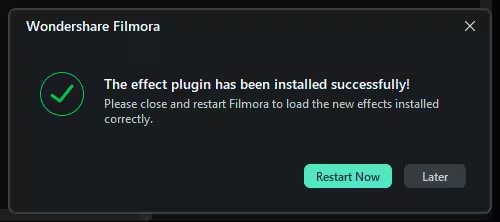
Step 3. Download Boris FX Plugin
After the download process is finished, follow the guide to click Restart Now.
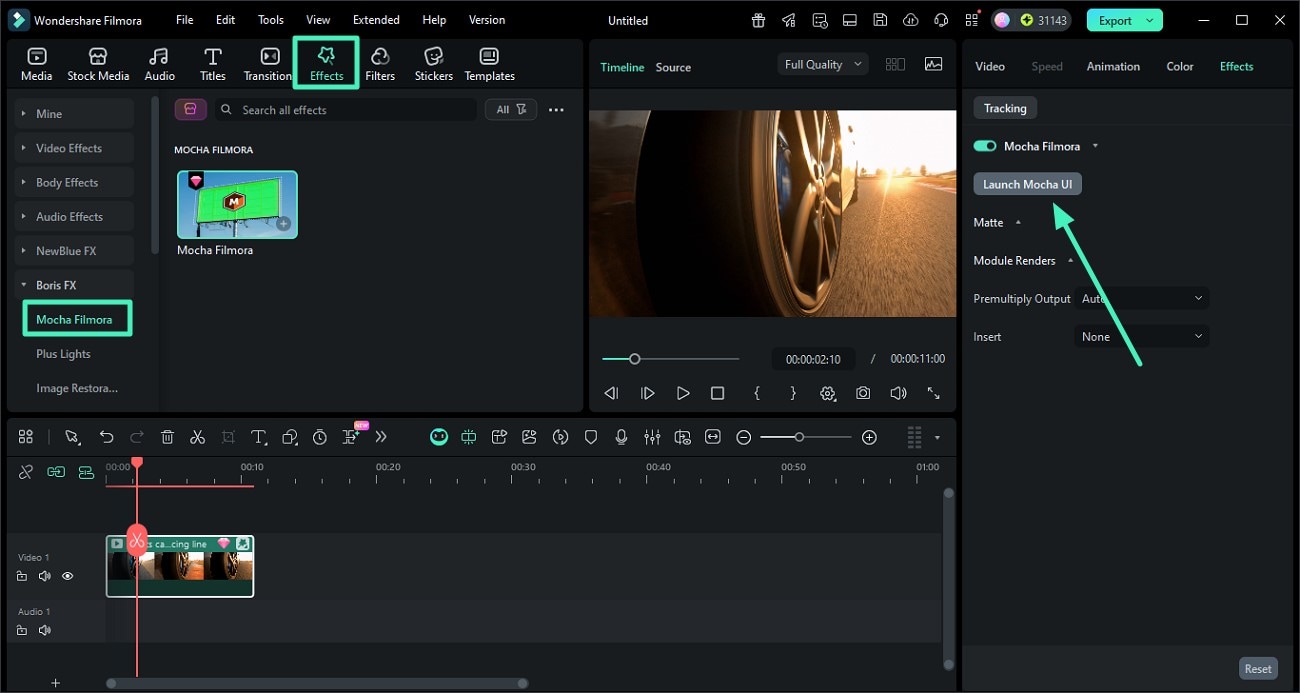
Step 4. Access the Mocha Filmora Effect
Once the Boris FX plugin is added to the tool, access the Mocha Filmora option from the left panel and click on the + icon. From the panel on the right, choose Launch Mocha UI and click on it to enter the Mocha interface.
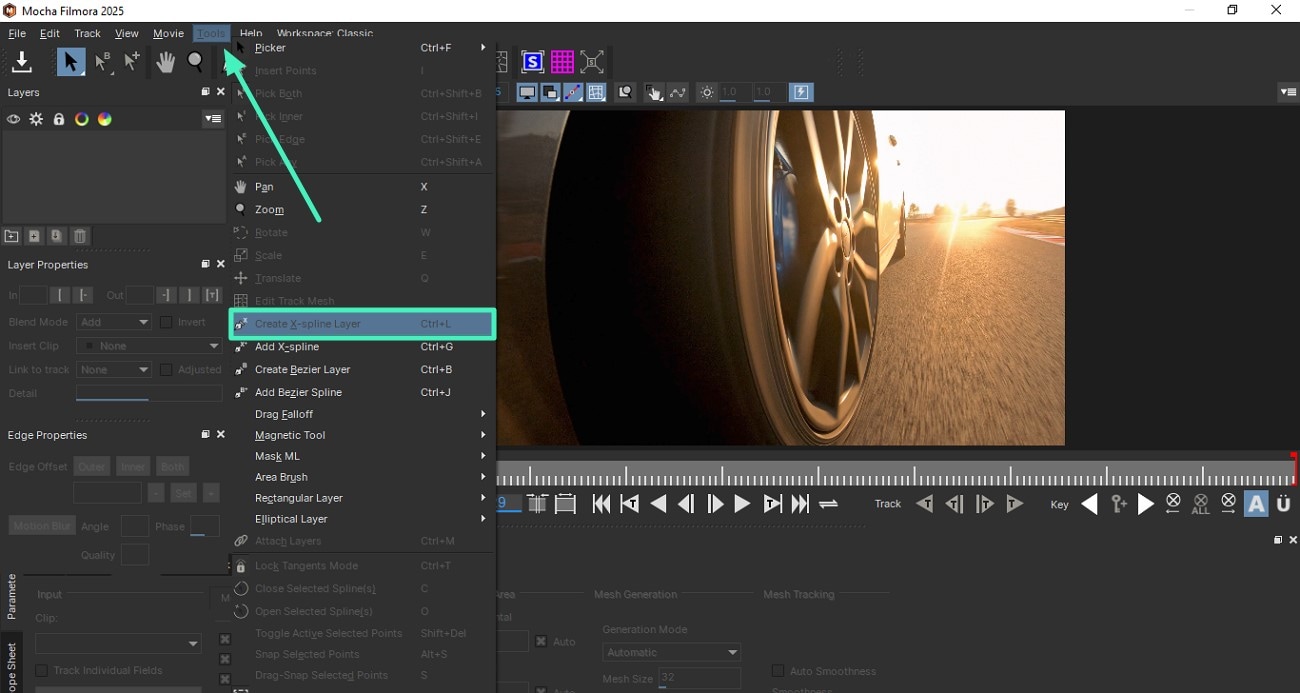
Step 5. Create X-Spline Layer in Mocha
In the Mocha Interface, head to the toolbar at the top and click on the Tools option. Next, click on the Create X-Spline Layer option and draw the area on the preview window. Complete your selection by right-clicking on the mouse.
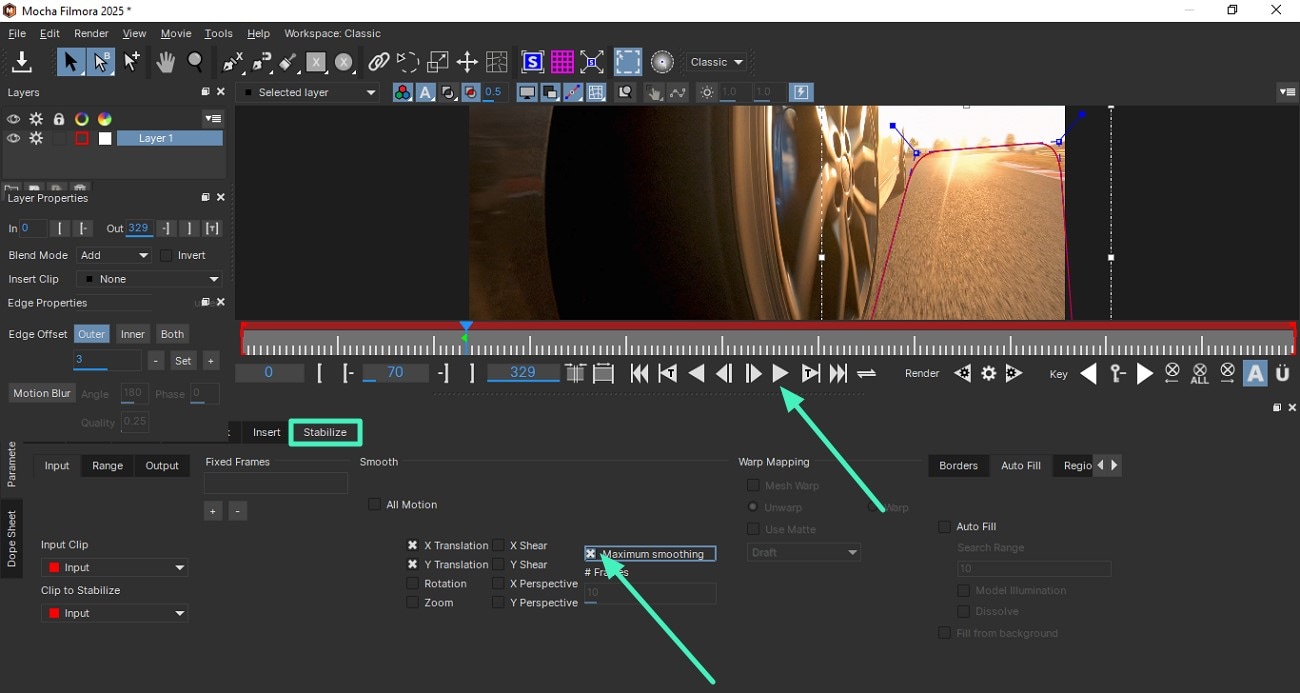
Step 6. Use Mocha Filmora Functions
With Mocha Filmora, you can perform various functions such as warping text, tracking planes, and stabilizing video. To stabilize the video, make the selection and access the Stabilization section. Now, configure settings such as Maximum Smoothing by ticking the checkbox. To render the changes, click on the Play icon located below the video preview.
Step 7. Add Boris FX Effects
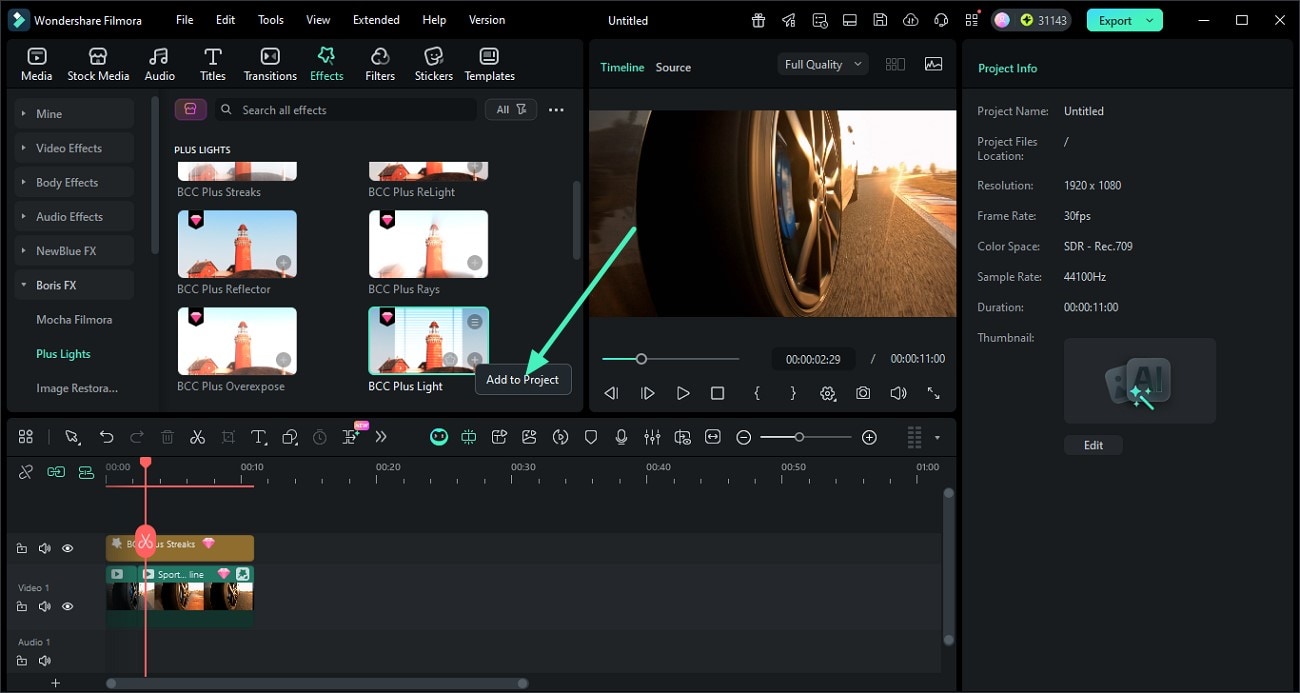
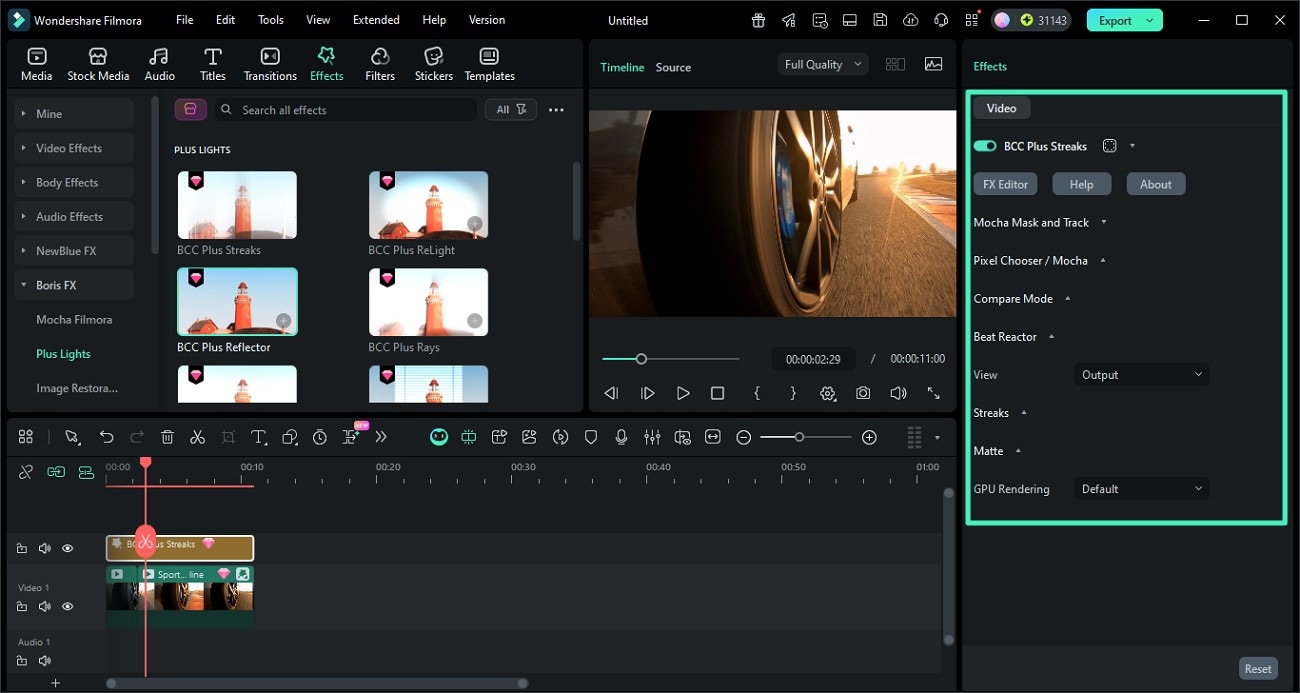
Go to Effects > Boris FX to add and preview the preset effects. You can see the Boris FX effects, such as BCC Plus Streaks, BCC Plus Relight, BCC Plus Reflector, BCC Plus Rays, BCC Plus Overexpose, BCC Plus Lights, BCC Plus Lens Flare, and so on.
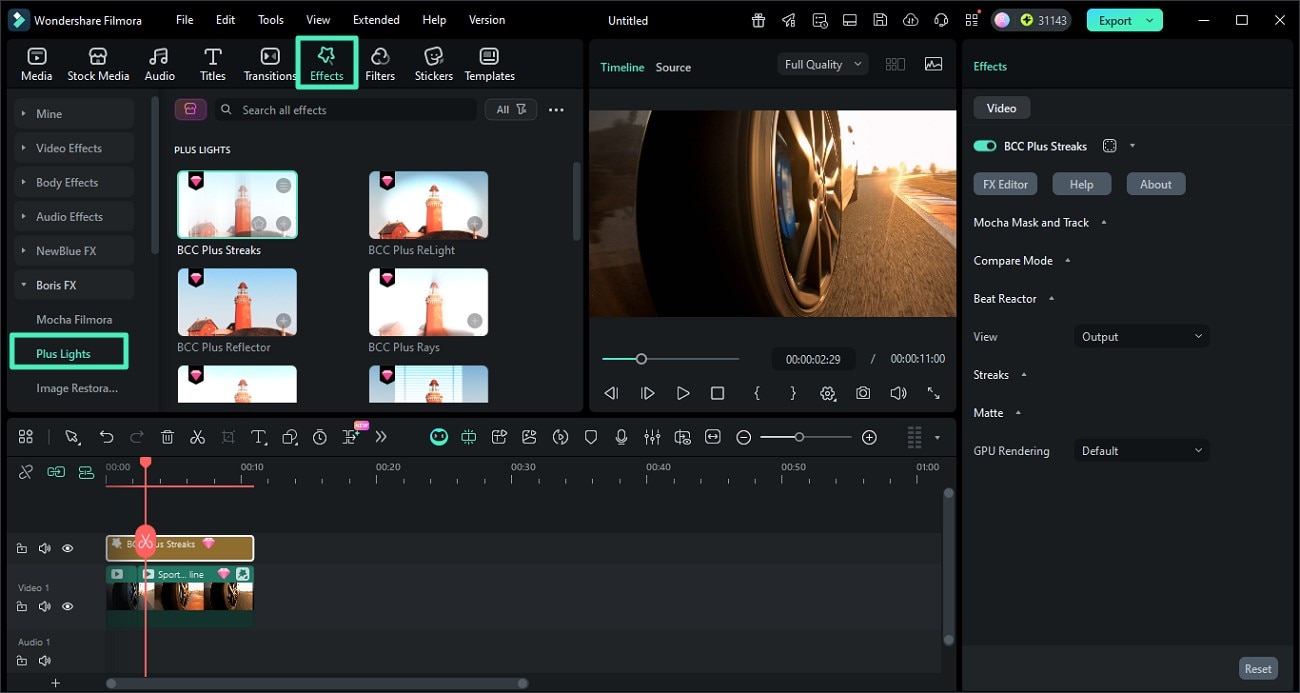
You can click Add to Project to try to add the effects to your videos.
Or you can choose to drag and drop the desired effect on the timeline track above your video and play to see the results.

Step 8. Modify Boris FX Effects
Head to the panel on the right to customize its settings, for example, Light, Shadow, Transform, and so on. You can click on the FX Editor to enter the editing interface of the effect and adjust it accordingly.
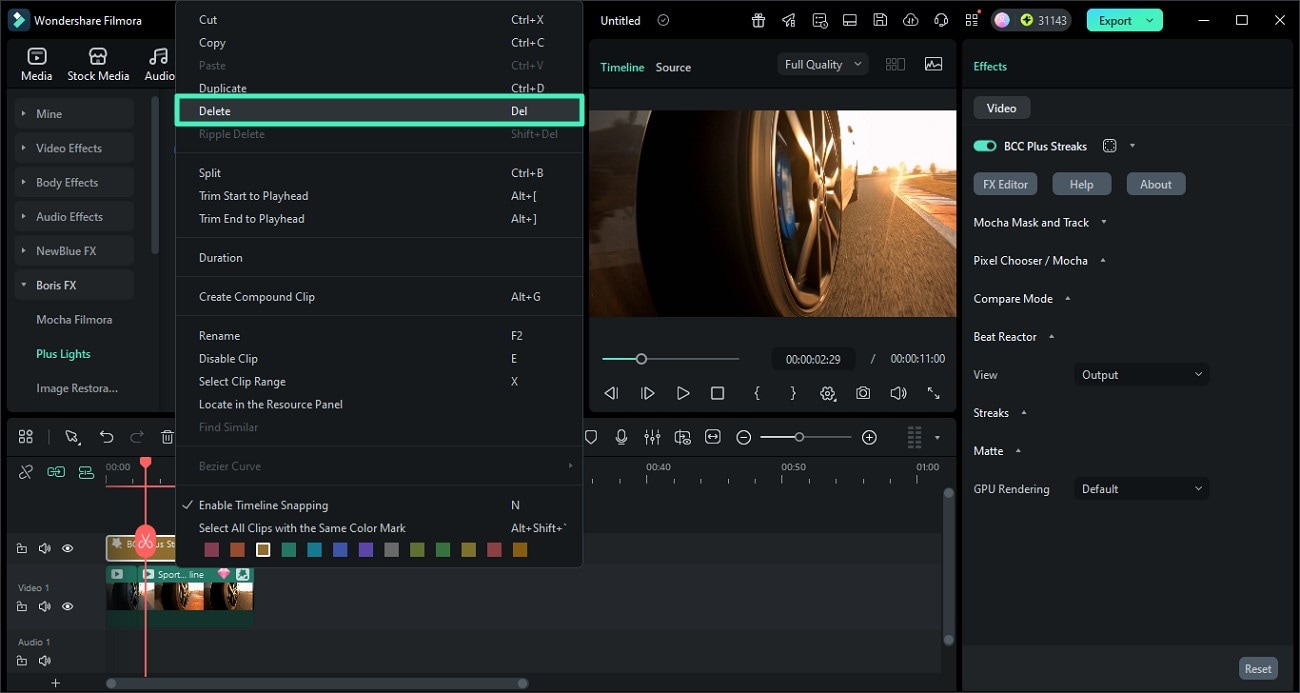
Step 9. Remove Boris FX Effects
There are two ways to remove Boris FX Effect from your project.
Method 1. Select the Boris FX Effect in the timeline and hit Delete on the toolbar area.

Method 2. Right click on the Boris FX Effect in the timeline and select Delete.
Related Posts
Featured Articles
Topaz Project Starlight: Diffusion-Based AI Video Enhancement
See how Topaz Project Starlight restores old footage using diffusion-based AI instead of standard upscaling methods, helping damaged videos look smoother and more natural.
How to Add a Logo to a Photo?
Add a logo to any photo in minutes using our step-by-step PIP workflow for desktop and mobile, pro tips for placement and opacity, and creative branding ideas.
How to Remove Emoji in Video By 3 Methods
Remove unnecessary emoji effortlessly through three different ways in Filmora and create emoji-free videos without the complicated techniques.
Recommended User Guide
Body Effects
Learn to add Body effects to your videos using Filmora.
NewBlue FX effects
Learn how to add and modify NewBlue FX Effects in Filmora for Windows.
Filmora VST3 Plugins for Windows
Learn how to install, scan, and manage VST3 plugins in Filmora on Windows with this step-by-step setup and troubleshooting guide.
