For the Best Results, Use the Latest Version.
-
Preparations
-
Account
-
Get Started & Basic Settings
-
Compatibility & Tech Specs
-
Performance Settings
-
-
Creating Projects
-
Creating New Projects
-
-
Importing & Recording
-
Video Editing for Windows
-
Basic Video Editing
- Enable/Disable Clip in Windows
- Magnetic Timeline for Windows
- Dual Monitor Setup for Video Editing on Windows
- Select All Clips on Timeline for Windows
- Manage Timeline and Tracks on Windows
- Auto Ripple for Windows
- Split & trim video
- Crop & Pan & Zoom Video
- Compositing
- Change Video Speed on Windows
- Playing videos in reverse
- Mark In and Mark Out for Windows
- Markers for Windows
- Group editing
- Customizable Backgrounds for Videos and Images in Windows
- Video snapshot
- Using freeze frame
- Logo Reveal For Windows
- Apply auto enhance
- Applying drop shadow
- Adjustment layer for Windows
- Transforming
- Video Editing Ruler – Windows
-
Advanced Video Editing
- Drawing Tools for Windows | Filmora Guide
- Create Multi-Camera Clip
- Compound Clip for Windows
- Multi-Clip Editing for Windows
- Filmora Motion Blur | Windows
- Filmora Flicker Removal Guide | Windows
- Apply mask to video
- Creating a PIP effect
- Keyframe Graph Editor for Windows
- Add animation keyframing for Windows
- Keyframe Path Curve for Windows
-
AI-Powered Video Editing
- Smart Scene Cut for Windows
- Smart Short Clips for Windows
- AI Face Mosaic for Windows
- Filmora AI Eye Contact- Windows
- AI Video Enhancer for Windows
- AI Text-to-Video for Windows
- Planar Tracking for Windows
- AI Idea to Video for Windows
- Filmora Image to Video for Windows
- Filmora Image to Prompt for Windows
- Instant Cutter Tool for Windows
- AI Extend
- Filmora AI Relight - Windows
- Filmora AI Image Enhancer Guide - Windows
- AI Script to Video Guide for Windows
- AI Text-Based Editing for Windows
- AI Mate Editing for Windows
- Create with instant mode
- ChatGPT Plugin - AI Copywriting
- AI Smart Cutout
- Lens correction on Windows
- Auto reframe video
- AI Portrait Cutout
- Scene detection feature
- AI Smart Masking for Windows
- Make motion tracking
- Video Stabilization for Windows
- AI Video/Photo Object Remover for Windows
- AI Smart Search for Windows
- AI Skin Tone Protection for Windows
- AI Image for Windows
- Chroma key (green screen)
- Super Slow Motion with Optical Flow for Windows
- Video Denoise for Windows
-
-
Audio Editing for Windows
-
Basic Audio Editing
-
Advanced Audio Editing
-
AI-Powered Audio Editing
-
-
Text Editing for Windows
-
Basic Text Editing
-
Advanced Text Editing
-
AI-Powered Text Editing
-
-
Video Customizations
-
Video Effects
-
Audio Effects
-
Transitions
-
Stickers
-
Filters
-
Color Editing
-
Animations
-
Templates
-
Asset Center
-
-
Exporting & Share & Cloud Backup
Super Slow Motion with Optical Flow for Windows
With Filmora's new upgrade, users can add slow motion to their videos and optimize them. Moreover, the AI algorithms involved in this feature ensure a smooth optical flow and maintain video quality. To make creative and trendy slo-mo with Filmora, keep reading the sections below:
Create a Super Slow-Motion with Optical Flow
With this new AI feature, users do not need assistance from an expert, as the AI can handle everything. Here is a step-by-step guide to using Wondershare Filmora for creating slow-motion videos:
Index
Method 1: Using the Settings Panel
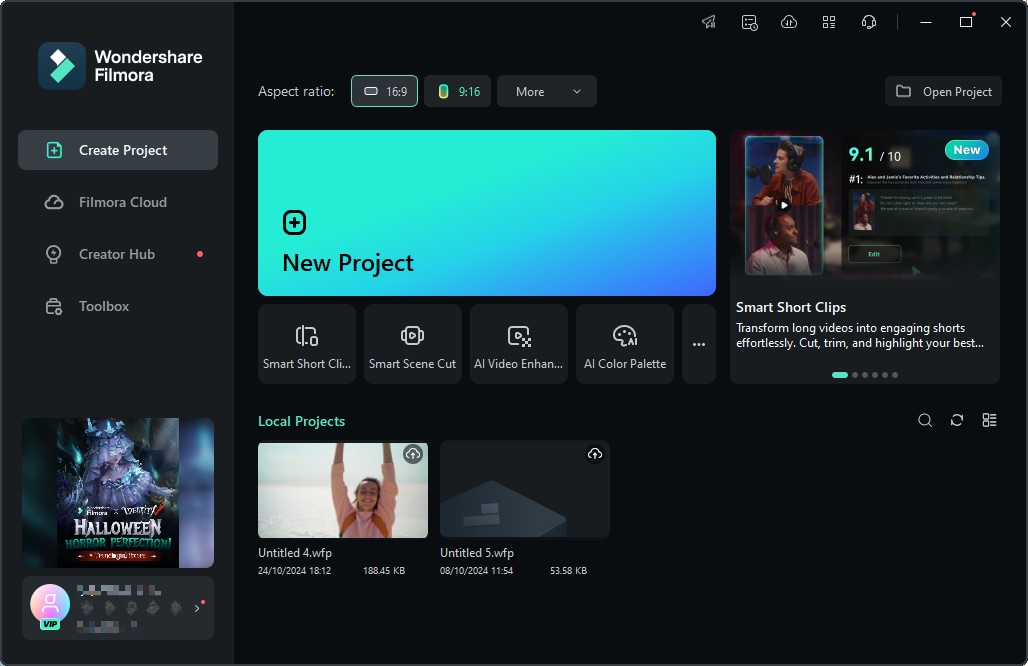
Step 1: Log in to Filmora and Create a New Project
After successfully downloading the software on your device, move toward the bar at the top, select the "Profile" icon, and log in. Once logged in, click the "New Project" button from the main menu.
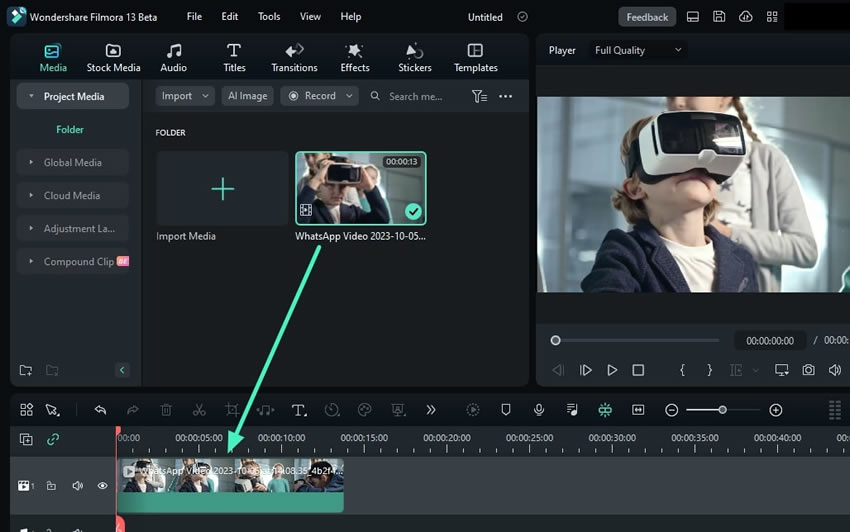
Step 2: Import Clip and Drop it to Timeline
After reaching the main interface of Filmora, press the "Ctrl + I" key on your keyboard and import media from your PC's "File Explorer". Once the media files are in the import section, drag and drop them to the timeline with the help of your cursor.
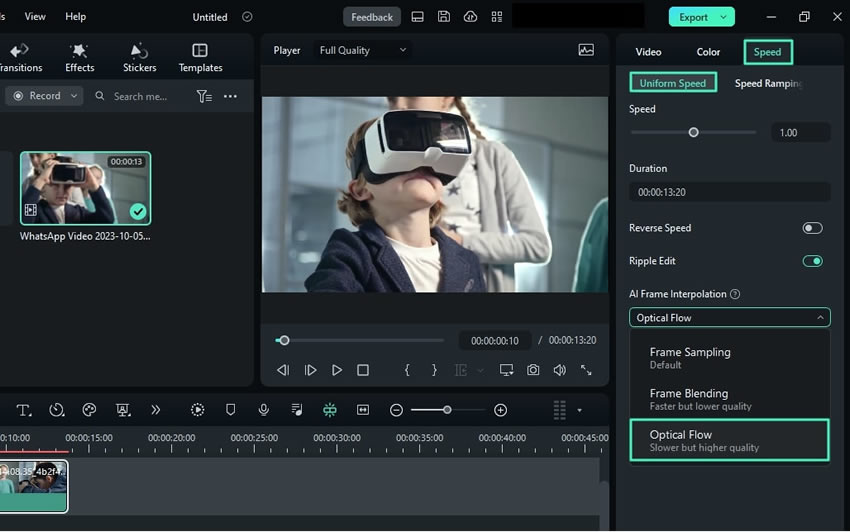
Step 3: Activate the Optical Flow
Select the video you just dropped into the timeline and navigate to the right settings panel. Then, select the "Speed" tab and choose "Uniform Speed" further. Expand the "AI Frame Interpolation" and select "Optical Flow" from the given options.
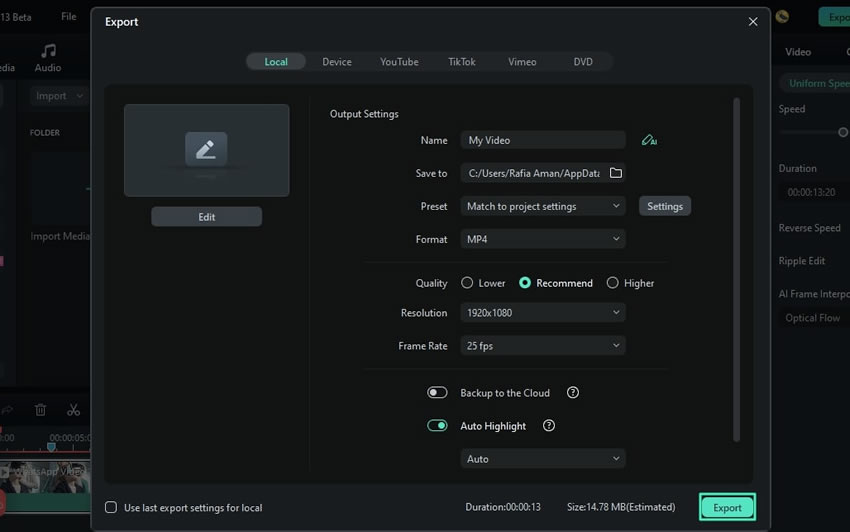
Step 4: Render Preview or Export for Results
To see the final results, go to the timeline toolbar and select "Render Preview". In addition, you can also export your video to see the outcome.
Method 2: Using the Timeline Options Menu
After bringing media to the timeline, navigate your cursor toward the clip in the timeline track and right-click on it. From the options panel, choose "Uniform Speed". Further, follow the same steps mentioned above.
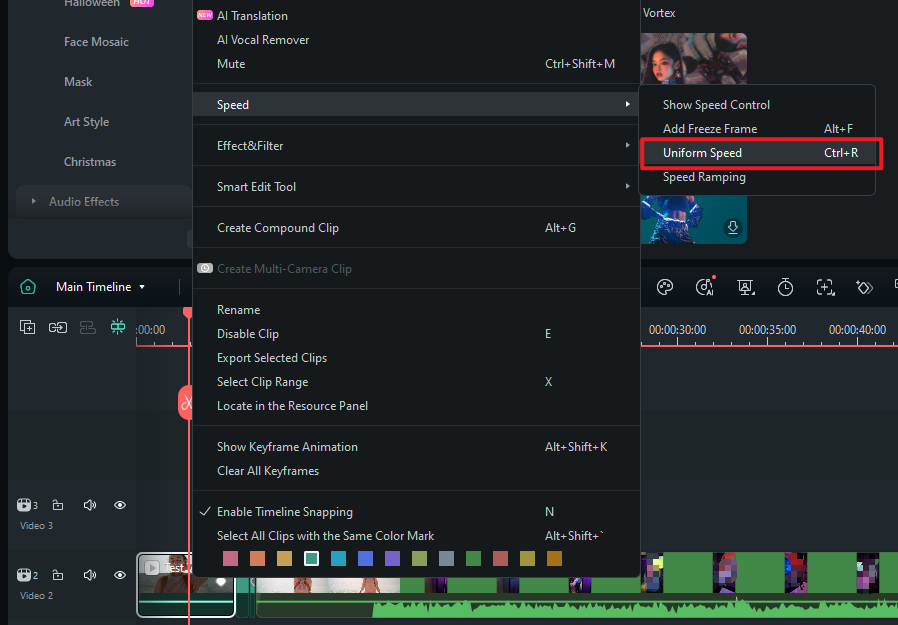
Method 3: From the Top Toolbar
Select your clip that is in the timeline track and navigate towards the top toolbar. From there, select "Tool", and expand the "Speed" option from the dropdown menu. Furthermore, choose "Uniform Speed" from the given options. Afterward, follow the same process to move further.

Related Posts
Featured Articles
How to Edit Snapchat Videos With The Best Editor | 2026
Looking for the best Snapchat video editor of 2026? Enhance your videos with Snapchat's built-in tools and the best Snapchat editor for professional-quality content.
What Is Cyber Monday? A Comprehensive Guide To The Online Shopping Event
Don't know what Cyber Monday is about? Read this post to discover everything about the online shopping event and the easiest way to create eye-catching ads for yours.
Top 10 Templates for Happy New Year Greeting Videos for Your Loved Ones
Create New Year wishing videos with these top 10 must-try templates. Capture holiday spirit effortlessly and share festive greetings with your friends and family!
Recommended User Guide
AI Smart Masking for Windows
Editing video elements independently is an important part of video creation, and Filmora's masking provides multiple options.
Planar Tracking for Windows
This guide explains how to use Planar Tracking in your videos on Windows
Filmora Image to Prompt for Windows
Here is the guide on how to use the Image to Prompt in Filmora on Windows.
