For the Best Results, Use the Latest Version.
-
Preparations
-
Account
-
Get Started & Basic Settings
-
Compatibility & Tech Specs
-
Performance Settings
-
-
Creating Projects
-
Creating New Projects
-
-
Importing & Recording
-
Video Editing for Windows
-
Basic Video Editing
- Enable/Disable Clip in Windows
- Magnetic Timeline for Windows
- Dual Monitor Setup for Video Editing on Windows
- Select All Clips on Timeline for Windows
- Manage Timeline and Tracks on Windows
- Auto Ripple for Windows
- Split & trim video
- Crop & Pan & Zoom Video
- Compositing
- Change video playback speed
- Playing videos in reverse
- Mark In and Mark Out for Windows
- Markers for Windows
- Group editing
- Customizable Backgrounds for Videos and Images in Windows
- Video snapshot
- Using freeze frame
- Logo Reveal For Windows
- Apply auto enhance
- Applying drop shadow
- Adjustment layer for Windows
- Transforming
- Video Editing Ruler – Windows
-
Advanced Video Editing
- Drawing Tools for Windows | Filmora Guide
- Create Multi-Camera Clip
- Compound Clip for Windows
- Multi-Clip Editing for Windows
- Filmora Motion Blur | Windows
- Filmora Flicker Removal Guide | Windows
- Apply mask to video
- Creating a PIP effect
- Keyframe Graph Editor for Windows
- Add animation keyframing for Windows
- Keyframe Path Curve for Windows
-
AI-Powered Video Editing
- Smart Scene Cut for Windows
- Smart Short Clips for Windows
- AI Face Mosaic for Windows
- Filmora AI Eye Contact- Windows
- AI Video Enhancer for Windows
- AI Text-to-Video for Windows
- Planar Tracking for Windows
- AI Idea to Video for Windows
- Filmora Image to Video for Windows
- Filmora Image to Prompt for Windows
- Instant Cutter Tool for Windows
- AI Extend
- Filmora AI Relight - Windows
- Filmora AI Image Enhancer Guide - Windows
- AI Script to Video Guide for Windows
- AI Text-Based Editing for Windows
- AI Mate Editing for Windows
- Create with instant mode
- ChatGPT Plugin - AI Copywriting
- AI Smart Cutout
- Lens correction on Windows
- Auto reframe video
- AI Portrait Cutout
- Scene detection feature
- AI Smart Masking for Windows
- Make motion tracking
- Video Stabilization for Windows
- AI Video/Photo Object Remover for Windows
- AI Smart Search for Windows
- AI Skin Tone Protection for Windows
- AI Image for Windows
- Chroma key (green screen)
- Super Slow Motion with Optical Flow for Windows
- Video Denoise for Windows
-
-
Audio Editing for Windows
-
Basic Audio Editing
-
Advanced Audio Editing
-
AI-Powered Audio Editing
-
-
Text Editing for Windows
-
Basic Text Editing
-
Advanced Text Editing
-
AI-Powered Text Editing
-
-
Video Customizations
-
Video Effects
-
Audio Effects
-
Transitions
-
Stickers
-
Filters
-
Color Editing
-
Animations
-
Templates
-
Asset Center
-
-
Exporting & Share & Cloud Backup
Filmstock Asset
When you edit your video with Filmora, you may see some effects and resources from Filmstock. And you will feel confused about that.Read this guide and you will find the answers.
What is Filmstock
Filmstock is a video asset designed for Filmora, including video templates, elements, transitions, titles, video clips, music, sound effects, and high-resolution images.
You can visit Filmstock for more information.
What does Filmstock Have:
- Over 400 effect packs for all types of videos, and always keeps updating.
- Various video clips like nature, lifestyle, business, animals, food, and more. You can try them in Filmora video editor.
- Unlimited downloads of 70K+ high-quality images.
- 1700+ music and audio effects for transitions, gaming, intro, social media, movie, birthday, or blockbuster.
How to Use Filmstock
There are two methods to help you.
Method 1: Download and Use Filmstock Resources from Filmora.
1 When you use Filmora, you will notice that some resources have a “diamond” shape on the top left. These are resources from Filmstock.
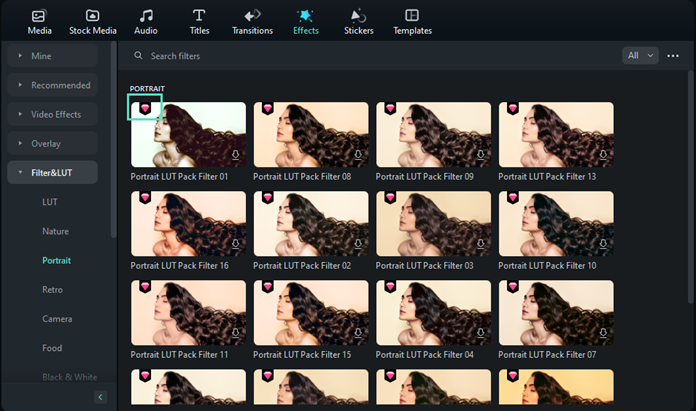
2 Download the resources and drag it to the timeline. Try it free.
3 If you want to use and download your video with these Filmstock effects, you can click to purchase for more service.
Method 2: Download Filmstock Resources from Filmstock Official Website and Use it in Filmora.
1 Login Filmstock by using the same account of Filmora.
Note:
The resources of Filmostock can’t be used if you don’t download Filmora.2 Choose the resources in Filmstock to download and use in Filmora.
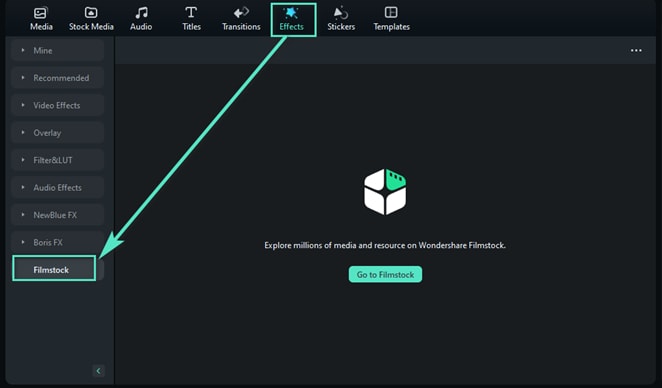
3 Find the Filmstock you downloaded under the folder “Filmstock” - Effect on Filmora.
Related Posts
Featured Articles
Beginner, Medium, and Pro Ways to Create a Video Collage for Instagram
Curious about how to make a collage video on Instagram? Check out our step-by-step guide and learn how to make a collage video for Instagram.
The Ultimate Guide to Setting Up Multiple Cameras for YouTube Live Streams
multi camera setup for youtube, multi camera live streaming youtube, youtube live stream multiple cameras, youtube live multiple cameras
Latest Update | Step-by-Step Motion Tracking in After Effects
It's time to improve your post-production skills. Unlock your creative potential by discovering the power of motion tracking in After Effects.
Recommended User Guide
Different Types of Video Effects
This is a guide explaining different types of effects in Filmora.
NewBlue FX effects
Learn how to add and modify NewBlue FX Effects in Filmora for Windows.
Animated Charts
Learn how to create professional animated charts effortlessly with Filmora. Turn your data into visually appealing animated graphs.
