For the Best Results, Use the Latest Version.
-
Preparations
-
Account
-
Get Started & Basic Settings
-
Compatibility & Tech Specs
-
Performance Settings
-
-
Creating Projects
-
Creating New Projects
-
-
Importing & Recording
-
Video Editing for Windows
-
Basic Video Editing
- Enable/Disable Clip in Windows
- Magnetic Timeline for Windows
- Drawing Tools fo Windows
- Dual Monitor Setup for Video Editing on Windows
- Select All Clips on Timeline for Windows
- Dual Monitor Setup for Video Editing on Mac
- Manage Timeline and Tracks
- Auto Ripple for Windows
- Split & trim video
- Crop & Pan & Zoom Video
- Compositing
- Change video playback speed
- Playing videos in reverse
- Mark In and Mark Out for Windows
- Markers for Windows
- Group editing
- Customizable Backgrounds for Videos and Images in Windows
- Video snapshot
- Using freeze frame
- Logo Reveal For Windows
- Apply auto enhance
- Applying drop shadow
- Adjustment layer for Windows
- Transforming
- Video Editing Ruler – Windows
-
Advanced Video Editing
-
AI-Powered Video Editing
- Smart Scene Cut for Windows
- Smart Short Clips for Windows
- AI Face Mosaic for Windows
- AI Video Enhancer
- AI Text-to-Video for Windows
- Planar Tracking
- AI Idea to Video for Windows
- Image to Video for Windows
- Instant Cutter Tool for Windows
- AI Extend
- AI Script to Video Guide for Windows
- AI Text-Based Editing for Windows
- AI Mate Editing for Windows
- Create with instant mode
- ChatGPT Plugin - AI Copywriting
- AI Smart Cutout
- Lens correction
- Auto reframe video
- AI Portrait Cutout
- Scene detection feature
- AI Smart Masking for Windows
- Make motion tracking
- Stabilization
- AI Video/Photo Object Remover for Windows
- AI Smart Search for Windows
- AI Skin Tone Protection for Windows
- AI Image for Windows
- Chroma key (green screen)
- Super Slow Motion with Optical Flow for Windows
- Video Denoise for Windows
-
-
Audio Editing for Windows
-
Basic Audio Editing
-
Advanced Audio Editing
-
AI-Powered Audio Editing
-
-
Text Editing for Windows
-
Basic Text Editing
-
Advanced Text Editing
-
AI-Powered Text Editing
-
-
Video Customizations
-
Video Effects
-
Audio Effects
-
Transitions
-
Stickers
-
Filters
-
Color Editing
-
Animations
-
Templates
-
Asset Center
-
-
Exporting & Share & Cloud Backup
Auto Beat Sync
Auto Beat Sync will take small parts from the same video or different videos, and then combine them into one personalized and stylized video.
Open Auto Beat Sync
To open Auto Beat Sync panel, you have the following three ways:
1 OpenFilmora video editing software, you can easily see Auto Beat Sync option in the startup window.
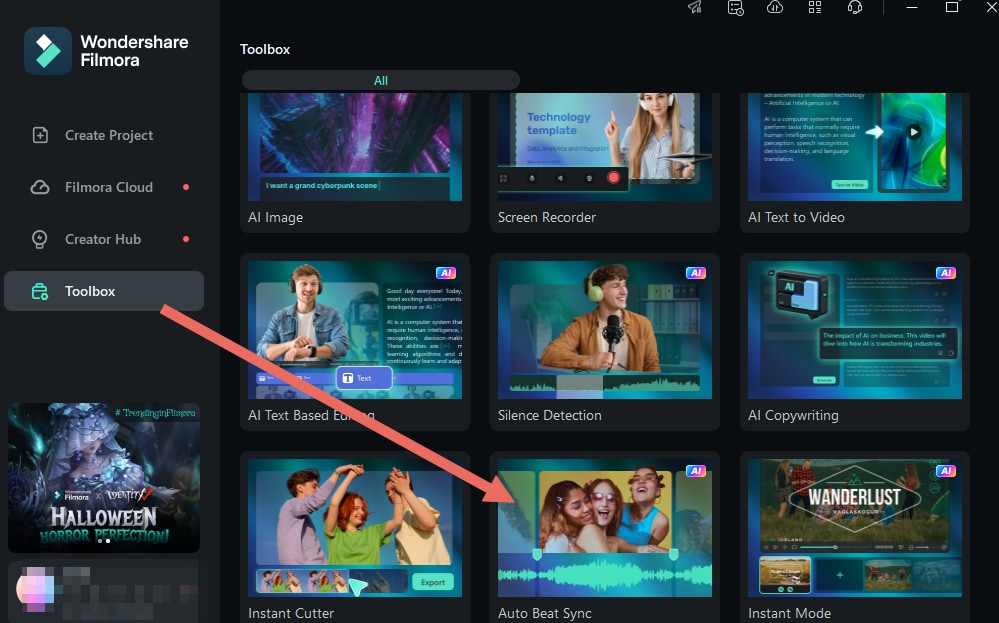
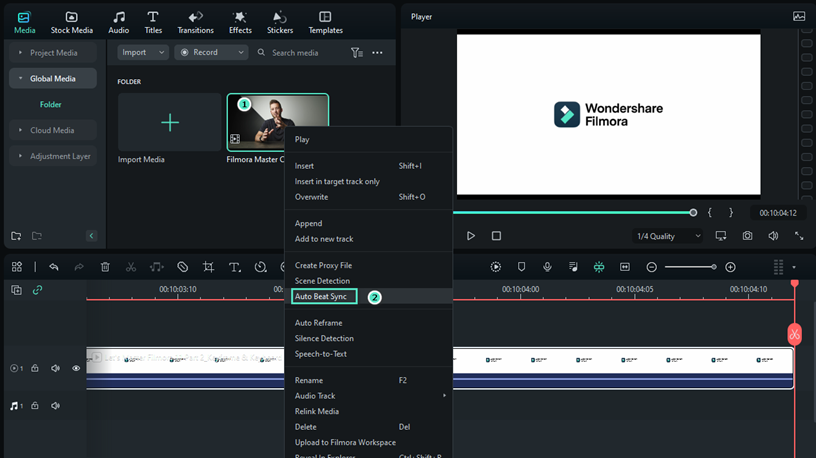
2 If you have already been in the editing interface, you can also access the function by right clicking the files imported in the Project Media, then selecting Auto Beat Sync.
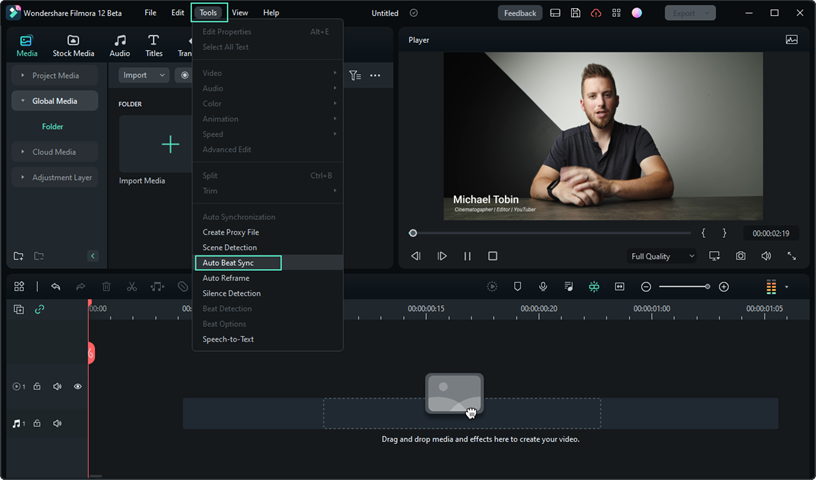
3 After selecting the imported files in the Project Media, you can also find Auto Beat Sync by clicking Tools>Auto Beat Sync in the navigation bar.
Adjust the Settings
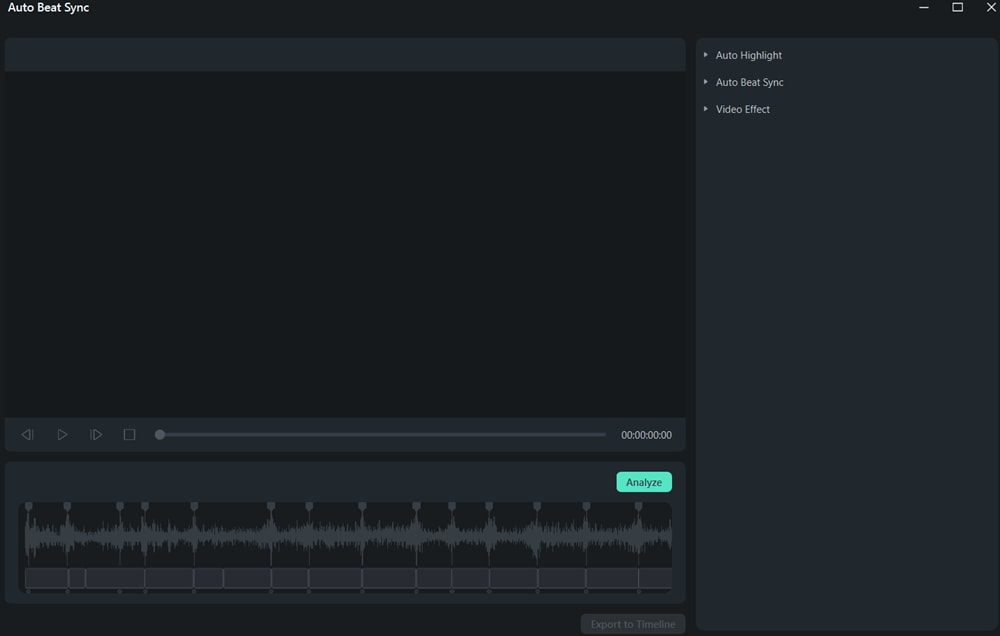
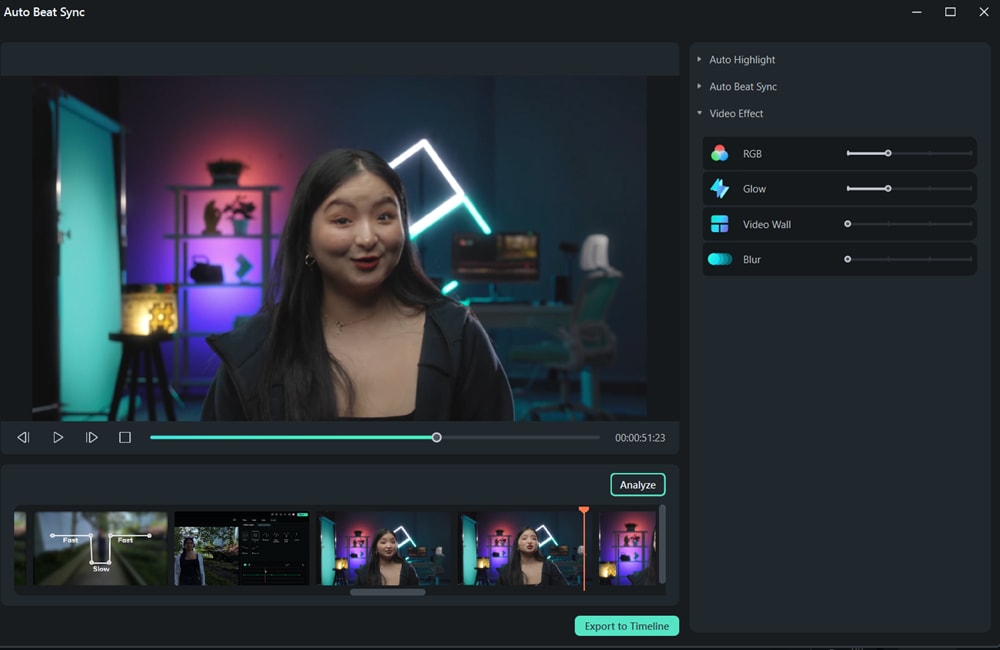
From the pop-up Auto Montage Panel, you can clearly see three main adjustable parameters: Auto Highlight, Auto Beat Sync, and Video Effect.
Auto Highlight
In the Auto Highlight segment, you can choose to add more video or audio clips. You can also adjust the order or delete the imported video or audio clips. At the same time, you can adjust the length of the generated video or audio clip.
Note:
The maximum duration of final video should be shorter than BGM and longer than 1/3 of total duration of all imported clips combined.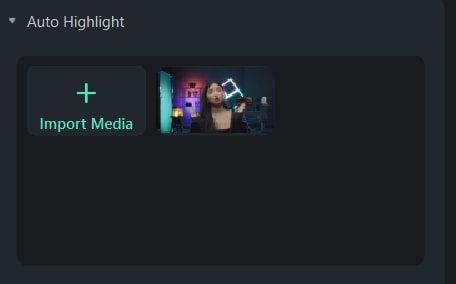
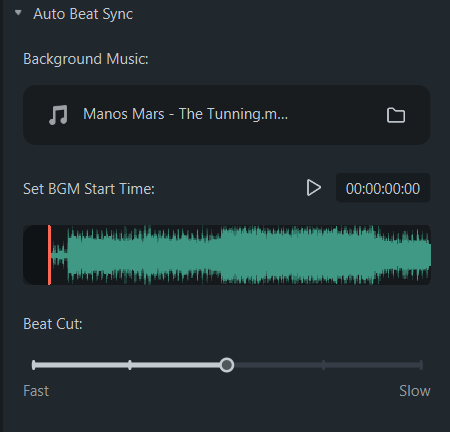
Auto Beat Sync
In the Auto Beat Sync interface, you can import background music, and set BGM start time. Surely, you can preview the background music to choose the start time. In addition, you can also choose the beat cut speed whether it is fast or slow.
Video Effect
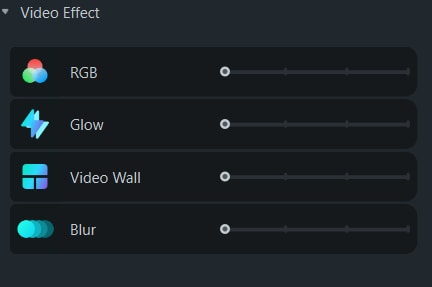
In the Video Effect segment, you can set the appearing frequency of RGB, Glow, Video Wall, Blur video effects.
Analyze
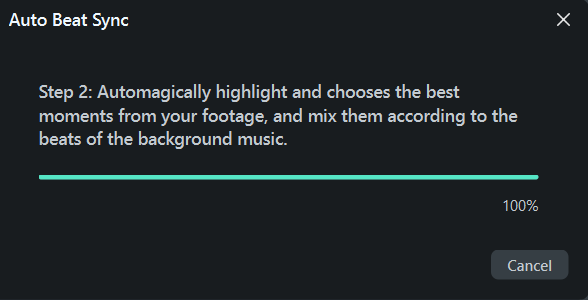
Once you finish all the settings, you can click on Analyze button to initiate the automatic analyzing process. Usually, it will take two steps to finish the analysis process. Please wait patiently.
Step 1. Analyze the beats and rhythm of the background music.
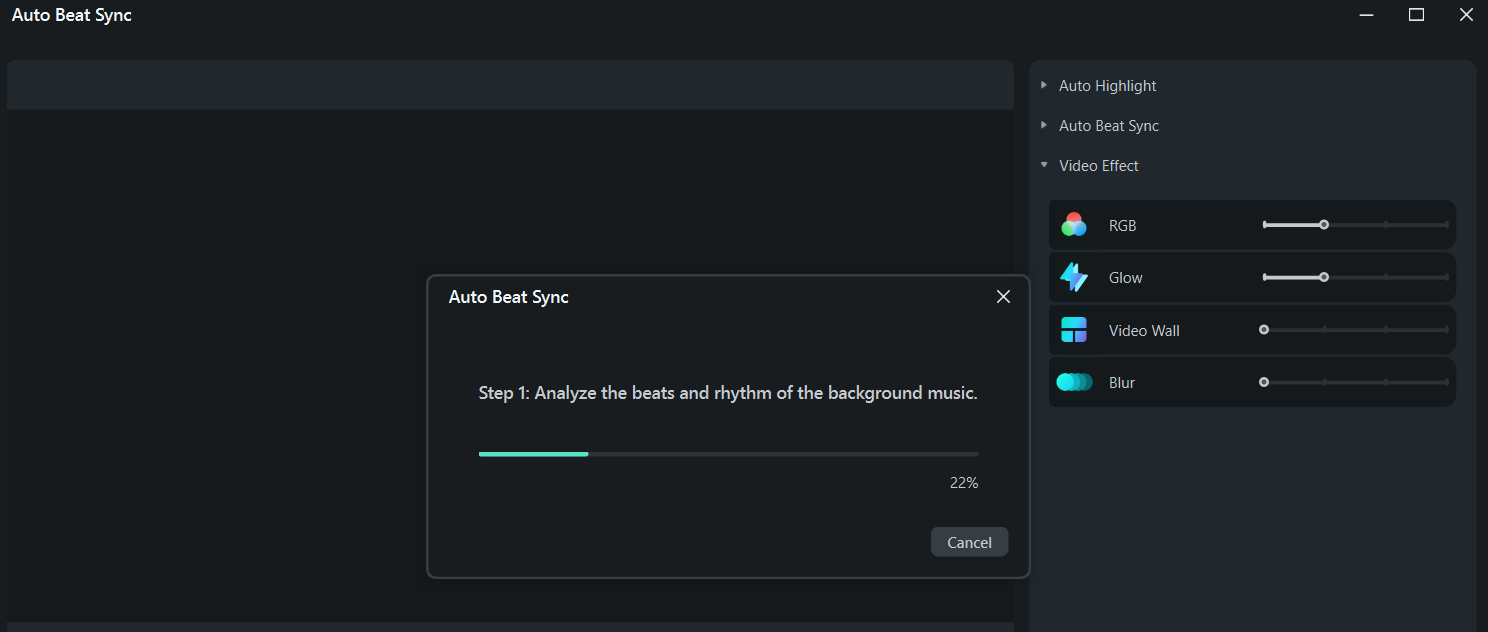
Step 2. Automatically highlights and chooses the best moments from the footage and mix them according to the beats of the background music.
Preview the Generated Video
You can preview the video by clicking on the Blank button. Or you can click on the Play icon. If you are satisfied with the result, you can Export to Timeline. Otherwise, you can adjust the settings again and Analyze.
Related Posts
Featured Articles
Prime Video Ads Explained: How to Reach Millions of Streaming Viewers
With Prime Video ads, you can reach millions of potential customers on one of the world's leading streaming services. Click here to read our full guide and start maximizing your reach.
Best Secret Voice Recorder Apps For Android & iOS [2025]
Are you searching for resources to capture audio without letting anyone know? Read this article to learn about the best secret voice recorder apps of all time.
How To Use Scary Sound Effects To Add Thrill To Your Videos
Want to make your videos scarier? Find out how to use scary sound effects with Wondershare Filmora to add suspense and thrill, making your content more engaging!
Recommended User Guide
Auto synchronization
This guide helps you match your audio with your video and make the sound clear.
How to Execute AI Voice Cloning in Wondershare Filmora?
Do you wish to clone a video recording or tutorial in your voice? Using basic text presets and easy voice training, create a perfect clone of your voice.
AI Sound Effect
Generate custom sound effects quickly with our AI tool. Just enter descriptive keywords to create personalized audio, set the duration and quantity, and preview or download the effects. Easily add them to your video timeline. Note that sound effects are available for download for 30 days. Enhance your videos with tailored audio effortlessly!
