For the Best Results, Use the Latest Version.
-
Preparations
-
Account
-
Get Started & Basic Settings
-
Compatibility & Tech Specs
-
Performance Settings
-
-
Creating Projects
-
Creating New Projects
-
-
Importing & Recording
-
Video Editing for Windows
-
Basic Video Editing
- Enable/Disable Clip in Windows
- Magnetic Timeline for Windows
- Drawing Tools fo Windows
- Dual Monitor Setup for Video Editing on Windows
- Select All Clips on Timeline for Windows
- Dual Monitor Setup for Video Editing on Mac
- Manage Timeline and Tracks
- Auto Ripple for Windows
- Split & trim video
- Crop & Pan & Zoom Video
- Compositing
- Change video playback speed
- Playing videos in reverse
- Mark In and Mark Out for Windows
- Markers for Windows
- Group editing
- Customizable Backgrounds for Videos and Images in Windows
- Video snapshot
- Using freeze frame
- Logo Reveal For Windows
- Apply auto enhance
- Applying drop shadow
- Adjustment layer for Windows
- Transforming
- Video Editing Ruler – Windows
-
Advanced Video Editing
-
AI-Powered Video Editing
- Smart Scene Cut for Windows
- Smart Short Clips for Windows
- AI Face Mosaic for Windows
- AI Video Enhancer
- AI Text-to-Video for Windows
- Planar Tracking
- AI Idea to Video for Windows
- Image to Video for Windows
- Instant Cutter Tool for Windows
- AI Extend
- AI Script to Video Guide for Windows
- AI Text-Based Editing for Windows
- AI Mate Editing for Windows
- Create with instant mode
- ChatGPT Plugin - AI Copywriting
- AI Smart Cutout
- Lens correction
- Auto reframe video
- AI Portrait Cutout
- Scene detection feature
- AI Smart Masking for Windows
- Make motion tracking
- Stabilization
- AI Video/Photo Object Remover for Windows
- AI Smart Search for Windows
- AI Skin Tone Protection for Windows
- AI Image for Windows
- Chroma key (green screen)
- Super Slow Motion with Optical Flow for Windows
- Video Denoise for Windows
-
-
Audio Editing for Windows
-
Basic Audio Editing
-
Advanced Audio Editing
-
AI-Powered Audio Editing
-
-
Text Editing for Windows
-
Basic Text Editing
-
Advanced Text Editing
-
AI-Powered Text Editing
-
-
Video Customizations
-
Video Effects
-
Audio Effects
-
Transitions
-
Stickers
-
Filters
-
Color Editing
-
Animations
-
Templates
-
Asset Center
-
-
Exporting & Share & Cloud Backup
Transitions
Transitions can tie the shots and clips together into a cohesive, polished video. Filmora has more than 500+ transitions to help you edit your videos better.
In this guide, you will learn how to find, add, adjust, remove, and favorite Filmora Transitions.
Index
Find Transition
Double-click on the app's desktop icon, and once the welcome window pops up on the screen click on the New Project option.
In the upper left corner of the editor's main window, you'll be able to see a few tabs, like Audio, Titles and Effects. Click on the Transitions tab.
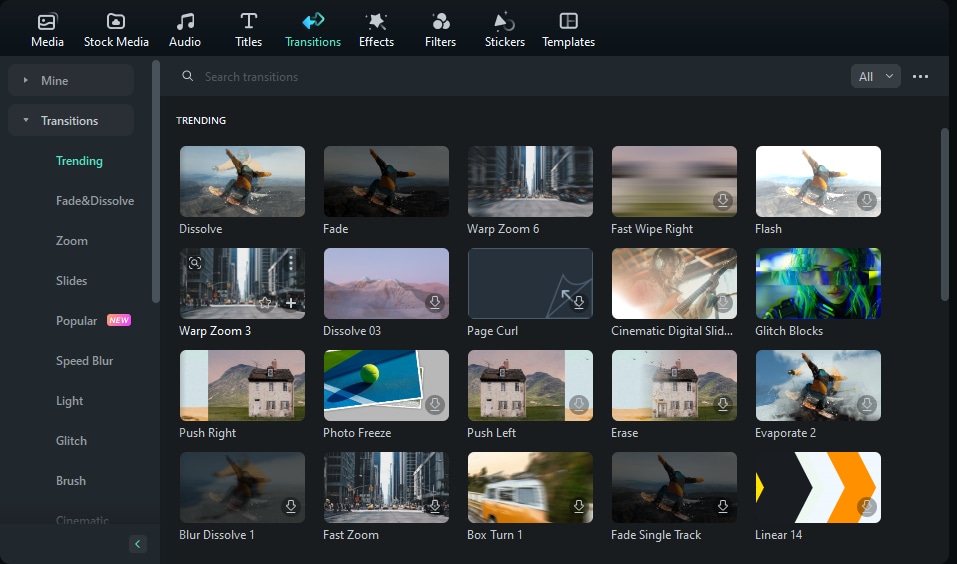
Add Transitions
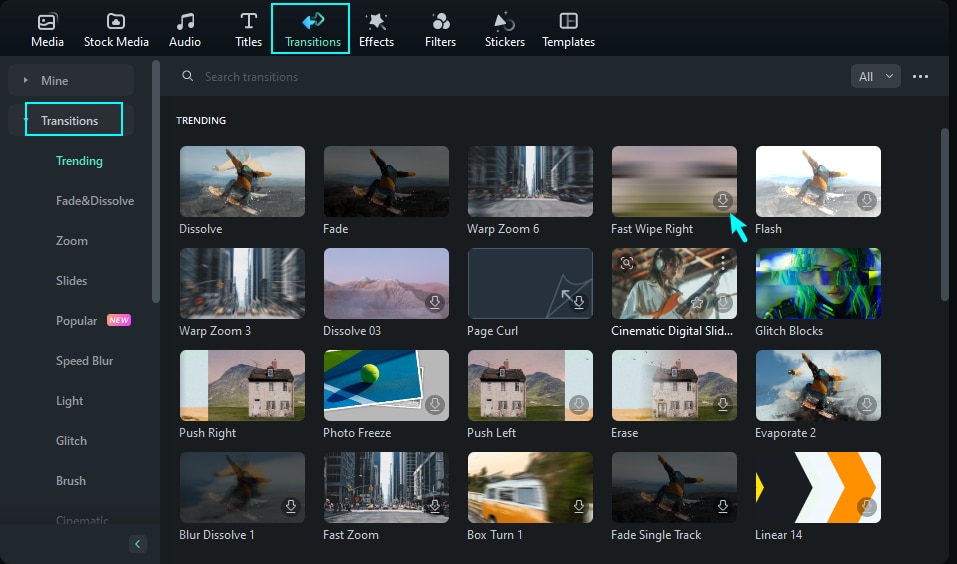
Method 1: Choose and Download the Transitions
Click the download button to download the transitions, it will cost you a seconds.
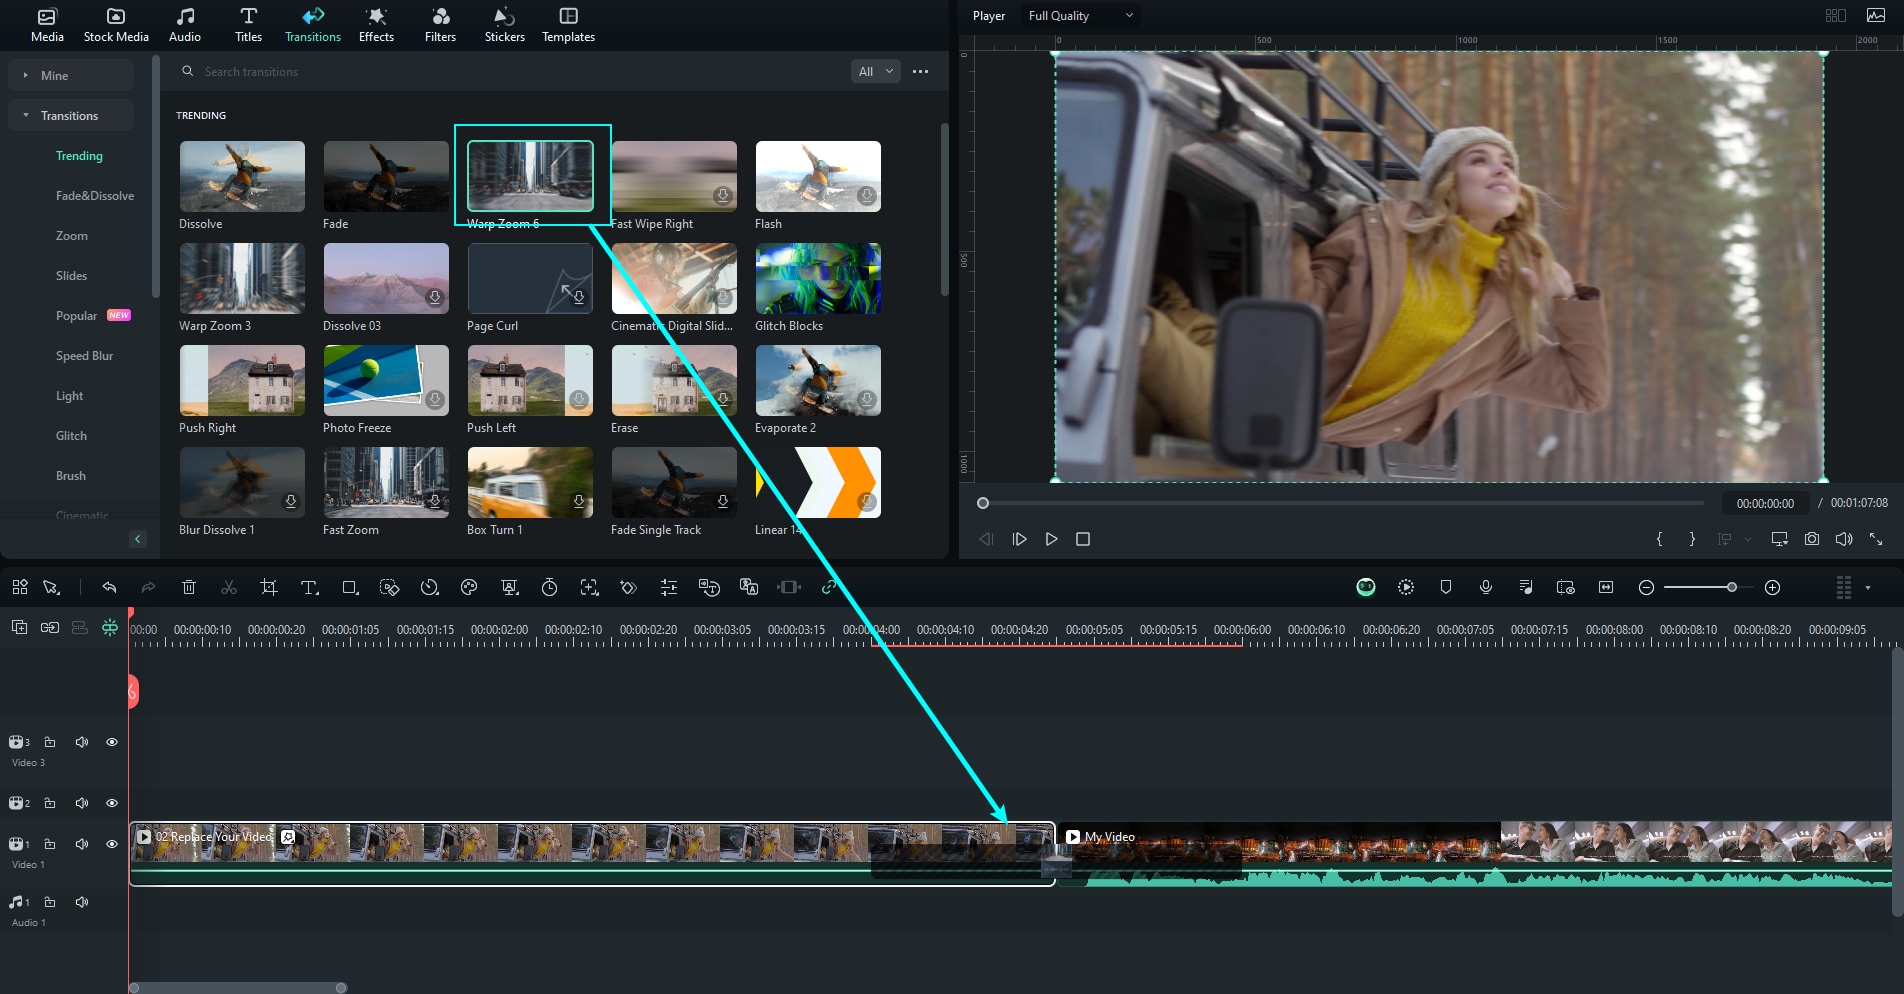
Method 2: Drag the Transition to the Timeline
Drag it to the beginning or end of a video clip or image in the timeline. You can also place the transition between the two videos.
Note:
In versions of Filmora 8 there is only one video track which you can use transitions on. In Filmora and above you can apply transitions to any video track.Adjust Transitions
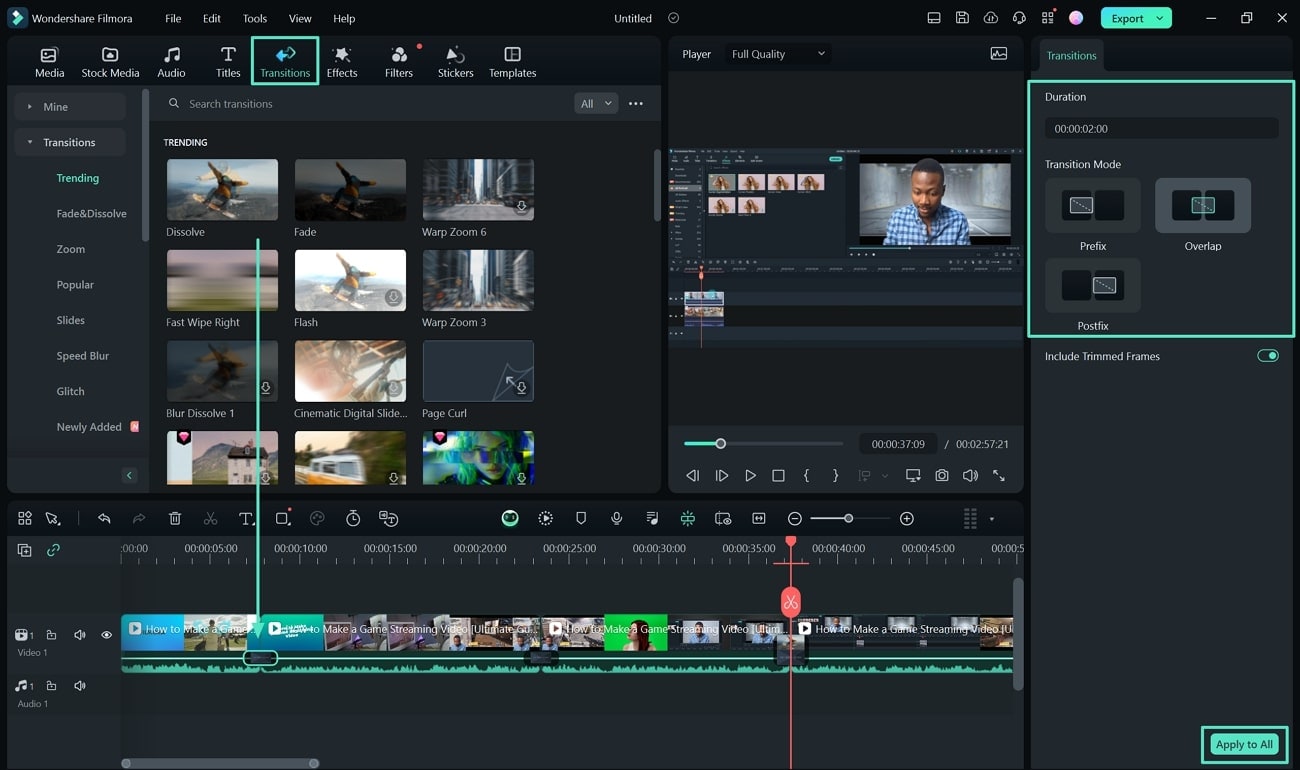
After dragging the transition to the timeline, you can double-click the transition to adjust the duration and the position. Usually, the default duration is 2 seconds.
2 Ways to Adjust the duration of the transition:
Method 1: Double-click the transition in the timeline and then enter a new duration.
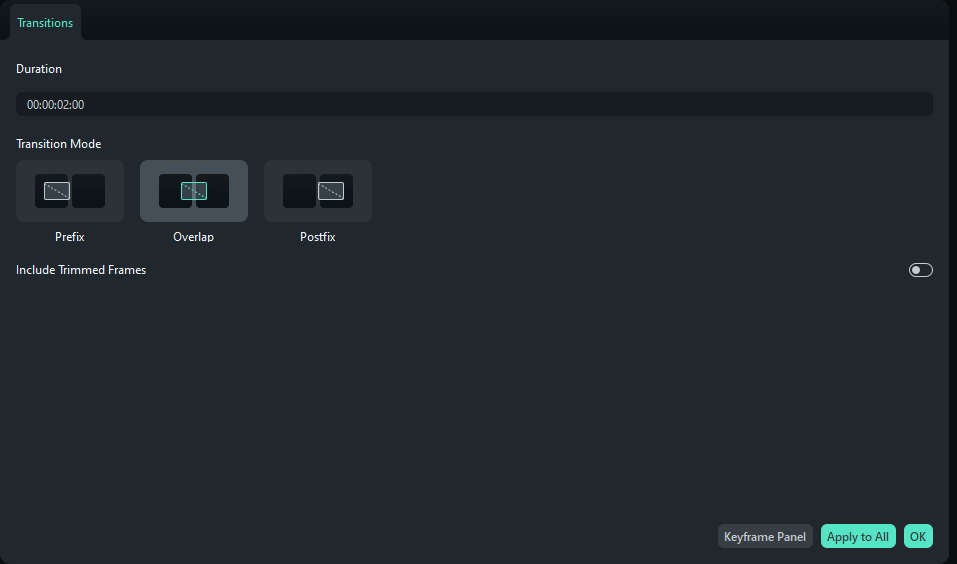
Method 2: You can also click and drag the starting or ending point of the transition forwards or backwards within the video clip or image.

Note:
Trimming frames will make the transition work by default when a media piece is not long enough to accommodate a transition. If you don't want this to happen, double-click the transition in the timeline and un-tick the "Include Trimmed Frames" option.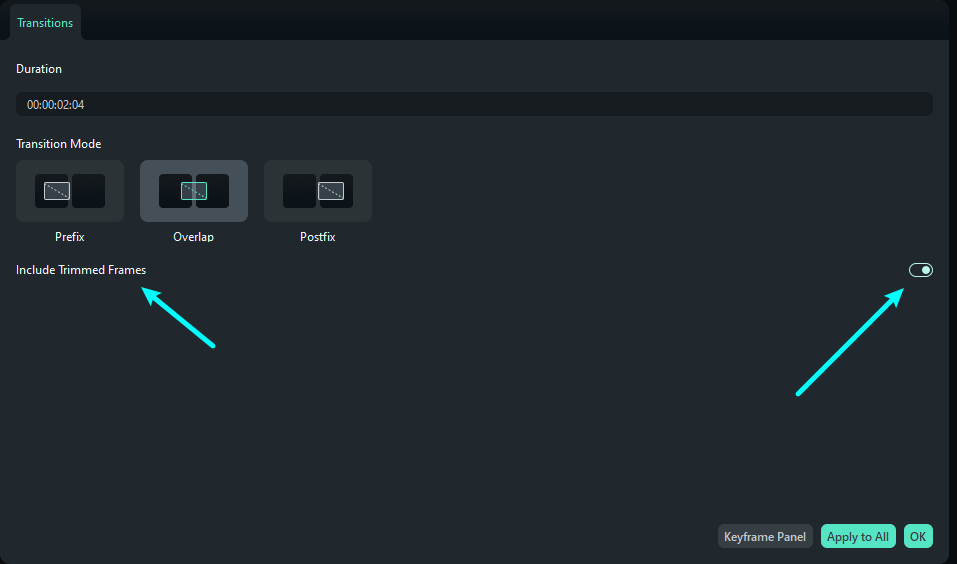
To apply the same transition through your entire project:
Right-click on the transition you want to use and select "APPLY TO ALL". But note that this transition can only be applied for the duration which is mentioned adjacent to it.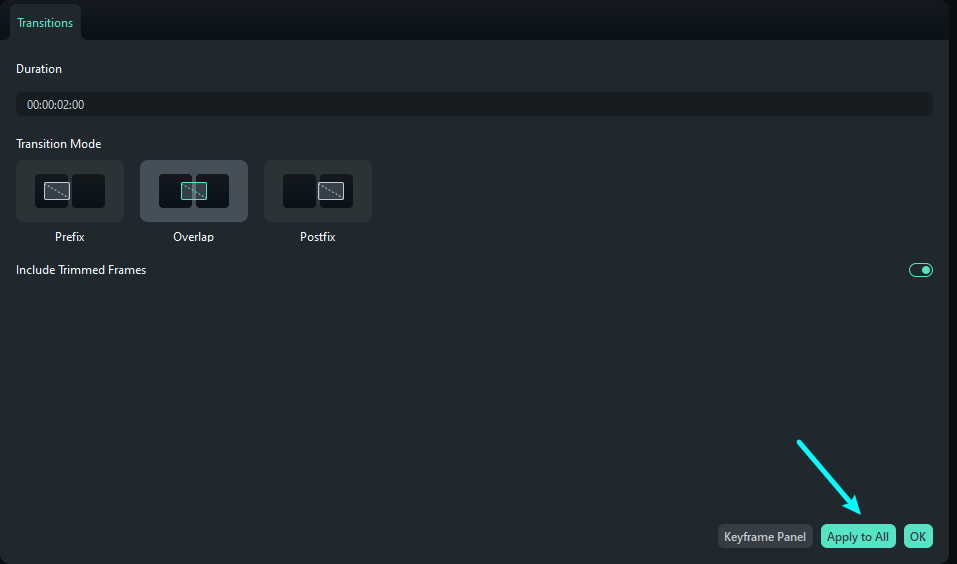
Remove Transitions
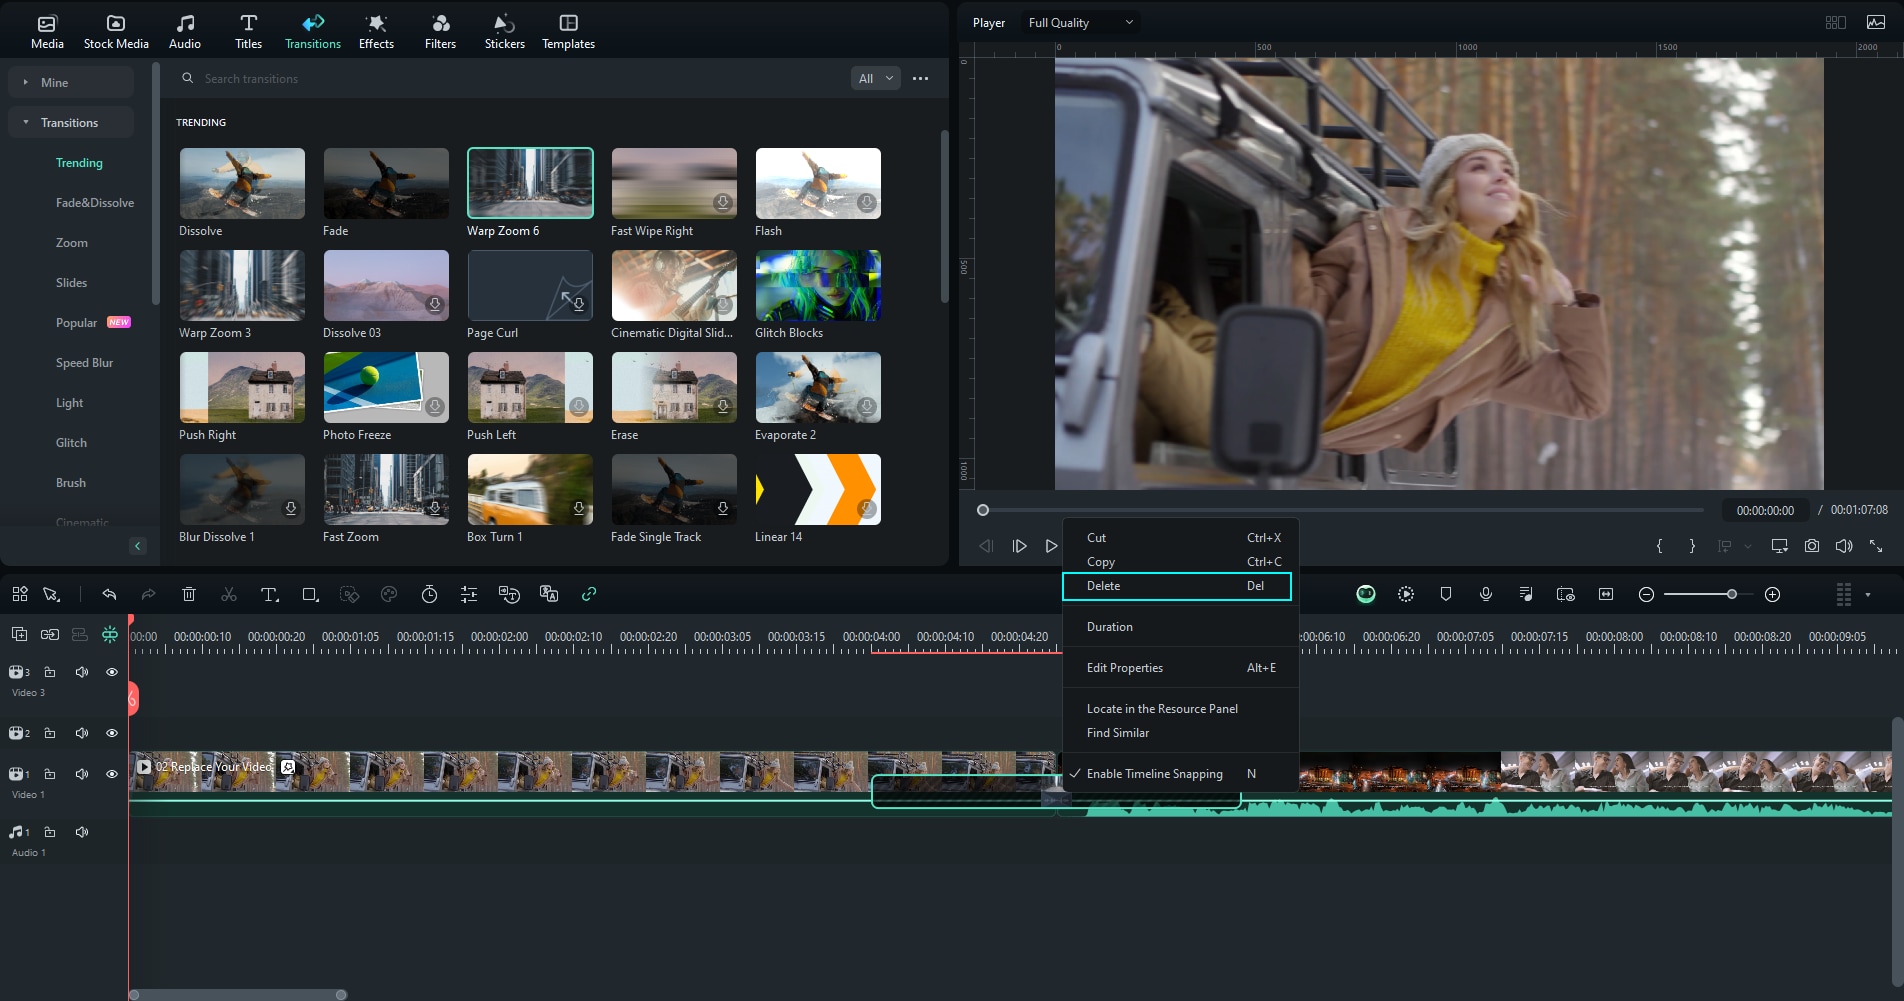
Method 1: Select the transition you want to remove from the timeline and hit the "Delete" button.

Method 2: Or right-click on the transition in the timeline and select the "Delete" option from the menu.
Favorite Transitions
Right-click on the transition in the Transitions menu and choose to Add to Favorites. Or you can also choose the transition as your requirement. You will see a "Star" shape on the top right. Click the "Star" into the red.
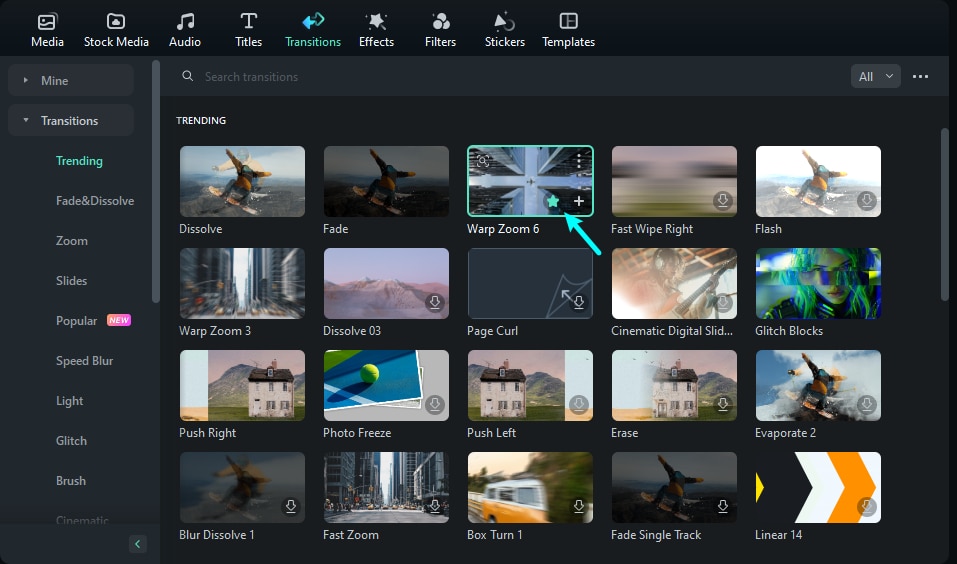
You can check your favorite transitions from the left drop-down list Mine- Favorites.

Batch Apply Transitions
Once you've added a transition to your video clip within the timeline, you can now batch apply a single transition to the video with a define duration. After adding one transition across the timeline, set the "Transition Mode" and "Duration" before selecting "Apply to All" button.
Apply Selected Transitions Randomly Across Clips
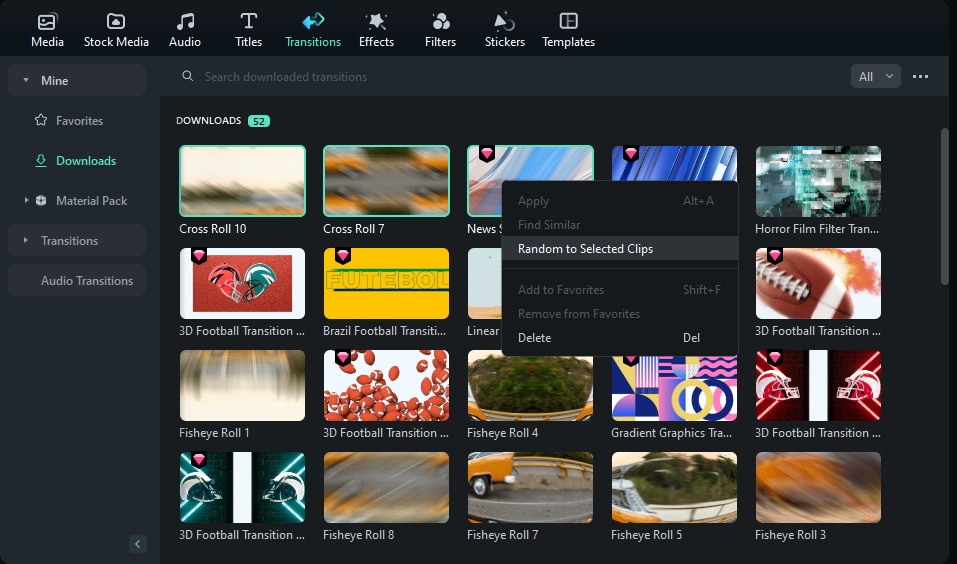
Wondershare Filmora now allows you to randomly apply a selected set of transitions to your video clips. For that, select the video clips across which you wish to apply the transitions and navigate to the "Downloads" sub-section in the "Mine" category of the "Transitions" tab. With the selected clips, press the "CTRL" button on your keyboard and select the transitions you want to apply. Right-click after the selection and press the "Random to Selected Clips" button to apply the transitions.
Related Posts
Featured Articles
How to Create High-Impact Vegan Video Content Using Filmora
Learn how to make viral vegan video content using Filmora. Explore trending YouTube vegan recipes and editing tips to grow your vegan meals YouTube channel.
Capture Perfection: 7 Best Camera Apps for iPhone [2025 Edition]
Explore the best photography apps for iPhone to capture and edit photos/videos. Discover tools and tips to enhance your iPhone photography experience.
How to Blur Faces in InShot - Ultimate Guide
In addition to its numerous features for media editing, Inshot also allows you to blur faces. In this detailed guide, you will explore how to blur faces in InShot.
