For the Best Results, Use the Latest Version.
-
Preparations
-
Account
-
Get Started & Basic Settings
-
Compatibility & Tech Specs
-
Performance Settings
-
-
Creating Projects
-
Creating New Projects
-
-
Importing & Recording
-
Video Editing for Windows
-
Basic Video Editing
- Enable/Disable Clip in Windows
- Magnetic Timeline for Windows
- Dual Monitor Setup for Video Editing on Windows
- Select All Clips on Timeline for Windows
- Manage Timeline and Tracks on Windows
- Auto Ripple for Windows
- Split & trim video
- Crop & Pan & Zoom Video
- Compositing
- Change Video Speed on Windows
- Playing videos in reverse
- Mark In and Mark Out for Windows
- Markers for Windows
- Group editing
- Customizable Backgrounds for Videos and Images in Windows
- Video snapshot
- Using freeze frame
- Logo Reveal For Windows
- Apply auto enhance
- Applying drop shadow
- Adjustment layer for Windows
- Transforming
- Video Editing Ruler – Windows
-
Advanced Video Editing
- Drawing Tools for Windows | Filmora Guide
- Create Multi-Camera Clip
- Compound Clip for Windows
- Multi-Clip Editing for Windows
- Filmora Motion Blur | Windows
- Filmora Flicker Removal Guide | Windows
- Apply mask to video
- Creating a PIP effect
- Keyframe Graph Editor for Windows
- Add animation keyframing for Windows
- Keyframe Path Curve for Windows
-
AI-Powered Video Editing
- Smart Scene Cut for Windows
- Smart Short Clips for Windows
- AI Face Mosaic for Windows
- Filmora AI Eye Contact- Windows
- AI Video Enhancer for Windows
- AI Text-to-Video for Windows
- Planar Tracking for Windows
- AI Idea to Video for Windows
- Filmora Image to Video for Windows
- Filmora Image to Prompt for Windows
- Instant Cutter Tool for Windows
- AI Extend
- Filmora AI Relight - Windows
- Filmora AI Image Enhancer Guide - Windows
- AI Script to Video Guide for Windows
- AI Text-Based Editing for Windows
- AI Mate Editing for Windows
- Create with instant mode
- ChatGPT Plugin - AI Copywriting
- AI Smart Cutout
- Lens correction on Windows
- Auto reframe video
- AI Portrait Cutout
- Scene detection feature
- AI Smart Masking for Windows
- Make motion tracking
- Video Stabilization for Windows
- AI Video/Photo Object Remover for Windows
- AI Smart Search for Windows
- AI Skin Tone Protection for Windows
- AI Image for Windows
- Chroma key (green screen)
- Super Slow Motion with Optical Flow for Windows
- Video Denoise for Windows
-
-
Audio Editing for Windows
-
Basic Audio Editing
-
Advanced Audio Editing
-
AI-Powered Audio Editing
-
-
Text Editing for Windows
-
Basic Text Editing
-
Advanced Text Editing
-
AI-Powered Text Editing
-
-
Video Customizations
-
Video Effects
-
Audio Effects
-
Transitions
-
Stickers
-
Filters
-
Color Editing
-
Animations
-
Templates
-
Asset Center
-
-
Exporting & Share & Cloud Backup
AI Smart Masking for Windows
Editing video elements independently is an important part of video creation, and Filmora's masking provides multiple options. However, with the V13 upgrade, users can activate the AI Mask, and it will automatically detect objects that can be masked. To save yourself time and effort and enjoy this option,
How to Enable AI Smart Masking
Modern video editing requires modern tools, and here is a step-by-step guide to using Filmora's AI Smart Masking option for an up-to-date editing experience:
Step 1: Install Filmora and Initiate a New Project
To start editing with Filmora, install and initiate the software on your desktop. Afterward, from the top of the main screen, log in to your account and navigate toward the left panel. Select the "Create Project" option and choose "New Project" from the displayed options.
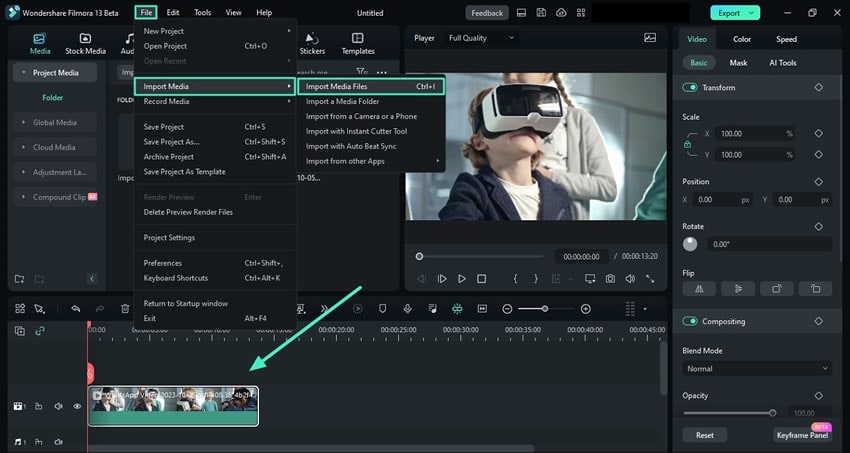
Step 2: Import Media and Place it on Timeline
Creating a new project will lead you to the main editing interface of Wondershare Filmora. From the top toolbar, select "File", expand the "Import Media" option from the dropdown menu, and choose a suitable method for import. After importing your media clip, pull this clip with the help of a mouse or trackpad and place it on the timeline track.
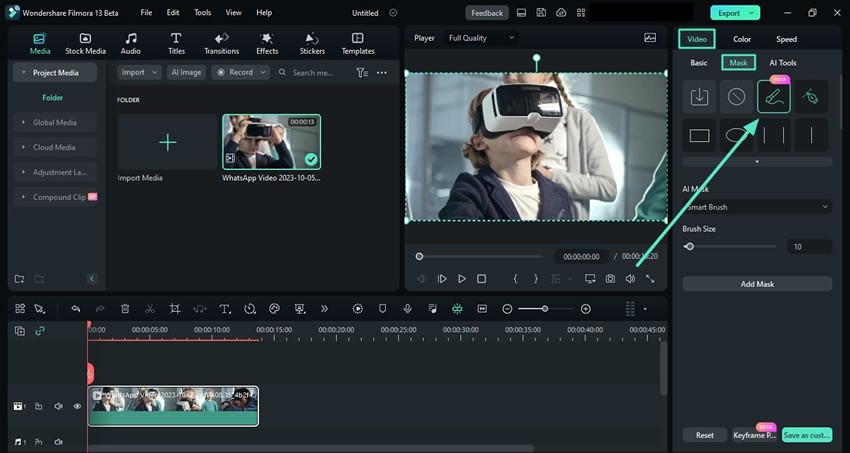
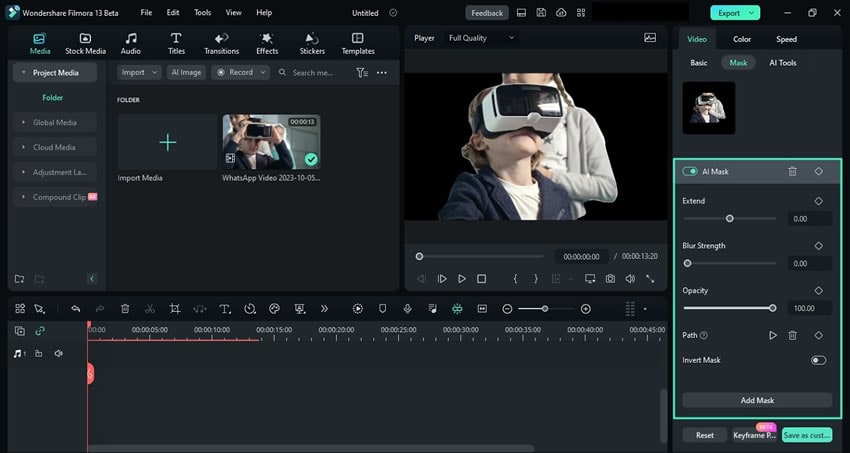
Step 3: Activate AI Mask Option
To start masking, select your clip in the timeline and hover the mouse towards the settings panel. Under the "Video" tab, select the "Mask" option and choose the "AI Mask" icon.
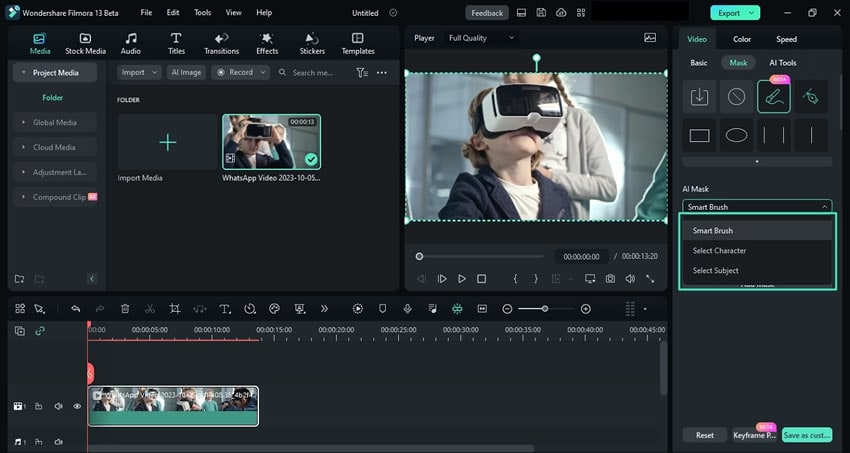
Step 4: Choose the AI Mask Option
This expands the "AI Mask" section, where you have to select from the given options per your requirements. There are multiple options like the "Smart Brush", "Select Character" or "Select Subject" to choose from. Select further from the given options and continue to choose the "Add Mask" button for detecting an automatic mask on the video.
Step 5: Adjust the Relative Settings and Export
If you specifically go with the "Select Subject" option and select any detected object through AI, you will get the opportunity to adjust other mask settings such as "Expand", "Blur Strength", and "Opacity". Furthermore, you can also enable motion tracking from the "Path" and "Invert Mask" options for your clip. Once finished, click the "Export" button at the top right corner and save your video on your device.
How to Disable AI Smart Masking
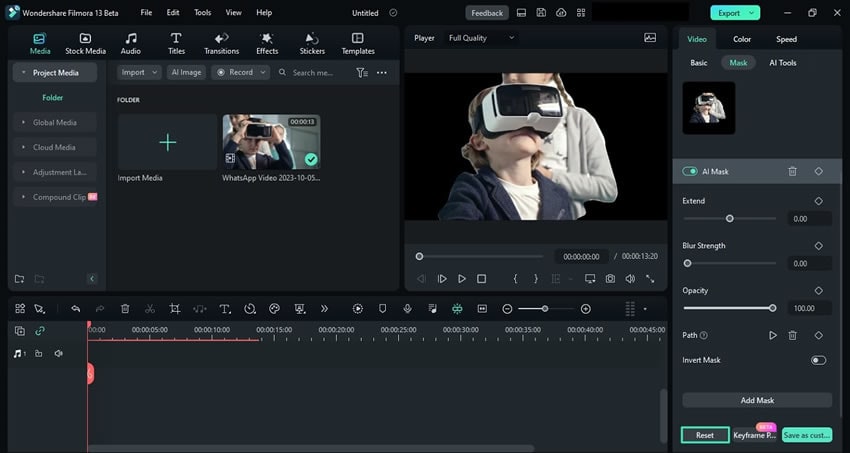
Way 1: From the Reset Button
Once you've enabled the AI Smart Masking and want to reset or delete it, navigate towards the bottom of the settings panel and click the "Reset" button.
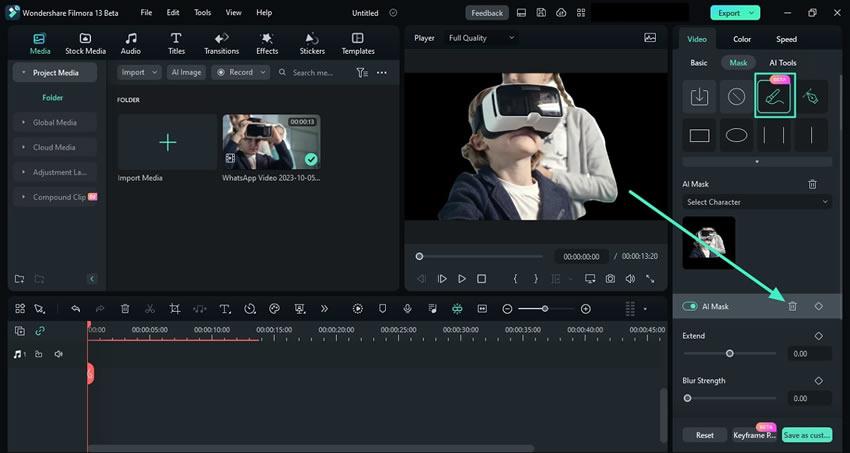
Way 2: From the Trash Icon
In the second method, select the clip and navigate towards the right side panel. Choose the "Mask" option in the "Video" tab and go to the "AI Mask" section. Click on the "Bin" icon adjacent to it, and the mask will be deleted.
Related Posts
Featured Articles
Essential Graphics Premiere Pro: 2026 Guide to the New Workflow
Discover the 2026 updates to Essential Graphics in Premiere Pro. Learn how the new Properties and Graphics Templates panels replace the old workspace for better motion graphics editing.
Step-by-Step: How to Replace the Sky in Photoshop?
Learning how to replace the sky in Photoshop is an easy task. We will give you the steps to add blue skies to any photo in Photoshop.
4 Ways to Animate Photos and Make Them Move
Are you looking for ways to animate photos and turn them into videos? Check the best photo animation maker and explore four methods to make photos move.
Recommended User Guide
ChatGPT Plugin - AI Copywriting
Auto-generate your video scripts, captions, descriptions, and more with ChatGPT in Filmora
AI Video Enhancer for Windows
This is a guide for how to enhance your video quality.
AI Extend
This is a guide for how to extend your video with our AI
