For the Best Results, Use the Latest Version.
-
Preparations
-
Account
-
Get Started & Basic Settings
-
Compatibility & Tech Specs
-
Performance Settings
-
-
Creating Projects
-
Creating New Projects
-
-
Importing & Recording
-
Video Editing for Windows
-
Basic Video Editing
- Enable/Disable Clip in Windows
- Magnetic Timeline for Windows
- Dual Monitor Setup for Video Editing on Windows
- Select All Clips on Timeline for Windows
- Manage Timeline and Tracks on Windows
- Auto Ripple for Windows
- Split & trim video
- Crop & Pan & Zoom Video
- Compositing
- Change video playback speed
- Playing videos in reverse
- Mark In and Mark Out for Windows
- Markers for Windows
- Group editing
- Customizable Backgrounds for Videos and Images in Windows
- Video snapshot
- Using freeze frame
- Logo Reveal For Windows
- Apply auto enhance
- Applying drop shadow
- Adjustment layer for Windows
- Transforming
- Video Editing Ruler – Windows
-
Advanced Video Editing
- Drawing Tools for Windows | Filmora Guide
- Create Multi-Camera Clip
- Compound Clip for Windows
- Multi-Clip Editing for Windows
- Filmora Flicker Removal Guide | Windows
- Apply mask to video
- Creating a PIP effect
- Keyframe Graph Editor for Windows
- Add animation keyframing for Windows
- Keyframe Path Curve for Windows
-
AI-Powered Video Editing
- Smart Scene Cut for Windows
- Smart Short Clips for Windows
- AI Face Mosaic for Windows
- AI Video Enhancer for Windows
- AI Text-to-Video for Windows
- Planar Tracking for Windows
- AI Idea to Video for Windows
- Filmora Image to Video for Windows
- Filmora Image to Prompt for Windows
- Instant Cutter Tool for Windows
- AI Extend
- Filmora AI Relight - Windows
- Filmora AI Image Enhancer Guide - Windows
- AI Script to Video Guide for Windows
- AI Text-Based Editing for Windows
- AI Mate Editing for Windows
- Create with instant mode
- ChatGPT Plugin - AI Copywriting
- AI Smart Cutout
- Lens correction on Windows
- Auto reframe video
- AI Portrait Cutout
- Scene detection feature
- AI Smart Masking for Windows
- Make motion tracking
- Video Stabilization for Windows
- AI Video/Photo Object Remover for Windows
- AI Smart Search for Windows
- AI Skin Tone Protection for Windows
- AI Image for Windows
- Chroma key (green screen)
- Super Slow Motion with Optical Flow for Windows
- Video Denoise for Windows
-
-
Audio Editing for Windows
-
Basic Audio Editing
-
Advanced Audio Editing
-
AI-Powered Audio Editing
-
-
Text Editing for Windows
-
Basic Text Editing
-
Advanced Text Editing
-
AI-Powered Text Editing
-
-
Video Customizations
-
Video Effects
-
Audio Effects
-
Transitions
-
Stickers
-
Filters
-
Color Editing
-
Animations
-
Templates
-
Asset Center
-
-
Exporting & Share & Cloud Backup
Animation on Windows
This guide introduces how to apply preset animations or preset motions to your video. Animation makes the clips in your video connect with each other more naturally and attractively. Plus, your video could be more creative and unique.
Here is how to activate the Animation feature and how to apply your ideal preset to the video.
Index
Step 1: Import your needed clip
Launch Filmora on the computer first. Drag the clip you need from the files to the processing interface.
Step 2: Activate Animation
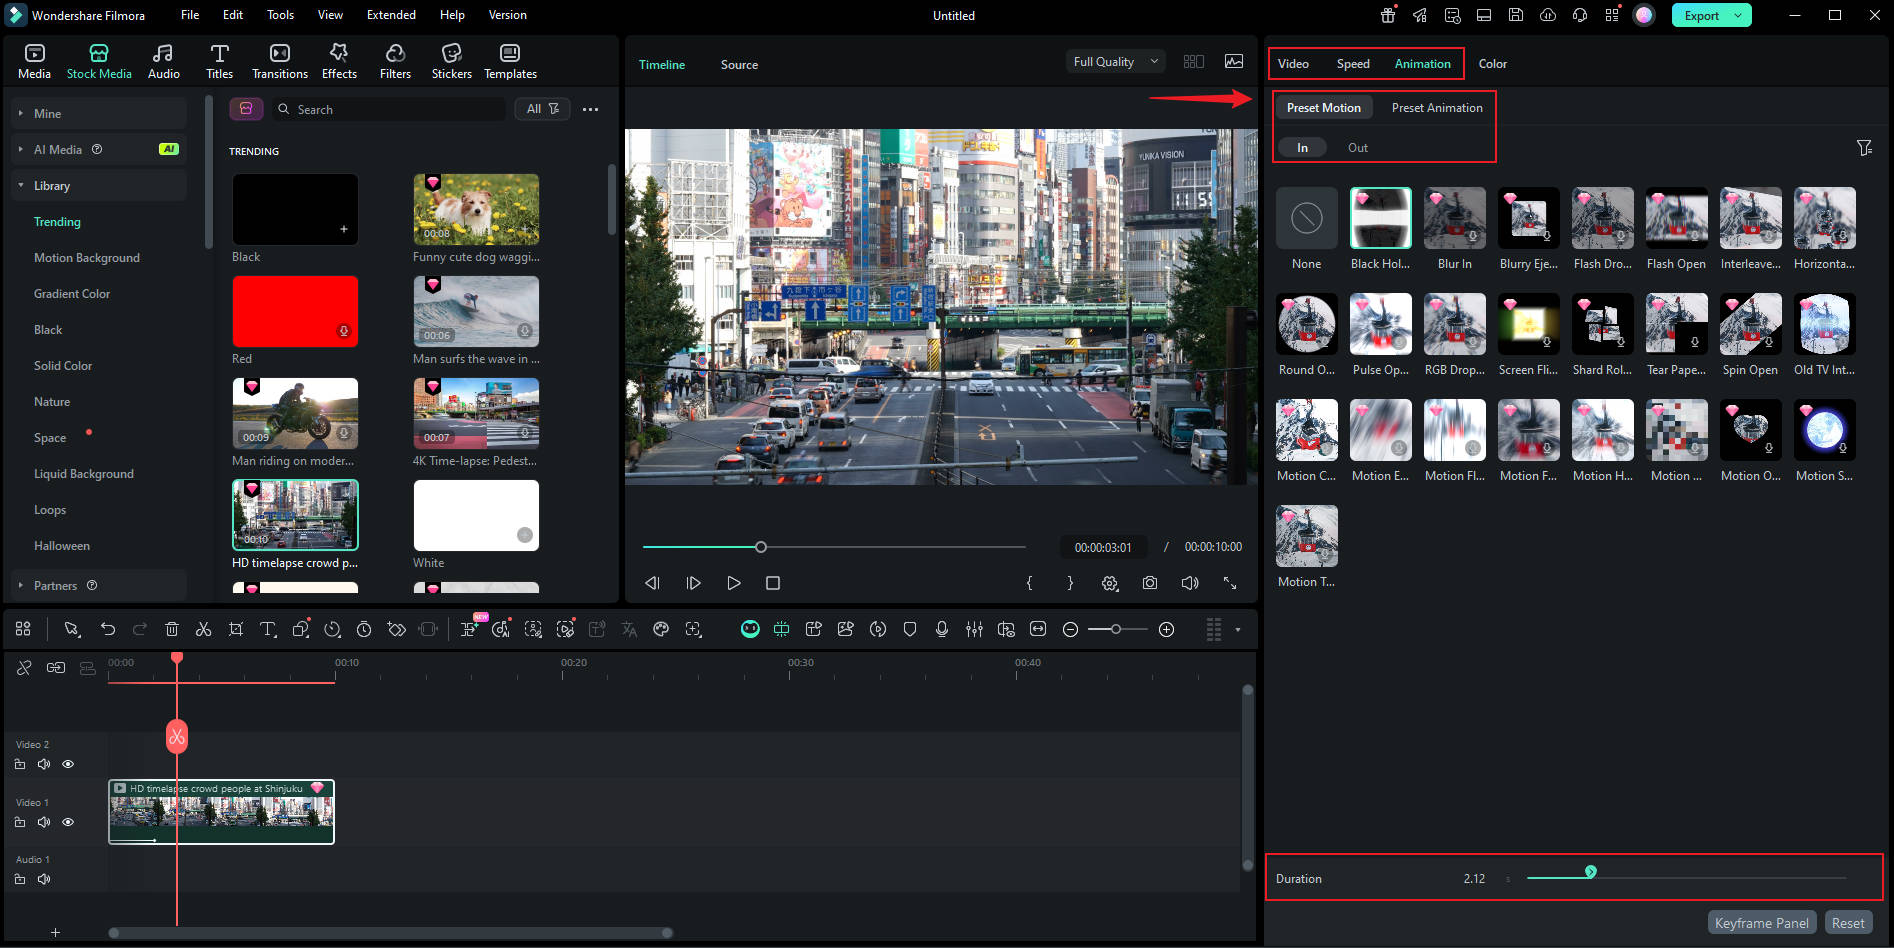
Move the progress bar to where you want to edit the animation. Click the video once, and in the property panel on the right side of the screen, find Video > Animation. Then, in the Drop Down List below, choose Preset Animation or Preset Motions.
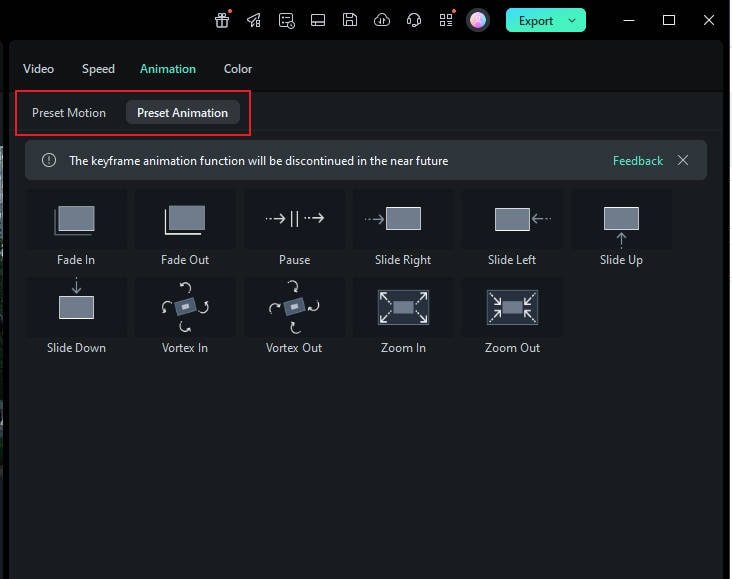
- Preset Animation: Filmora offers nine types of preset animations, including Fade in, Fade out, Pause, Slide Right, Slide Up, Vortex In, Vortex Out, Zoom In, and Zoom Out.
- Preset Motions: The Preset Motions offers more than 70 templates. You can explore and discover the feature you like.
Note:
Hover the pointer on the animation effects and stay there for a while, and you can preview the effect in the little windows where it is located.Step 3: Apply Animation Templates to Videos on Windows
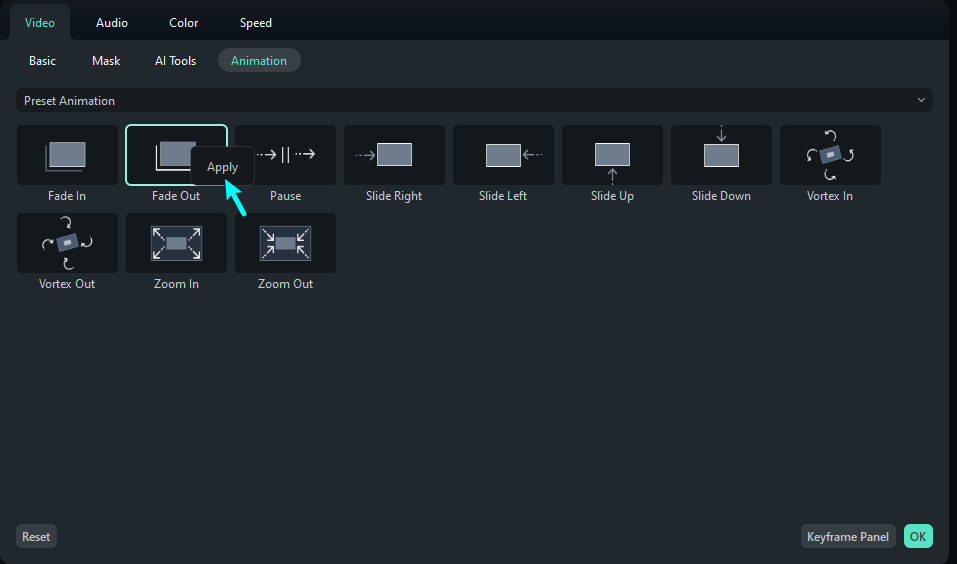
Drag or double-click the effect to apply. After double-clicking the effect, the player on the right side will show you a short preview of it. You can consider whether it is suitable for your video.
Step 4: Customize the Preset Animation
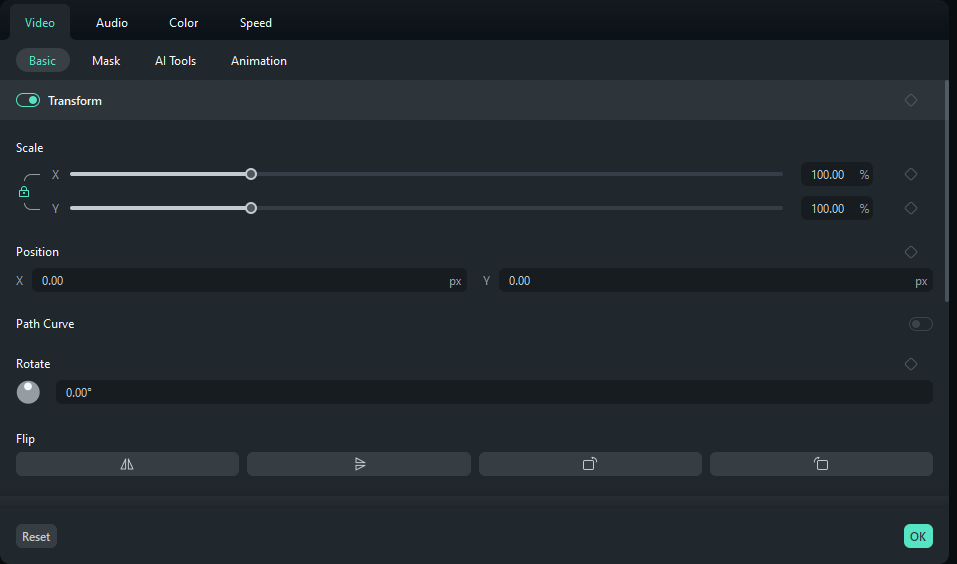
You can edit or delete the preset animation by clicking the keyframe on the video clip, and customizing the rotate, scale, position, and opacity values you want.
Step 5: Remove Preset Animation or Preset Motions
The following operations explain how to remove the two features:
- Preset Animation
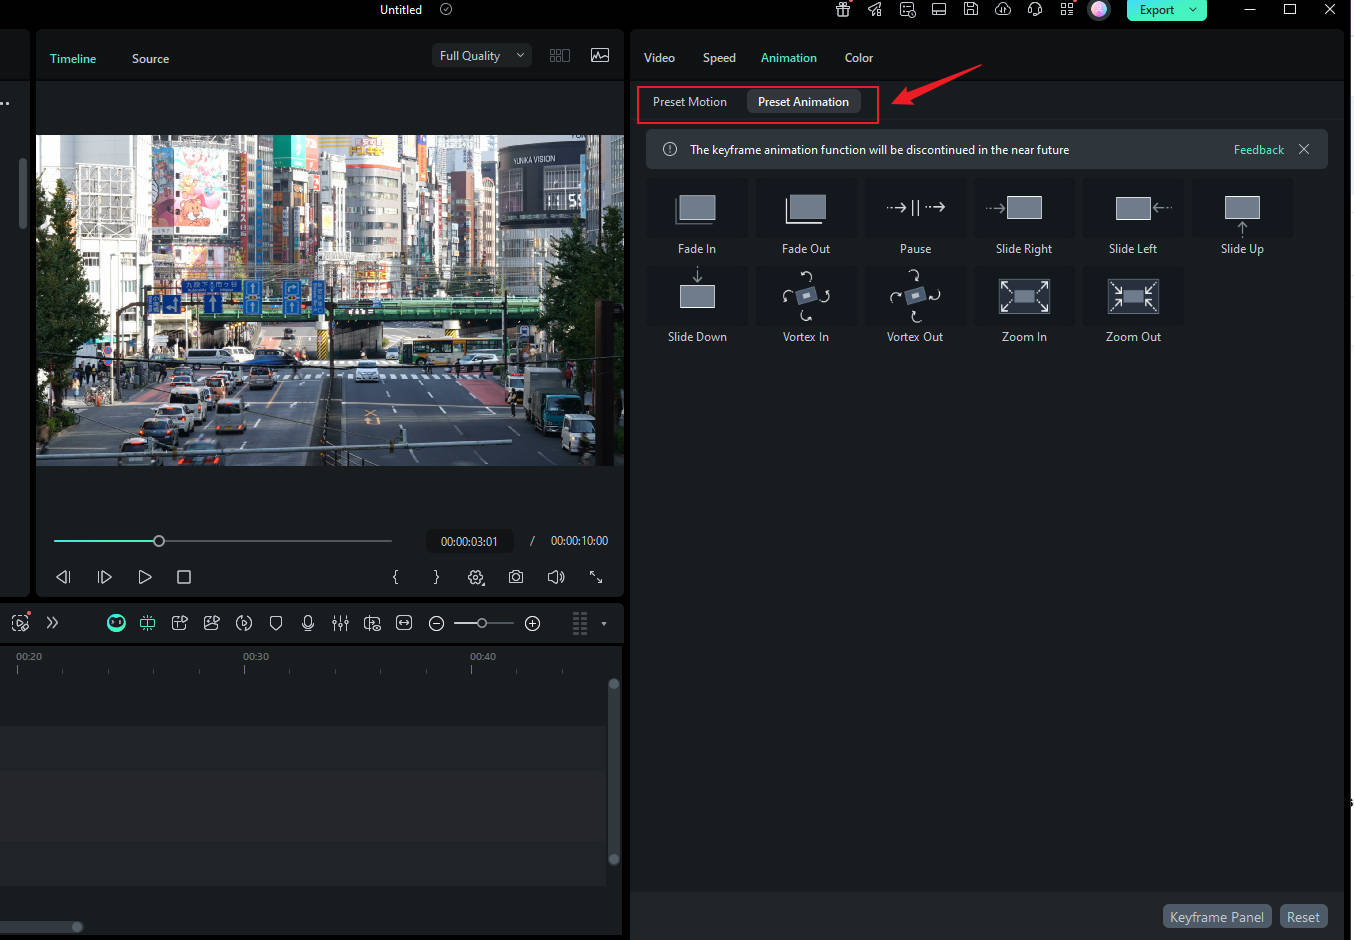
- To remove the Preset Animation adjustment, go back to the property panel and click Video > Animation > Preset Animation again. Then, click Reset to revert to the default effect.
- Preset Motions
To remove the Preset Motions adjustment, go to Video > Animation > Preset Motions in the property panel first. You can choose to favorite a preset or adjust the duration settings before removing it. Then, click Reset at the bottom of the tab, or select None at the top of the list to clear the effect.
Note:
Filmora not only provides Preset Animation and Preset Motions to videos but also the text inserted in the video. You can double-click the text to launch the text animation feature, and the steps are similar to the above-mentioned ones.Related Posts
Featured Articles
A Detailed Lightroom Review: Know All Features and A Better Alternative
Discover the full feature breakdown of Adobe Lightroom 2026 and explore a more intuitive, AI-powered alternative for seamless photo and video editing.
How to Create Thumbnails with & without Capcut?
Wondering how to make thumbnails after CapCut's ban in the U.S.? Learn how to create eye-catching thumbnails using Filmora, a robust alternative with professional tools.
2026 | Best 4 Tools to Remove Grain From Videos Online for Free
If you're looking for reliable options for removing grain from videos online for free, here are the top 5 options to consider.


