For the Best Results, Use the Latest Version.
-
Preparations
-
Account
-
Get Started & Basic Settings
-
Compatibility & Tech Specs
-
Performance Settings
-
-
Creating Projects
-
Creating New Projects
-
-
Importing & Recording
-
Video Editing for Windows
-
Basic Video Editing
- Enable/Disable Clip in Windows
- Magnetic Timeline for Windows
- Drawing Tools fo Windows
- Dual Monitor Setup for Video Editing on Windows
- Select All Clips on Timeline for Windows
- Dual Monitor Setup for Video Editing on Mac
- Manage Timeline and Tracks
- Auto Ripple for Windows
- Split & trim video
- Crop & Pan & Zoom Video
- Compositing
- Change video playback speed
- Playing videos in reverse
- Mark In and Mark Out for Windows
- Markers for Windows
- Group editing
- Customizable Backgrounds for Videos and Images in Windows
- Video snapshot
- Using freeze frame
- Logo Reveal For Windows
- Apply auto enhance
- Applying drop shadow
- Adjustment layer for Windows
- Transforming
- Video Editing Ruler – Windows
-
Advanced Video Editing
-
AI-Powered Video Editing
- Smart Scene Cut for Windows
- Smart Short Clips for Windows
- AI Face Mosaic for Windows
- AI Video Enhancer
- AI Text-to-Video for Windows
- Planar Tracking
- AI Idea to Video for Windows
- Image to Video for Windows
- Instant Cutter Tool for Windows
- AI Extend
- AI Script to Video Guide for Windows
- AI Text-Based Editing for Windows
- AI Mate Editing for Windows
- Create with instant mode
- ChatGPT Plugin - AI Copywriting
- AI Smart Cutout
- Lens correction
- Auto reframe video
- AI Portrait Cutout
- Scene detection feature
- AI Smart Masking for Windows
- Make motion tracking
- Stabilization
- AI Video/Photo Object Remover for Windows
- AI Smart Search for Windows
- AI Skin Tone Protection for Windows
- AI Image for Windows
- Chroma key (green screen)
- Super Slow Motion with Optical Flow for Windows
- Video Denoise for Windows
-
-
Audio Editing for Windows
-
Basic Audio Editing
-
Advanced Audio Editing
-
AI-Powered Audio Editing
-
-
Text Editing for Windows
-
Basic Text Editing
-
Advanced Text Editing
-
AI-Powered Text Editing
-
-
Video Customizations
-
Video Effects
-
Audio Effects
-
Transitions
-
Stickers
-
Filters
-
Color Editing
-
Animations
-
Templates
-
Asset Center
-
-
Exporting & Share & Cloud Backup
Auto Enhance
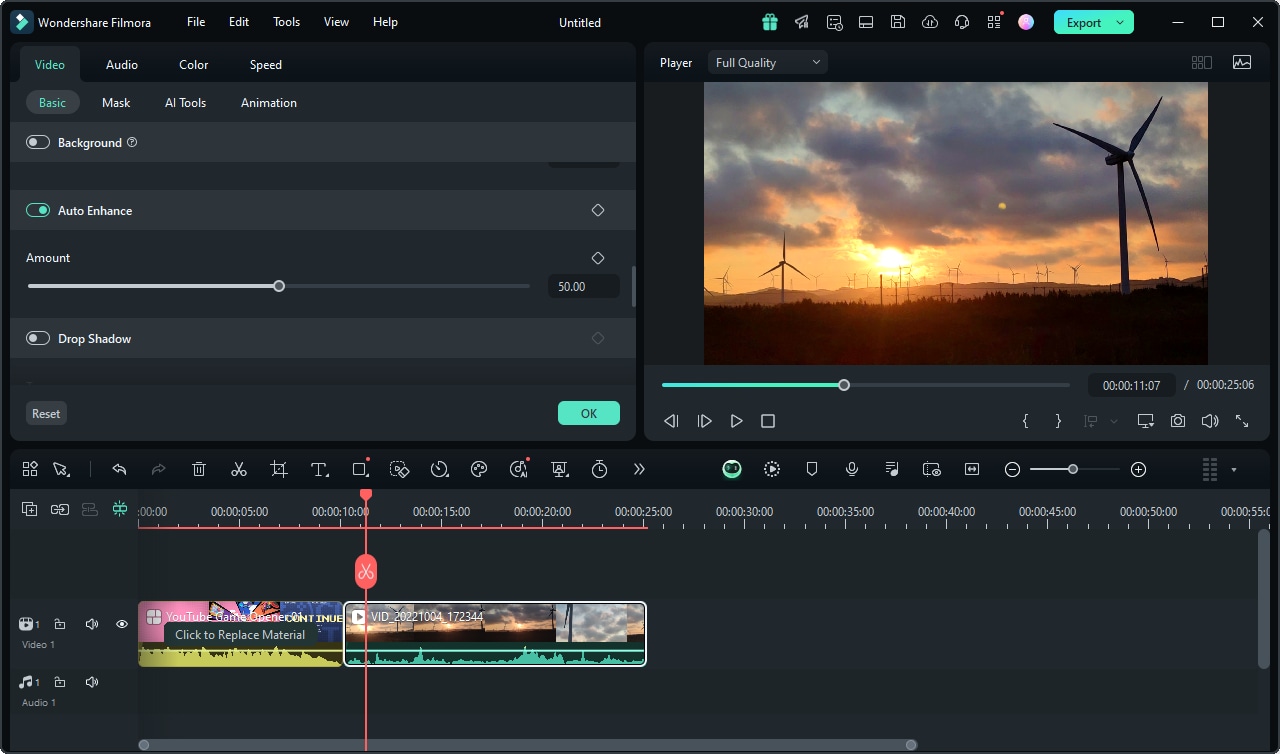
The Auto Enhance feature is used to adjust the video brightness and sharpness with one click, which makes the video looks more natural. (Enhance video on Filmora X)
Click the video in the timeline to enter the Video panel.
- Choose the Video>Basic tab and scroll down the property panel. Then click the button next to Auto Enhance.
- Adjust the result by dragging the amount slider and viewing the result in the Preview window. Click OK to save the result.

Related Posts
Featured Articles
Top 8-Bit Music Generators Online in 2025: Create Retro Beats with Ease
Craft retro tunes that feel like a throwback to classic games with a handy 8-bit music generator. Follow this guide to pick the right one for your projects.
Top 12 Free YouTube Thumbnail Makers [2025]
In search of boosting the reach on your social platform? Create thumbnails using the best thumbnail maker app for enhanced reach of your visual content.
Top New Year's Eve Songs to Ring in the New Year
Want your New Year songs to make the atmosphere more festive and exciting? Record your exciting New Year moments and don't forget to play some music!
Recommended User Guide
Split & trim video
Learn how to use Split & Trim in FIlmora 11
Markers for Windows
Here is the user guide for adding or removing marker on Filmora.
Dual Monitor Setup for Video Editing on Mac
Master dual-screen workflows in Filmora for Mac with the new Source and Timeline Preview Editing feature. Simultaneously view raw footage and timeline sequences for enhanced productivity and precise editing.
