For the Best Results, Use the Latest Version.
-
Preparations
-
Account
-
Get Started & Basic Settings
-
Compatibility & Tech Specs
-
Performance Settings
-
-
Creating Projects
-
Creating New Projects
-
-
Importing & Recording
-
Video Editing for Windows
-
Basic Video Editing
- Enable/Disable Clip in Windows
- Magnetic Timeline for Windows
- Dual Monitor Setup for Video Editing on Windows
- Select All Clips on Timeline for Windows
- Manage Timeline and Tracks on Windows
- Auto Ripple for Windows
- Split & trim video
- Crop & Pan & Zoom Video
- Compositing
- Change video playback speed
- Playing videos in reverse
- Mark In and Mark Out for Windows
- Markers for Windows
- Group editing
- Customizable Backgrounds for Videos and Images in Windows
- Video snapshot
- Using freeze frame
- Logo Reveal For Windows
- Apply auto enhance
- Applying drop shadow
- Adjustment layer for Windows
- Transforming
- Video Editing Ruler – Windows
-
Advanced Video Editing
- Drawing Tools for Windows | Filmora Guide
- Create Multi-Camera Clip
- Compound Clip for Windows
- Multi-Clip Editing for Windows
- Filmora Motion Blur | Windows
- Filmora Flicker Removal Guide | Windows
- Apply mask to video
- Creating a PIP effect
- Keyframe Graph Editor for Windows
- Add animation keyframing for Windows
- Keyframe Path Curve for Windows
-
AI-Powered Video Editing
- Smart Scene Cut for Windows
- Smart Short Clips for Windows
- AI Face Mosaic for Windows
- Filmora AI Eye Contact- Windows
- AI Video Enhancer for Windows
- AI Text-to-Video for Windows
- Planar Tracking for Windows
- AI Idea to Video for Windows
- Filmora Image to Video for Windows
- Filmora Image to Prompt for Windows
- Instant Cutter Tool for Windows
- AI Extend
- Filmora AI Relight - Windows
- Filmora AI Image Enhancer Guide - Windows
- AI Script to Video Guide for Windows
- AI Text-Based Editing for Windows
- AI Mate Editing for Windows
- Create with instant mode
- ChatGPT Plugin - AI Copywriting
- AI Smart Cutout
- Lens correction on Windows
- Auto reframe video
- AI Portrait Cutout
- Scene detection feature
- AI Smart Masking for Windows
- Make motion tracking
- Video Stabilization for Windows
- AI Video/Photo Object Remover for Windows
- AI Smart Search for Windows
- AI Skin Tone Protection for Windows
- AI Image for Windows
- Chroma key (green screen)
- Super Slow Motion with Optical Flow for Windows
- Video Denoise for Windows
-
-
Audio Editing for Windows
-
Basic Audio Editing
-
Advanced Audio Editing
-
AI-Powered Audio Editing
-
-
Text Editing for Windows
-
Basic Text Editing
-
Advanced Text Editing
-
AI-Powered Text Editing
-
-
Video Customizations
-
Video Effects
-
Audio Effects
-
Transitions
-
Stickers
-
Filters
-
Color Editing
-
Animations
-
Templates
-
Asset Center
-
-
Exporting & Share & Cloud Backup
Preview Render Files
Preview rendering reduces the preview lag which can occur when editing complex or high-resolution projects.
This results in smoother playback. Filmora offers 2 ways to render your timeline preview:
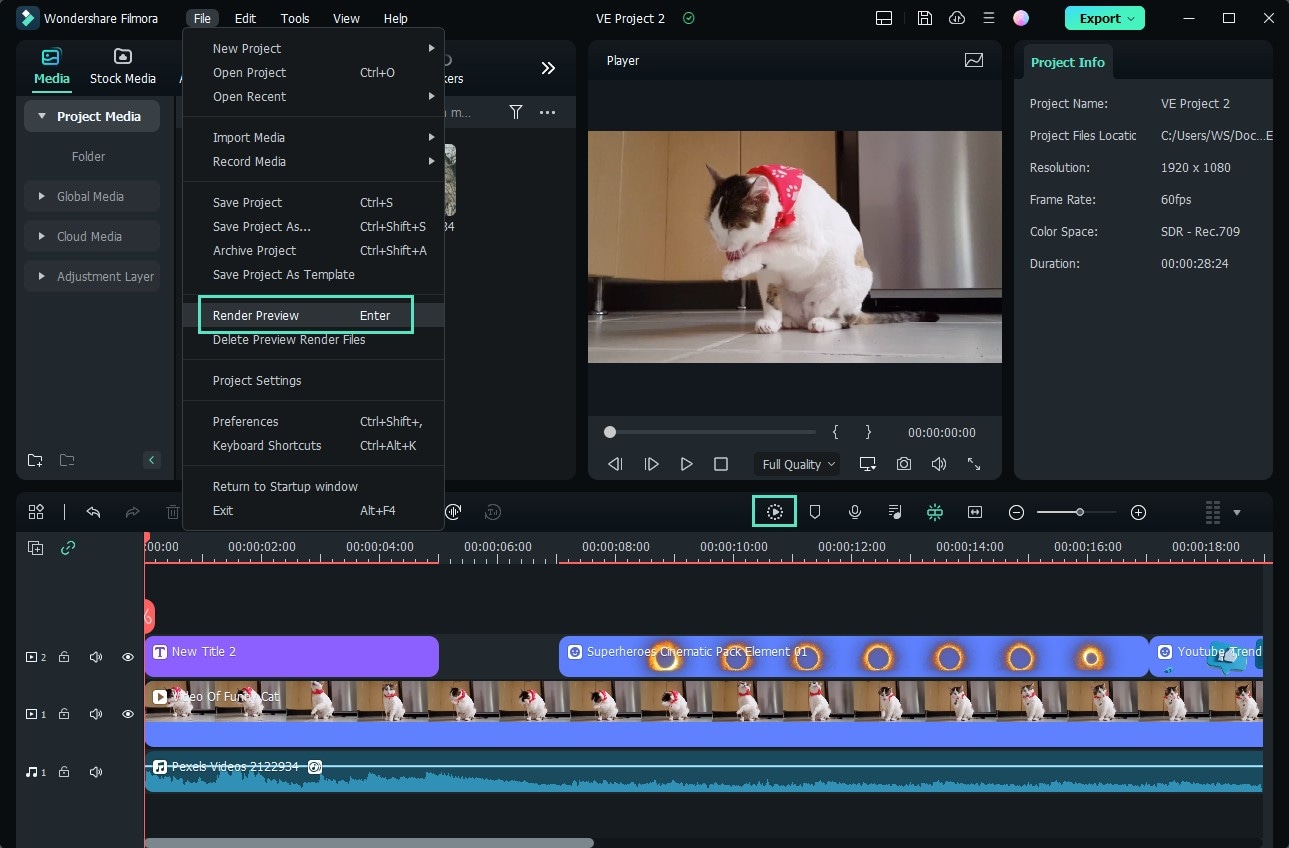
Manual Render (Render Preview)
Click the Render Button to begin rendering your timeline whenever this red line appears (as when you add media or make other changes to your timeline).
The render preview window will pop up, showing the render progress and the estimated remaining time.
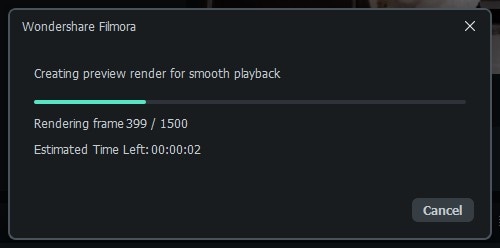
Once the rendering is complete, the red line will turn green.
Note:
You will need to wait until the rendering process is finished to continue editing.Auto-Render
Besides manually clicking the Render Button, you can also use a feature called Background Render. If you enable it, your videos will be rendered automatically when you add your videos to the timeline for editing.
You can go to File-Preferences-Performance, set a starting time, and enable it.
By default, the render process will be performed after 5 seconds of inactivity on the timeline.
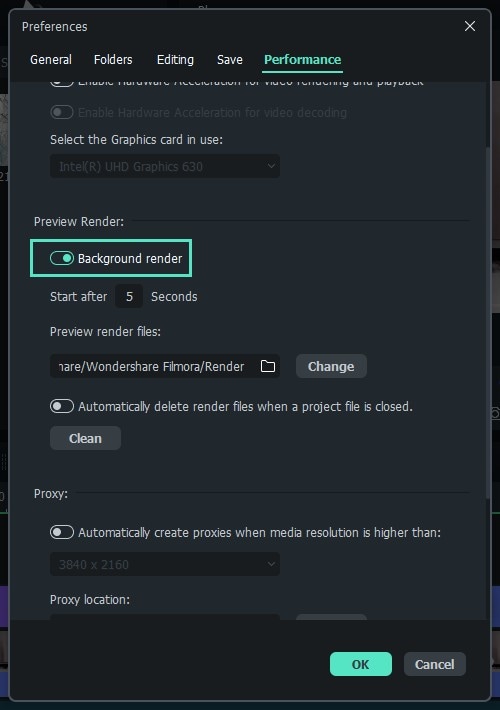
Click OK to save your settings.
Note:
The rendered parts of your timeline will be indicated by a green line. The line will be red for the un-rendered parts. Once you change, modify, or add effects to the rendered section you’ll notice the line turning red to indicate you need to render again.Related Posts
Featured Articles
Trending Twitter Videos: Discover the Hottest Clips on X (Twitter) Today
Explore the exciting world of trending videos on Twitter (X). From funny memes to breaking news, discover viral clips and learn how Filmora can boost your content!
How To Convert GIF to PNG Sequence? [2026 Updated]
Explore top-notch editing apps with us. To convert GIF to PNG Sequence, you need professional apps, which we will discuss here.
How To Record Screen and Audio on Mac
Discover easy methods to record screen and audio on your Mac. Learn about the best software to screen record with sound on Mac, perfect for tutorials and more!
Recommended User Guide
Get Started with The Full User Guide
Wondershare Filmora is a trendy video editing software that empowers you to produce creative and polished videos in just a few simple steps.
Panel Layout & Preference
The Panel Layout standards provide guidance for using these layouts.
Register / update / uninstall
The latest and greatest version of Filmora Video Editor for Windows and Mac can be downloaded from the official website top navigation bar.
