For the Best Results, Use the Latest Version.
-
Preparations
-
Account
-
Get Started & Basic Settings
-
Compatibility & Tech Specs
-
Performance Settings
-
-
Creating Projects
-
Creating New Projects
-
-
Importing & Recording
-
Video Editing for Windows
-
Basic Video Editing
- Enable/Disable Clip in Windows
- Magnetic Timeline for Windows
- Dual Monitor Setup for Video Editing on Windows
- Select All Clips on Timeline for Windows
- Manage Timeline and Tracks on Windows
- Auto Ripple for Windows
- Split & trim video
- Crop & Pan & Zoom Video in Filmora for Windows
- Compositing
- Change Video Speed on Windows
- Playing videos in reverse
- Mark In and Mark Out for Windows
- Markers for Windows
- Group editing
- Customizable Backgrounds for Videos and Images in Windows
- Video snapshot
- Using Freeze Frame in Filmora for Windows
- Logo Reveal For Windows
- Auto Enhance in Filmora for Windows
- Applying drop shadow
- Adjustment layer for Windows
- Apply Transforming for Windows
- Video Editing Ruler – Windows
-
Advanced Video Editing
- Drawing Tools for Windows | Filmora Guide
- Create Multi-Camera Clip in Filmora for Windows
- Compound Clip for Windows
- Multi-Clip Editing for Windows
- Filmora Motion Blur | Windows
- Filmora Flicker Removal Guide | Windows
- Apply mask to video
- Creating a PIP Effect for Windows
- Keyframe Graph Editor for Windows
- Add animation keyframing for Windows
- Keyframe Path Curve for Windows
-
AI-Powered Video Editing
- Smart Scene Cut for Windows
- Smart Short Clips for Windows
- AI Face Mosaic for Windows
- Filmora AI Eye Contact- Windows
- AI Video Enhancer for Windows
- AI Text-to-Video for Windows
- Planar Tracking for Windows
- AI Idea to Video for Windows
- Filmora Image to Video for Windows
- Filmora Image to Prompt for Windows
- Instant Cutter Tool for Windows
- AI Extend
- Filmora AI Relight - Windows
- Filmora AI Image Enhancer Guide - Windows
- AI Script to Video Guide for Windows
- AI Text-Based Editing for Windows
- AI Mate Editing for Windows
- Instant Mode in Filmora
- ChatGPT Plugin - AI Copywriting
- AI Smart Cutout for Windows
- Lens correction on Windows
- Auto Reframe Video for Windows
- AI Portrait Cutout
- Scene detection feature
- AI Smart Masking for Windows
- Motion Tracking on Windows
- Video Stabilization for Windows
- AI Video/Photo Object Remover for Windows
- AI Smart Search for Windows
- AI Skin Tone Protection for Windows
- AI Image for Windows
- Chroma key (green screen)
- Super Slow Motion with Optical Flow for Windows
- Video Denoise for Windows
-
-
Audio Editing for Windows
-
Basic Audio Editing
-
Advanced Audio Editing
-
AI-Powered Audio Editing
- Auto synchronization
- AI Sound Effects in Filmora for Windows
- Smart BGM Generation on Windows
- AI Voice Enhancer in Filmora
- AI Voice Cloning in Wondershare Filmora
- AI Music Generator for Windows
- Audio To Video
- AI Vocal Remover for Windows
- AI Auto Beat Sync for Windows
- AI Audio Stretch for Windows
- AI Audio Denoise for Windows
- Silence Detection on Windows
-
-
Text Editing for Windows
-
Basic Text Editing
-
Advanced Text Editing
-
AI-Powered Text Editing
-
-
Video Customizations
-
Video Effects
-
Audio Effects
-
Transitions
-
Stickers
-
Filters
-
Color Editing
-
Animations
-
Templates
-
Asset Center
-
-
Exporting & Share & Cloud Backup
Detect Beats and Add Beat Markers for Windows
This feature makes music-based editing much easier by automatically recognizing beats in an audio track and placing beat markers on the timeline. This helps editors sync clips, transitions, images, and effects with the rhythm of the music without manually finding every beat. You can also fine-tune the generated markers by adjusting settings, adding custom markers, or deleting unnecessary ones for better timing accuracy.
Steps to Use Beat Detection in Filmora
Beat Detection is designed to simplify audio synchronization and save editing time. Follow the steps below to detect beats and edit with greater precision:
Step 1. Start a New Project and Import Music
Open Filmora on your Windows PC and click New Project from the main interface. Once inside the editor, import the music or audio file you want to analyze.

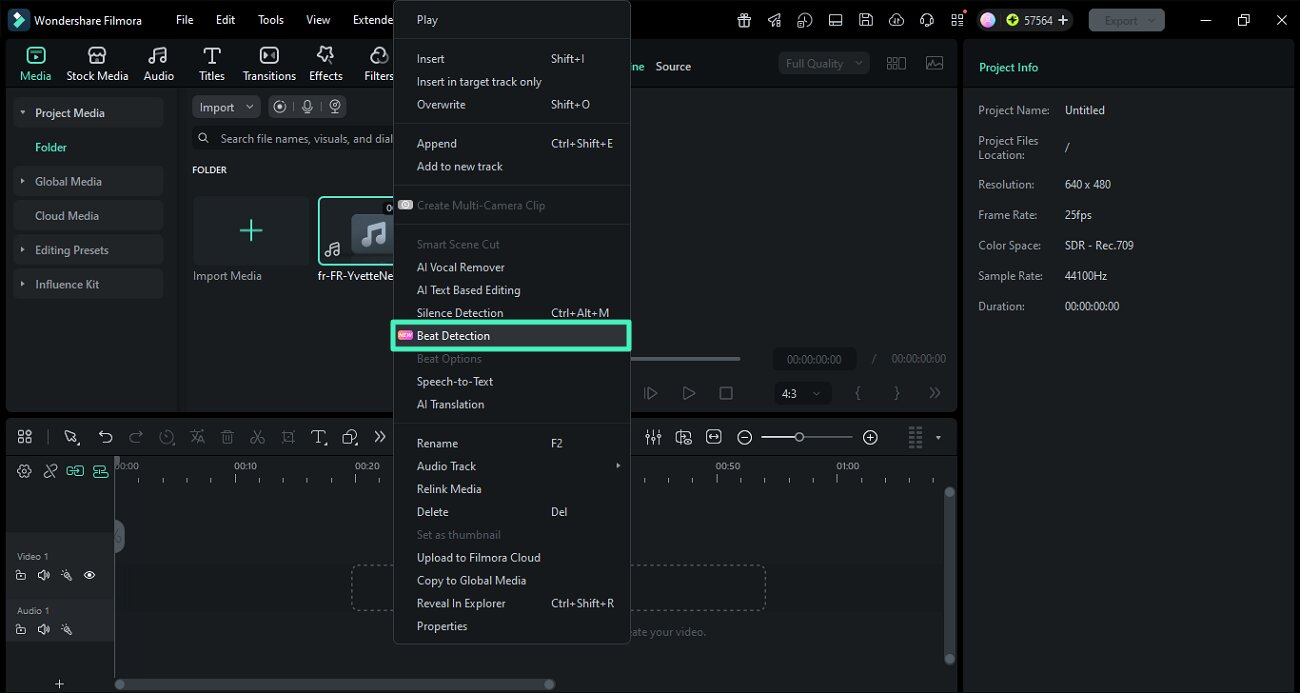
Step 2. Run Beat Detection on the Audio Track
Locate the imported music file in the media library and right-click it. From the menu that appears, choose Beat Detection to let Filmora scan the audio and identify the rhythm automatically.
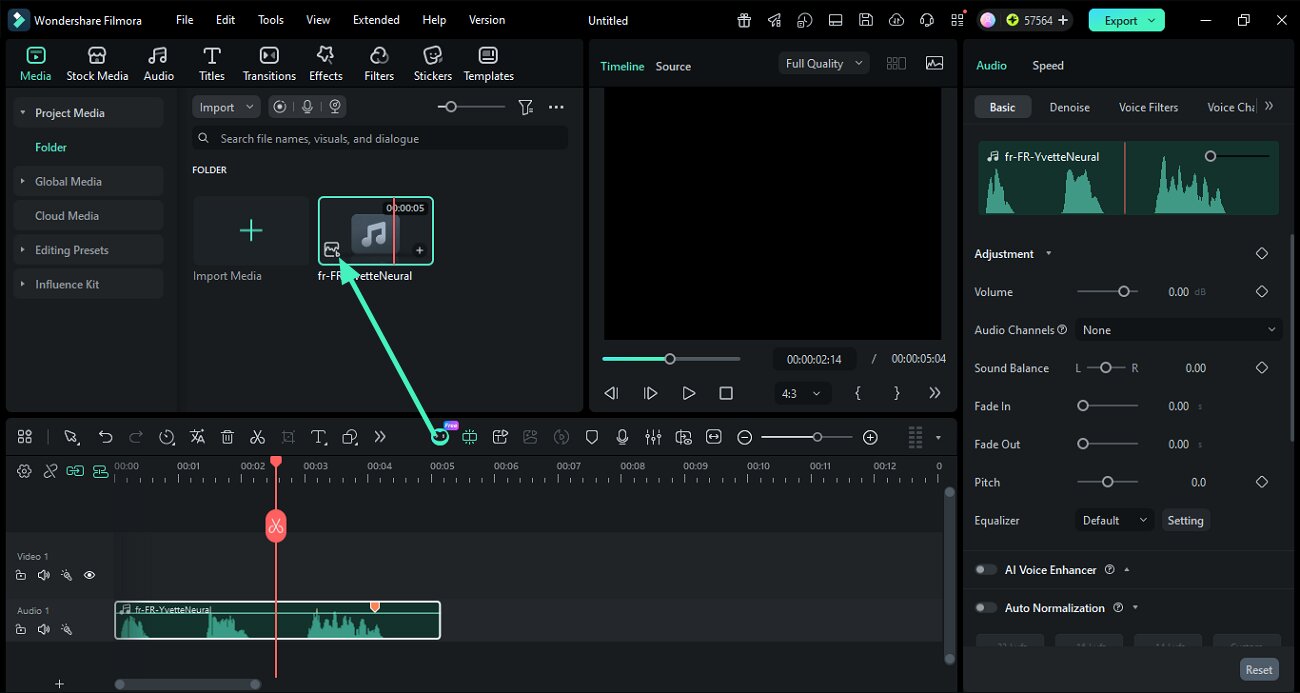
Step 3. Check Beat Markers on the Timeline
Once the analysis finishes, a Beat icon will appear on the audio thumbnail. Drag the processed music file to the timeline to see the generated beat markers aligned with the soundtrack.
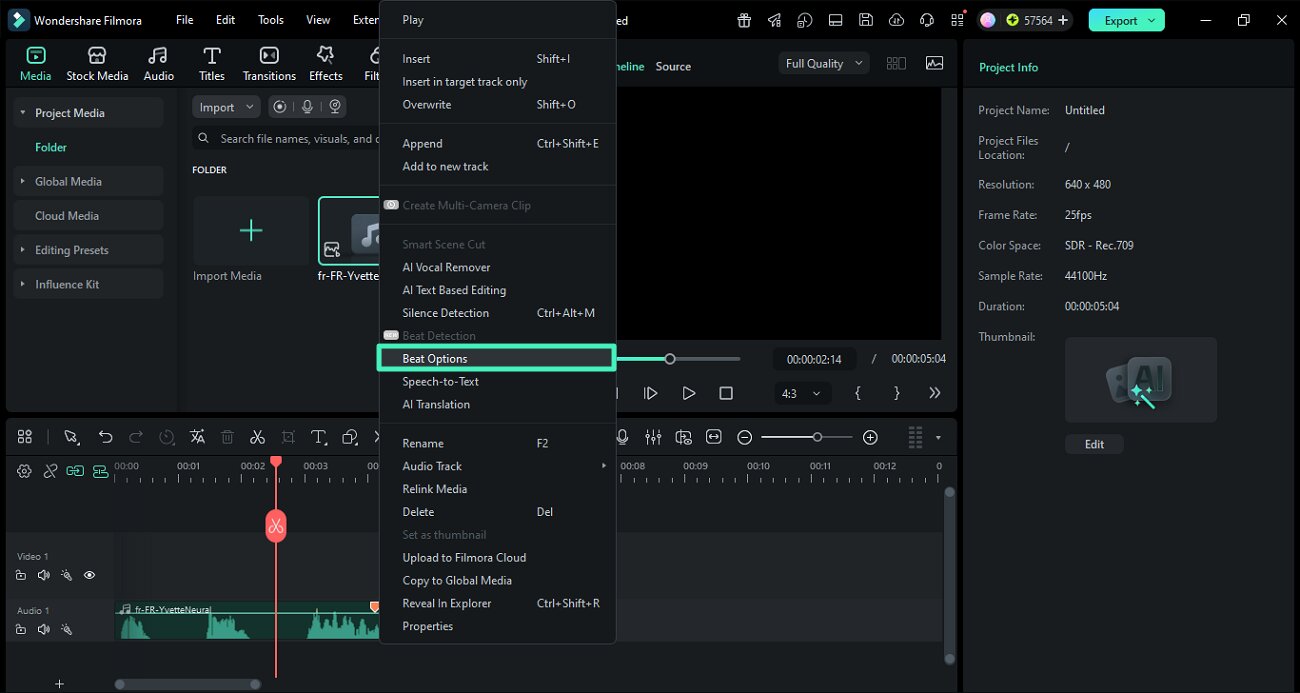
Step 4. Open Beat Marker Settings
If you want more control over the detected beats, right-click the audio file in the media library and select Beat Options. This opens the beat customization panel.
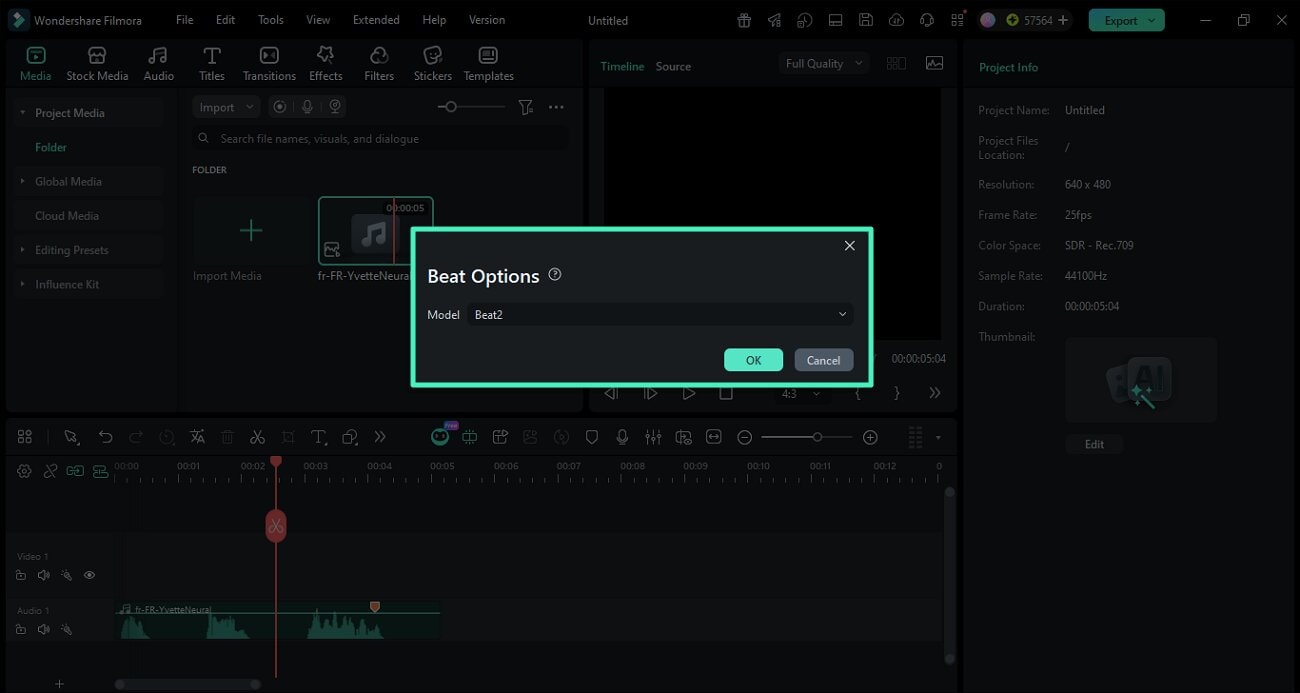
Step 5. Modify Beat Detection Preferences
Inside the Beat Options window, select the Beat option and press the OK button to proceed.
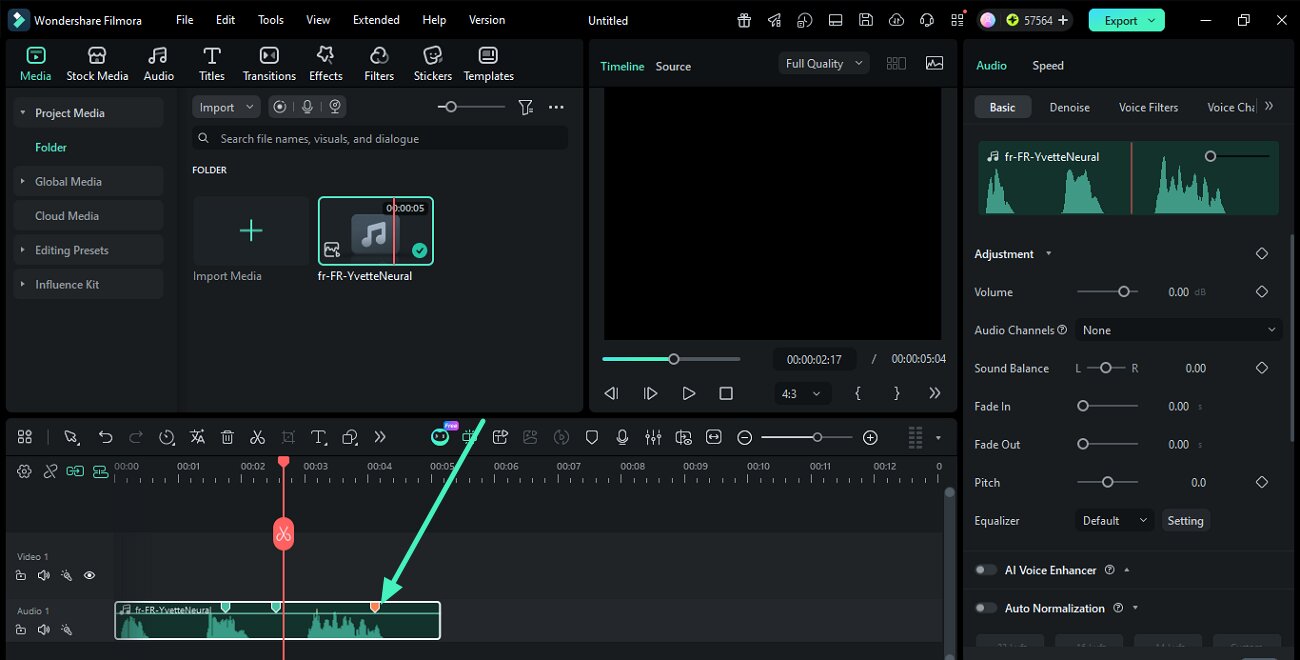
Step 6. Insert Extra Beat Markers Manually
For sections where additional timing points are needed, move the playhead to the desired position and select the audio clip on the timeline. Then click the Marker button or press M on your keyboard to place a new marker.
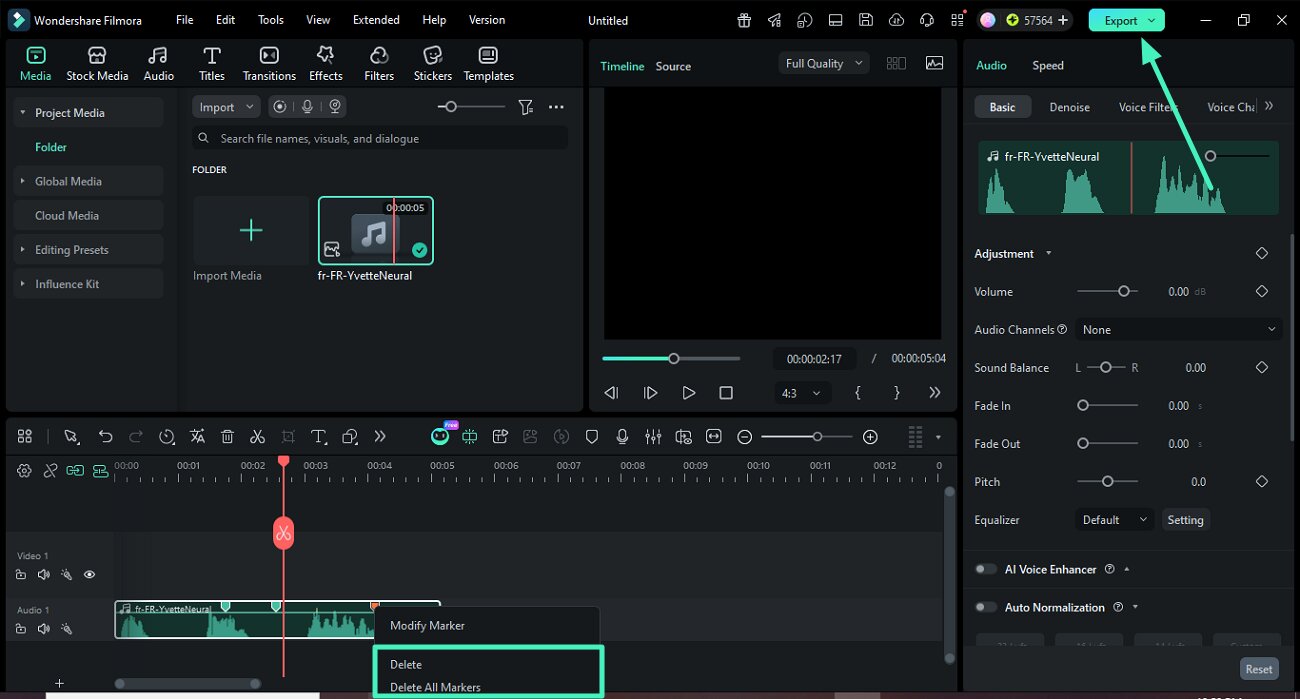
Step 7. Delete Unnecessary Beat Markers
If certain markers are not needed, click the marker and press the Delete key to remove it. You can also right-click a marker and choose Delete or Delete All Markers to clear multiple points quickly. When everything looks right, click Export to save the finished project.
Related Posts
Featured Articles
InShot vs CapCut: Which Video Editing App Wins in 2026?
InShot vs CapCut: Discover which 2026 video editing app offers the best features, performance, and creative tools for mobile creators. Make your videos stand out today!
Transform Your Videos: 3 Easiest Ways to Add Stickers Using Filmora
Have you been longing to add stickers to your video? This article features Filmora, which provides 3 techniques to add sticker to video.
How To Add the Ghost Effect to Your Videos [4 Ways]
Want to know how to add the ghost effect to your videos? Read this article till the end to grab some insightful information!
Recommended User Guide
Audio Ducking for Windows
This is a guide about Filmora audio ducking.
Audio Gain for Windows
Learn to use Audio Gain feature in Filmora
