For the Best Results, Use the Latest Version.
-
Preparations
-
Account
-
Get Started & Basic Settings
-
Compatibility & Tech Specs
-
Performance Settings
-
-
Creating Projects
-
Creating New Projects
-
-
Importing & Recording
-
Video Editing for Windows
-
Basic Video Editing
- Enable/Disable Clip in Windows
- Magnetic Timeline for Windows
- Dual Monitor Setup for Video Editing on Windows
- Select All Clips on Timeline for Windows
- Manage Timeline and Tracks on Windows
- Auto Ripple for Windows
- Split & trim video
- Crop & Pan & Zoom Video
- Compositing
- Change Video Speed on Windows
- Playing videos in reverse
- Mark In and Mark Out for Windows
- Markers for Windows
- Group editing
- Customizable Backgrounds for Videos and Images in Windows
- Video snapshot
- Using freeze frame
- Logo Reveal For Windows
- Auto Enhance in Filmora for Windows
- Applying drop shadow
- Adjustment layer for Windows
- Apply Transforming for Windows
- Video Editing Ruler – Windows
-
Advanced Video Editing
- Drawing Tools for Windows | Filmora Guide
- Create Multi-Camera Clip
- Compound Clip for Windows
- Multi-Clip Editing for Windows
- Filmora Motion Blur | Windows
- Filmora Flicker Removal Guide | Windows
- Apply mask to video
- Creating a PIP effect
- Keyframe Graph Editor for Windows
- Add animation keyframing for Windows
- Keyframe Path Curve for Windows
-
AI-Powered Video Editing
- Smart Scene Cut for Windows
- Smart Short Clips for Windows
- AI Face Mosaic for Windows
- Filmora AI Eye Contact- Windows
- AI Video Enhancer for Windows
- AI Text-to-Video for Windows
- Planar Tracking for Windows
- AI Idea to Video for Windows
- Filmora Image to Video for Windows
- Filmora Image to Prompt for Windows
- Instant Cutter Tool for Windows
- AI Extend
- Filmora AI Relight - Windows
- Filmora AI Image Enhancer Guide - Windows
- AI Script to Video Guide for Windows
- AI Text-Based Editing for Windows
- AI Mate Editing for Windows
- Create with instant mode
- ChatGPT Plugin - AI Copywriting
- AI Smart Cutout for Windows
- Lens correction on Windows
- Auto Reframe Video for Windows
- AI Portrait Cutout
- Scene detection feature
- AI Smart Masking for Windows
- Make motion tracking
- Video Stabilization for Windows
- AI Video/Photo Object Remover for Windows
- AI Smart Search for Windows
- AI Skin Tone Protection for Windows
- AI Image for Windows
- Chroma key (green screen)
- Super Slow Motion with Optical Flow for Windows
- Video Denoise for Windows
-
-
Audio Editing for Windows
-
Basic Audio Editing
-
Advanced Audio Editing
-
AI-Powered Audio Editing
- Auto synchronization
- AI Sound Effect
- Smart BGM Generation
- AI Voice Enhancer
- How to Execute AI Voice Cloning in Wondershare Filmora?
- AI Music Generator for Windows
- Audio To Video
- AI Vocal Remover for Windows
- AI Auto Beat Sync for Windows
- AI Audio Stretch for Windows
- AI Audio Denoise for Windows
- Silence detection
-
-
Text Editing for Windows
-
Basic Text Editing
-
Advanced Text Editing
-
AI-Powered Text Editing
-
-
Video Customizations
-
Video Effects
-
Audio Effects
-
Transitions
-
Stickers
-
Filters
-
Color Editing
-
Animations
-
Templates
-
Asset Center
-
-
Exporting & Share & Cloud Backup
Auto Reframe Video for Windows
Auto Reframe Video in Filmora automatically adjusts your footage to fit different aspect ratios like 1:1, 9:16, or 16:9. It uses AI motion tracking to keep the main subject in focus while resizing the frame. This feature is perfect for repurposing videos across platforms like social media, saving time and ensuring your content remains centered and visually engaging.
Index
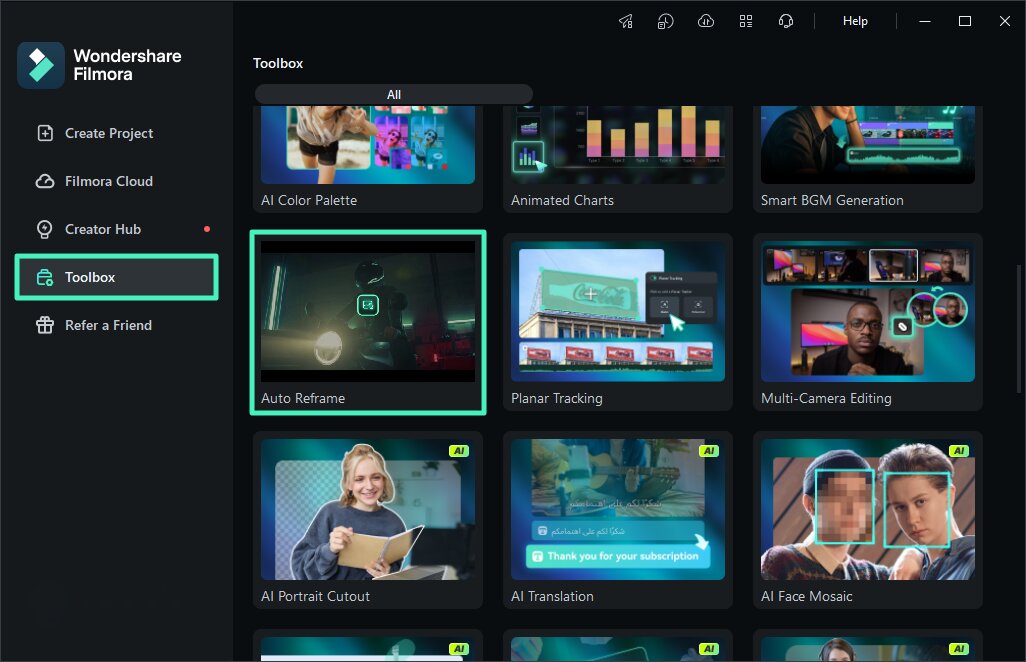
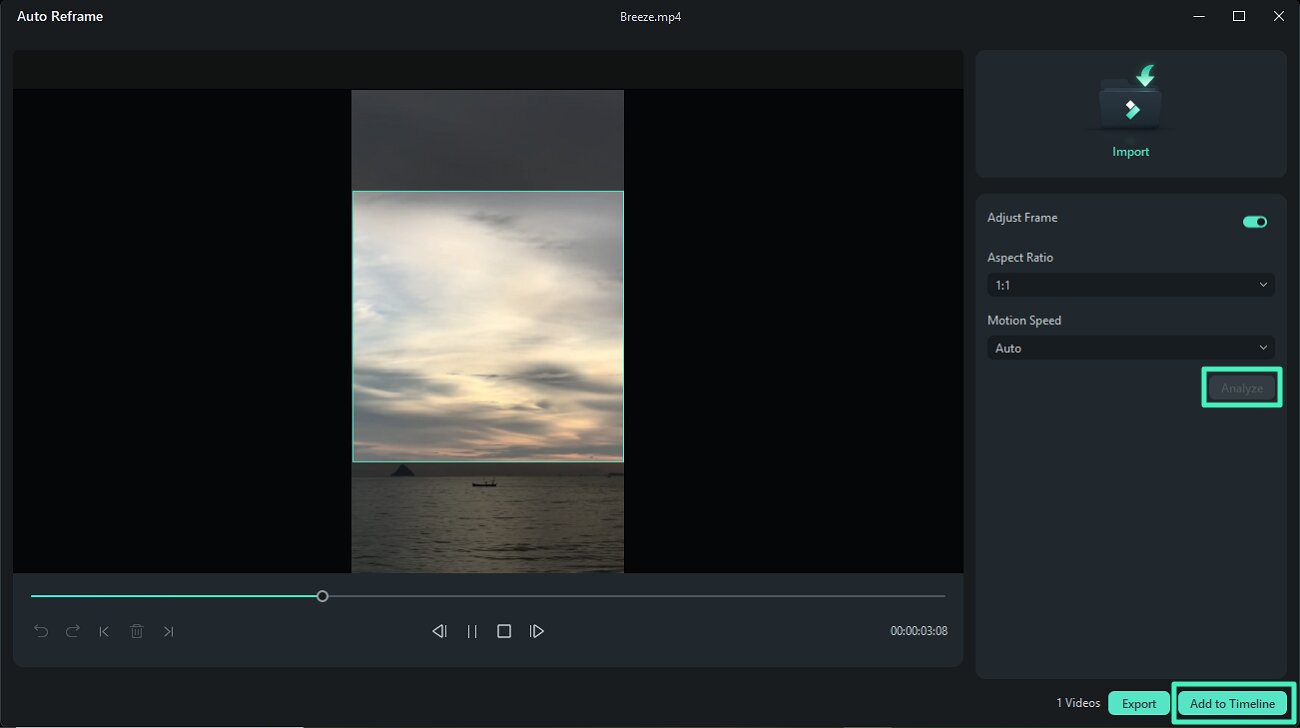
Method 1: Choose From the Toolbox
Step 1. Access Auto Reframe in AI Toolbox
After launching Filmora, locate the Toolbox panel on the left side of the interface. From there, select the Auto Reframe option to instantly open and start using the reframing feature.
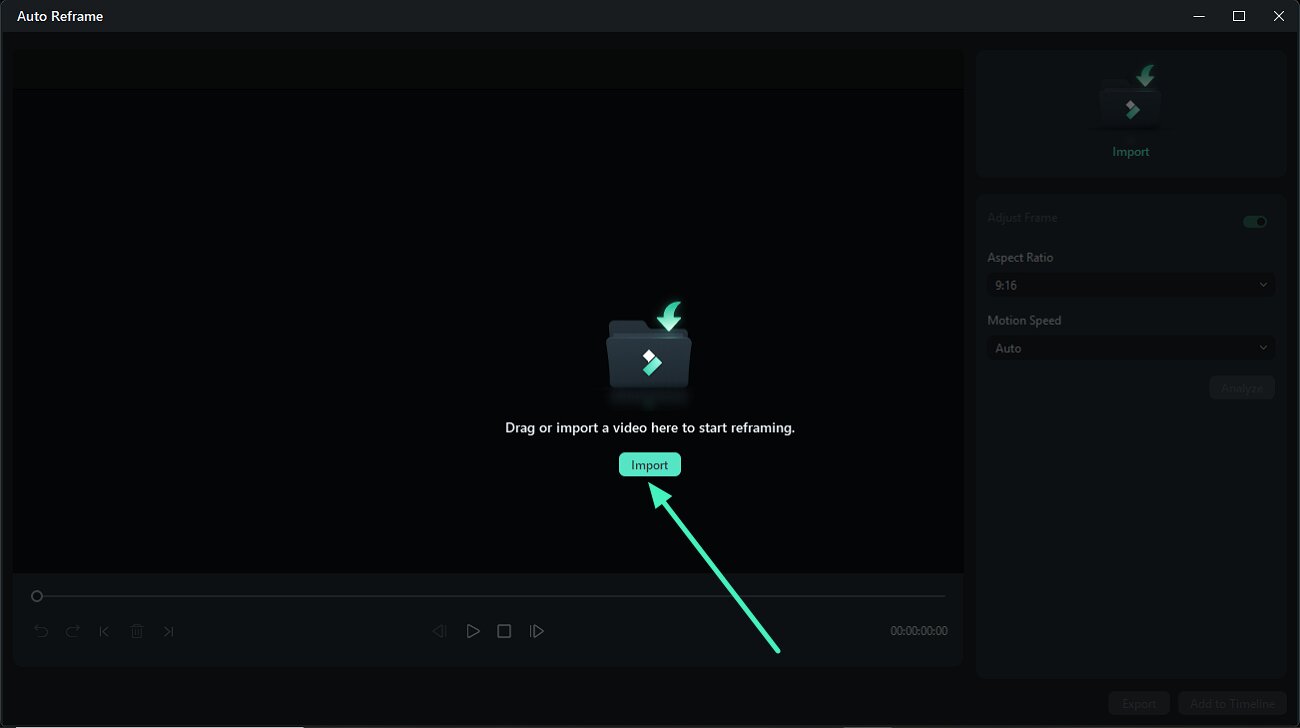
Step 2. Import Video To The Tool
Moving forward, locate the Import button in the following interface and click on it to add your video.
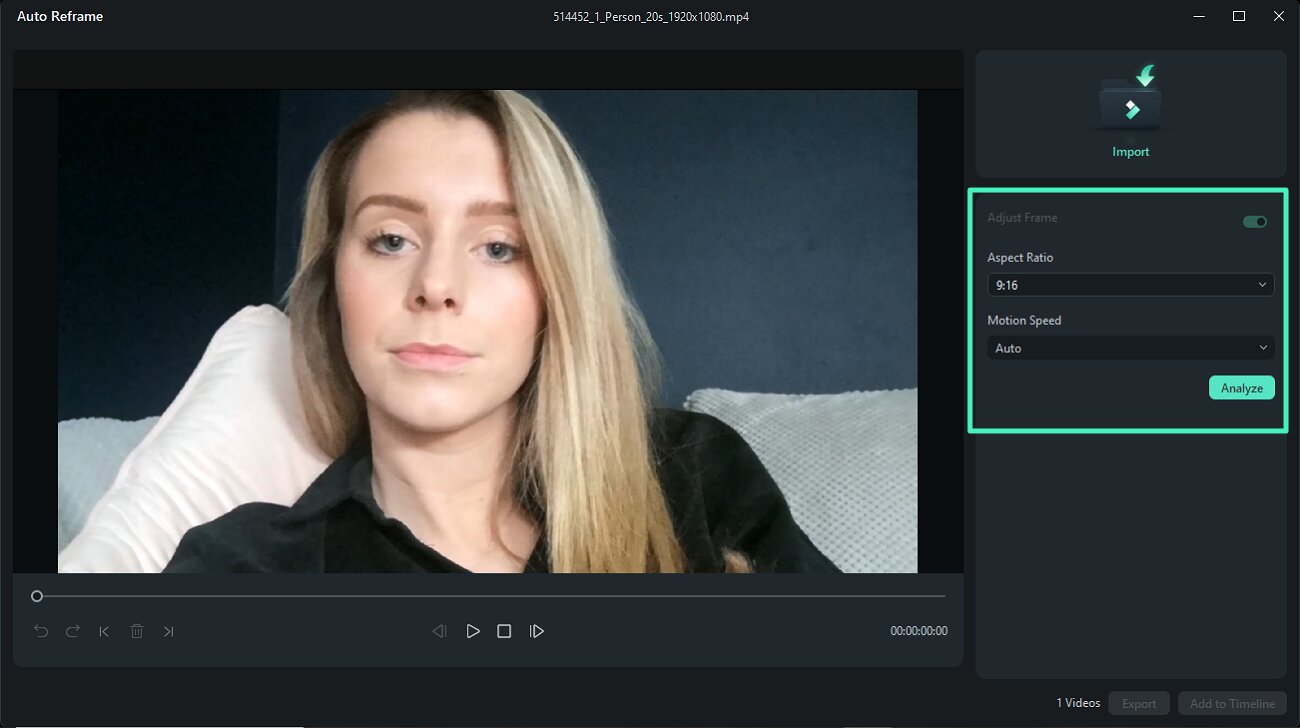
Step 3. Select Aspect Ratio and Analyze
Once the videos are added, select the Aspect Ratio option from the drop-down menu located on the right. Next, choose the Motion Speed and hit the Analyze button to execute.
Step 4. Preview and Export
Once the video is reframed, preview it and either save it directly using the Export button or press Add to Timeline for further editing.
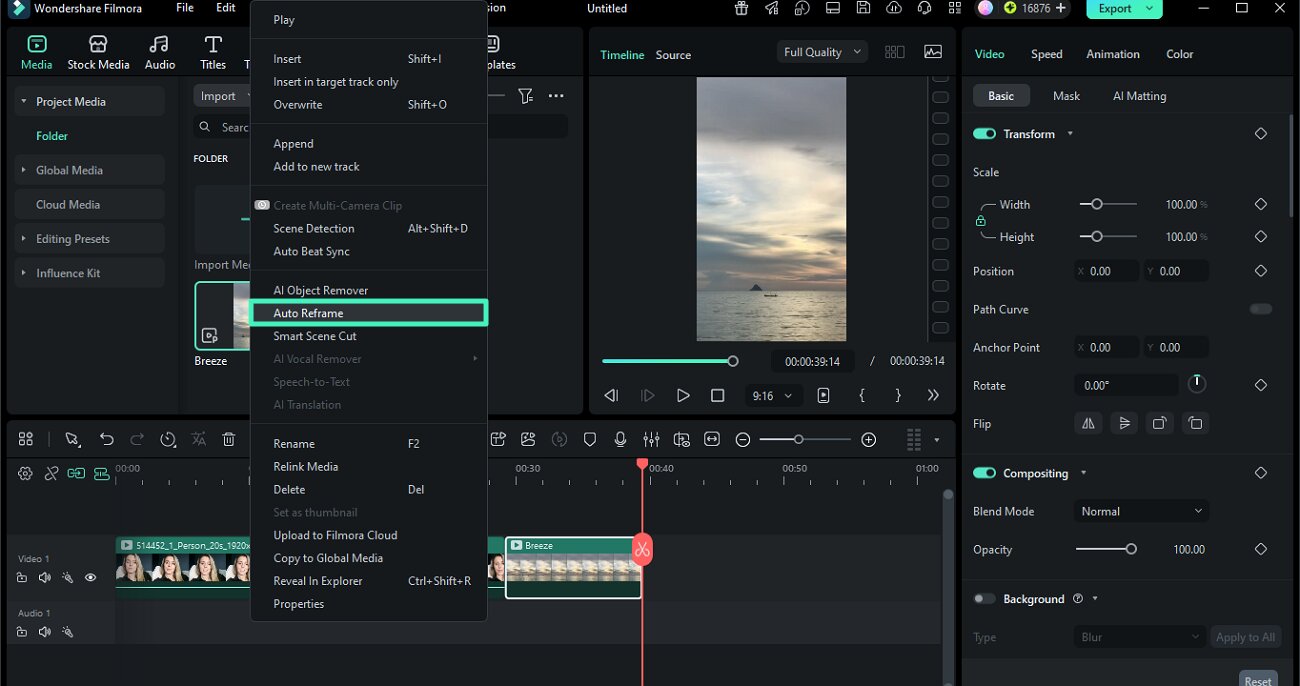
Method 2: Use From Editing Interface
Step 1. Import Video Choose Auto Reframe
After importing the video to the tool’s interface, right-click on it and select the Auto Reframe option from the expanded list.
Step 2. Choose Aspect Ratio and Speed
Select the Aspect Ratio option and Motion Speed using the designated option. Press the Analyze button to execute the process. Once done, click on Export to save the results to your device.
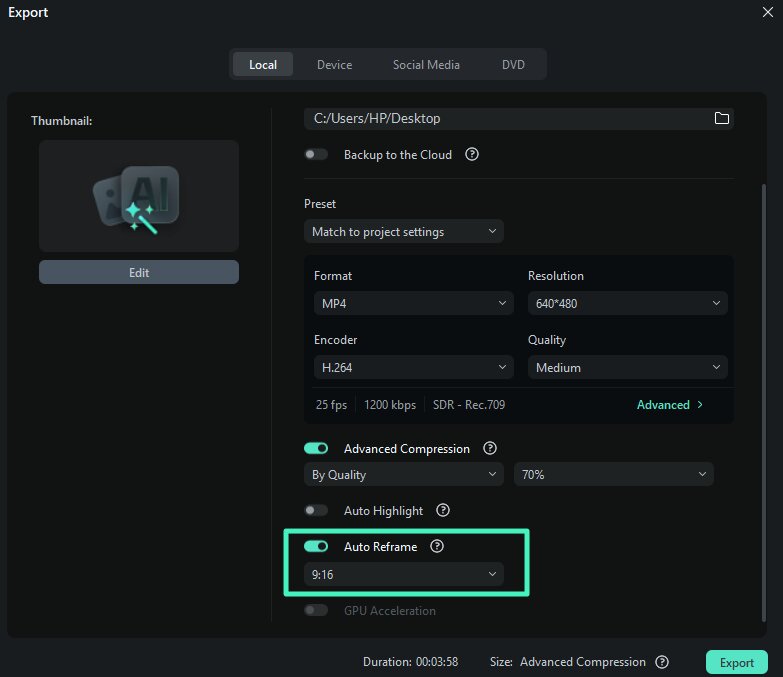
Method 3: Access From Export Window
Instructions
Once you have pressed the Export button, you will be navigated to the export window. Here, turn the toggle on for Auto Reframe and select the Aspect ratio. Finally, press the Export button to save the results.
Related Posts
Featured Articles
How to Create Interactive Video Ads with Filmora: Complete Tutorial [2026]
Get more clicks and engagement with interactive video ads! This guide walks you through how to make them and showcases the best interactive video ad examples out there.
What Is Discord and How to Use It? [Updated]
Discord has everything you need in a good communication software with its voice chats, video calls, and text options. Check this article to know it in detail.
How To Create Animated Clipart in PowerPoint
What is moving clipart called? Where can I find free animated clipart? How do you add animated clipart to the slide? Here are the answers to all your questions.
Recommended User Guide
Lens correction on Windows
Learn how to use Lens Correction in Filmora 11
Super Slow Motion with Optical Flow for Windows
With Filmora's new upgrade, users can add slow motion to their videos and optimize them.
AI Face Mosaic for Windows
The AI Face Mosaic feature is an advanced tool designed to automatically recognize and protect faces in videos or images. Utilizing intelligent mosaic to track and cover faces in real-time, ensuring that privacy is safeguarded regardless of face movement within the frame.
