Cropping videos can be time-consuming. Are you still spending a lot of time manually cropping videos for social media posts of different aspect ratios? Stop it! Try the new AI-powered Auto Reframe feature included in Wondershare Filmora 10.2 for Mac! It will save your valuable editing time.
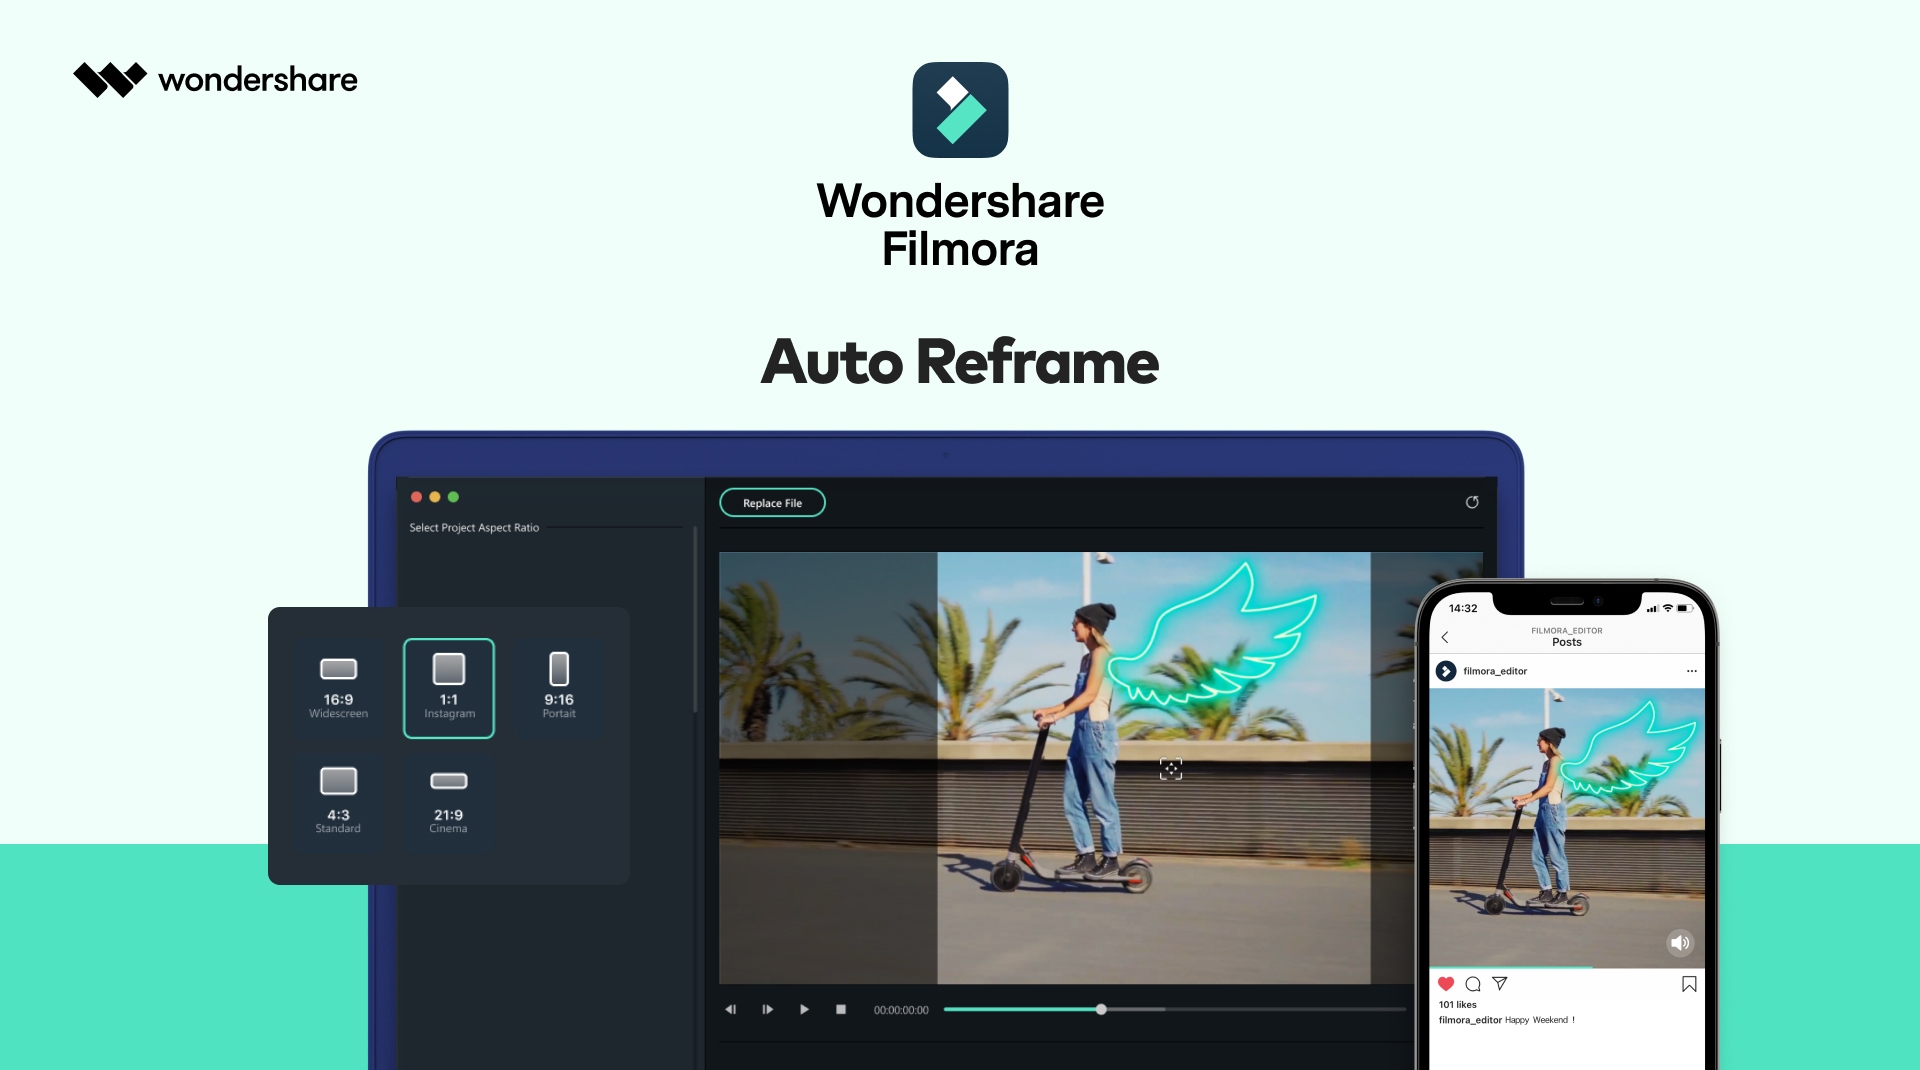
The Auto Reframe feature can detect a moving object in any video, and then automatically crop it to suit different aspect ratios instantly. What used to take hours or even a day of editing can now be done in minutes. If you often need to post your videos to different social media platforms like YouTube, Instagram, and Facebook, this feature will improve your video making efficiency.
In this guide, we will show you how to use this advanced feature to reframe sequences. Here we go!
There are two methods to apply the Auto Reframe feature in Filmora for Mac:
Method 1. Launch Filmora on your Mac device, choose More Tools > Auto Reframe.

Now, drag the clip that you want to crop or hit the Import button to select and import it.

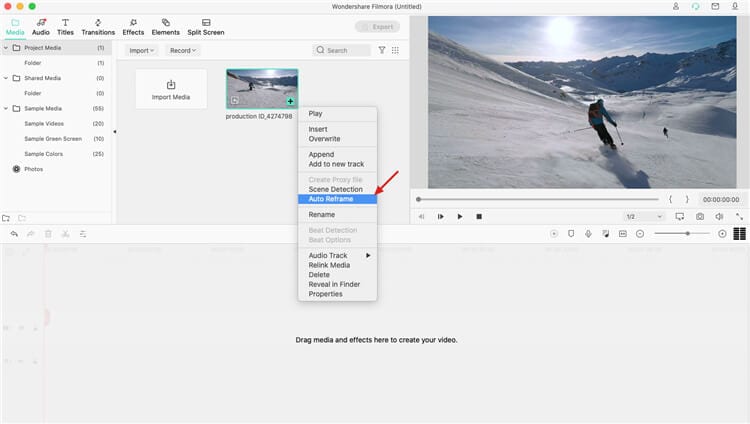
Method 2. Launch Filmora and select Create Project. Drag the video clip to the Media area, right click on it and choose Auto Reframe from the pop-up menu. The clip will be automatically added to the Auto Reframe tool.
After importing the clip to the tool, you can follow the steps below to auto crop it for different aspect ratios:
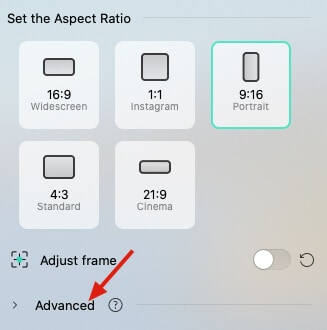
Step 1. Select the aspect ratio you need, then the reframing will start automatically.
There are 5 aspect ratio options: square (1:1), vertical (9:16), standard (4:3), widescreen (16:9) and cinema (21:9).

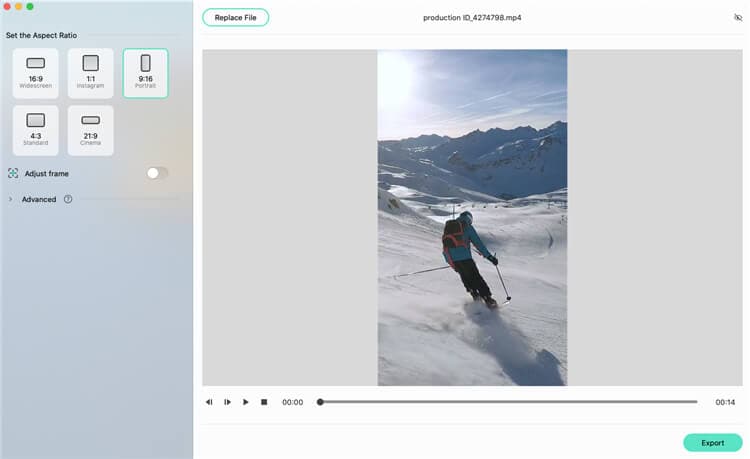
Once the reframing starts, you can see the result in the preview window. At this point, the video outside the frame will be hidden. If you want to see the whole video screen, click on the eye icon in the upper right corner.

Step 2. If you want to adjust the frame, click the Adjust frame toggle button on the right, then drag the crop box to adjust it. Fix the frame to fit your needs, and hit OK to apply all changes.

Step 3. You can also change the tracking subject and tracking speed by clicking on the Advanced tab under Adjust frame. Choose to track the secondary subject or adjust the tracking speed.


Step 4. When the adjustment and reframing are completed, hit the Export button to save your work.

Step 5. Enter the file name, select the location folder, and then click on Save.

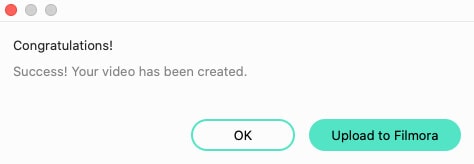
Step 6. When the video is created, hit the “Upload to Filmora” button. The video will be automatically imported to the Media window in Filmora.
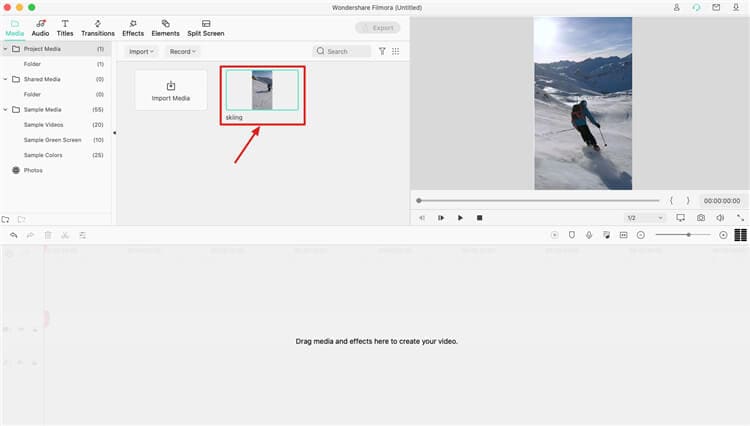
Step 7. You can drag the clip to the timeline for further editing. Add music, titles, effects, or transitions to enhance it.
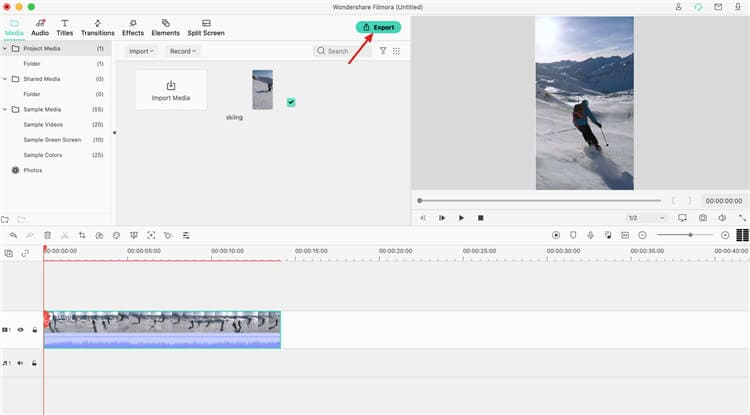
Step 8. When the editing is done, click the Export button to save and share your video.