Filmora for Mac (Latest Filmora version X) makes it easy to create text & titles that match your style. Captions, lower 3rds, subtitles, openers, and end credits are among the text options available in Filmora for Mac. You can even add animated text effects like dialog balloons. In this guide you’ll learn how to access and use them.
There are a variety of animated text presets you can access under the Titles menu. You can customize any text effect you find and save it as a new preset.
Adding text to your project
Go to the Titles menu, choose a text effect, and drag it into the timeline. You can also right click on the text effect and choose Apply.
You can also enter plain text, it's no animations or extras,just simple text.

In the Titles menu on the left side of the screen, you’ll see folders for different types of text effects marked Opener, Titles, Lower 3rds, Sub Titles, and End Credits. You can preview each effect by double-clicking on it. Drag and drop the effect you want to use into the timeline, or right click on it and select Apply.
Applying Openers and End Credits
To add an Opener (also called an Intro) go to the Opener menu under Titles and right click on the Opener you want to add. Select Apply and the Opener will be added to a new video track.
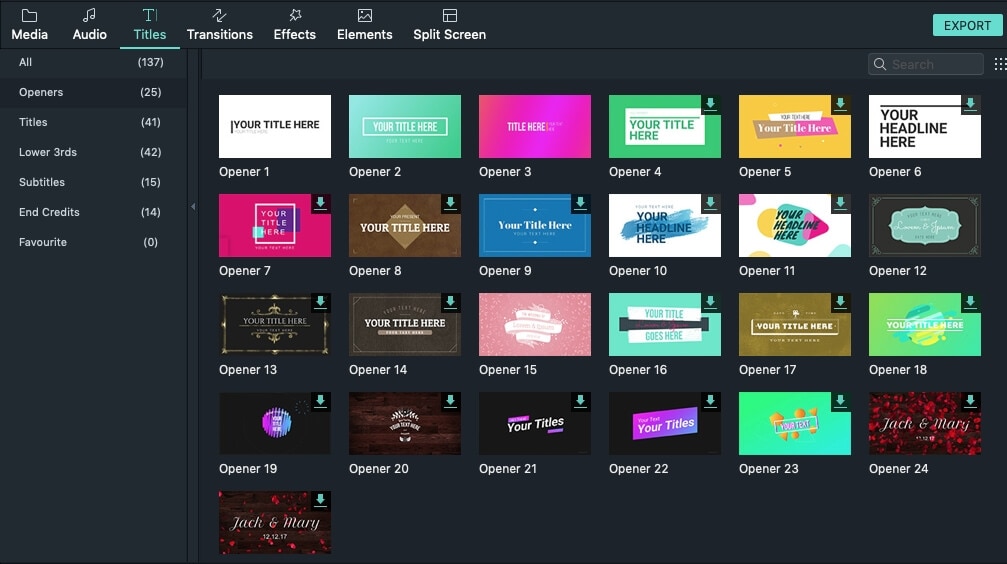
To add End Credits, go to End Credits under Titles and right click on the credits you want. Then, select Apply from the submenu.

To enter text:
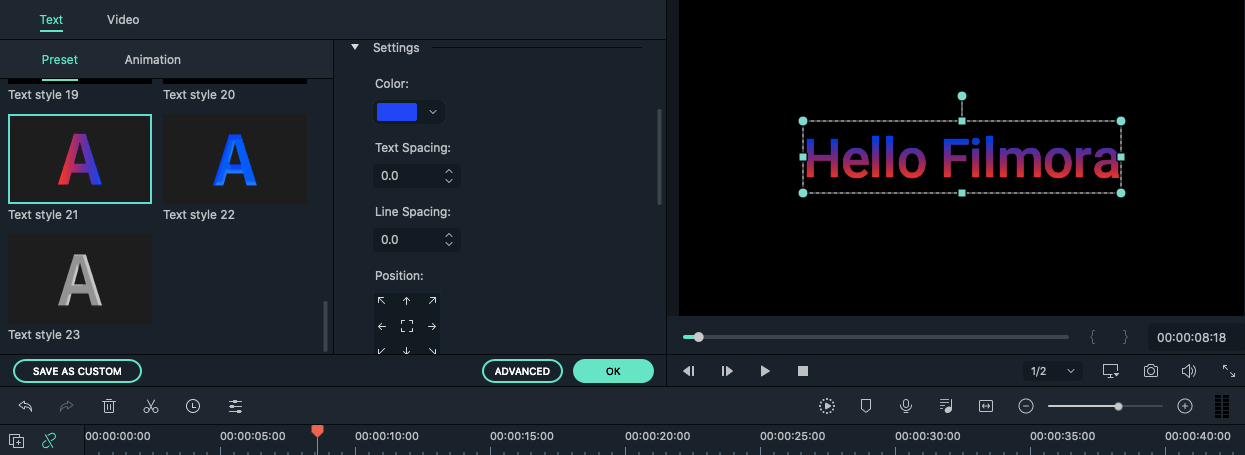
Double click on the text effect in the timeline to open the Text Editing panel and type in your message. You can then modify the properties (font, spacing, size, style, alignment, color, and more) of the title effect.
Click on the Font drop-down menu to change the style of your text. You can also download a font from the internet, install it on your OS, and then use it in Filmora.
Note: If you download a font from the internet you will have to restart Filmora for Mac before that font becomes available in the software's font library.
To preset styles to text effects:
Go to the Preset tab of the Text Editing menu and click the thumbnails of the preset styles to apply them.
To change the position of text in the Preview Window
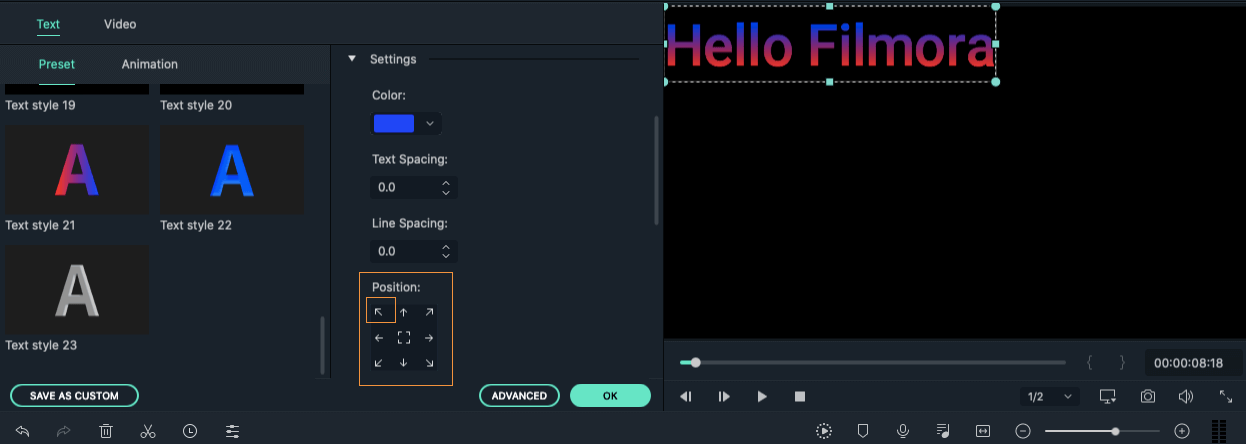
You can set a position for your text by changing the Position parameters in Text Editing panel. You can also click and drag your text in the preview window to move it where you want.
To adjust the duration of text effects
The default duration of all the text effects is 5 seconds, but you can change that by dragging either of a text effect’s edges in the timeline. You can also click on the Duration icon ![]() to change the effect’s duration.
to change the effect’s duration.

If you want to change the default duration of all title effects in Filmora go to the Wondershare Filmora menu, click on Preferences, and then enter the new default duration beside Effect Duration.

To Apply or Change Text Animations
In the Text Editing panel click into the Animation tab. Filmora offers more than 80 different text animations you can apply by double clicking on an effect to preview it and then clicking OK to apply it.

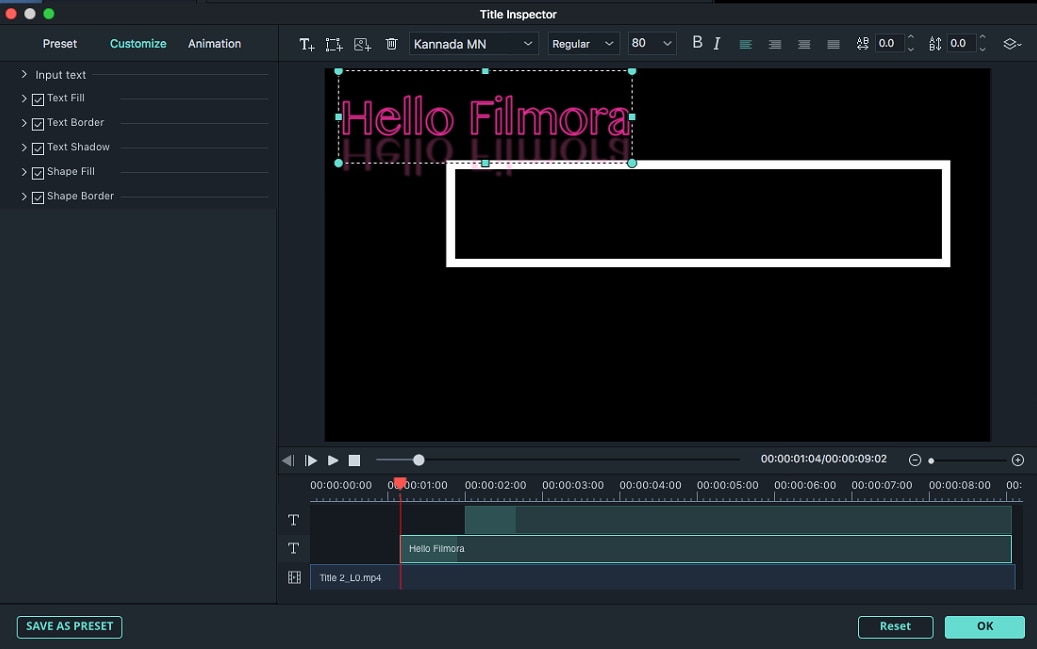
Click on the Advanced button in the lower right corner of the Text Editing panel to access the Title Inspector window.

Besides enabling you to add shadows or borders to the text you insert, the Title Inspector also lets you add new text boxes by clicking on the Add Textbox icon  . In addition, you can add shapes like bubbles and arrows by clicking on the Add Shape icon
  or insert an image by clicking on the Add Image icon
  . Each new element you add will be displayed on the timeline below the preview window in Title Inspector window.
Changing the color or opacity, of your text, or adding blur to the text, are also options you can access from the Title Inspector window.
Customizing Text Style
Besides entering customized text, the Customize tab contains five more options: Text Fill, Text Border, Text Shadow, Shape Fill and Shape Border.
Text and Shape Fill: in Text Fill you can choose from Color Fill, Image Fill or Gradient Fill. In Shape Fill, you can choose Color Fill or Gradient Fill.
 to load your own image and have that fill your text.
Tip: You can drag the slider below to set the Blur and Opacity (transparency) values.
Border/Shadow:
Add a border around the letters of your text or a shadow behind them. You can drag the Blur slider to blur the text shadow or border or the Opacity slider to adjust the transparency.
Filmora for Mac lets you save customized text effects from both the Title Inspector and the Text Editing panel. Once you’ve made all the adjustments you want to a text effect, click on the Save as preset button located in the lower left corner either menu.

A dialogue box will pop up where you can enter the name of the new preset.

The new preset will be saved in the Custom folder in the Titles tab.
All title effects in the timeline can be removed by selecting them and pressing the Delete key on your keyboard or by clicking on the Delete icon in the toolbar. You can also right click on the title effect you want to remove from the timeline and select Delete.
