For the Best Results, Use the Latest Version.
-
Preparations
-
Account
-
Get Started & Basic Settings
-
Compatibility & Tech Specs
-
Performance Settings
-
-
Creating Projects
-
Creating New Projects
-
-
Importing & Recording
-
Video Editing for Windows
-
Basic Video Editing
- Enable/Disable Clip in Windows
- Magnetic Timeline for Windows
- Dual Monitor Setup for Video Editing on Windows
- Select All Clips on Timeline for Windows
- Manage Timeline and Tracks on Windows
- Auto Ripple for Windows
- Split & trim video
- Crop & Pan & Zoom Video
- Compositing
- Change Video Speed on Windows
- Playing videos in reverse
- Mark In and Mark Out for Windows
- Markers for Windows
- Group editing
- Customizable Backgrounds for Videos and Images in Windows
- Video snapshot
- Using freeze frame
- Logo Reveal For Windows
- Apply auto enhance
- Applying drop shadow
- Adjustment layer for Windows
- Transforming
- Video Editing Ruler – Windows
-
Advanced Video Editing
- Drawing Tools for Windows | Filmora Guide
- Create Multi-Camera Clip
- Compound Clip for Windows
- Multi-Clip Editing for Windows
- Filmora Motion Blur | Windows
- Filmora Flicker Removal Guide | Windows
- Apply mask to video
- Creating a PIP effect
- Keyframe Graph Editor for Windows
- Add animation keyframing for Windows
- Keyframe Path Curve for Windows
-
AI-Powered Video Editing
- Smart Scene Cut for Windows
- Smart Short Clips for Windows
- AI Face Mosaic for Windows
- Filmora AI Eye Contact- Windows
- AI Video Enhancer for Windows
- AI Text-to-Video for Windows
- Planar Tracking for Windows
- AI Idea to Video for Windows
- Filmora Image to Video for Windows
- Filmora Image to Prompt for Windows
- Instant Cutter Tool for Windows
- AI Extend
- Filmora AI Relight - Windows
- Filmora AI Image Enhancer Guide - Windows
- AI Script to Video Guide for Windows
- AI Text-Based Editing for Windows
- AI Mate Editing for Windows
- Create with instant mode
- ChatGPT Plugin - AI Copywriting
- AI Smart Cutout
- Lens correction on Windows
- Auto reframe video
- AI Portrait Cutout
- Scene detection feature
- AI Smart Masking for Windows
- Make motion tracking
- Video Stabilization for Windows
- AI Video/Photo Object Remover for Windows
- AI Smart Search for Windows
- AI Skin Tone Protection for Windows
- AI Image for Windows
- Chroma key (green screen)
- Super Slow Motion with Optical Flow for Windows
- Video Denoise for Windows
-
-
Audio Editing for Windows
-
Basic Audio Editing
-
Advanced Audio Editing
-
AI-Powered Audio Editing
-
-
Text Editing for Windows
-
Basic Text Editing
-
Advanced Text Editing
-
AI-Powered Text Editing
-
-
Video Customizations
-
Video Effects
-
Audio Effects
-
Transitions
-
Stickers
-
Filters
-
Color Editing
-
Animations
-
Templates
-
Asset Center
-
-
Exporting & Share & Cloud Backup
Multi-Clip Editing for Windows
Wondershare Filmora already has a timeline feature in which users can drag and drop many videos and effects for professional editing. However, the new version brings a Multi-Clip Editing feature that allows users to edit two or more videos simultaneously. This feature will replace the "Batch Edit" feature of Filmora with a better functionality. Keep reading this guide to learn about the features and functionality:
Accessing Multi-Clip Editing
In case you are confused about how to edit multiple clips at once with Filmora, here is a step-by-step instruction manual for it:
Step 1: Install Filmora and Start a New Project
By accessing the official site of Wondershare Filmora, download it for Windows, and after that, open it. Then, log in to your account and click on the "New Project" tab appearing on the main menu.
Step 2: Import Media and Bring it to the Timeline
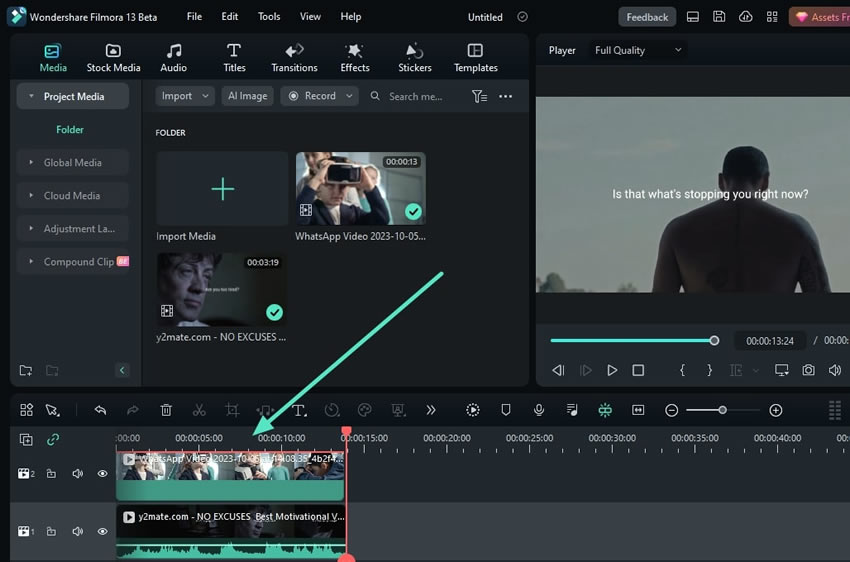
Once you are in the editing window of Filmora, click the "Click Here to Import Media" button just below the "File" icon and import your files in the "Media Library". Use the drag-and-drop method to bring files to the timeline.
Step 3: Initiate Multi-Clip Editing
You can drop these files on the same track or different ones to edit simultaneously. To do this, press the "Ctrl" button from your keyboard and, with the help of your cursor, select both clips, one after another.

Step 4: Right Click to Start Editing
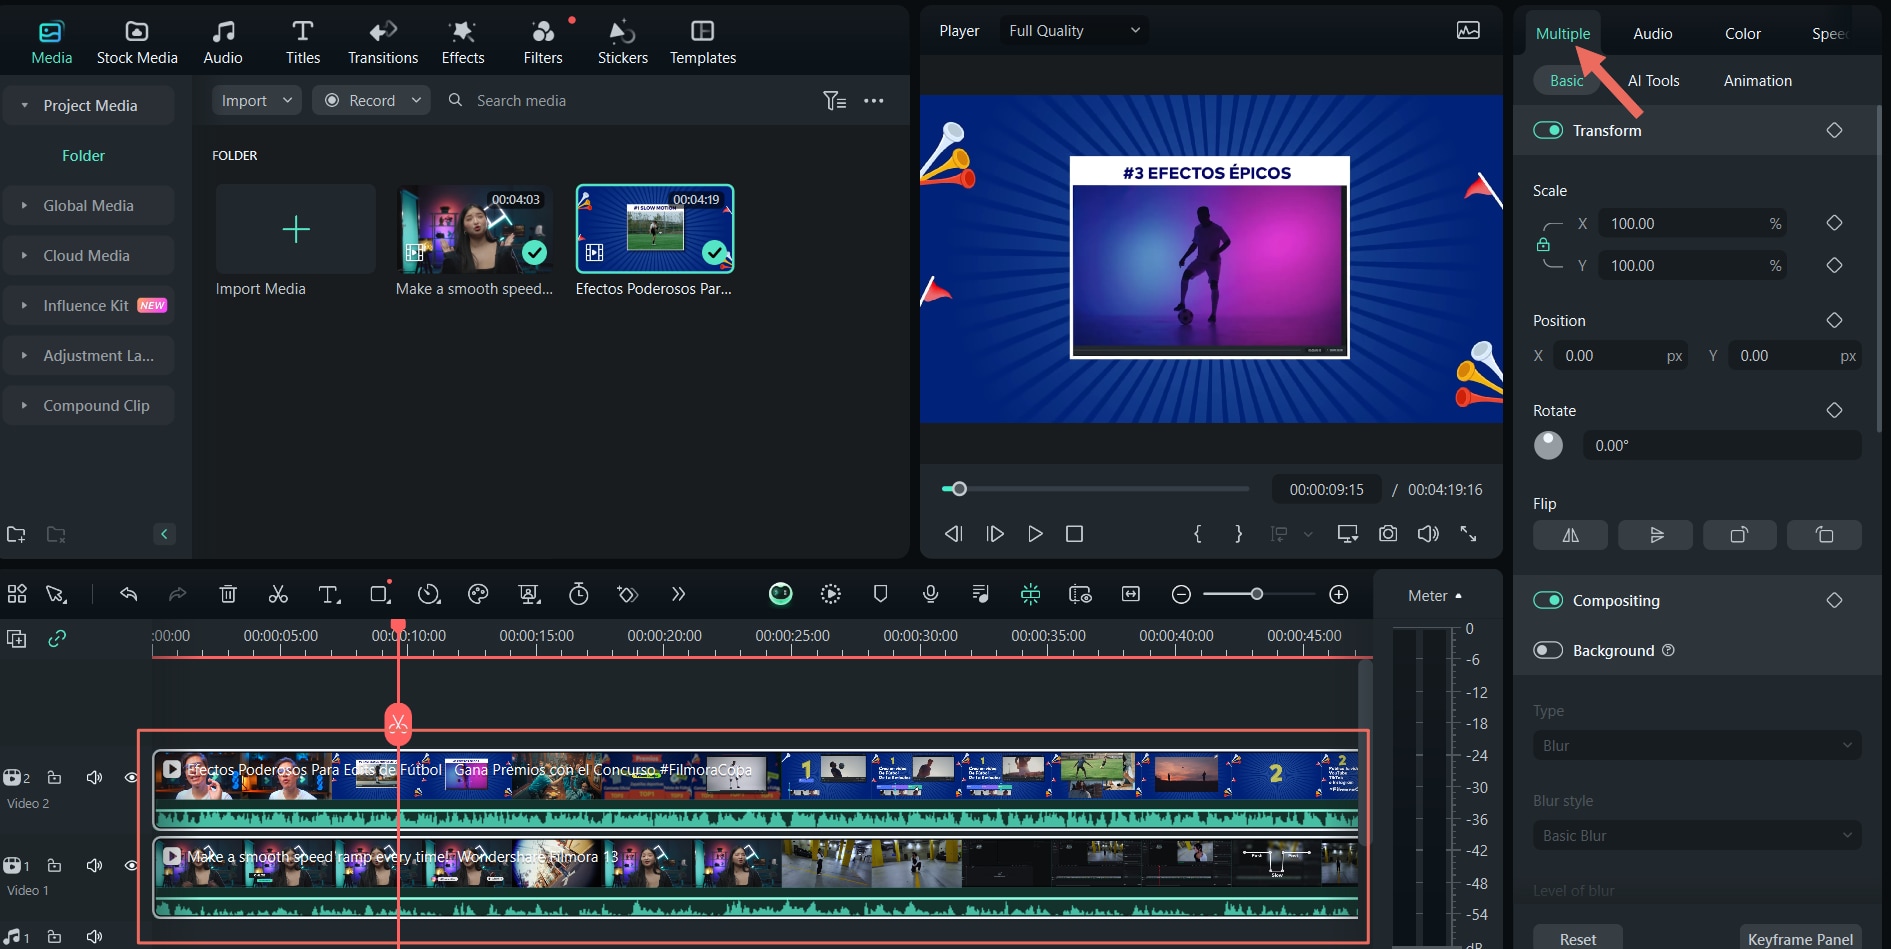
After selecting the multiple clips, right-click, and the dropdown menu will appear. From the options available, you can incorporate any function on these clips. For instance, you can enable "Compound Clip", and "Color Match", or you can "Adjust Audio" for both at a time.

Step 5: Perform Multi-Editing With Different Features
Multi-editing can be continued across different elements within the video timeline. For instance, if you have added a video clip and a title across it, you can select both and edit them simultaneously. For that, double-click on the video clip to open its settings at first. Continue to hold the "CTRL" key and tap the title on the timeline to open the multi-editing system.
Note:
There are a few things that are to be known about this feature. This feature does not support preset keyboard operations like "centering", "zooming", or making "vertical or horizontal shifts". Secondly, you cannot use the "Special Effects", "AI Smart Cutout", "Masking", "Motion Tracking", and "Stabilization" features in multi-clip editing as of yet.Related Posts
Featured Articles
10 Most Iconic Car Scenes in Film, from Car Chases to Emotional Road Trips
Car scenes in movies can be fast, funny, or full of feelings. Come see our top picks of the most iconic ones in movie history and learn how filmmakers bring them to life.
Best Ways to Change Facial Expressions with AI
Do you want to change facial expressions in a photo or video? Here are some of the best ways you can change facial expressions using an AI facial expression changer.
An Essential Yet Simple Guide on How to Make Reels on iPhone
Do you want to know how to make a reel easily with just your iPhone? AI Reels Maker could be your perfect solution! Here’s an essential step-by-step guide on creating Reels on an iPhone to help you get started.
Recommended User Guide
Add animation keyframing for Windows
This is a guide teaching you to add animation keyframing in Filmora.
Drawing Tools for Windows | Filmora Guide
This guide tell you how to use Drawing Tools feature in Filmora for Mac.
Filmora Flicker Removal Guide | Windows
Learn how to use Filmora Flicker Remover on Windows to remove video flicker and fix lighting issues quickly and easily.
