For the Best Results, Use the Latest Version.
-
Preparations
-
Account
-
Get Started & Basic Settings
-
Compatibility & Tech Specs
-
Performance Settings
-
-
Creating Projects
-
Creating New Projects
-
-
Importing & Recording
-
Video Editing for Windows
-
Basic Video Editing
- Enable/Disable Clip in Windows
- Magnetic Timeline for Windows
- Drawing Tools fo Windows
- Dual Monitor Setup for Video Editing on Windows
- Select All Clips on Timeline for Windows
- Dual Monitor Setup for Video Editing on Mac
- Manage Timeline and Tracks
- Auto Ripple for Windows
- Split & trim video
- Crop & Pan & Zoom Video
- Compositing
- Change video playback speed
- Playing videos in reverse
- Mark In and Mark Out for Windows
- Markers for Windows
- Group editing
- Customizable Backgrounds for Videos and Images in Windows
- Video snapshot
- Using freeze frame
- Logo Reveal For Windows
- Apply auto enhance
- Applying drop shadow
- Adjustment layer for Windows
- Transforming
- Video Editing Ruler – Windows
-
Advanced Video Editing
-
AI-Powered Video Editing
- Smart Scene Cut for Windows
- Smart Short Clips for Windows
- AI Face Mosaic for Windows
- AI Video Enhancer
- AI Text-to-Video for Windows
- Planar Tracking
- AI Idea to Video for Windows
- Image to Video for Windows
- Instant Cutter Tool for Windows
- AI Extend
- AI Script to Video Guide for Windows
- AI Text-Based Editing for Windows
- AI Mate Editing for Windows
- Create with instant mode
- ChatGPT Plugin - AI Copywriting
- AI Smart Cutout
- Lens correction
- Auto reframe video
- AI Portrait Cutout
- Scene detection feature
- AI Smart Masking for Windows
- Make motion tracking
- Stabilization
- AI Video/Photo Object Remover for Windows
- AI Smart Search for Windows
- AI Skin Tone Protection for Windows
- AI Image for Windows
- Chroma key (green screen)
- Super Slow Motion with Optical Flow for Windows
- Video Denoise for Windows
-
-
Audio Editing for Windows
-
Basic Audio Editing
-
Advanced Audio Editing
-
AI-Powered Audio Editing
-
-
Text Editing for Windows
-
Basic Text Editing
-
Advanced Text Editing
-
AI-Powered Text Editing
-
-
Video Customizations
-
Video Effects
-
Audio Effects
-
Transitions
-
Stickers
-
Filters
-
Color Editing
-
Animations
-
Templates
-
Asset Center
-
-
Exporting & Share & Cloud Backup
Wondershare Drive Basic information
Wondershare Drive is a cloud storage for work and content creators. You can safely store and share photos, videos, files and other contents without the device limitation.
Index
Main Function
- Free 1G cloud storage space upon activation;
- Provide upload, download and share operations;
- The files that can be uploaded are: project documents (including packaging), project templates, finished videos
- Support macOS/Windows interoperability and collaboration;
- A variety of membership levels to choose from to meet the different needs of users.
User Scenario
- Students make videos on the school computer, back up the project to the cloud disk, and log in to the account at home to continue editing and perfecting;
- Internet celebrities share their engineering templates with their fans for use.
- Users with Cross-Platform Plan can upload the materials from mobile and edit the project on desktop.
- As a business client in the video industry, constantly sending videos back and forth for review and modification can be inconvenient. By utilizing an online link shared with the video editors, you can provide immediate feedback and view changes as soon as they are made.
Use Wondershare Drive in Filmora
After you get 1GB Cloud Storage in Filmora, you can do it with these:
- Upload your videos and project files.
- Download your videos and project files.
- Share your videos and project files.
Workspace Interface
Here is the introduction of the features in the workspace interface.
Media File
Here is where to save your uploaded video. You can drag or drop your locally saved video to this section. Then, the clip will be displayed here, available to be renamed, shared, viewed, or downloaded.
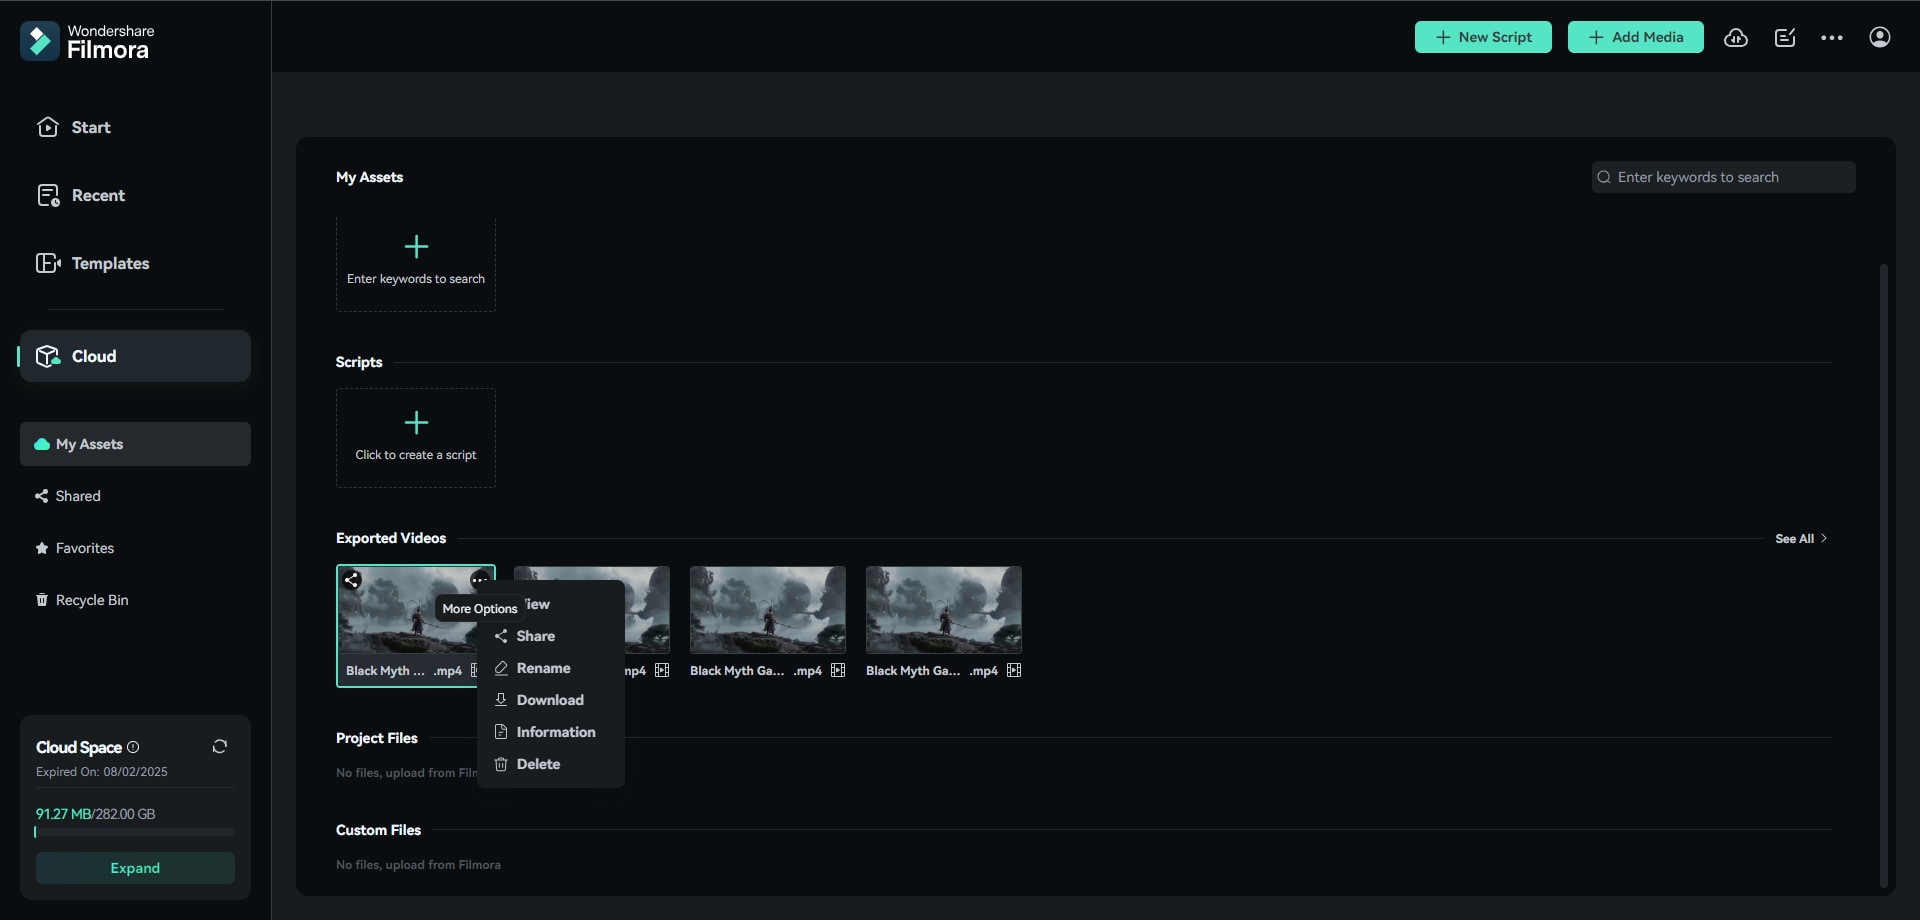
Note:
The following are tips on how to share and comment on your videos.
- Share
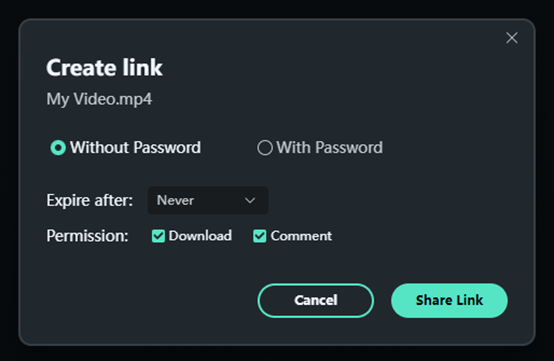
The Share feature can create a link for you to send to other people. You are able to share the link With Password or Without Password.
- If you choose to contain an Access code, it will be given automatically with four characters. It's uneditable.
- The expiration of the link can be set from 1 day, 7 days, 30 days, to Never.
- Permission, including Download and Comment, can also be set.
- View
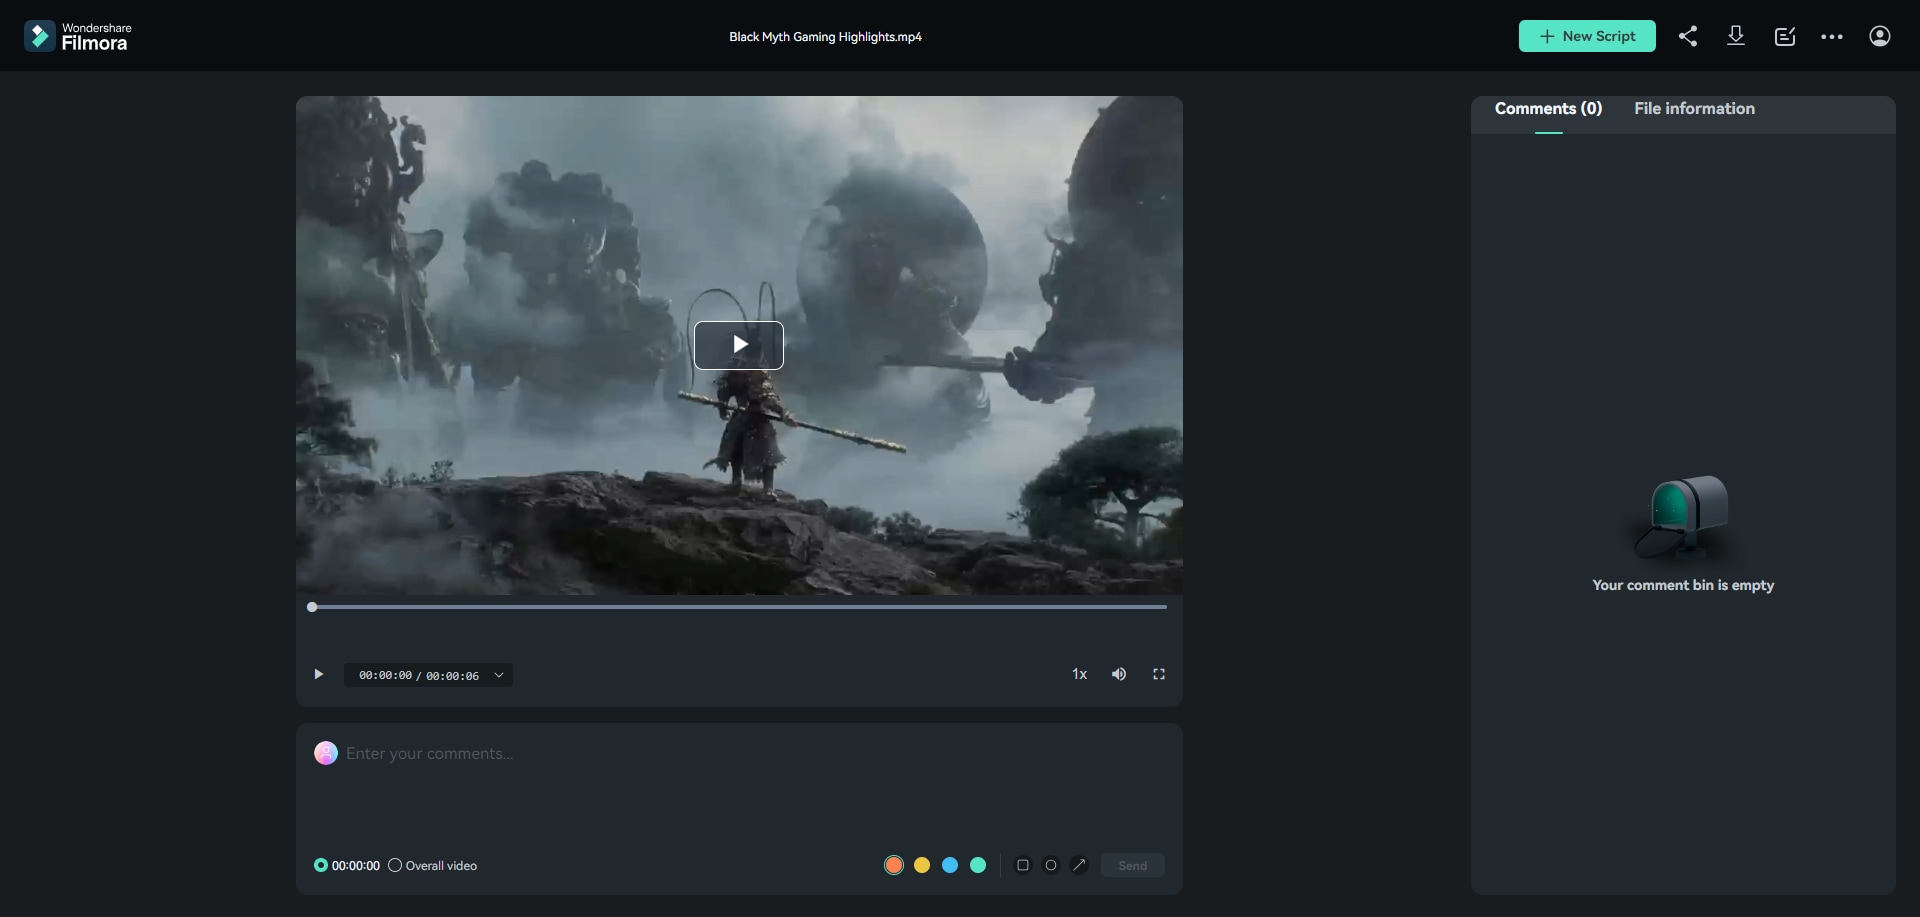
Here is where you can send feedback on the video. You can select to comment on the exact time of the clip or the Overall video. Apart from noting down your own views, you can invite others to leave an opinion by sending them the link to the video.
Finished Videos
Here shows your exported videos if you've uploaded them from Filmora after editing.
Project Files
This section displays your project files uploaded from Filmora.
Shared Files
You can check the recordings of all videos you have shared. It allows you to view the clips, find the link to the video, and adjust the expiration time or permissions.
Recycle Bin
In the Recycle Bin, you can find accidentally deleted files and restore them in Media Files.
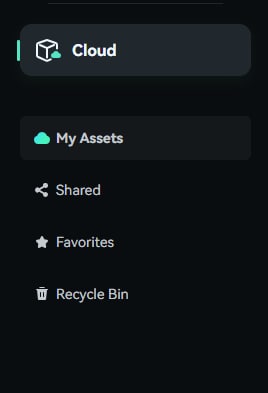
If you want to learn more about Wondershare Drive and get more cloud storage, please visit Wondershare Drive to get more information.
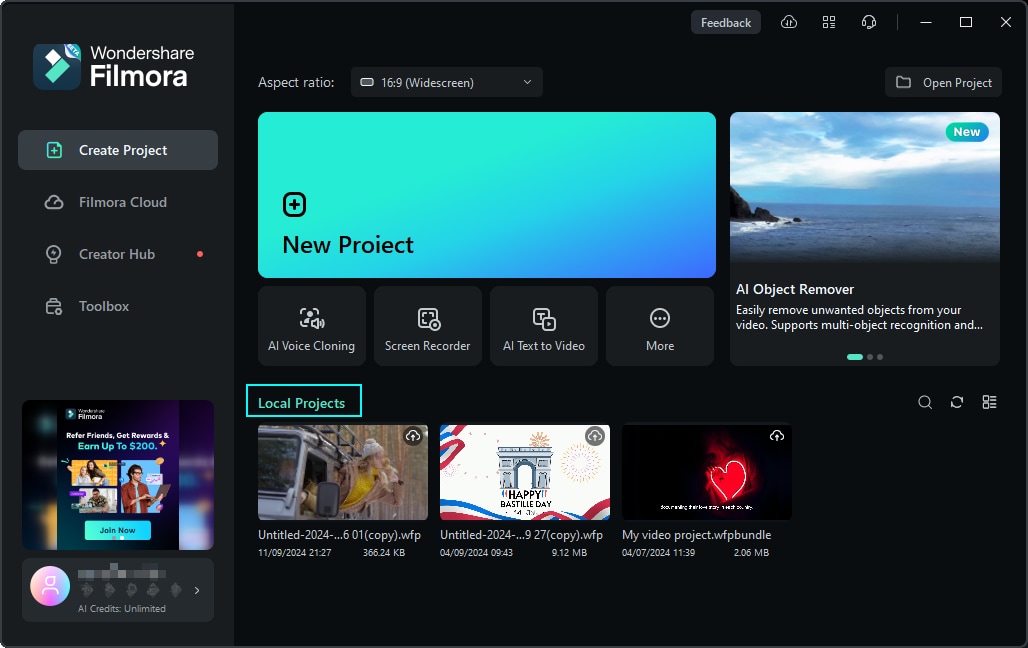
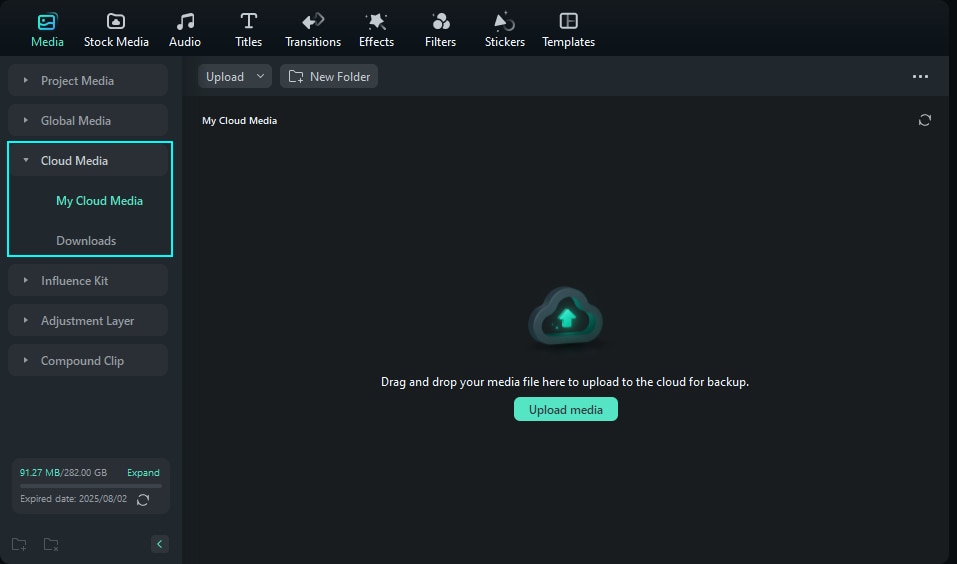
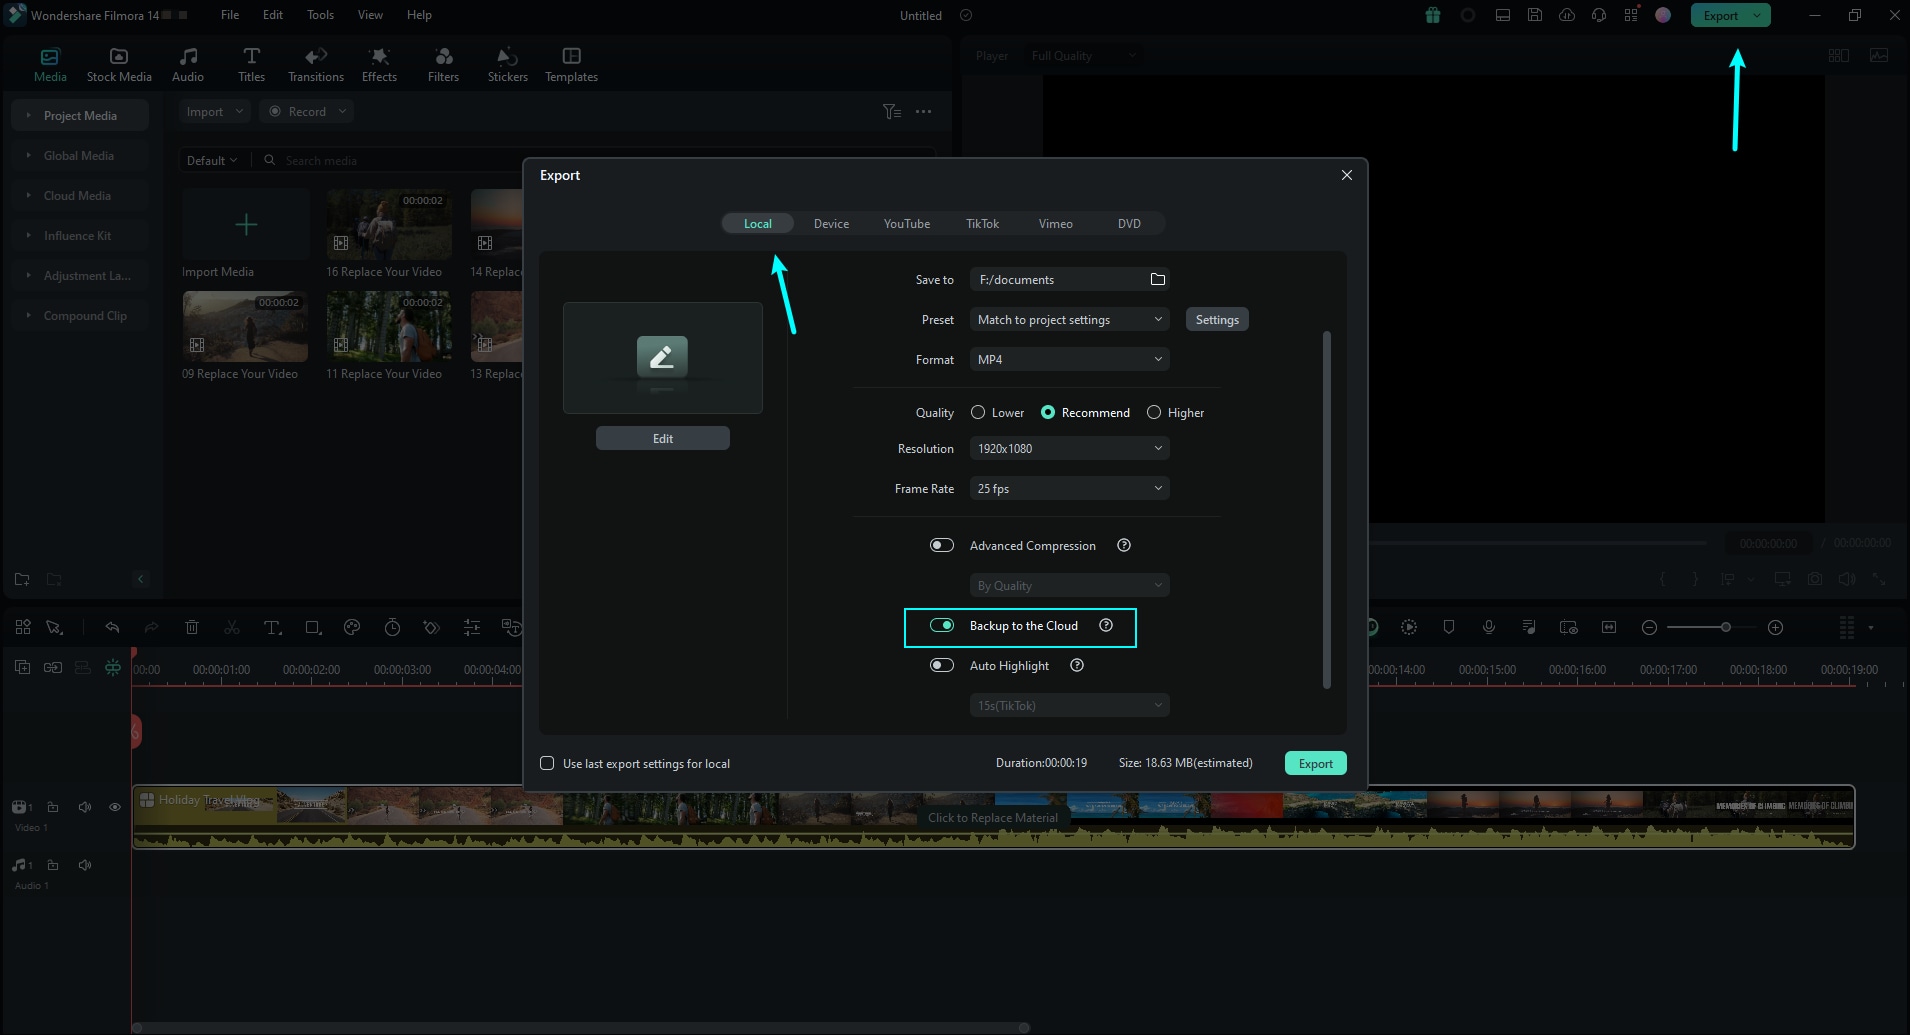
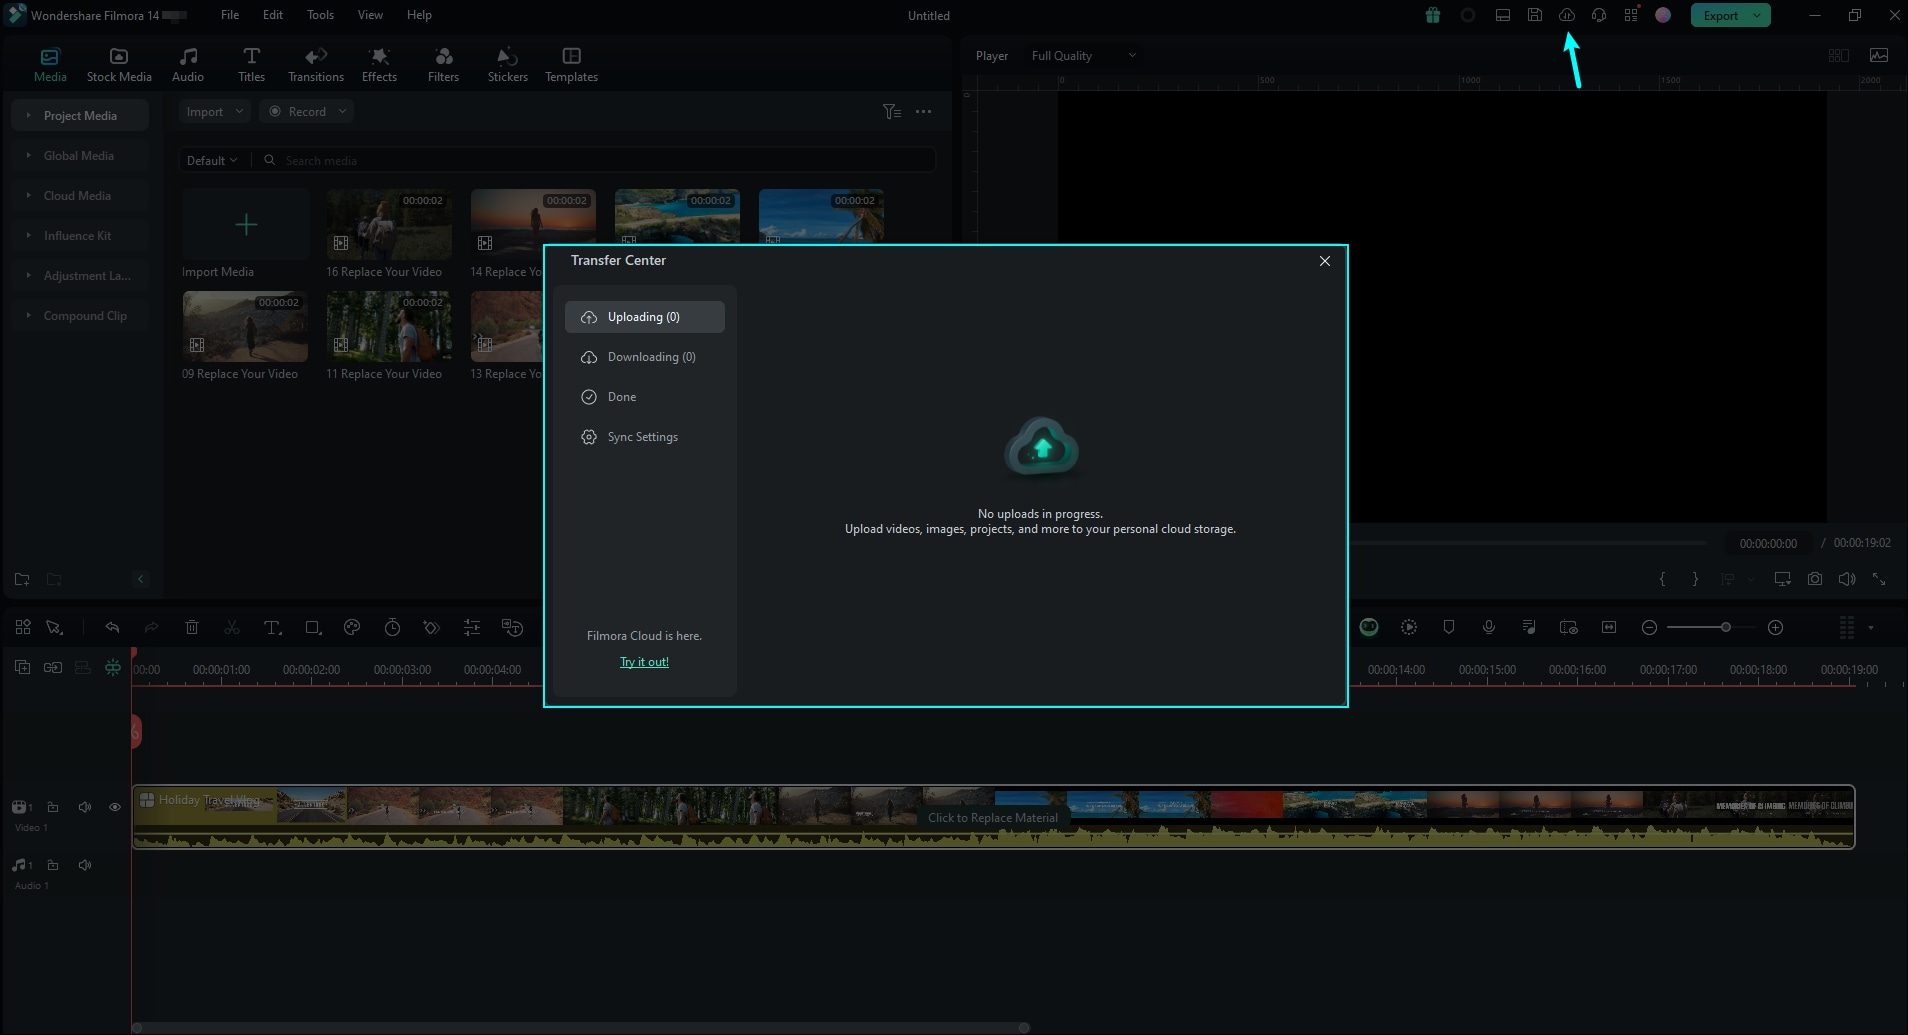
Function Entry of Cloud Backup
A total of 3 function entrances and 1 cloud disk task management. The entrance is as follows:
- Startup Window
- Cloud Media
- Video Export
- Cloud Disk Task Management
For more information, click to learn Wondershare Drive.
Related Posts
Featured Articles
Best Independence Day Video Makers with Templates to Try Now
Independence Day is the perfect time to celebrate, and creating an Independence Day video is a great way to join in the spirit. No need to worry, this article will guide you through exactly how to do it.
10 of the Best Happy New Year GIF Video Websites
Do you want to create a Happy New Year GIF video for your loved ones? Here are 10 of the best Happy New Year GIF video websites to help you out.
What Do Professional Movie Editing Timelines Look Like?
Learn how to create and manage movie editing timelines in Premiere Pro and Filmora. Our step-by-step guide makes it easy for beginners and pros alike.
Recommended User Guide
Wondershare Drive overview
Wondershare Drive-Filmora
