
 100% Security Verified | No Subscription Required | No Malware


 ChatGPT
 Perplexity
 Gemini
 Claude
 Grok
Grok
The "red eye" effect, where pupils seemingly glow red, can ruin a perfect picture. You only want to look that spooky when wearing colored contacts on Halloween. The good news is many tools can help you get rid of red eyes in photos on desktop, mobile, and online.
We'll show you how to get rid of red eyes in Windows with Photoshop, Lightroom, Red Eye Corrector, and Filmora, walking you through the process step by step. We'll also explore tips for preventing this annoying effect when taking pictures. Let's first see why it occurs.
In this article
Causes of Red Eye in Photos
Your eyes can become red in pictures because of the following causes:
- Using a camera flash in low-light conditions – Whether taking a photo in dim light or at night using a flash while looking directly at the camera lens, a bright burst of light enters your eyes because your pupils can't constrict fast enough.
- The proximity of the camera lens and flash – Compact cameras with a built-in flash can contribute to the red-eye effect in photos. The light reflecting from the retina bounces back at the flash and enters the camera lens because they're close to each other. That typically isn't the case with external flashes.
- Low melanin in your eyes – People with green or blue eyes have less melanin than those with dark eyes. Their eyes reflect more light from the retina, appearing red in photos when using a camera flash.
Regardless of the cause, you can quickly eliminate the red-eye effect, so don't delete your photos. Here's how to fix red eyes in pictures on any device.
How to Remove Red Eye in Photos?
You can use a red-eye remover on desktop, mobile, and online. Here are your best options.
How to Remove Red Eye in Photos on Windows and Mac?
Photoshop is among the best software for editing photos, offering professional-grade tools for flawless results. It has a steep learning curve, but correcting the red-eye effect is straightforward, even for beginners.
Photoshop lets you remove red eyes on Windows 11 or older and macOS 10.15 (Catalina) and newer. Here's how to fix red eye in Photoshop in a few clicks:
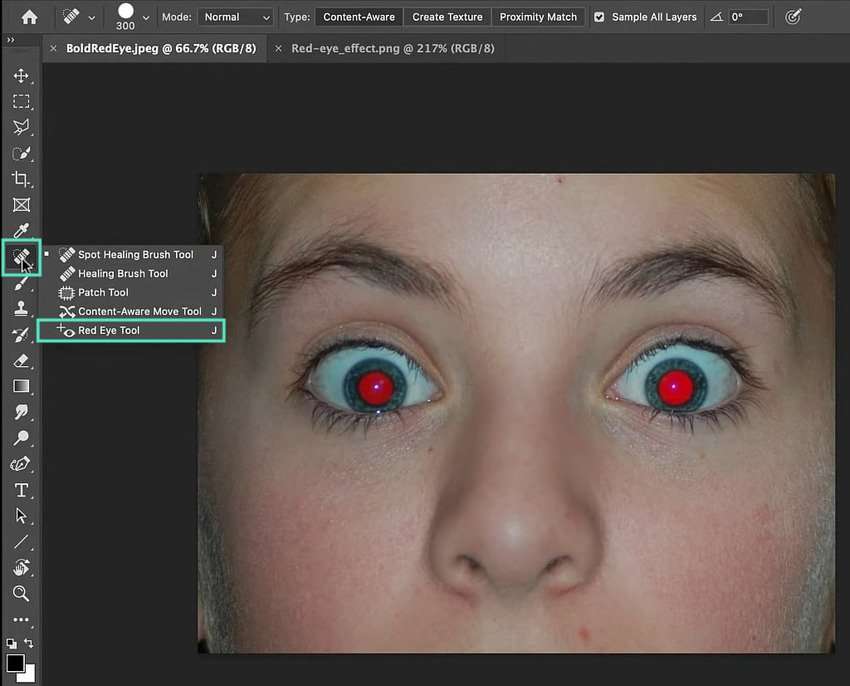
- Import your photo, click and hold the Spot Healing Brush in the left sidebar to expand its options, and select the Red Eye Tool.
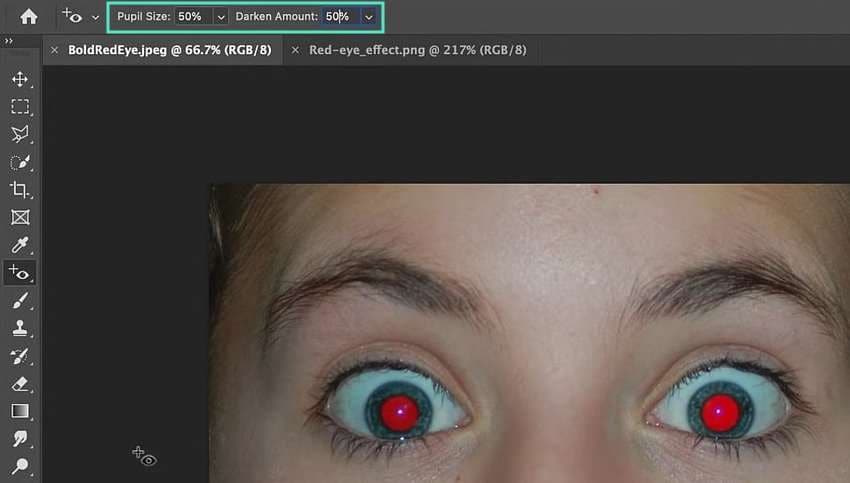
- Set the Pupil Size and Darken Amount in the Tool Options bar at the top. Their default setting is 50% (which usually does the trick), but you can change it if necessary.
- Position the Red Eye Tool inside one red pupil and click for automatic correction.
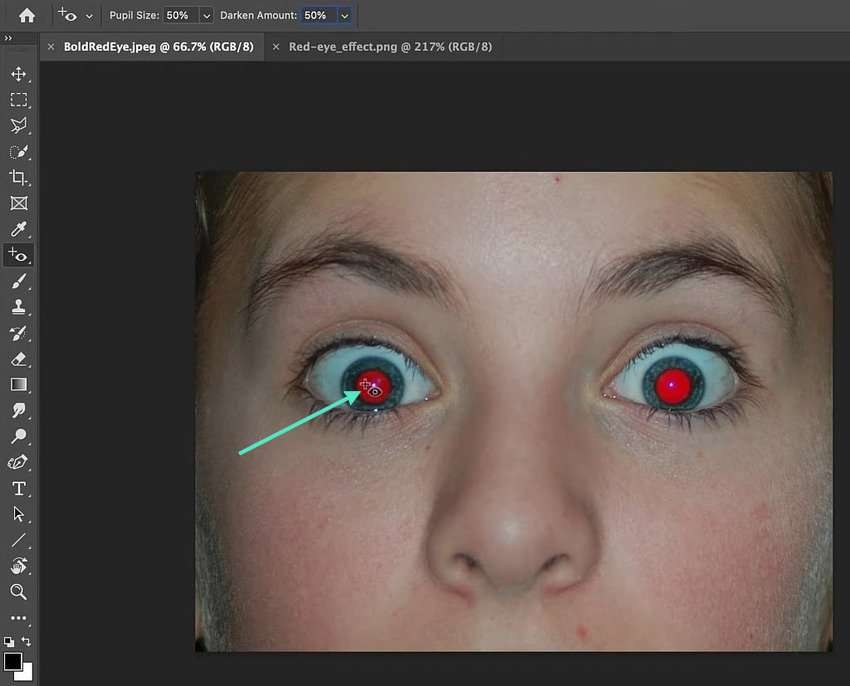
- Repeat the step for the second eye, or click and drag to draw a selection over the red eye.

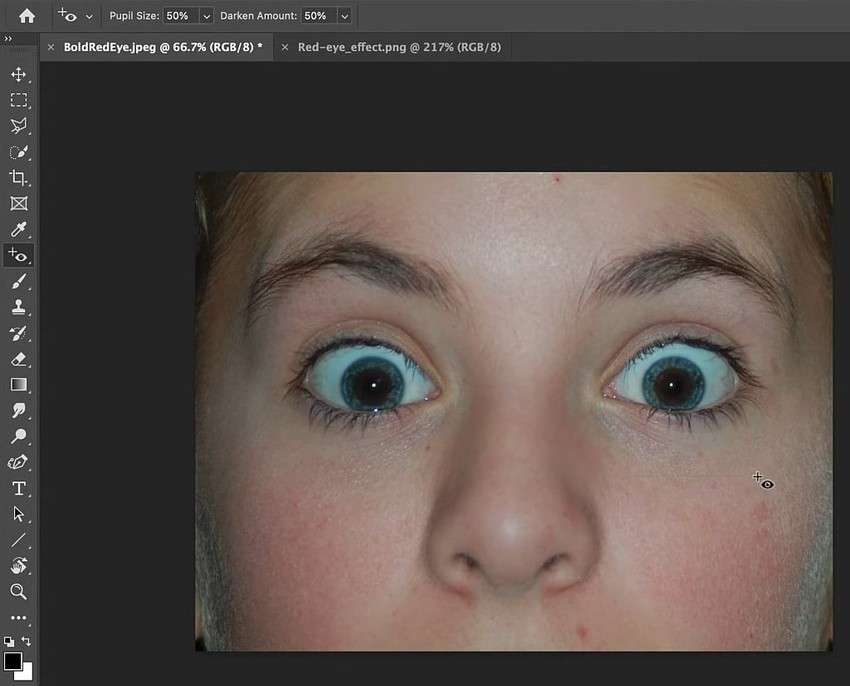
- Check the result. If the red color still comes through, increase the Darken Amount (and Pupil Size if necessary) and click the affected eyes.
How to Remove Red Eye From Photos Online?
Lightroom has fewer bells and whistles than Photoshop, making its interface more straightforward. It's also non-destructive, keeping all changes in its catalog instead of altering the original files.
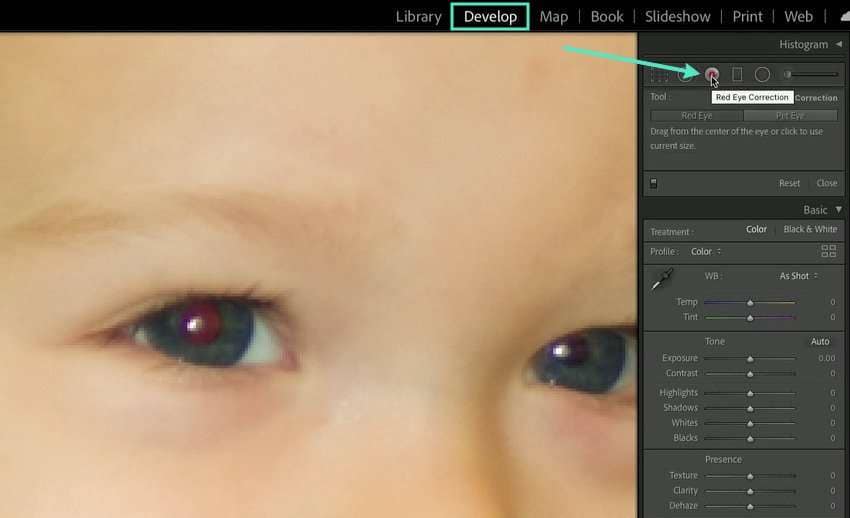
The red-eye removal Lightroom offers works like its Photoshop counterpart, except you can move the selection area for better precision. Here's how to remove red-eye online with Lightroom:
- Import a photo, switch to the Develop module, and click the Red Eye Correction button. Zoom in using the Navigator panel or a keyboard shortcut (Ctrl + Plus on Windows or Command + Plus on macOS) if necessary.
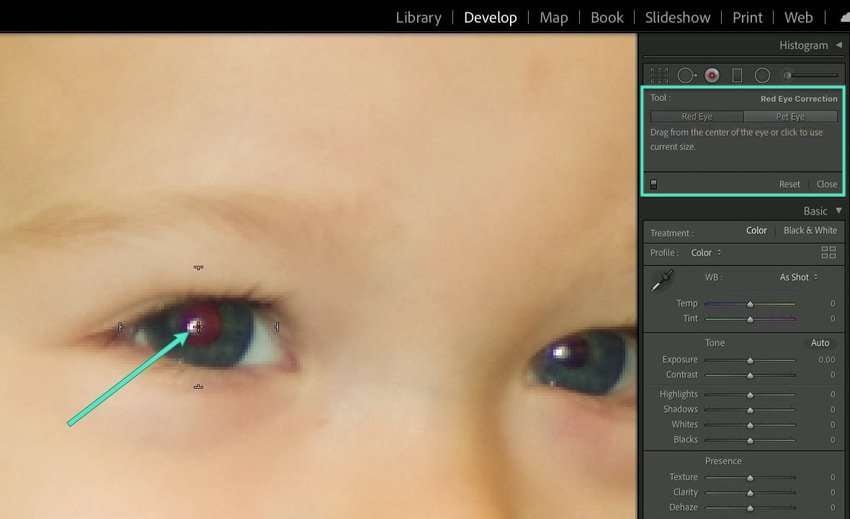
- The default setting under Red Eye Correction is Red Eye, so keep it if your subject is a person. Otherwise, switch to the Pet Eye tab. Then, click the center of one pupil to select the red eye. Do the same for the other eye.
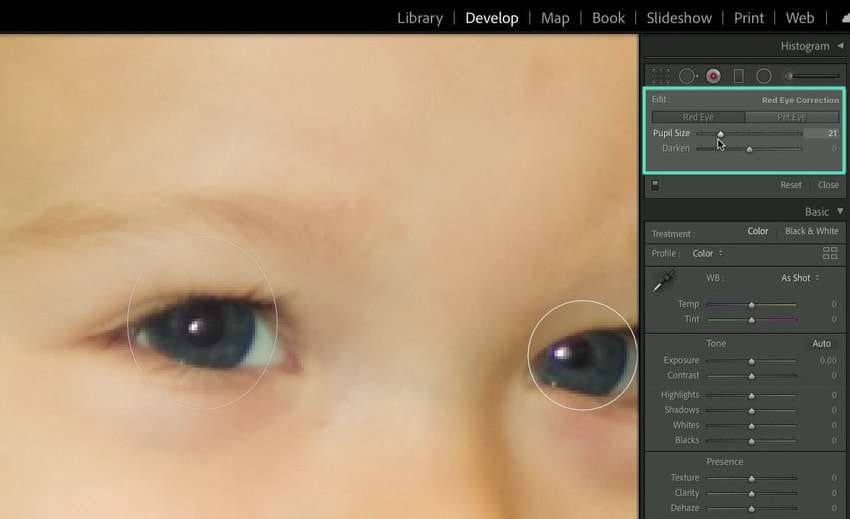
- Click any circled area to select it, and move the Pupil Size and Darken sliders to adjust the result.
- If the circled area needs adjustment because the subject isn't looking directly at the camera, activate the Hand tool to move the selection and refine the pupil size and color better.
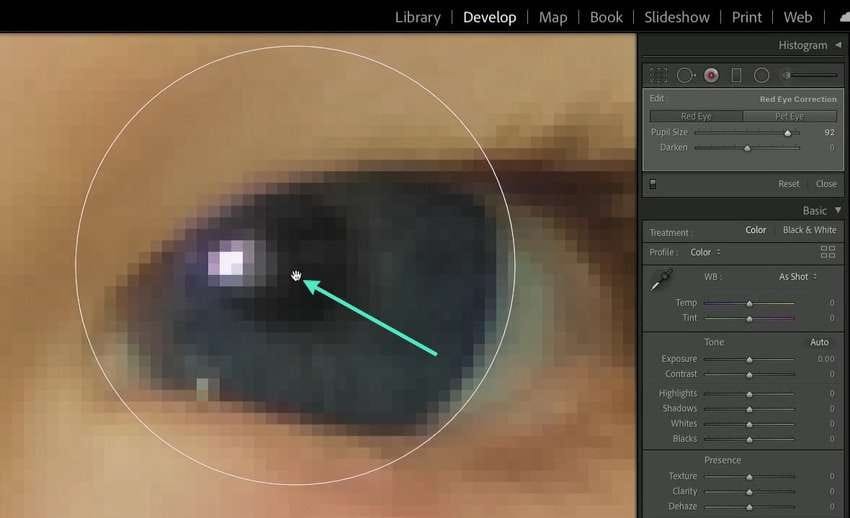
- Readjust the Darken and Pupil Size settings.
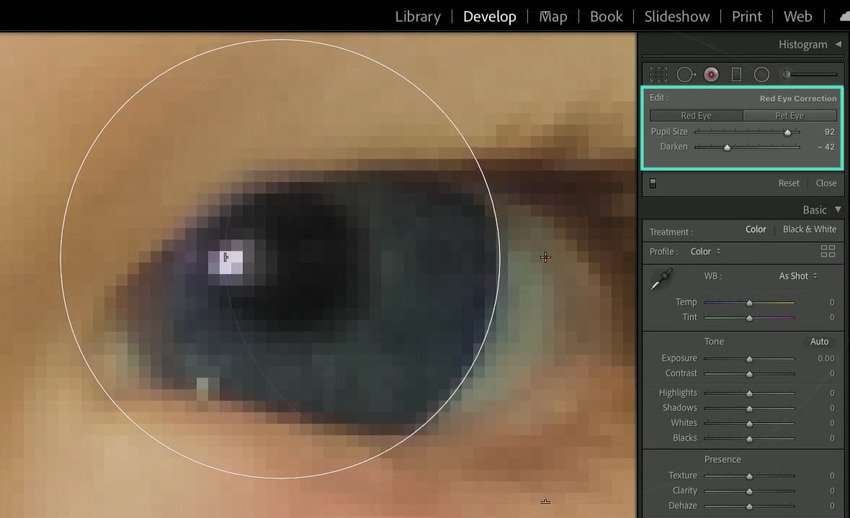
- Zoom out to see the result.
How to Fix Red Eye in Photos on Mobile?
Many mobile apps let you edit out red eyes, typically using AI. Some also offer multi-colored lenses to change the color of your pupils and irises for a fun effect.
Red Eye Corrector is among the best apps for fixing red eyes in photos because it does it automatically. It doesn't have editing tools, but you don't need them because the app serves its purpose perfectly, providing excellent results.
Here's how to use it:
- Download Red Eye Corrector from the App Store.
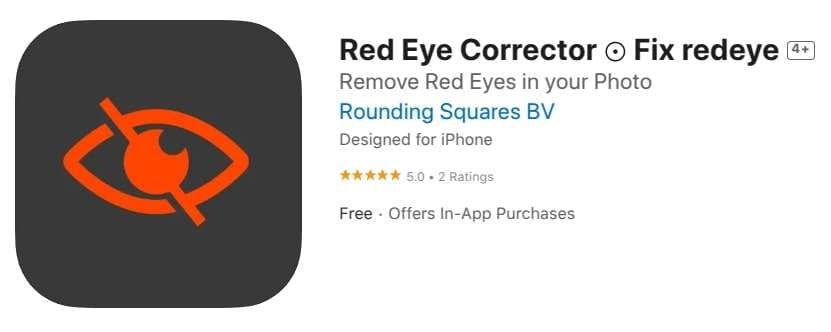
- Launch the app, tap Import Photo, and select one from your library.

- The app will automatically fix your red eyes. Compare the Original and Corrected pictures to see how you like the result. Tap the Download button to save the photo.

Replace the Red Eye With Special Eye Effects
Fixing your red eyes in photos is excellent to avoid looking creepy, but have you tried using fun eye effects instead? Filmora lets you add laser or cartoon eyes (among others) and put dynamic eye stickers for a hilarious effect.
 secure download

It can transform your photos and videos in many ways, besides helping you create something amusing to share with friends and family. It has abundant tools for editing videos, images, and audio, including AI features for animating pictures, matching colors across projects, removing backgrounds and unwanted objects, etc.
You can use it on Android and iOS, but the desktop version has many more features and is better for extensive customization. Let's see how to use effects and stickers to replace red eyes in photos. Download Filmora for Windows or Filmora for macOS and follow these steps:
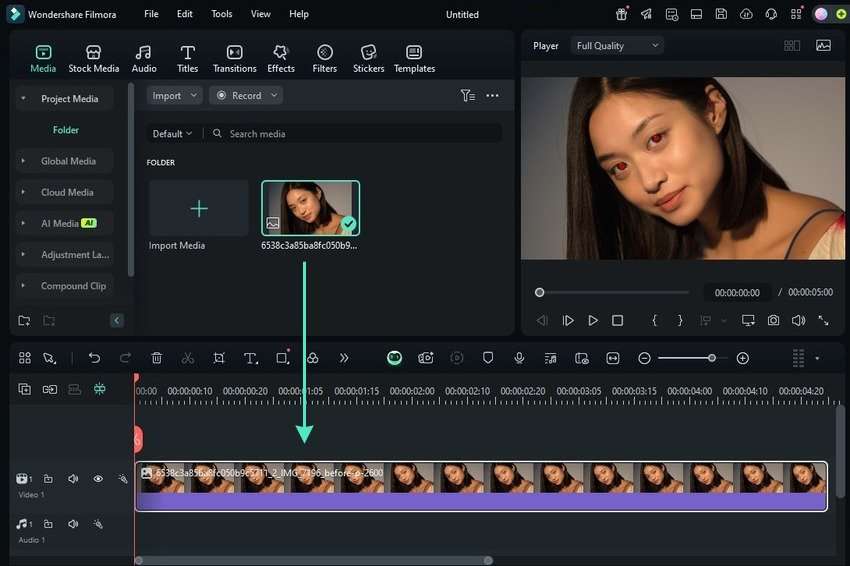
- Click New Project to open the editor.

- Click Import and choose a photo where you have red eyes.

- Drag and drop your photo onto the video track on the Timeline panel.
- Go to Effects and type "eye" into the search box. Click any effect to preview it. Once you pick one, drag and drop it above or directly on the video track.
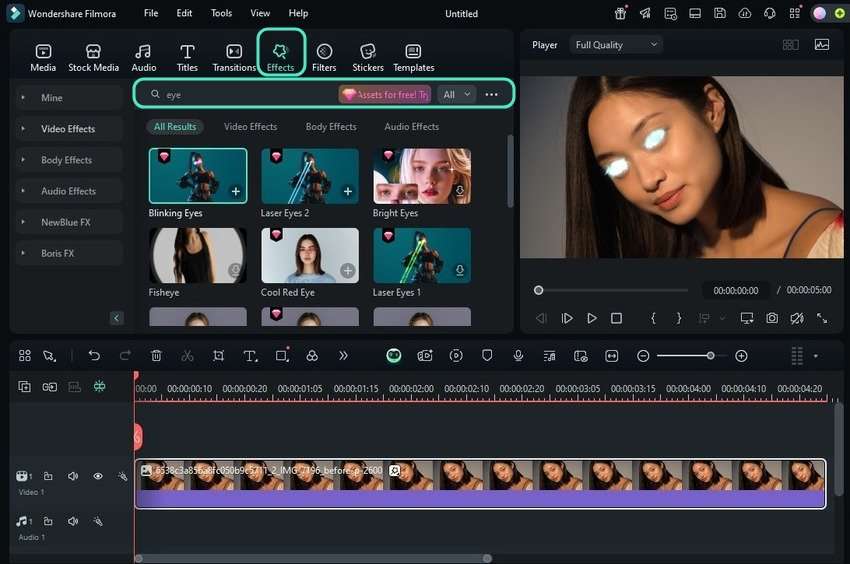
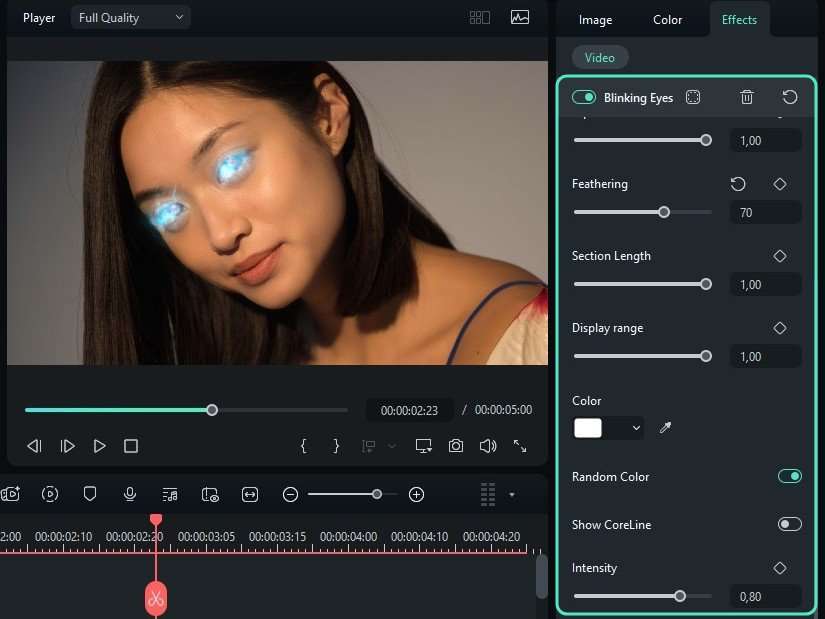
- Move the sliders to customize the default settings under Effects > Video on the Properties panel (some eye effects don't allow customizations). For instance, the Blinking Eyes effect in our example lets you adjust the Radius, Feathering, Zoom and Alpha Nodes, Section Length, Display Range, and Intensity to modify how the light and energy behave.
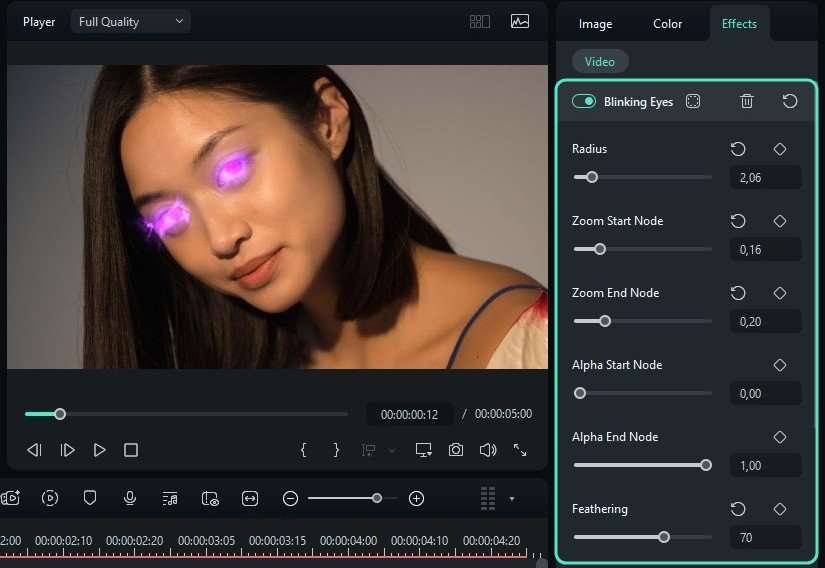
- Explore other settings (if available) to refine the result. For instance, Laser and Blinking Eyes let you choose a color or keep the Random Color setting.
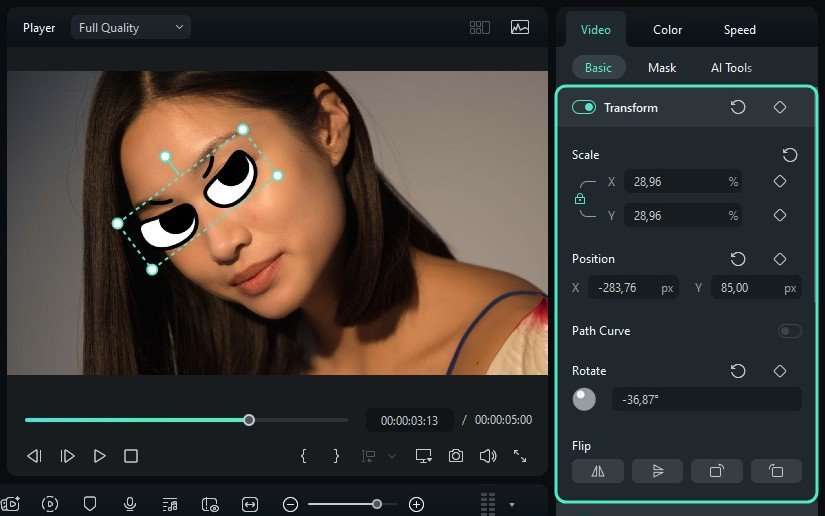
- If you don't want to use effects, go to Stickers and type "eye" into the search box. Drag your pick above the video track.
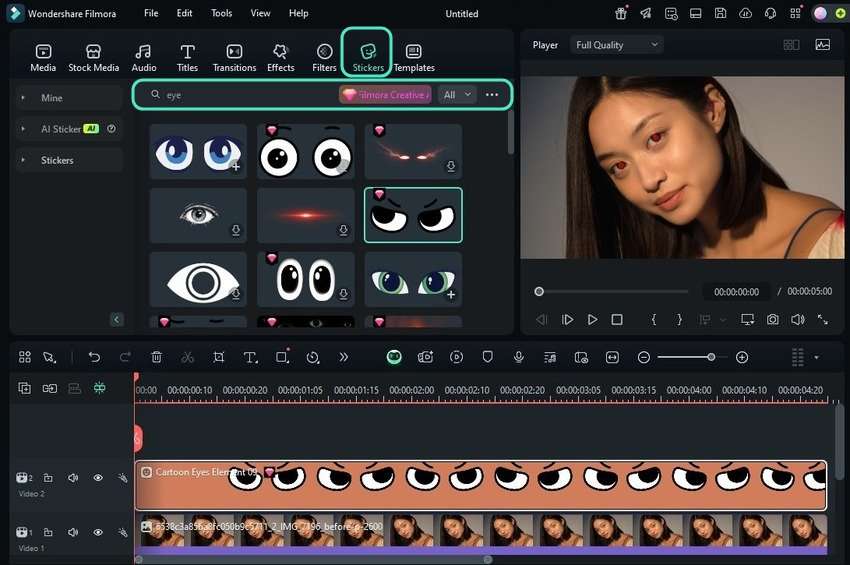
- Change the sticker's size and position using the Transform tools under Video > Basic on the Properties panel. You can also do it directly on the Player panel using the click-and-drag functionality.
Further Edit Your Eyes in Details
Filmora offers more effects than those that make funny photos and videos. For instance, its Beautify effect lets you refine your eyes, nose, face, and overall beauty (e.g., smooth your skin and make your teeth whiter). It's perfect for fine-tuning pictures in several clicks before fixing red eyes in another app.
Here's how to add the Beautify effect in Filmora and customize your eyes:
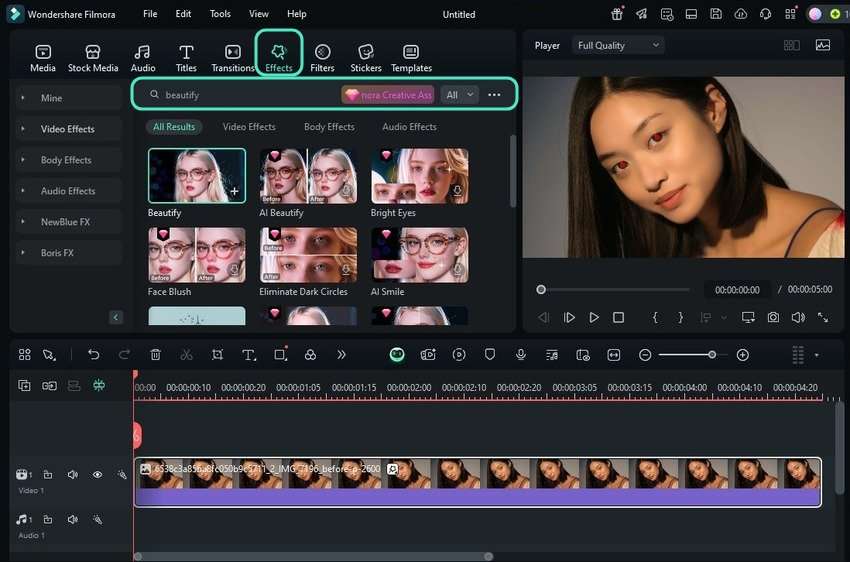
secure download - Go to Effects and search for Beautify. You can also find it under Body Effects > Retouch. Drag and drop it above or onto your timeline picture.
- Go to Effects > Video > Beautify and switch to the Eye tab. Change the size, distance, and angle, make your eyes rounder and brighter, and adjust the internal and external canthi (the parts where your eyelids meet).
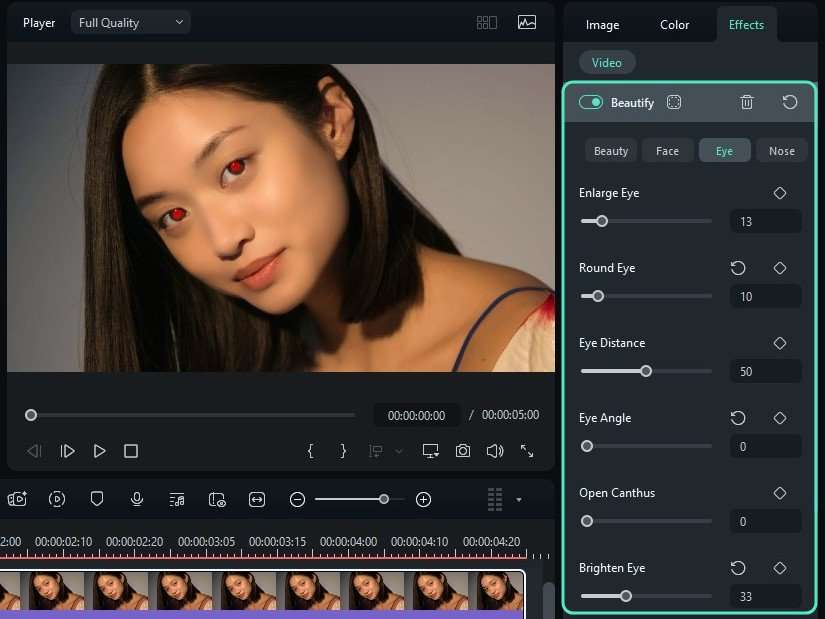
- You can also remove dark circles. Experiment with all settings to make your eyes perfect.

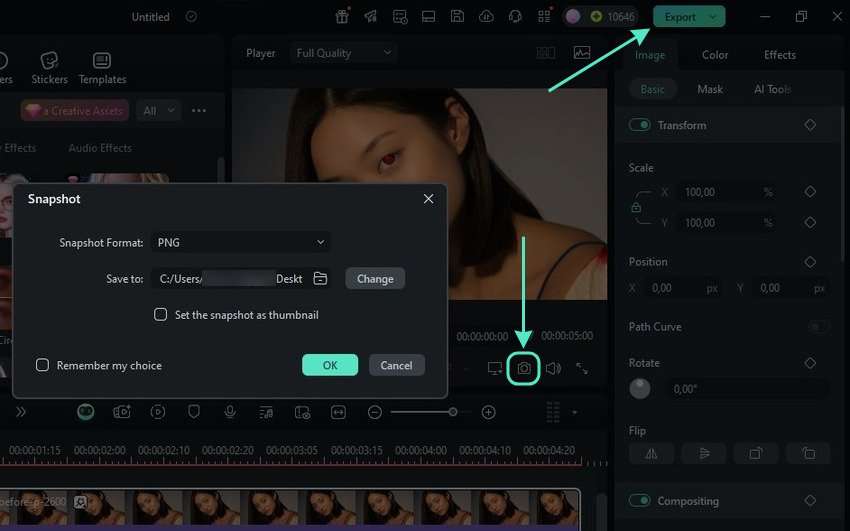
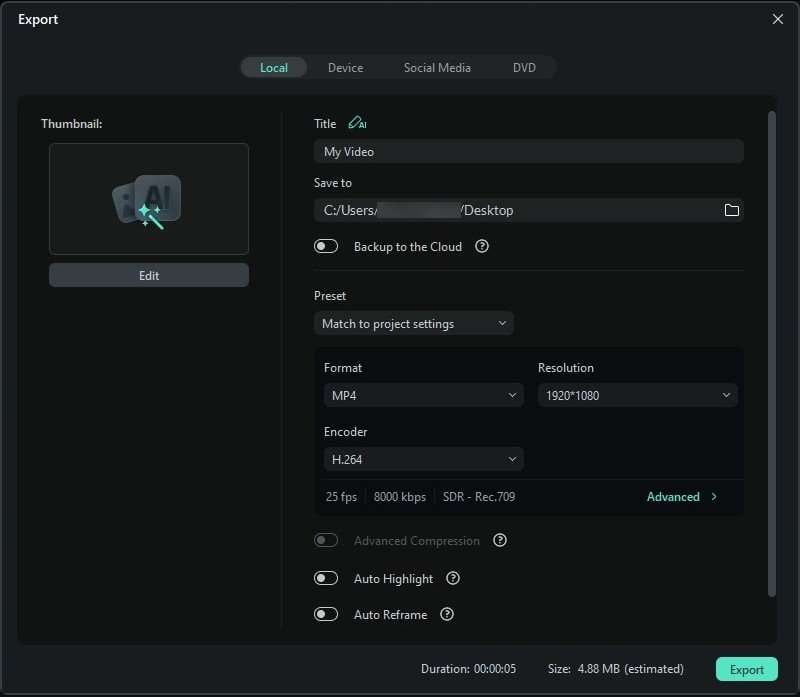
- Click the Snapshot button on the Player panel, choose a PNG or JPG format, and hit Save. Click Export to save your photo as a GIF or a video.
- Adjust the output settings and hit Export.
Tips for Preventing Red Eye in Photos
The following tips can help you avoid the red-eye effect in pictures:
- Use red-eye reduction mode – Most modern cameras have this function, which makes the flash go off twice. The initial burst of light constricts your pupils, while the subsequent flash fires shortly, not giving the pupils enough time to dilate and reflect more light.
- Don't look directly at the camera – When your eyes don't capture light from the camera's flash at a direct angle, they won't reflect it at the lens and appear red in photos.
- Place an external flash away from the camera lens – The farther your lens and external flash, the less light reflecting from the retina will bounce back at the lens.
- Brighten the environment – Pupils dilate in dark environments, so turn on more lights. If taking a photo outside at night, stand in a bright area (e.g., under a street light) and don't use the flash.
These tips will significantly improve your photos, eliminating the need to remove red eyes in Lightroom, Photoshop, or another app.
Conclusion
The frustrating red-eye effect doesn't need to ruin your photos. You can correct red eyes in photos with Photoshop, Lightroom, Red Eye Corrector, Filmora, and many other apps. However, only Filmora lets you replace them with fun eye effects and stickers, helping you make unique pictures and videos ideal for social media.
Try Filmora for free and take your editing to the next level with its ever-growing features and creative assets.
secure download 