- Final Cut Tutorial
- Multiple transition styles at your choice.
- Exclusive transitions that fits for photo slideshows.
- Add transitions without affecting total duration of the two clips.

 100% Security Verified | No Subscription Required | No Malware
3 Ways To Add Transitions In Final Cut Pro

Jul 28, 2026• Proven solutions
 TL;DR:
Final Cut Pro allows editors to apply video transitions utilizing keyboard shortcuts, the dedicated Transitions Browser, or the Menu bar, while Wondershare Filmora offers a less complex alternative for beginners.
● Press Command+T to instantly apply a default transition between clips, use Ctrl+Command+5 to open the Transitions Browser, and press Command+C followed by Command+V to duplicate the same effect across multiple clips.
● Users who prefer manual navigation instead of hotkeys can access the effects library by clicking the top-left Transitions icon or by selecting Window, Show in Workspace, and then Transitions from the menu bar.
● Wondershare Filmora provides an easier interface for macOS 10.14 or Windows 7 and later users, featuring previewable transition assets with adjustable durations that can be saved to a favorites folder for future access.
Ask AI for a summary
 ChatGPT
 Perplexity
 Gemini
 Claude
 Grok
Grok
Storytelling plays an important role in gaining the audience's attention in modern-day video making. If you abruptly switch from one frame to the next, you can kill the overall aesthetic of the video. Final Cut Pro is a well-known video editing tool that offers many methods to add video transitions. With proper Final Cut Pro transitions, as the viewer shifts to the next scene, a story can be built through a simple video.
Besides, you can also reflect your professionalism as a video editor through these resources. Thus, this article looks into the 3 effective methods of using Final Cut Pro to create a video with transitions.
Those who are not familiar with Final Cut Pro platform and finding it a little complex as a beginner can switch to Wondershare Filmora for Mac as it is one of the easiest professional tools available from Mac devices.
This software is loaded with all powerful features and possesses an interactive user interface for those who are just starting out with Video Editing.


You may also like: How to add effects in Final Cut Pro >>
When looking for a comprehensive video editor, Mac users look into Final Cut Pro. With its helpful AI features, it refines the quality of the videos to make them shareable. Besides advanced features, this tool also offers various basic utilities to fix your content. Users can also apply the built-in transitions to improve their storytelling powers. The following section features a leap into adding transitions in Final Cut Pro using various methods:
Part 1. 3 Methods to Add or Modify the Transitions in Final Cut Pro
- Method 1: Using Shortcut to Apply Transitions >>
- Method 2: Use Browser to Apply Transition >>
- Method 3: Use Menu Bar to Apply Transition >>
Method 1: Using Shortcut to Apply Transitions:
The most convenient way to add a transition using this tool is by using the shortcuts. Final Cut Pro has numerous transitions that streamline your workflow with a single click. From selecting a transition to positioning it, each function has a designated hotkey. Follow the instructions below to learn how to use Final Cut Pro to add transitions using shortcuts:
- Step 1. To start, import the desired videos and select the cut between the two clips. To open the Transitions Browser on the right, use the keyboard shortcut "Ctrl+Command+5. You can also use the "Command+T" keys to apply the default transition.
- Step 2. Change the default transition by using the "Command+5" keys to open the Transitions Browser. As the transitions library appears, right-click on the desired resource and select the "Make Default" option to use it as the default transition.
- Step 3. If you are working with multiple clips, you can apply the same transition to each one. To do this, enter the "Command+C" keys to copy the transition and "Command+V" to paste it where needed.

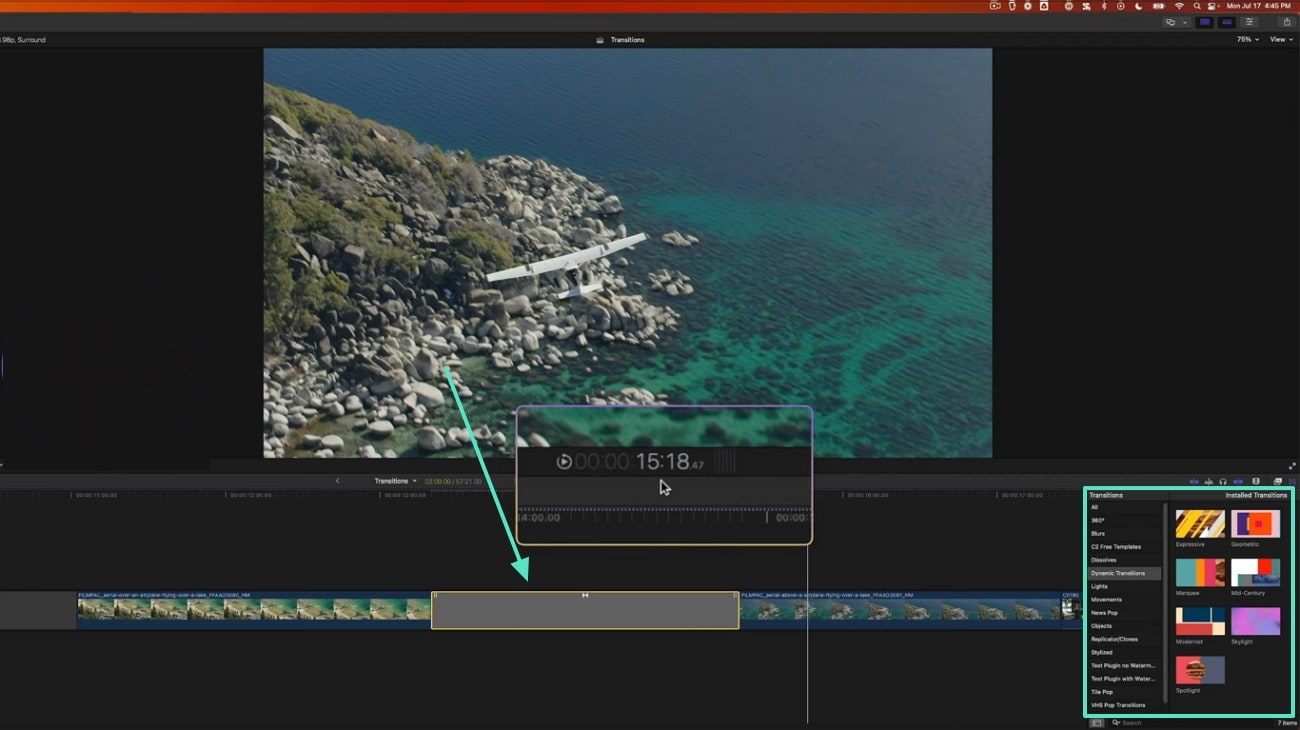
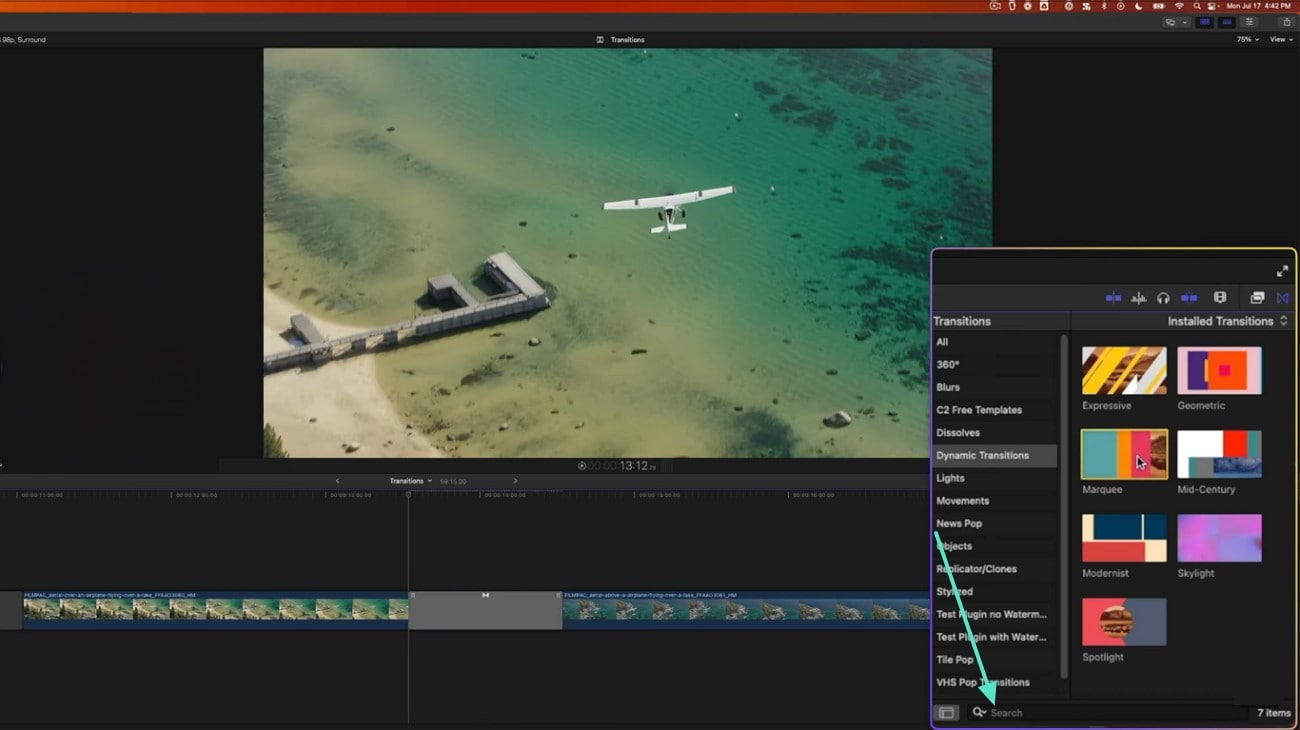
Method 2: Use Browser to Apply Transition:
If you want to select from a library of transitions, this will be the right method for adding them. Although using the Browser applies the default transitions, you can change them at any point. This technique allows users to quickly apply a transition without any extensive search. Follow the steps below and learn how to add transitions in Final Cut Pro using the Browser:
- Step 1. To start, click the Transitions icon in the top-left corner of the interface to access the Transitions Browser.
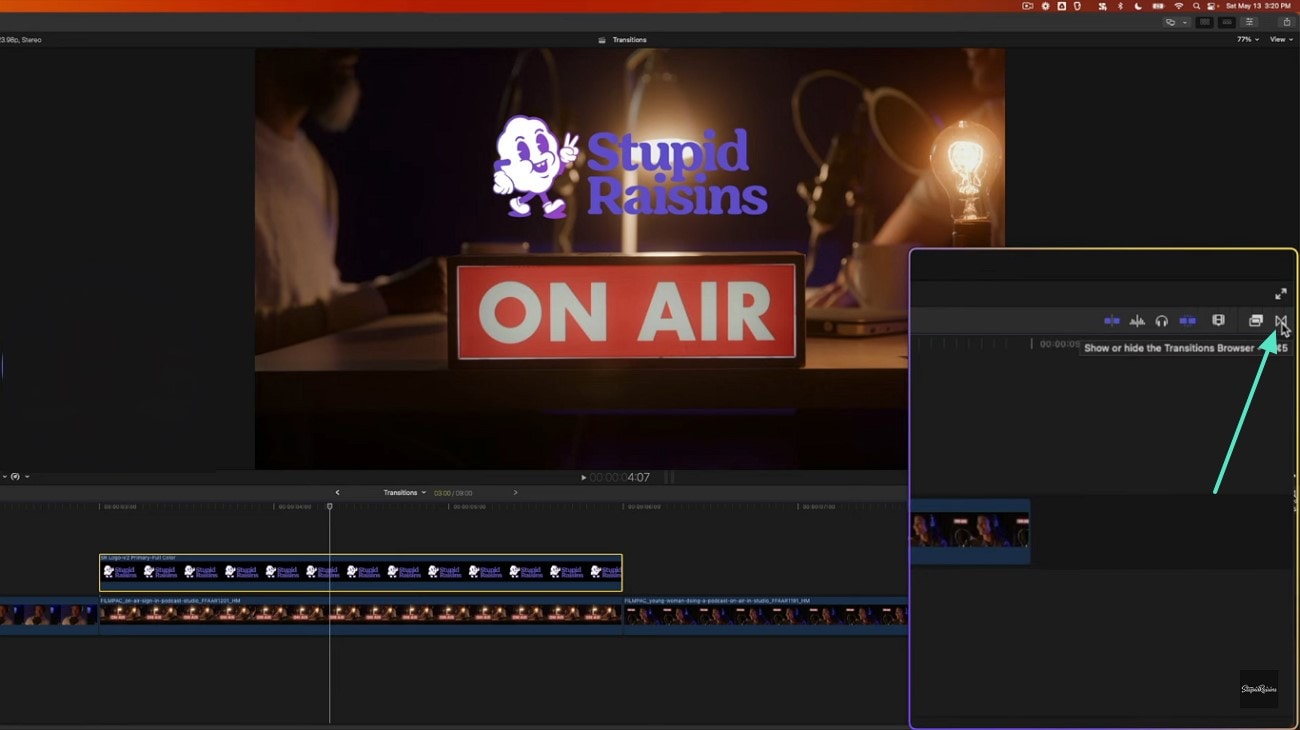
- Step 2. Use the categories on the left to select transitions or type the name of a transition in the search bar to apply it.
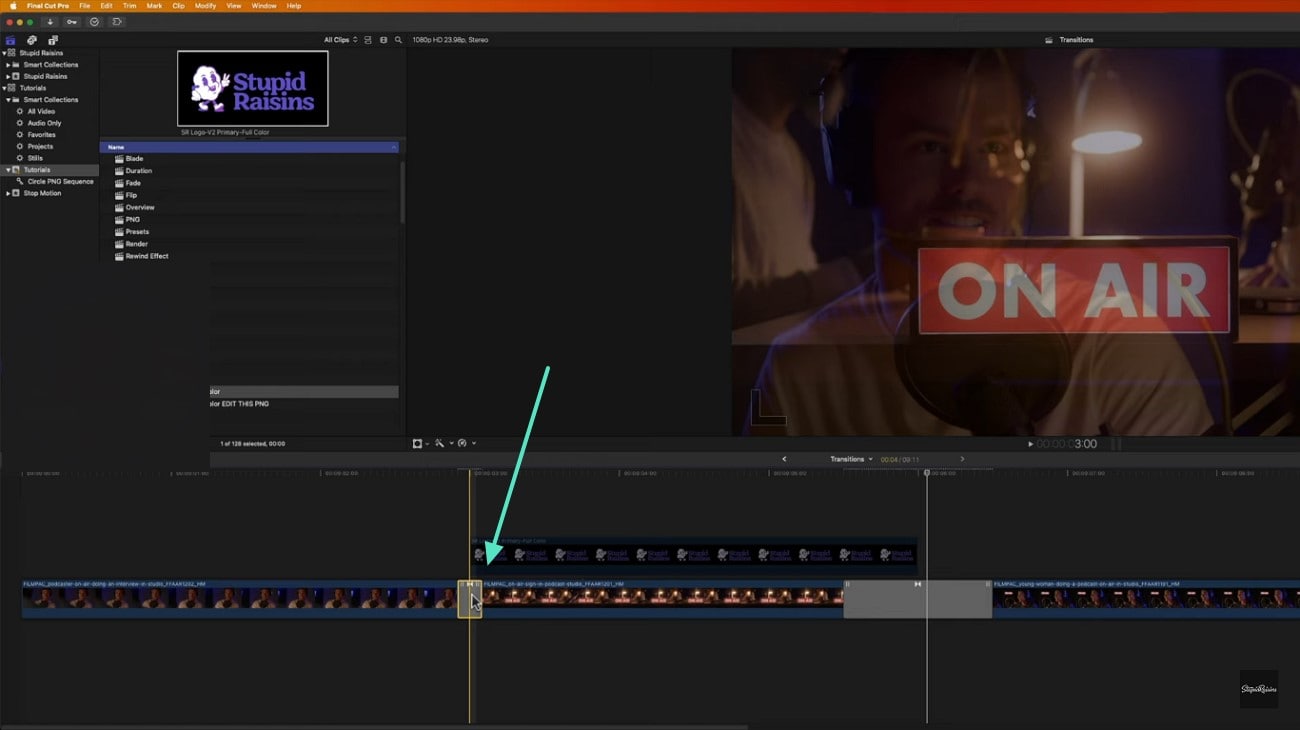
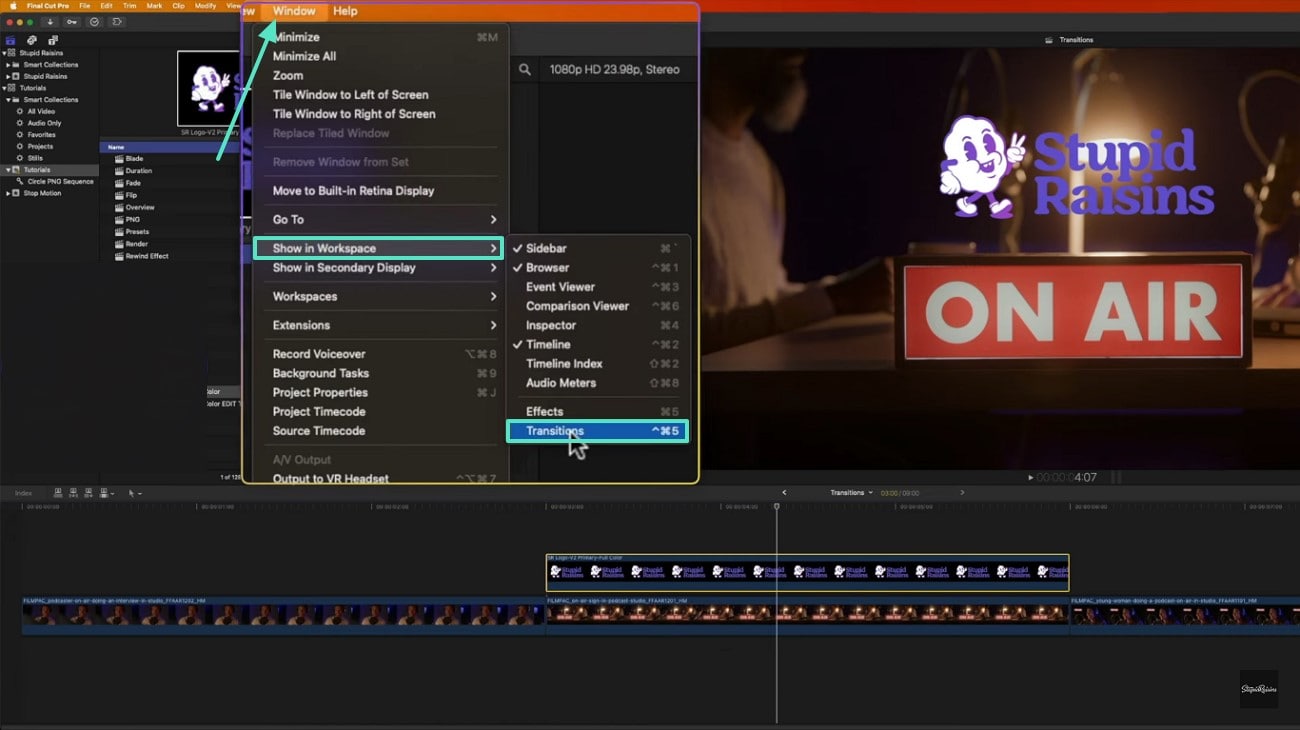
Method 3: Use Menu Bar to Apply Transition:
Using the Menu Bar for applying transitions can be helpful for beginners, as it is a direct method. It is an easier approach for users who are not comfortable using keyboard shortcuts. By following this method, you can control which transition you copy and where you paste it. The following guide is a detailed instruction on applying the Final Cut transitions using this method:
- Instructions. First, open a video in Final Cut Pro and open the "Window" tab from the menu bar. Hover the mouse over the "Show in Workspace" option to select the "Transitions" option. As the transitions panel opens on the right, select and apply the desired resource.
Related article: How to fade in/out audio in FCP >>
Part 2. Taking Video Transitions to Another Level with Wondershare Filmora
Having discussed where the transitions are in Final Cut Pro, let's look at an effective alternative. Wondershare Filmora is a robust video editor that offers numerous transition resources to add a story-like effect to your videos. To add an asset to your videos, you can either import multiple clips or cut a single video into two. Before you select a transition for your video, you can preview it in the designated preview window.
Once applied, users can customize the transitions by adjusting their duration. If you like a resource, you can save it in the designated Mine folder for easy access in the future. As mentioned, Filmora offers a diverse library of built-in transitions to make your videos attractive. Check out the following list and explore some of the prominent resources offered by this tool:
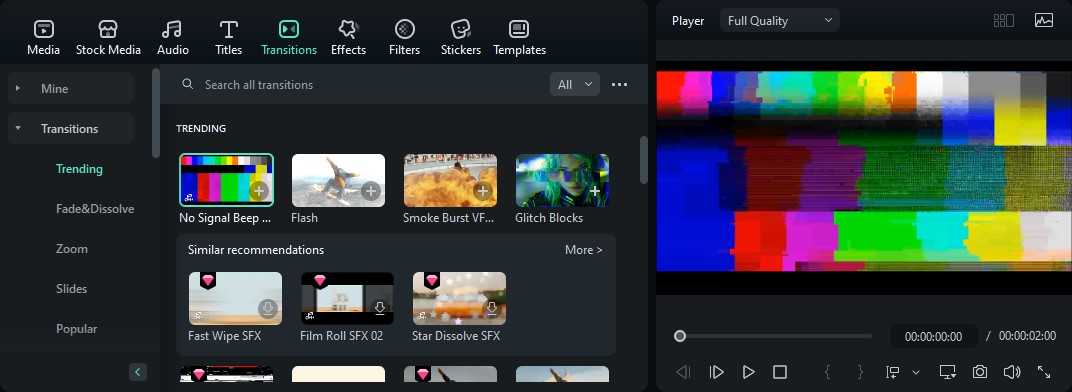
1. No Single Beep SFX
If you want a comprehensive transition resource, this FCPX transition alternative will do fine. Along with the visuals, it also adds a transition sound effect to make it smooth. With its glitchy visuals, it completely blocks the video and serves as a perfect resource to combine two irrelevant clips.
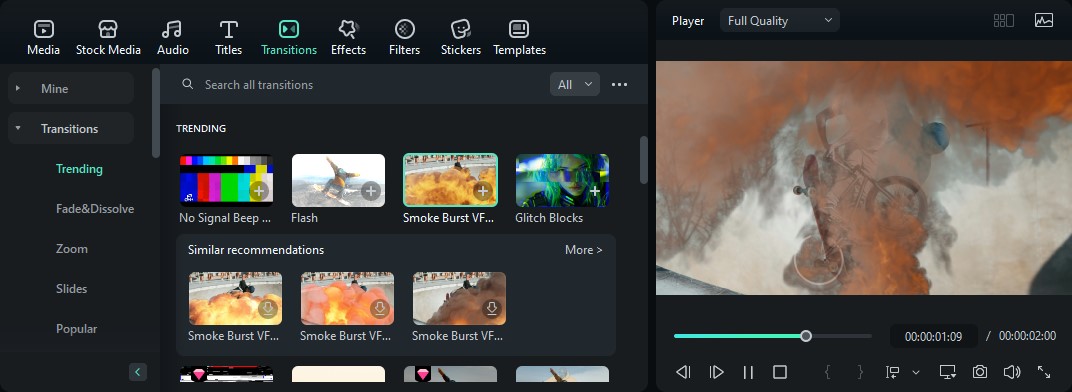
2. Smoke Burst VFX Transition 03
Influencers who like shooting transformation videos can use this smoke transition to represent the shift in their appearances. Due to the high quality of this asset, it can also be used as a part of your video if you need to showcase a fire.
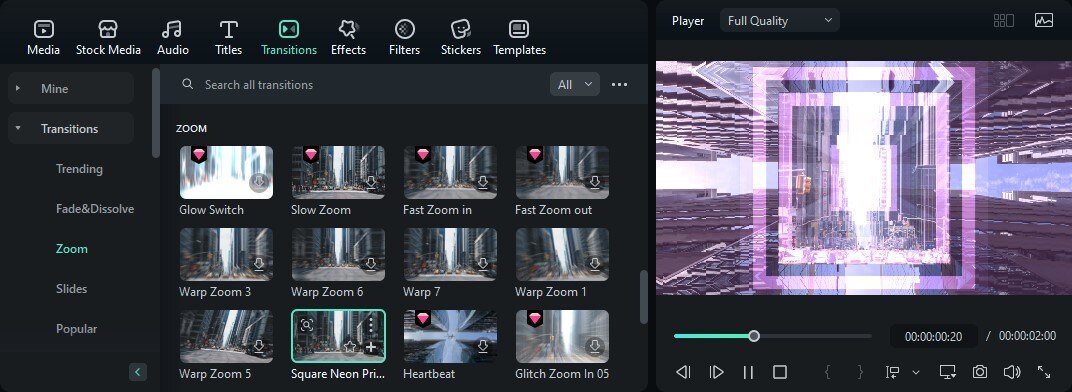
3. Square Neon Prism
When you need to combine aesthetics with a smooth flow, you can use the Square Neon Prism asset. Residing in the Zoom category, this alternative to free Final Cut Pro transitions is ideal for daily vlogs. It can be used to bridge two clips from different parts of the day in a cool way.
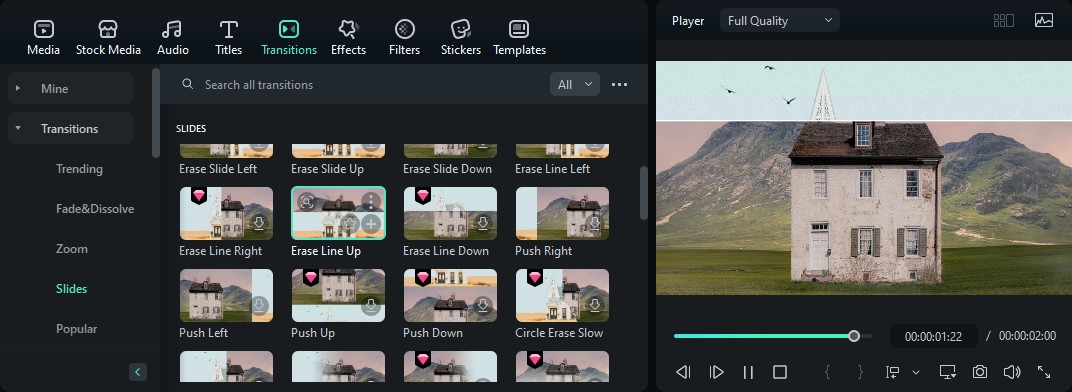
4. Erase Line Up
Filmora has an awesome collection of resources in the Slides category of transitions. Among these is the Erase Line Up transition, perfect to show before and after results. It has a cool blue colored transition slide that has a wipe-up animation as the video frame changes.
5. Glitch Blocks
The Glitch Blocks transition is about distorted visuals, but it makes it aesthetic. Although it is a 2-second-long clip, you can adjust its duration to elongate it. You can find this FCP transitions replacement in the designated Glitch category, which has a separate room for distorted resources.


Conclusion:
Conclusively, this discussion looked into how you can apply the Final Cut Pro transitions to add a smooth flow to your videos. After exploring the three effective methods for this process, we discovered the diverse transition resources by Wondershare Filmora. In addition to these resources, Filmora has numerous other AI and basic tools to execute extensive editing for your videos.
Benjamin Arango
staff Editor
