
 100% Security Verified | No Subscription Required | No Malware

Struggling to create smooth transitions in Final Cut Pro? Transitions help connect clips and make videos look more professional. They add style, improve flow, and keep your audience engaged.
Final Cut Pro (FCPX) has many built-in transitions, from simple fades to creative effects. But using them the right way can be confusing. In this guide, you’ll learn how to add, customize, and manage transitions in Final Cut Pro. You’ll also find out where transitions are stored and how to create a crossfade effect.
If Final Cut Pro feels too complicated, don’t worry. We’ll also introduce an easier way to add smooth transitions with just a few clicks.
In this article
Part 1. How to Add Transitions in Final Cut Pro
Final Cut Pro has over 100 built-in transitions to make your videos look smooth and professional. These transitions are divided into different types. Standard transitions, like Cross Dissolve and Fade to Black, create simple and clean edits. Dynamic transitions, such as Slide, Push, and Zoom, add movement and energy. Creative transitions, like Glitch, Light Leaks, and Prism, give your videos a unique and modern look.
All transitions are stored in the Transitions Browser inside Final Cut Pro. This is where you can browse, preview, and apply them. If you install extra transitions, they will appear here too.
To apply transitions, there are two easy ways: using the Transitions Browser and the Edit Menu.
Method 1: Using the Transition browser
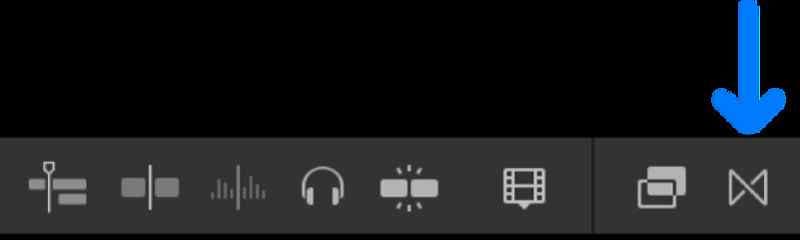
Step 1. Open the Transitions Browser
Click the Transitions Browser icon in the top-right of your timeline. You can also press CONTROL + COMMAND + 5 to open it.
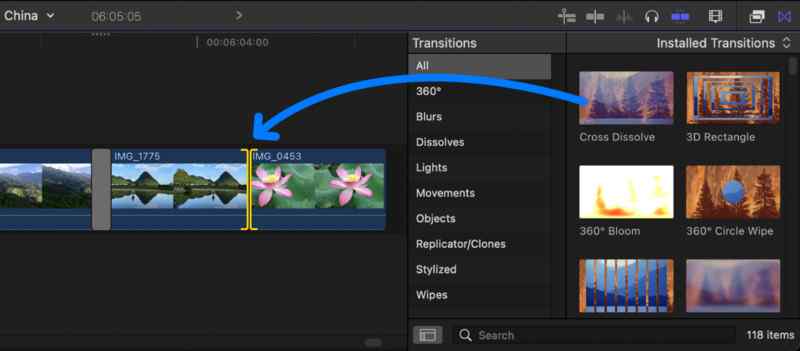
Step 2. Preview Available Transitions
Hover your mouse over any transition to see a live preview. Final Cut Pro has many options, including dissolves, blurs, and fades.
Step 3. Apply a Transition
Click and drag your chosen transition to the edit point between two clips.
Step 4. Adjust the Transition Duration (Optional)
Click the edges of the transition in the timeline. Drag left to shorten or right to lengthen the transition.
Step 5. Playback and Review
Press play to see how the transition looks. If needed, adjust the duration or try a different transition.
Method 2: Using the Edit menu
Step 1. Select the Edit Point
Click the space between two clips where you want to add a transition.
Step 2. Open the Edit Menu
Go to the Edit menu at the top of the screen. Then, hover over Add [transition] to see the default transition.
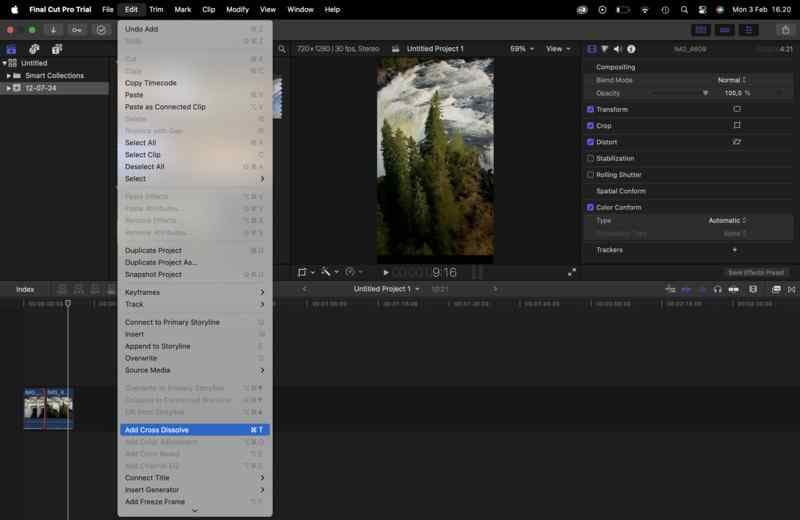
Step 3. Apply the Default Transition
Click to apply the transition. If you want a different transition, set it as the default first.
Step 4. Adjust the Transition Duration (Optional)
Click and drag the edges of the transition to change its length.
Step 5. Review
Play back your timeline and see how the transition looks. You can adjust the duration or apply another transition if necessary.
Part 2. How to Apply Transitions from Third-Party Plugins to Final Cut Pro
Final Cut Pro has a wide range of built-in transitions, but sometimes you need something more unique. That’s where third-party plugins come in. They allow you to expand your transition library with custom effects that go beyond what’s available in Final Cut Pro transitions. Whether you’re looking for free FCPX transitions or premium cinematic effects, plugins help enhance your editing options.
Some of the best third-party transition plugins for FCPX transitions include:
- BorisFX: A powerful plugin with advanced visual effects and professional-quality transitions.
- Motion Array: A popular resource for free Final Cut Pro transitions and paid transition packs.
- Pixel Film Studios: Offers creative and modern Final Cut transitions for different video styles.
- FXFactory: A marketplace with hundreds of FCPX transitions, including free and premium options.
These plugins allow you to add stylish, seamless transitions to your videos. Once installed, these transitions work just like the built-in ones in Final Cut Pro.
To use third-party transitions, you first need to install them and make sure Final Cut Pro detects them. Follow these steps:
Step 1. Download and Install the Plugin
Download the transition plugin from a trusted source such as BorisFX, Motion Array, or FXFactory. Most transition plugins come in .dmg or .zip format.
Open the downloaded file and follow the installation instructions. Some plugins require activation or a subscription, so check the details before proceeding.
Step 2. Locate the Installed Transitions in Final Cut Pro
After installing the plugin, open Final Cut Pro. Click the Effects icon (filmstrip symbol) in the lower-right corner of the screen to access the Transitions Browser. Scroll through the list to find the new transition pack.
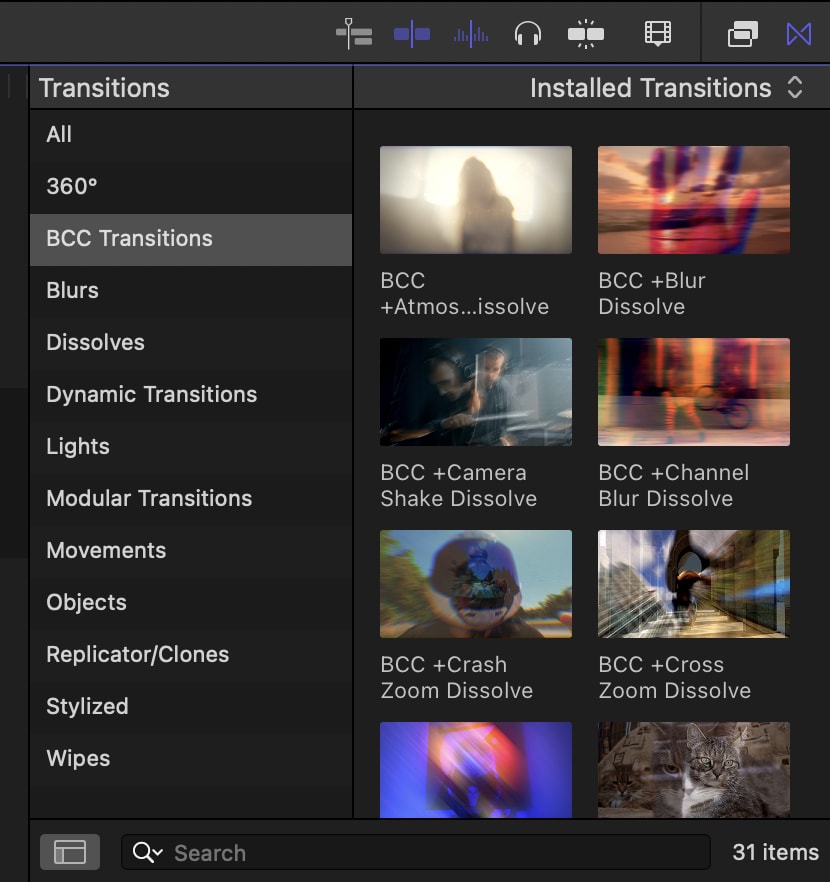
If you install multiple plugins, they will appear under their respective names. For example, "BorisFX Transitions" or "Motion Array Transitions." If the transition does not appear, restart Final Cut Pro to refresh the browser.
Step 3. Apply a Third-Party Transition to Your Timeline
Once you locate the transition, hover your mouse over it to preview how it looks. To apply it, click and drag the transition to the edit point between two clips on your timeline. Adjust the duration by clicking on the transition and dragging its edges left or right.
Step 4. Customize the Transition Settings (If Available)
If the transition comes with customizable settings, select it in the timeline and open the Inspector panel by pressing Command + 4. This will allow you to modify properties such as speed, blur intensity, color effects, or motion adjustments.
After making the changes, play back the transition to see how it looks. If needed, you can replace it with another transition by simply dragging a new one onto the same edit point.
Part 3. Filmora: The Simpler Way to Use Transition
Final Cut Pro transitions can be powerful, but they are not always easy to use. If you want a faster and simpler way to apply smooth transitions, Wondershare Filmora is a great alternative.
Filmora offers an intuitive drag-and-drop interface, making it easy for beginners and content creators. Unlike FCPX transitions, which often require extra plugins, Filmora comes with a built-in transition library. You can apply effects in seconds without downloading additional files. It also includes AI-powered tools that speed up the editing process.
 secure download

Why Use Filmora for Transitions?
- Easy Drag-and-Drop Editing: Adding transitions in Filmora is simple. Just drag and drop a transition between clips—no complicated settings.
- Built-in Transition Library: Filmora provides a variety of pre-designed transitions, including fades, wipes, zooms, and glitch effects. Unlike Final Cut Pro transitions, you don't need to download extra packs or plugins.
- AI-Powered Tools: Filmora includes smart editing tools like AI Smart Cut and Auto Scene Detection. These features help you apply smooth transitions without manual adjustments.
- Customizable Effects: Like FCPX transitions, Filmora allows you to adjust transition speed, duration, and blending effects. This gives you control over how your transitions look.
- Fast and User-Friendly: Unlike Final Cut transitions, which takes time to learn, Filmora is quick and easy. You can create smooth transitions in minutes.
How to Add Transitions in Filmora
Step 1. Start New Project
Open Filmora and start a new project. Import your video clips into the timeline.

Step 2. Go To the Transitions Menu
Click the Transitions tab at the top. You will see a list of built-in transitions, including basic fades, zooms, and cinematic effects.

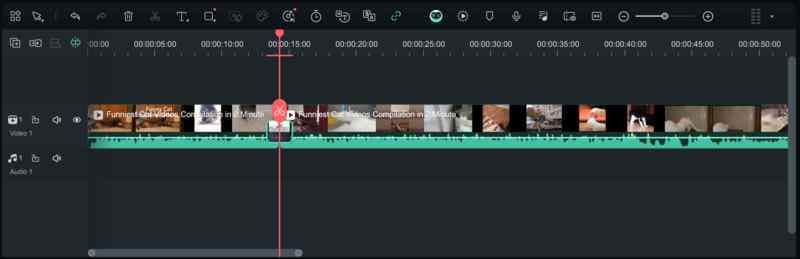
Step 3. Apply Transition
To apply a transition, drag and drop it between two clips on the timeline. The transition will be applied instantly.
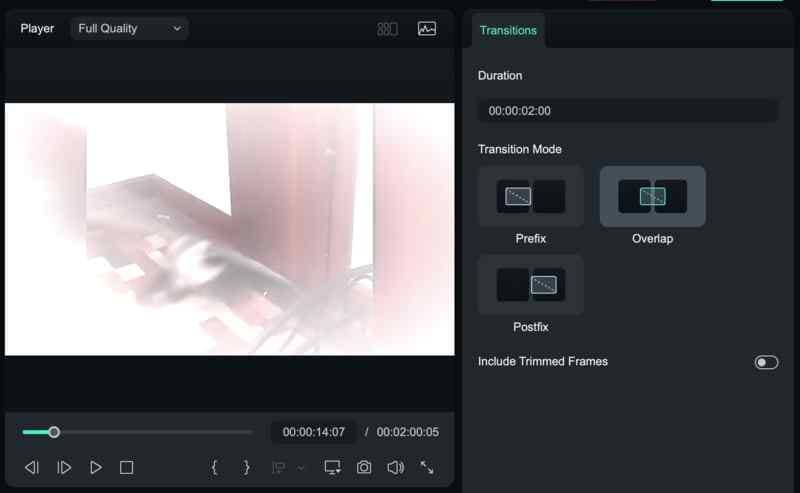
Step 4. Adjust Transition (Optional)
If needed, adjust the duration by dragging the edges of the transition. You can also click the transition to open the settings panel and modify effects like speed and blending.
Step 5. Preview Transition
Once done, preview your video to see how the transition looks. If needed, you can replace or edit the transition easily.
Conclusion
Transitions are essential for creating smooth and professional video edits. Final Cut Pro transitions offer powerful effects, but they can be complicated for beginners. With over 100 built-in FCPX transitions and third-party plugins, Final Cut Pro provides flexibility but requires time to master.
If you want a simpler solution, Filmora makes adding transitions effortless. Its drag-and-drop features, built-in transition library, and AI-powered tools allow anyone to create stunning edits without a steep learning curve. Filmora is a faster alternative, whether you're looking for free Final Cut Pro transitions or an easy way to enhance your videos. Try it today!
