
 100% Security Verified | No Subscription Required | No Malware

In this article
Great videos often start with simple ideas, and changing the background can instantly turn an ordinary clip into something eye-catching. With Final Cut Pro's chroma key feature, also known as the green screen effect, creators can replace any plain setting with a custom image or video to match their story. It's the same technique used in films and commercials to transport viewers into new worlds, and now available right on your editing timeline.
This time, we'll show you how to change the video background in Final Cut Pro, from applying the chroma key to refining it for realistic results. You'll also get tips for achieving clean, professional composites and learn an easier, more intuitive way to create stunning green screen videos on both Mac and Windows.
Part 1. How to Change Video Background in Final Cut Pro
Learning how to change the video background in Final Cut Pro opens up endless creative possibilities. By replacing any solid-colored backdrop with a photo, animation, or video of your choice, you can transform your scene entirely.
This technique is widely used by filmmakers, educators, and content creators to produce a virtual studio or even a cinematic landscape. Here's how you can apply it step by step.
Step 1. Start a New Project and Import Your Clips
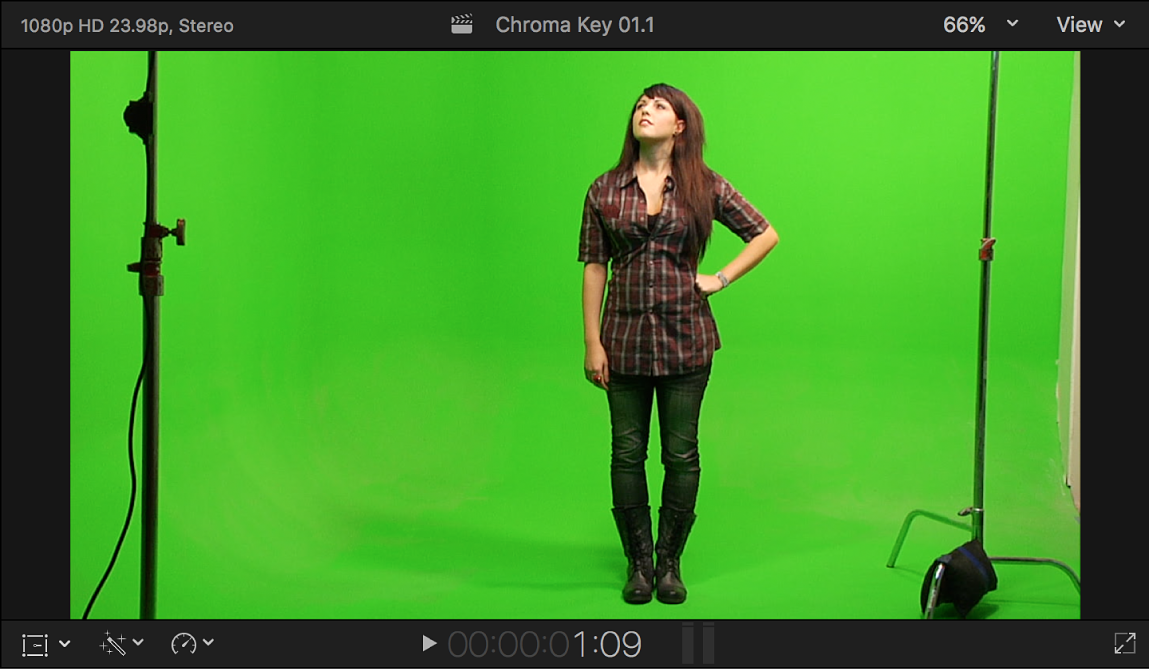
Open Final Cut Pro and click New Project to begin. Then, go to File > Import > Media and bring in your green screen footage along with the background you plan to use.
Step 2. Place Clips on the Timeline
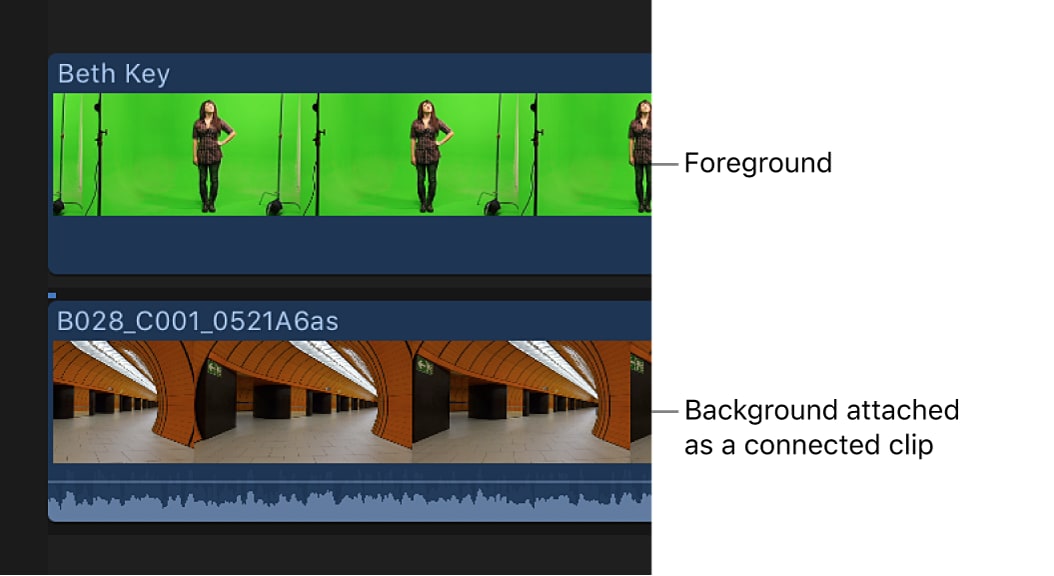
To prepare for green screen in Final Cut Pro, drag your background clip onto the first layer of the timeline. Then, place the green screen footage directly above it.
This placement tells Final Cut Pro to treat the top layer as your subject and the lower layer as the new background once the chroma key effect is applied.
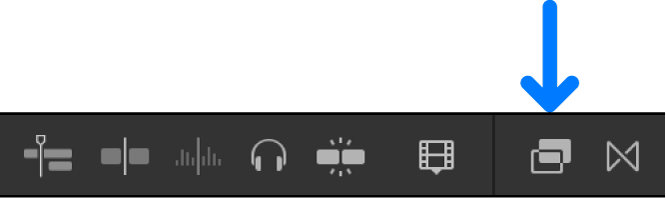
Step 4. Apply the Keyer Effect
Open the Effects Browser and look for the Keying category. Drag the Keyer effect onto your green screen clip.
The software automatically removes the green background, replacing it with transparency so your background layer appears behind the subject.
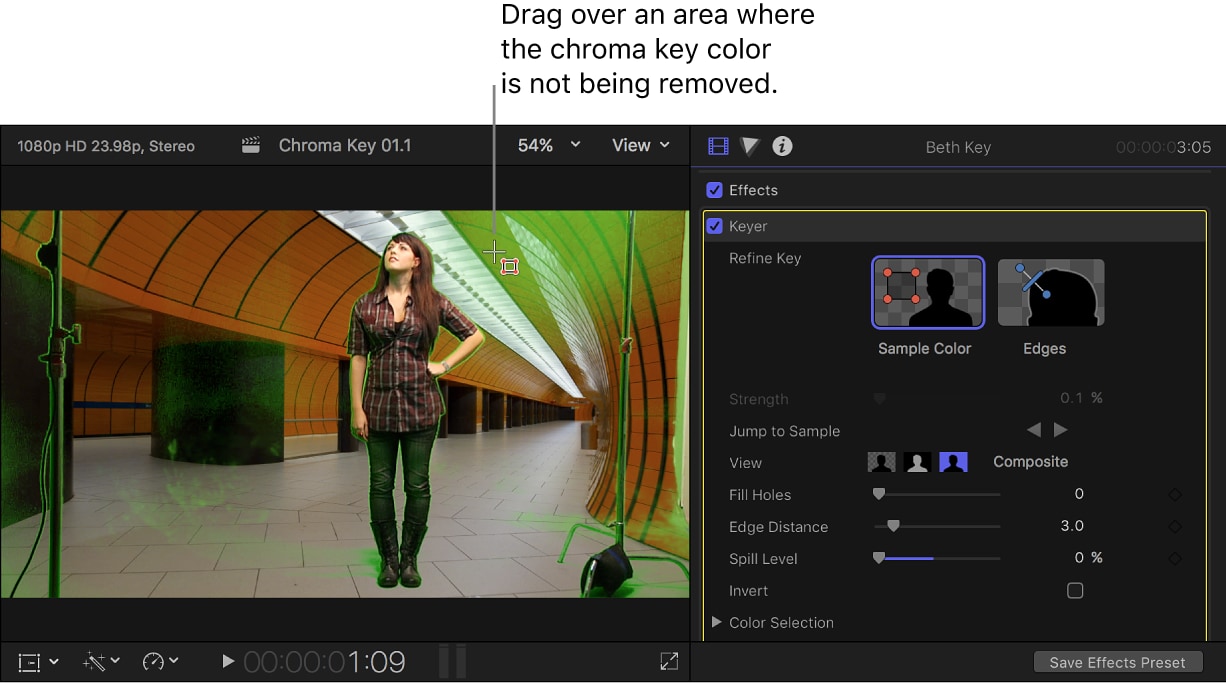
Step 5. Refine the Keyer Effect
Select your green screen clip and open the Inspector panel to adjust the effect. Use Sample Color to remove uneven green areas or lighting inconsistencies. Tweak the Edge Distance, Spill Level, and Strength sliders to smooth the edges and eliminate color fringing.
You can also balance brightness and contrast to make the new background look more natural.
Step 6. Add Final Touches
Once your background replacement looks clean and consistent, polish your project with additional effects, titles, or audio. Subtle transitions or filters can make the final edit feel more cohesive.
When you're ready, go to File > Share > Export File and save your video in your preferred format and resolution.
Tips for Better Green Screen Editing in Final Cut Pro
Green screen editing can look incredible when done right, but it also comes with a few challenges. Try these tips to get a cleaner result.
- Lighting Setup: Use even, soft lighting on your green screen to avoid dark shadows or uneven brightness. Proper lighting helps the chroma key detect colors accurately.
- Avoid Green Clothing: Keep your subject's clothing distinct from the background color so the green screen Final Cut Pro tool doesn't remove unintended areas.
- Camera Settings: Use steady, high-resolution footage. Shooting in 4K provides more precision when refining edges during Final Cut Pro chroma key editing.
- Edge Cleanup: Use Spill Suppression and Matte Tools in Final Cut Pro to remove any remaining green edges and ensure your subject blends naturally with the background.
Part 2. Filmora: An Easier Way to Change Video Background
While many professionals use Final Cut Pro to replace video backgrounds, its tools can be overwhelming for beginners. The Final Cut Pro chroma key delivers impressive results, but the workflow requires more time and a deeper learning curve.
If you prefer something faster and more intuitive, Wondershare Filmora offers a simple yet powerful way to achieve the same effect. It allows you to change or remove a background in minutes, even without knowing how to use green screen in Final Cut Pro.
 secure download


Filmora's built-in Chroma Key tool helps change video backgrounds, removing green screens, or blend multiple layers of footage easily without advanced editing knowledge. The process is quick, intuitive, and accessible for both Windows and Mac.
Why Choose Filmora for Green Screen?

Filmora simplifies the process of changing video backgrounds without compromising the end result. It's designed for creators who value speed, creativity, and flexibility in their workflow. Compared with the green screen Final Cut Pro workflow, Filmora offers:
- Accurate blending controls: Adjust color balance, edge softness, and shadow intensity to make your subject match the new environment naturally.
- Creative visual tools: Access hundreds of transitions, overlays, and effects to make your green screen edits look cinematic. Add filters, motion elements, or text animations directly from the built-in library.
- Smooth performance and fast rendering: Filmora handles HD and 4K projects efficiently, even on standard computers.
- Affordable and easy to learn: No steep learning curve or premium hardware needed. Filmora combines professional tools with an interface designed for beginners and experienced editors alike.
How to Use Chroma Key in Filmora (Quick Workflow)
Step 1. Import and Arrange Media
Launch Wondershare Filmora, create a new project, and import both your green screen video and your chosen background. Drag the background to the first track on the timeline, then place your green screen clip above it.
secure download 
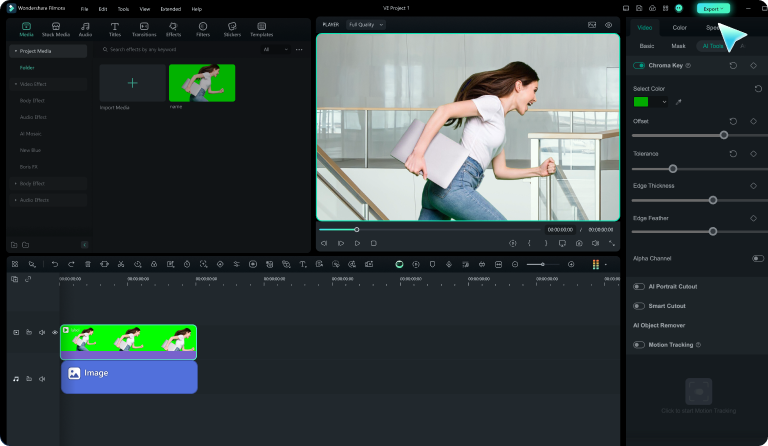
Step 2. Enable Chroma Key
Click the green screen clip to open the editing panel, go to Video > AI Tools > Chroma Key, and turn on the feature. The green background will be removed automatically, revealing the layer beneath it.

Step 3. Refine Background and Export
Fine-tune the tolerance, feather, and edge thickness sliders until the subject blends cleanly with the new background. You can then add text, filters, or music for a polished finish. Once done, click Export to save your project in your preferred format.
Other Ways to Automatically Remove Background in Filmora
Filmora also offers other smart tools to change your video background without a green screen. AI Portraitcan automatically detect and separate the subject from the background, while Smart Cutoutprovides manual precision when working with complex footage.
These options make Filmora a strong alternative to green screen Final Cut Pro editing, giving you full flexibility depending on your editing style.
Part 3. Final Cut Pro vs Filmora: A Quick Comparison
Both Final Cut Pro and Wondershare Filmora are capable of creating impressive green screen videos, but they serve different types of creators.
- Final Cut Pro chroma key feature delivers precision and professional control, perfect for editors who already understand how to use green screen in Final Cut Pro. It allows detailed adjustments for color sampling, edge refinement, and spill suppression.
- Filmora is more built for speed, simplicity, and accessibility. It provides all the essential tools, including a reliable chroma key feature, while maintaining an easy learning curve for beginners.
The comparison below outlines how these two video editors differ in performance, usability, and creative flexibility.
| Features | Final Cut Pro | Filmora |
|---|---|---|
| Platform | macOS only | Windows and macOS |
| Pricing | One-time purchase (around $299.99) | Free trial, affordable subscription, or lifetime plan |
| Learning Curves | Steeper, suited for professionals | Easy to learn, great for beginners and intermediate creators |
| Chroma Key/Green Screen | Advanced Keyer effect with precise color sampling, edge correction, and spill suppression | One-click Chroma Key tool with intuitive sliders for tolerance, feather, and shadow adjustment |
| Performance | Optimized for high-end Macs, ideal for large 4K or multi-camera projects | Runs smoothly on most systems for HD and 4K projects |
| Extra Editing Tools | Professional color grading, motion graphics, HDR editing, and multicam support | Built-in stock media, AI tools, transitions, effects, and audio syncing options |
| Export Options | Wide support for professional formats | Supports popular formats (MP4, MOV, WMV, AVI) with direct sharing to YouTube or TikTok |
| Integration | Works seamlessly with Apple Motion and Logic Pro | Integrated effects store, plug-ins, and AI features within Filmora |
| Best For | Professional editors, filmmakers, and post-production teams | Content creators, vloggers, educators, and marketers who want fast, clean results |
Conclusion
Changing your video background in Final Cut Pro's chroma key feature is a simple yet powerful way to elevate your content. By mastering the green screen Final Cut Pro technique, you can create professional and creative visuals from any setting.
For those who prefer a smoother editing experience, Filmora offers an equally strong alternative. Its easy-to-use Chroma Key tool and AI-powered background editing make professional results achievable for every creator, helping you focus more on storytelling and less on technical steps.
